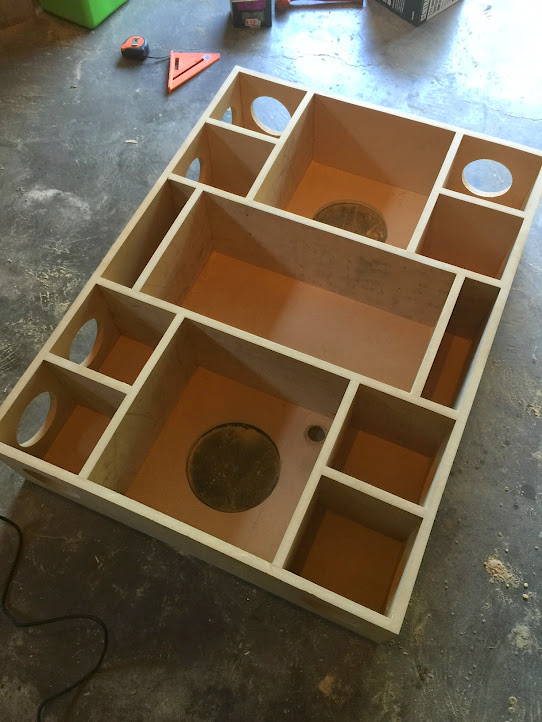
I’ve finally decided to build a non-cooler stereo. Here are a few teaser pictures. Total of 14 speakers (10 6.5” and 2 6x9”s), 2 subwoofers, 1 two channel subwoofer amp, and 2 eight channel amps. The plan is to waterproof with spray on bed liner paint using hopper gun.


Here are some photos of hopper spray painting using truck bed liner from Harbor Freight. The gallons were $38 with the 20% off coupon.


Here is the first coat of the final paint job with a nice teal blue. That black would have been smokin’ hot!


More updates from this weekend.
Final paint touch up, hanging from the tree :)

Start of wiring, measuring lengths of wires

All the wires are ran through other speaker boxes into the electronics compartment

Wires into center 6x9 box to electronics compartment

Electronics compartment

14 regular speakers and all their glory, 12 6.5” and 2 6x9” (MonoPrice brand)
Plus a Natty Datty :)

More pics from Sunday…
Big ass 190Ah deep cycle battery, weighing in at 120lbs, will be mounted in the inside of the cooler float

Electronics compartment with 1 of the 2 eight channel amplifiers

All speakers but one installed (ran out of screws), the subs will be pointing down

Electronics compartment with 2 of the 3 amplifiers, the bottom one is the subwoofer amplifier

Another shot of the speakers

More pics from this Sunday. Didn’t get a lot done but installed the flange PVC frame fittings on the stereo. Wired up the one of the amplifiers but waiting on more parts to wire up the others. But the 8 of 14 speakers sound awesome!!
Liquid nails for the rubber lid seal


PVC raft frame for holding the stereo on top of the raft

Raft and stereo upsidedown


More pictures from this week…
Initial fuse block placement

Fuse block with amplifier wired

Plastic lid held down by wing nuts to bottom via all thread

Fuse block with main power terminals to bottom

Main power terminals connected to battery

Connector to go from box to battery for disconnect

Holes for remote switches

Cables for main power

Anderson power connectors used for most things on the stereo including high current cabling

More pics from this weekend putting the wheels on. The plane is to roll it like a two wheeled wheel barrow.
About to weld up the arm for the wheel bracket

Bracket welded with holes drilled for mounting to Mr. Meeseeks

Bracket mounted to Mr. Meeseeks without wheel

With the wheel

Other side, going to use a cotter pin or something to hold the wheel on

Painted white to match speakers and lid

Got the wheels mounted and loaded up in Vangina (Toyota Previa) for testing in a friends swimming pool tomorrow. Wish us luck that it floats well!!


Finally finished up Mr. Meeseeks and a successful float down the Clackamas river on Saturday. Here are some final pictures of the new raft, float, and party. It is pretty early in the season in Oregon so the river wasn’t very populated.
Switch/fan/volt meter wiring with disconnect for removing lid

Lid installed
From left to right switches: fans, bluetooth, amp 1, sub amp, amp 2

New raft, we put rubber flooring down on the edges of the raft to protect it. Also it was attached to the raft with large zip ties

Mr. Meeseeks with Mt. Hood in the background

The main party spot on the Clackamas river
The main party spot

The whole crew (I’m the tall bearded guy in the back)

Mr. Meeseeks’s accomplice

Well, Mr. Meeseeks was on the news talkin’ bout safety….


Channel 12..
