Preface
Out of the blue my Porter Cable drill’s battery charger stopped working. So instead of buying a new one for $30 I decided to repair it. The following process fixed my charger but may or may not be applicable to yours.
Required Tools
- Torx security bits (one with the hole in the center of the bit)
- Soldering iron
- Solder
- Multimeter to verify this is the issue
- Optionally, solderwick or a solderpump for removing solder
Defective Components
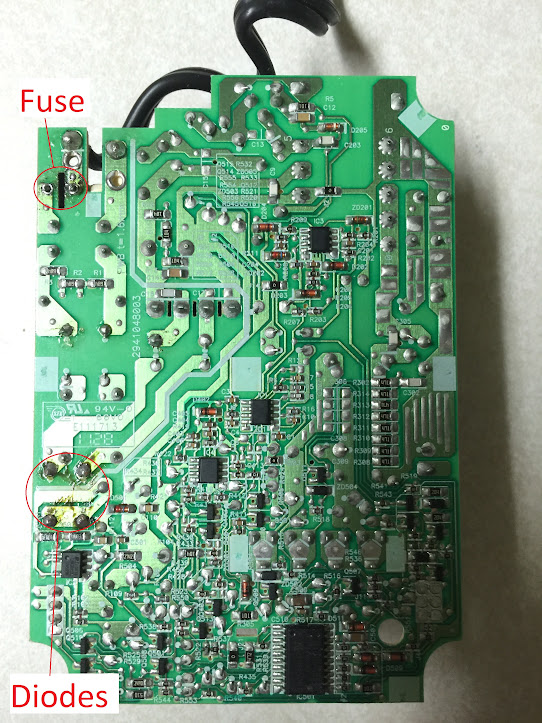
- AC line 4A fuse, part number = Bel Fuse Inc. MRF 4-BULK
- Protection diodes for switching regulator, part number = 1N2007 (free samples + free shipping via ON Semiconductor’s website)
Description of Issue
Two protection diodes (D3 and D4) failed short causing the fuse (T4A) to blow. Replacing the two protection diodes and fuse brought my charger back to life. Take your multimeter and measure across the two leads of TA4, if it reads a very high resistance value then your fuse is blown, if it reads 0-10 ohms your fuse is OK and something else is defective. Now measure across D3 and D4, if you measure 0 ohms across both the diodes this is your issue Use the pictures below to fix it!
Pictures
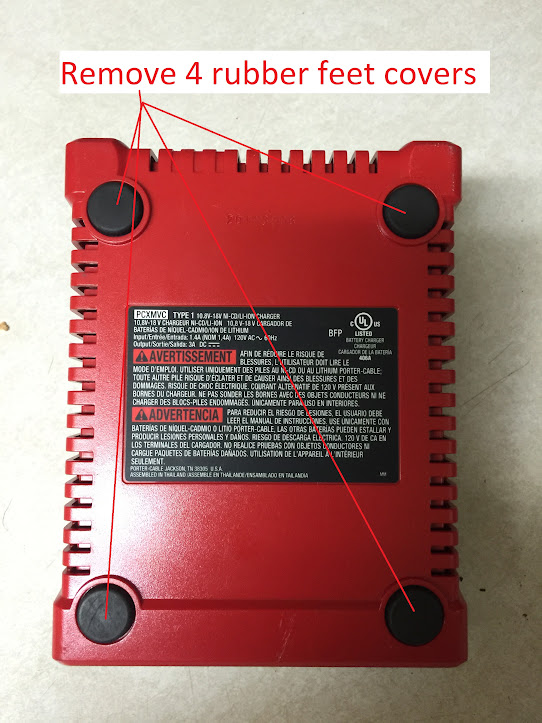
Remove the 4 black feet covers to reveal 4 security torx screws to open the charger up
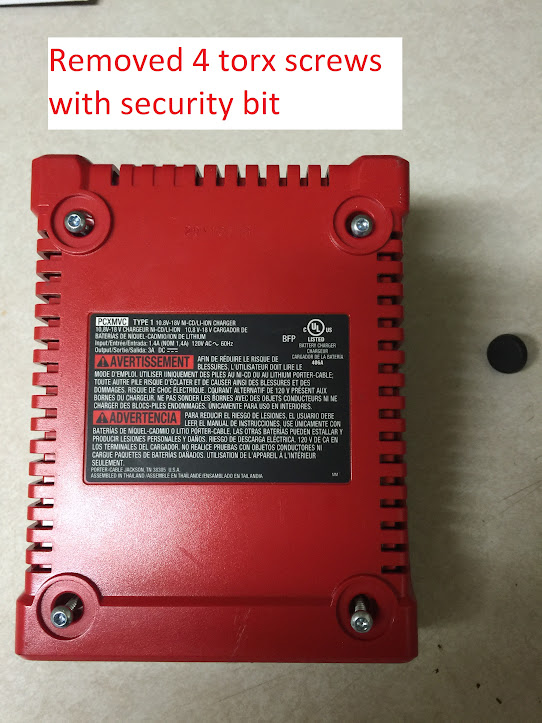
Remove the screws and open the cover, to remove the PCB it must be slide the opposite way of how the battery is normally inserted
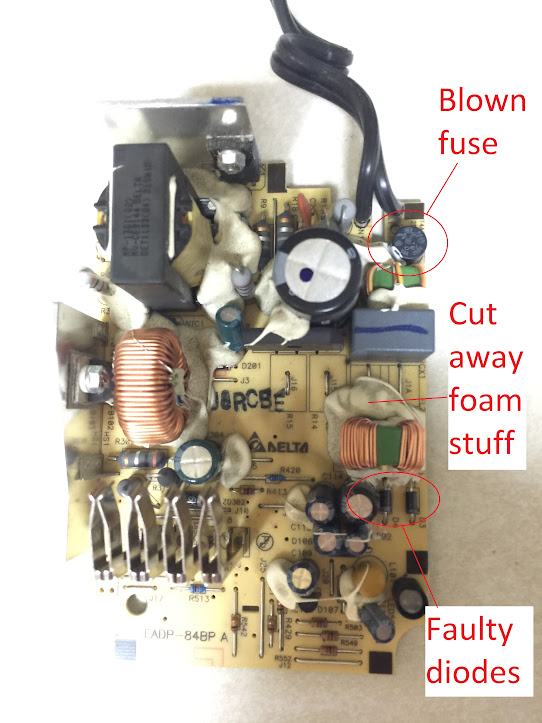
Diodes and fuse that need to be replaced, you’ll need to cut back the foam material to access D4 and F4A
The surface mount side