Paris is For Sale
I have had many wonderful adventures in Paris over the years. But… it is time to move on. Paris is for sale. Please contact me at aric.beaver@gmail.com if you have interest.
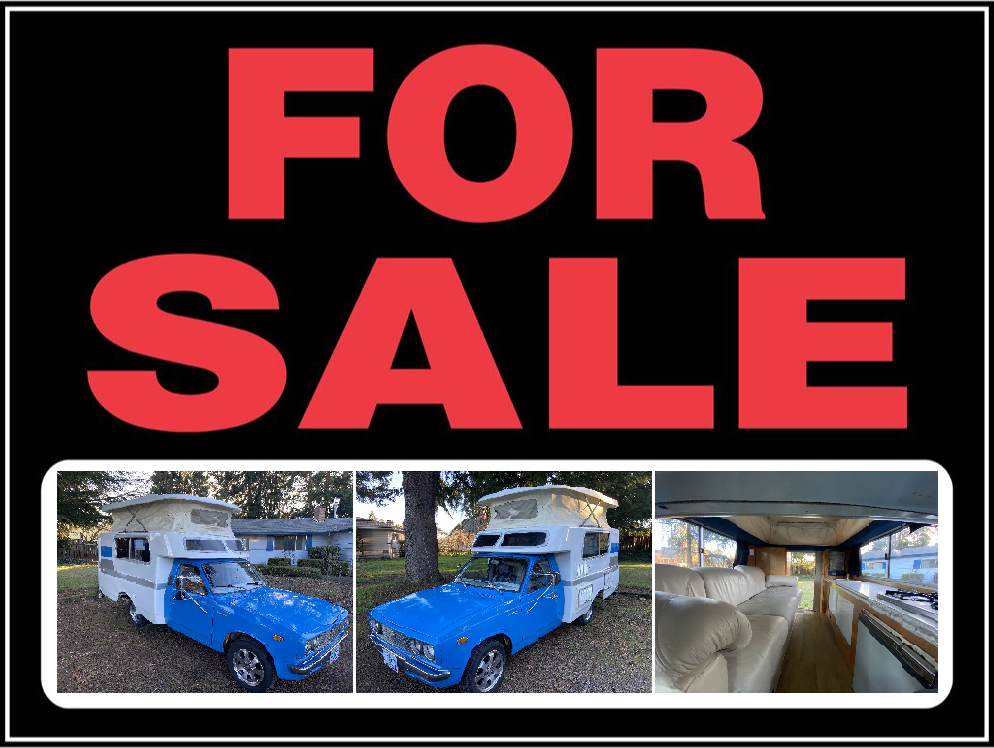
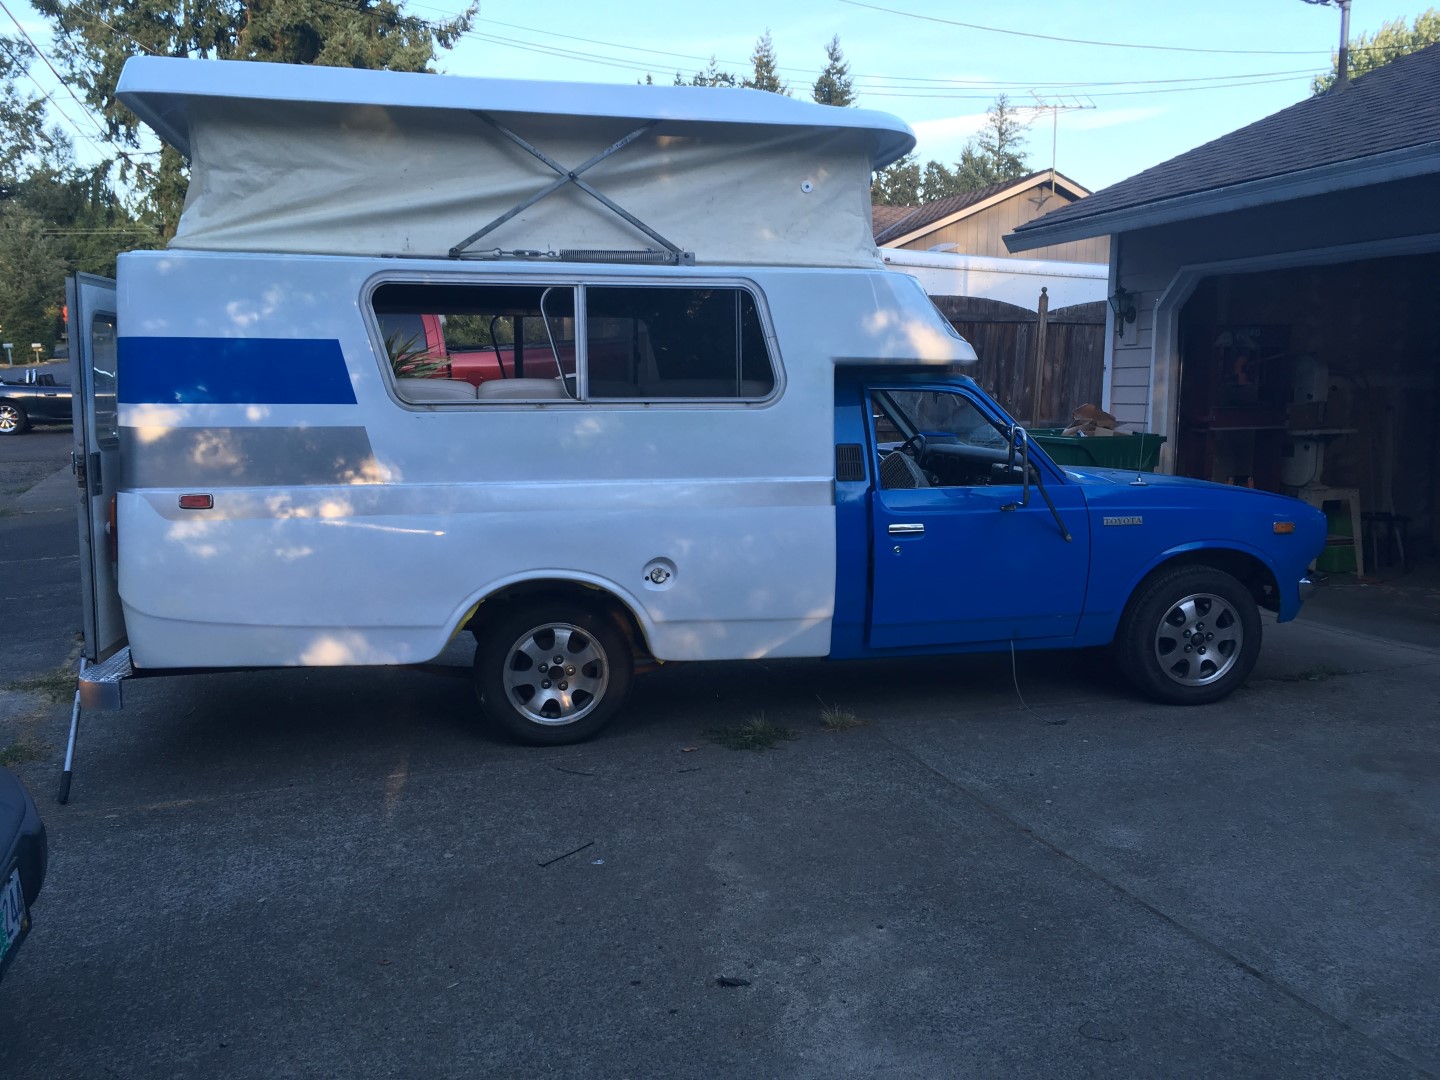
Here are the most recent photos taken earlier this year.


Introduction
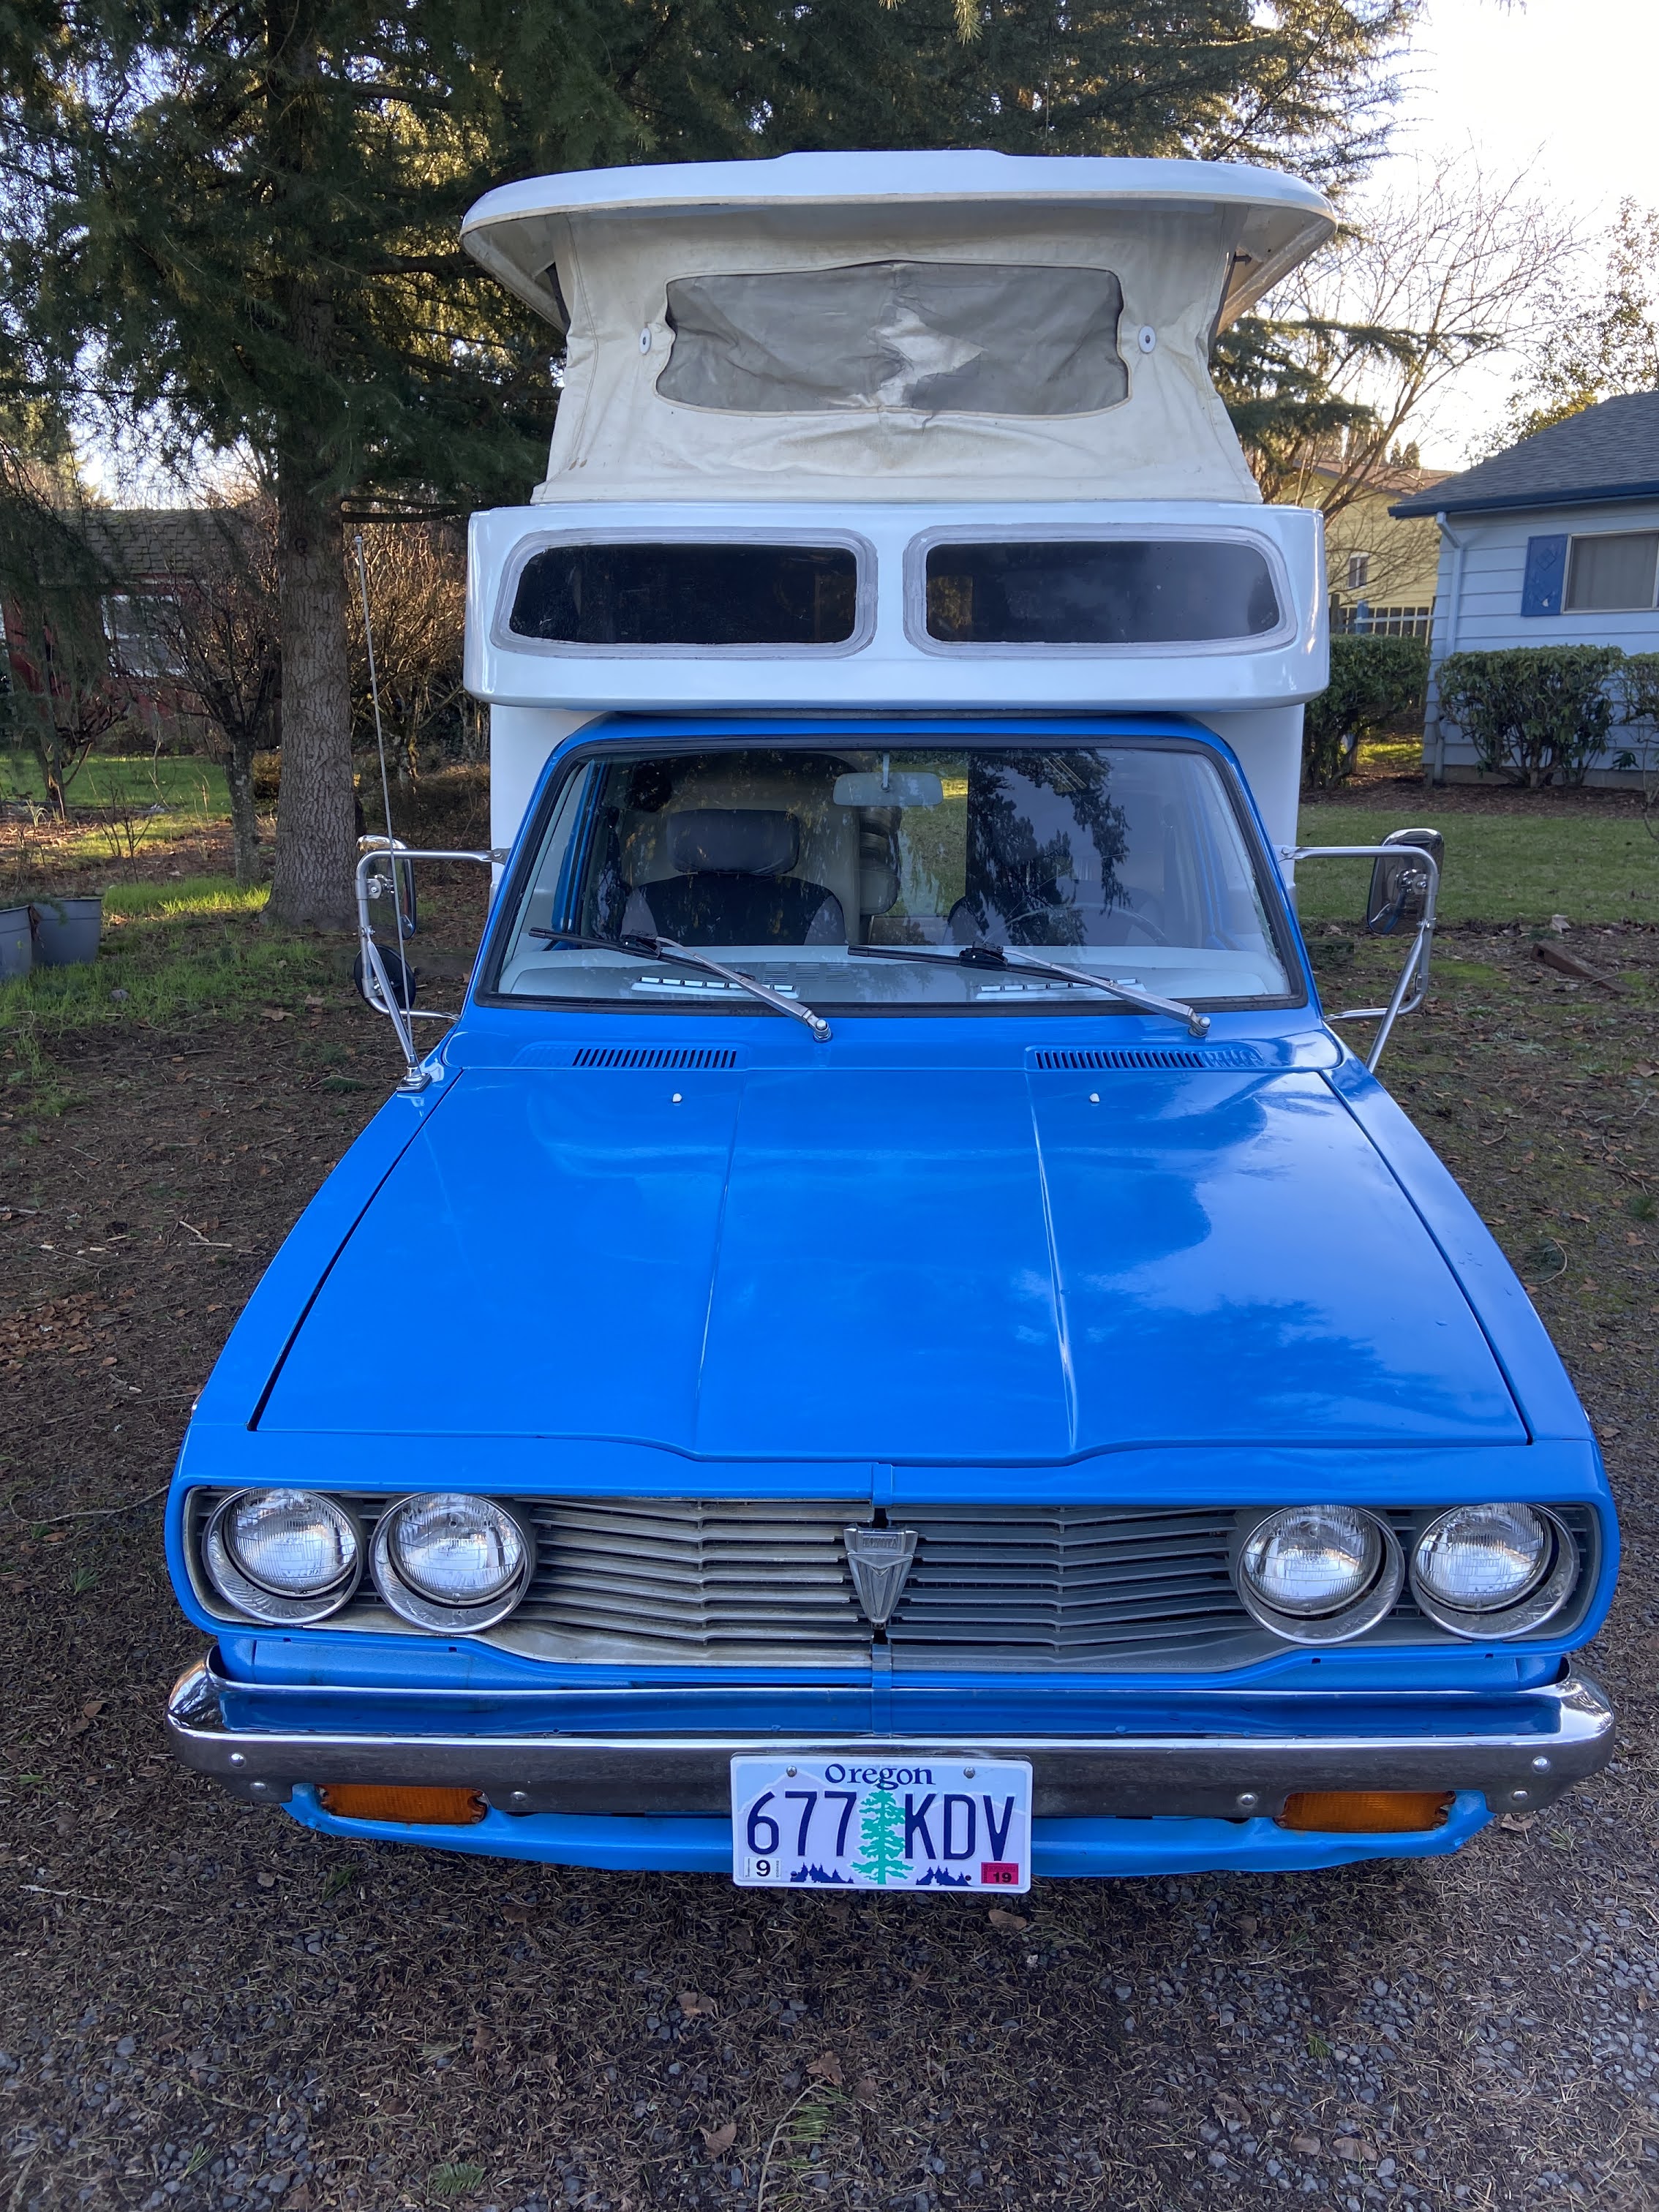
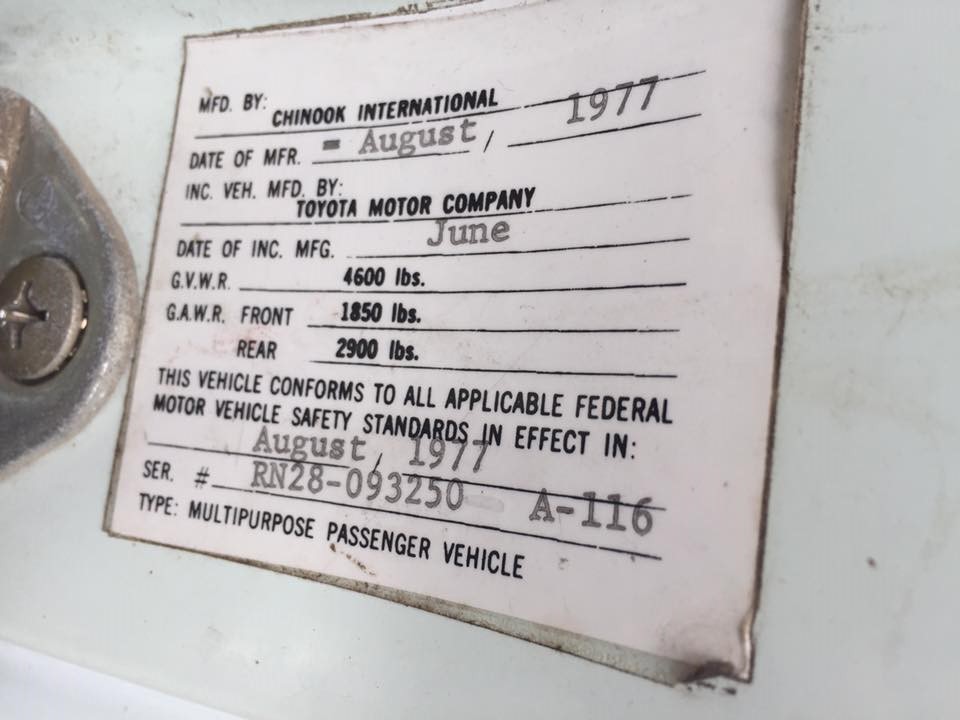
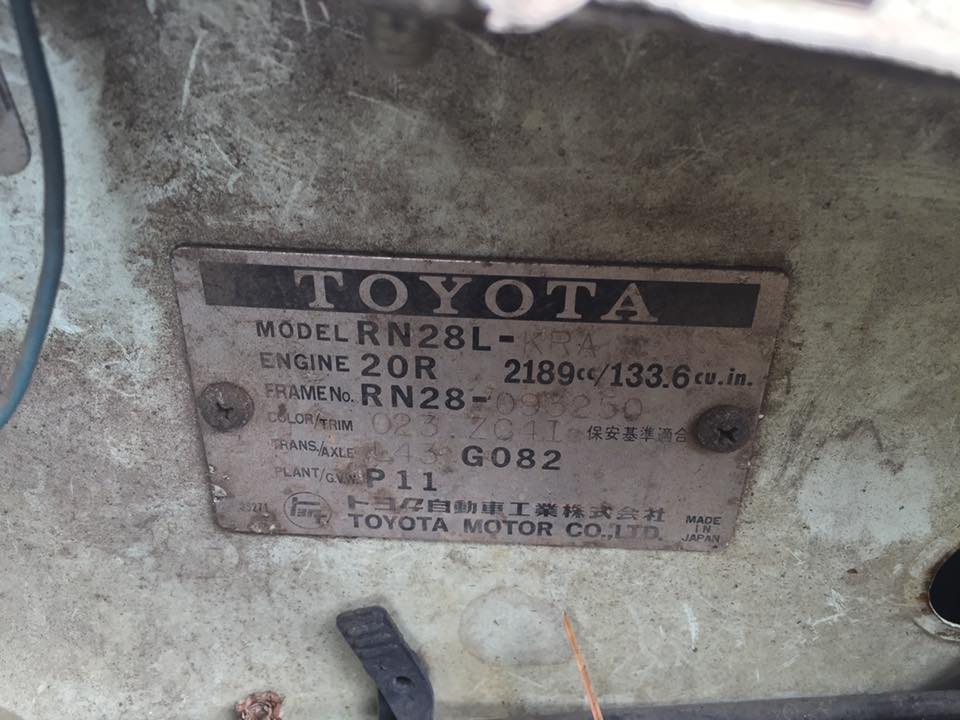
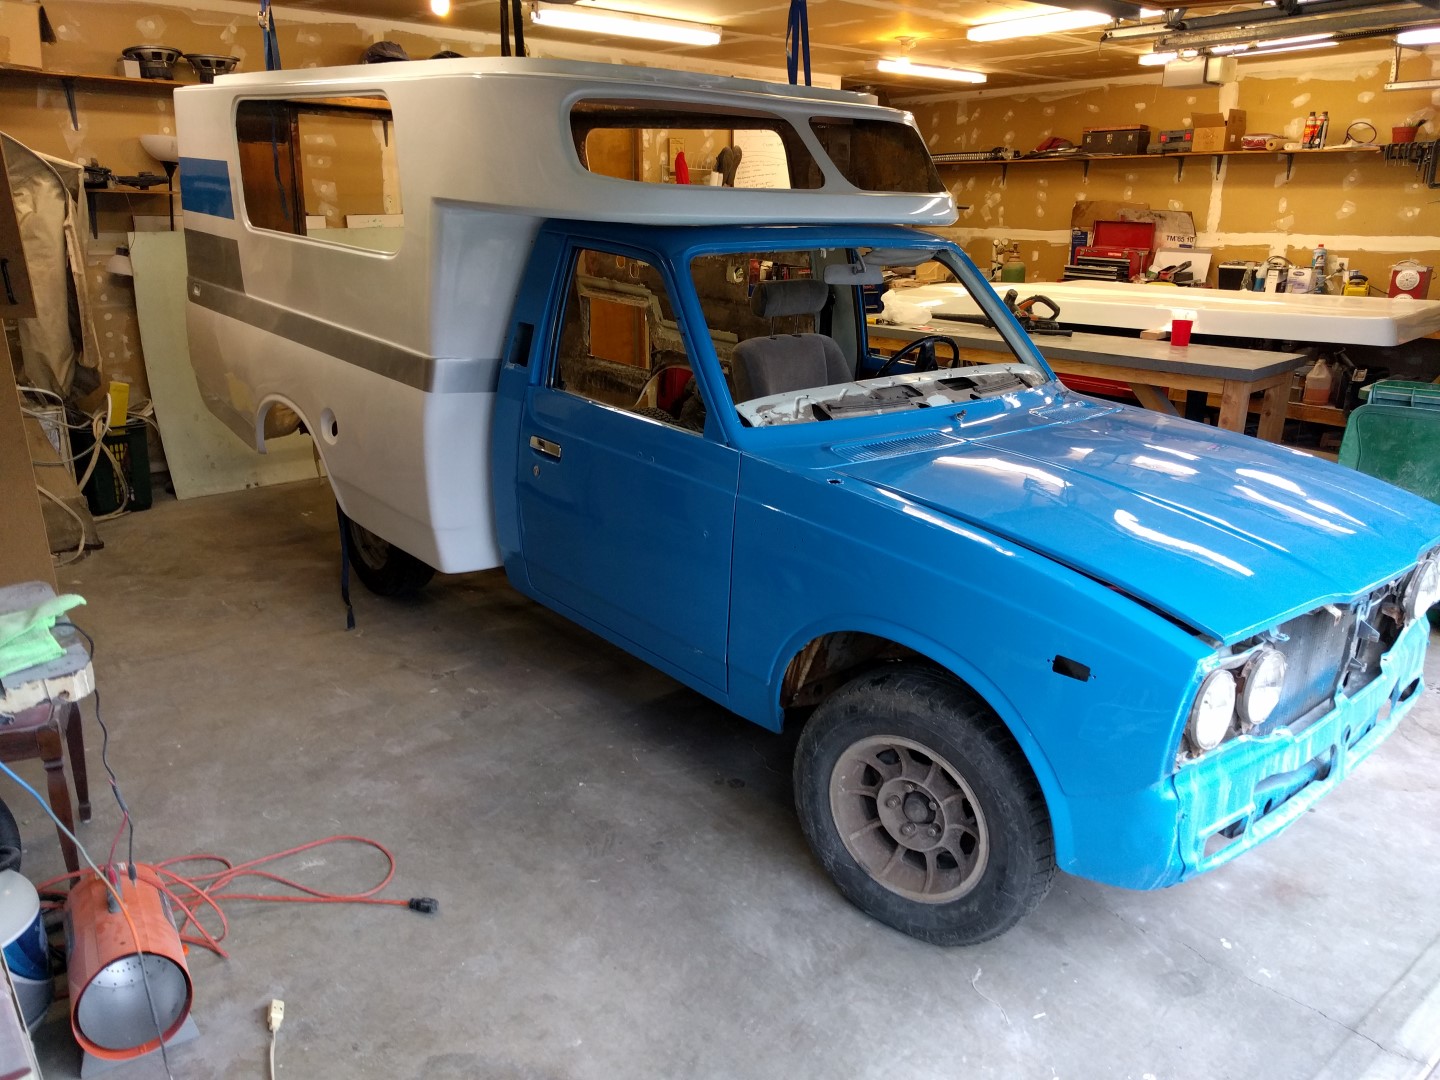
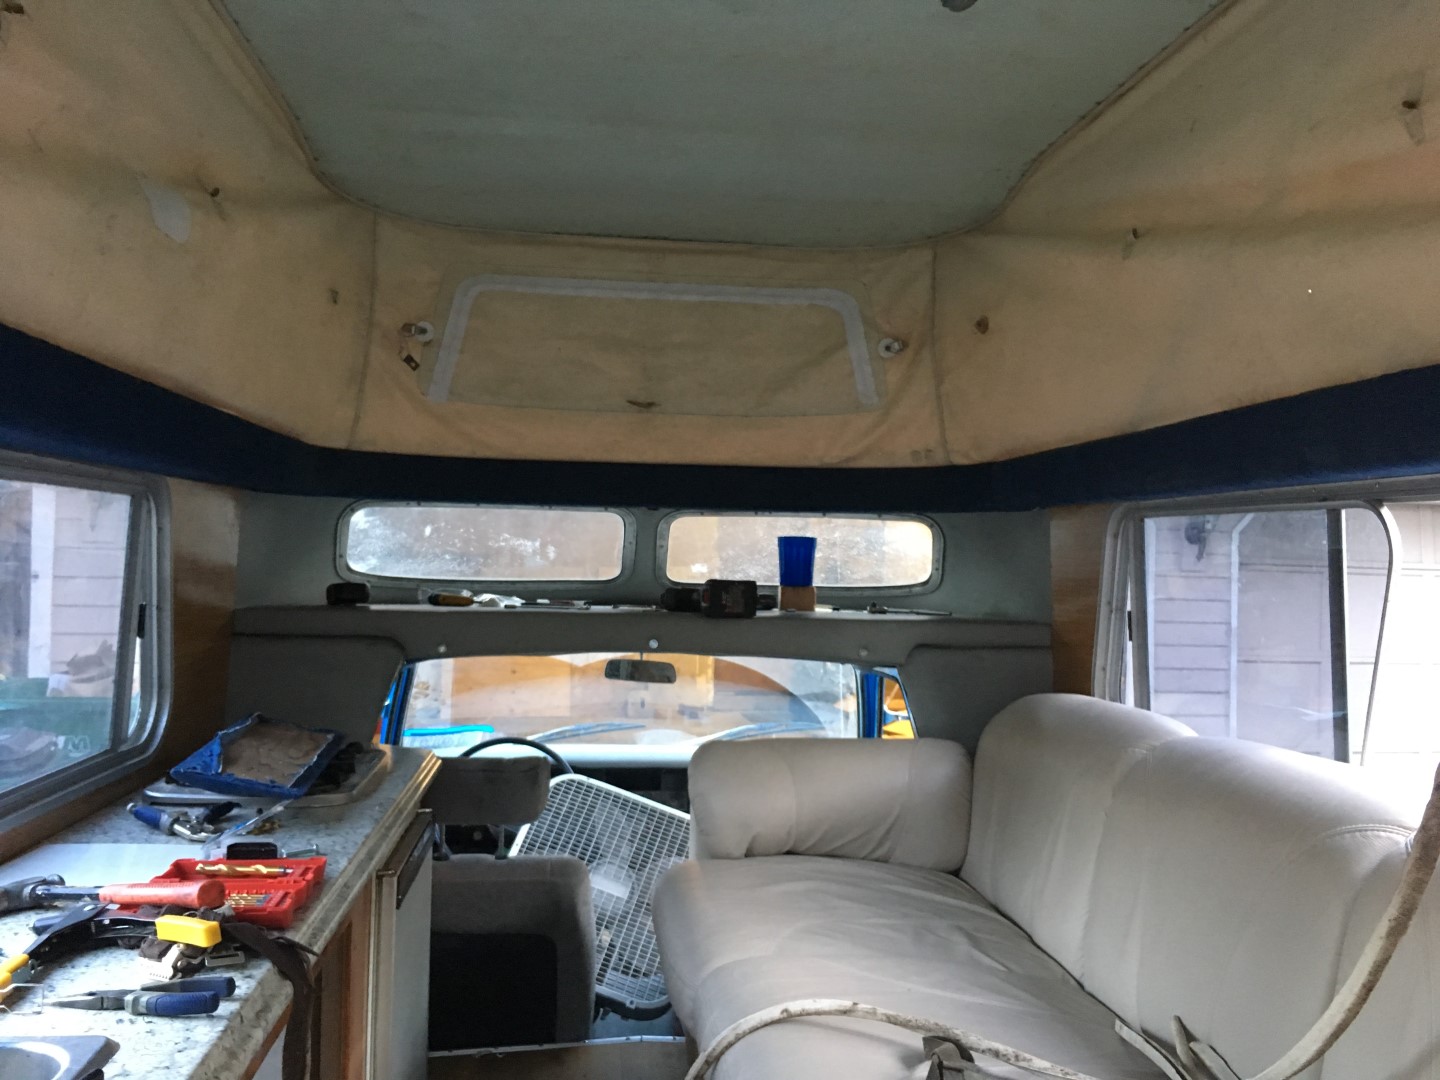
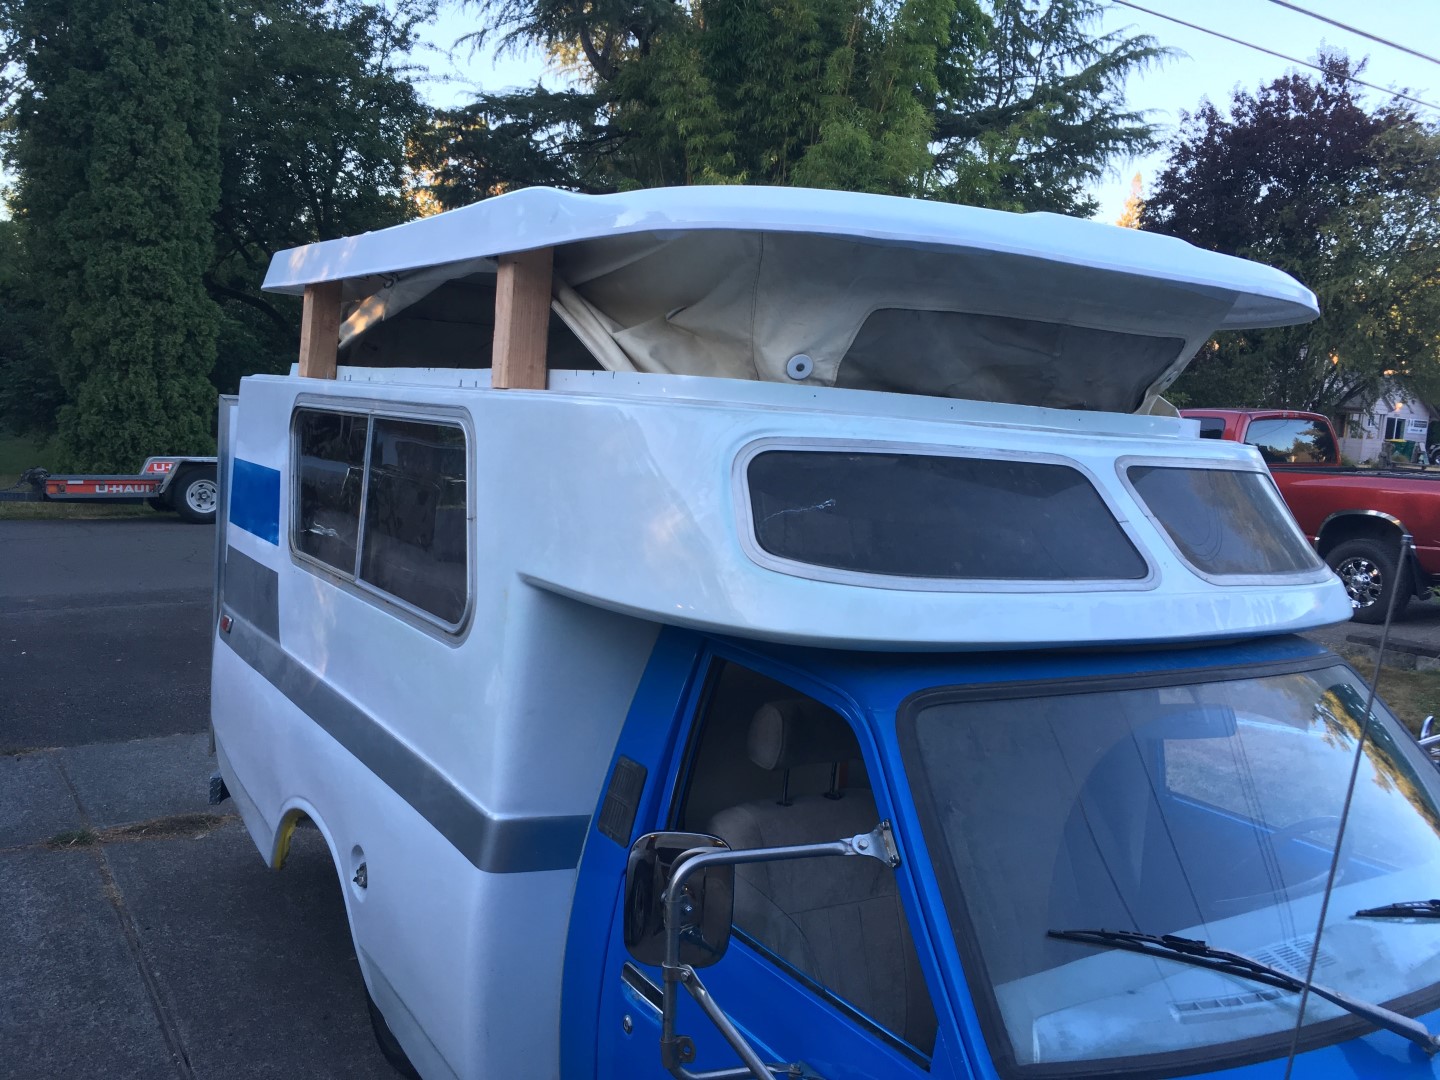
Welcome to the restoration of a 1977 Toyota Chinook motorhome! The project took me about 1.5 years to complete and this blog post has all the information you will ever need to know about a Toyota Chinook. I hope everyone finds this information enjoyable or useful for your restoration.
The chassis is a long bed 1977 Toyota Pickup (also know as Hilux) with a fiberglass shell attached. The truck has a classic carbureted 20R engine. These were manufactured by a out of business company called Chinook in Washington State that also made other variations of camper conversions such as the Omega, Concourse, and Newport. I purchased two Chinooks for $500 each and used one for parts and the other for the restoration. The roof pops up and has about six feet and 2 inches of clearance from head to toe; at 6’4” I am still comfortable.
This blog post will cover every single detail about restoring the motorhome from engine rebuild and drive-train to fiberglass work and interior. But before we get to that, one important thing. Her name is Paris and that is how I will refer to her from now on. The person I bought my restoration rig from was using it as a storage unit for useless items one of which was a pristine hand drawn picture of a woman named Paris (or it was taken in Paris?). Either way, Paris is quite comely and deserves an awesome rig to be named after her! Check out the photo of her below and a few others.

Below this there are 50+ different sections describing aspects of the camper in detail. Please feel free to read through them and comment on anything! Additionally, here is a quick 20 minute walk-through video of the completed project.
YouTube Video Tour
Table of Contents
- Before
- Exhaust
- Paint Preparation
- Paint
- Canvas Repair
- Roof Repair
- Door Panels
- Windshield and Wipers
- Attaching the Fiberglass Shell to the Truck Cab
- Rear Frame
- Floor Installation
- Propane Propane
- Attaching Shell and Vertical Frame to Floor
- Gas Tank and Hose
- Wheel Wells
- Roof Trim and Hold Downs and Bungee
- Tail Lights
- Dometic 211 Fridge
- Exterior Panels
- Couch Bed
- Vinyl Flooring
- Walls
- Over Cab Section
- Wall Insulation and Vinyl Trim
- Table Failure
- Table
- Coach Door Rebuild
- Camper Windows
- Wheels
- Rear Bumper
- Engine Removal
- Engine Rebuild
- Engine Bay Paint
- Engine Install
- Suspension and Steering and Brakes
- Heater
- Cabinets
- Ignition
- Alternator
- Electrical
- Auxiliary Coach Battery
- Headliner
- Water and Tank
- Interior Finishing
- Table Top with Stove and Sink
- Truck Cab Carpet and Seats
- Mirrors
- Roof Install
- Leaf Spring Rebuild
- Moving In
- Comments
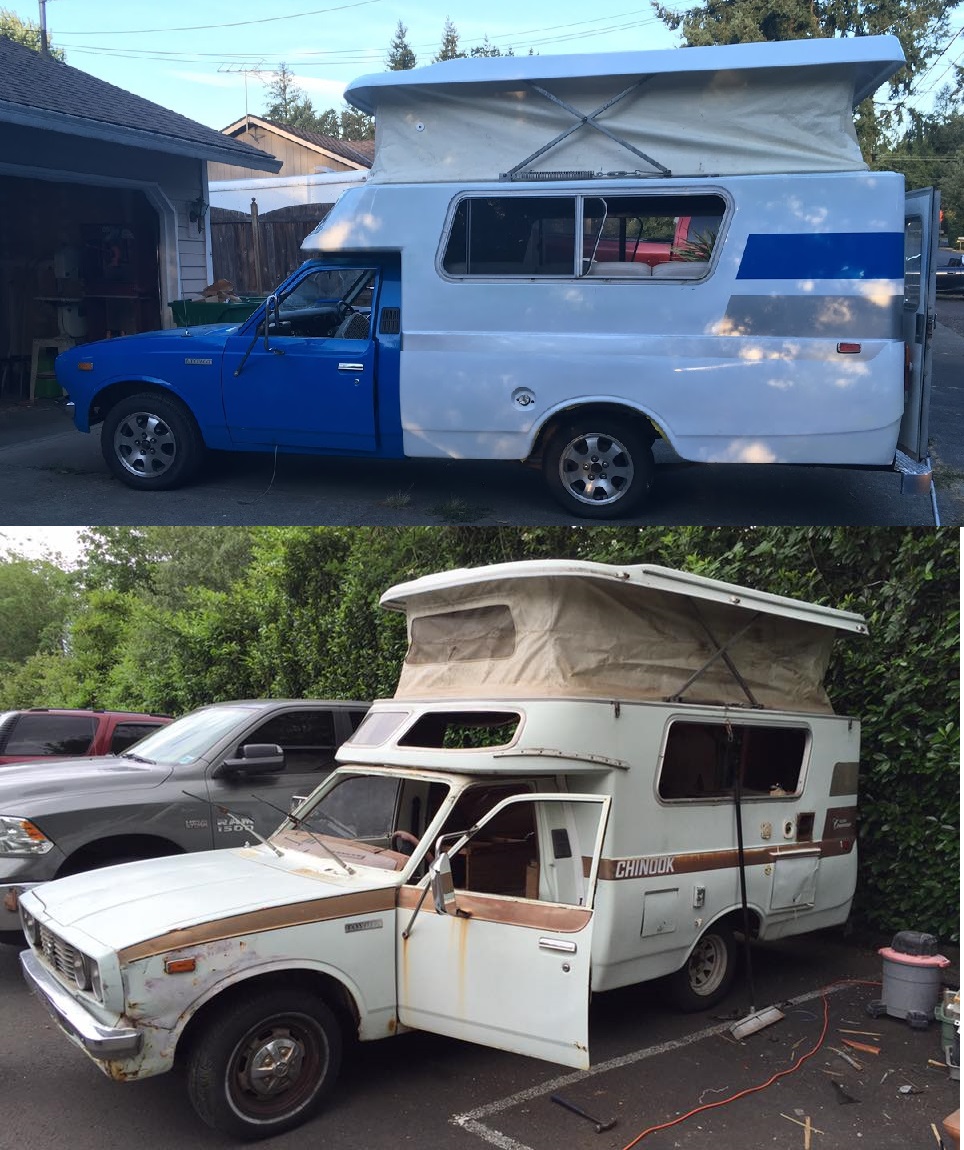
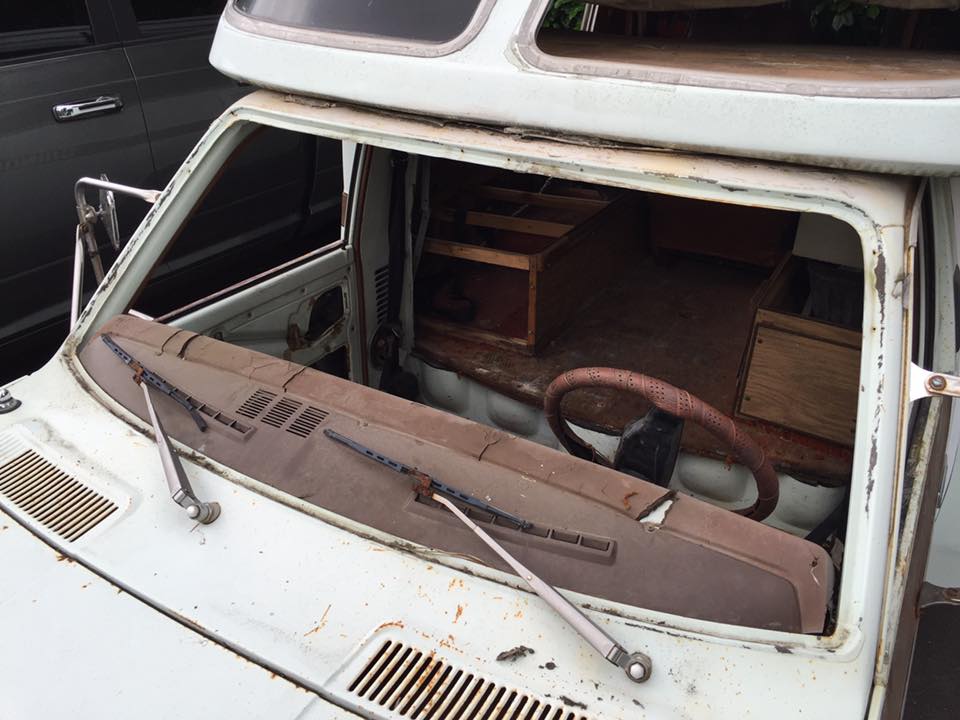
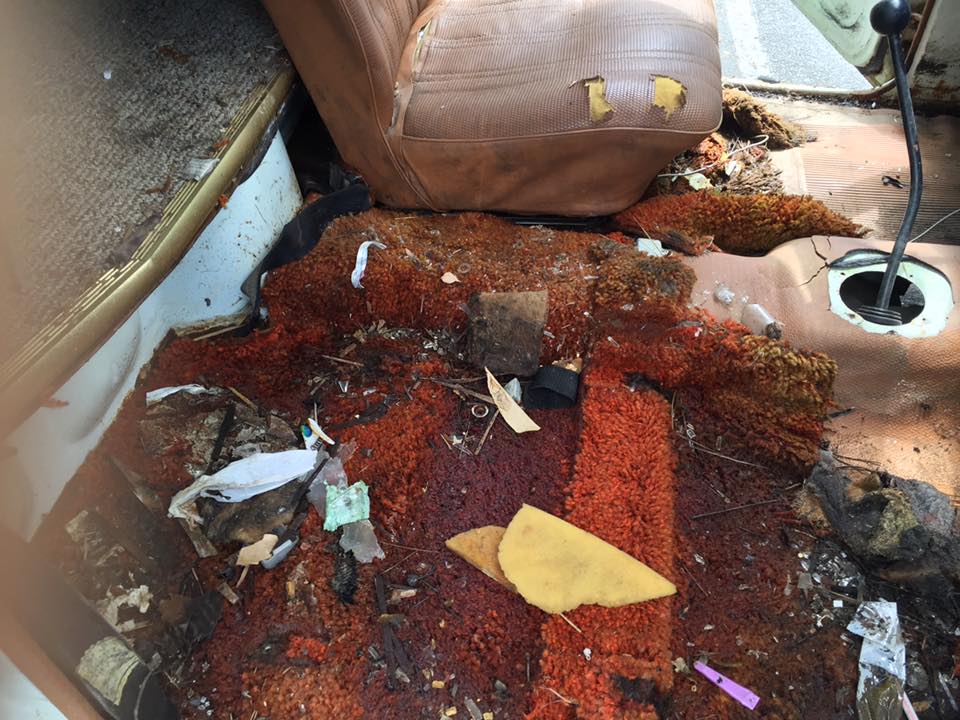
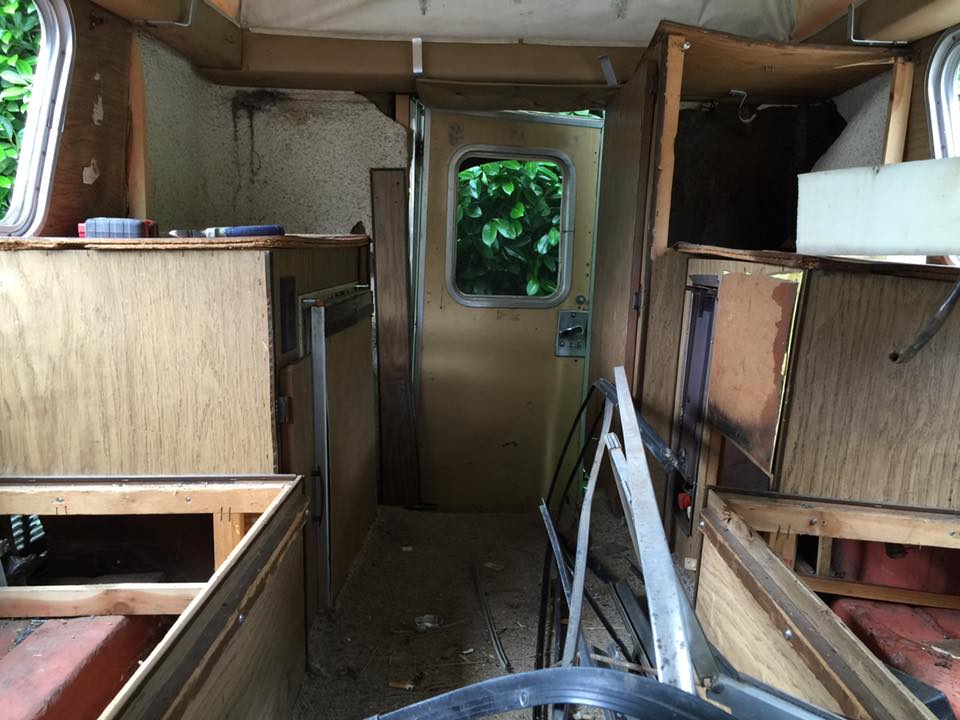
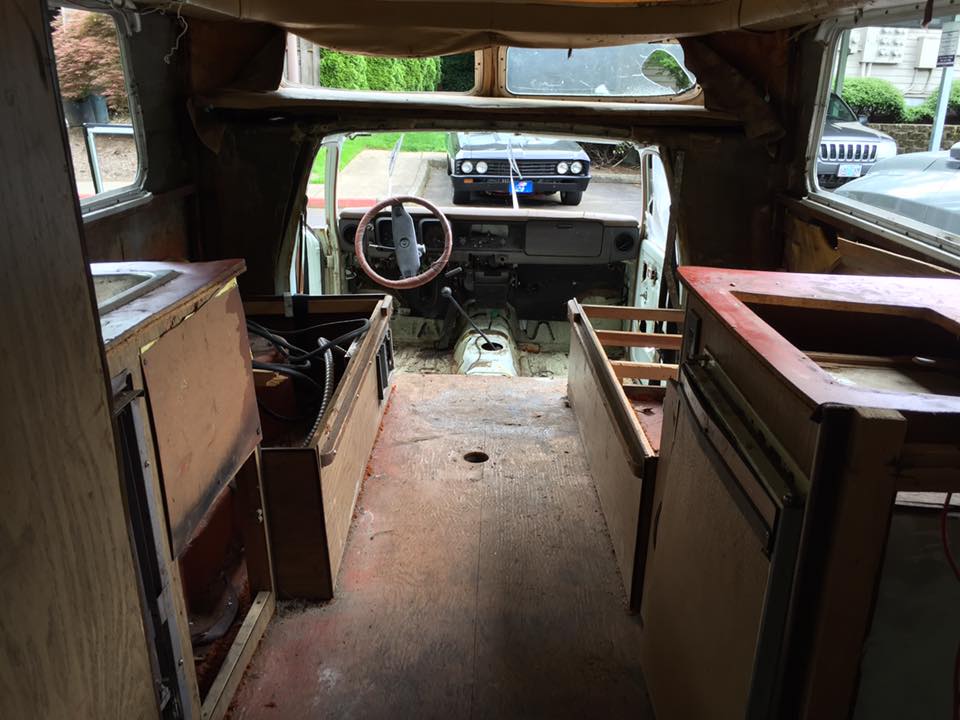
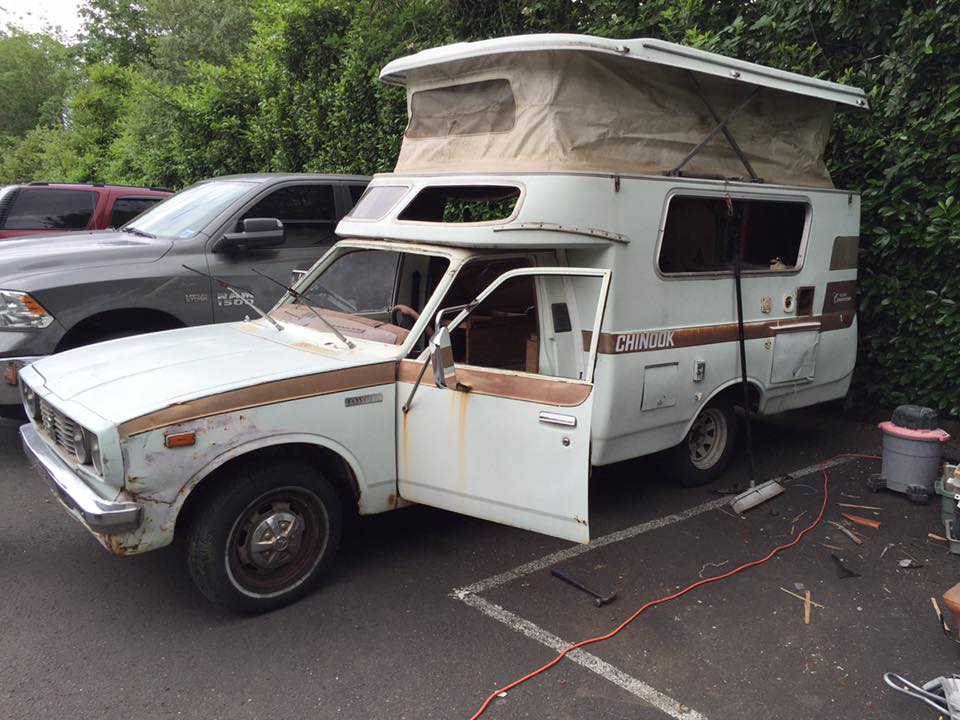
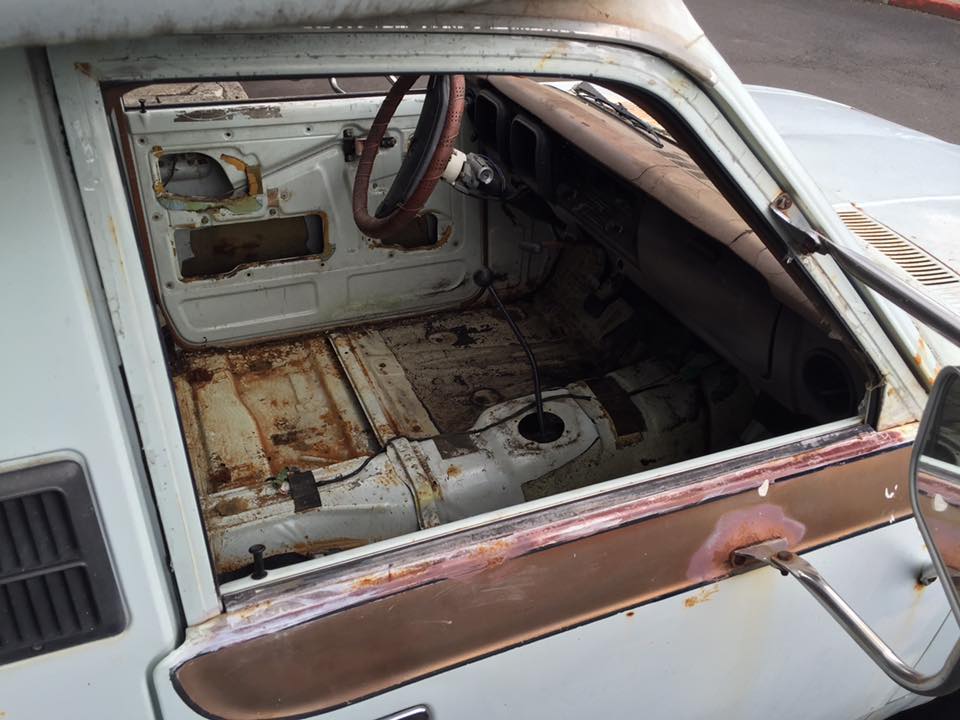
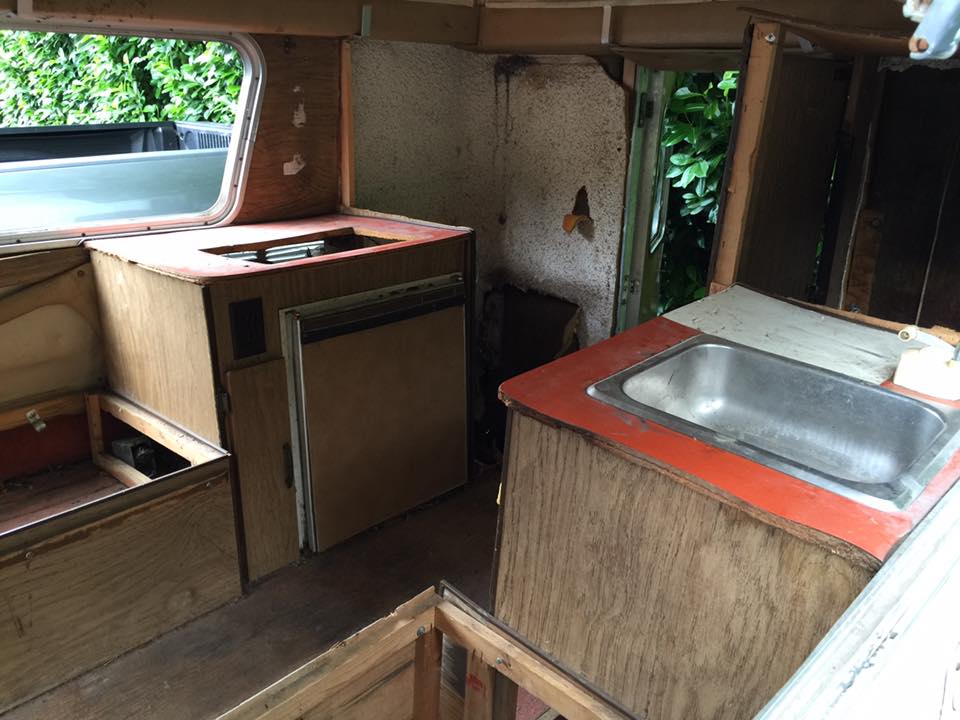
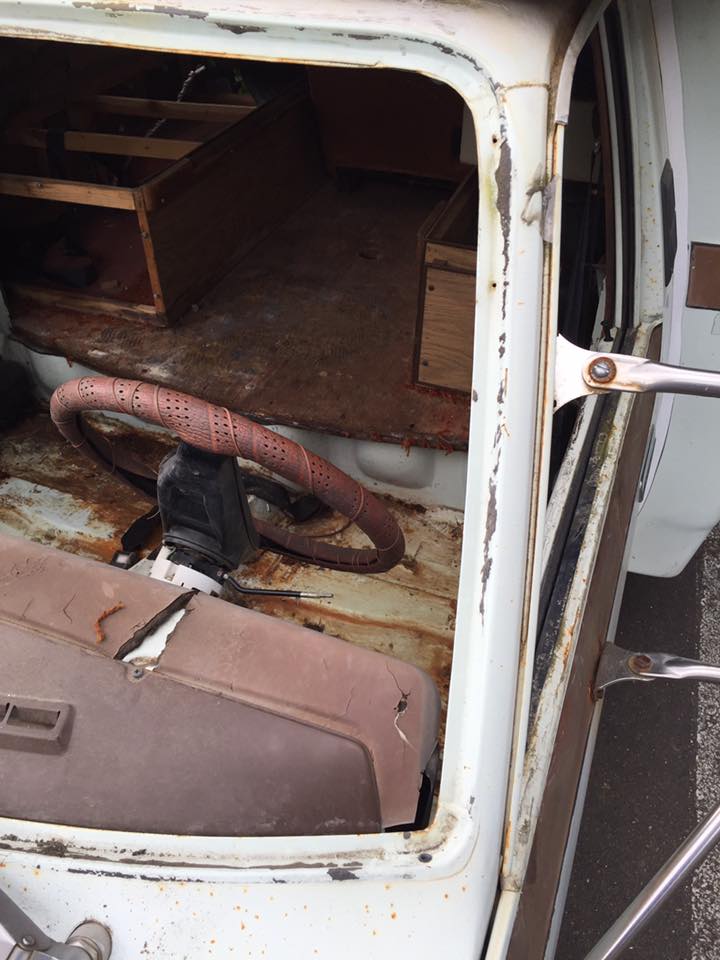
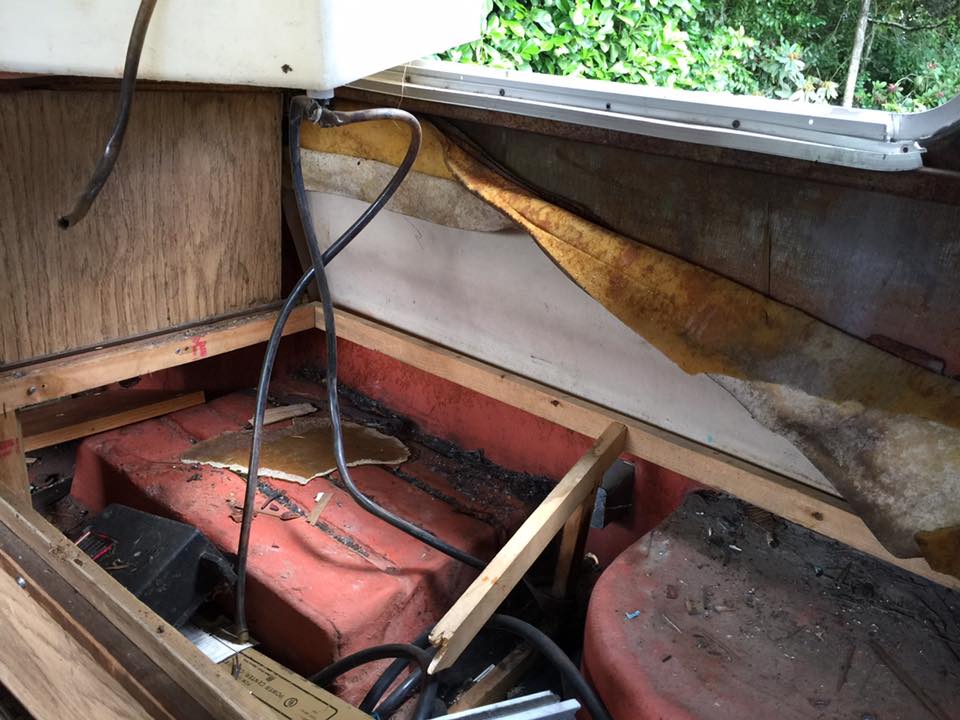
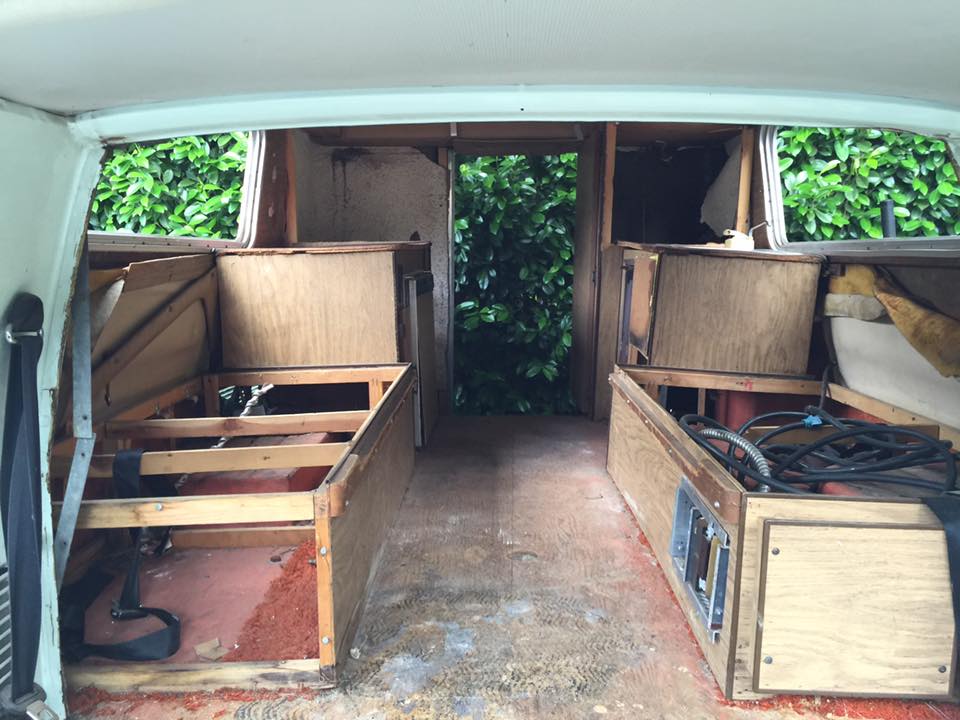
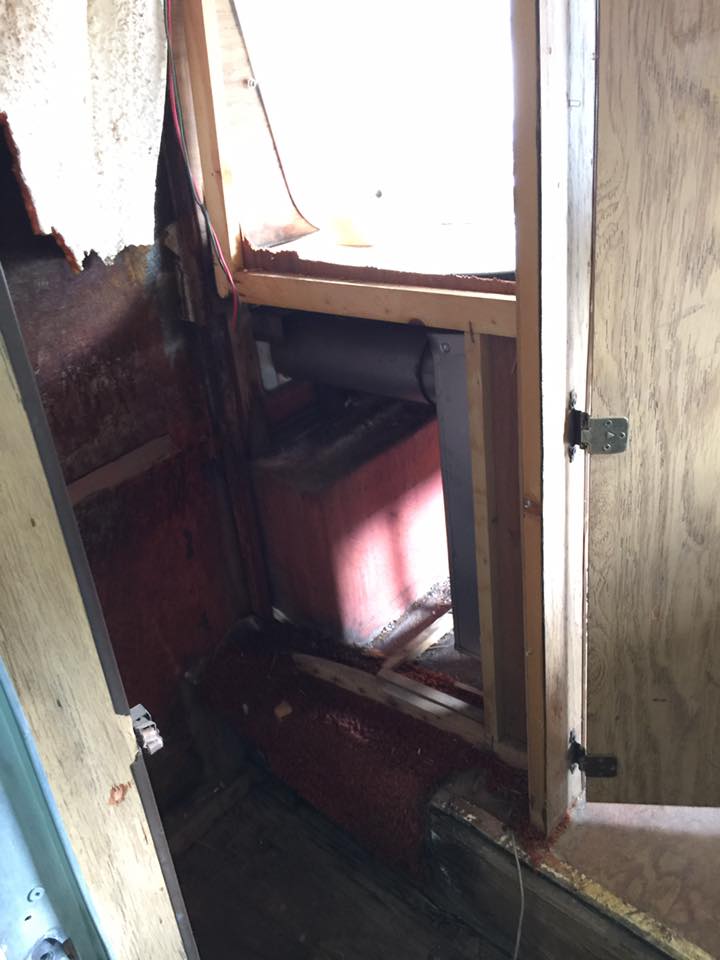
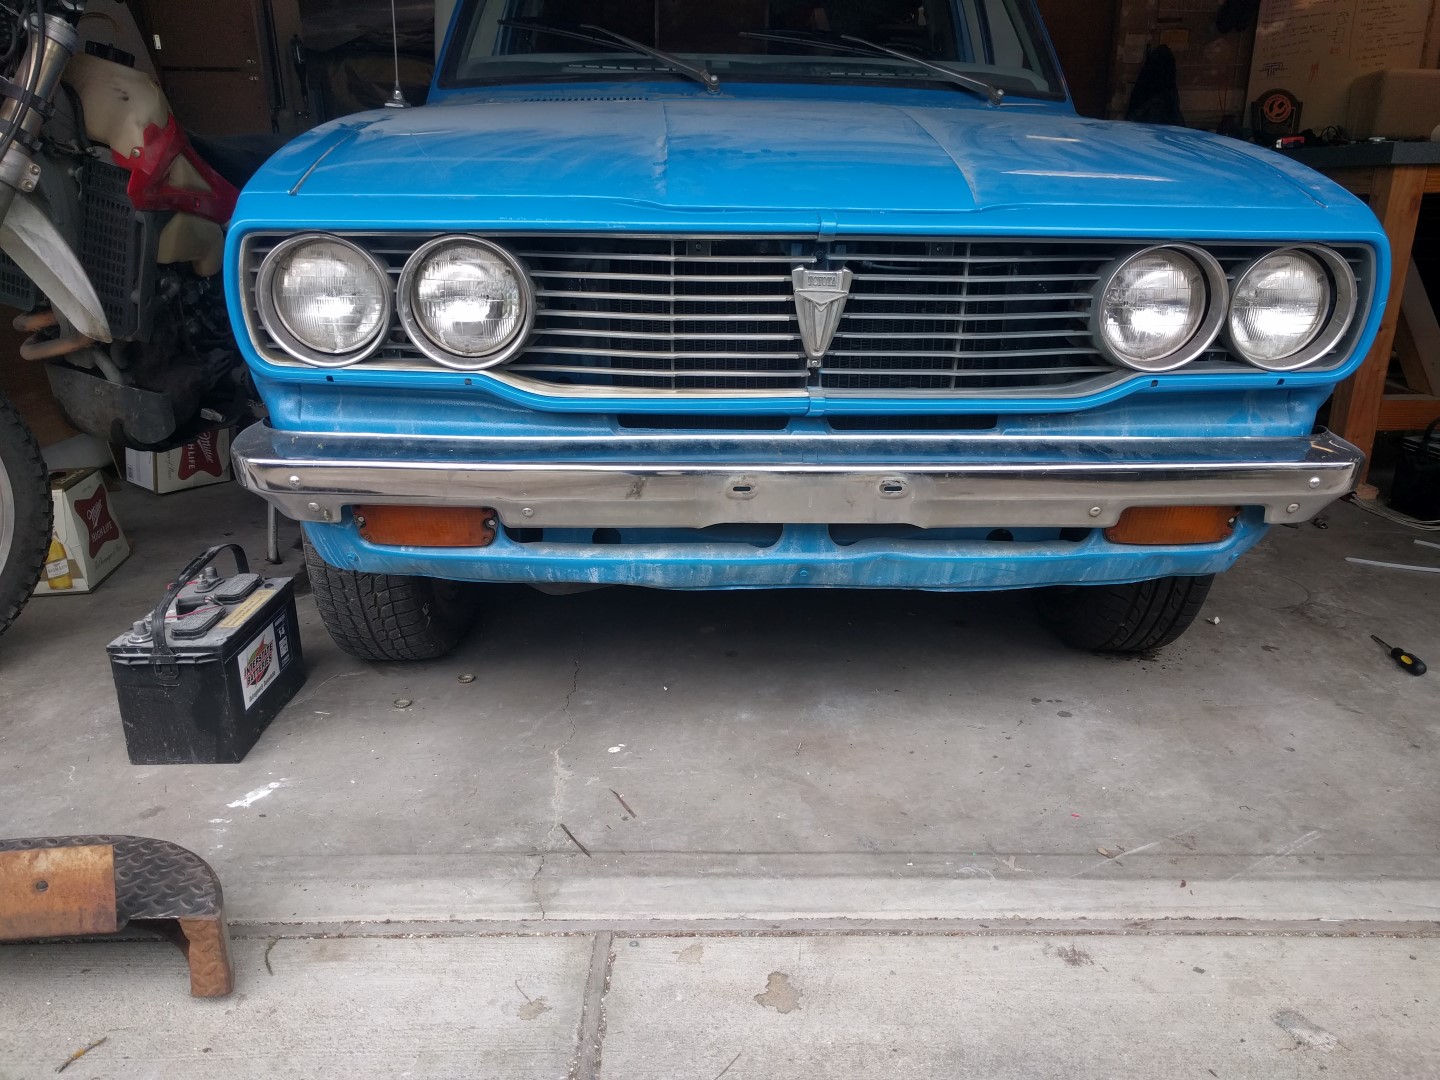
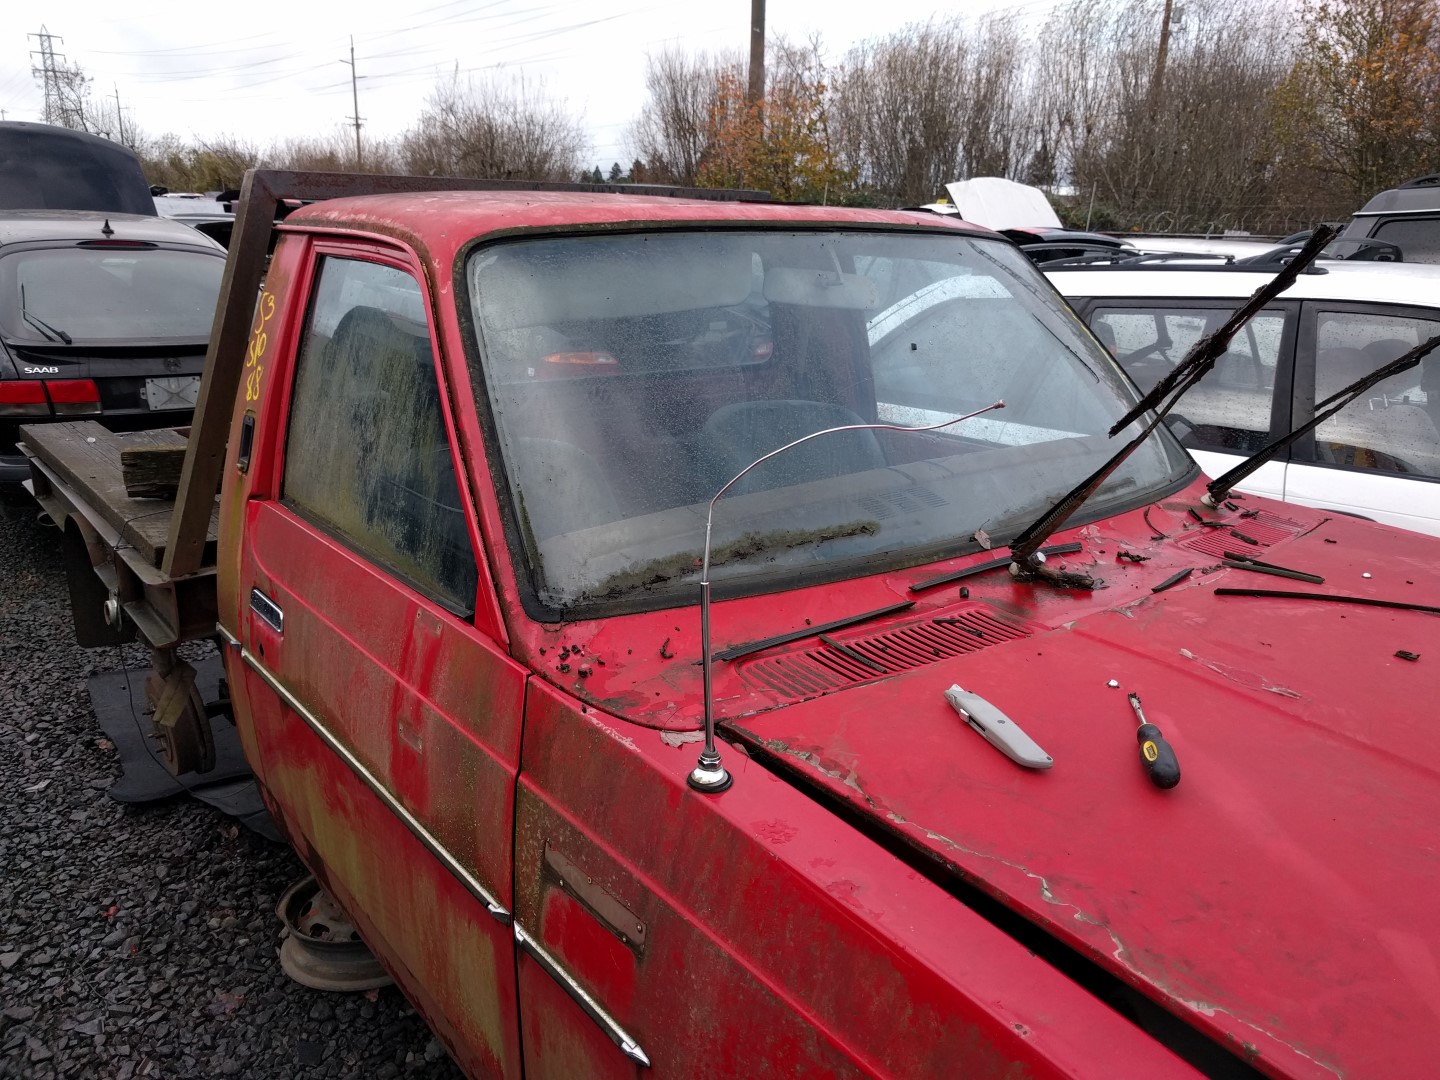
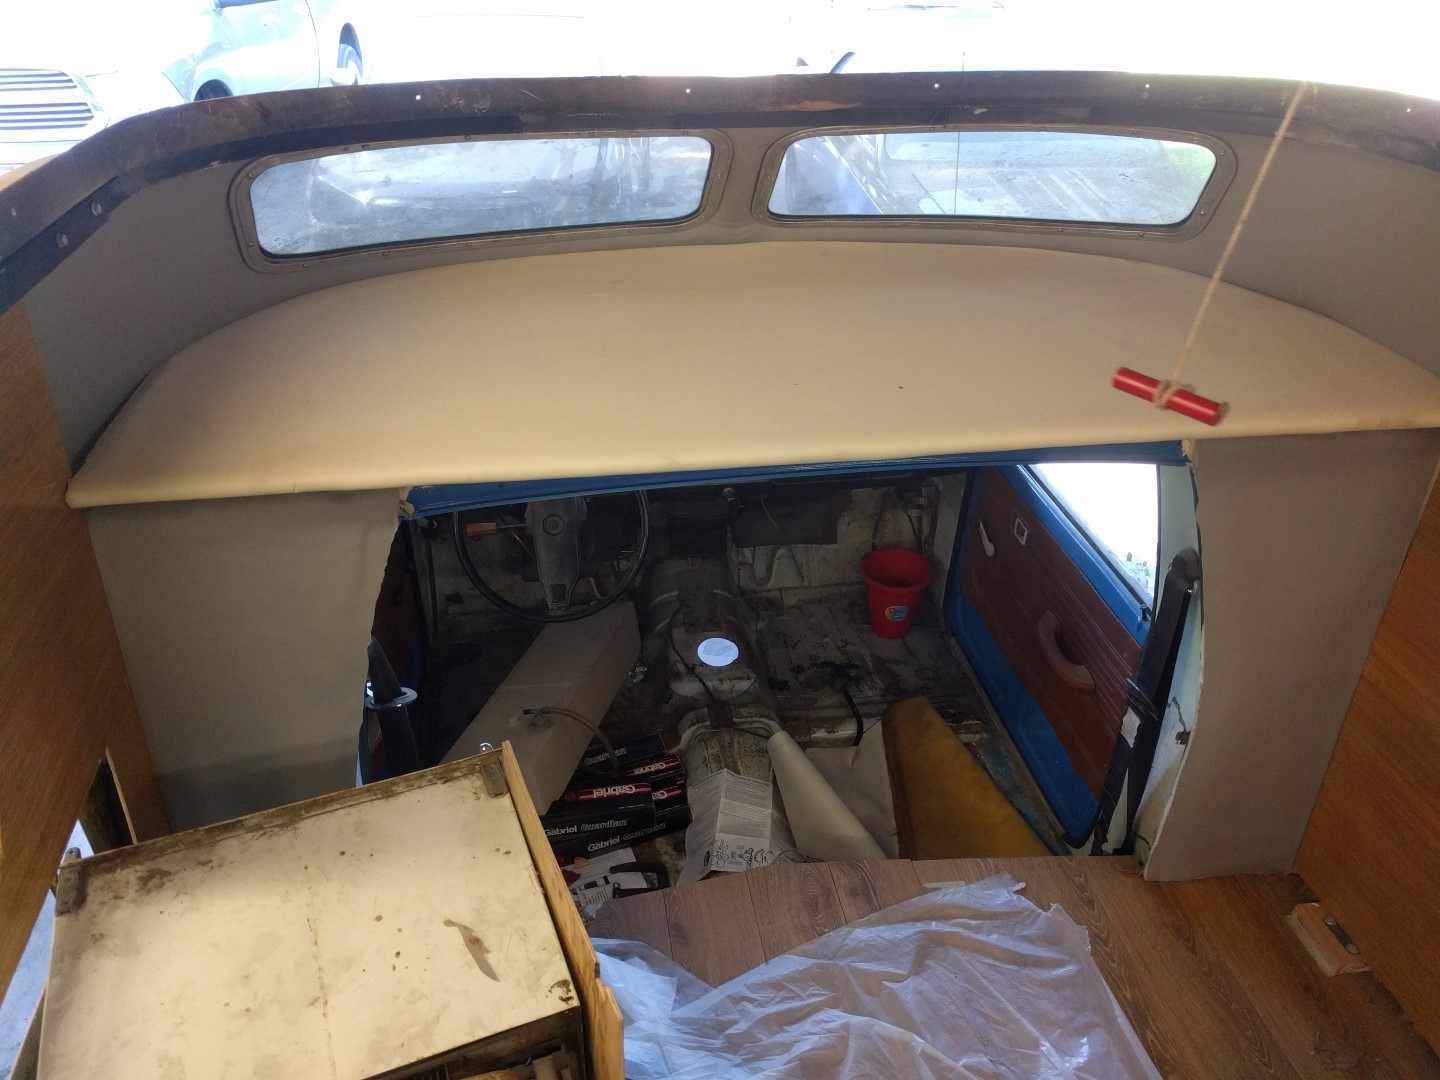
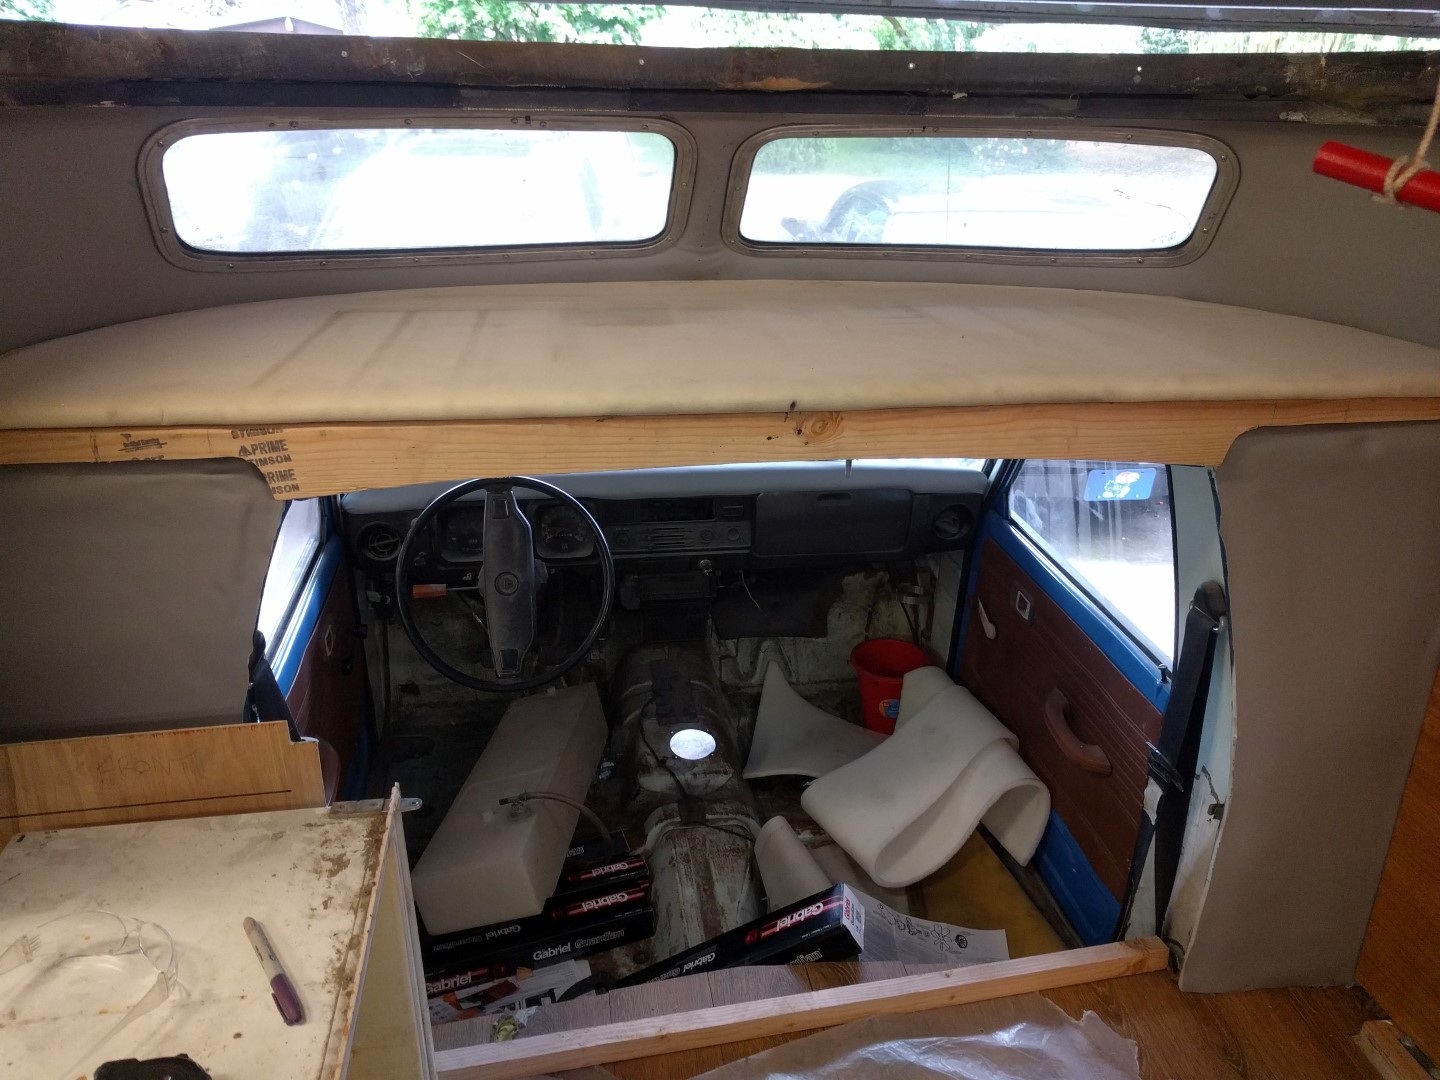
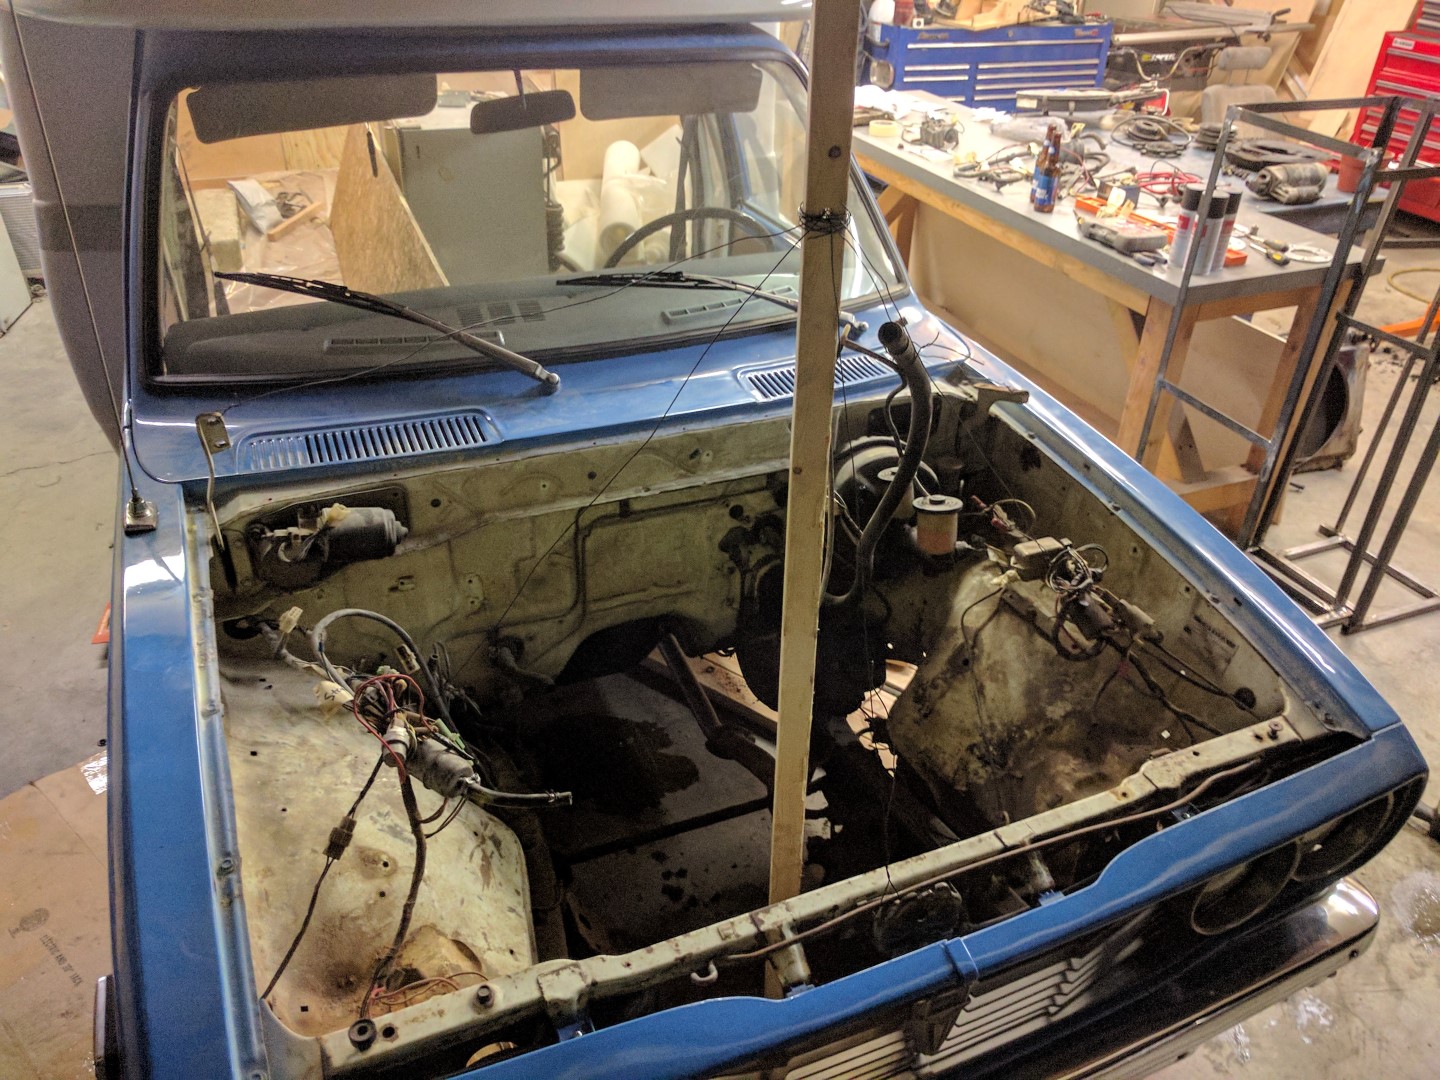
Before
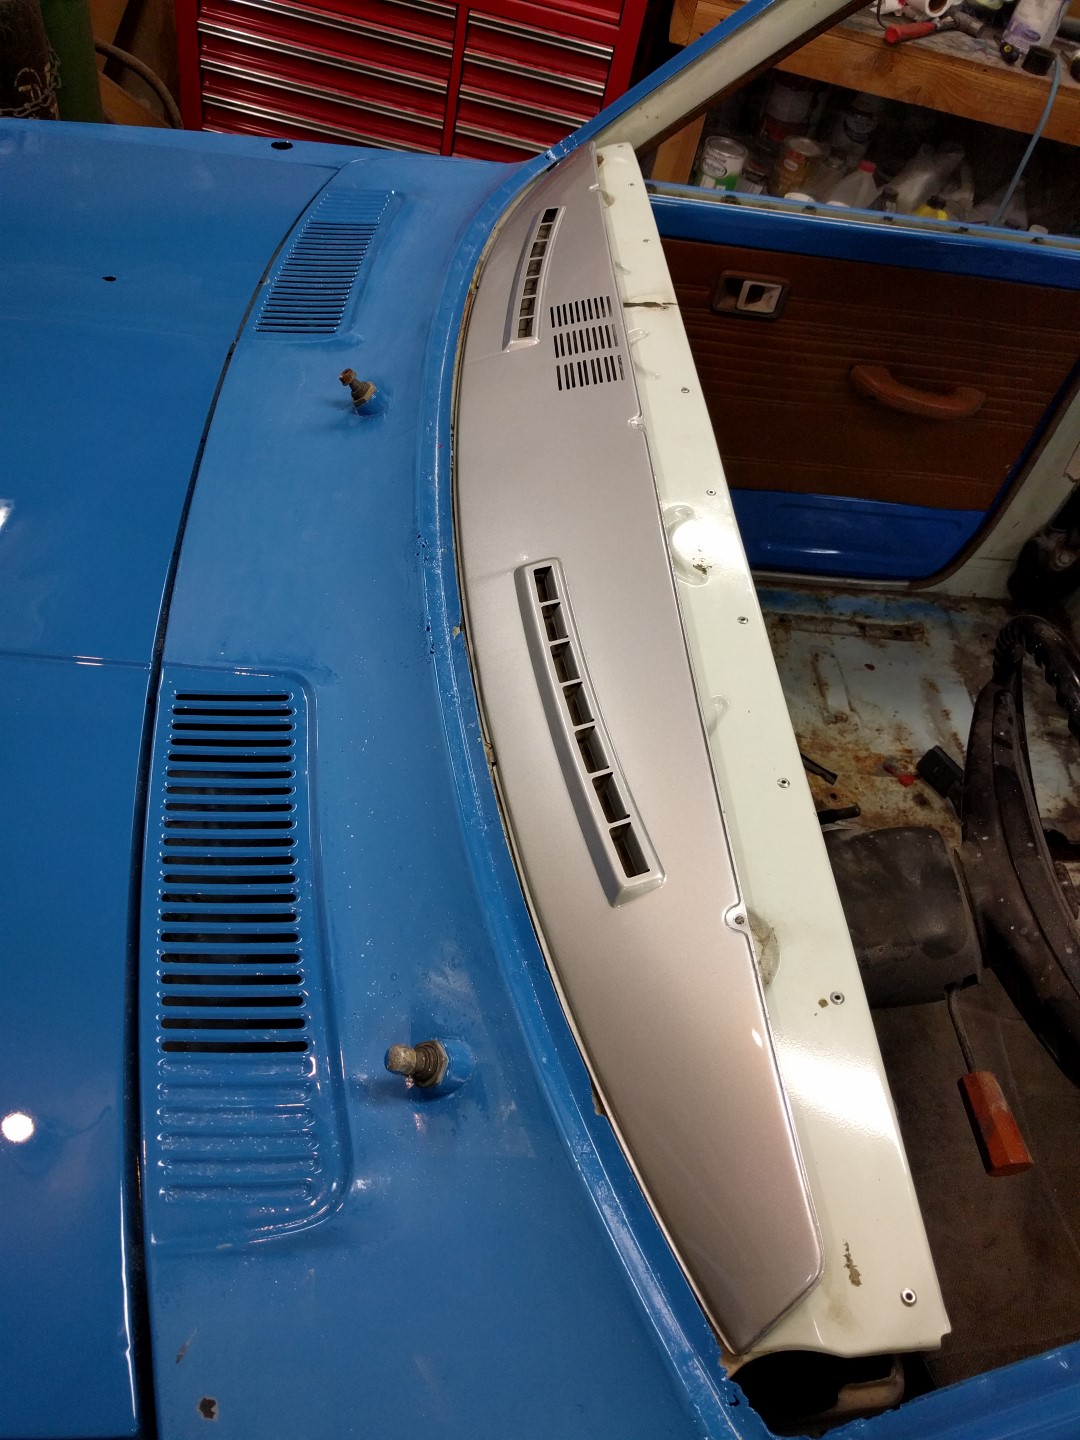
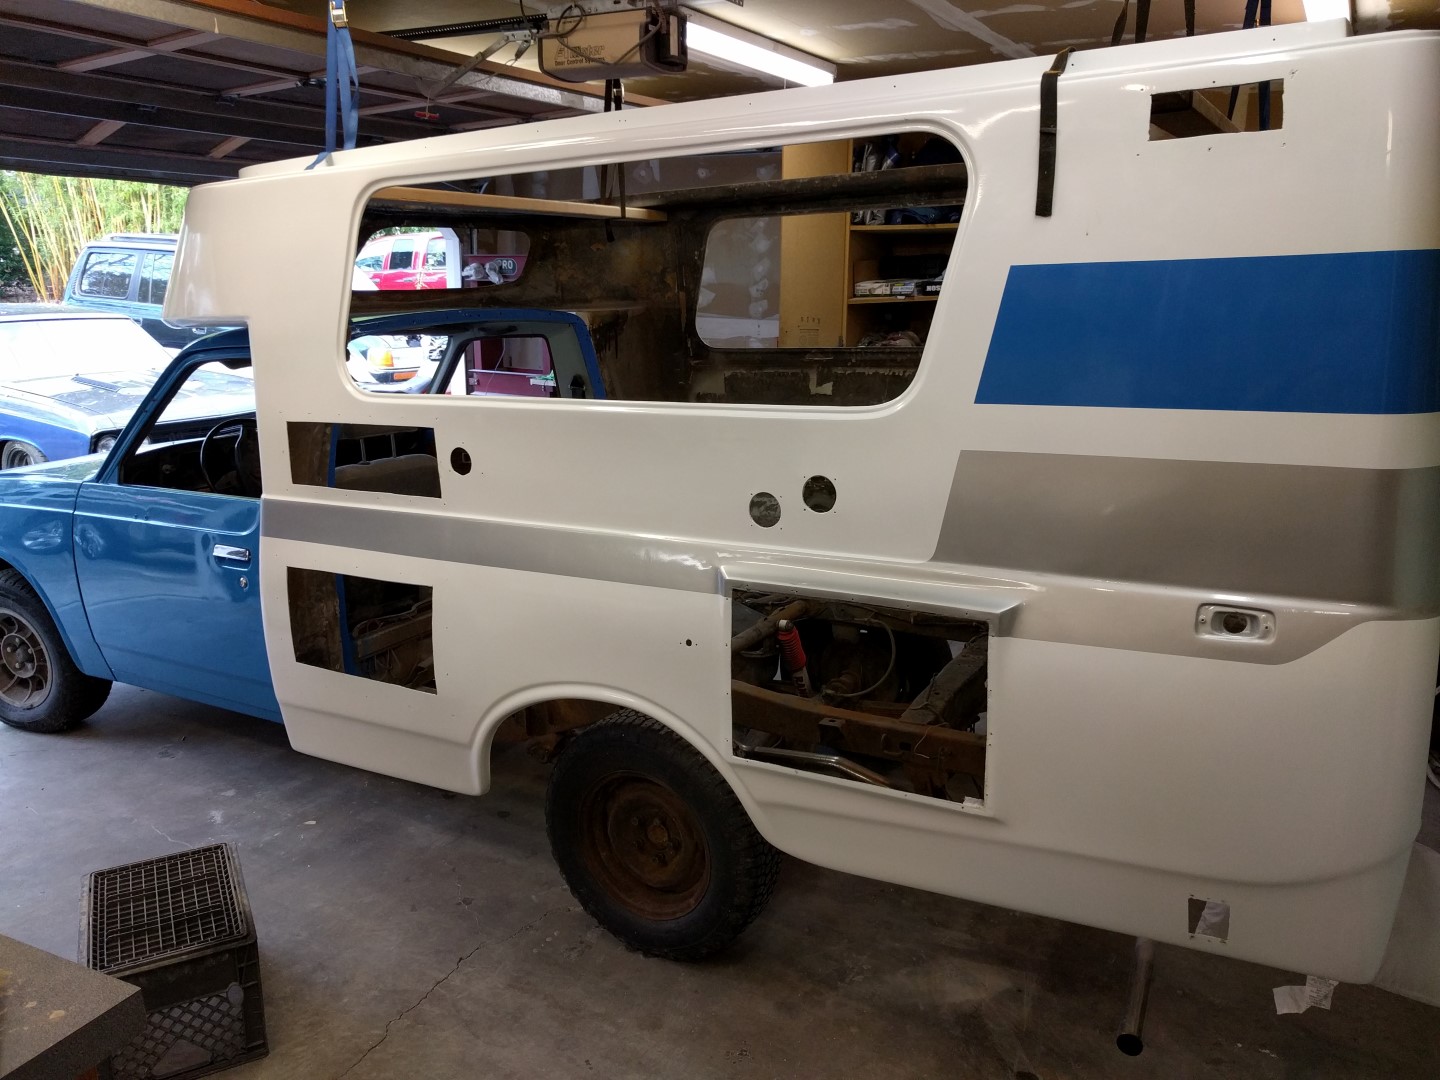
This is what Paris looked like before the restoration; however, I forgot to take pictures of Paris before restoration so here is the parts rig I acquired. Vandals broke out all the windows on the parts rig were broken out before I bought it. They both were in similar condition and both 1977s. Interestingly, Chinook has quite a few different interior layouts and exterior panel configurations even within the same year. Paris’ layout was a single couch on one side and table on the other which I stuck with for the restoration configuration and the parts rig had a table in the front that converted into a bed and two counters on each side. The change in interior layouts this causes the exterior vents to be in different locations so most of the parts rig’s vents couldn’t be used as backups on Paris. The fridge vent in particular is on the driver’s side on Paris where the body is curved so Chinook made this custom piece of plastic that makes for a flat panel; whereas the parts rig this is built into the fiberglass shell.


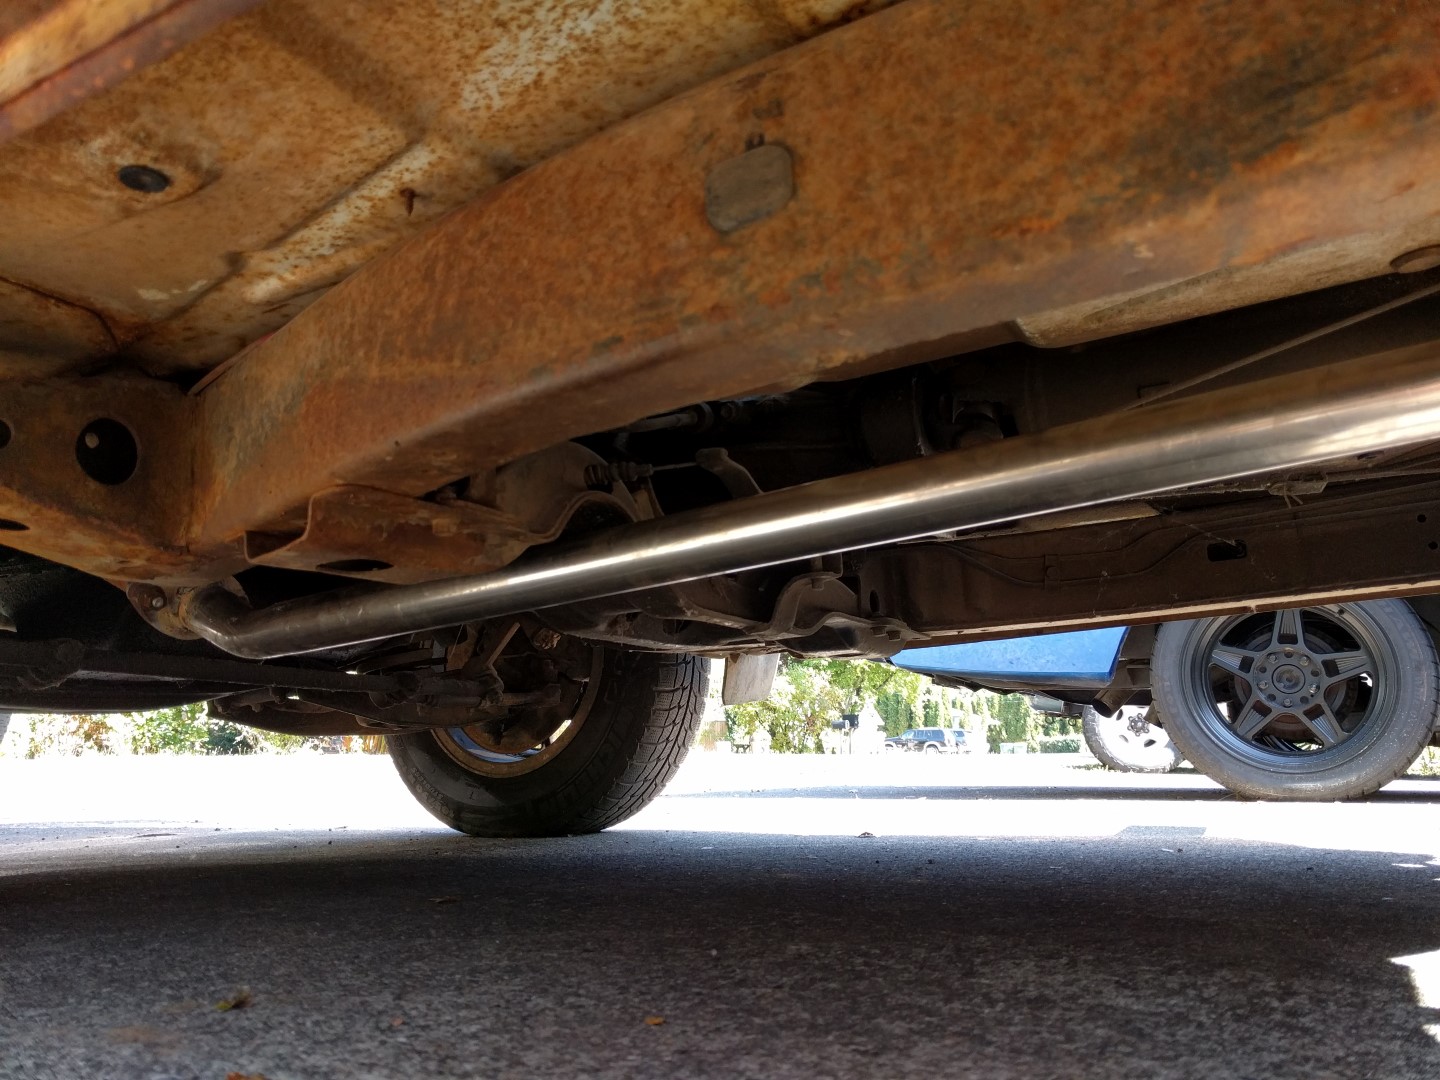
Exhaust
I purchased some 1.75” steel tube from the metal store and got a local exhaust shop to do the bending using the old exhaust as a reference. The muffler is a basic $20 unit. The catalytic converter was not installed, not enough power as it is!
Muffler
Exhaust clamps to hold muffler in place

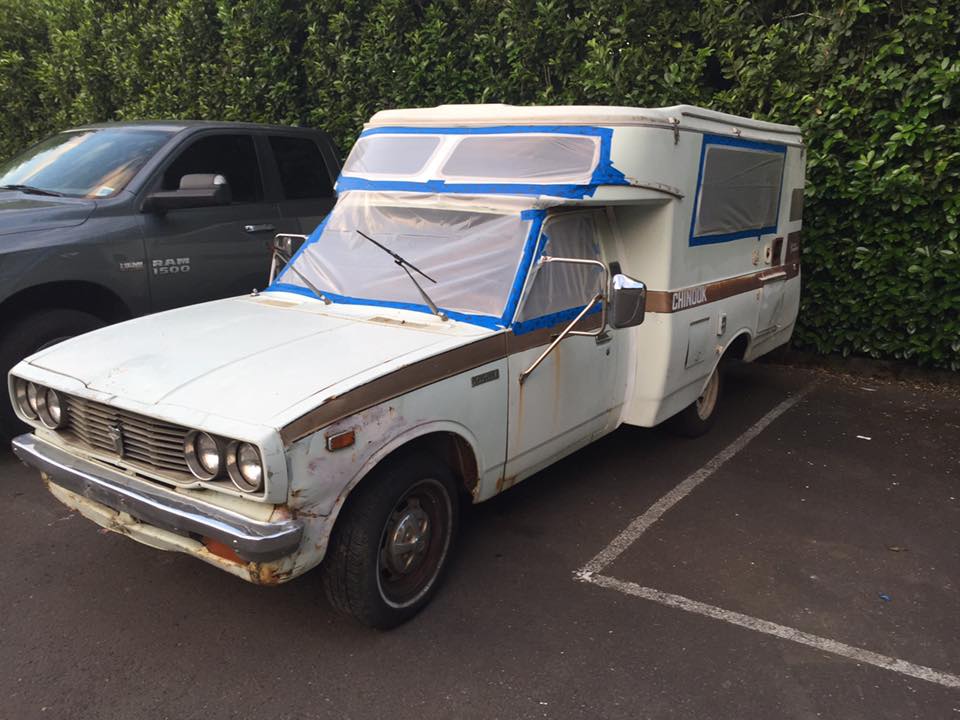
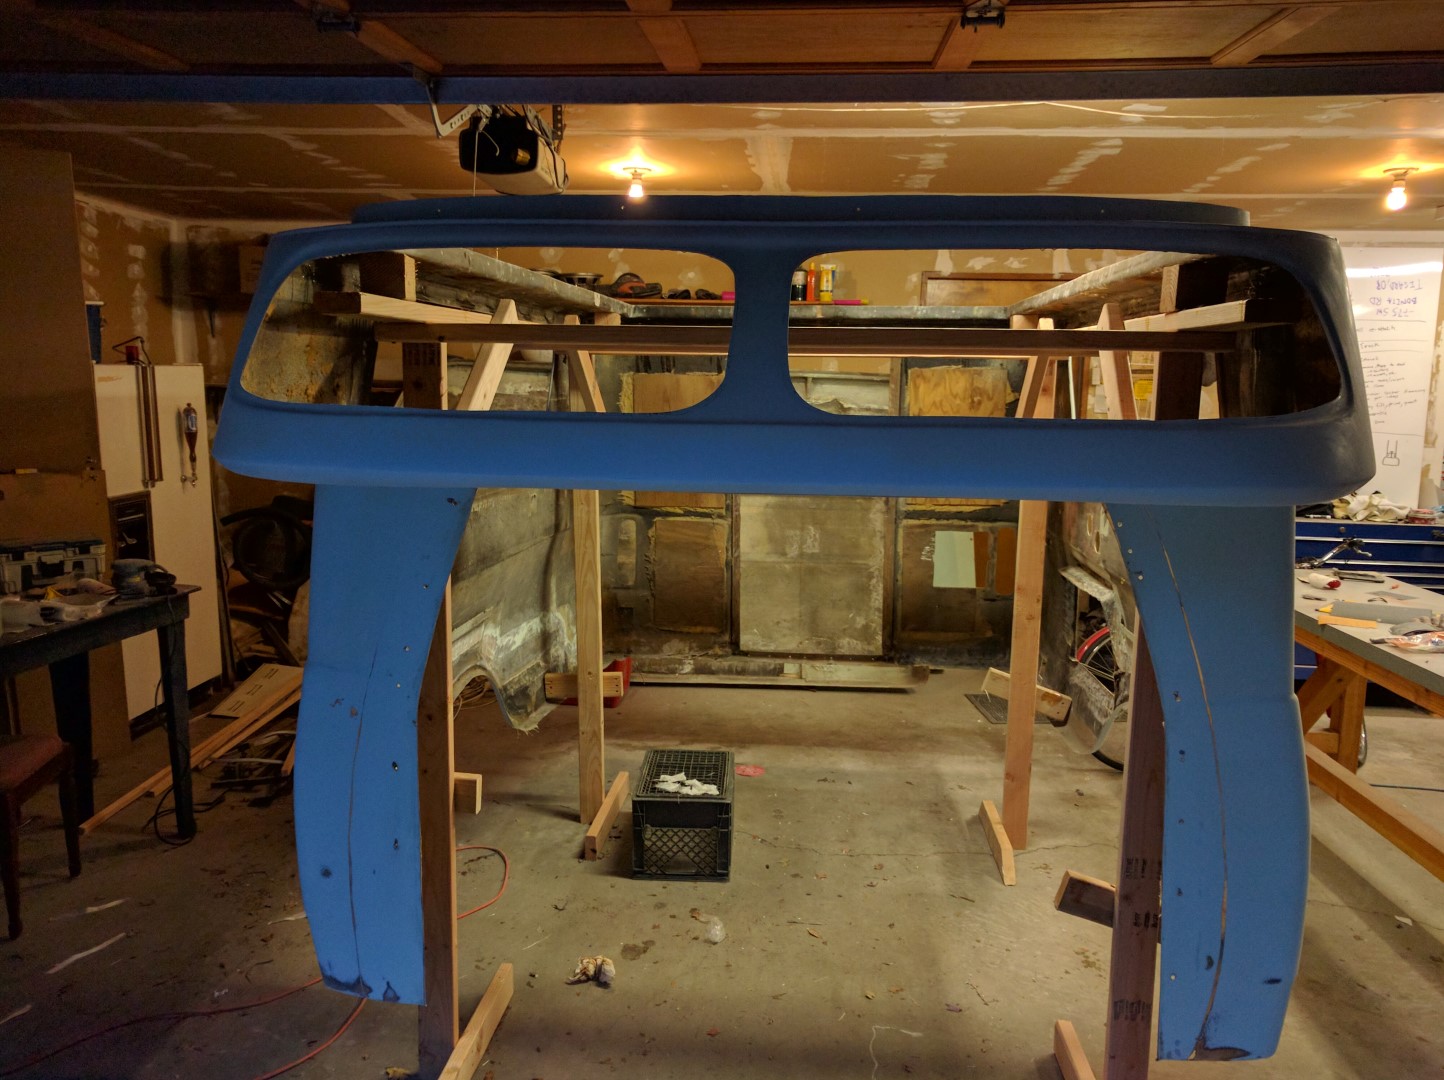
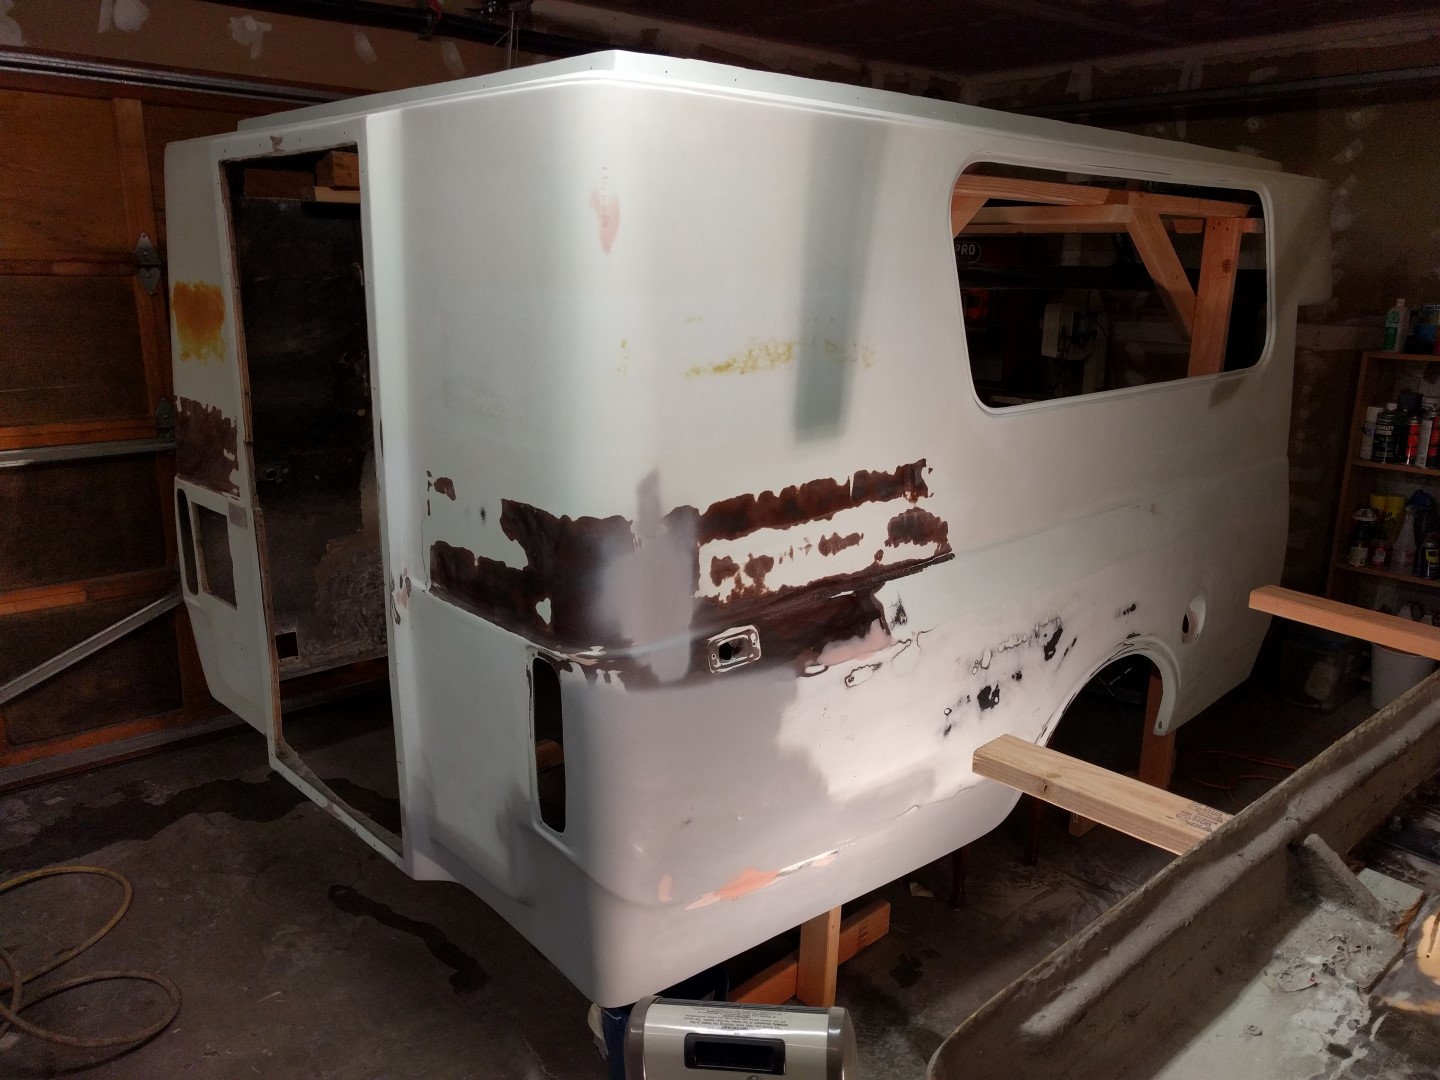
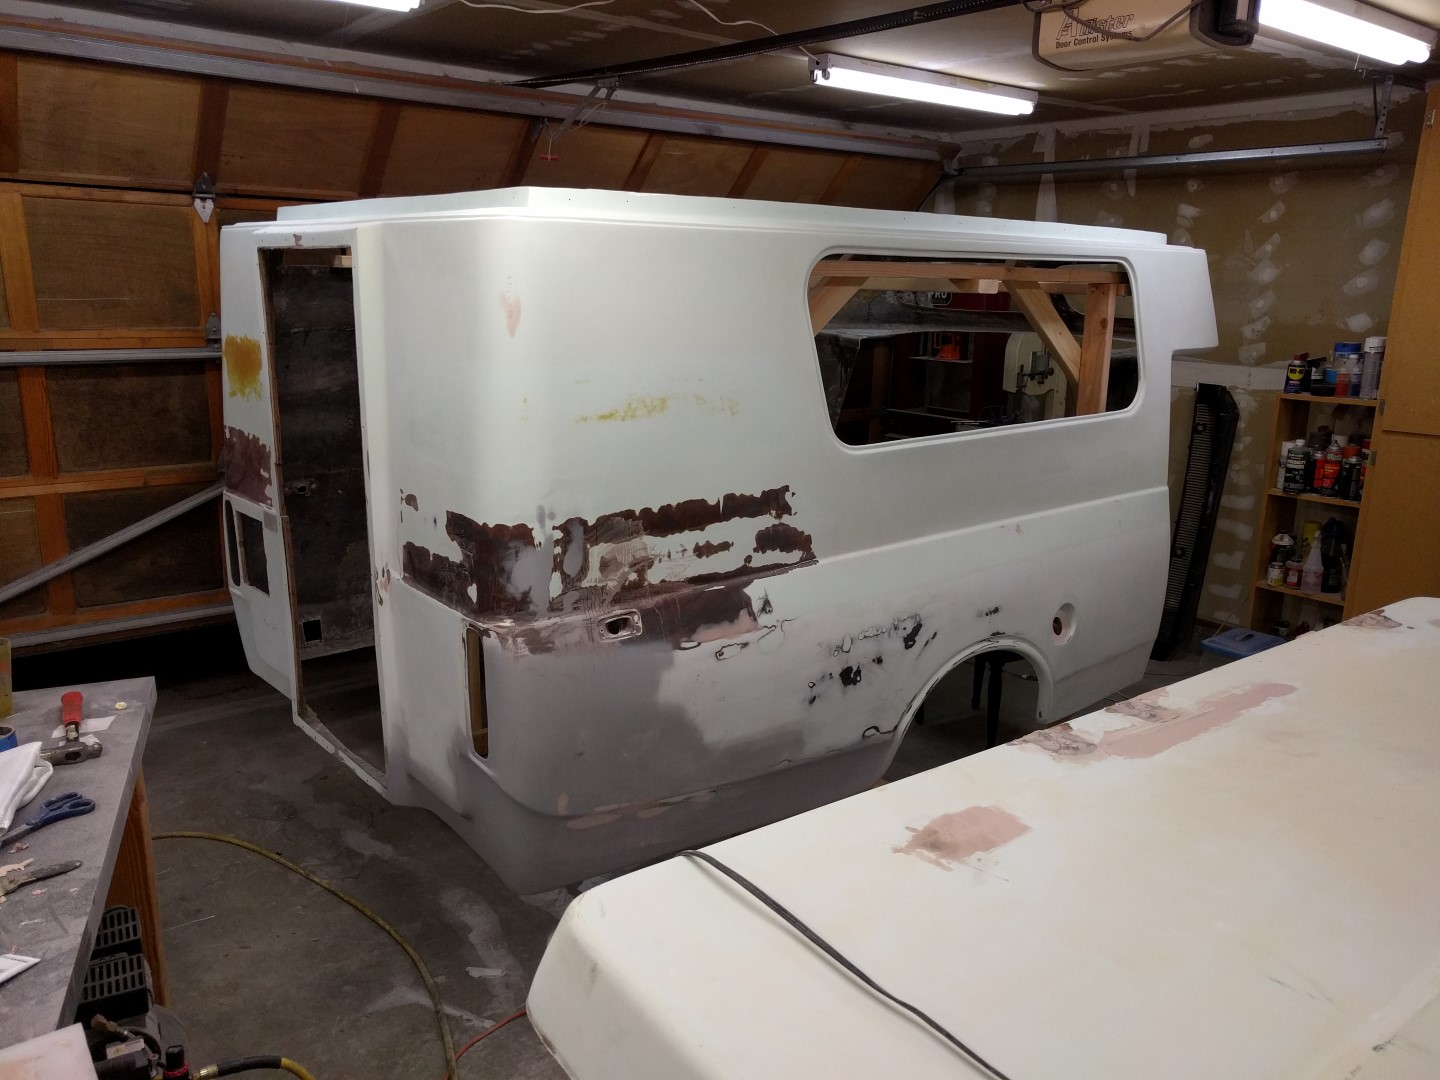
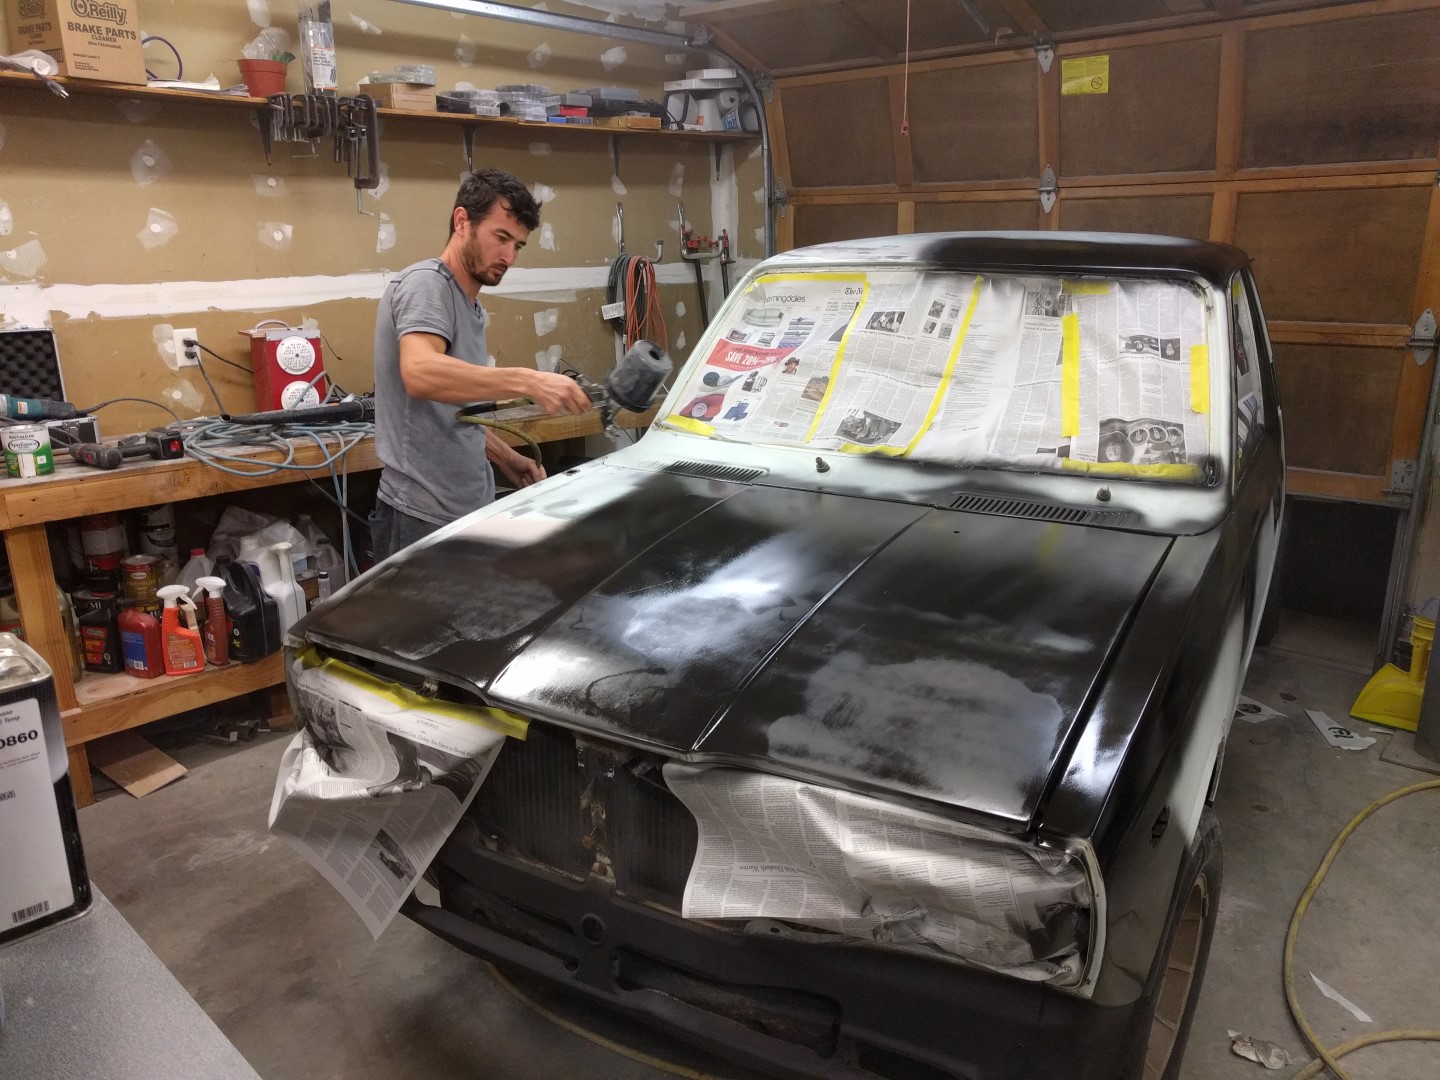
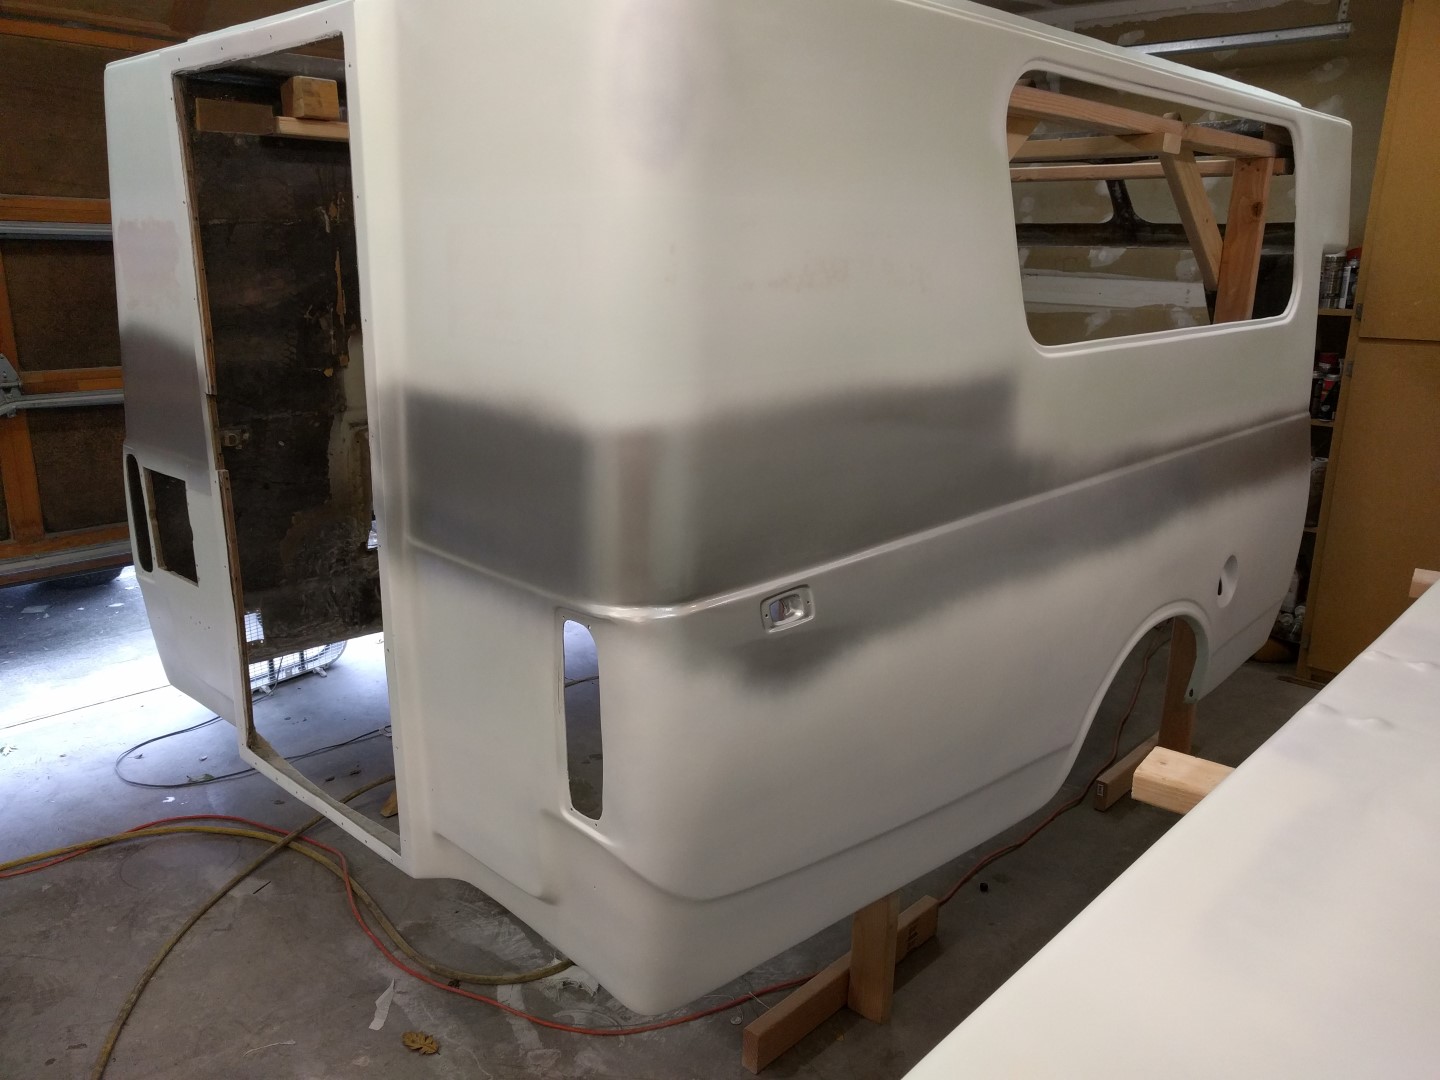
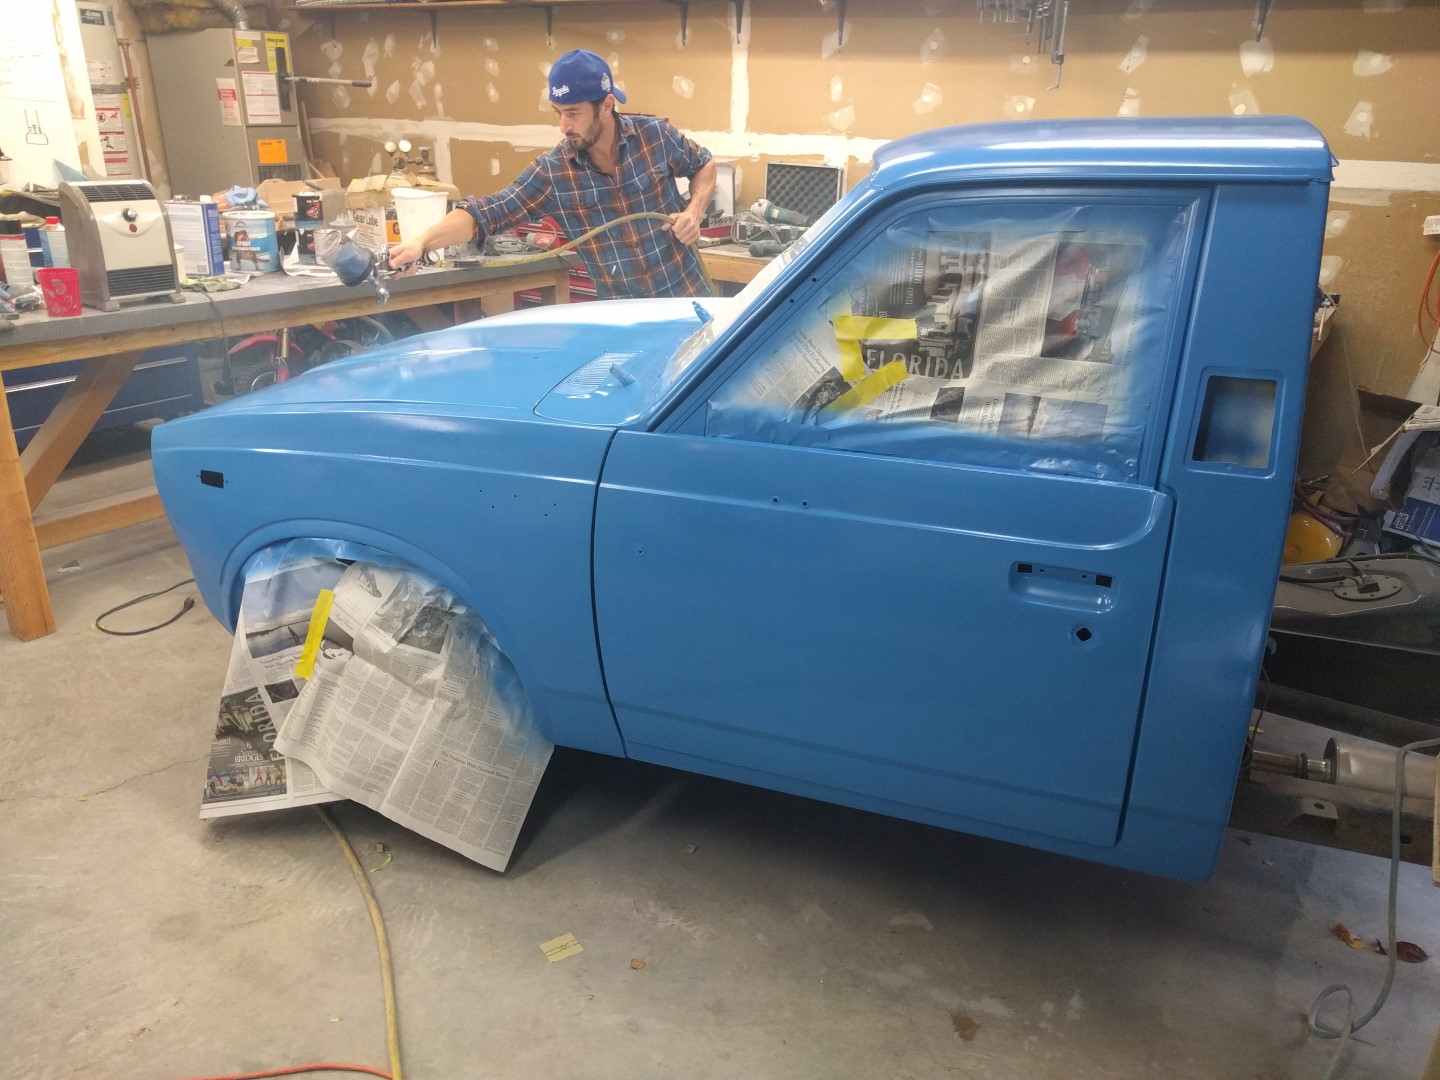
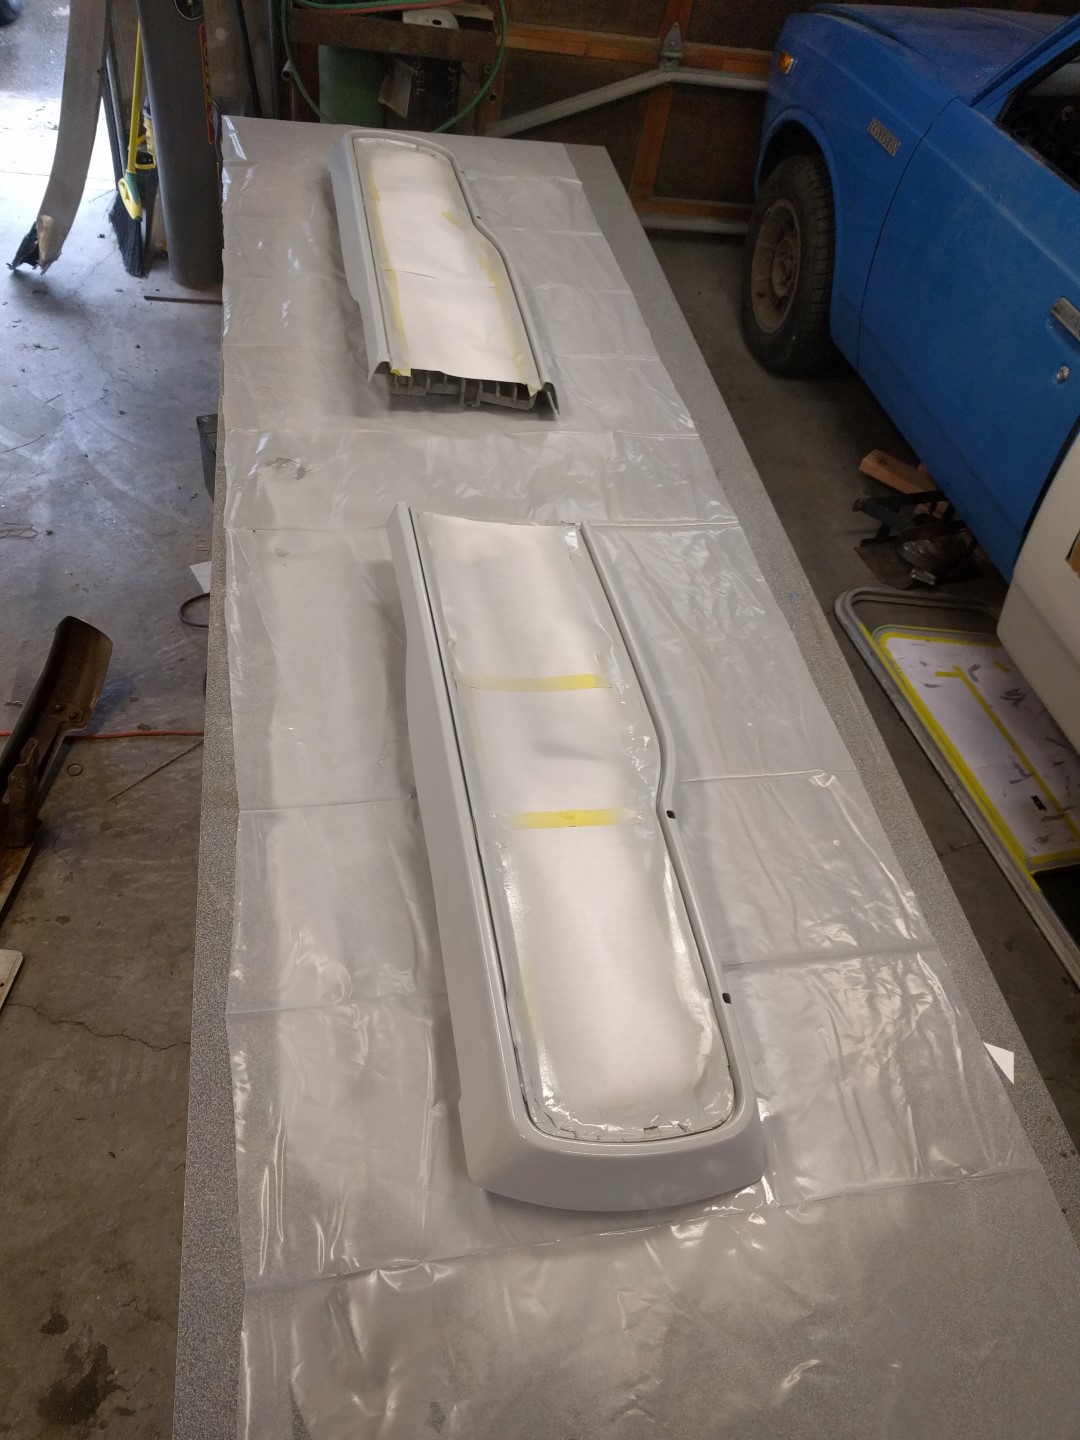
Paint Preparation
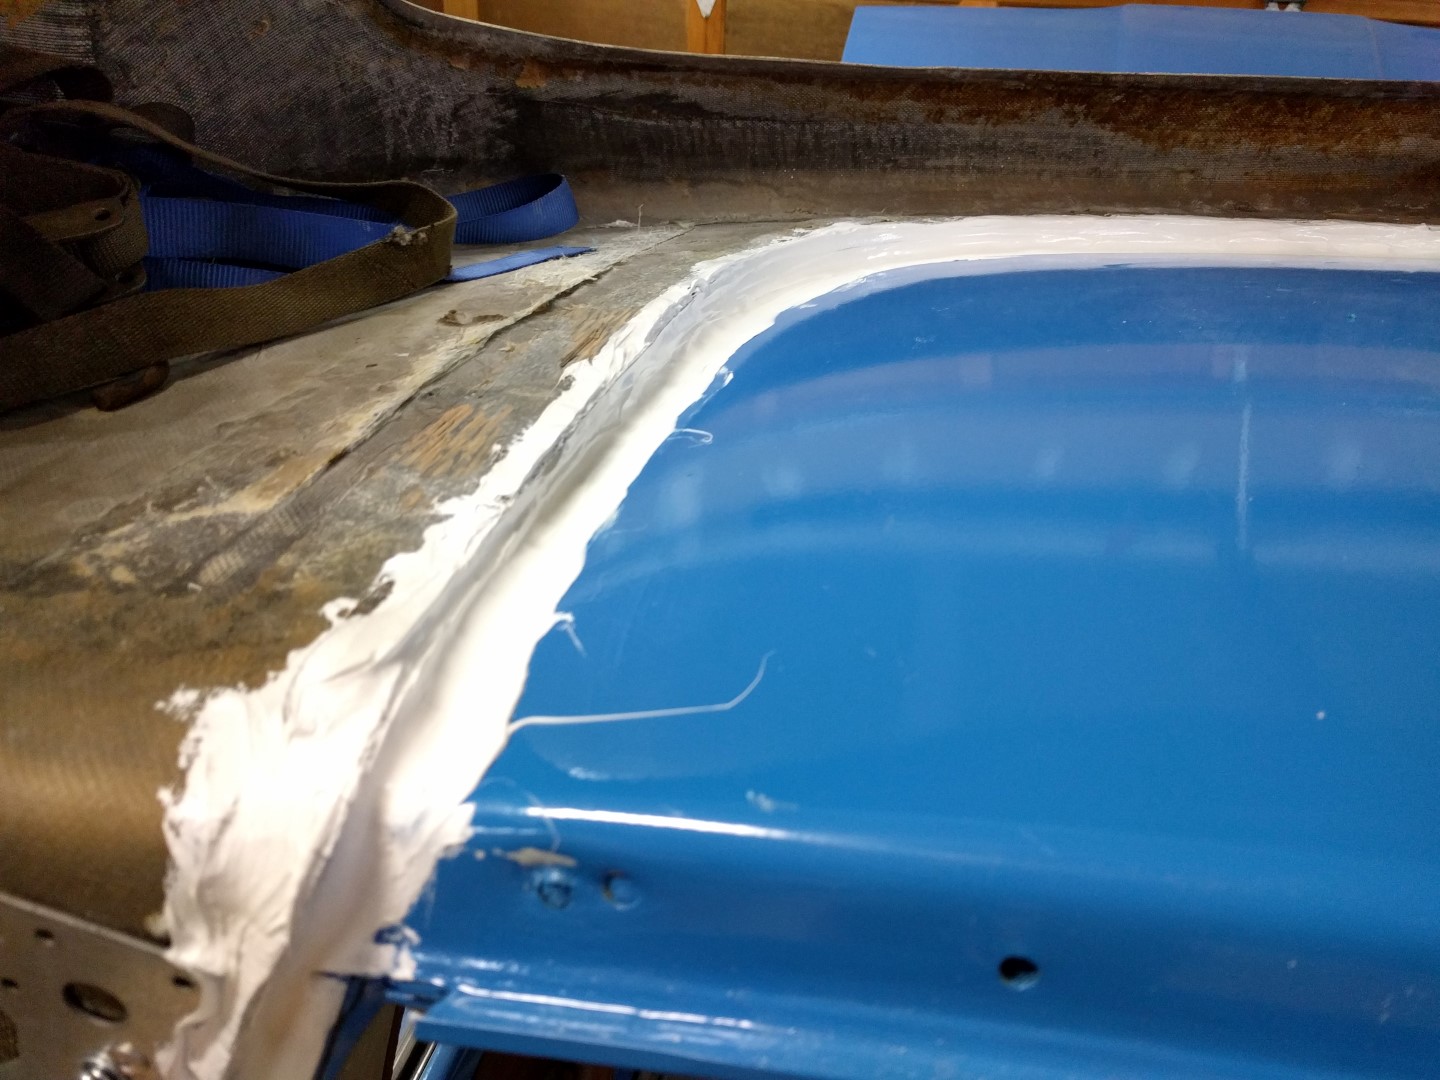
Preparing a vehicle for paint is quite a difficult and time consuming task. The shell was removed an placed on a stand about 1.5 feet off the ground. The fiberglass around the edges of the shell were in poor condition so that was the first area of focus. Then the damaged body on both the truck and shell that needed body filler were fixed by applying filler, sanding, and repeating; followed up with a coat of filler primer and sanded again. The top edges of the shell where the roof sits wore some grooves into the shell so that was also repaired with body filler and primer.
The shell actually wasn’t painted stock it uses bare fiberglass and then gelcoat like a boat. Reading up on this a bit you can paint right over the top of gelcoat as long as the gelcoat is properly prepared. The stripes are just stickers that are very difficult to remove! But sanding them prepares the surface enough for paint to adhere.
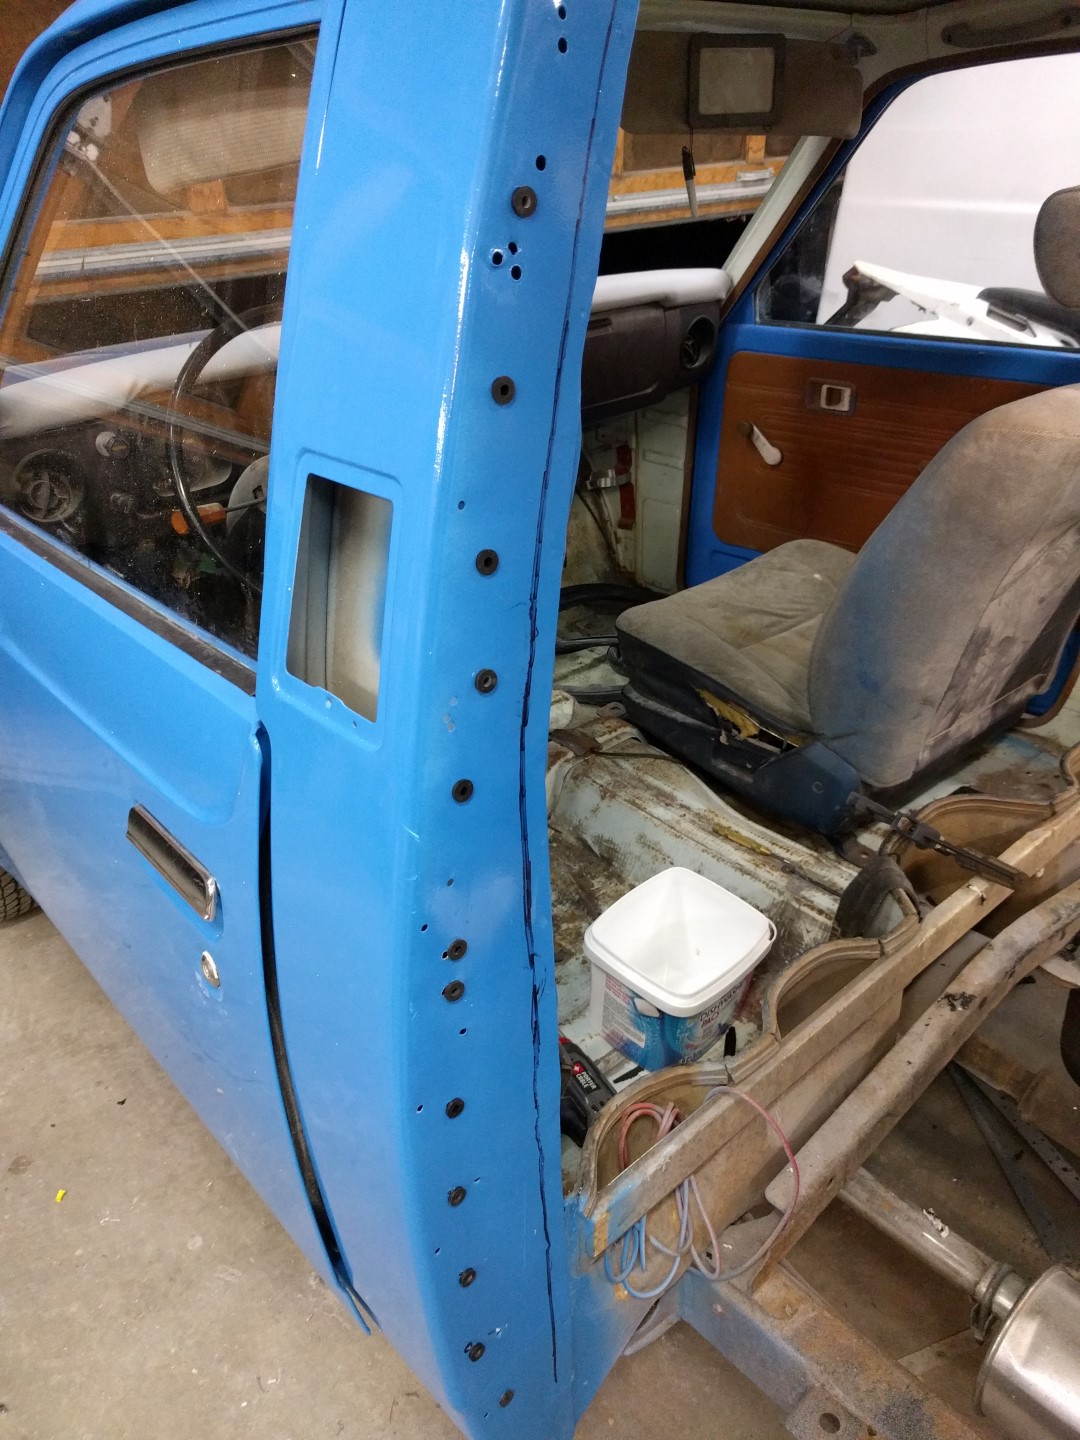
All of the removable parts from the truck cab were removed: door panels, mirrors, grille, windshield, door handles, etc. The inside door jambs were just cleaned and scuffed with red 3M scuff pads. Everything was sanded with 300 grit sand paper before painting. I mean everything! This is a required task that takes several hours. Lastly, a tack rag was used to remove any stray dust/debris.
The roof also had quite a bit of body work. See the roof repair section for more information on that!


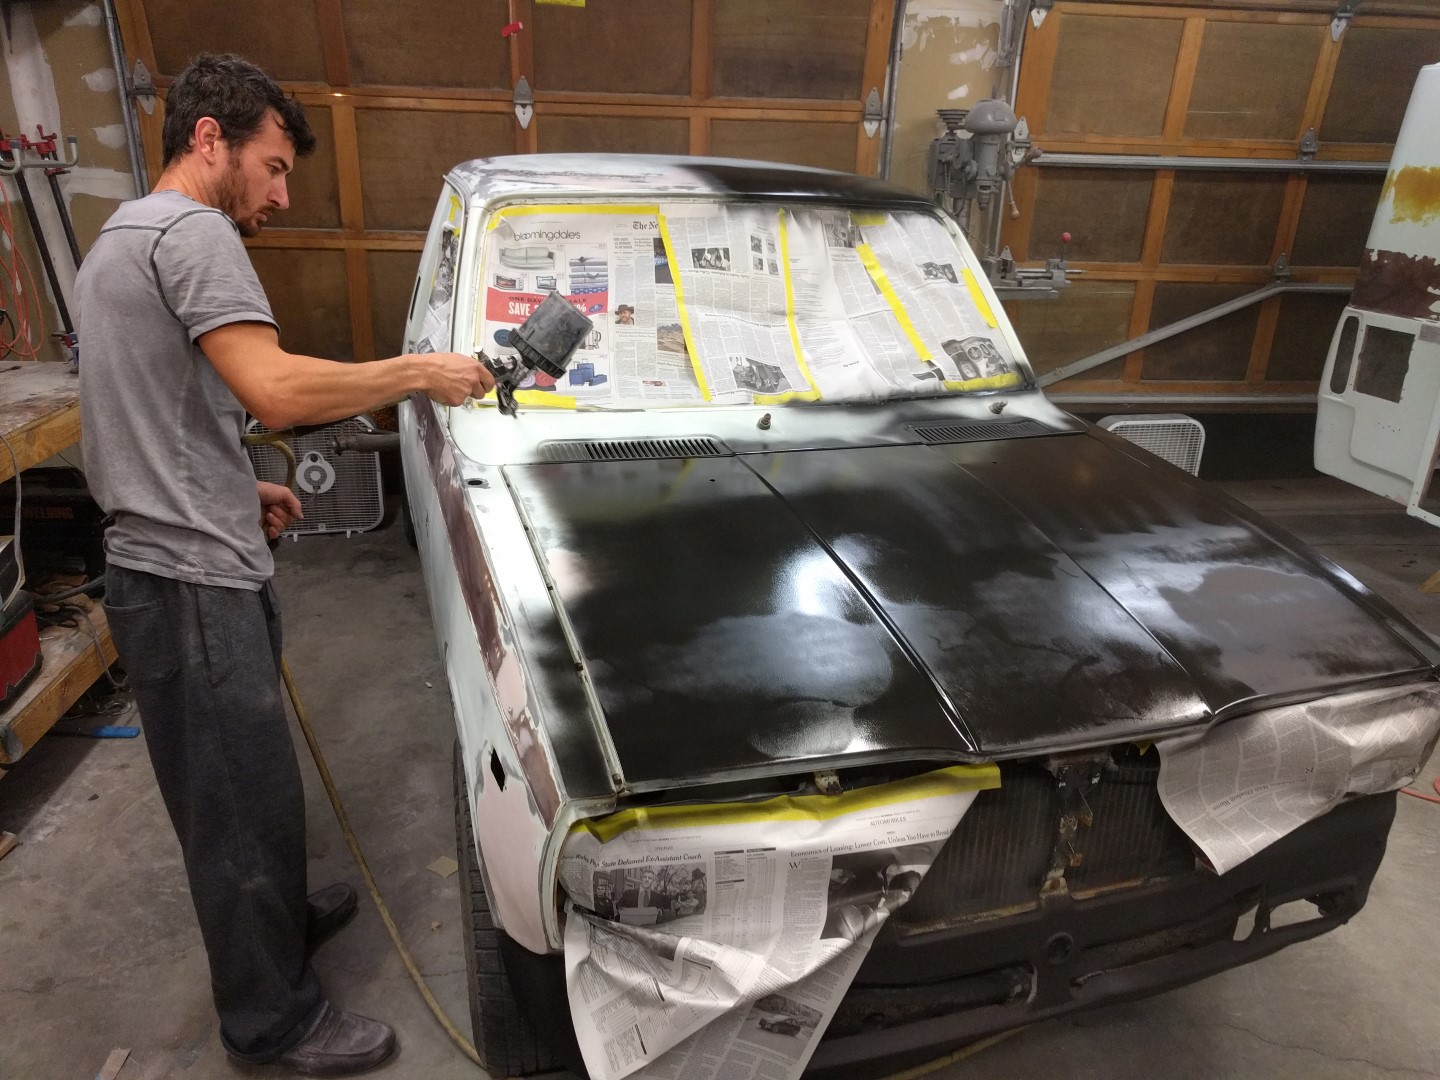
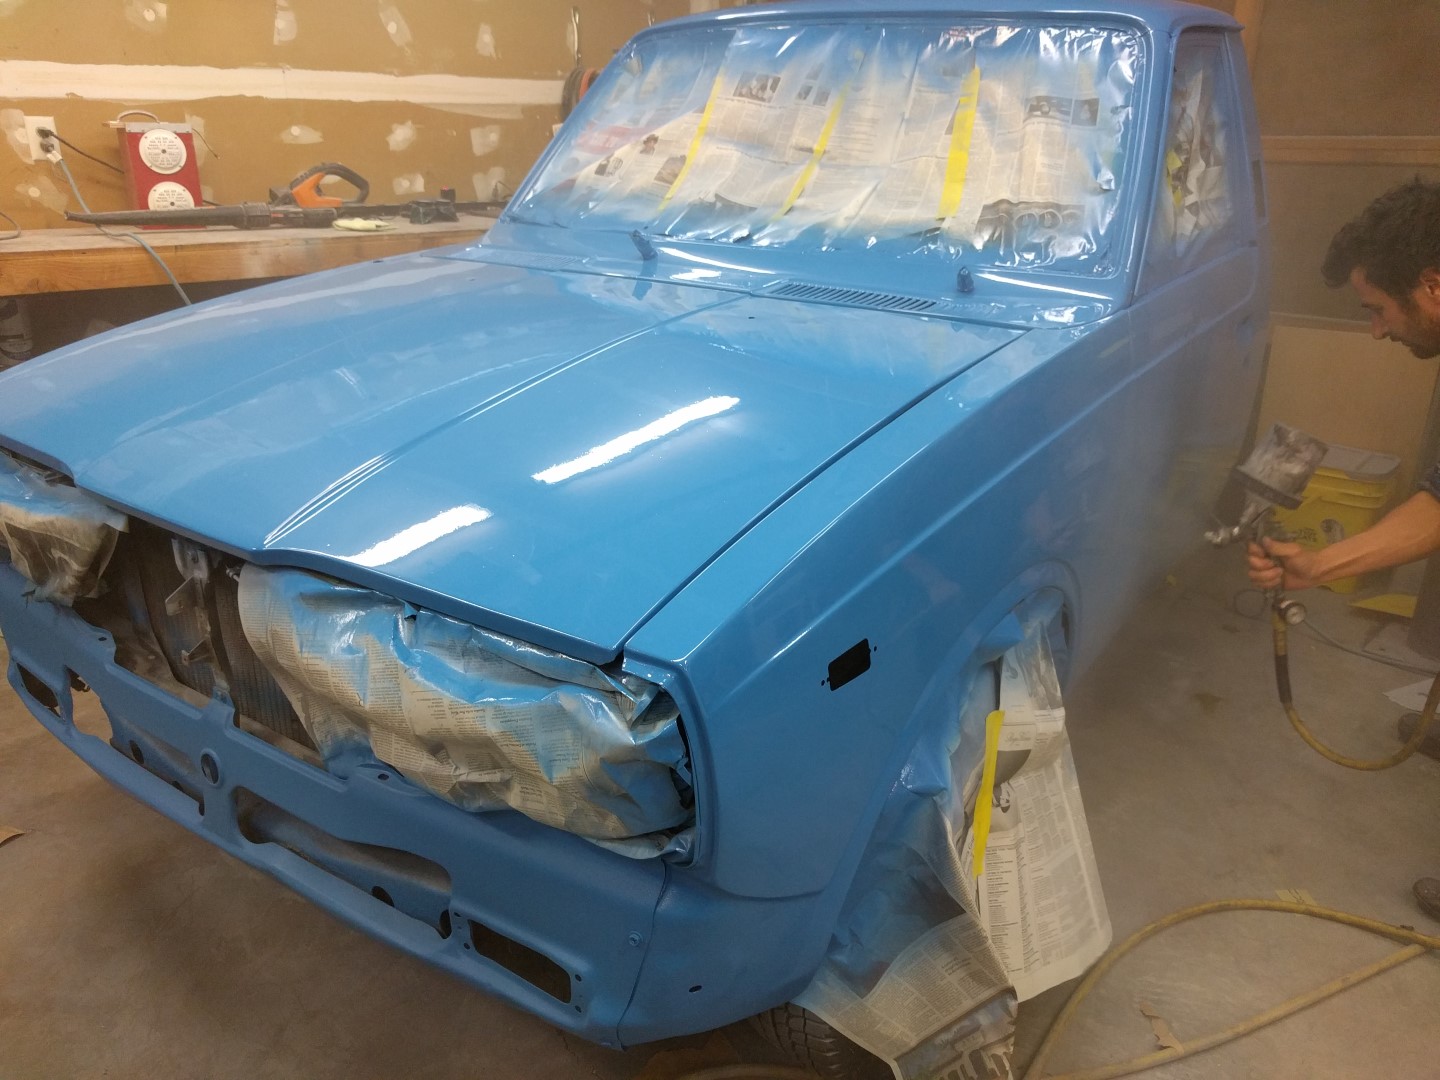
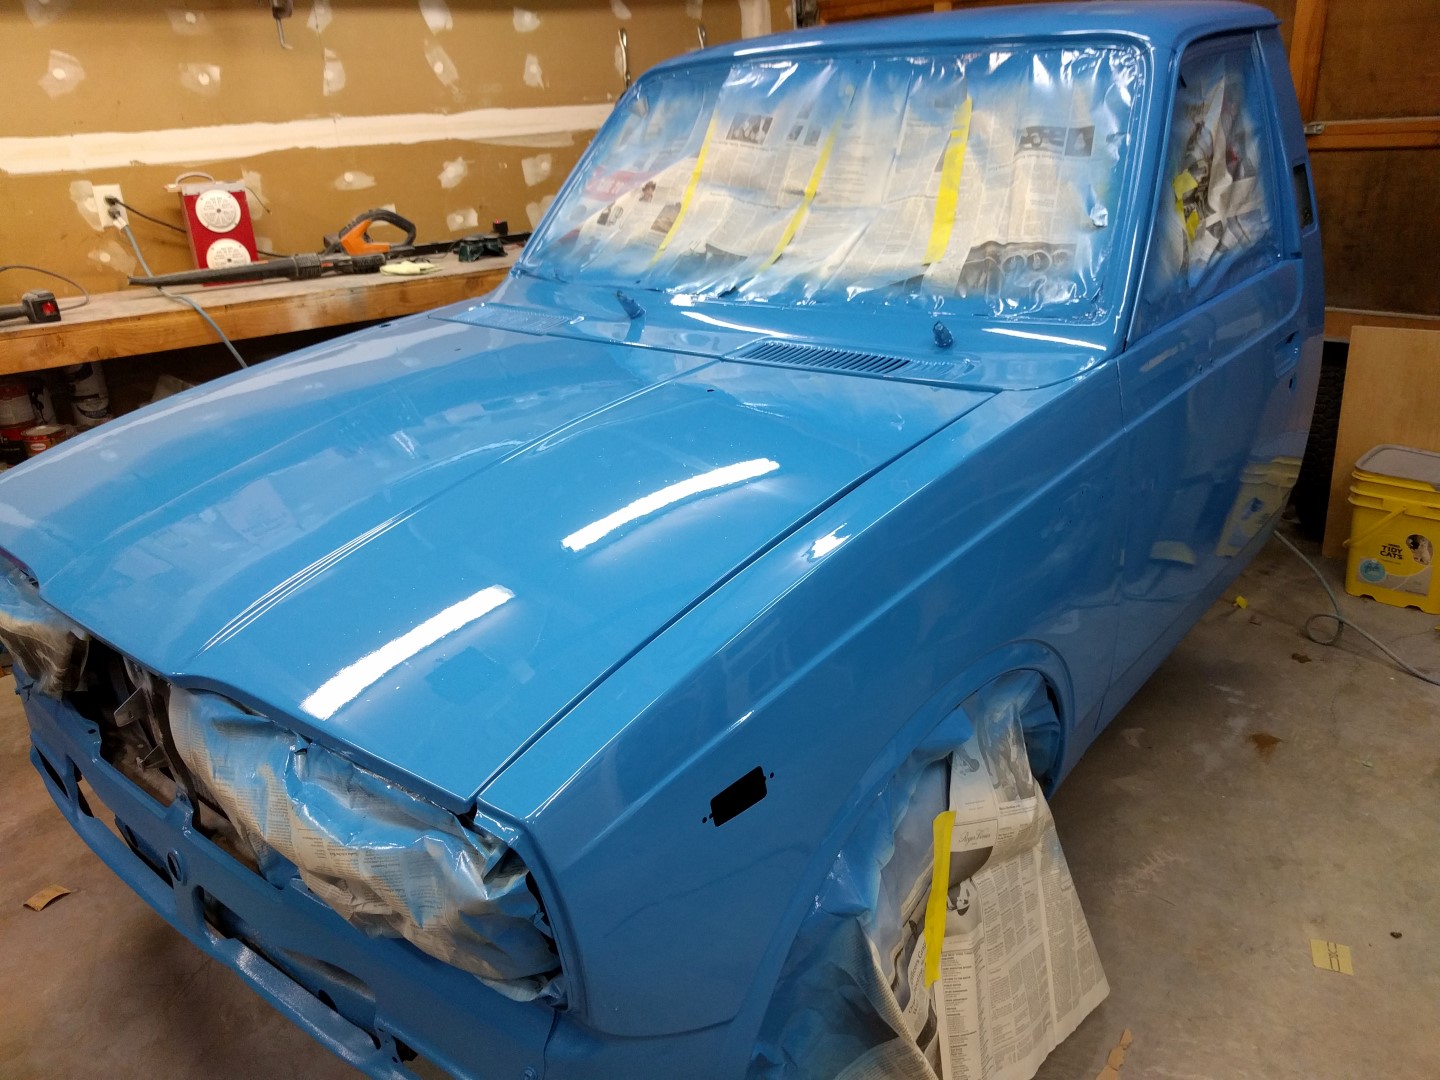
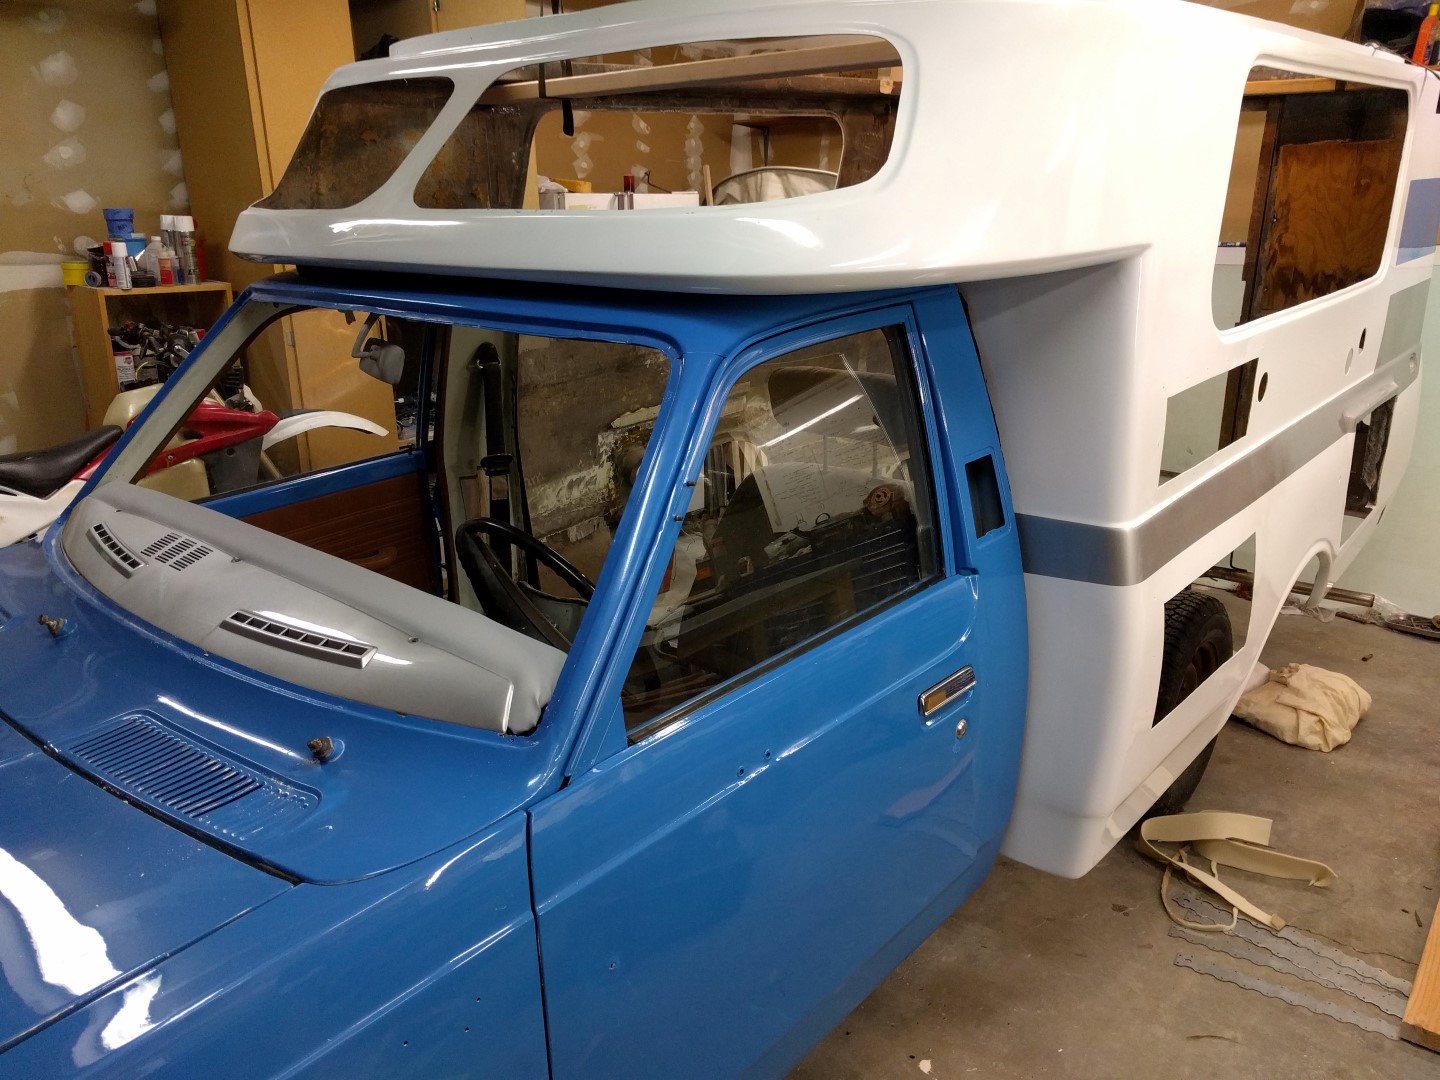
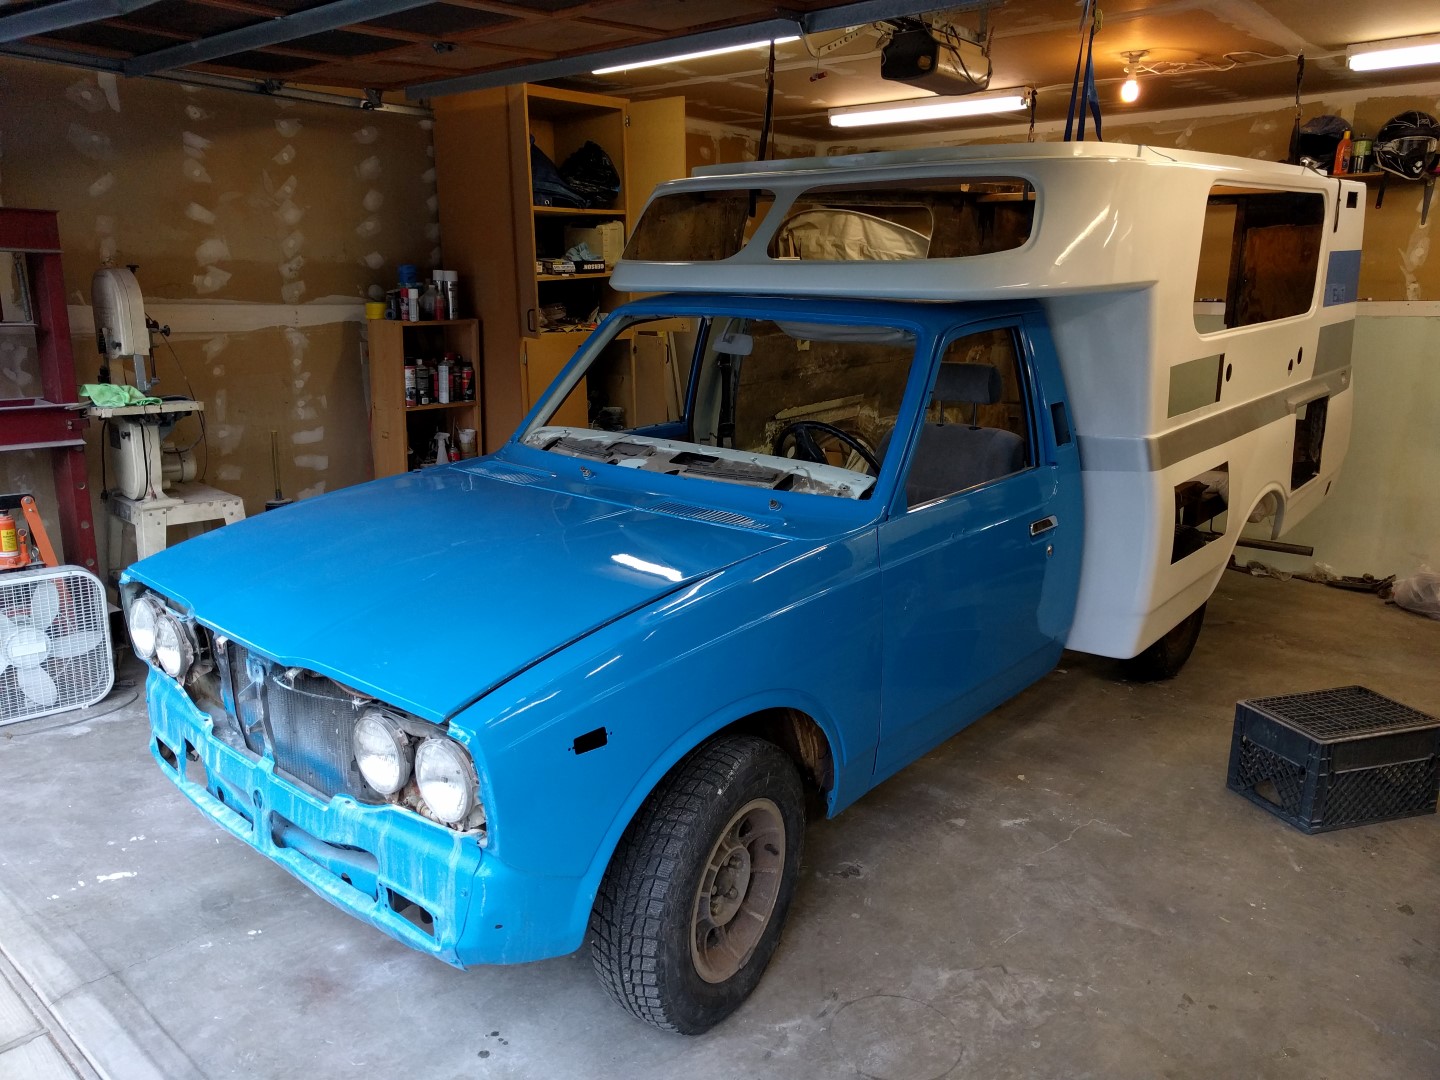
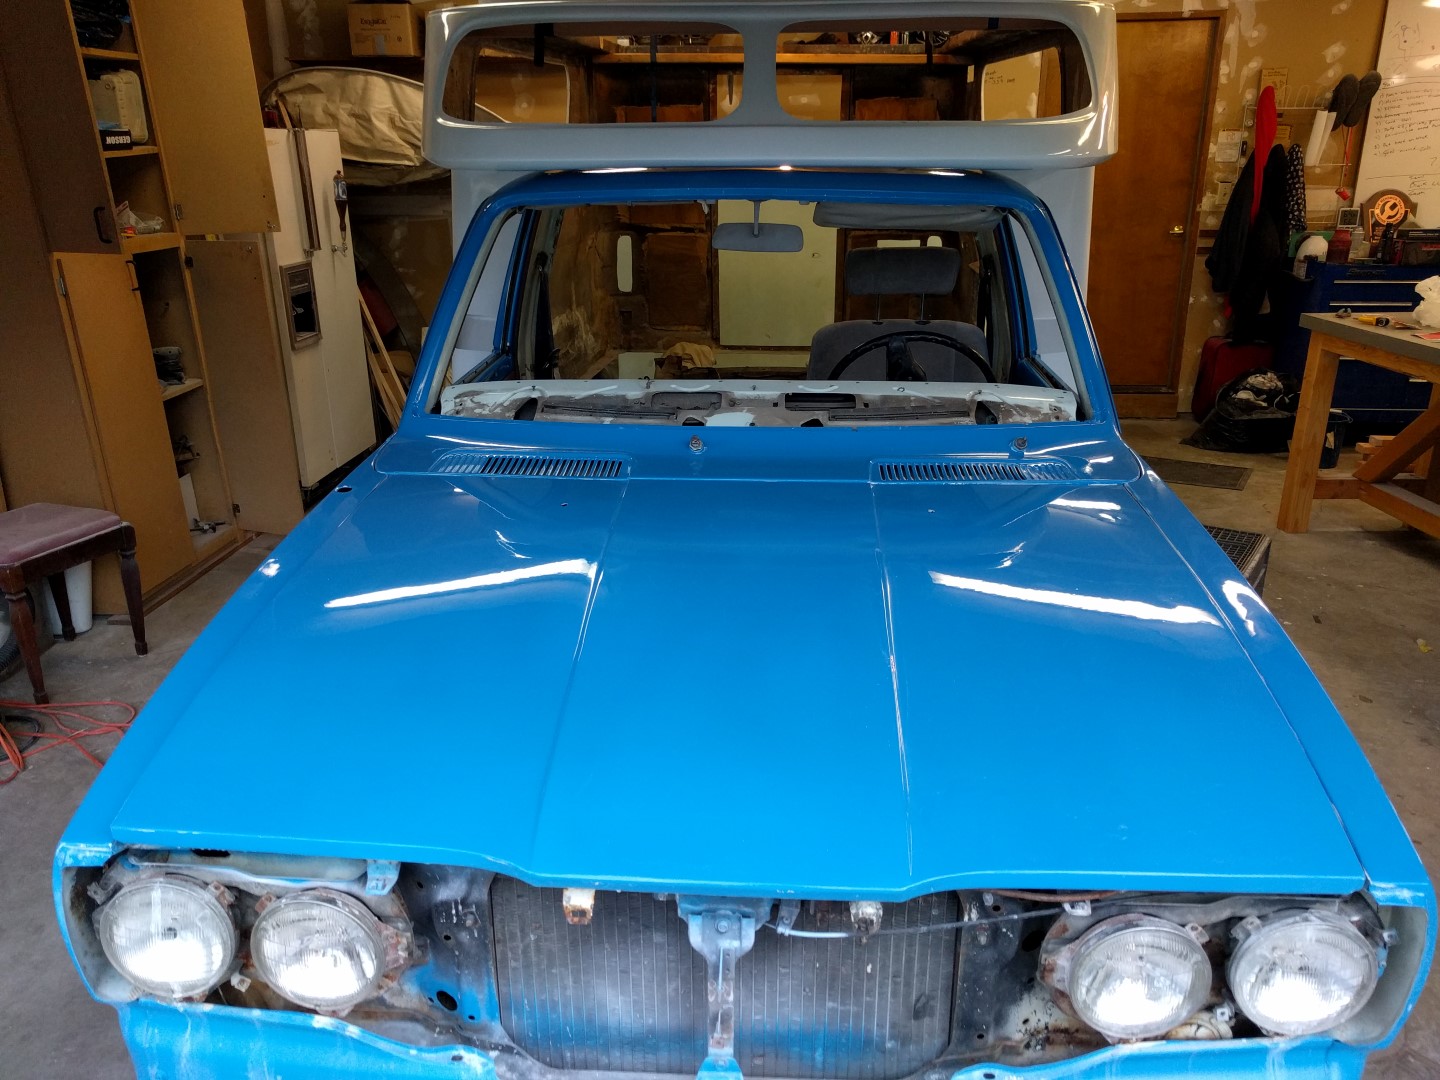
Paint
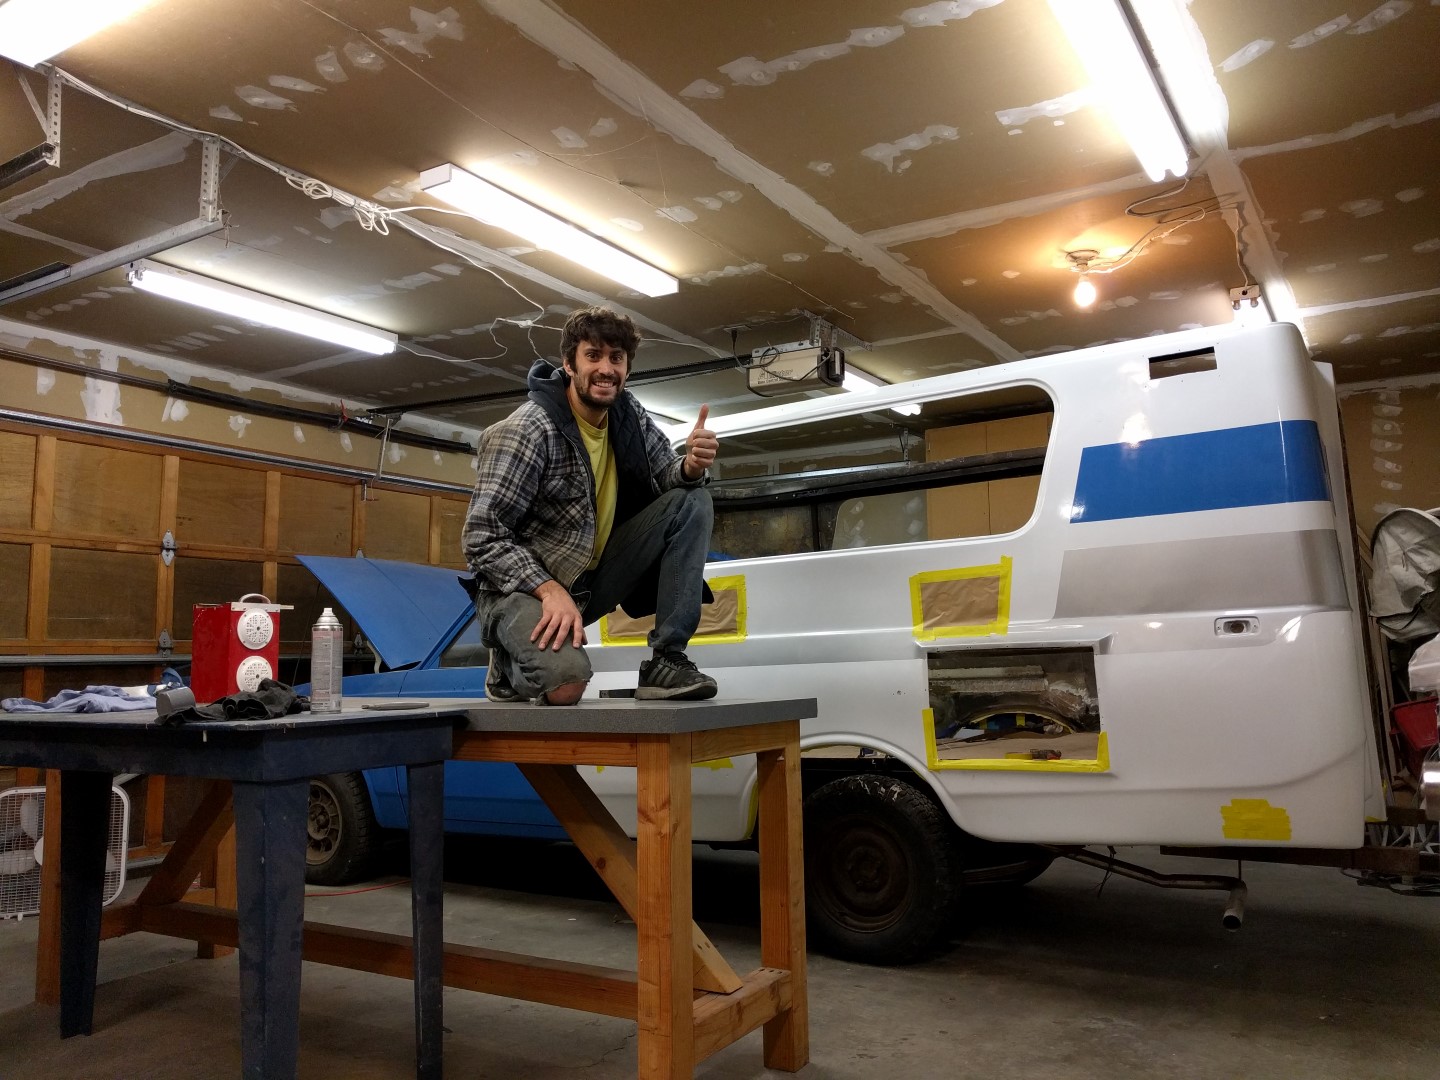
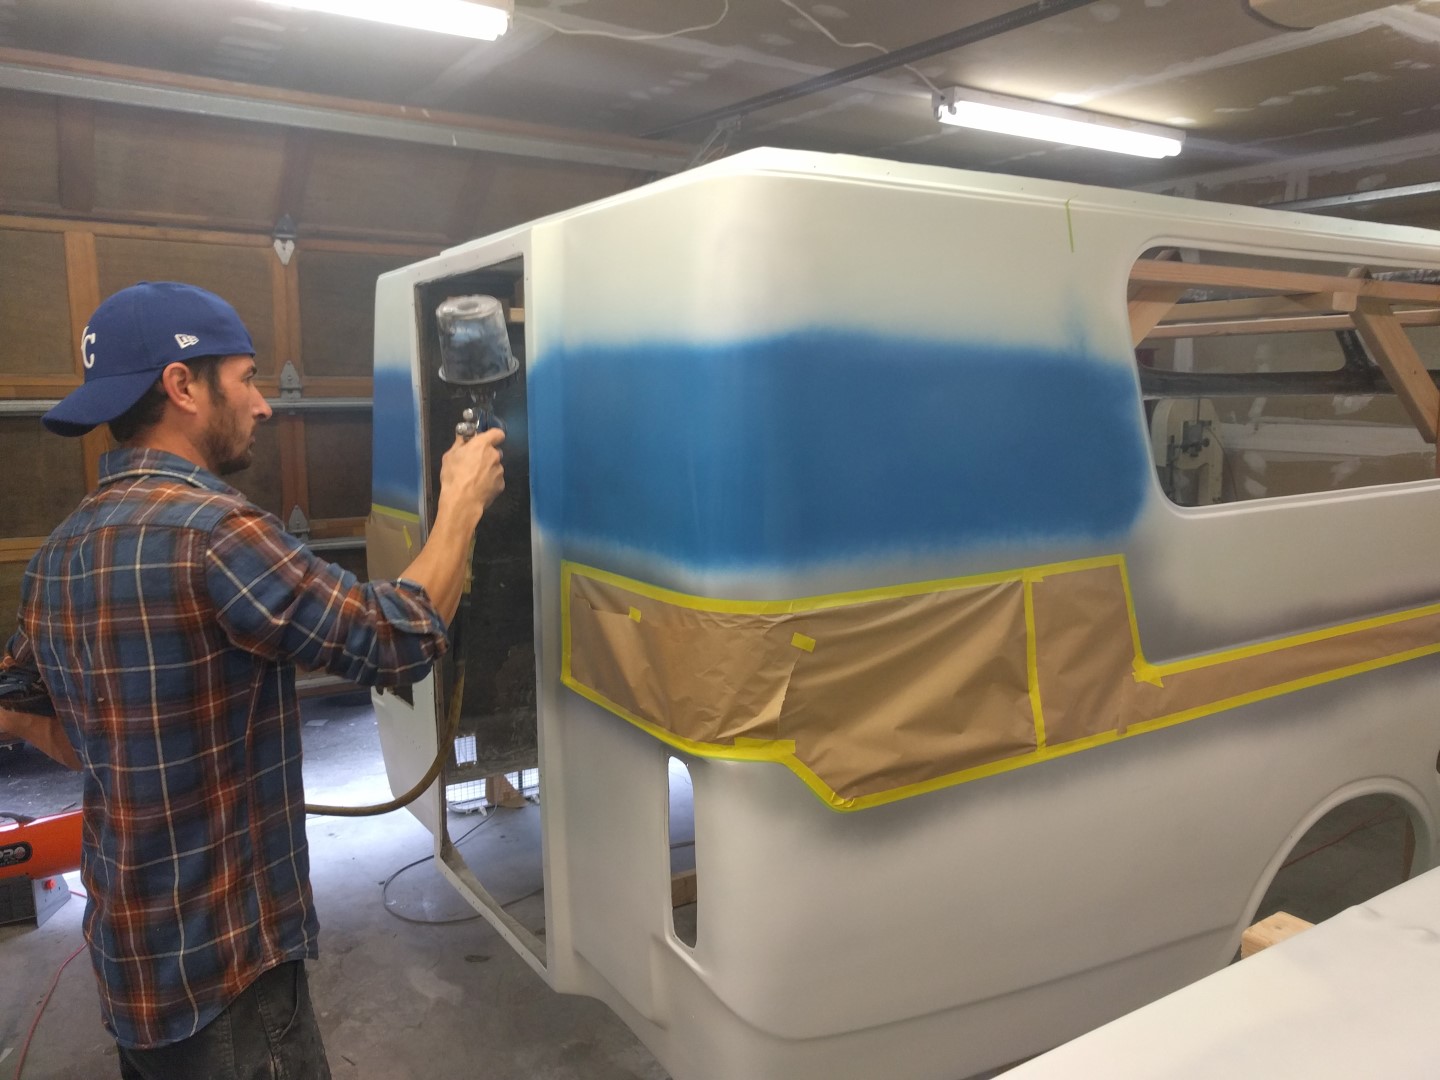
Luckily my roommate’s brother is a professional car painter and helped me out with this part of the project. He provided me with recommendations on qualities/types of paint to use and even helped me paint Paris!
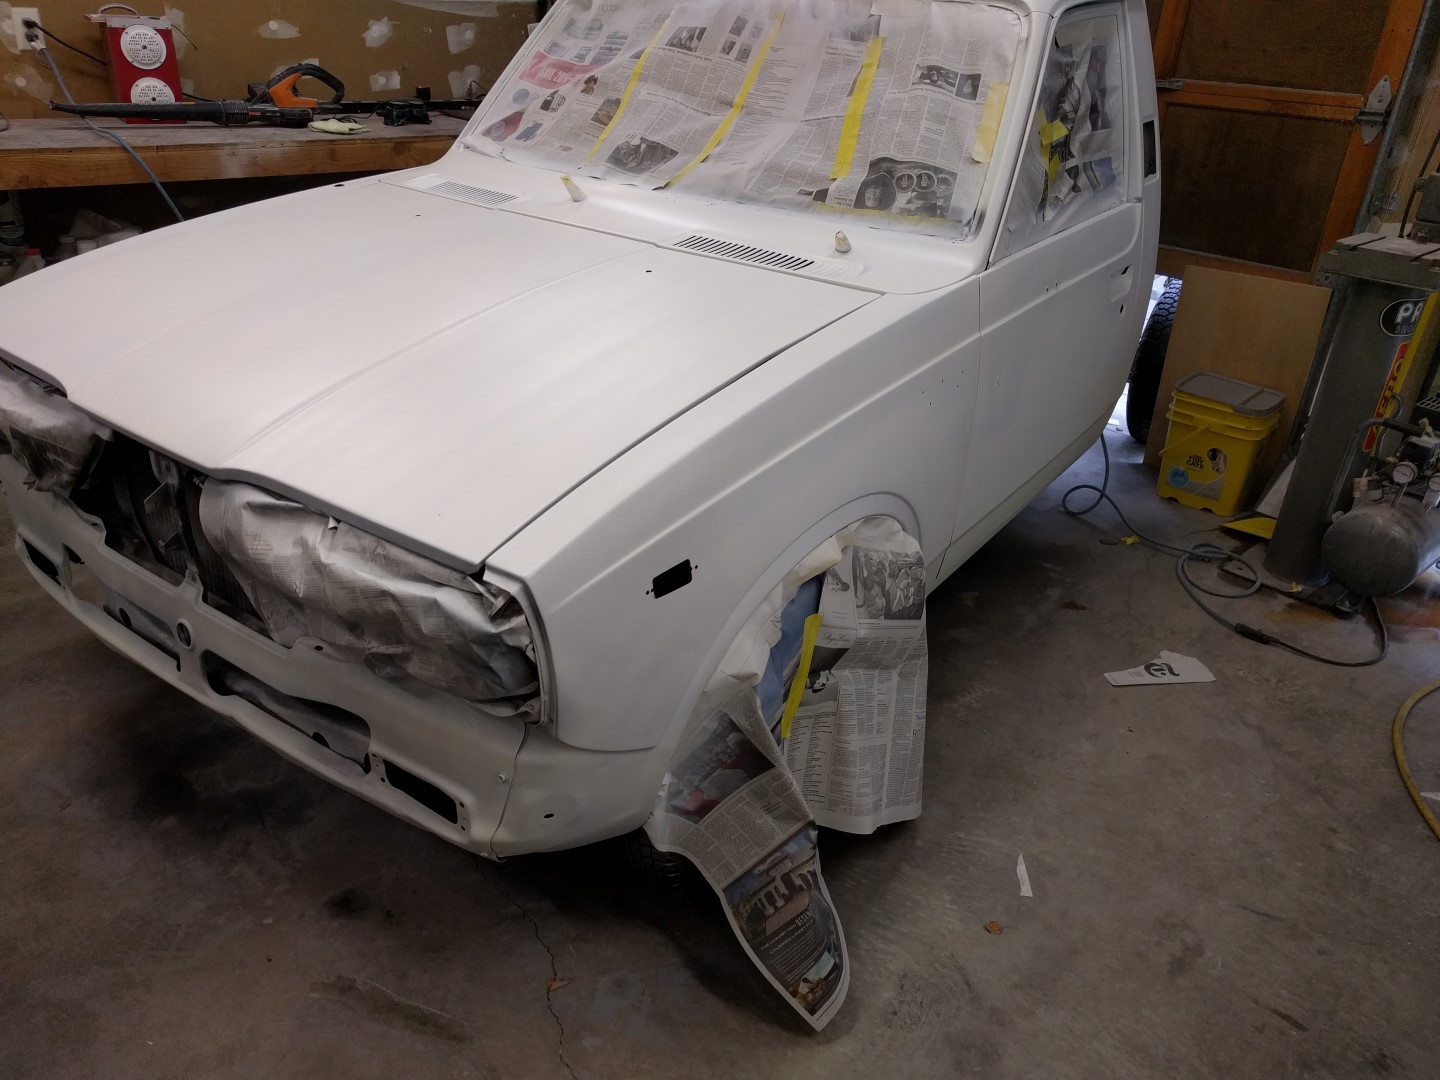
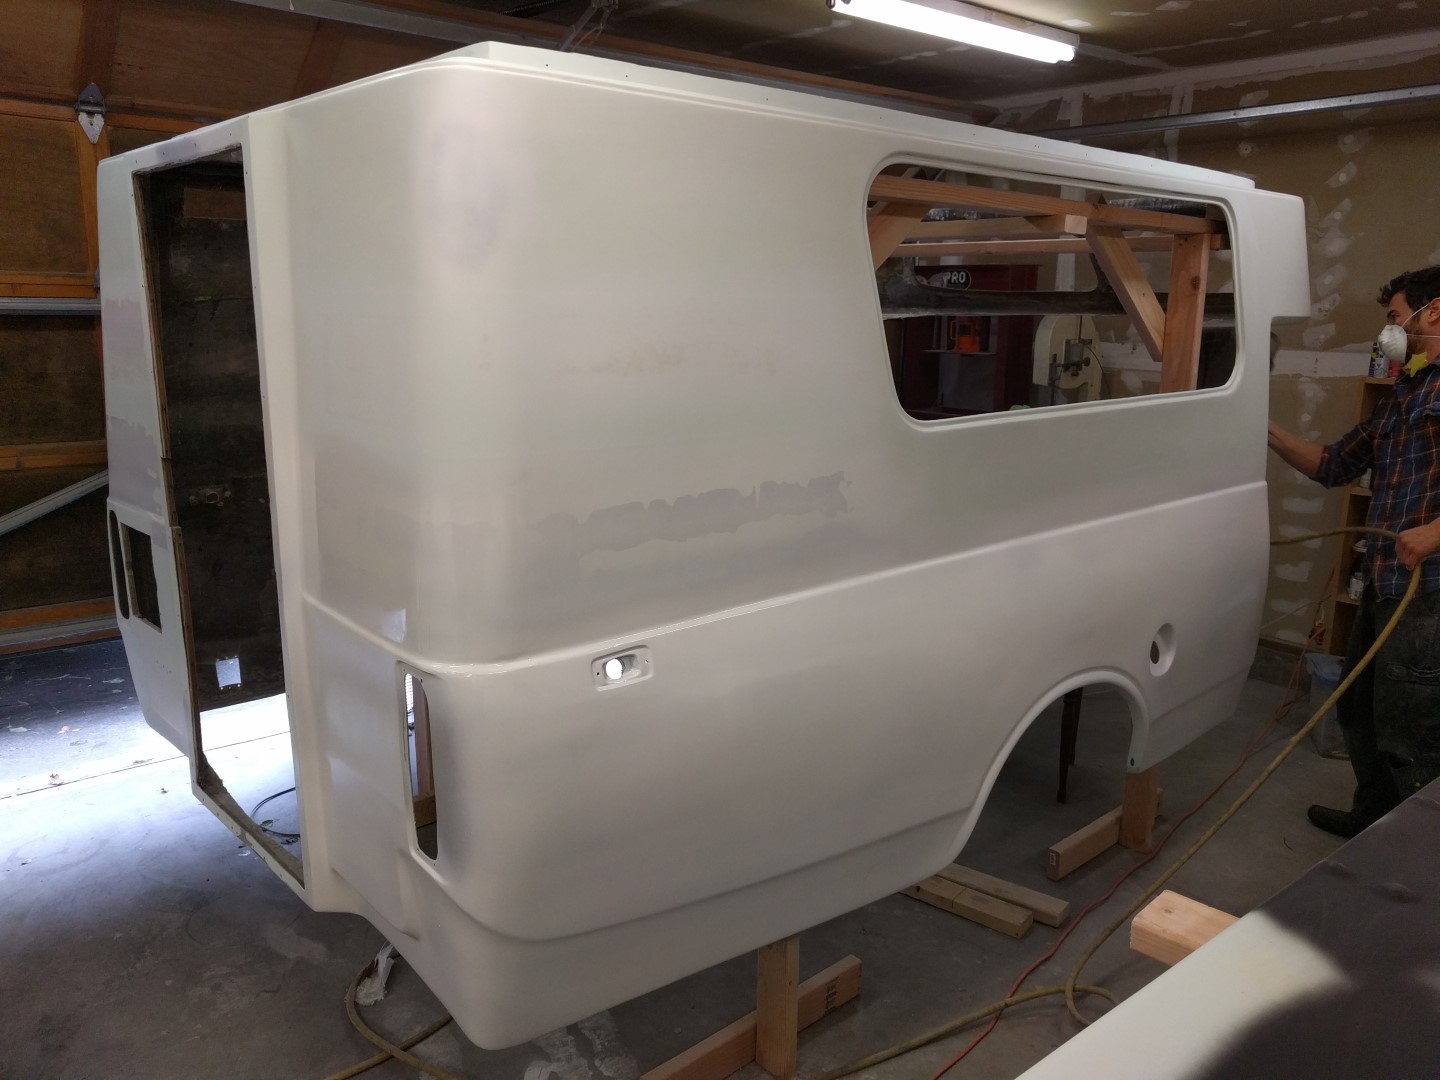
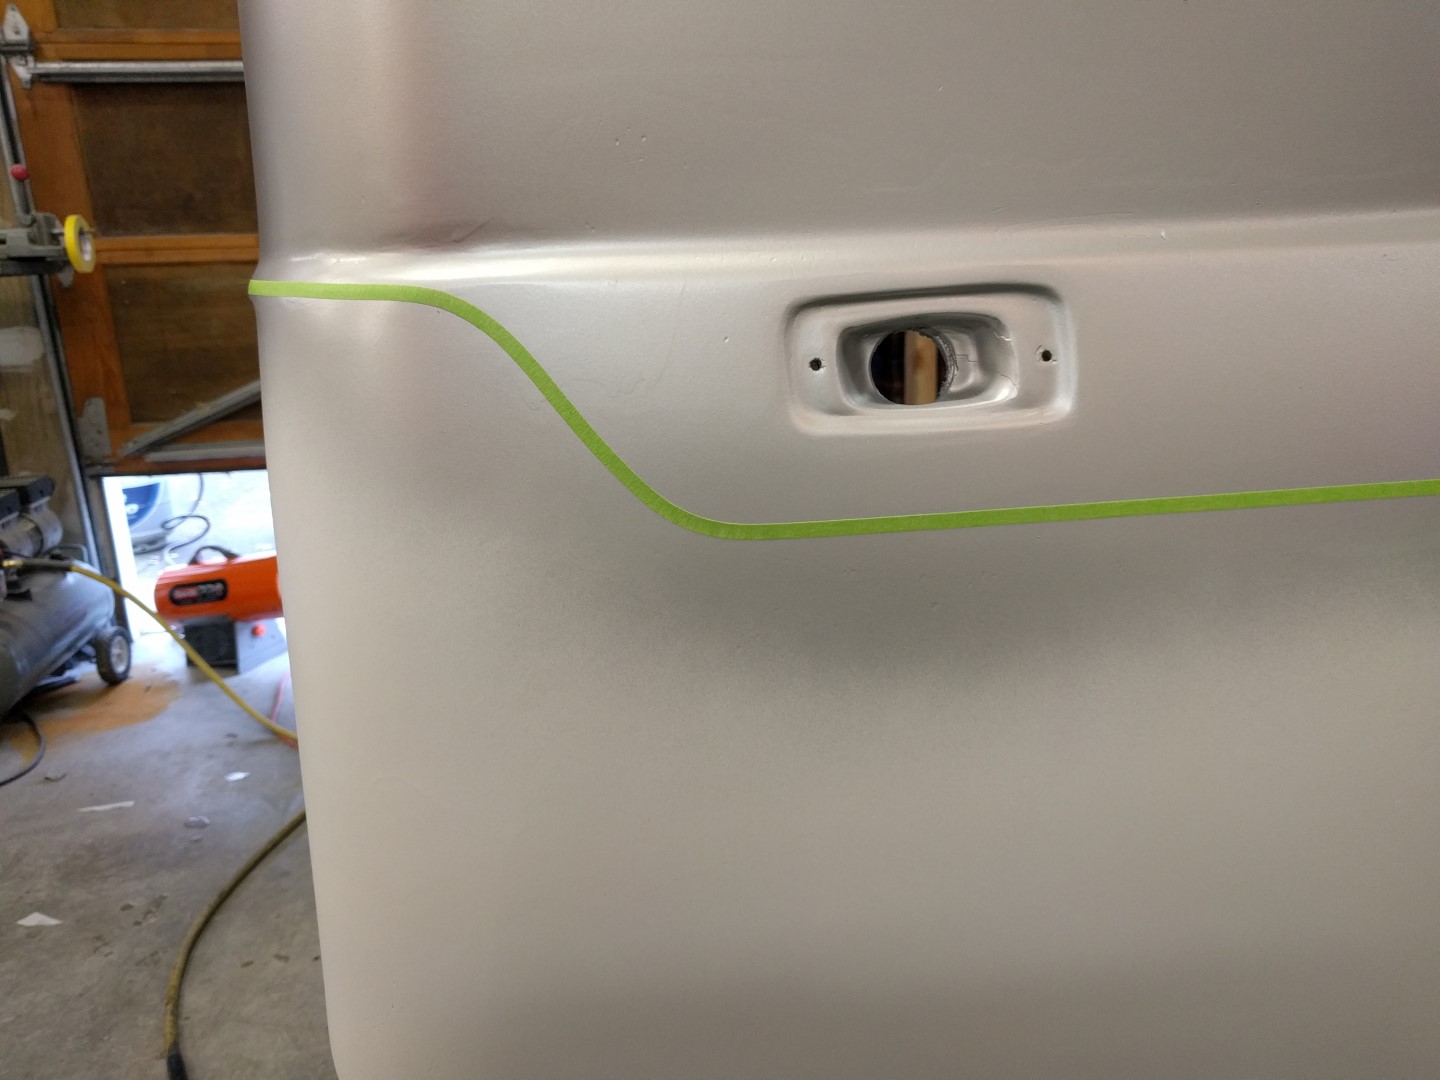
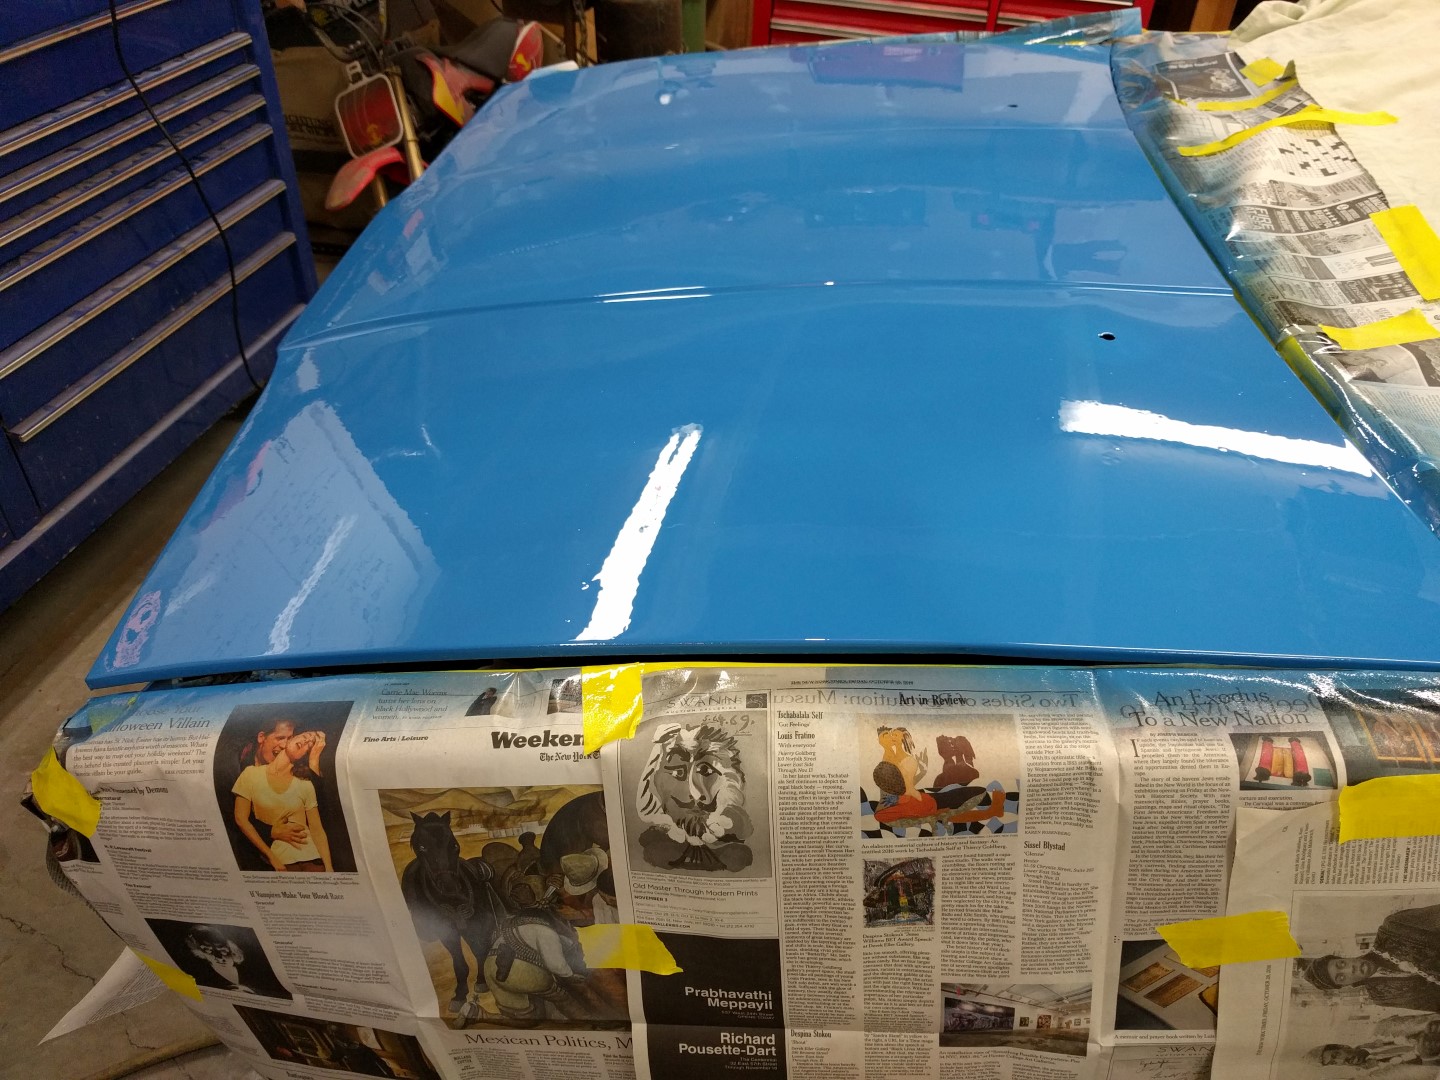
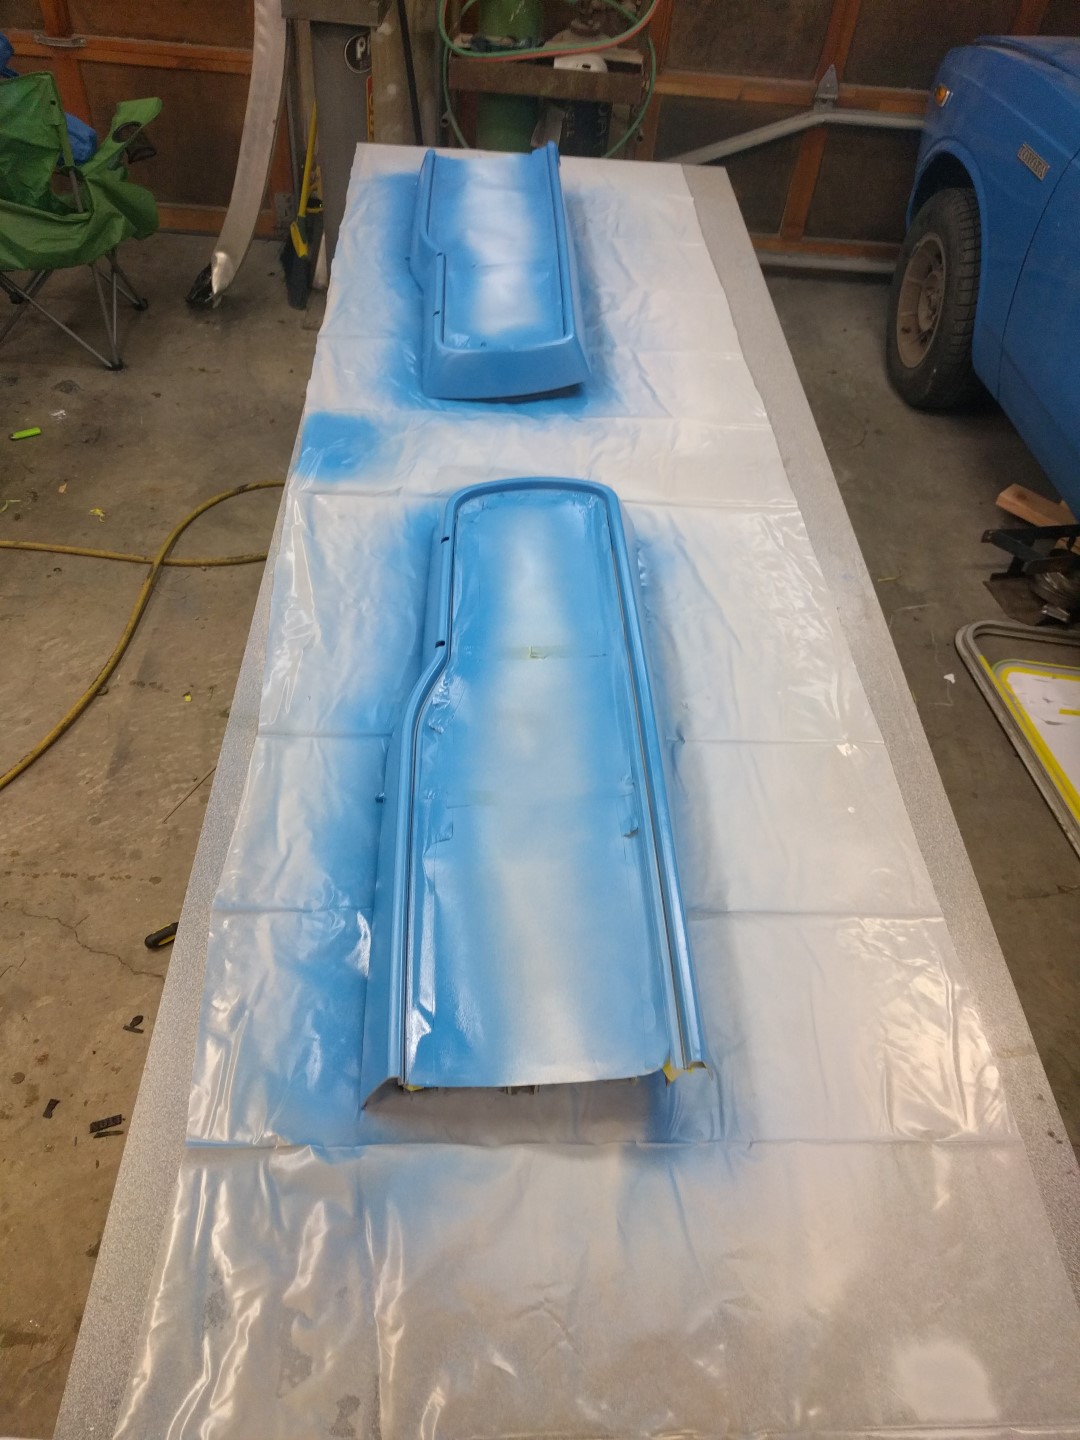
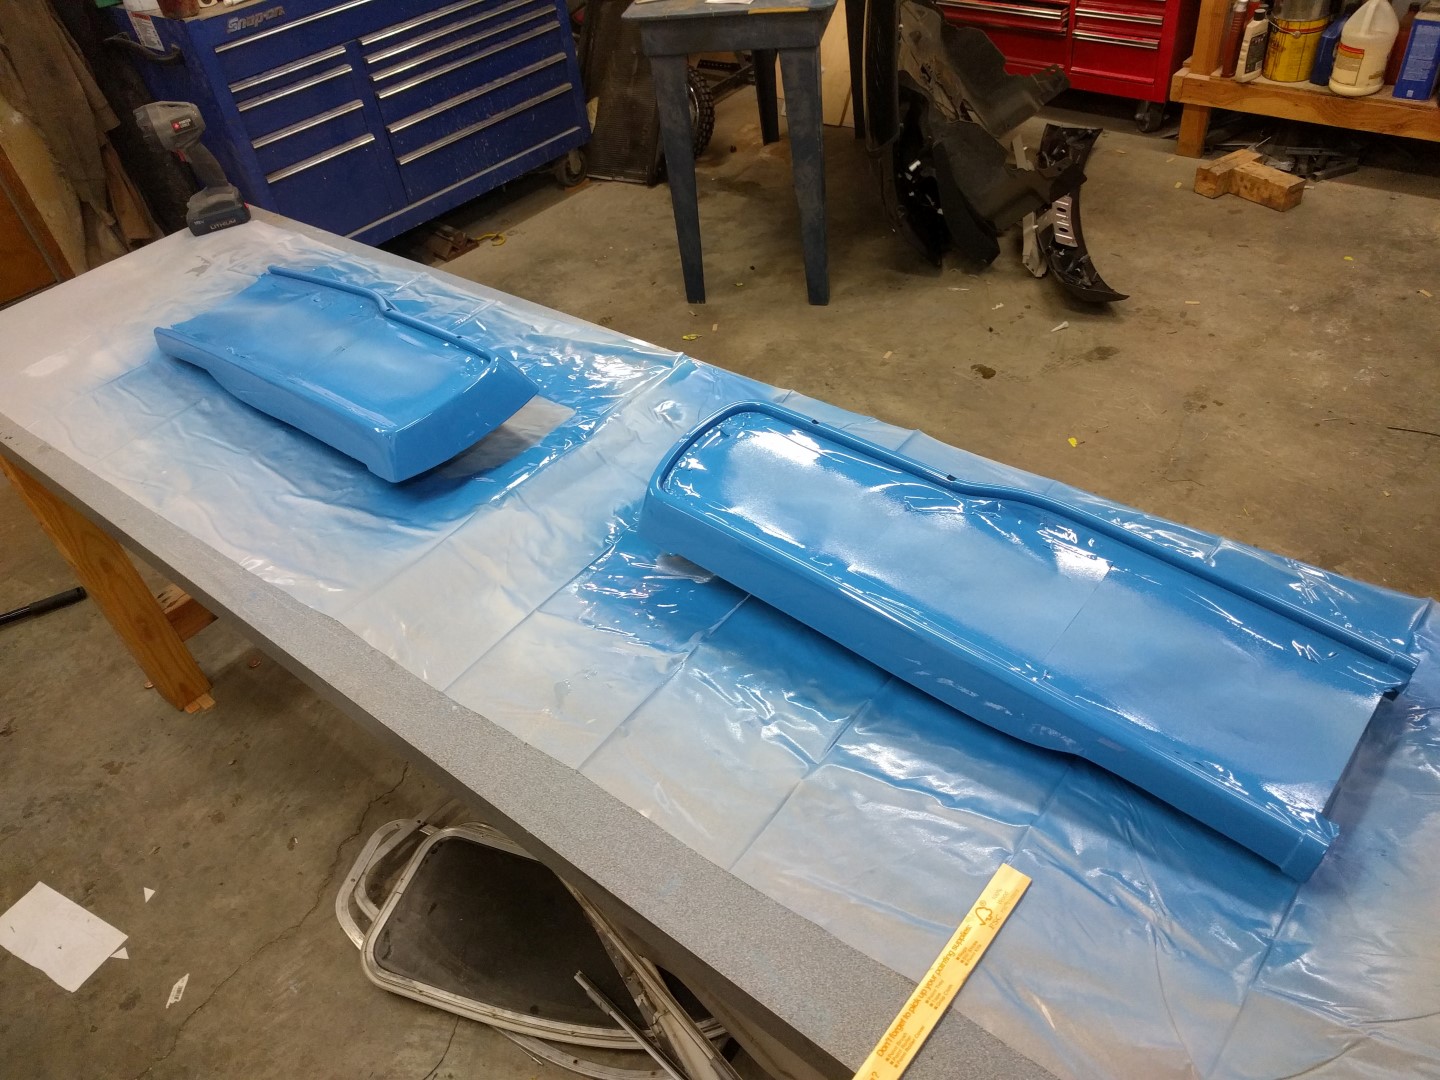
The parts of the body that required extensive body work a cheap epoxy primer was used to cover the body filler/rattle an primer. In the order of application, epoxy primer, white sealer, basecoat, and the finally clearcoat. This is the basecoat/clearcoat method that requires two spray sessions unlike single stage that combines the basecoat and clearcoat into a single mixture. The reason basecoat/clearcoat was used over single stage is because of the difficulty of creating different color stripes and there would be a more noticeable edge due to the thickness increase of single stage.
After primer and white sealer on the shell, the silver/blue stripes were approximated then taped off in their exact shape. Then white over the top, there is almost no color bleed through the white.
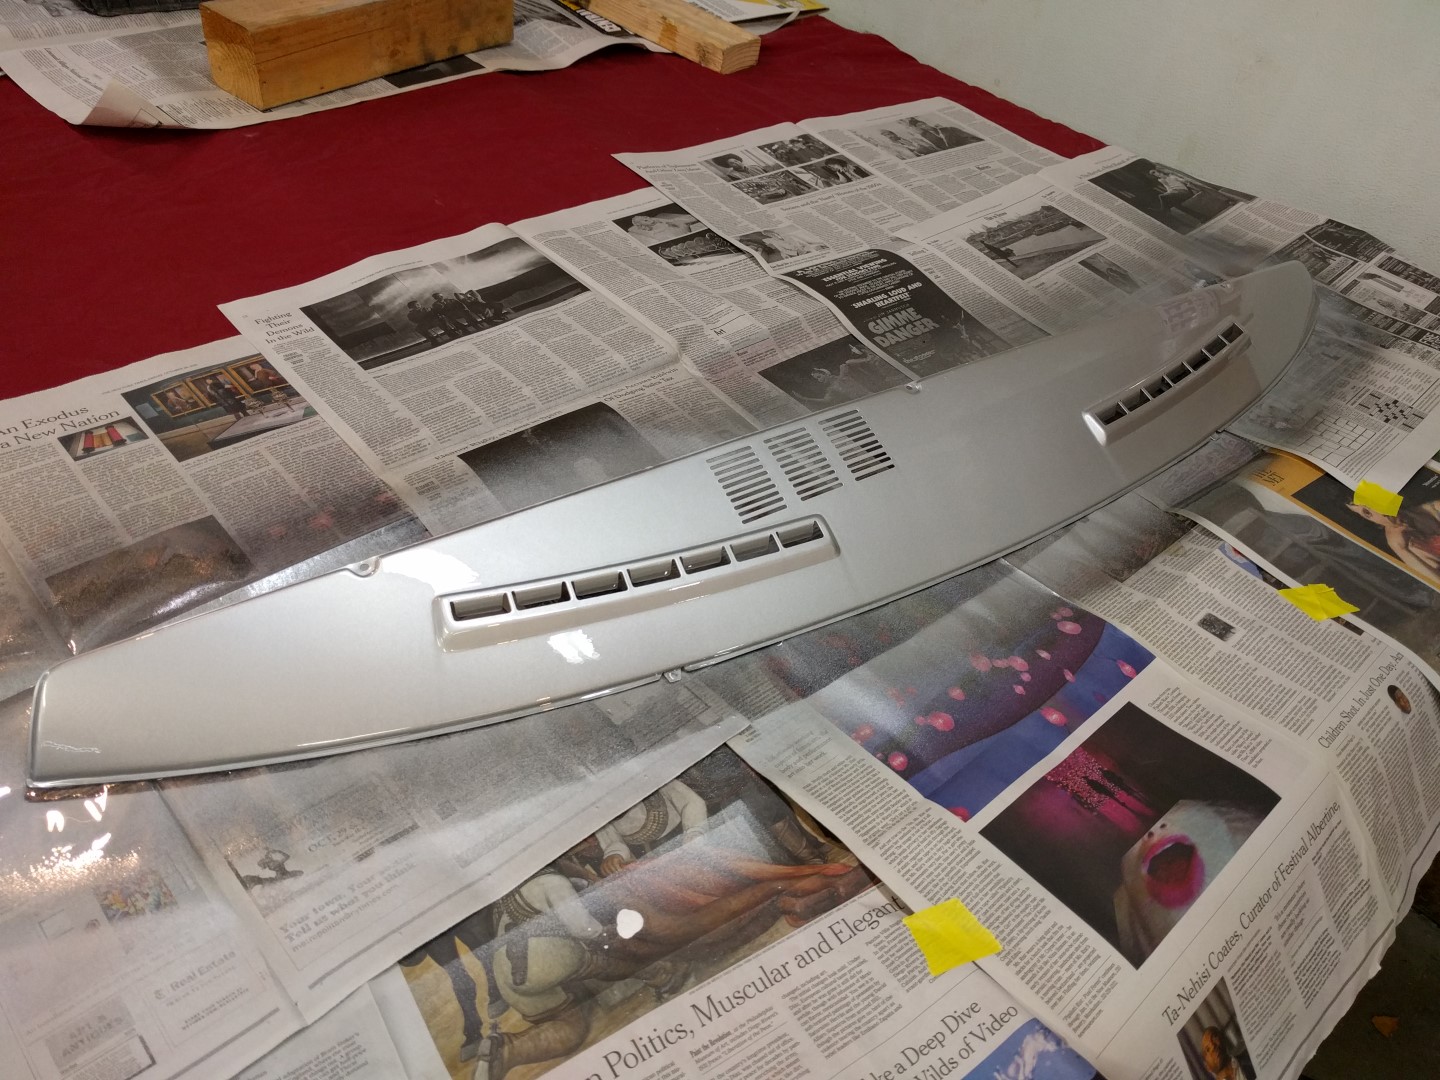
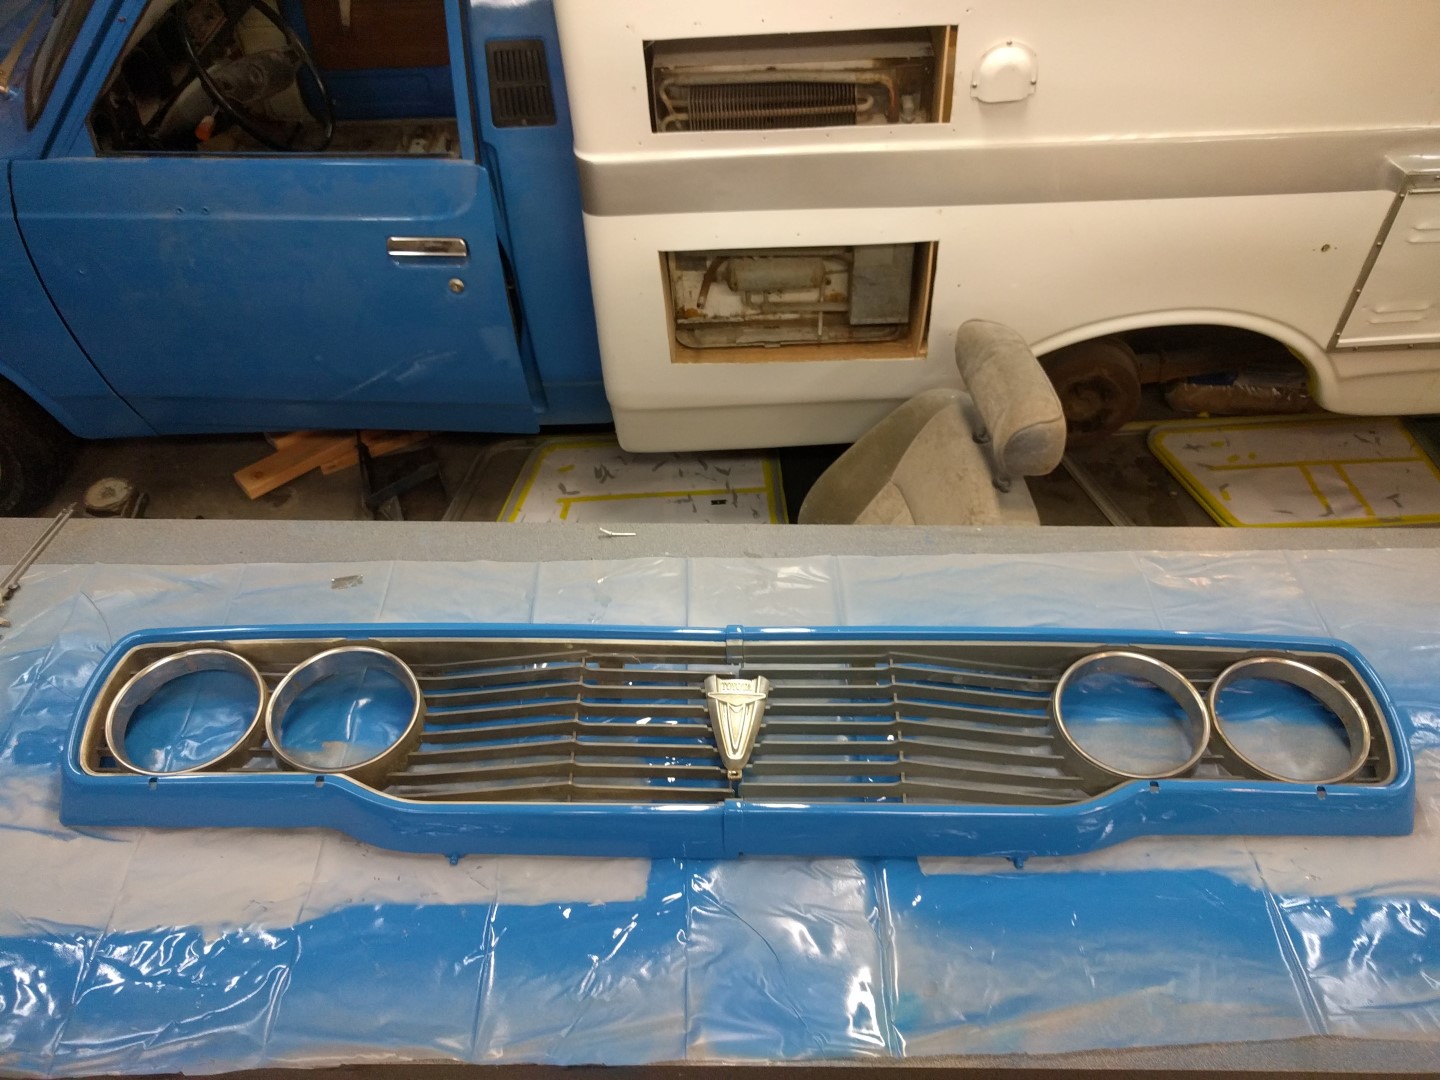
The grille and the dash painting is also shown in the pictures below.
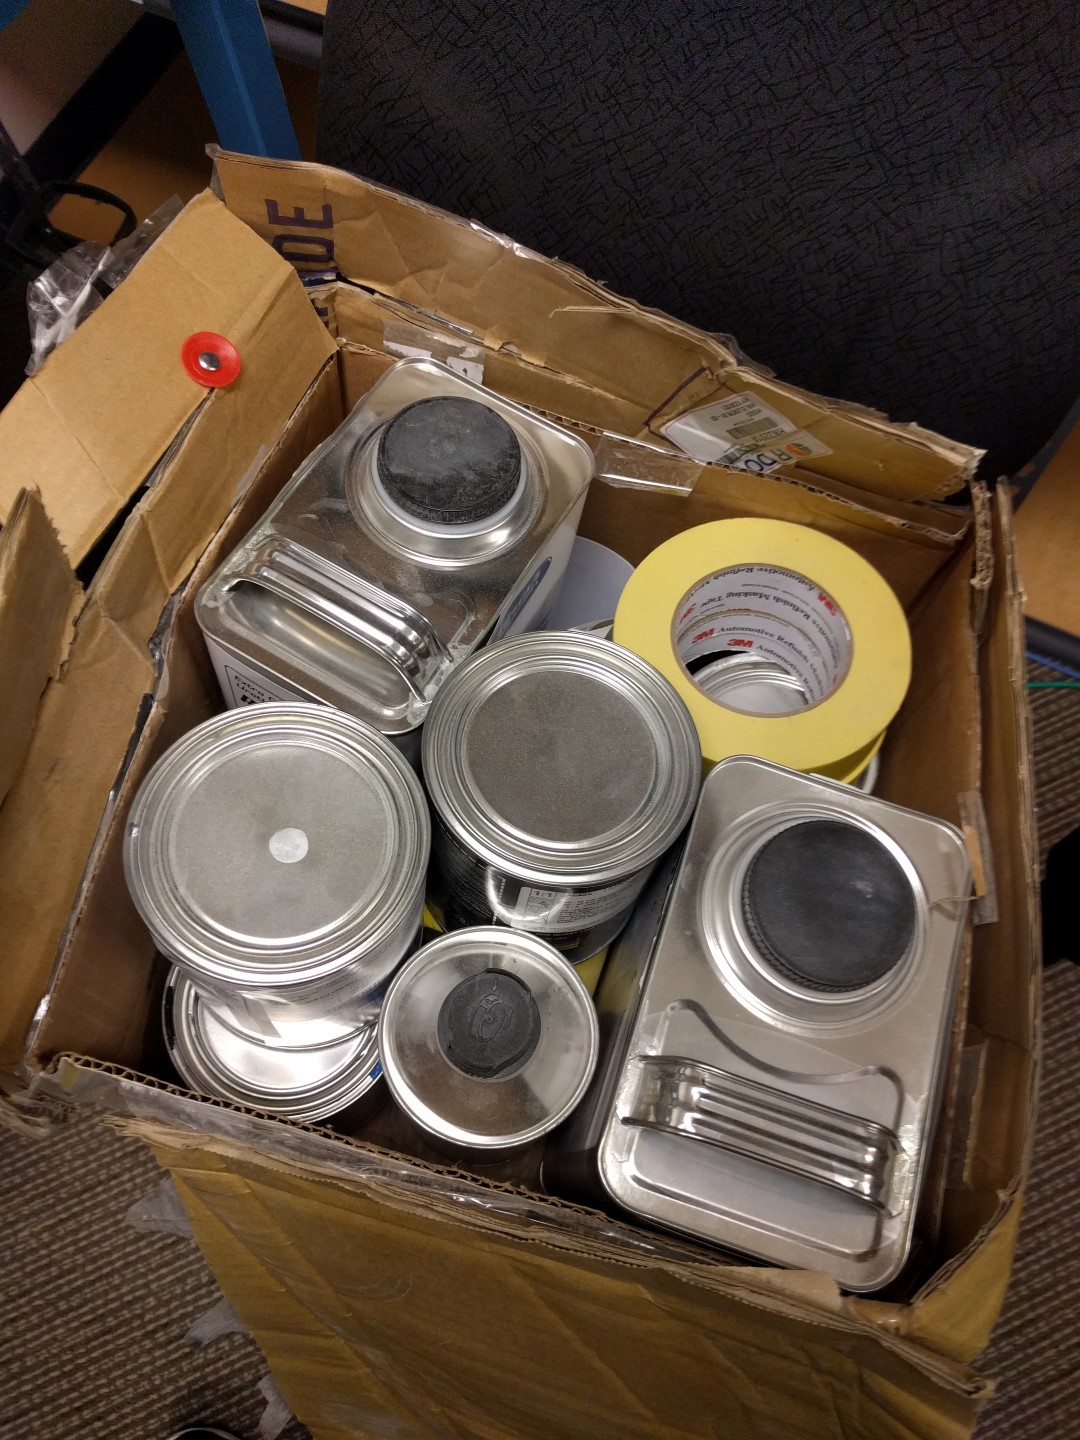
Here are the details of the paint supplies:
Cheap epoxy primer over body work only = Speedokote SMR-260
Good quality sealer/epoxy primer over entire body = Nexera 8444
Silver stripe = GM RPB-91988?
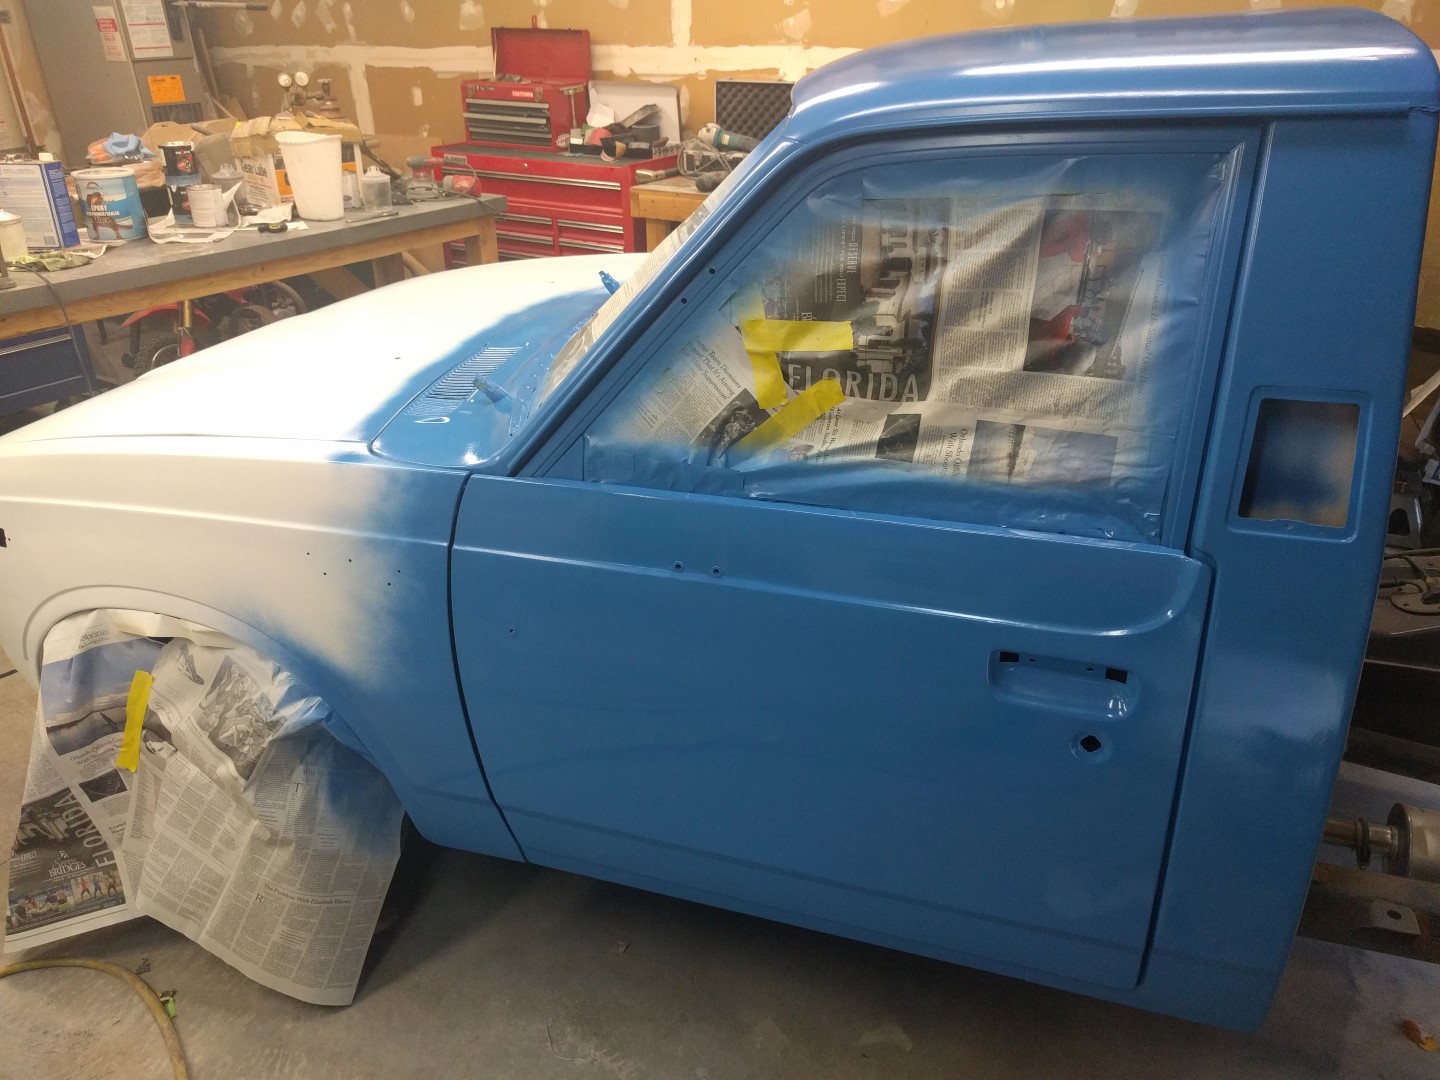
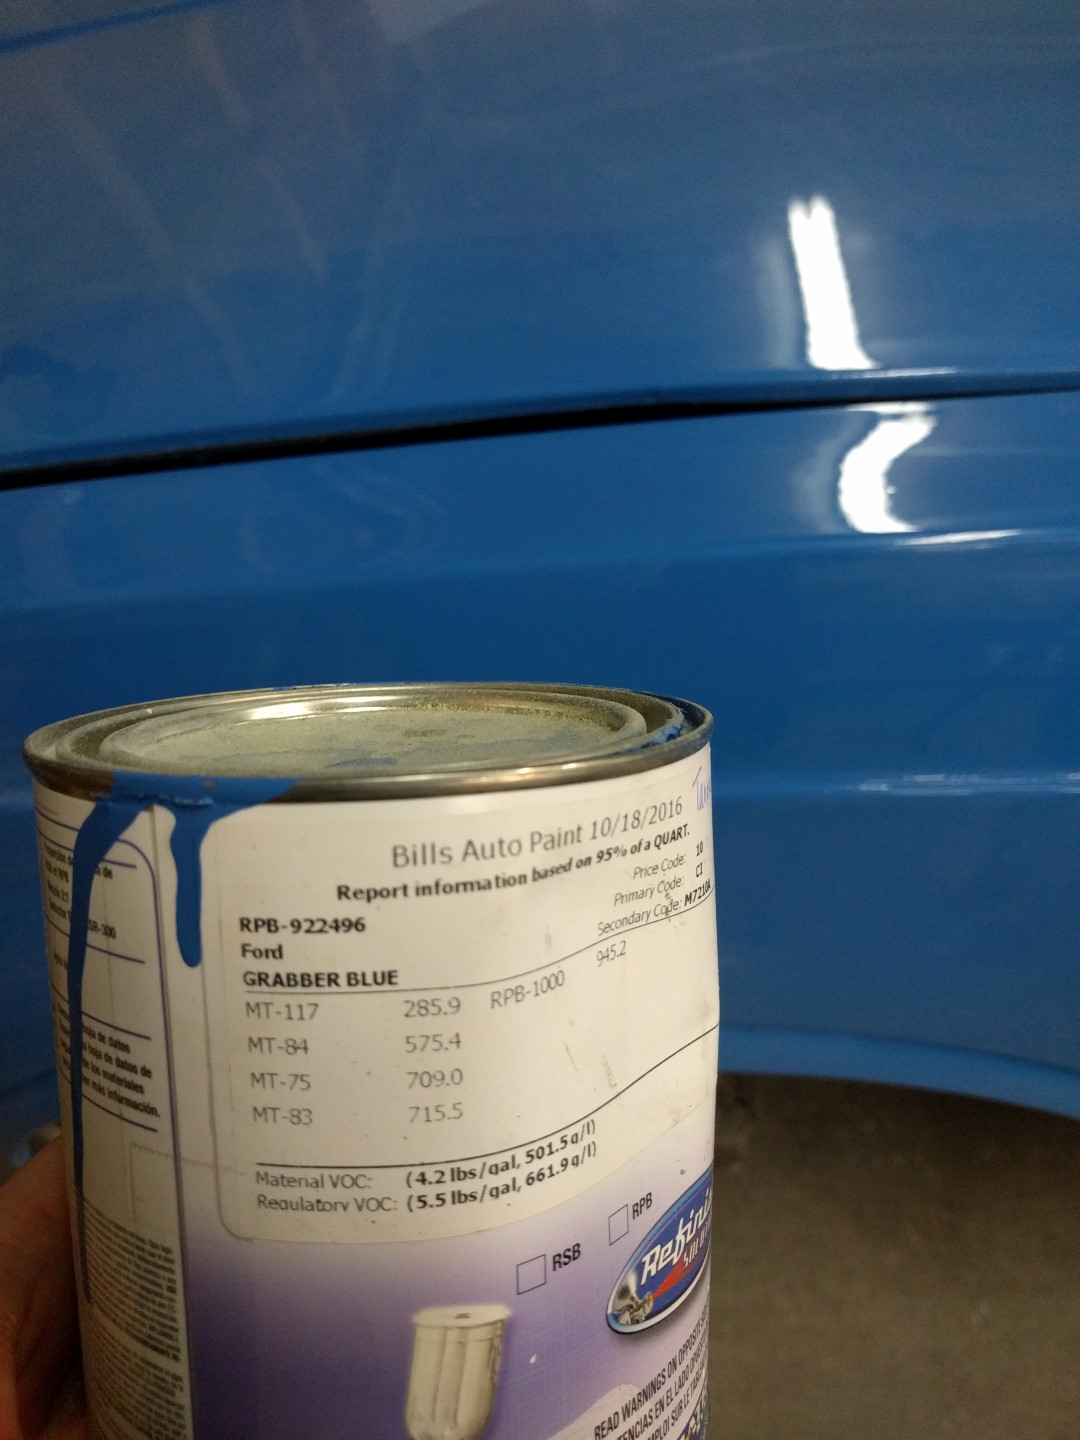
Blue on truck, door jambs, and stripe = Ford RPB-922496 (same color as the new bright blue Mustangs, called Grabber Blue!!)
White on shell/roof = GM RPB-6155
Clear over everything, ~3 day cure time = Refinish solutions RSC-220/RSA-225
Reducer used (mixed per manufacturer recommendations) = Matrix MR-0806
A HVLP paint gun was used (the harbor freight one’s are decent enough), see manufacturer recommendations for tip diameter. Need an air compressor that can maintain 10-20 PSI at ~60 PSI in tank. There is little over spray, no worries about painting in your garage. Need some ventilation and heat, 70 degrees or warmer recommended.
Approximate cost in paint = $600


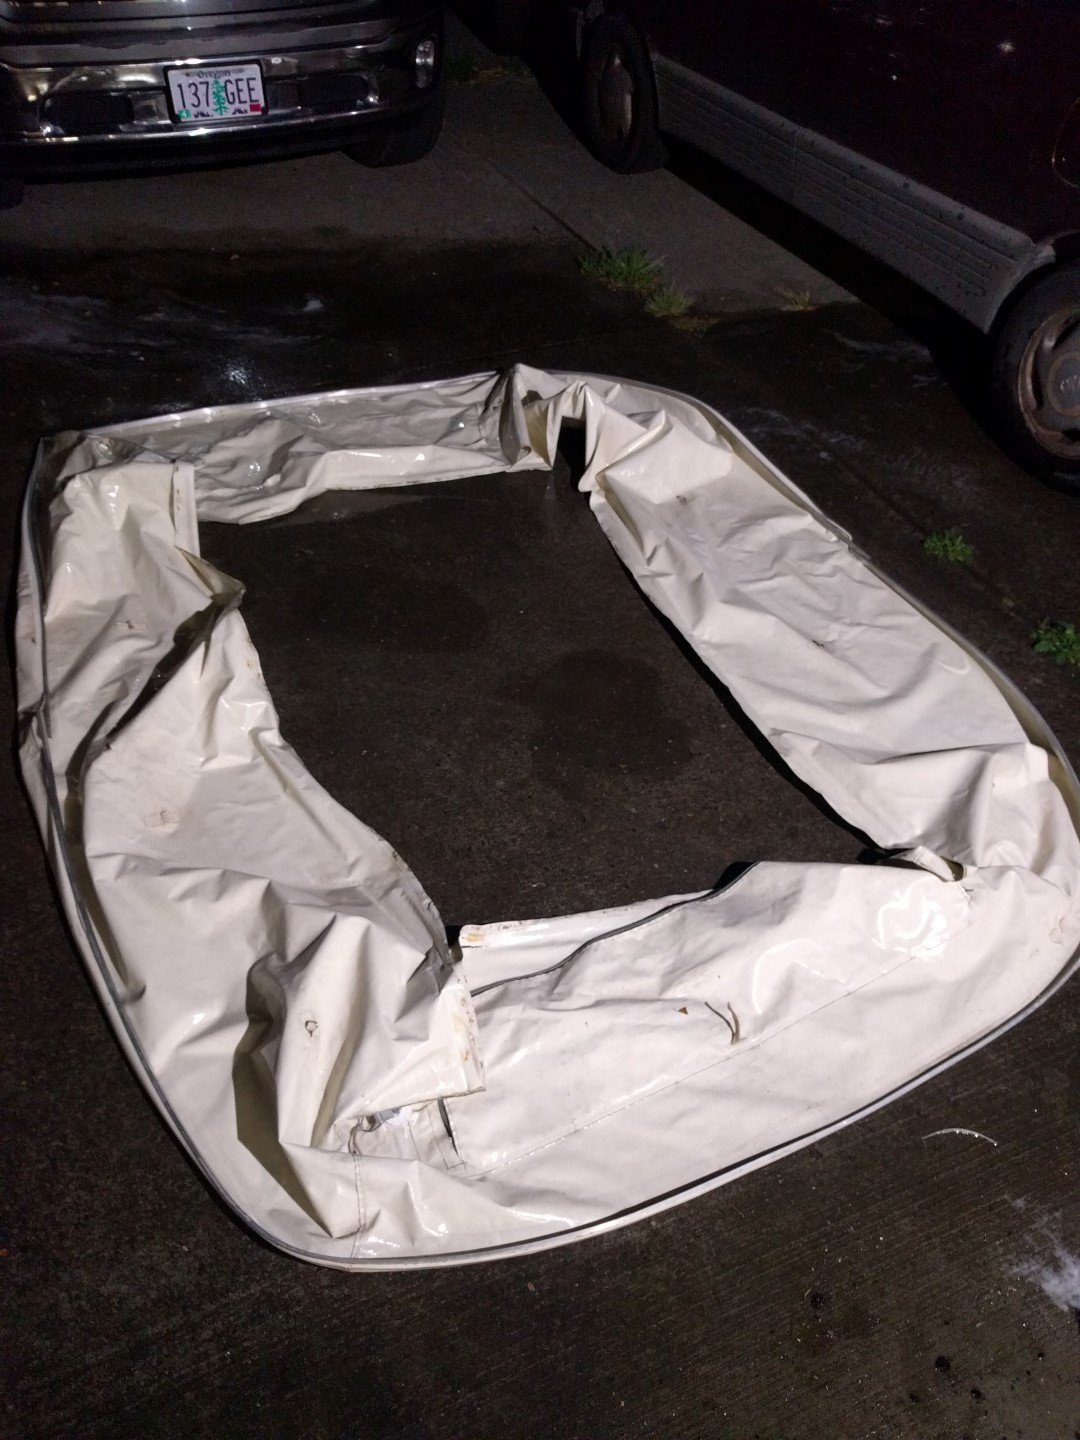
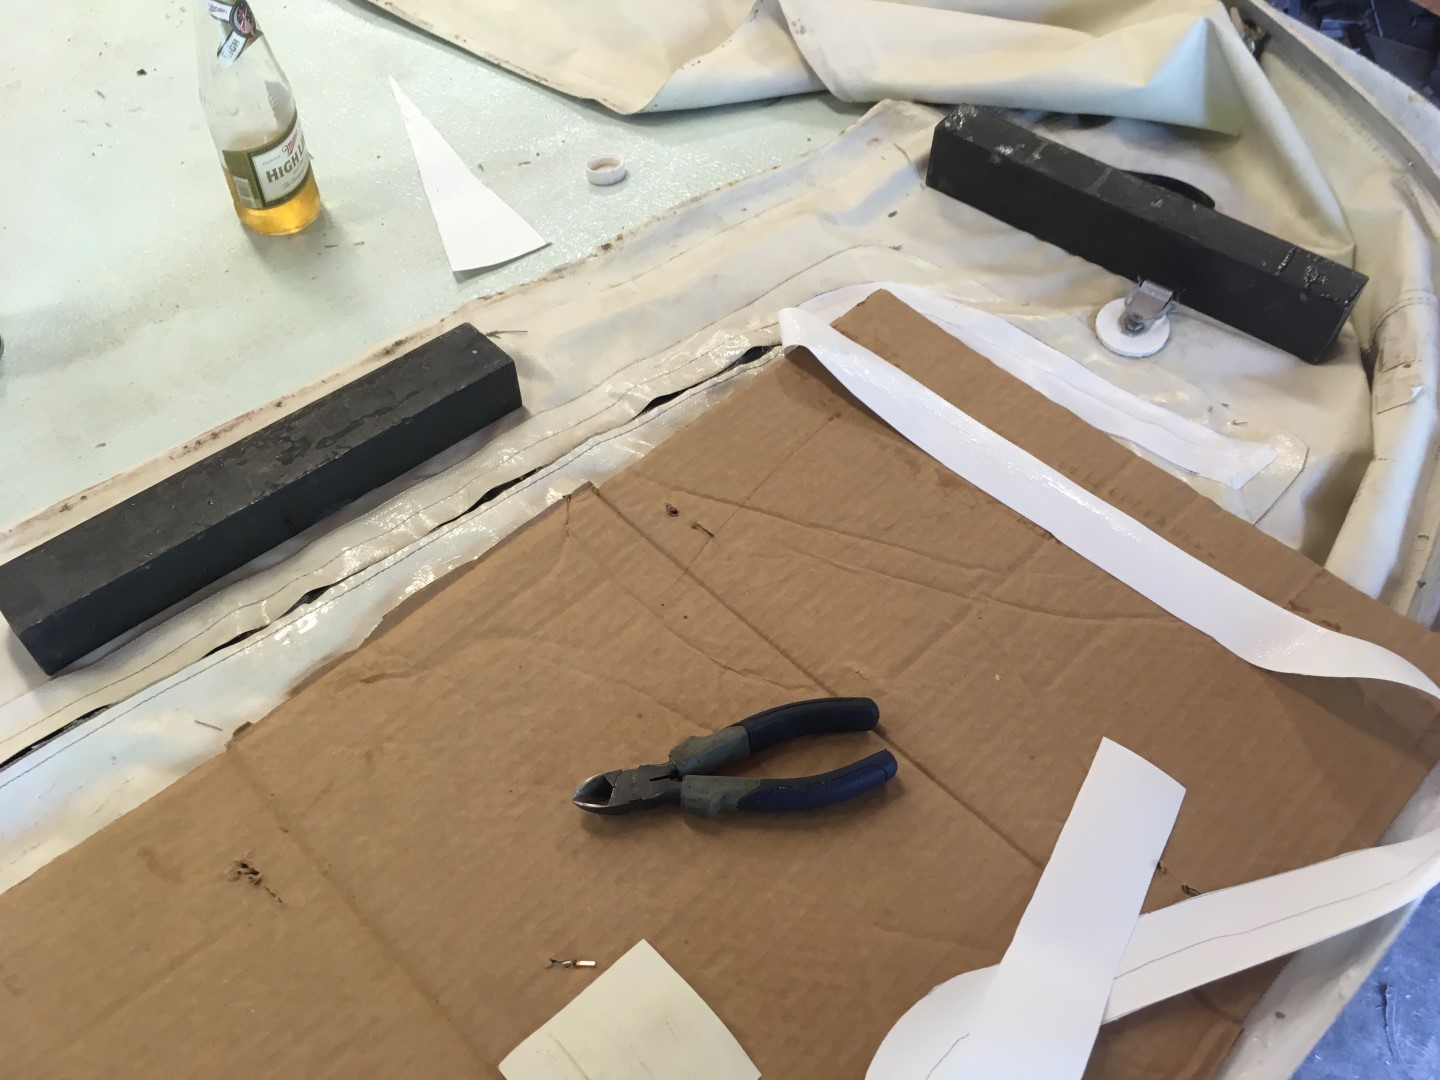
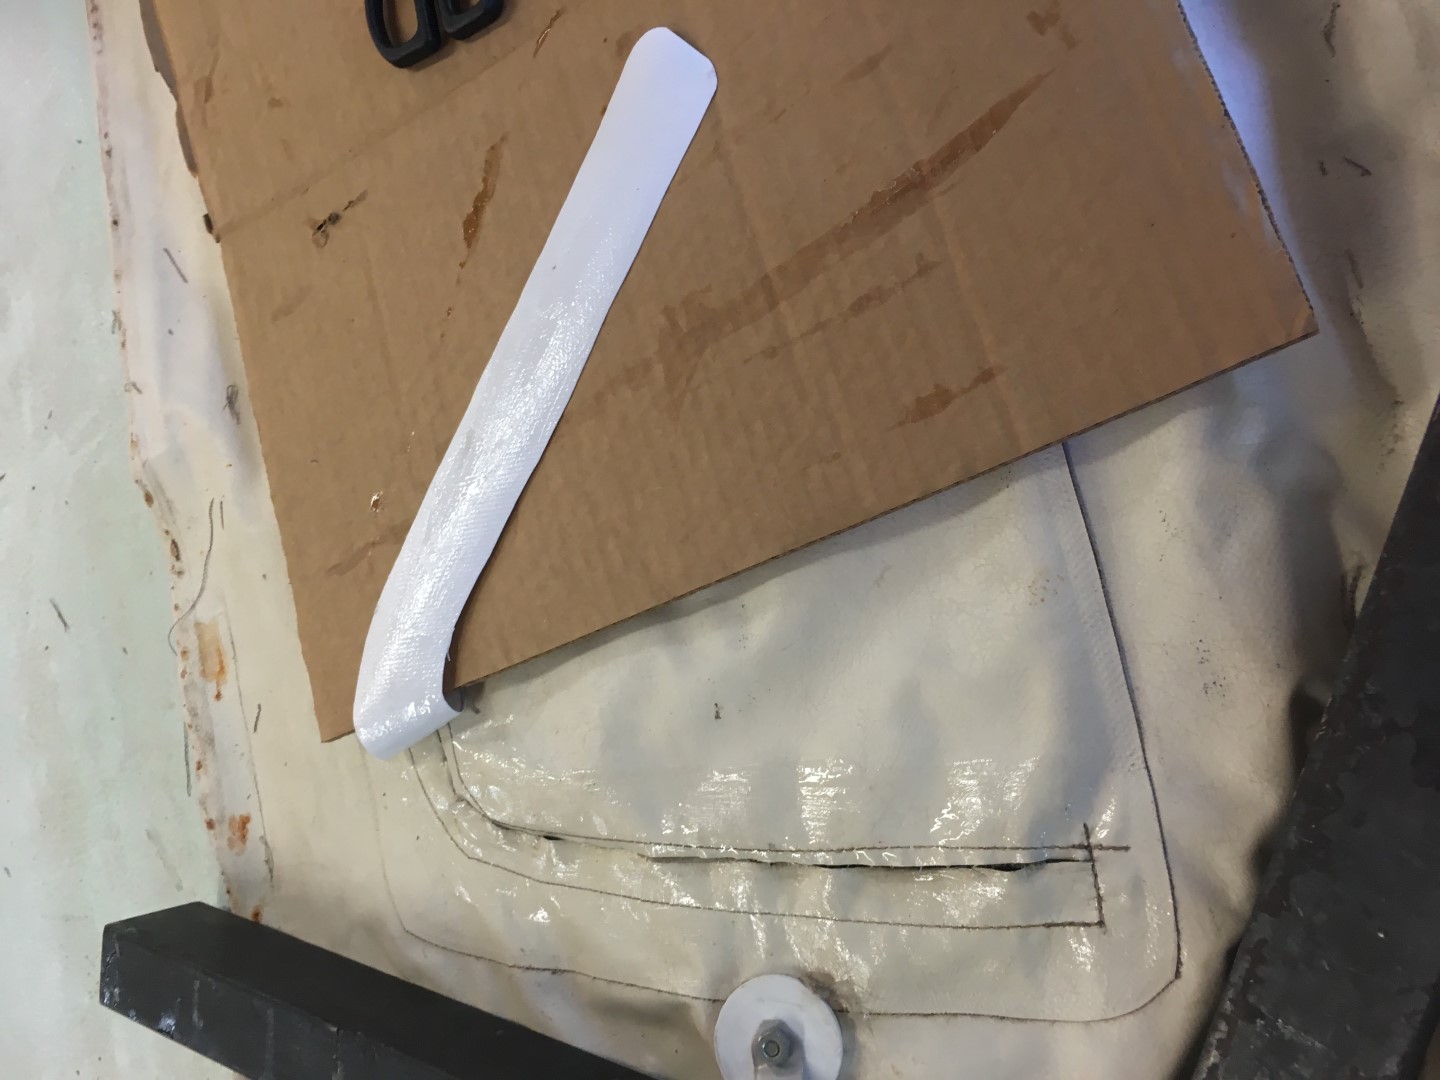
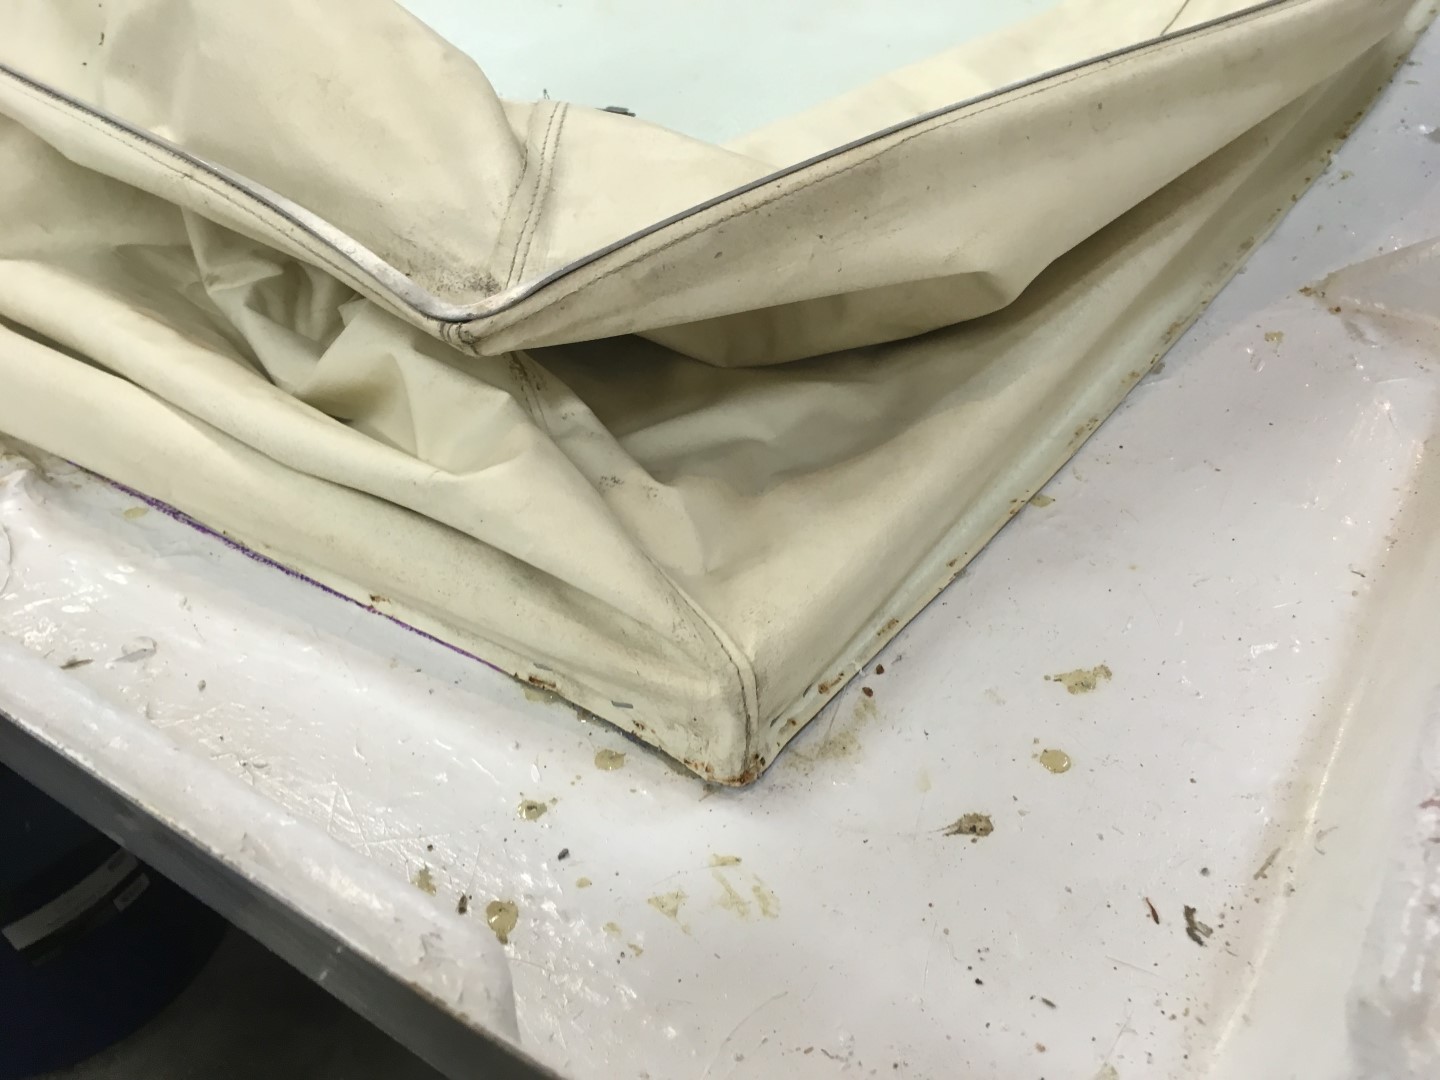
Canvas Repair
After reading a few posts over on the Yahoo Chinook email group I found the best way to repair the canvas which is made out of vinyl coated polyester.
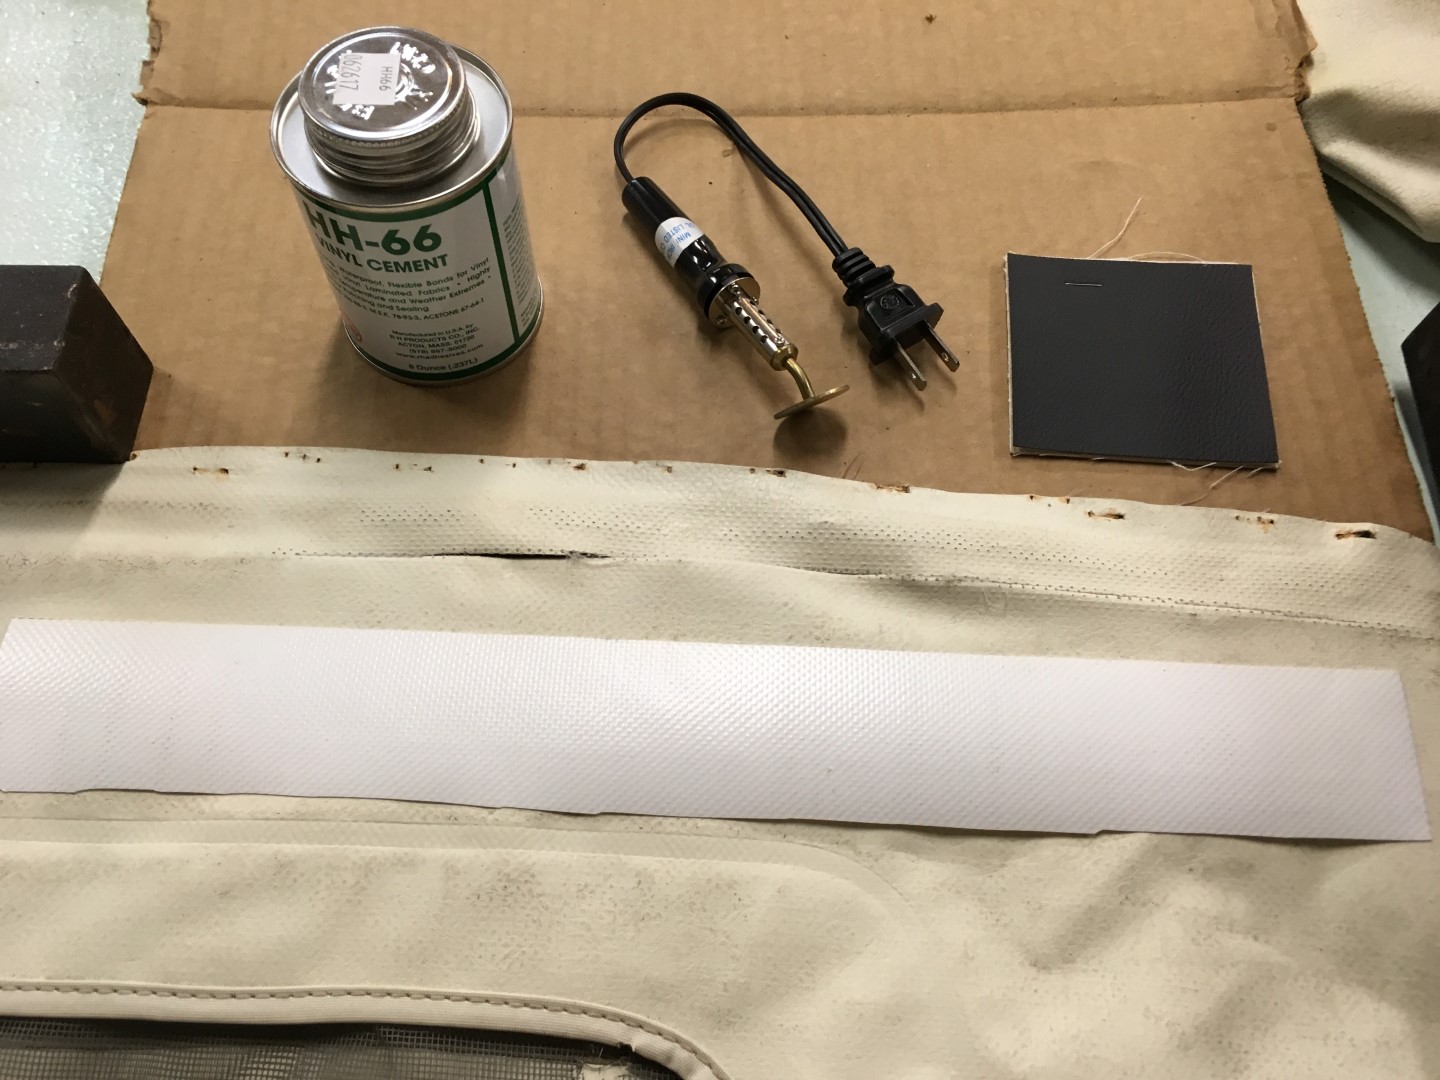
Here are the supplies you need.
- Vinyl coated polyester fabric which can be found inexpensively on eBay
- HH-66 vinyl cement
- Heat applicator tool
- Heat pad that protects the canvas from direct contact with the fabric
The last two supplies can be purchased together in Permatex repair kit #81781 for around $18.
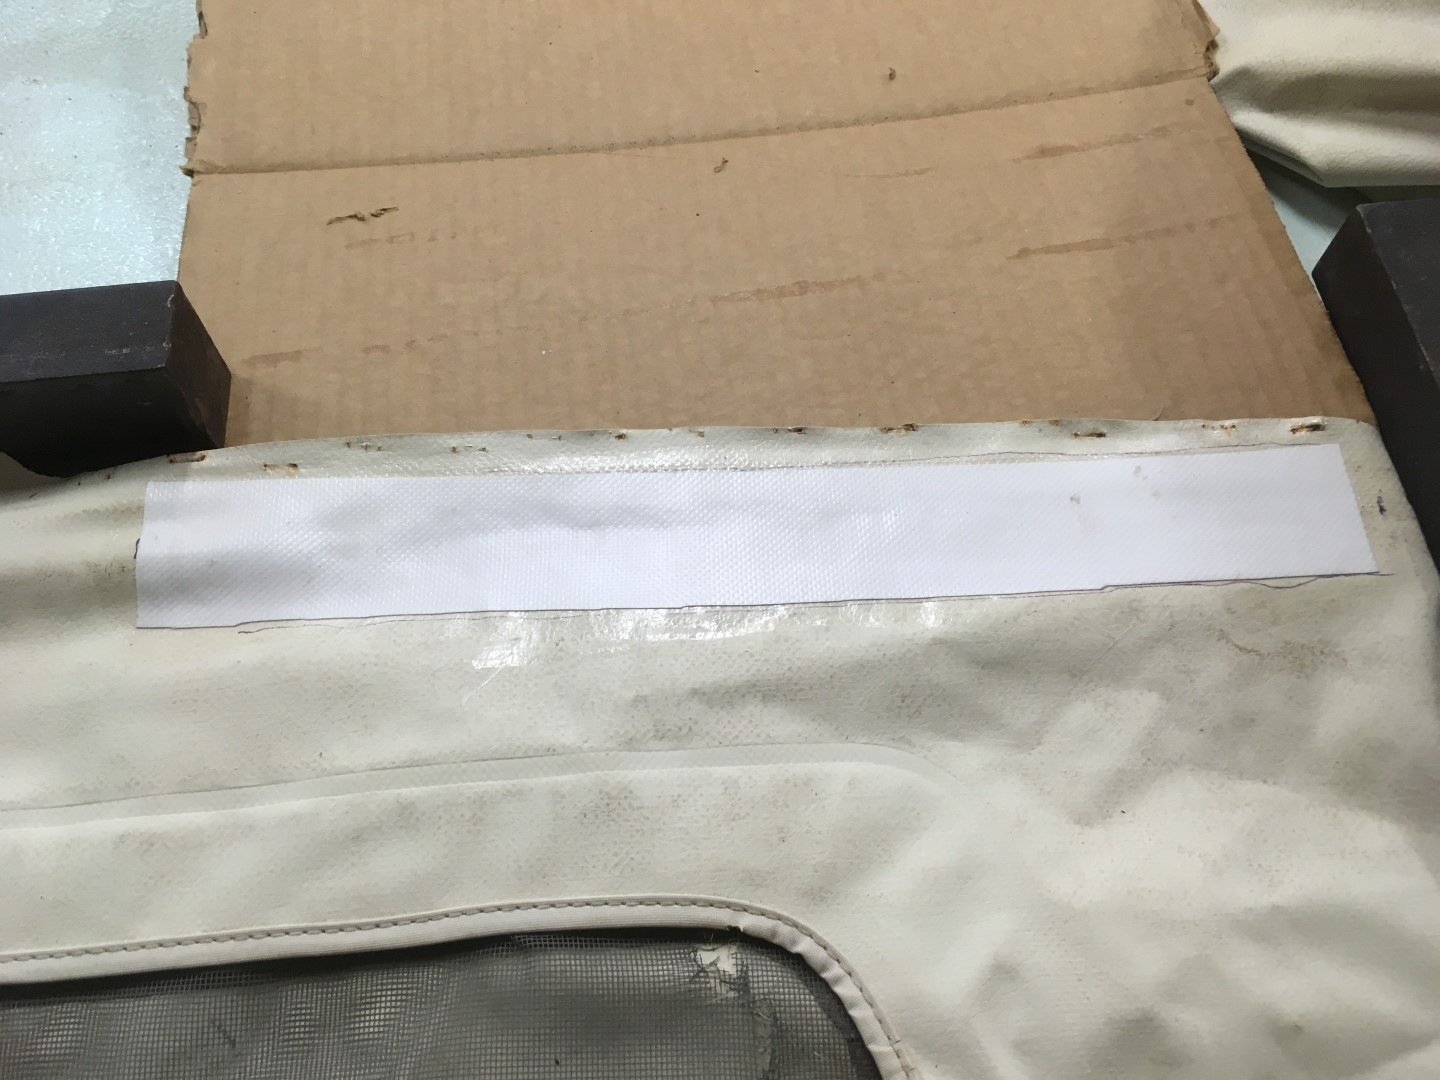
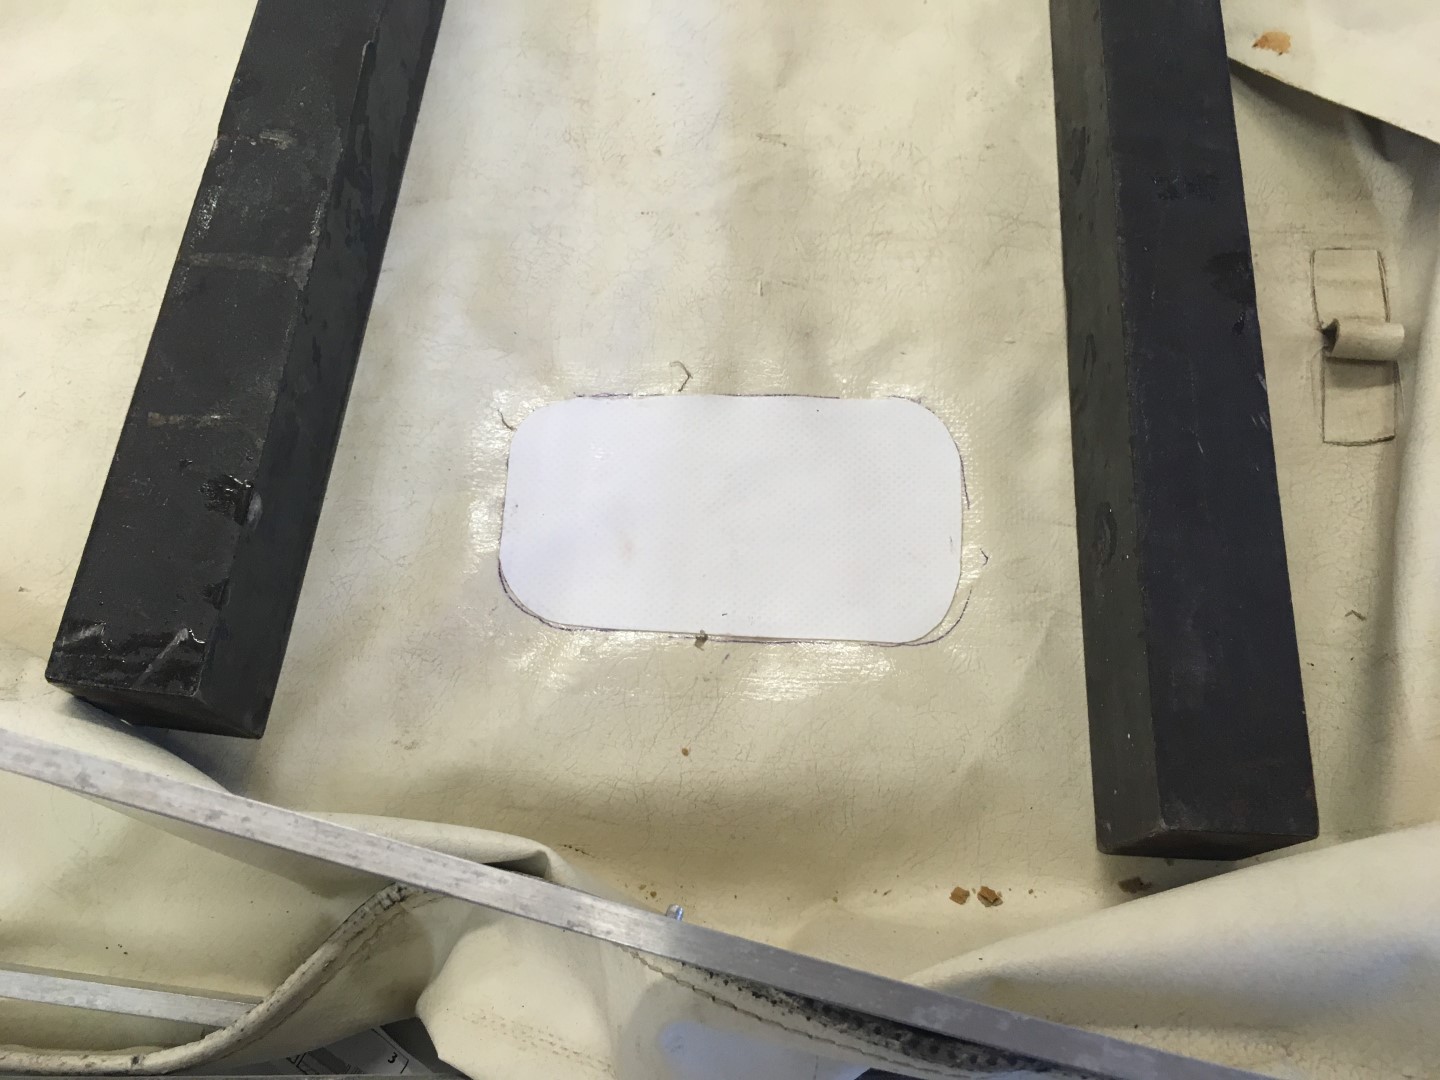
The the steps are pretty basic for repair.
- Cut out a piece of vinyl fabric that is approximately 1” larger on each side of the hole in the canvas
- Clean the canvas throughly around the hole with alcohol
- Make sure the repair area is entirely accessible
- Plug in the head tool
- Apply HH-66 cement to both the canvas and the vinyl fabric piece, if the piece is larger than approximately 5 inches I would recommend applying the cement in 5 inch increments to avoid it drying to quickly
- Place the piece on the canvas and apply a decent amount of pressure with your hand across the entire area of the patch
- Now take the heat pad and place it on top of the patch
- Apply the heat tool to the pad for 15 seconds and repeat until heat has been applied to the entire patch
- Step number 8. is the most important, the heat creates a good bond
I had to seal one of the canvas zippers up because the zipper was broken and beyond repair.
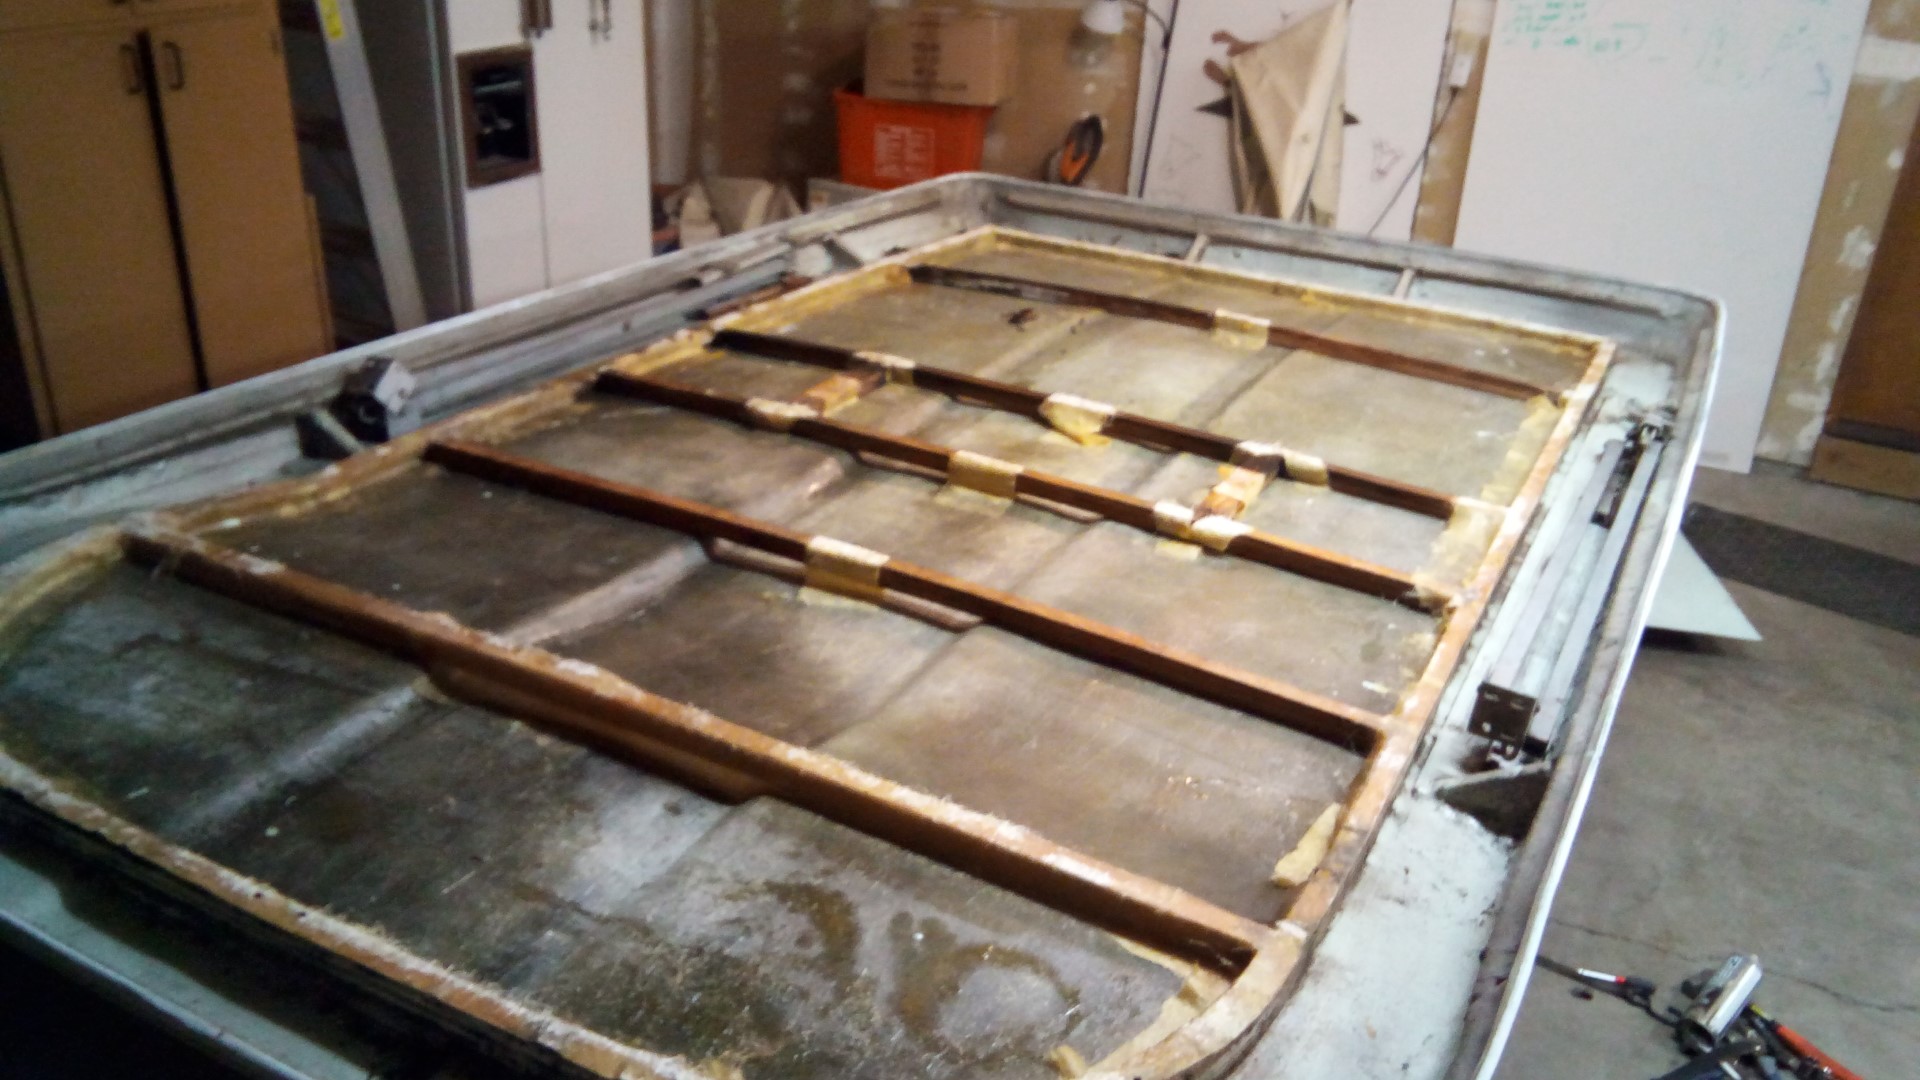
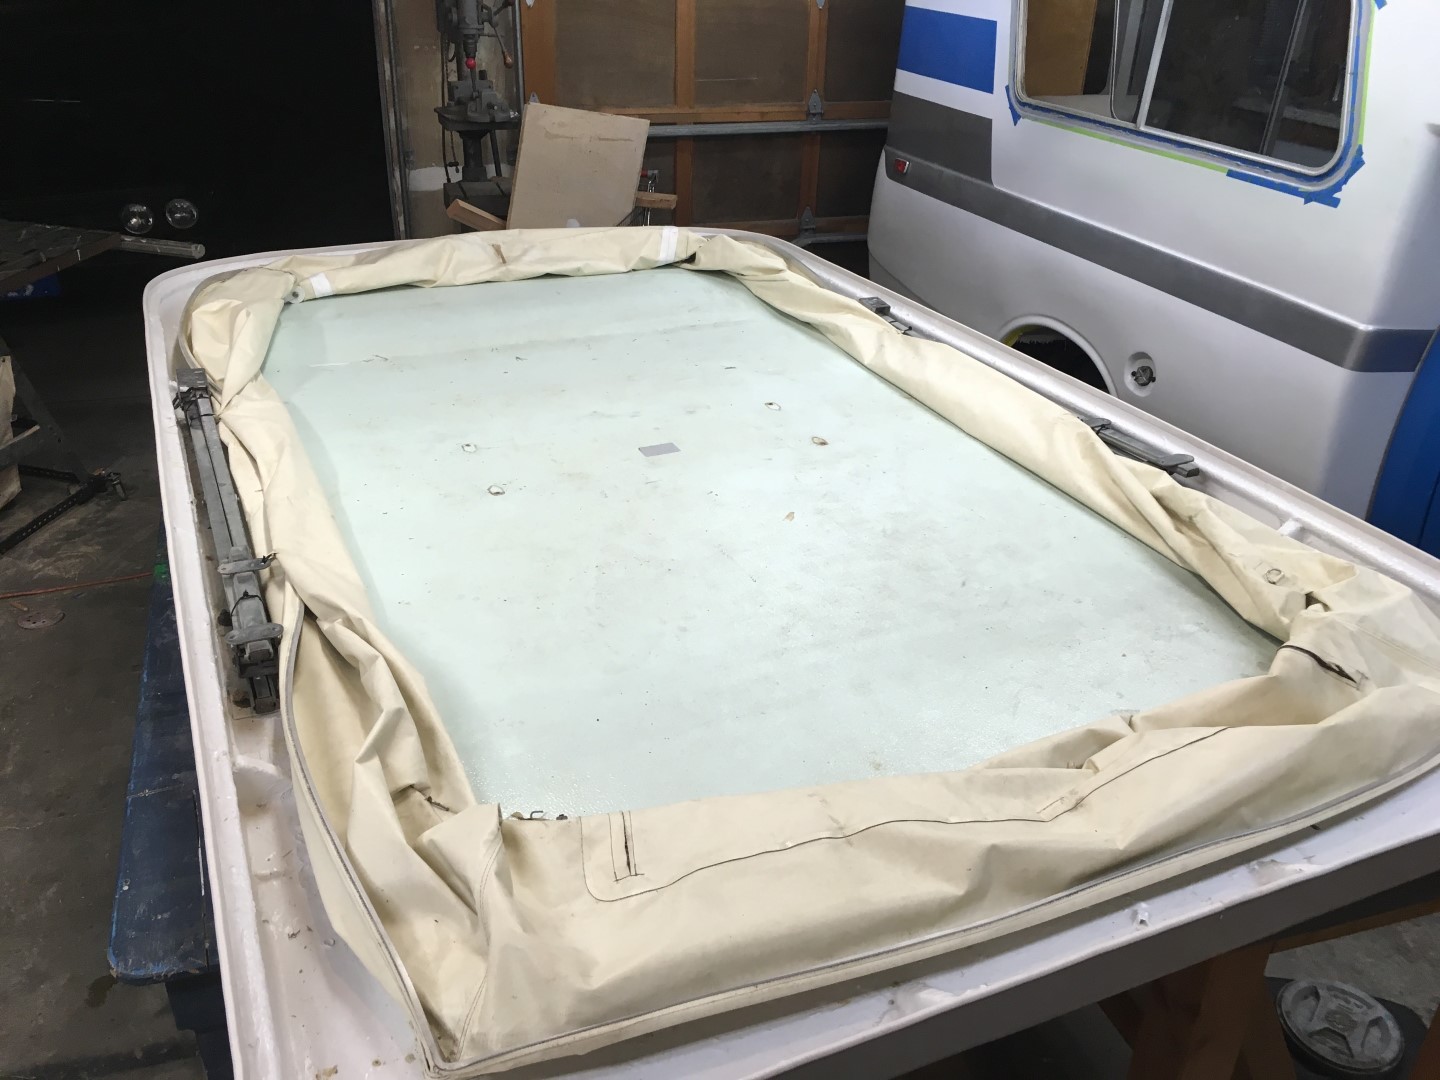
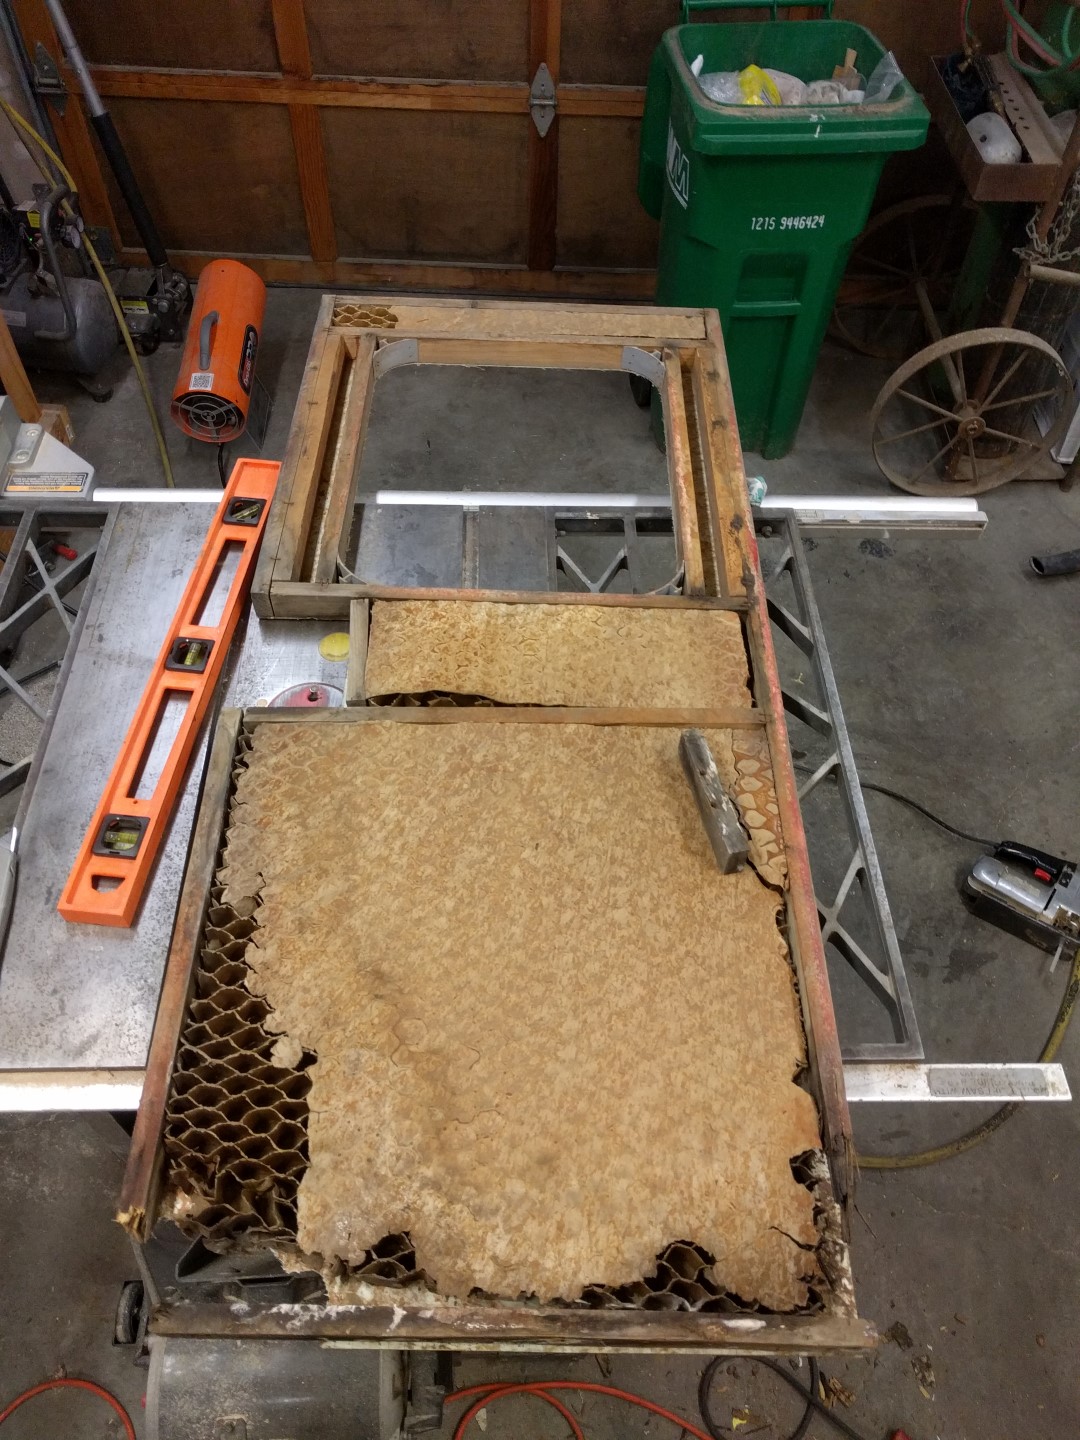
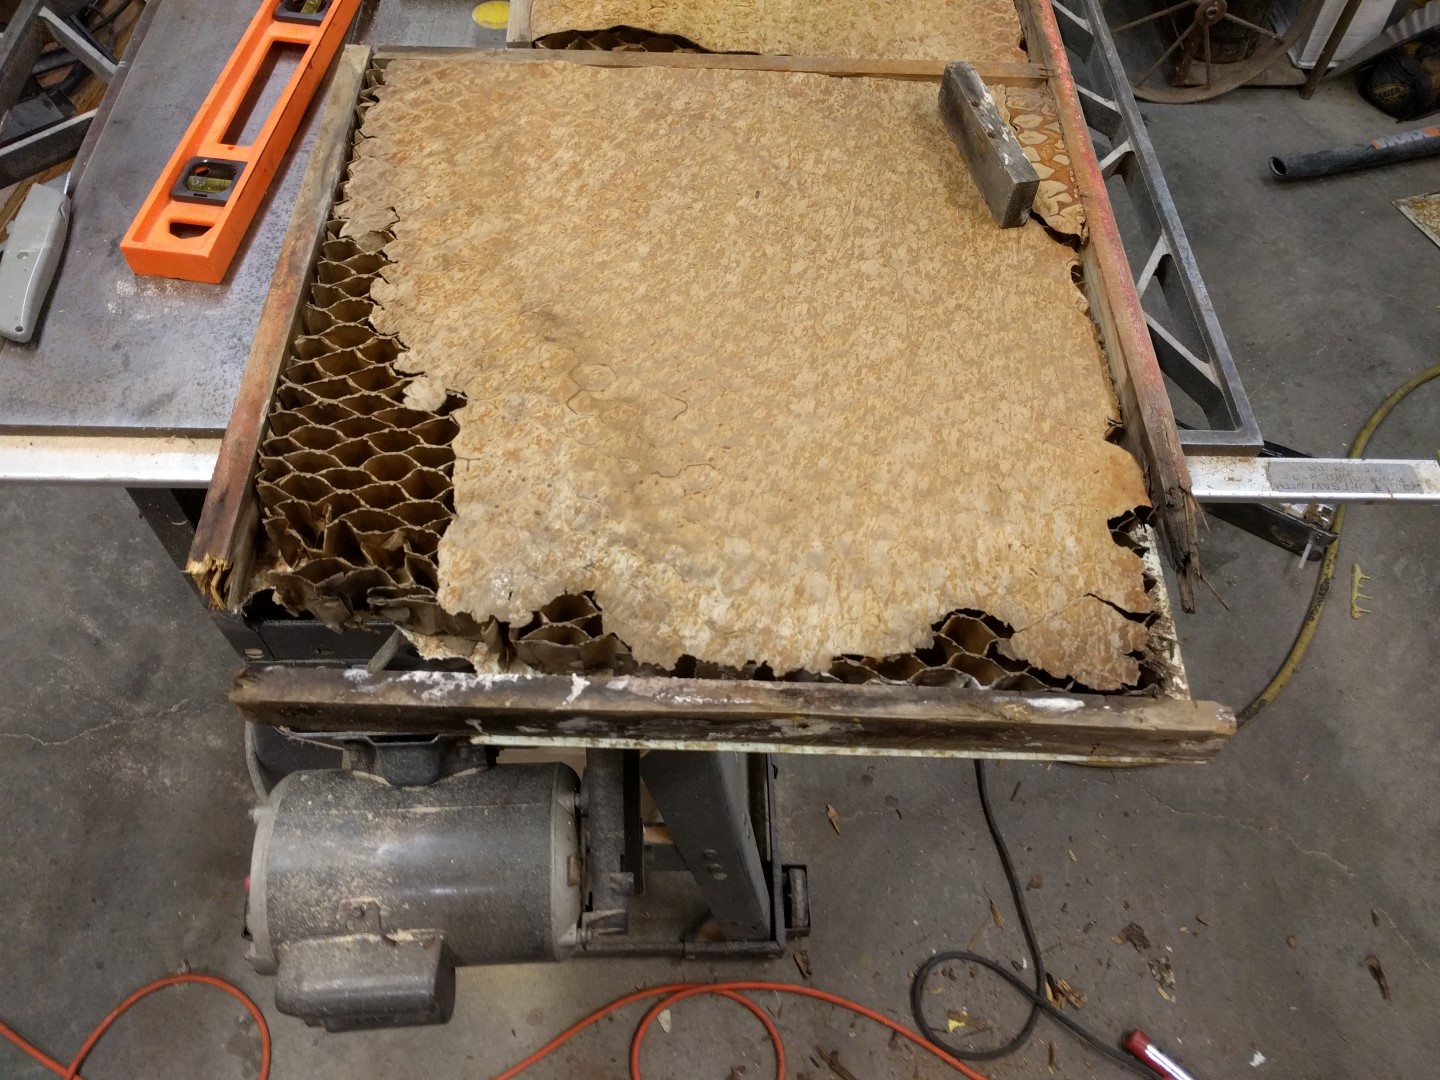
Roof Repair
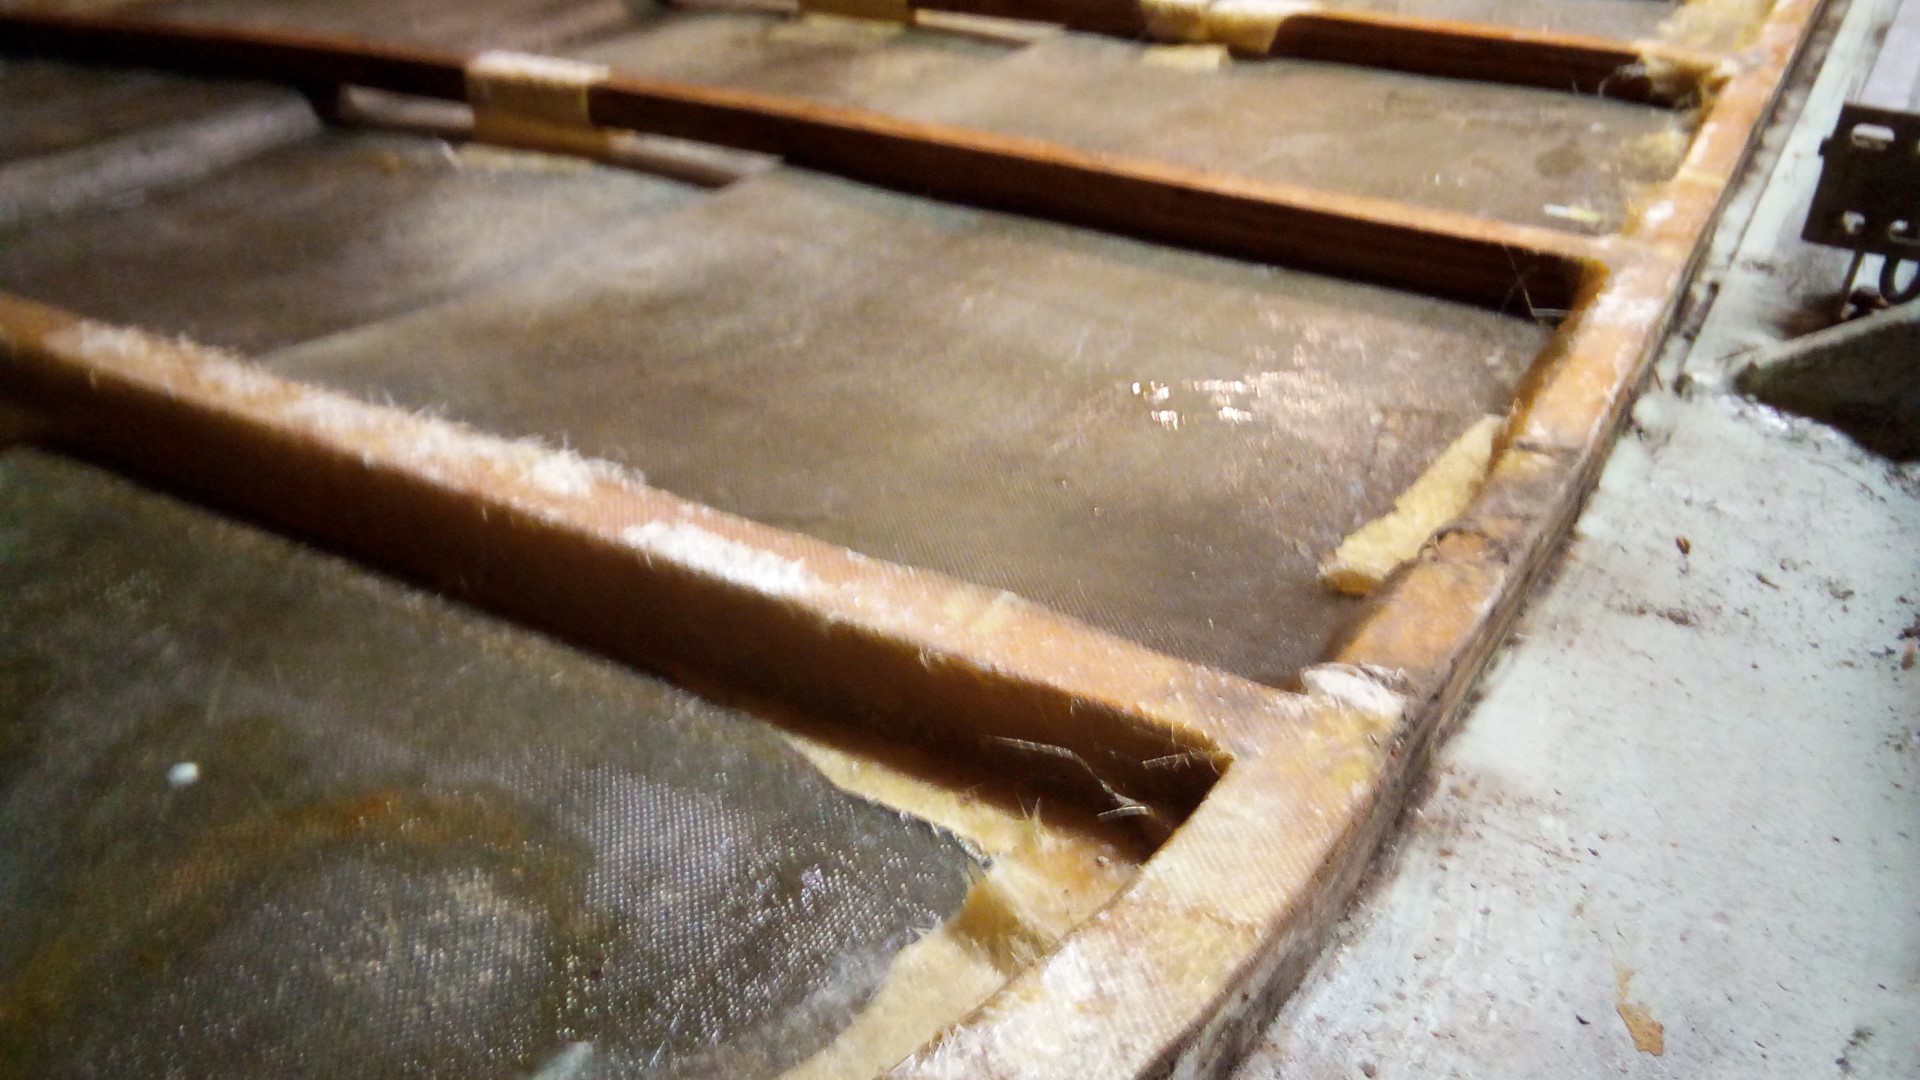
The stock roof was an interesting design to say the least. Basic 1x1” wood frame and occasional fiberglass strips with 20+ holes in the roof! I will personally credit the roof being the #1 reason why these campers start to leak. They leak, then rot, then sag, and hold water.
The construction of the stock roof is like this from bottom to top:
- Vinyl like fabric strip
- Canvas
- Rubber right angle strip
- Fiberglass sheet as the interior
- Wood frame and fiberglass strips
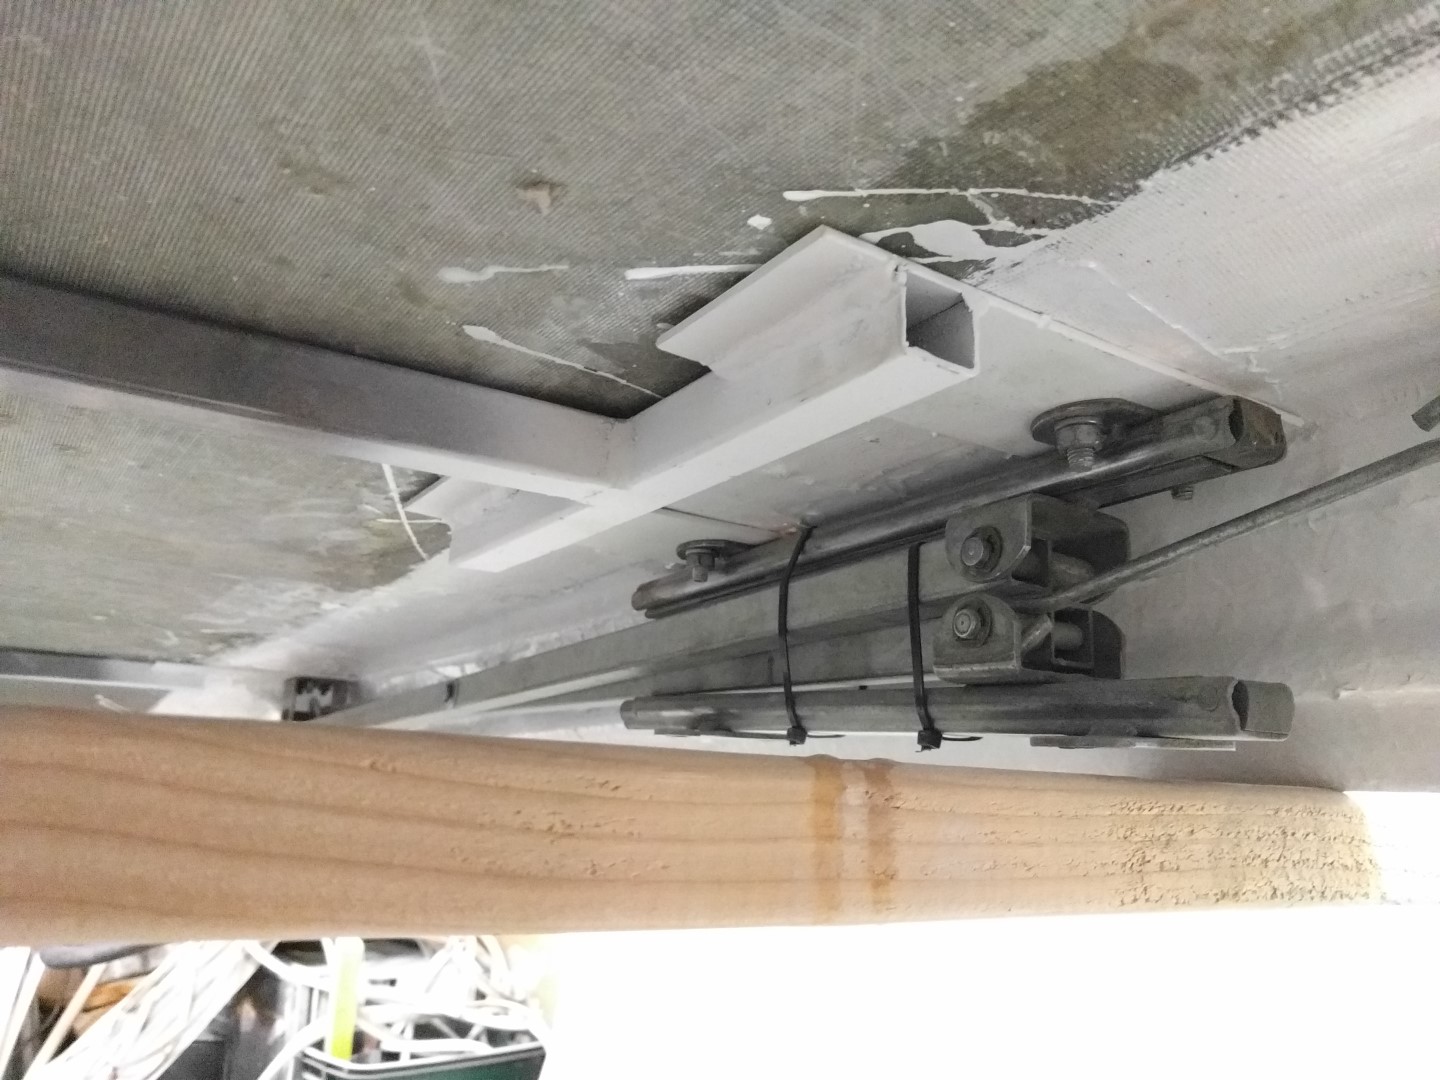
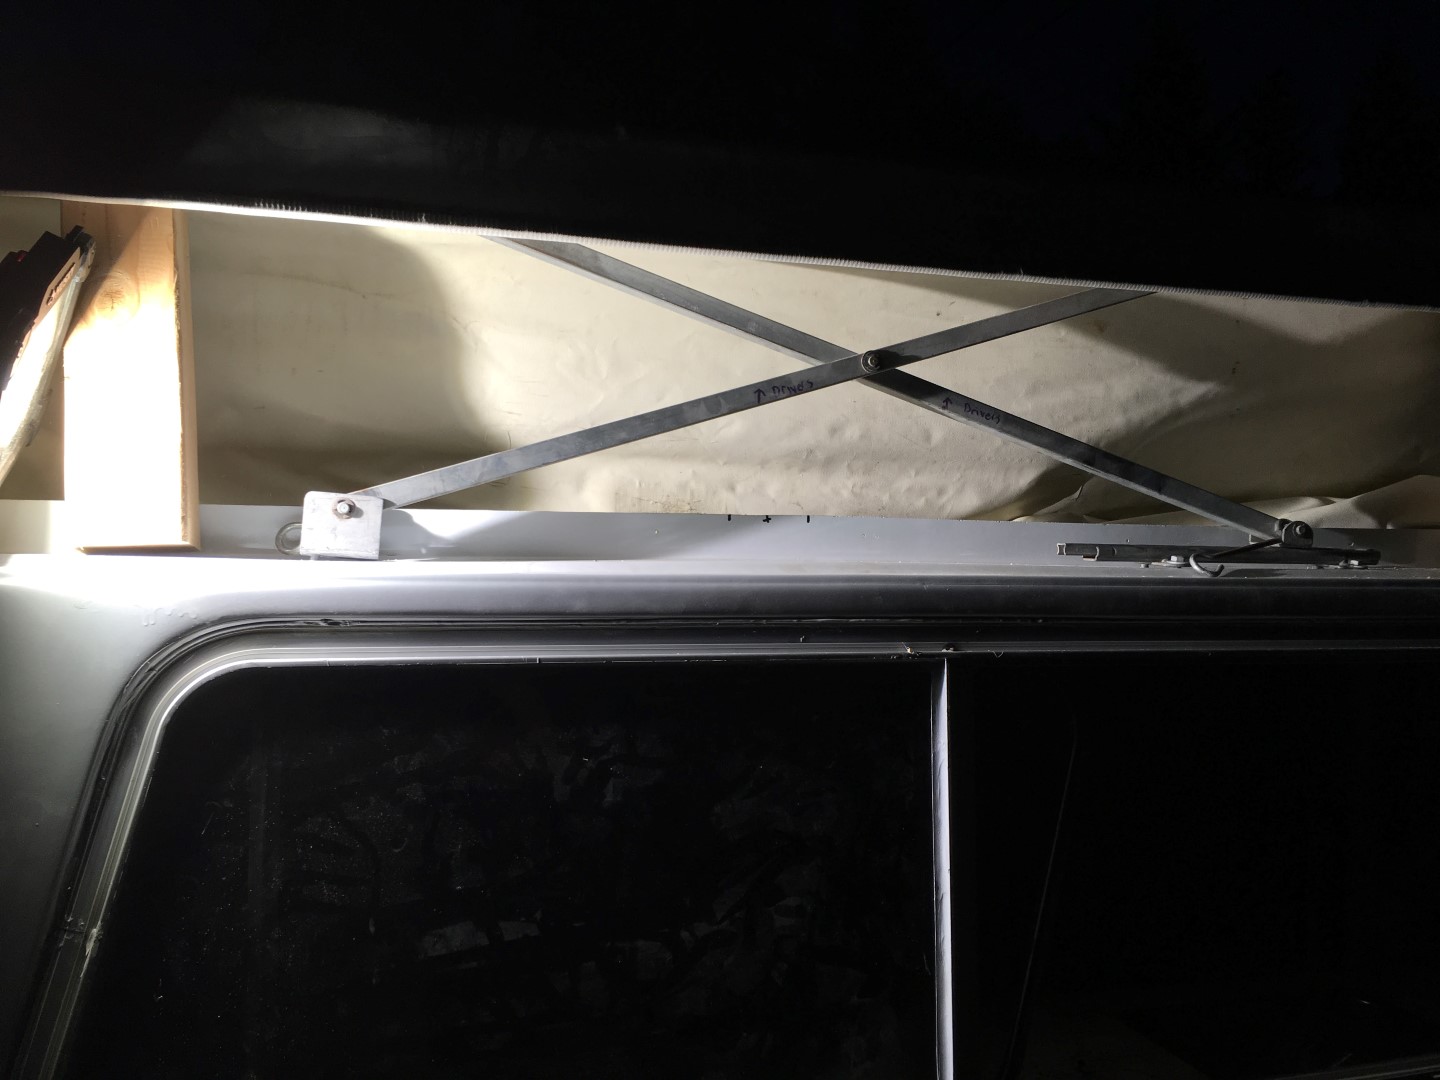
- Scissor mechanism and mounting anchors
- Fiberglass roof
- Bolts through roof for scissor mechanism and roof hold down straps when driving
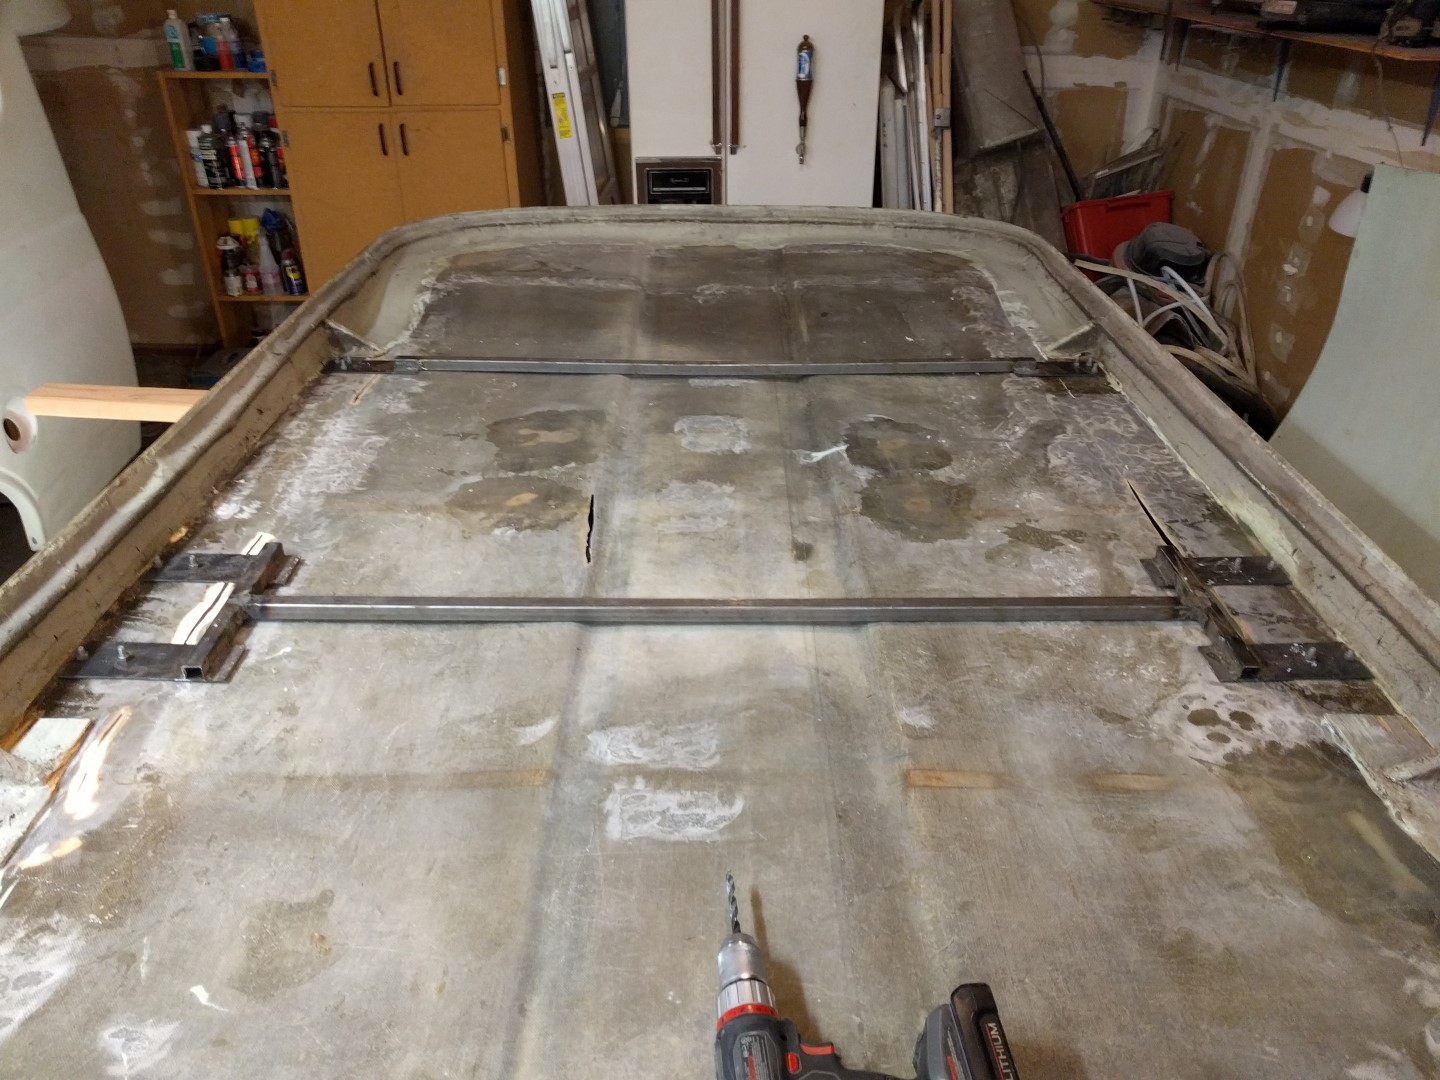
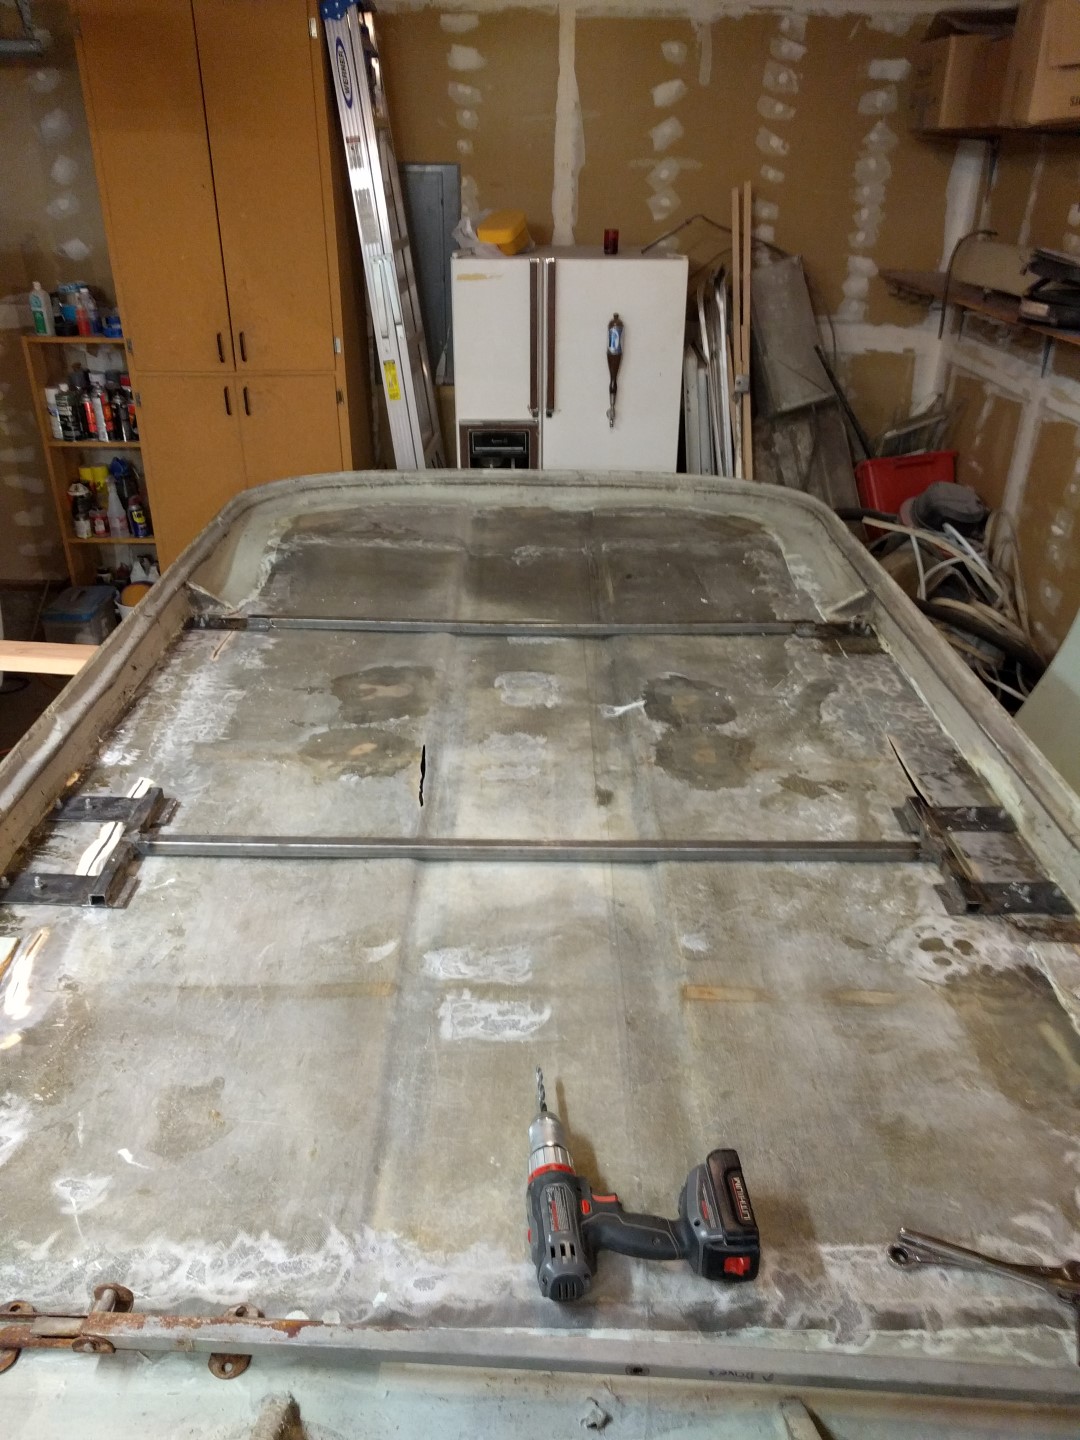
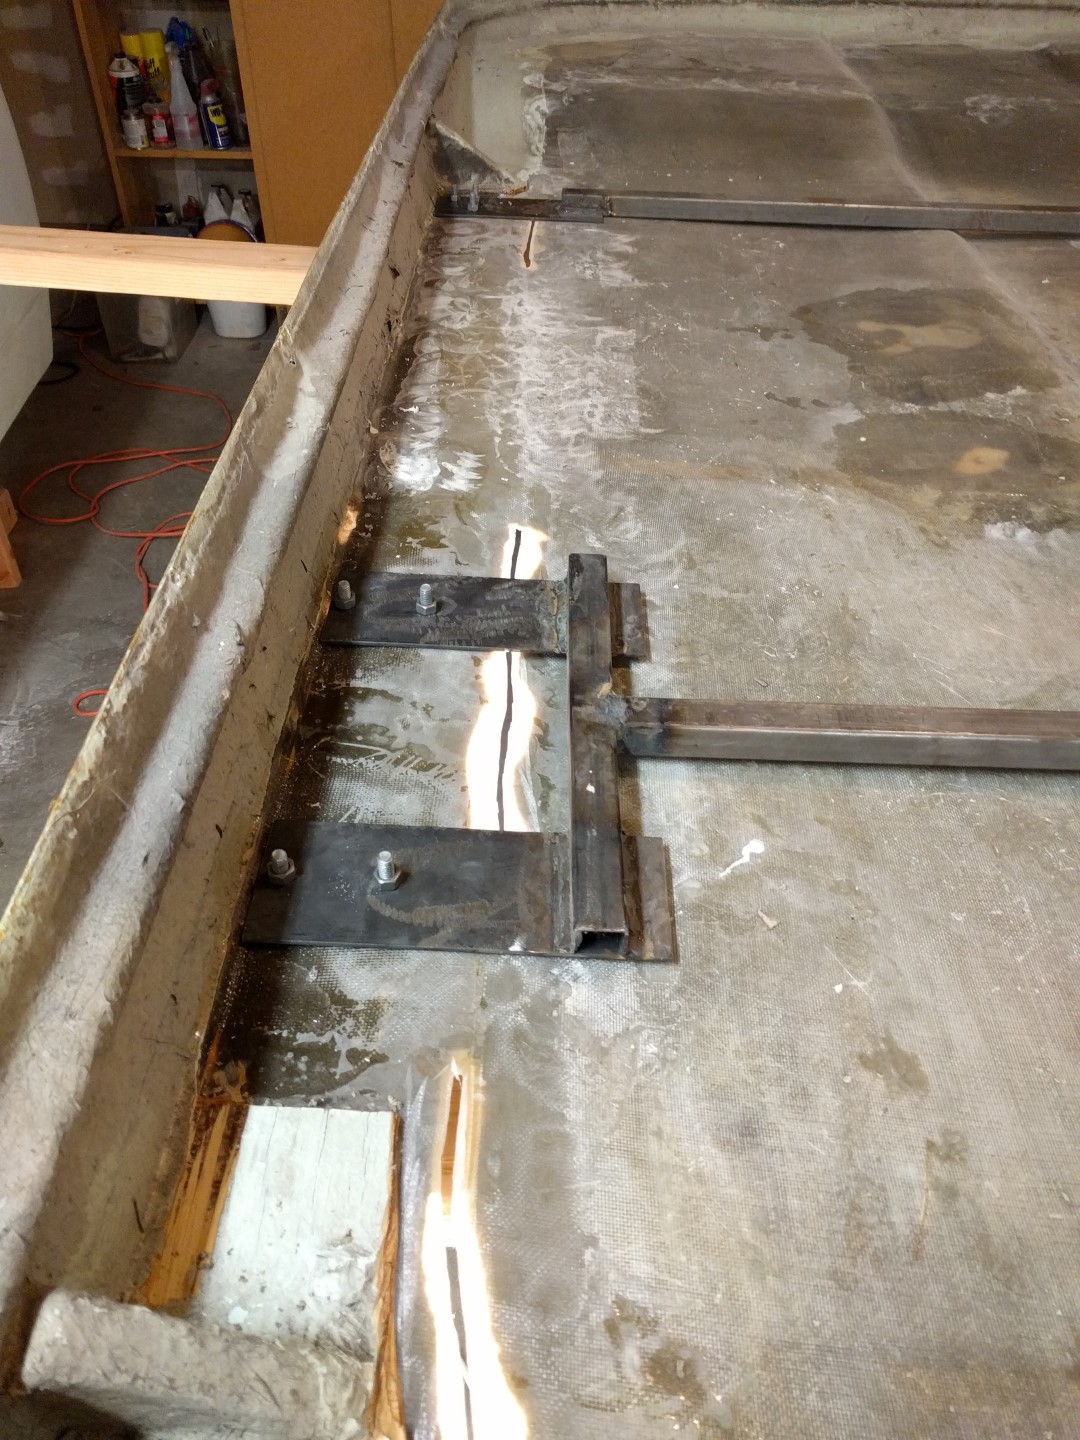
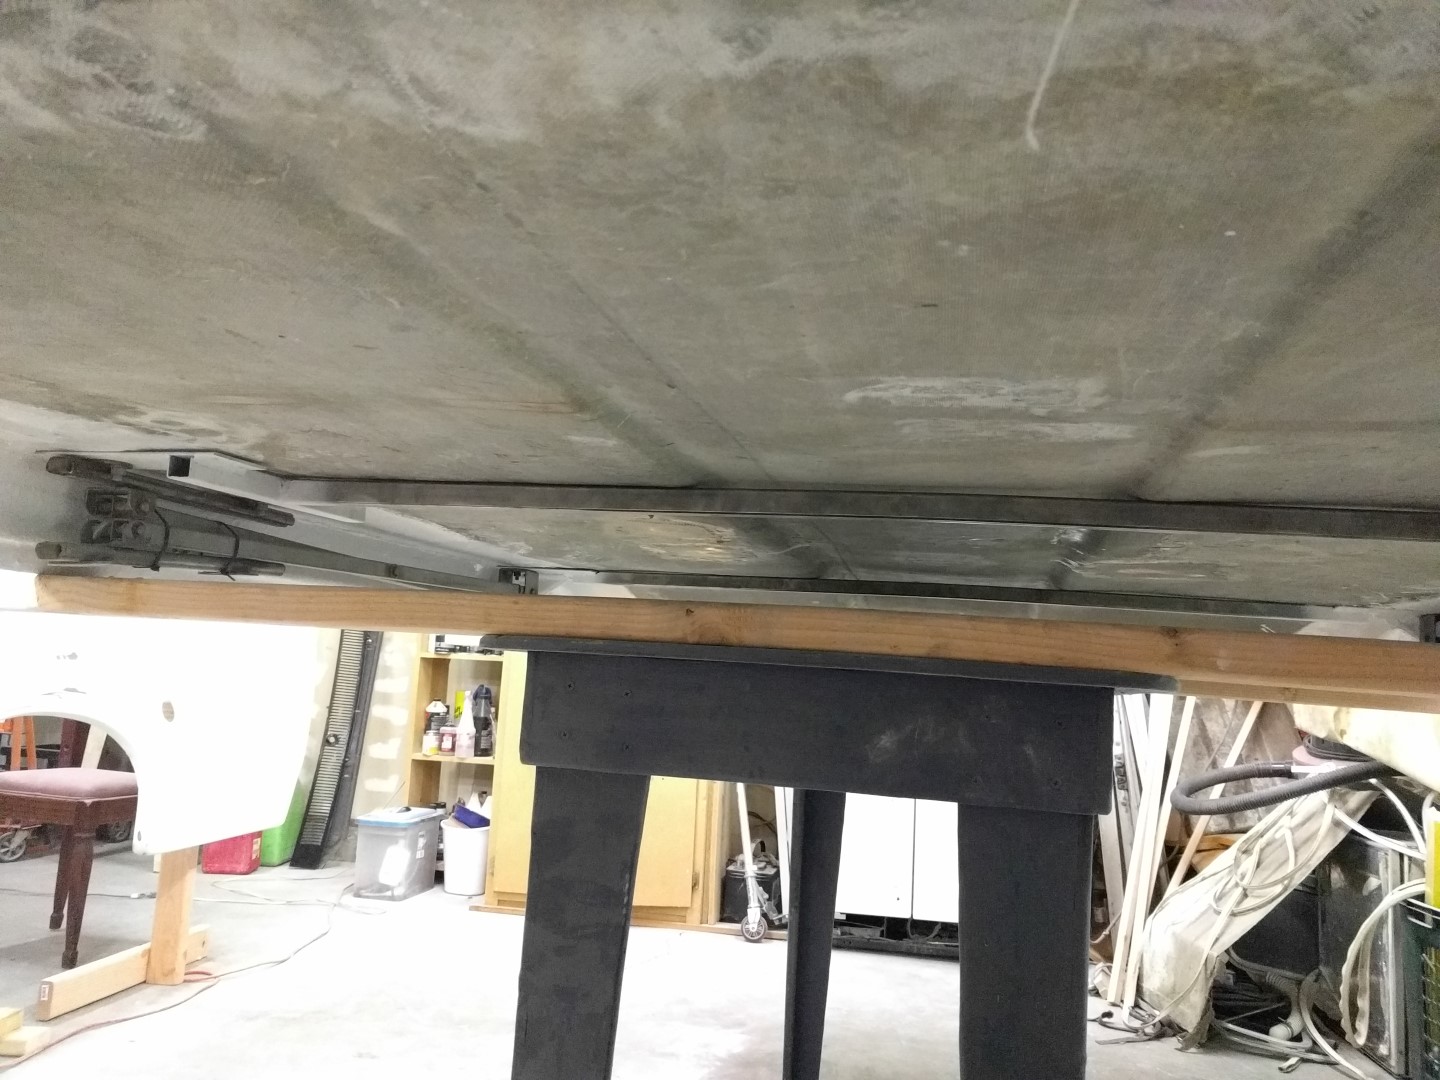
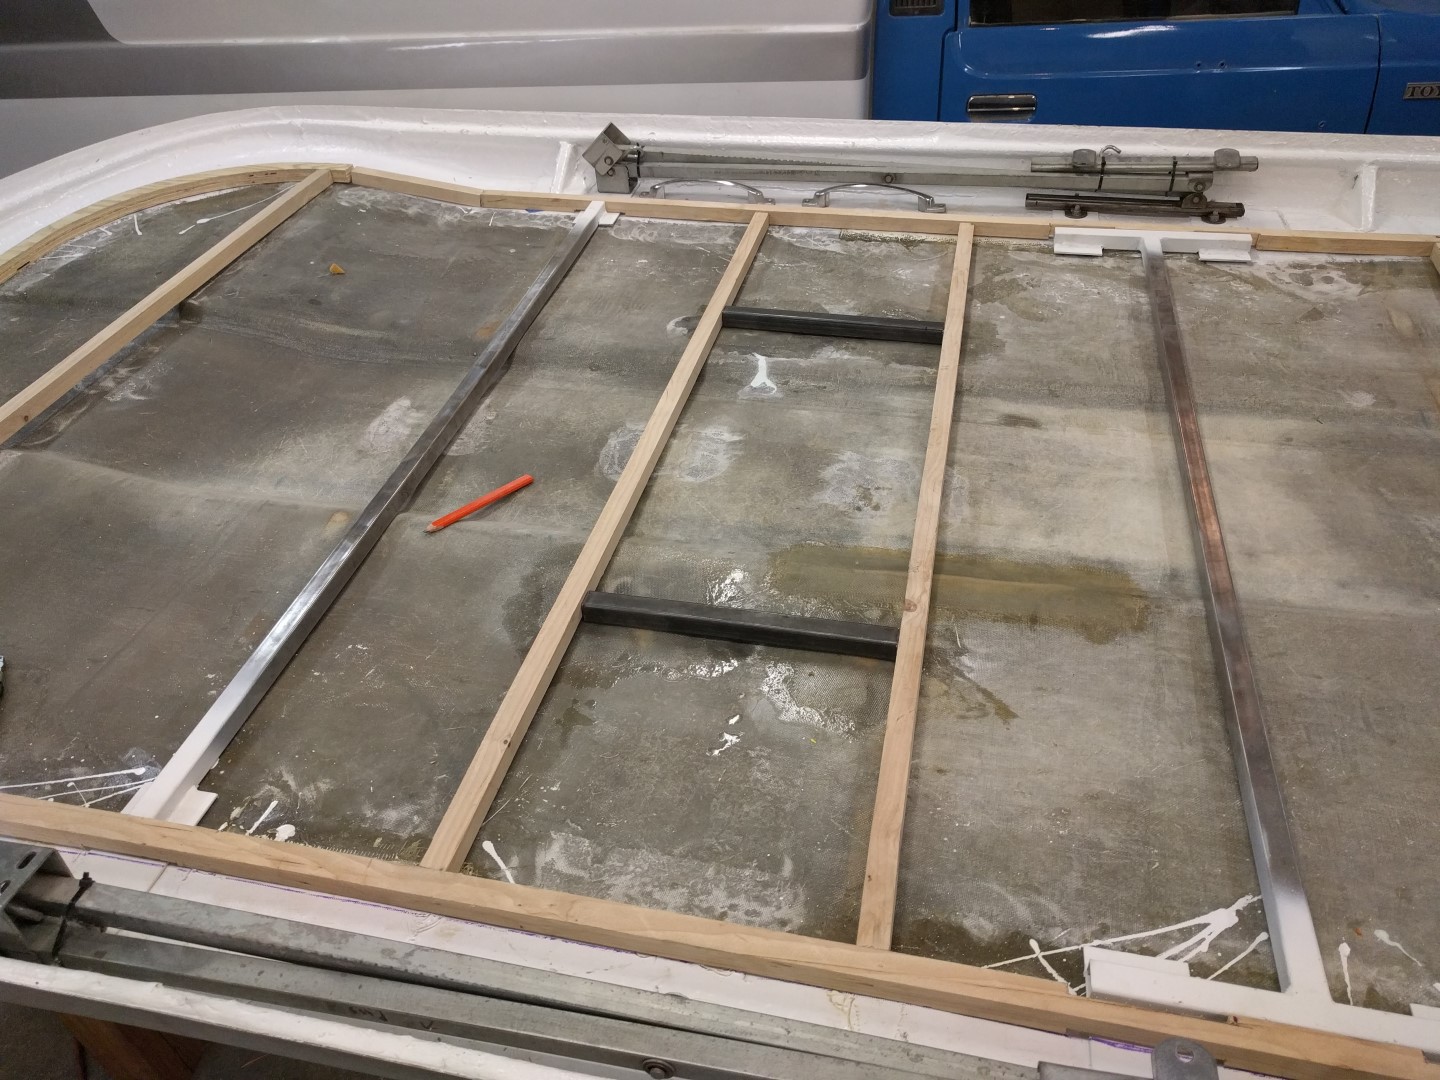
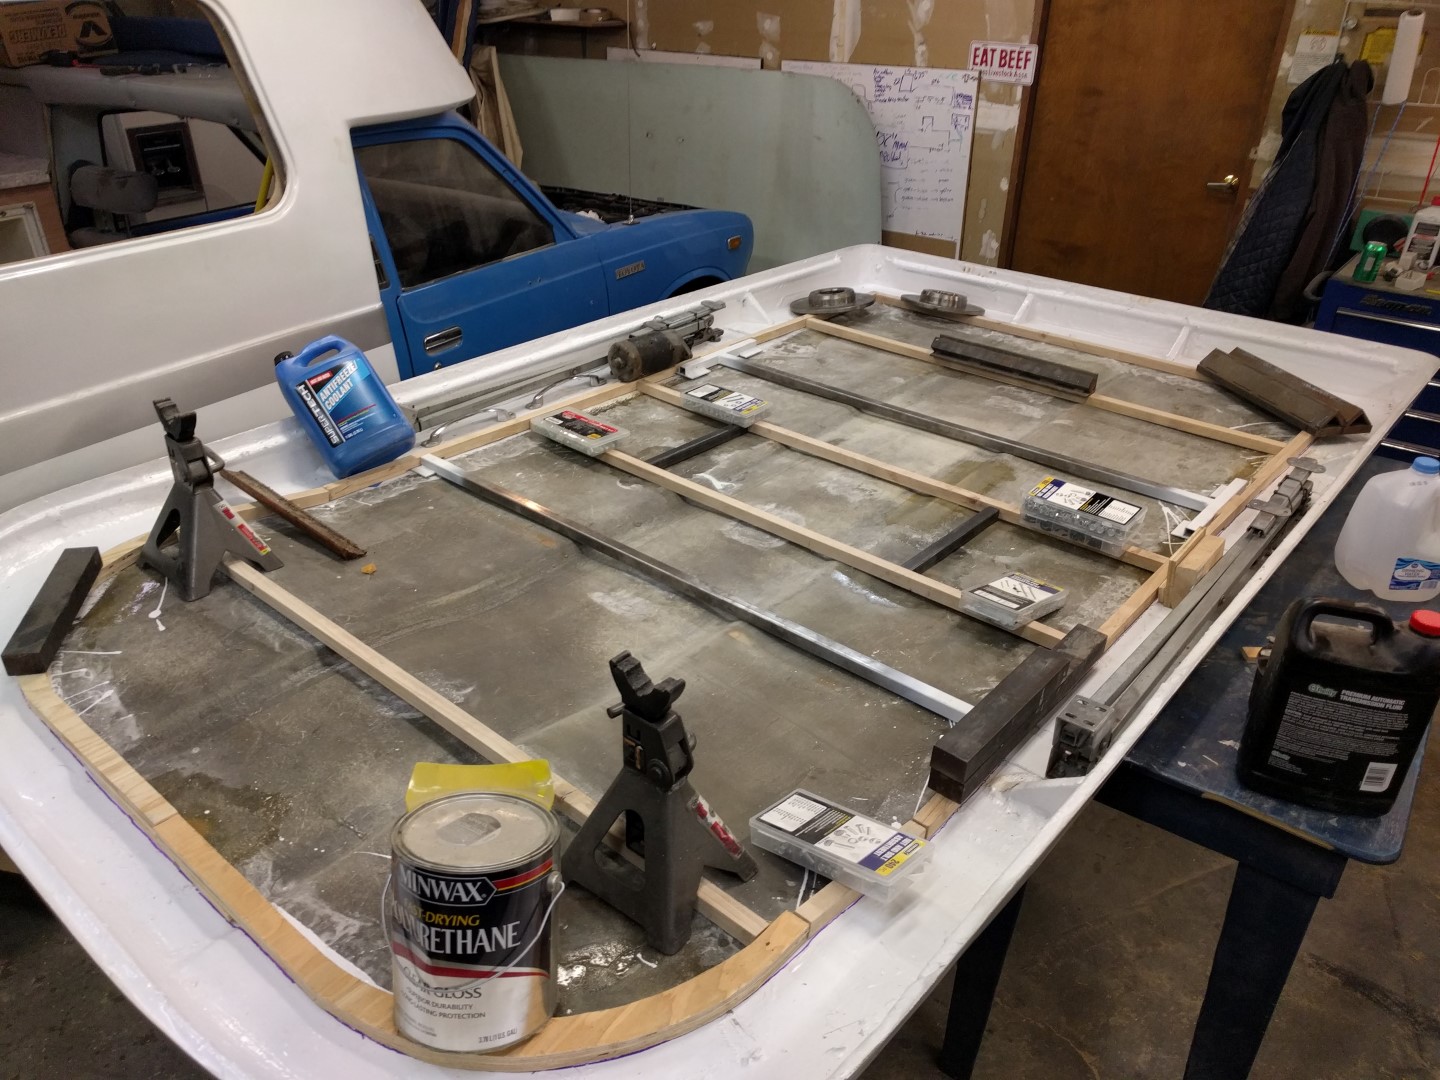
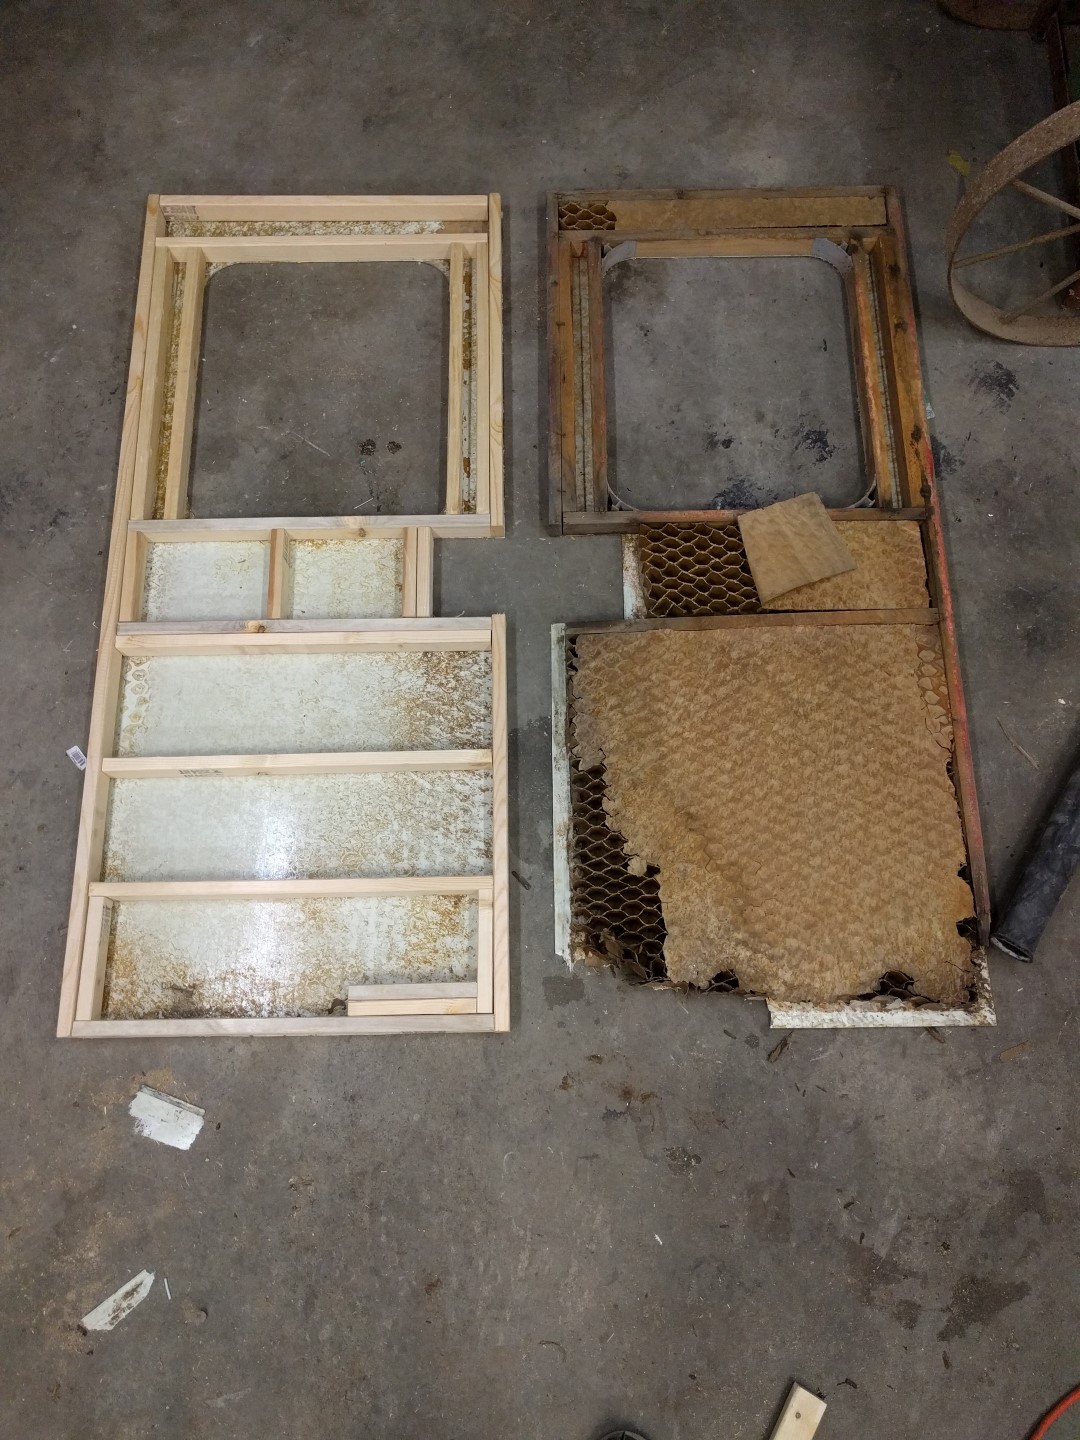
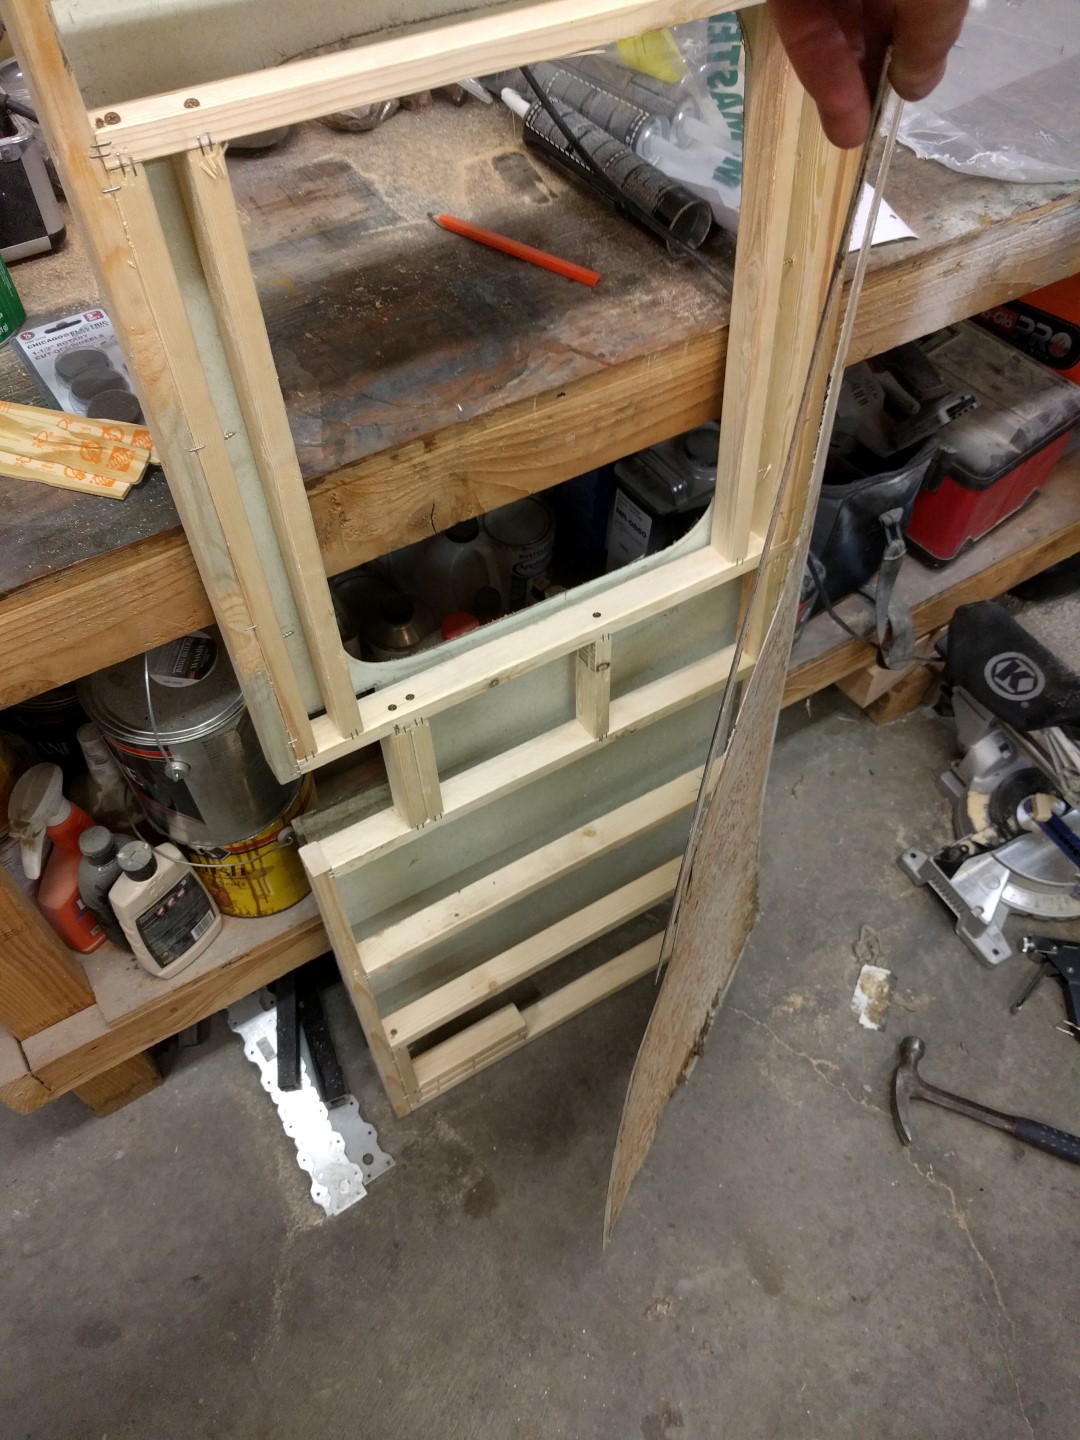
I removed all the fiberglass and wood frame and striped it down to bare fiberglass. The fiberglass resin has to be wire-wheeled off to get a nice clean surface for future fiberglass. The next step is to build a quasi metal frame that will prevent the roof from sagging and provide solid mounts for the scissor mechanism. Two “I” shaped beams were devised.
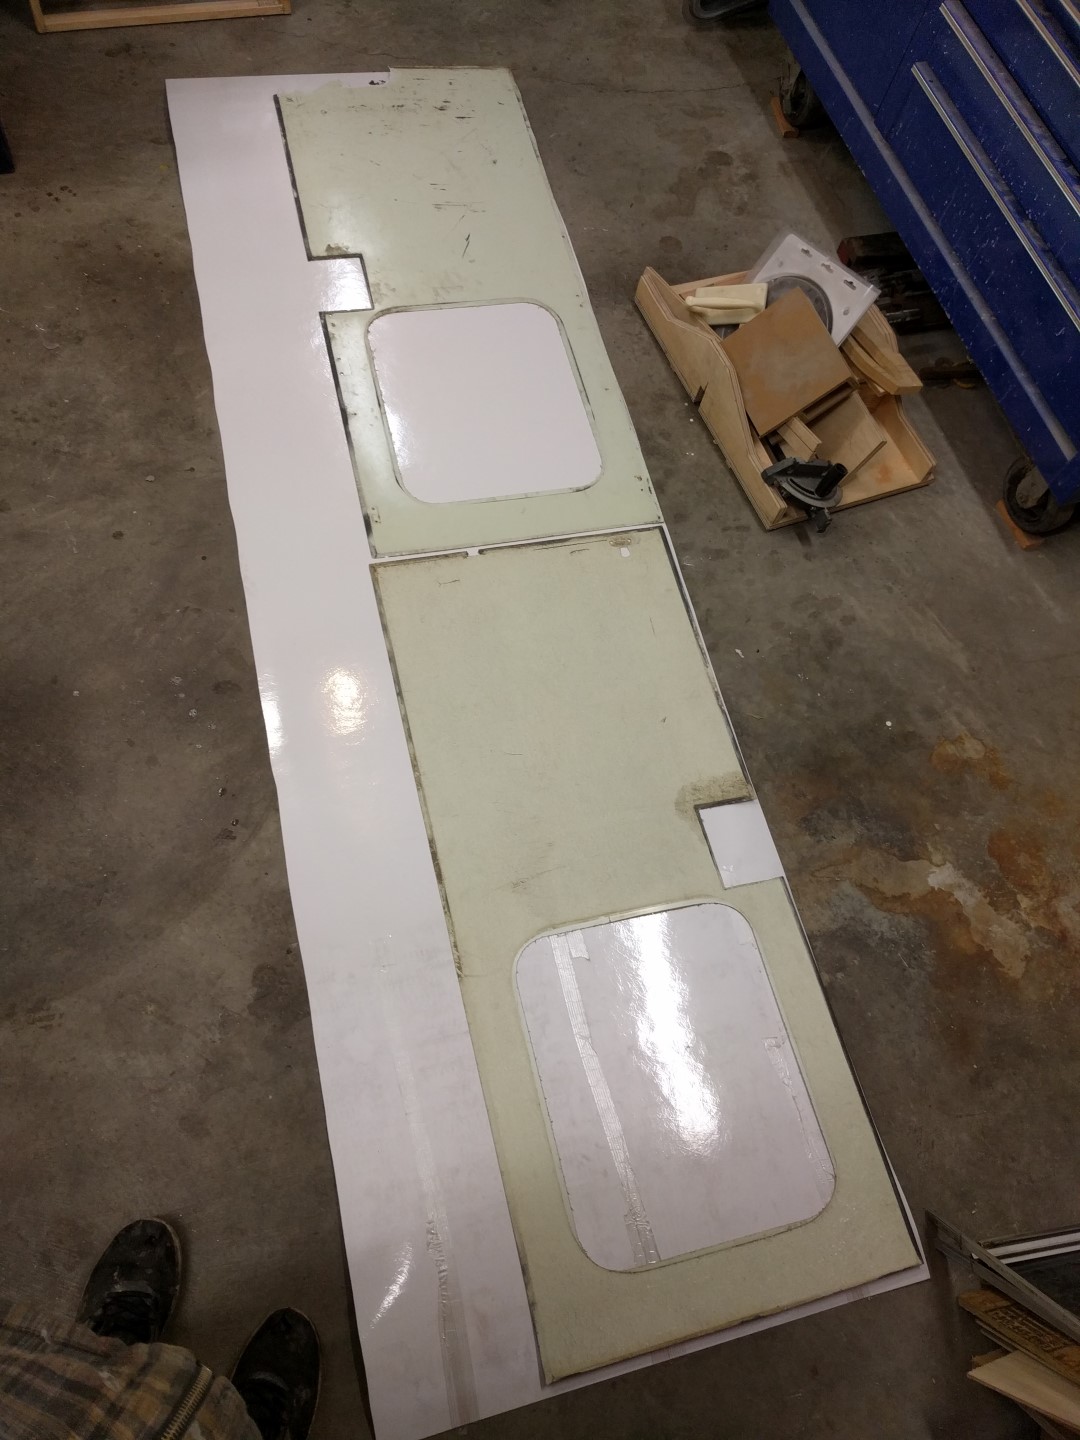
Anywhere the roof was sagging and the fiberglass, sort of, “held” the shape of the sag, I took a cutoff wheel and cut a slit in the roof. From there the roof was placed upside down on two tables with the “I” shaped beams and the tables holding it in its final shape. The slits were fiberglassed over with epoxy fiberglass resin from US Composites.
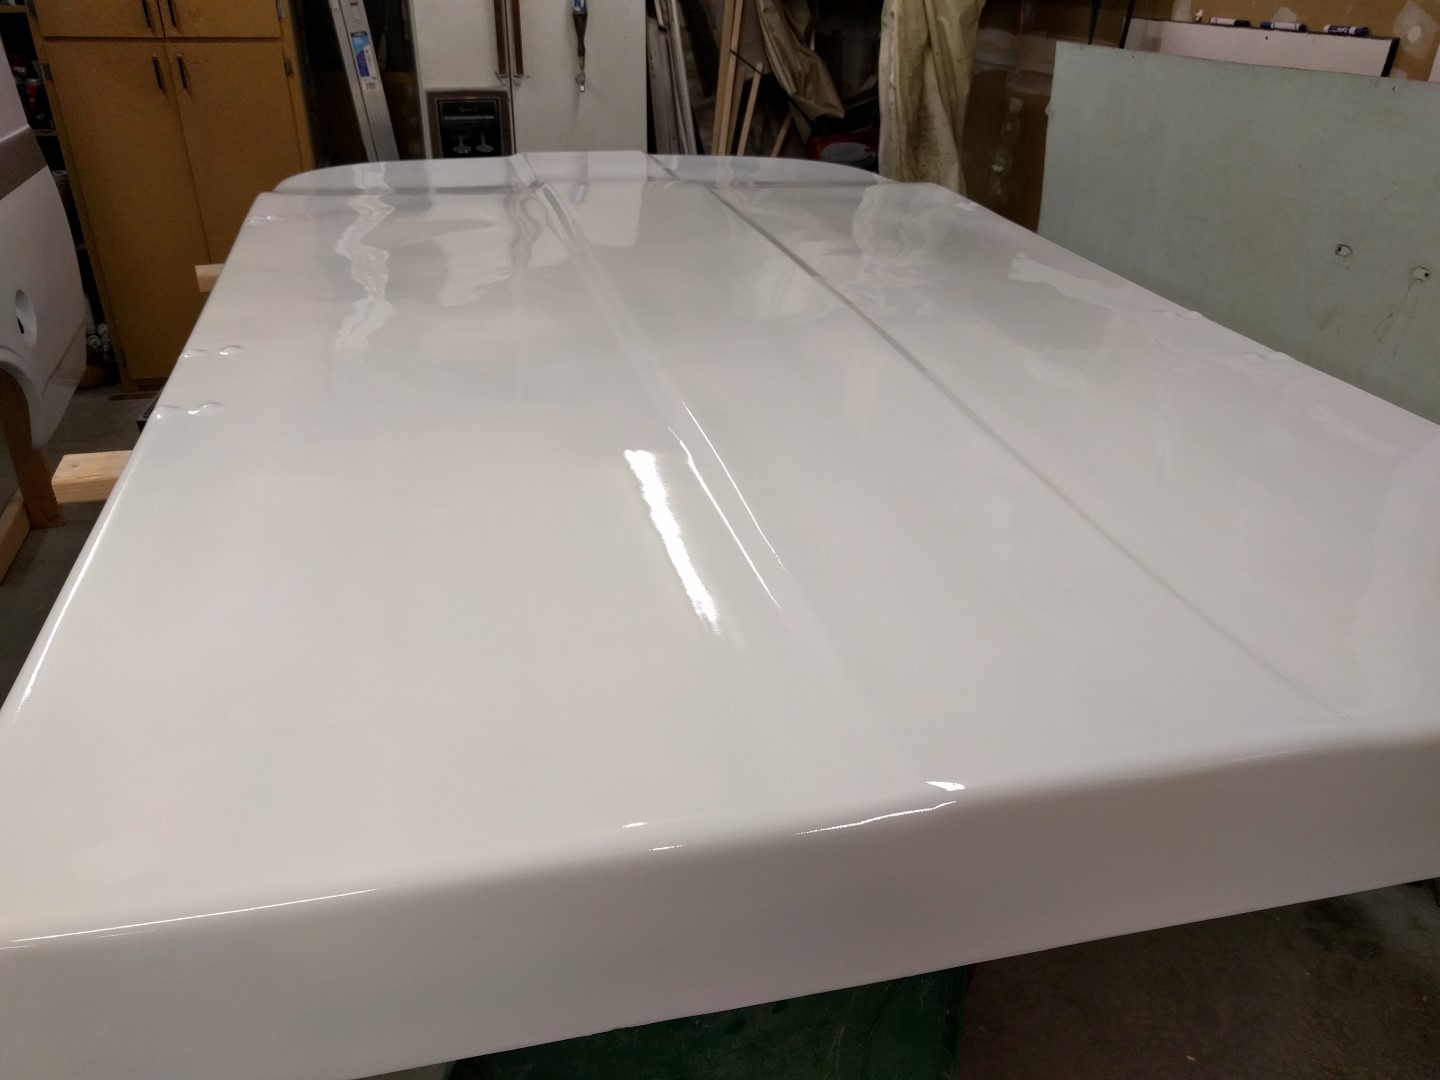
The white paint used was standard appliance paint applied with a paintbrush.
The only bolts that go through the roof are the ones that hold the scissor mechanism down. And I even fiberglass over these on the top, leaving little nipples. This roof will never leak.
In the areas where fiberglassing from the inside was required body work on the outside was also required. An orbital sander and body filler took care of that nicely. Everything was sanded and then painted! See the Paint section for more details on that.
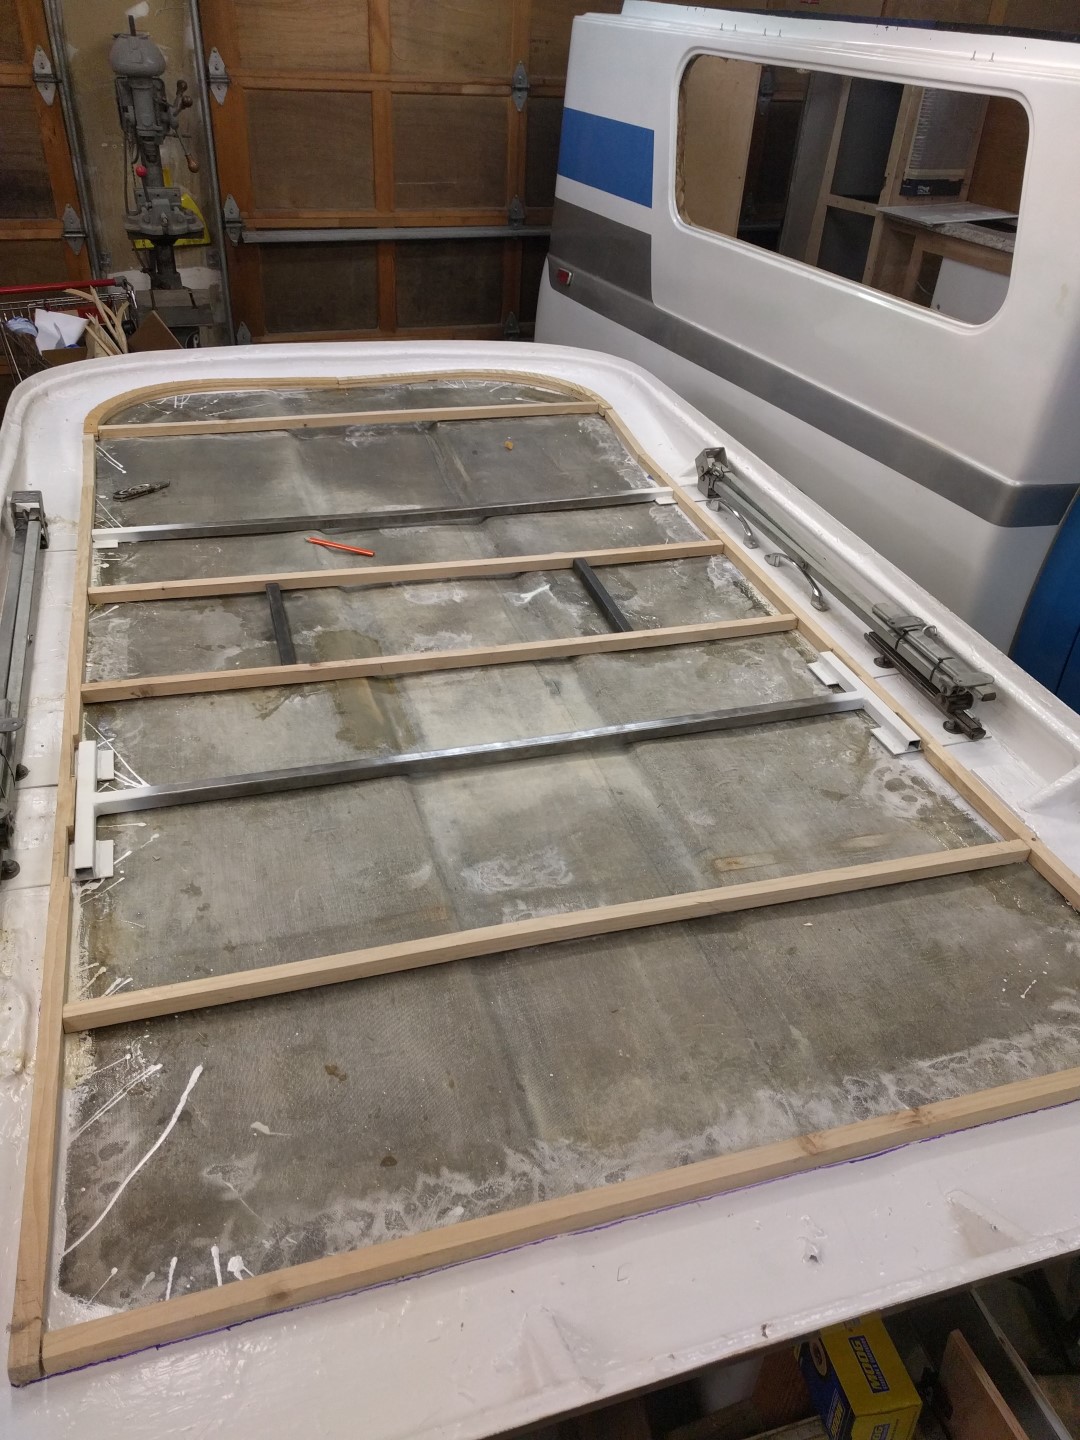
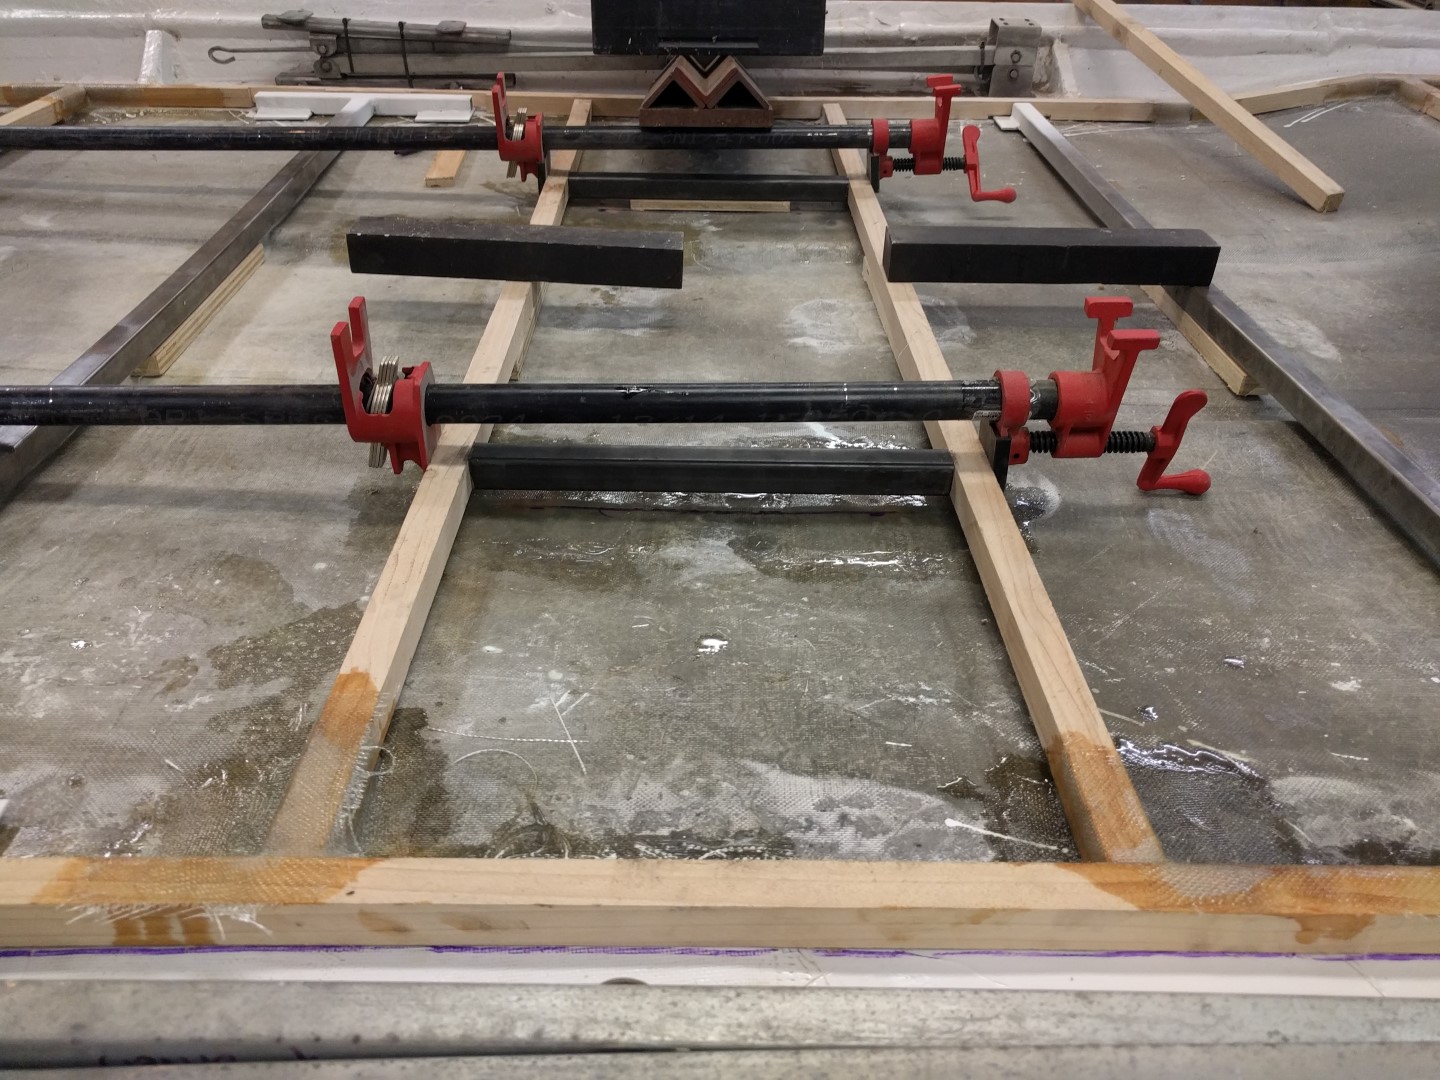
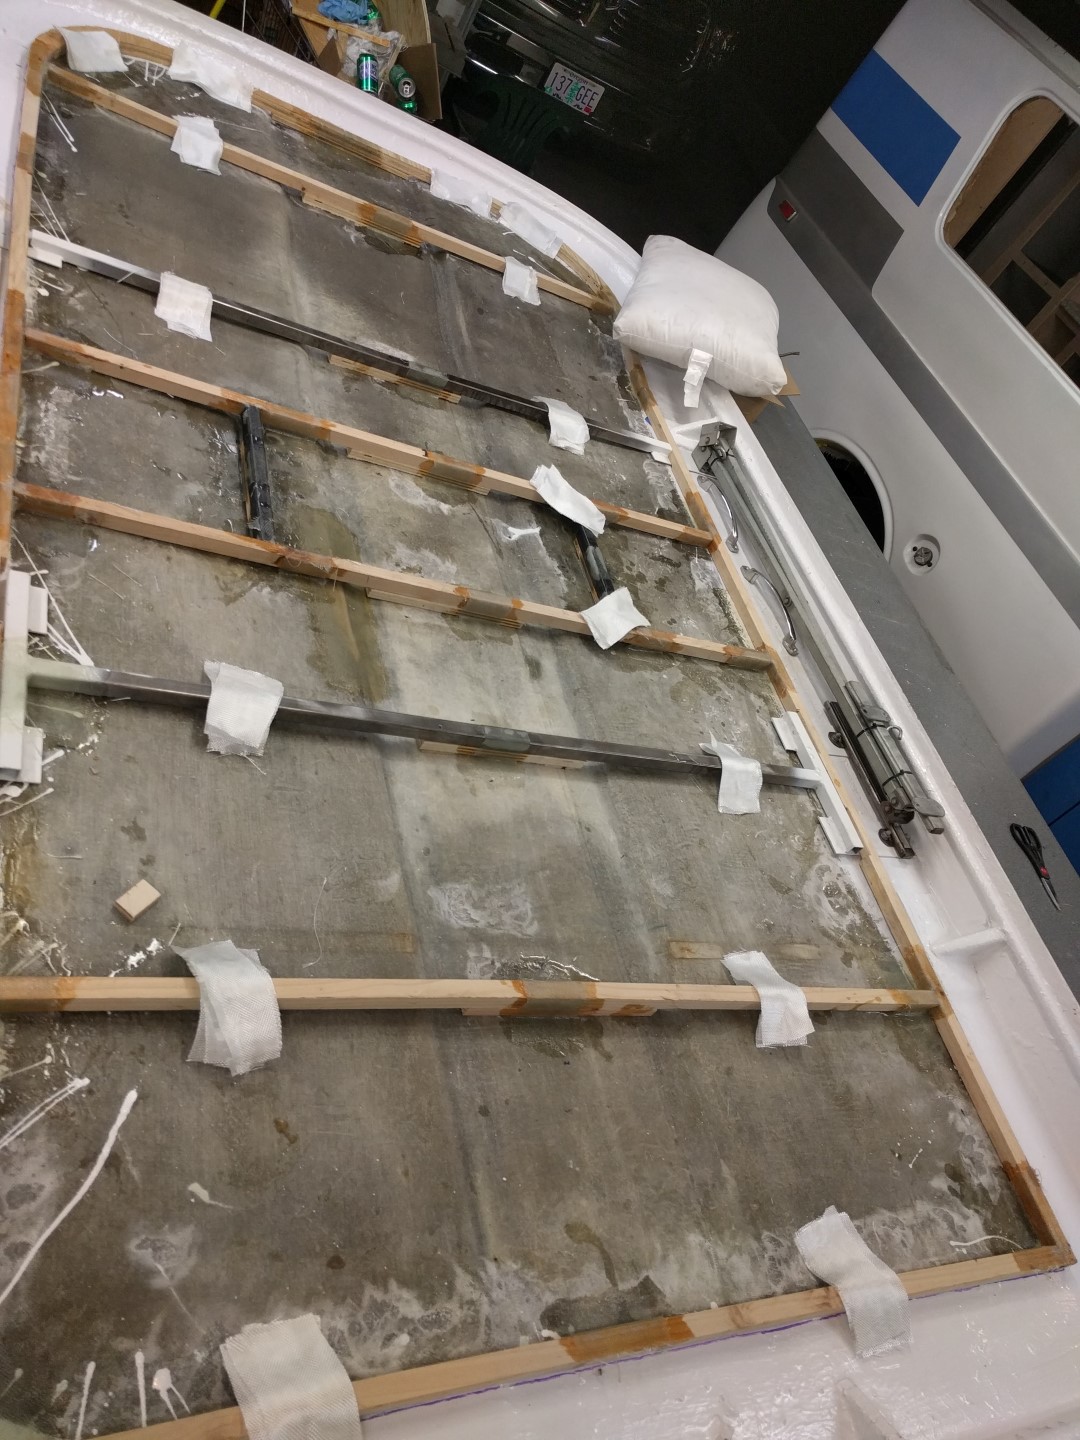
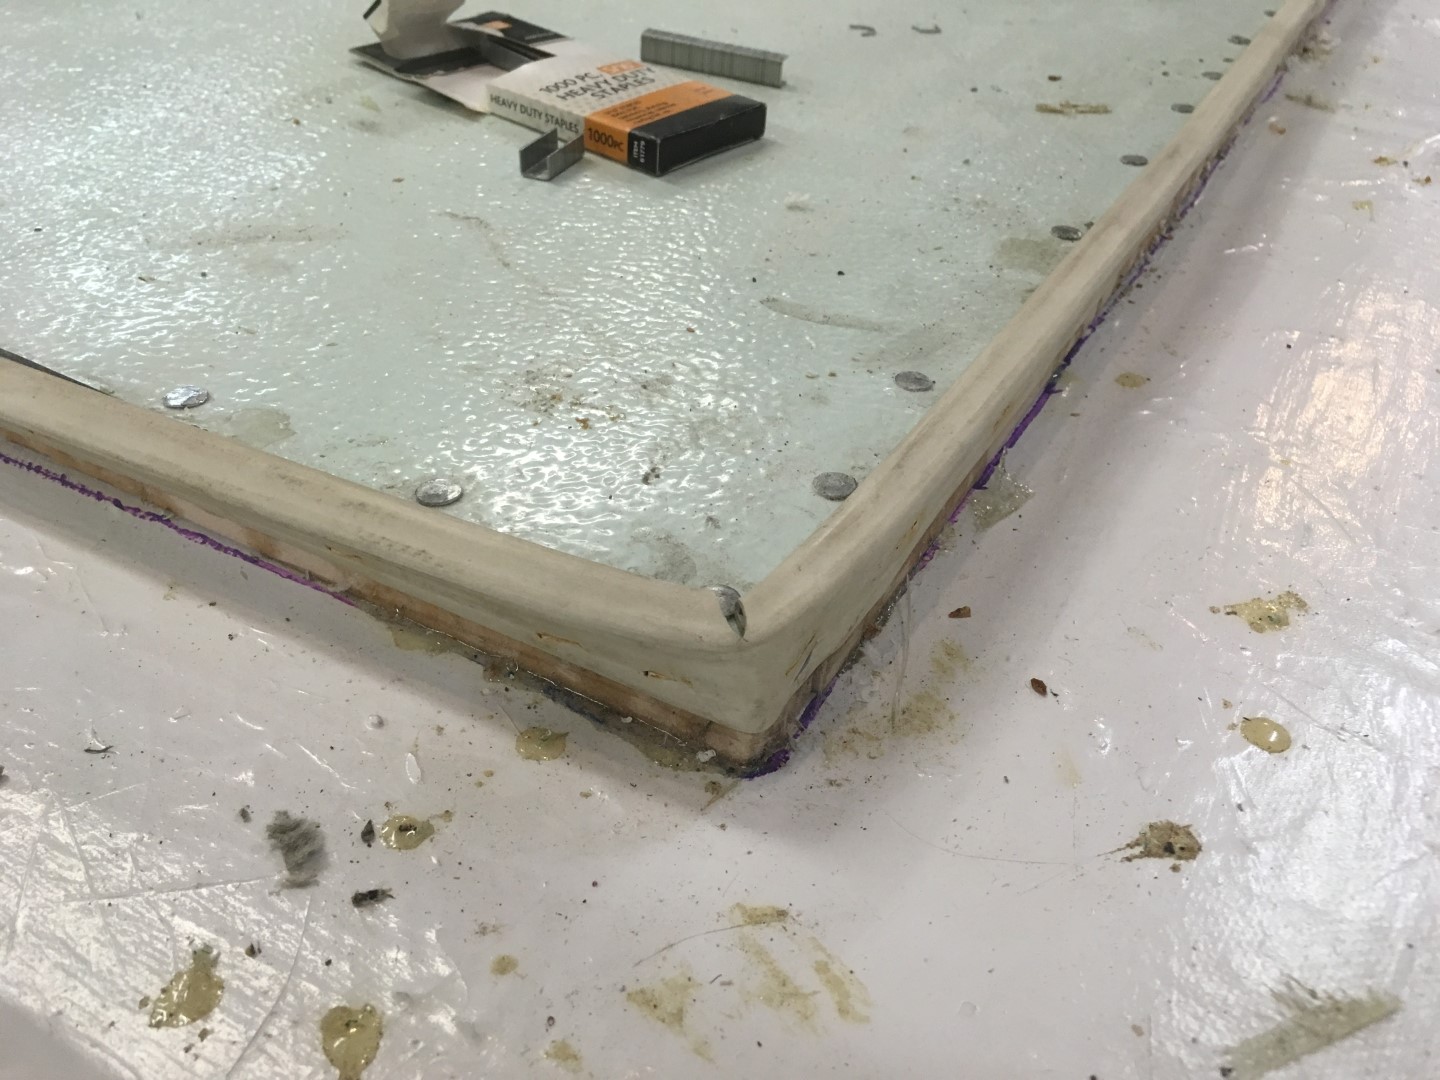
I mimicked the same stock wood frame plus the hybrid metal frame. A hybrid frame over entirely metal frame is almost required to keep the weight of the pop-up down. Another reason to keep the wood frame around the perimeter is because the canvas is attached purely by staples! Stapling into metal is quite difficult. One other metal bar in the middle was added which is where the two handles on the inside are screwed to; just for a bit more rigidity. Same fiberglass strips were used to hold down the wood and metal frame.
The stock foam insulation was used for the most part until running; then some fiberglass insulation was used instead. Next was covering the insulation with the stock fiberglass sheet. Applying a bunch of fiberglass resin to the wood frame and a few pieces of fiberglass and weighting it down was the method I used. Ideally, one would secure the frame and the sheet at the same time but its not an easy task.
Securing the canvas and trip is the opposite of removal, stapling each one down (three trips around the roof):
- Rubber right angle strip
- Canvas
- Vinyl like fabric strip
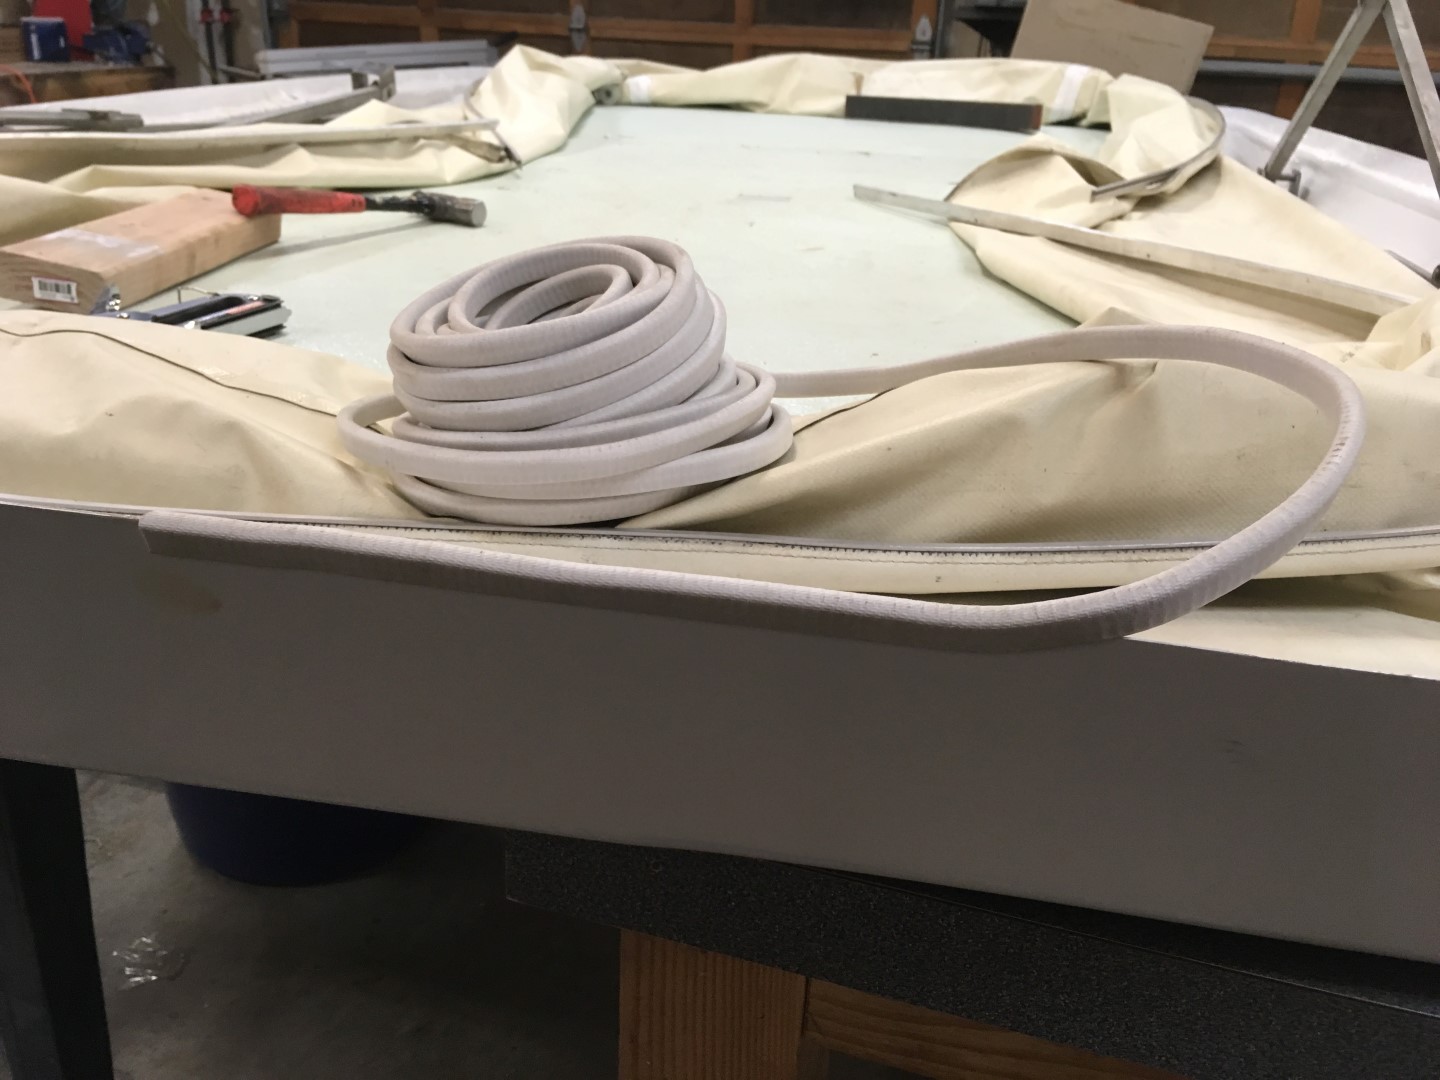
Finally, some new trimlock u-trim on the perimeter of the roof where it sits on the shell. And attaching the handles for poppin’ the pop-top.


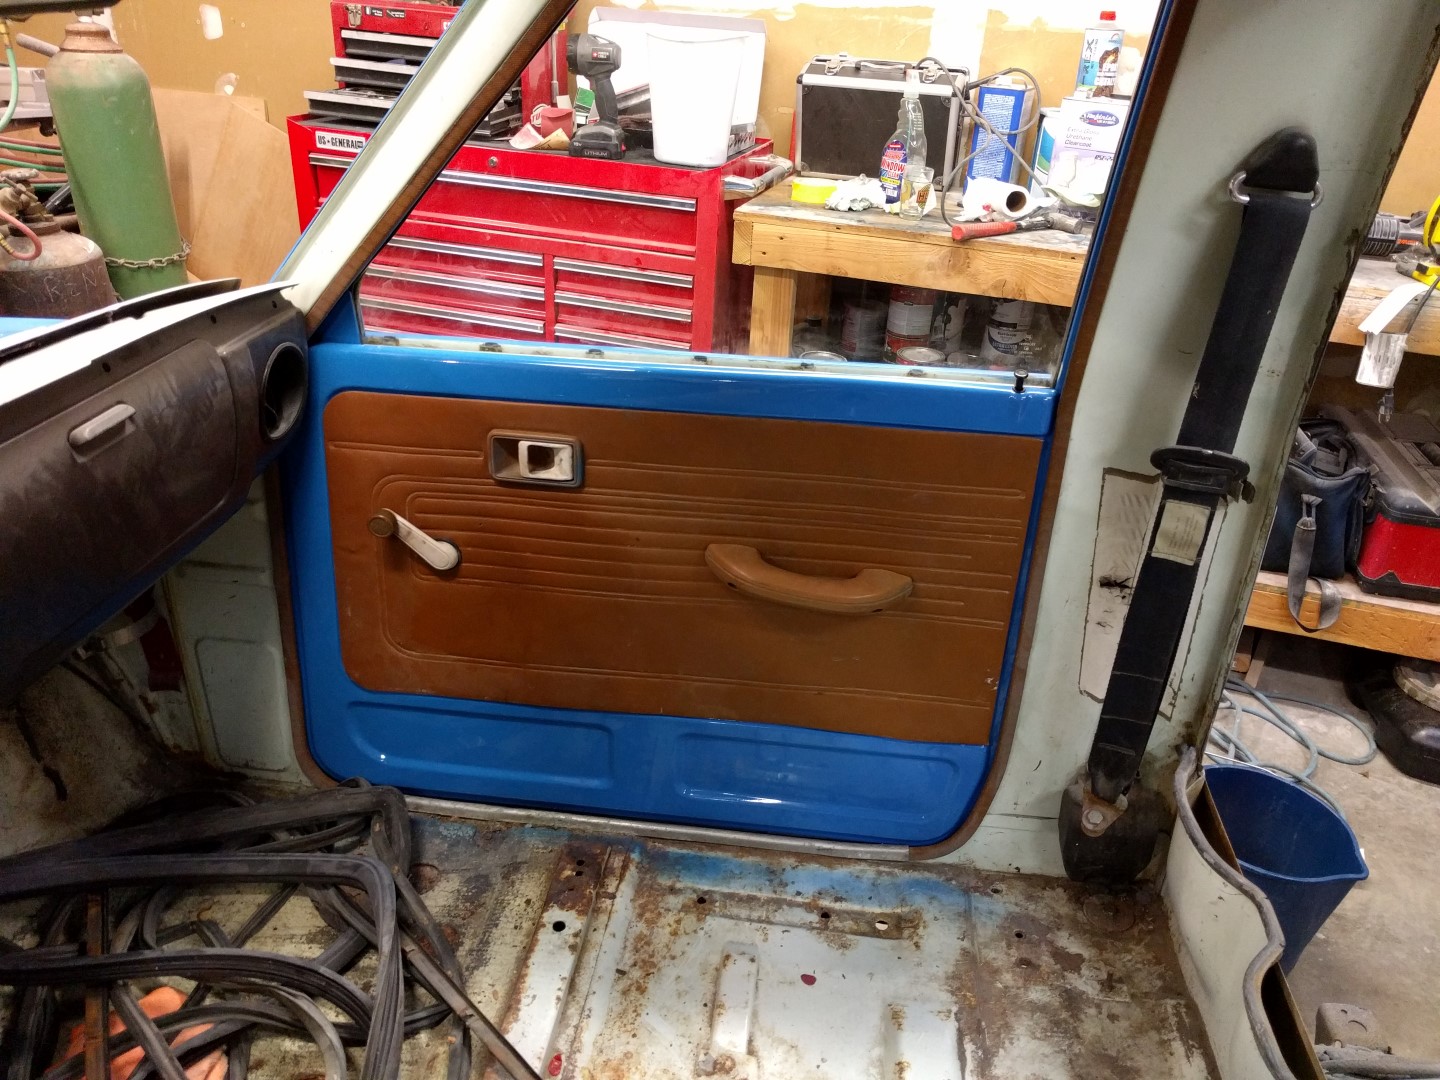
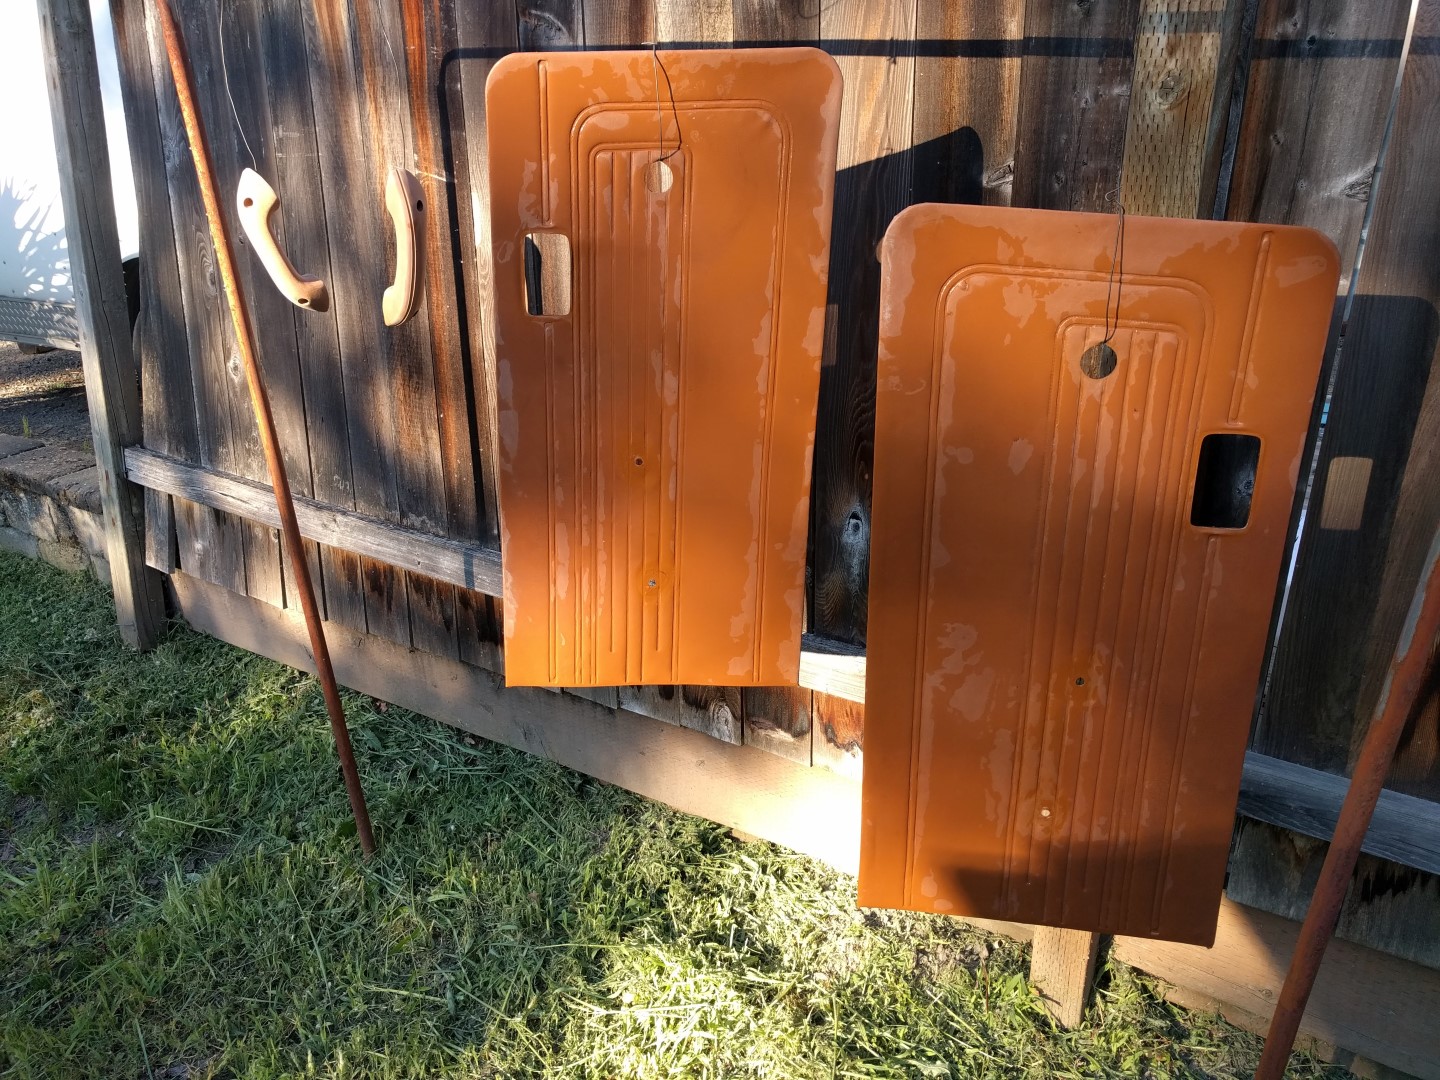
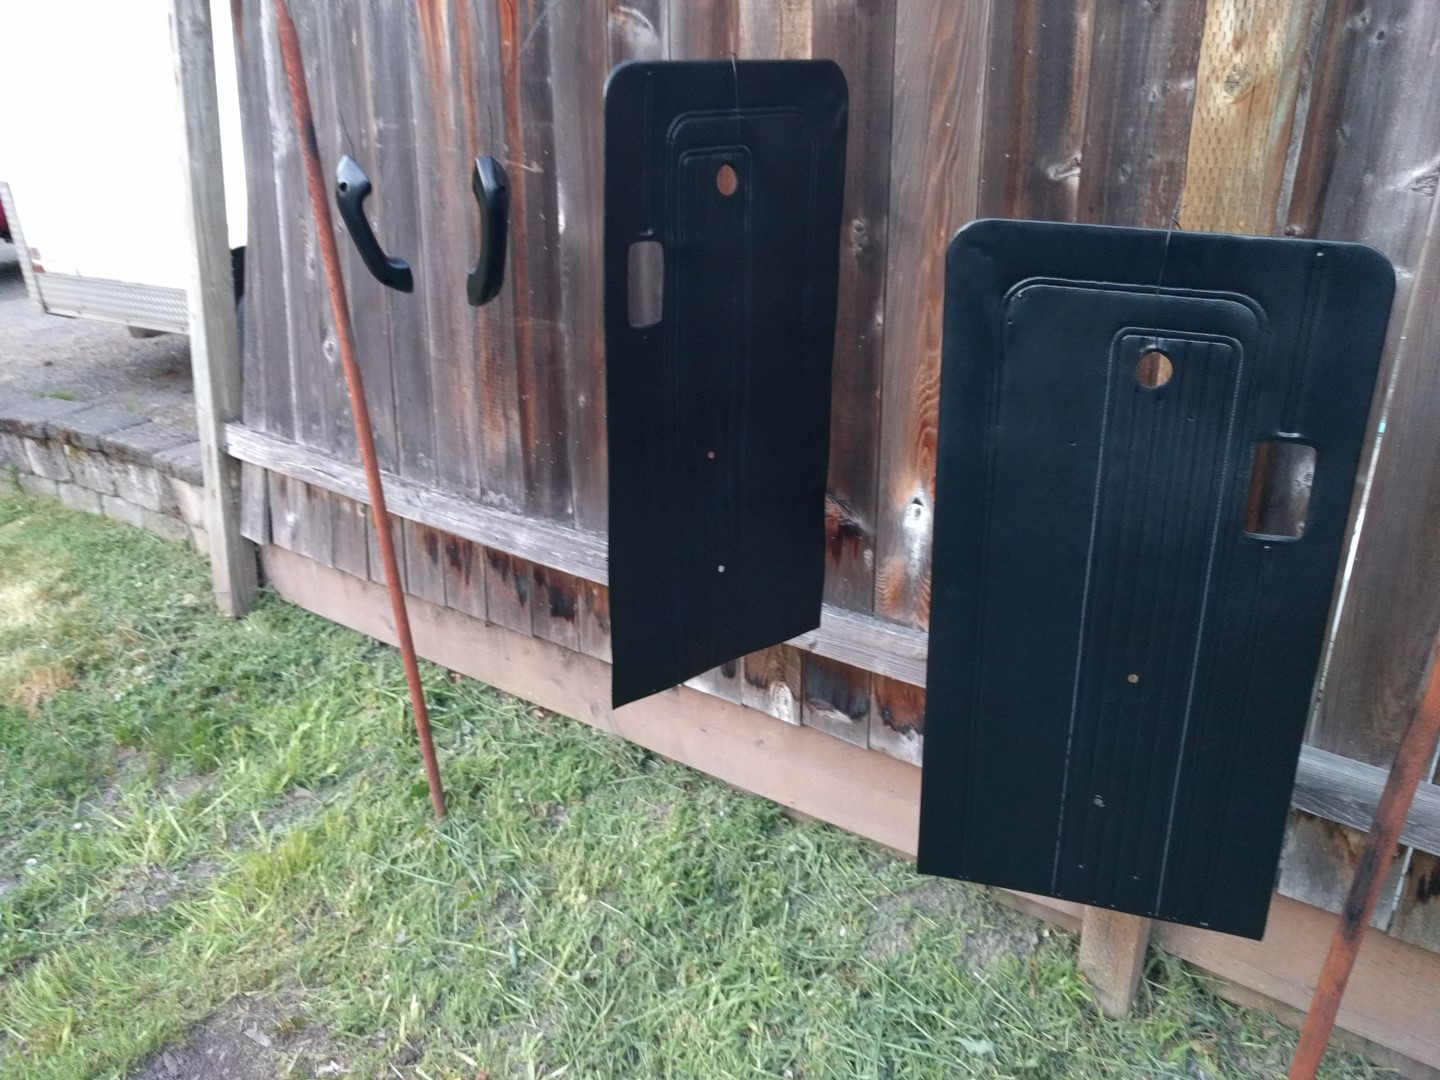
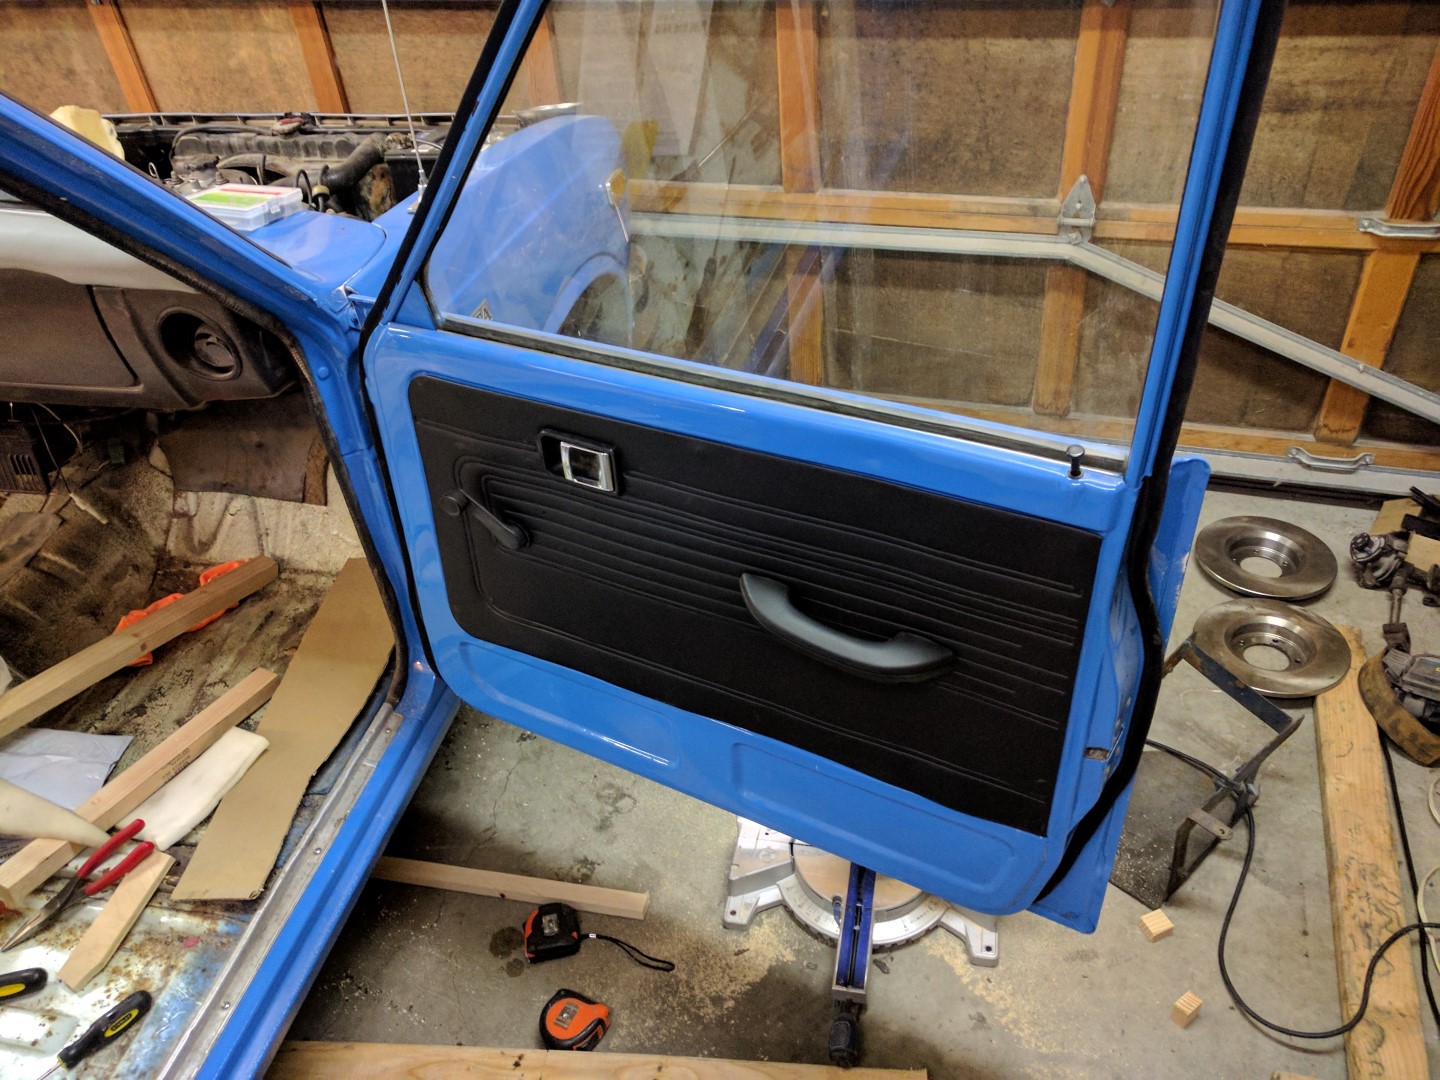
Door Panels
The door panels were painted black and some black trim, door handle, and window handle from a donor truck at PickNPull converted the ugly brown into an awesome black feel. Read up on painting vinyl material. It is not hard but need specific paint.


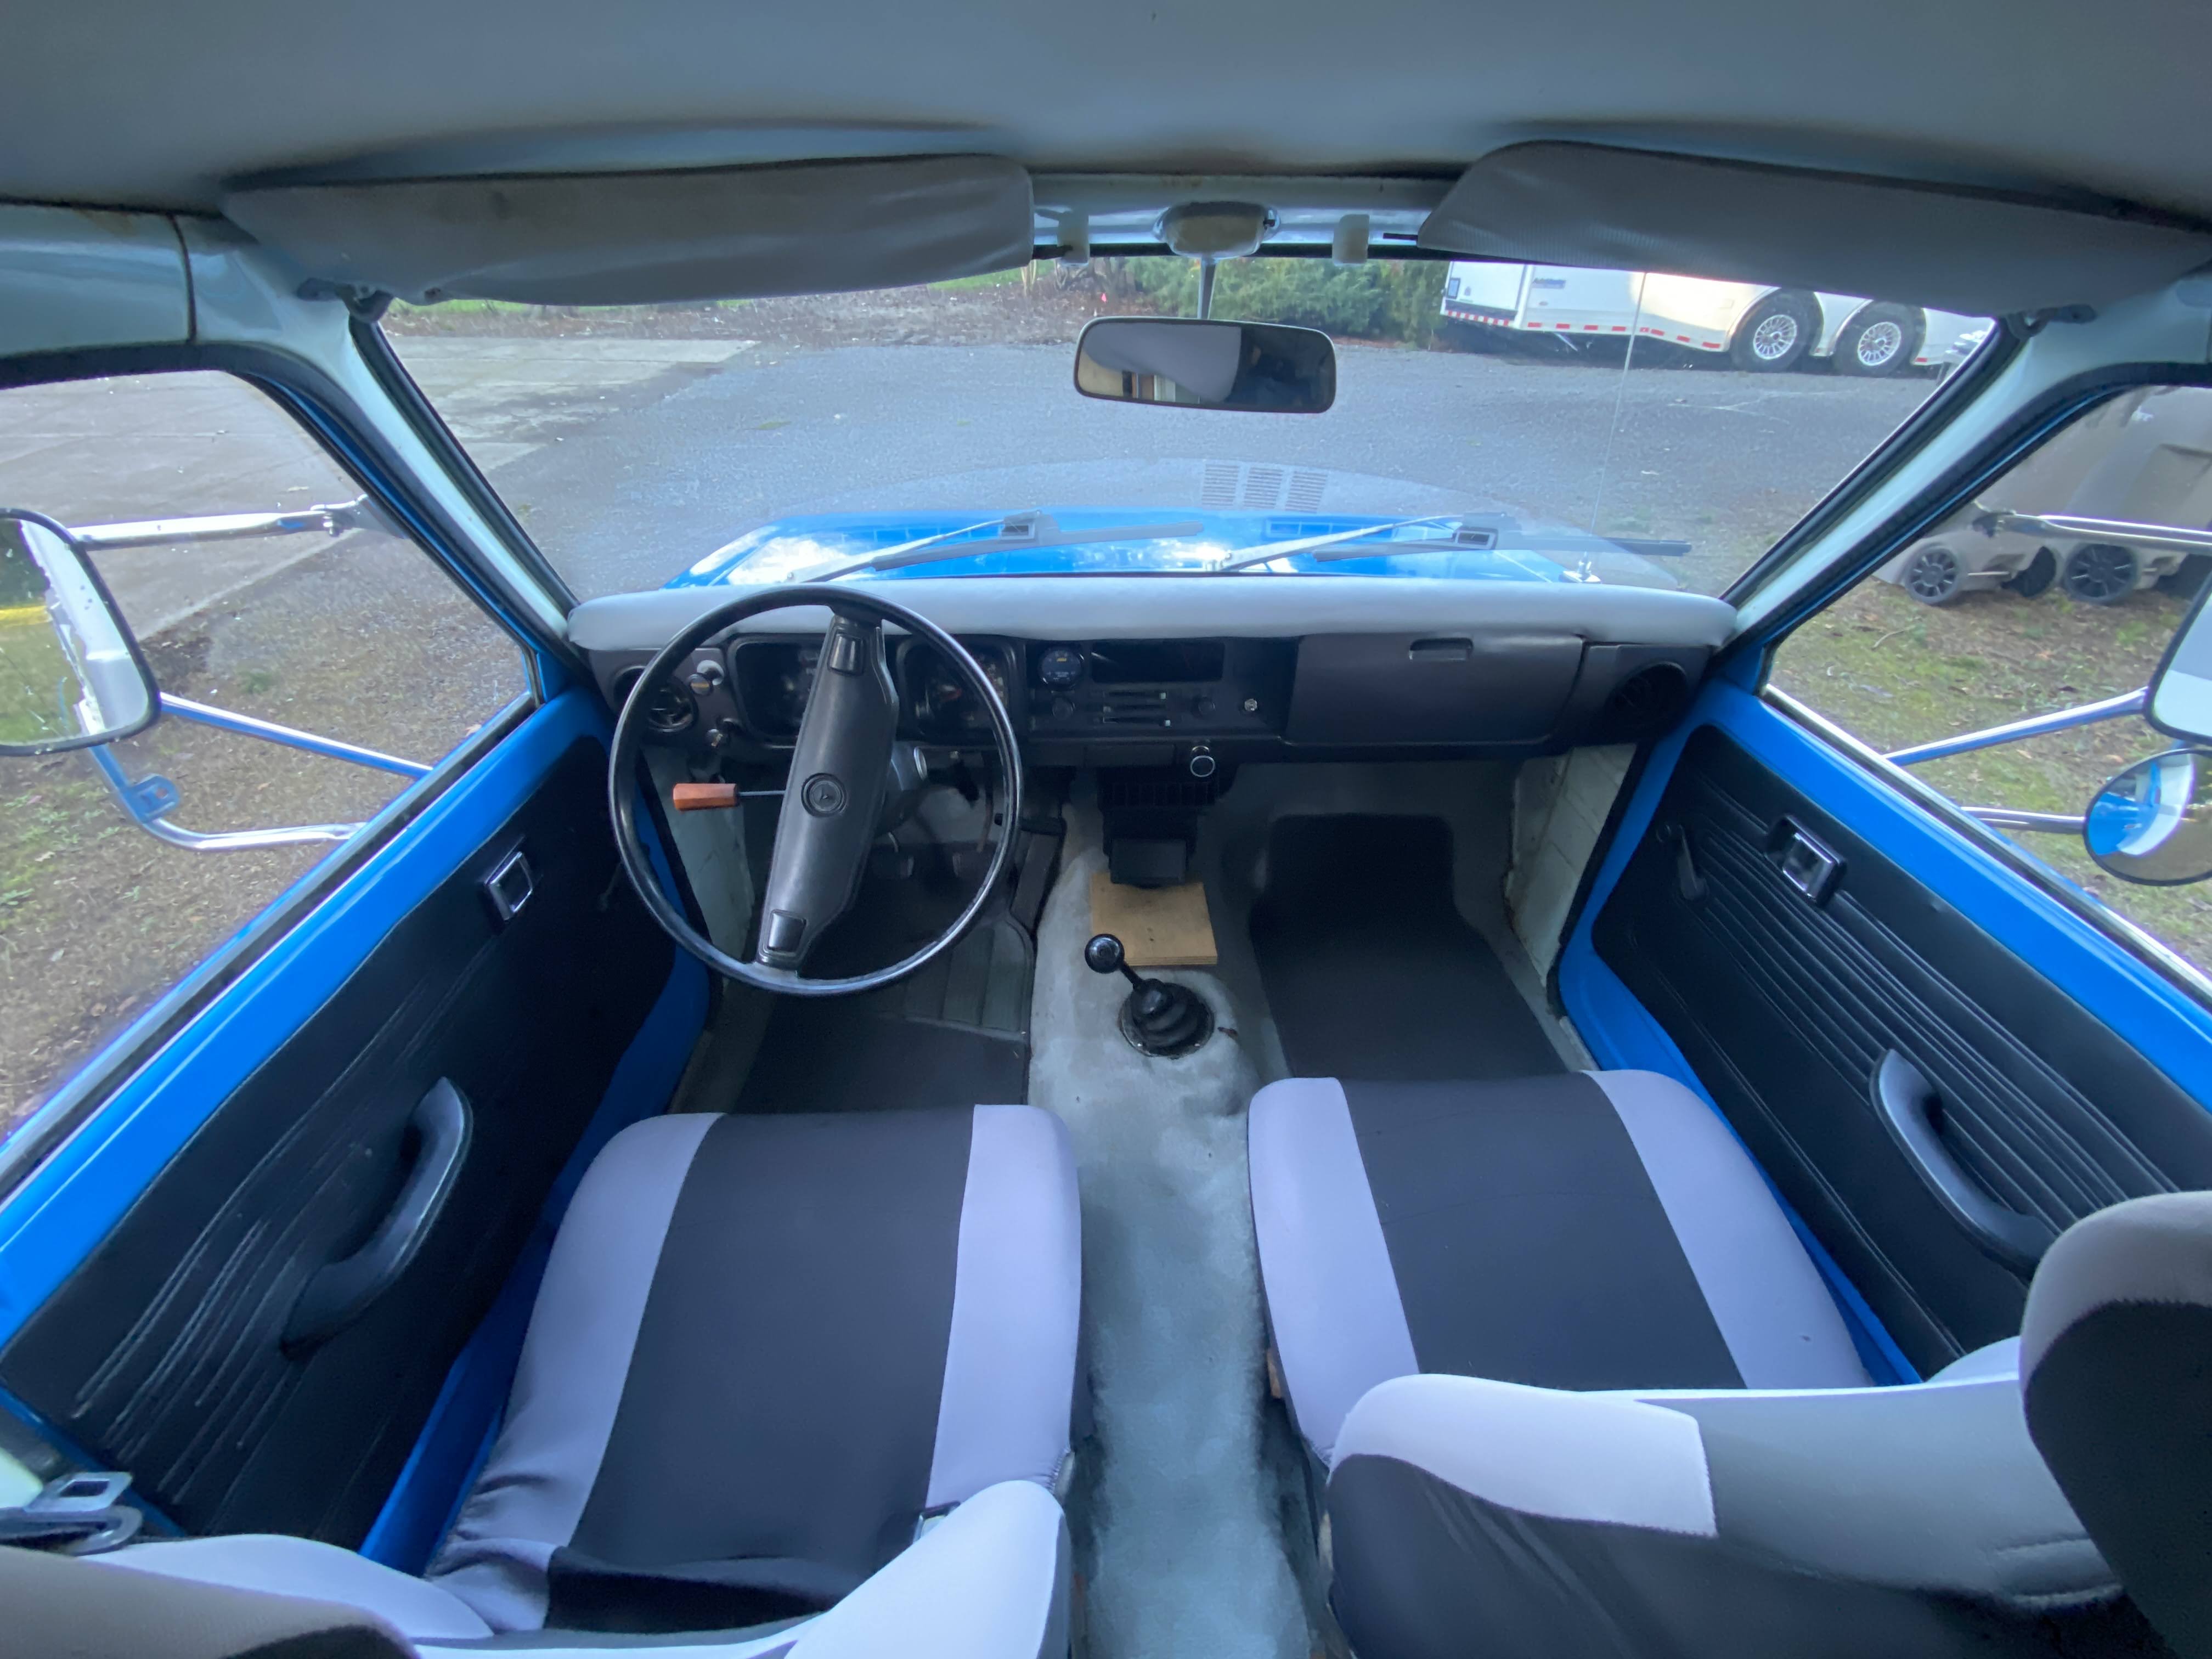
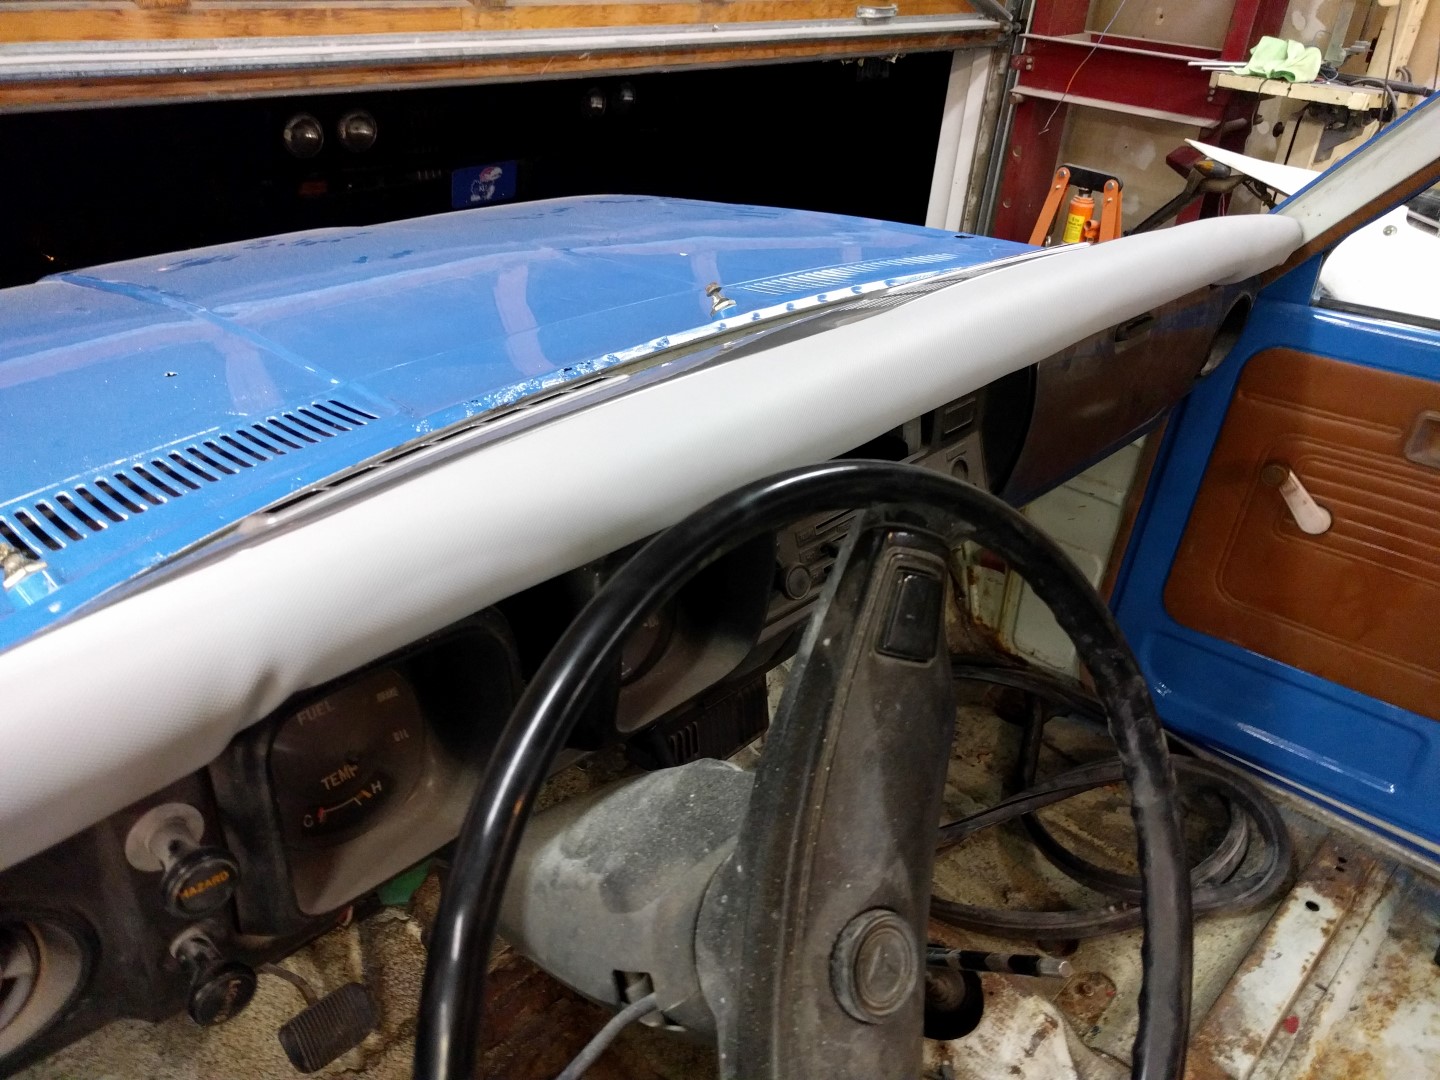
Dash
The dash on these rigs usually deteriorates and creates very large cracks in the plastic/foam dash board. Instead of finding a new dash I just got some headliner material and wrapped the deteriorated dash and then wrapped it again in a silver vinyl material.
The metal part of the dash was painted with the same paint used to paint the stripe on the shell. Then it was clearcoated.

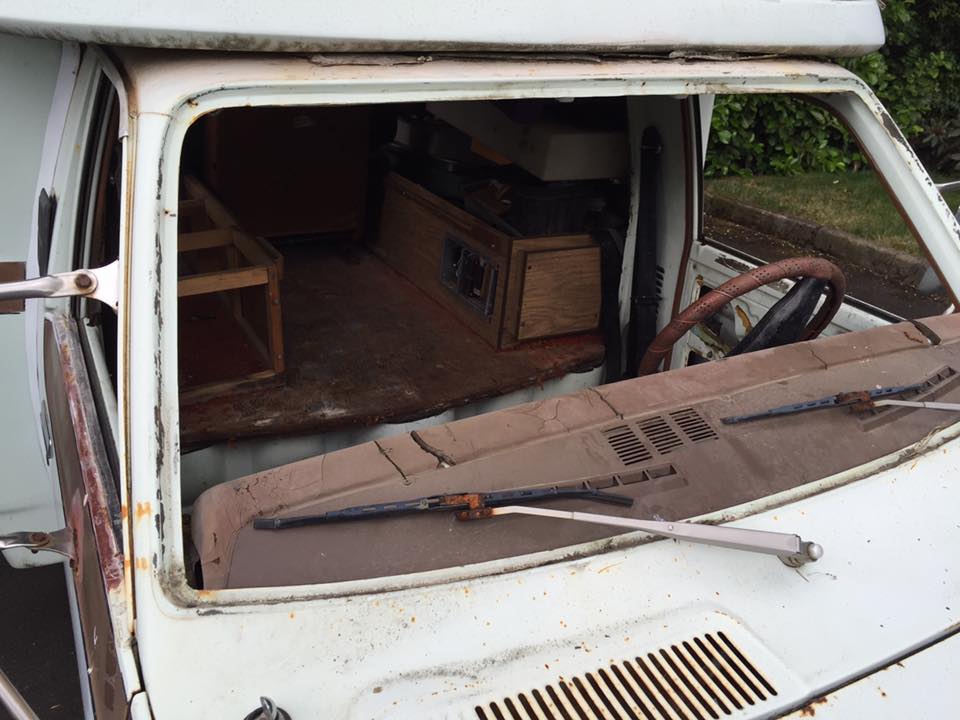
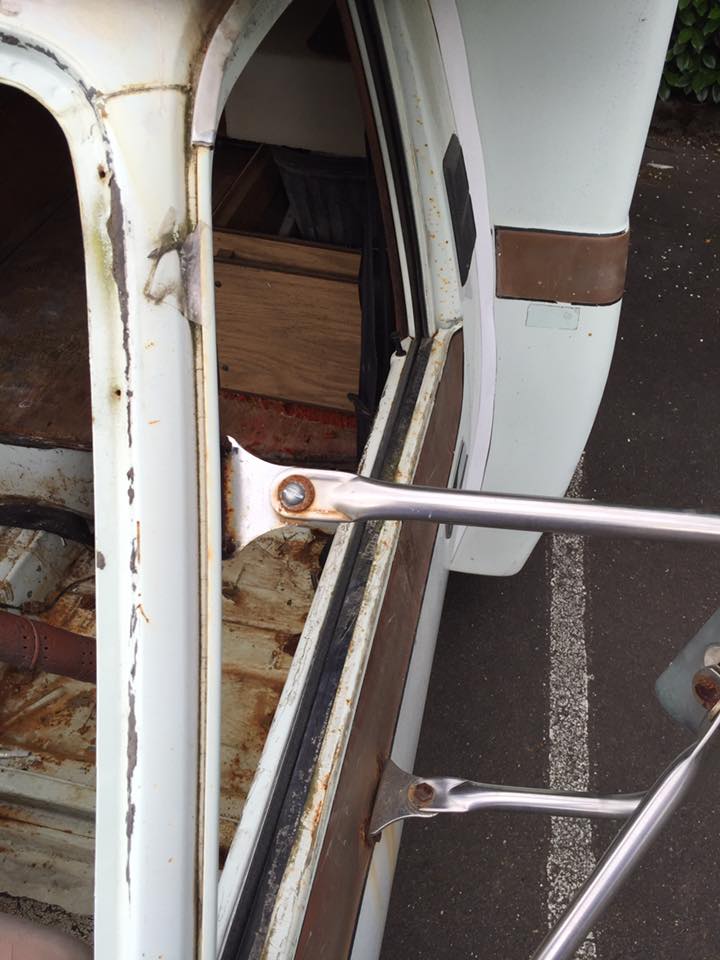
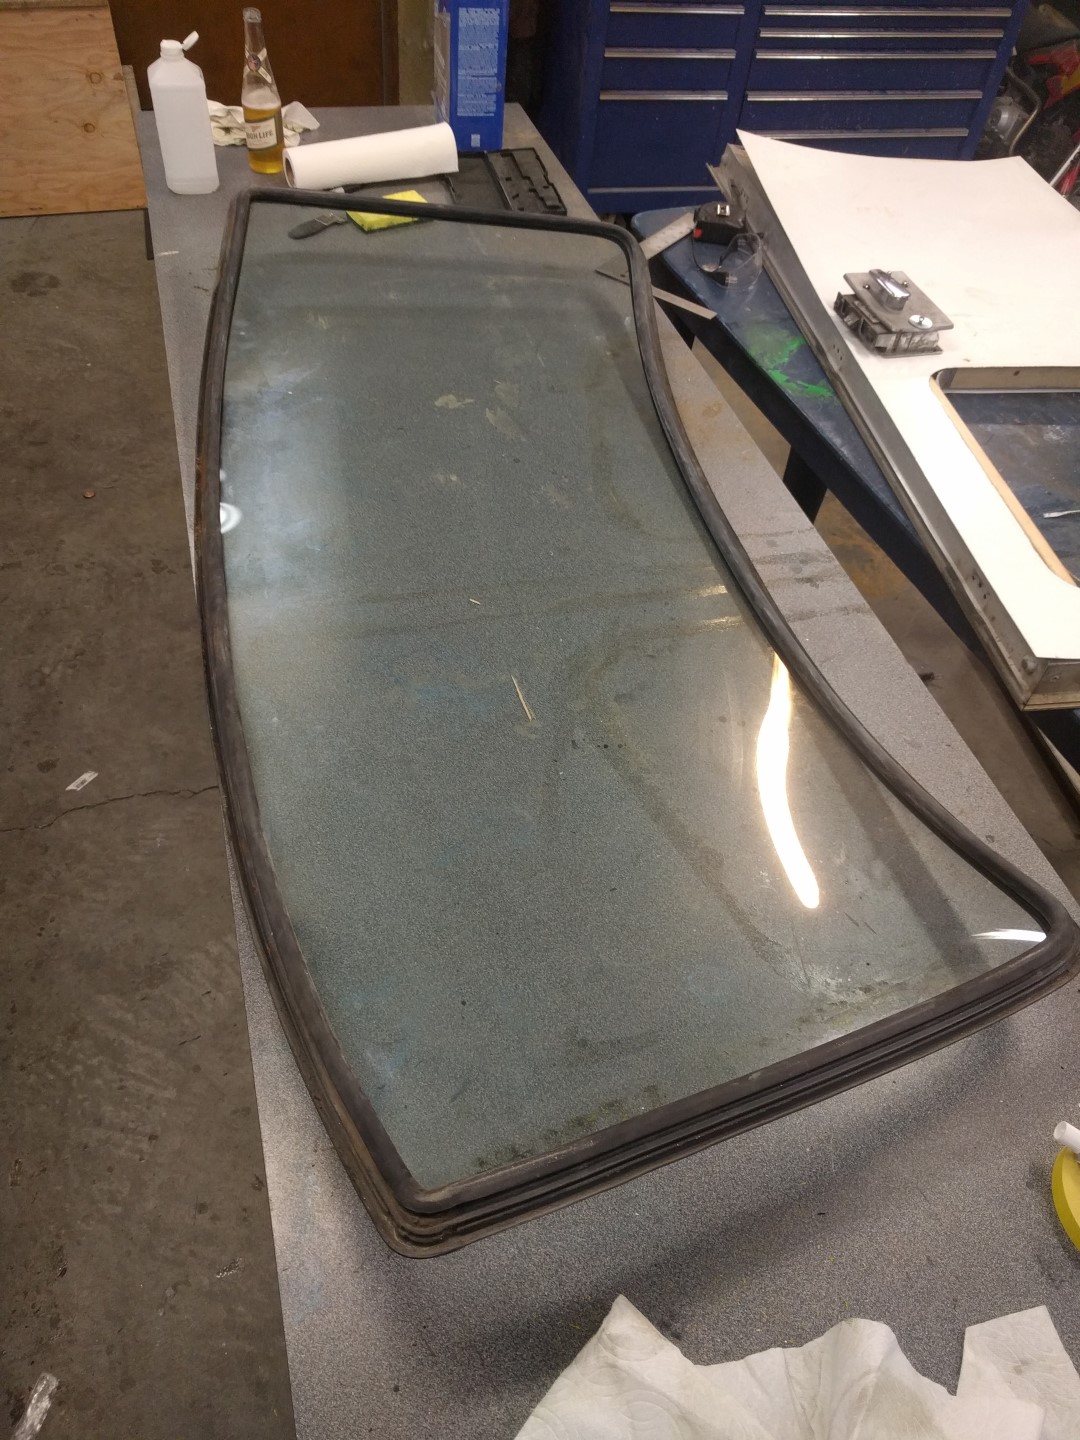
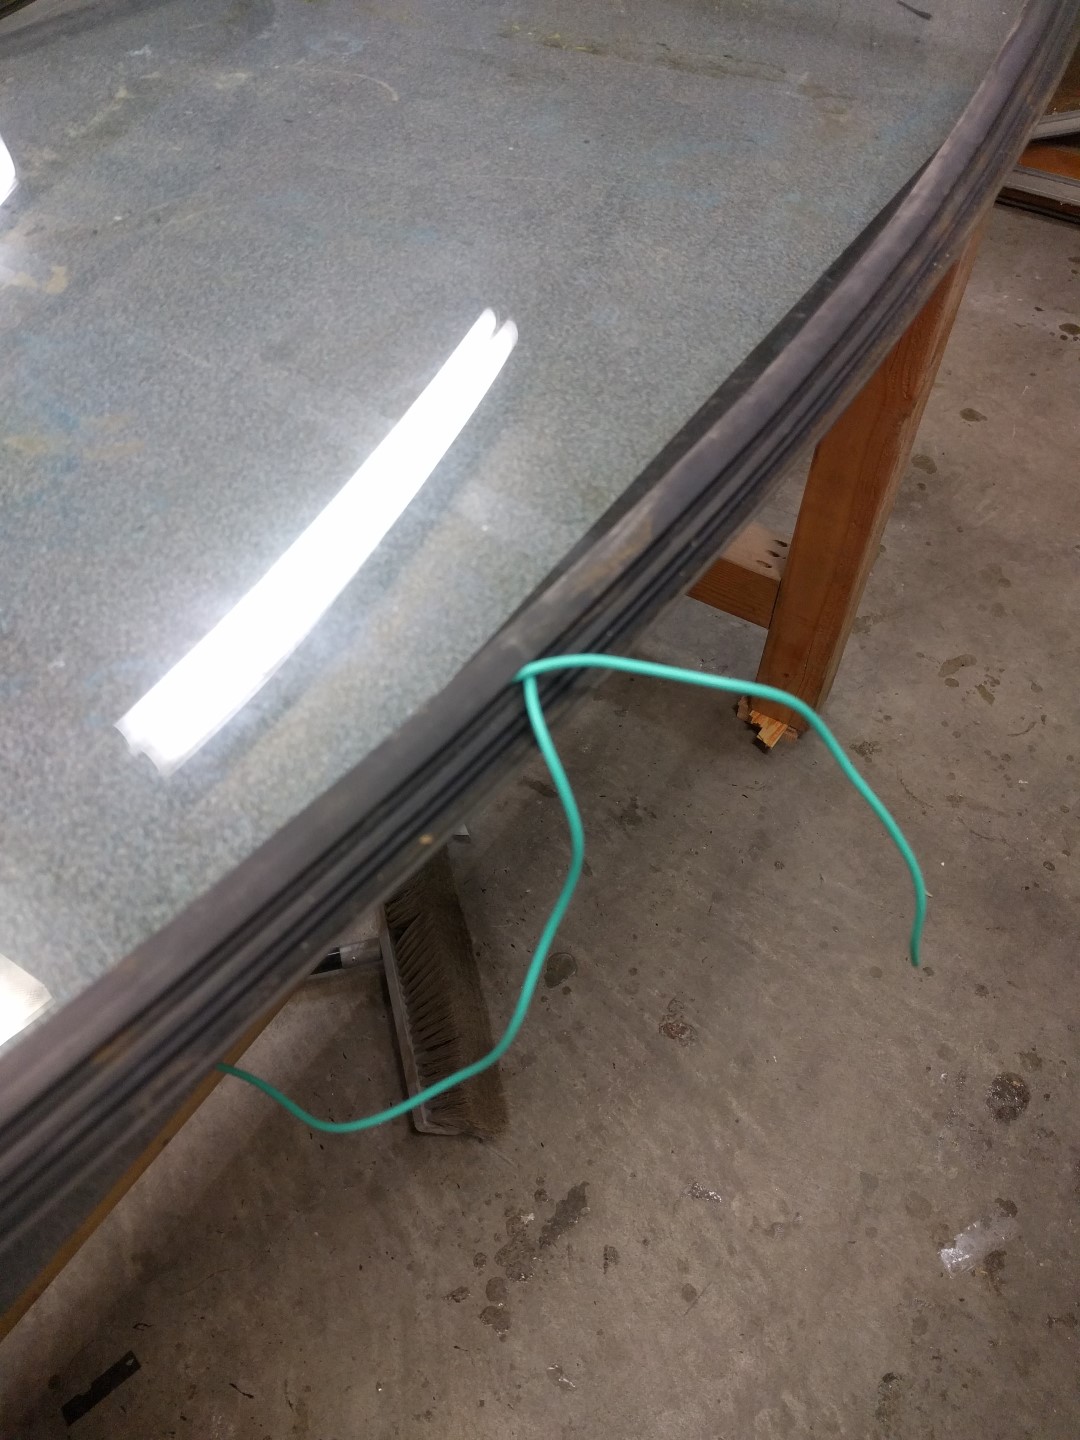
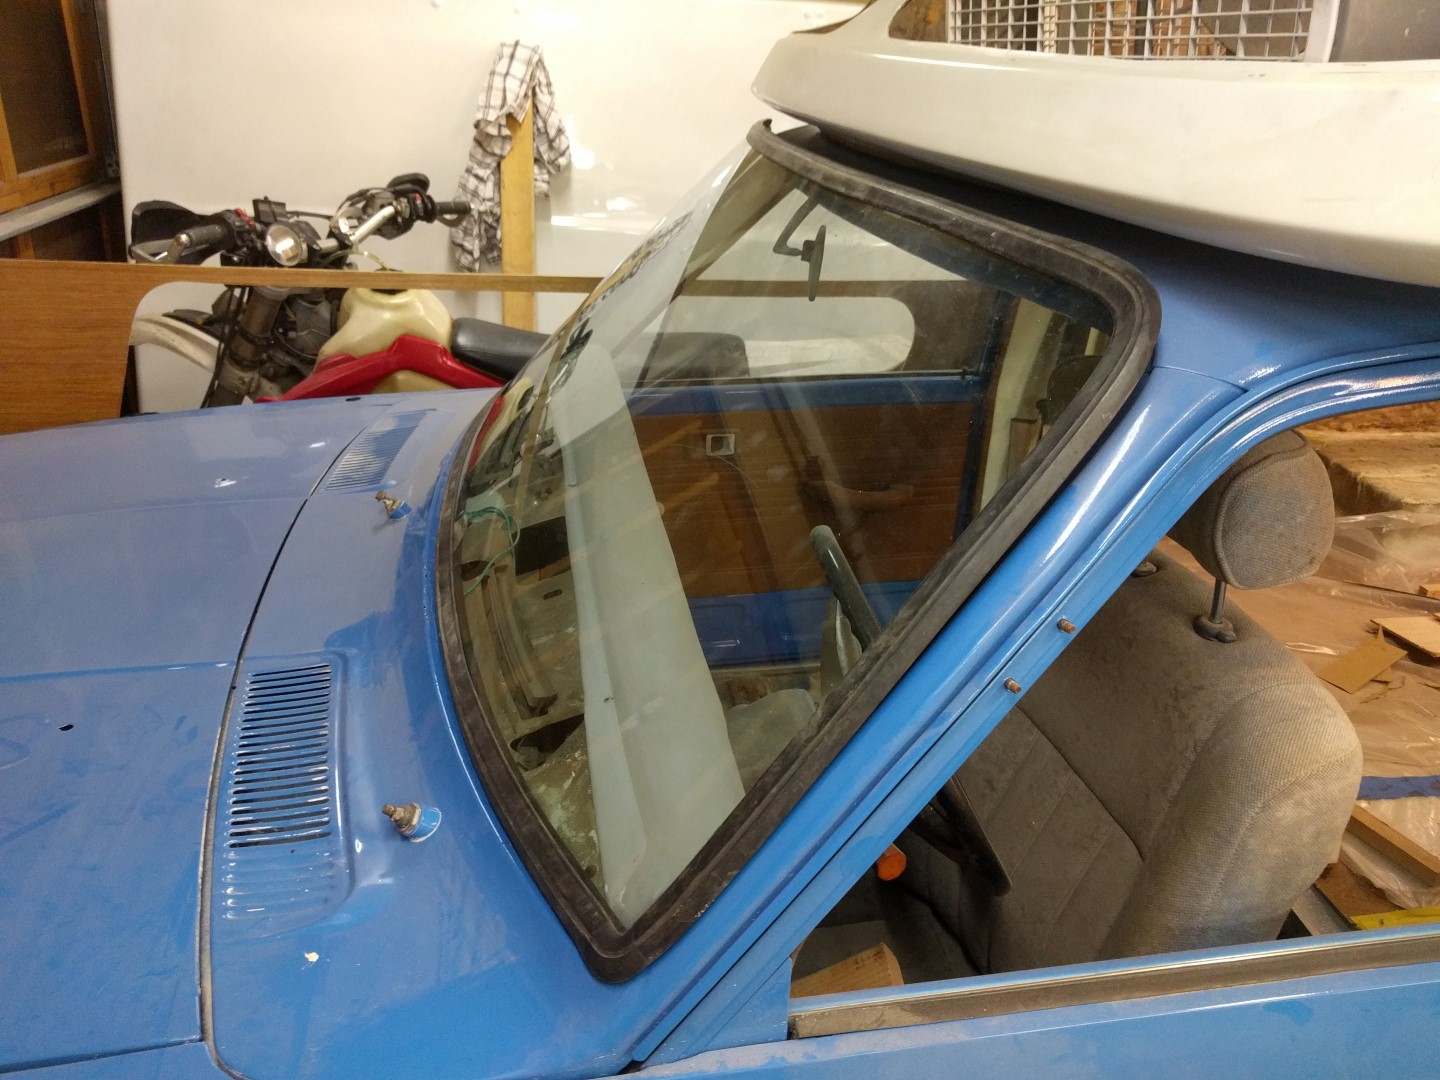
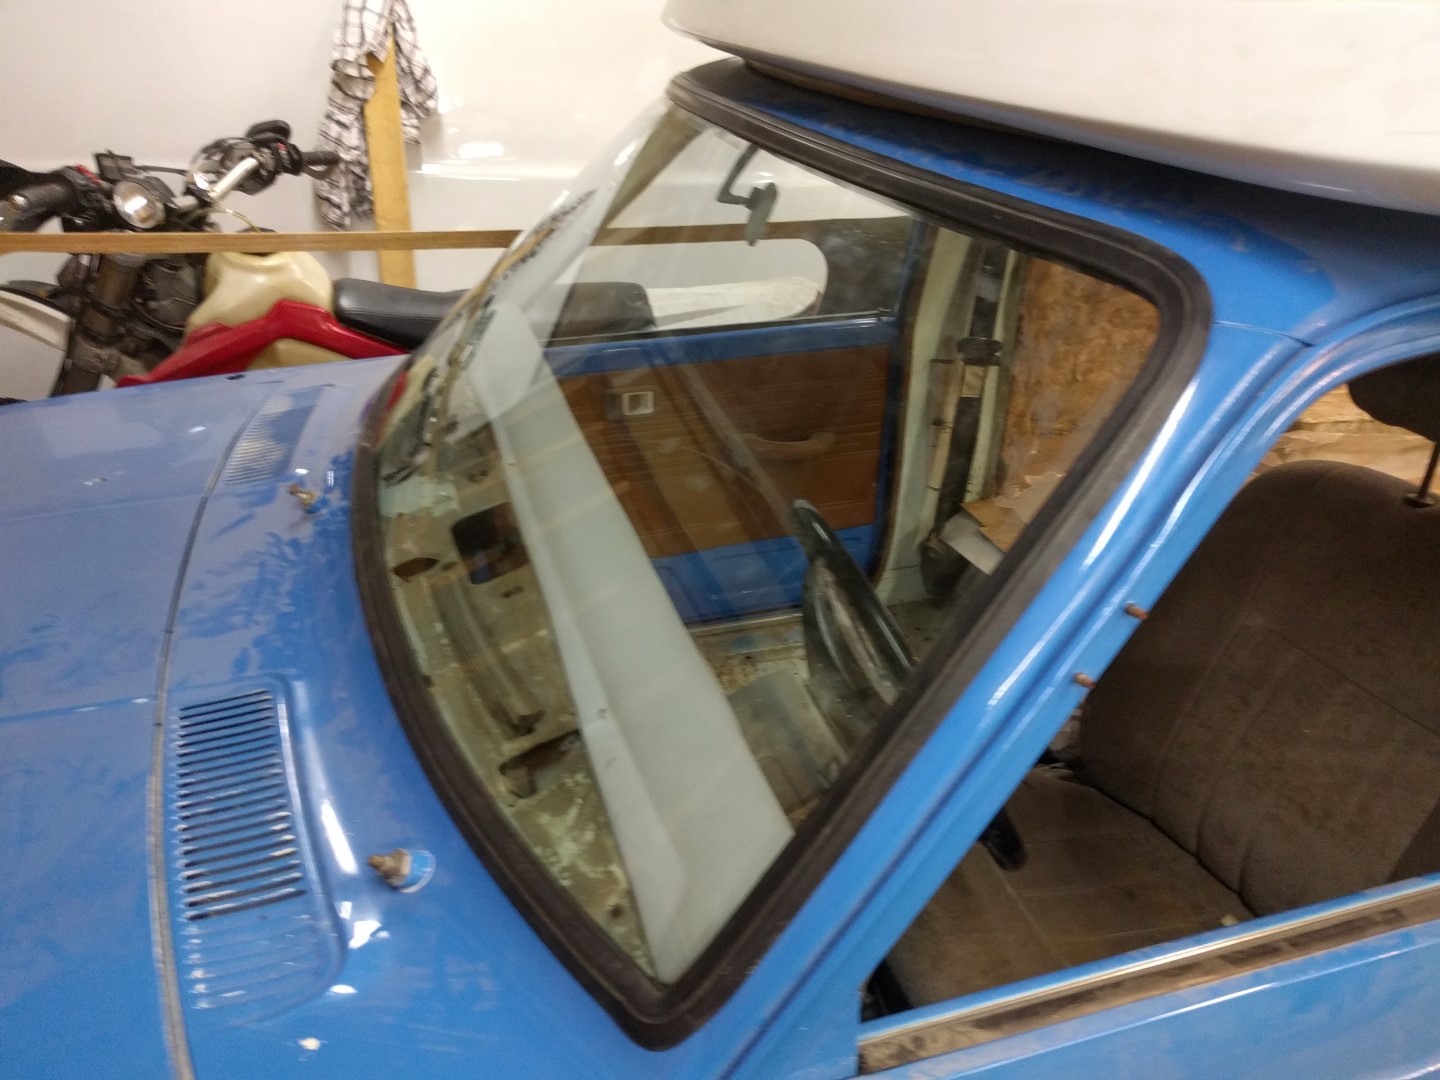
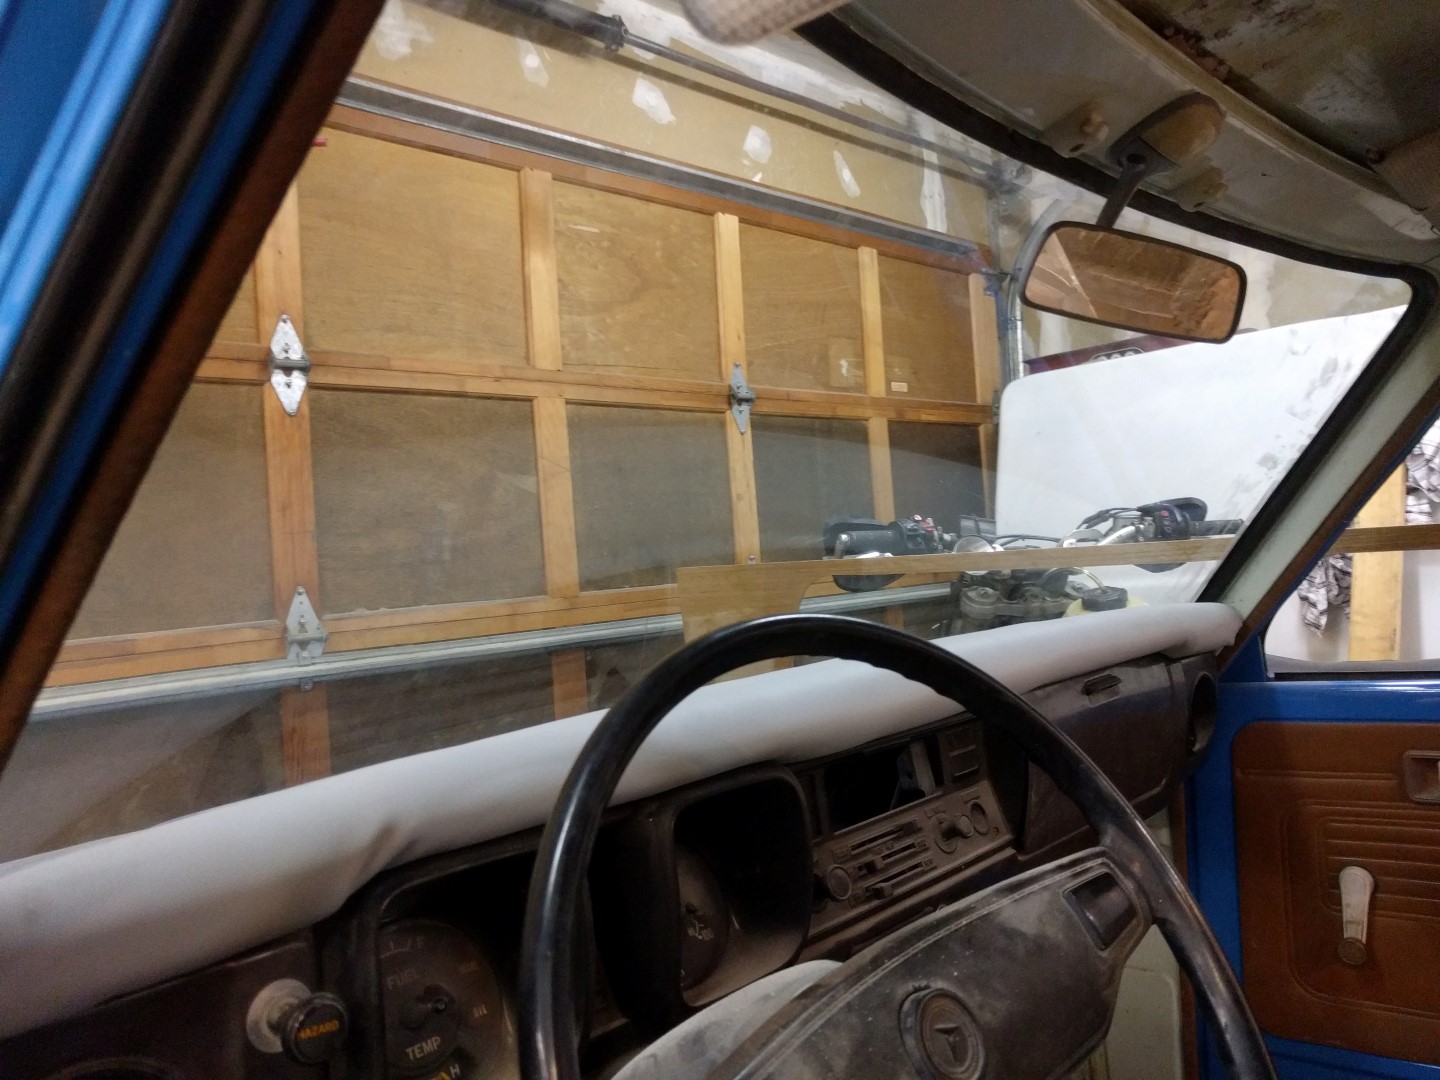
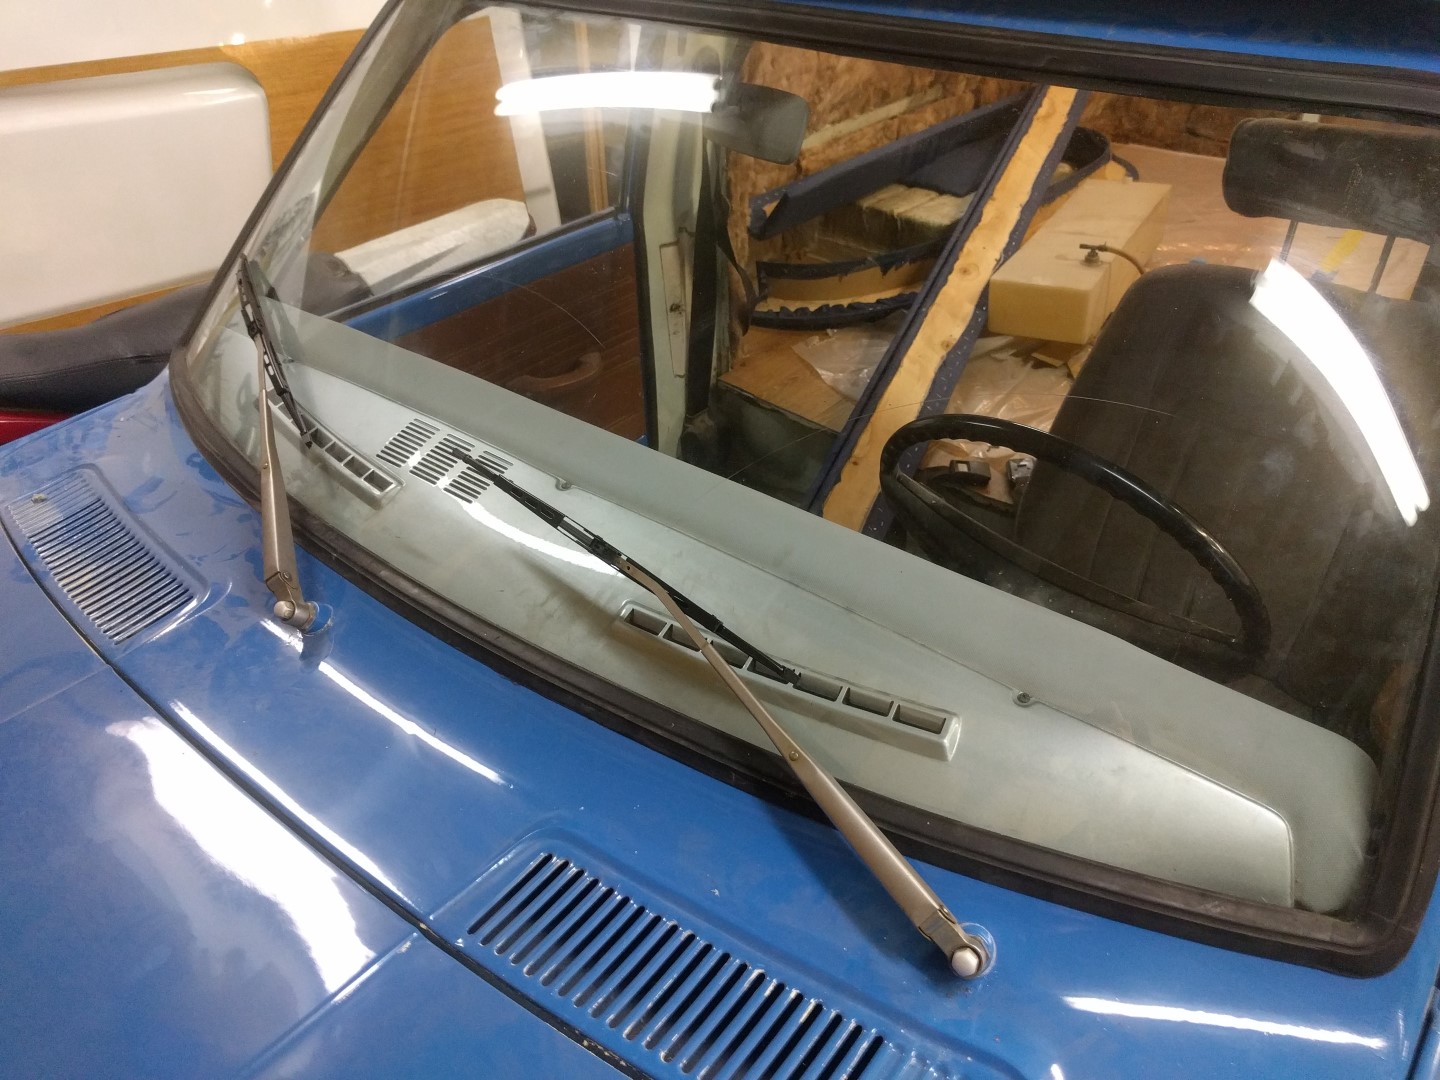
Windshield and Wipers
Unfortunately, I broke the windshield when removing it from the truck but I found a 1977 flatbed pickup from the junkyard at PickNPull and grabbed that for $30. I think someone could make a living pulling obscure glass from old vehicles.
Installing the windshield was a breeze. You take a rope, or wire in my case, and thread it through the windshield seal then place it on the truck cab. From the inside, pull the rope and the lip of the seal will perfectly overlap the metal trim. Go all the way around and you are set!
The wipers use the original motor. The only issue is the motor is a little bit worn out and the wipers sit a bit up in the view of the driver. Have yet to hook up the wiper fluid. Something interesting is the 1977 Toyota Pickup has two different models for wiper fluid. The parts rig I had, the wiper fluid shoots up through the cowl but the one I restored has holes in the hood with little nipples that shoot at the windows. Hmmm.
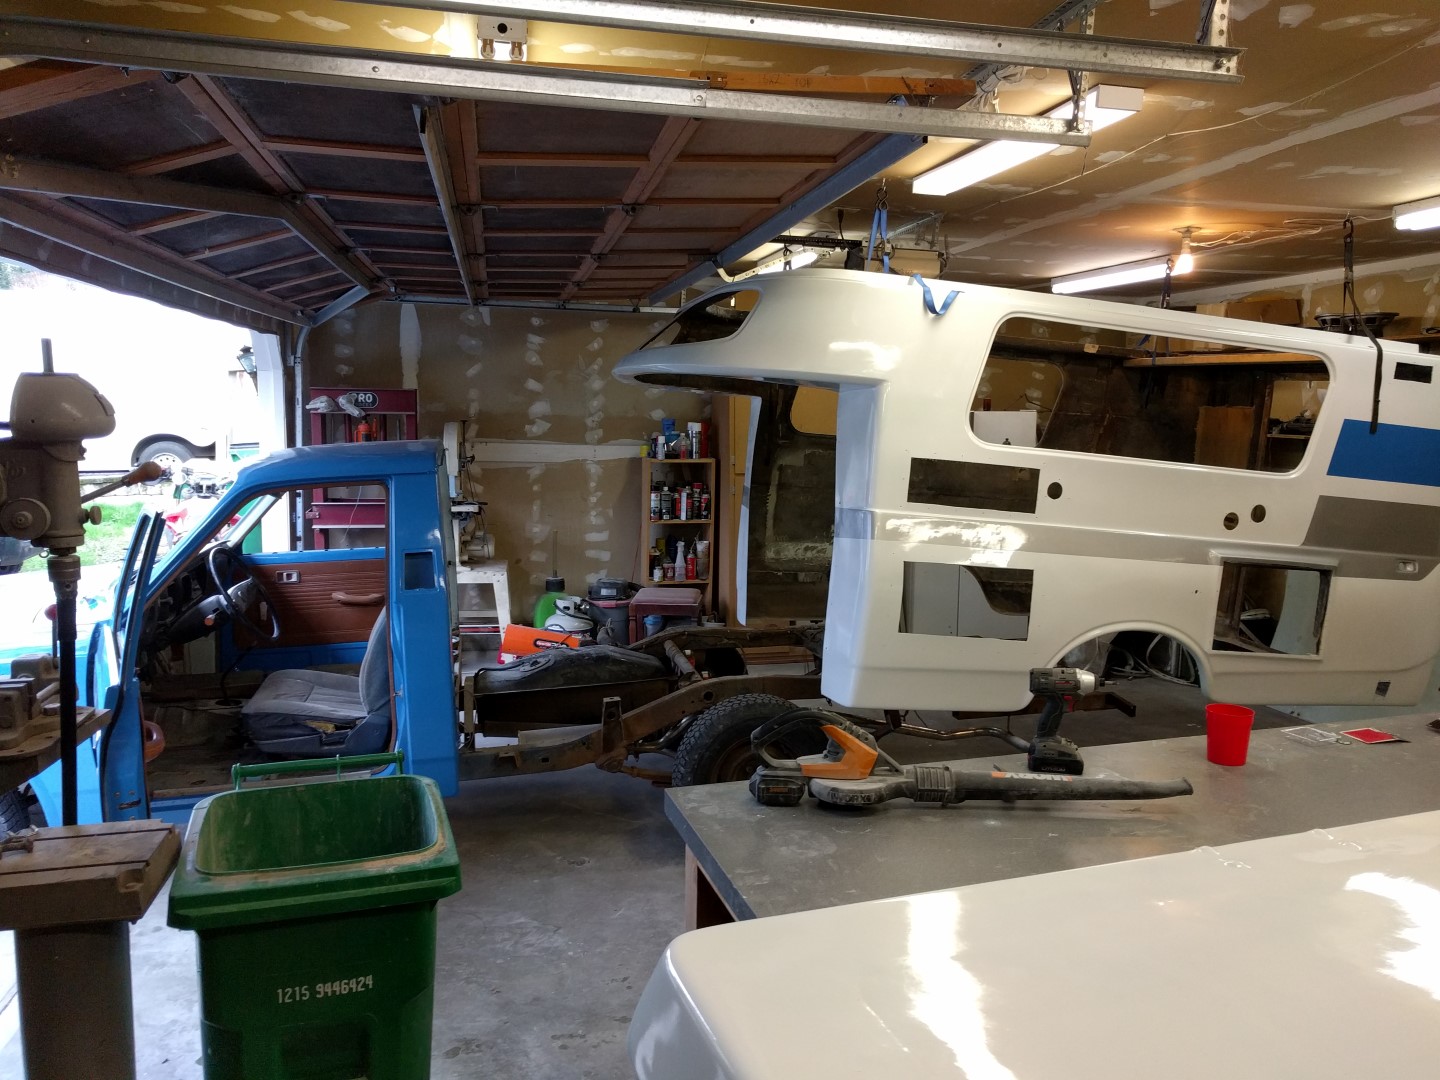
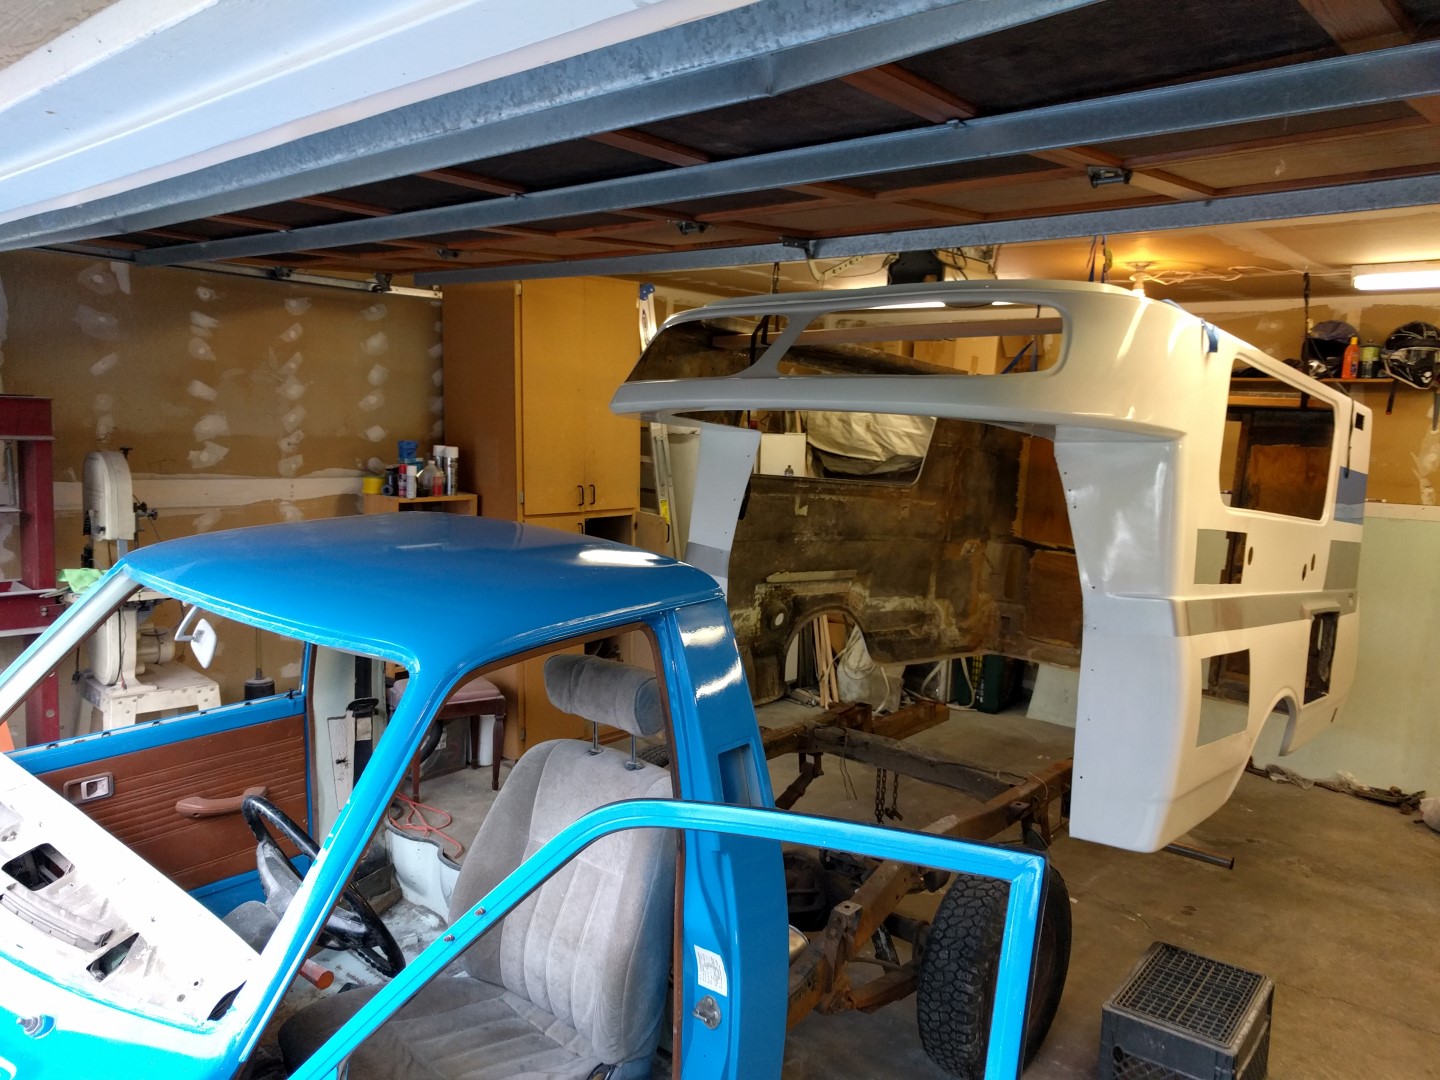
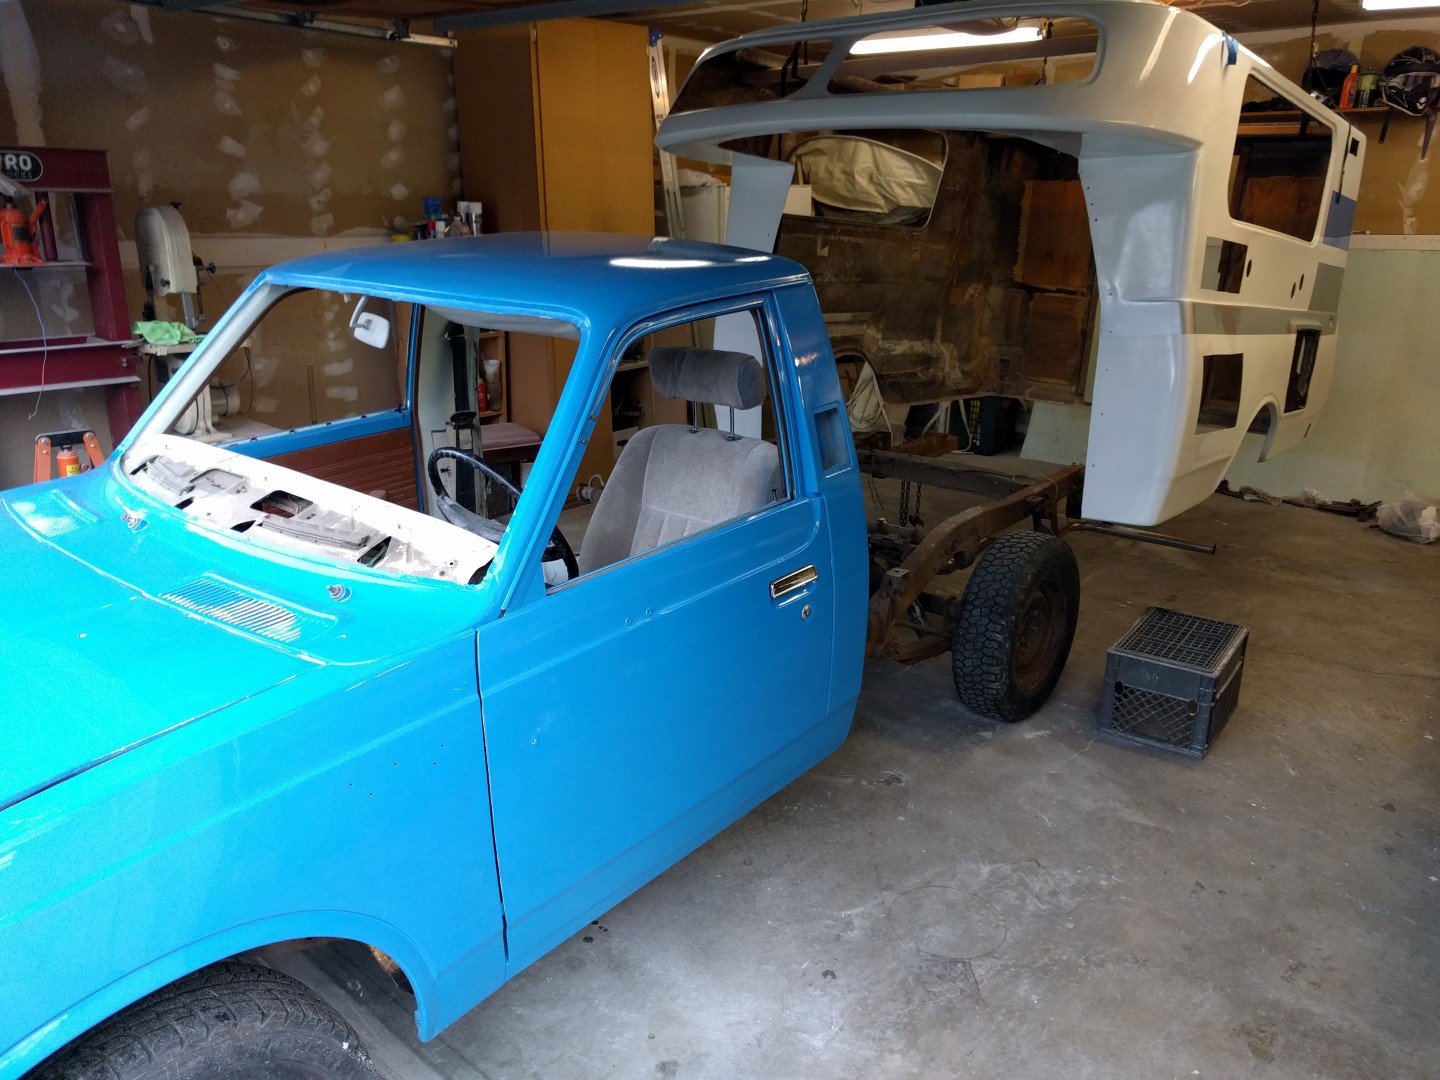
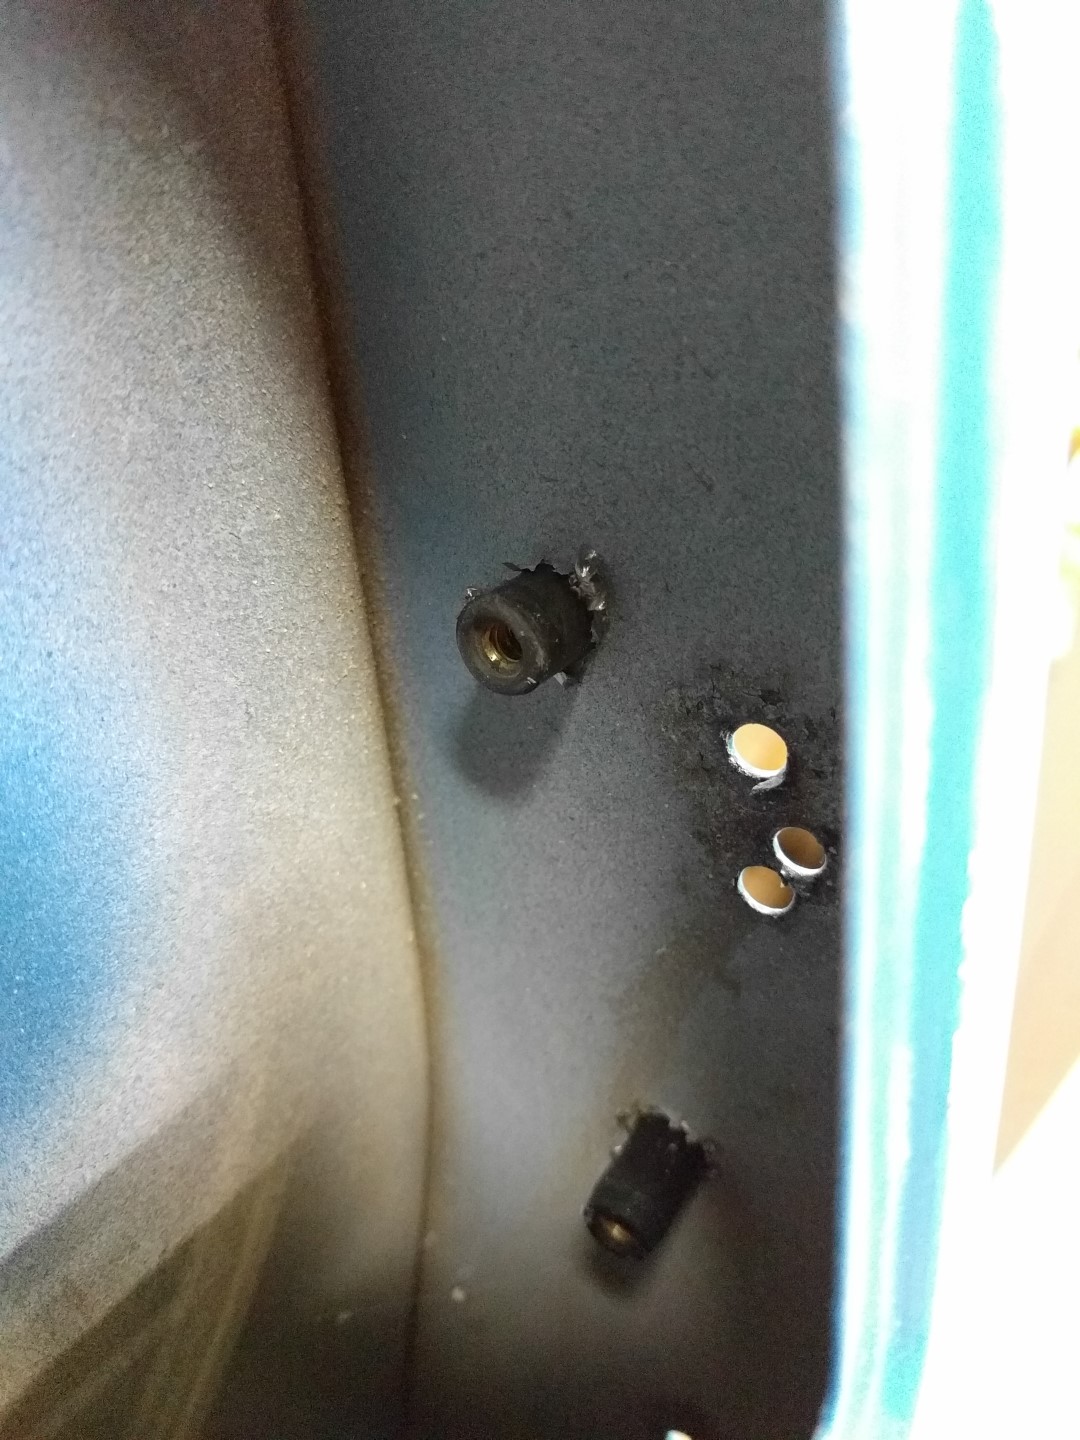
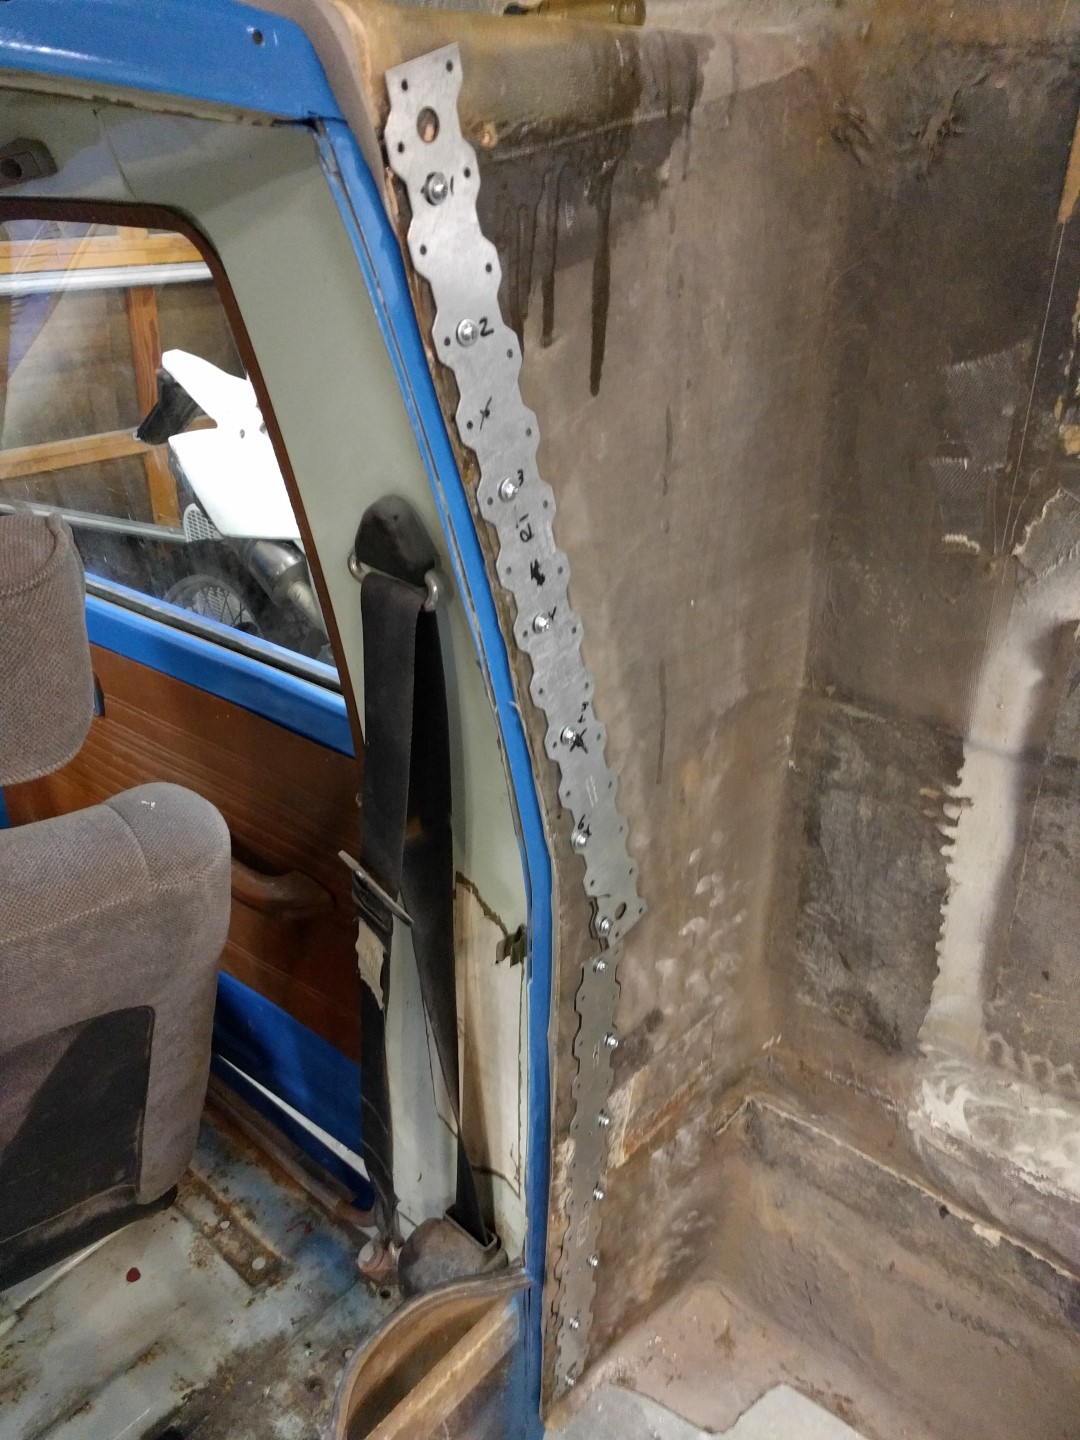
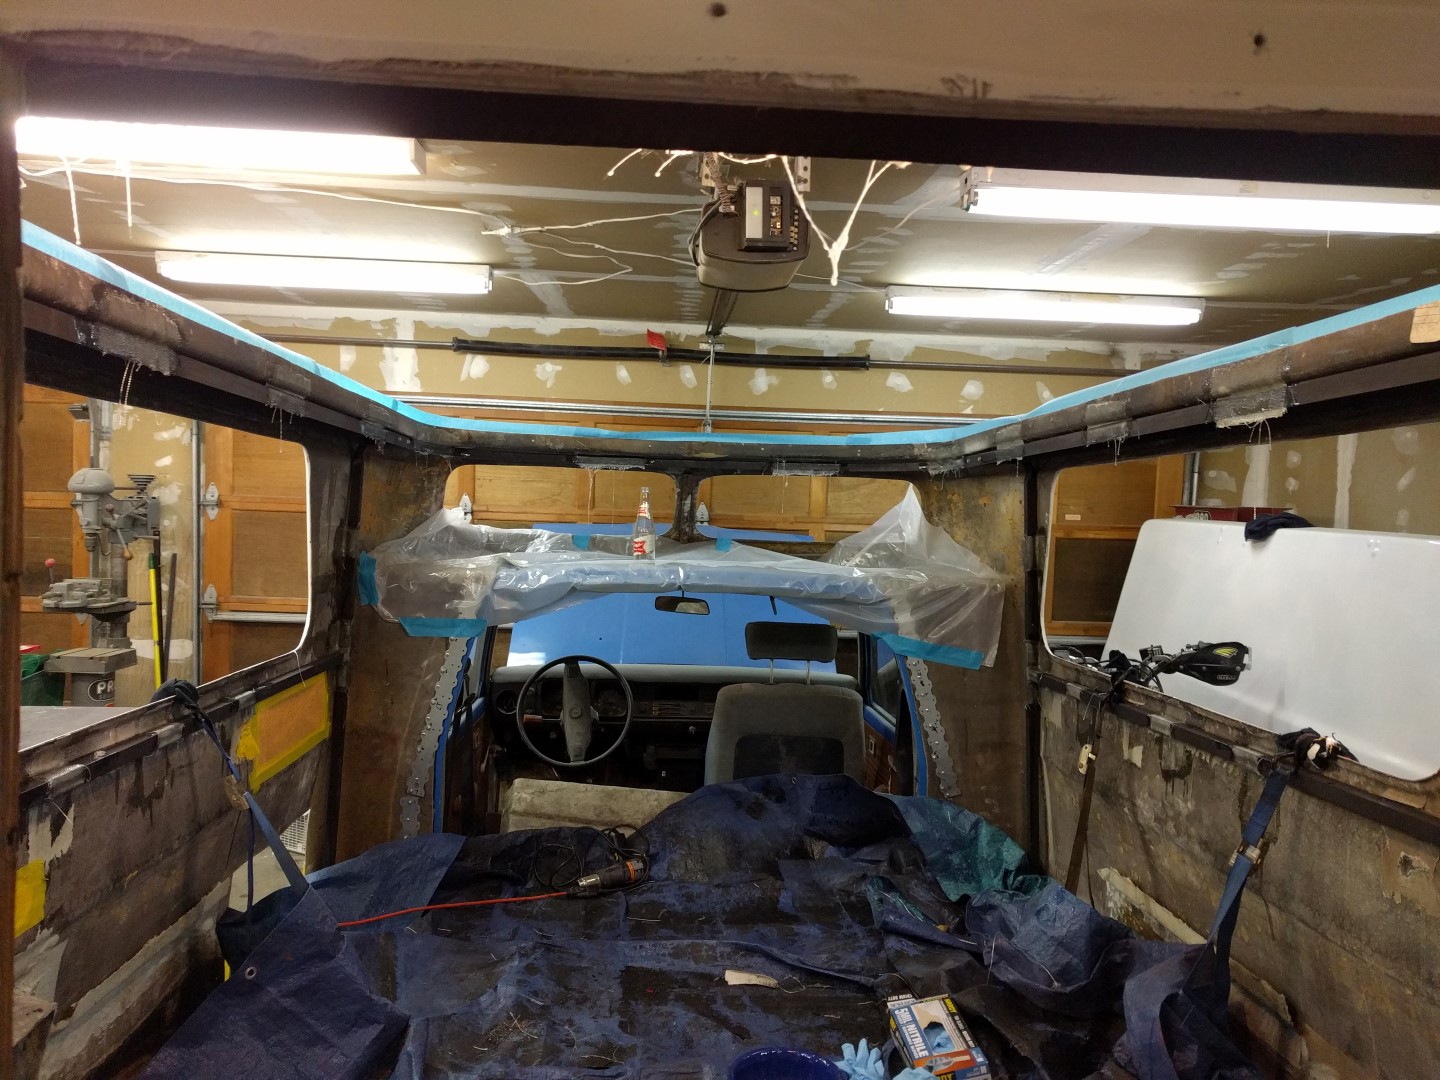
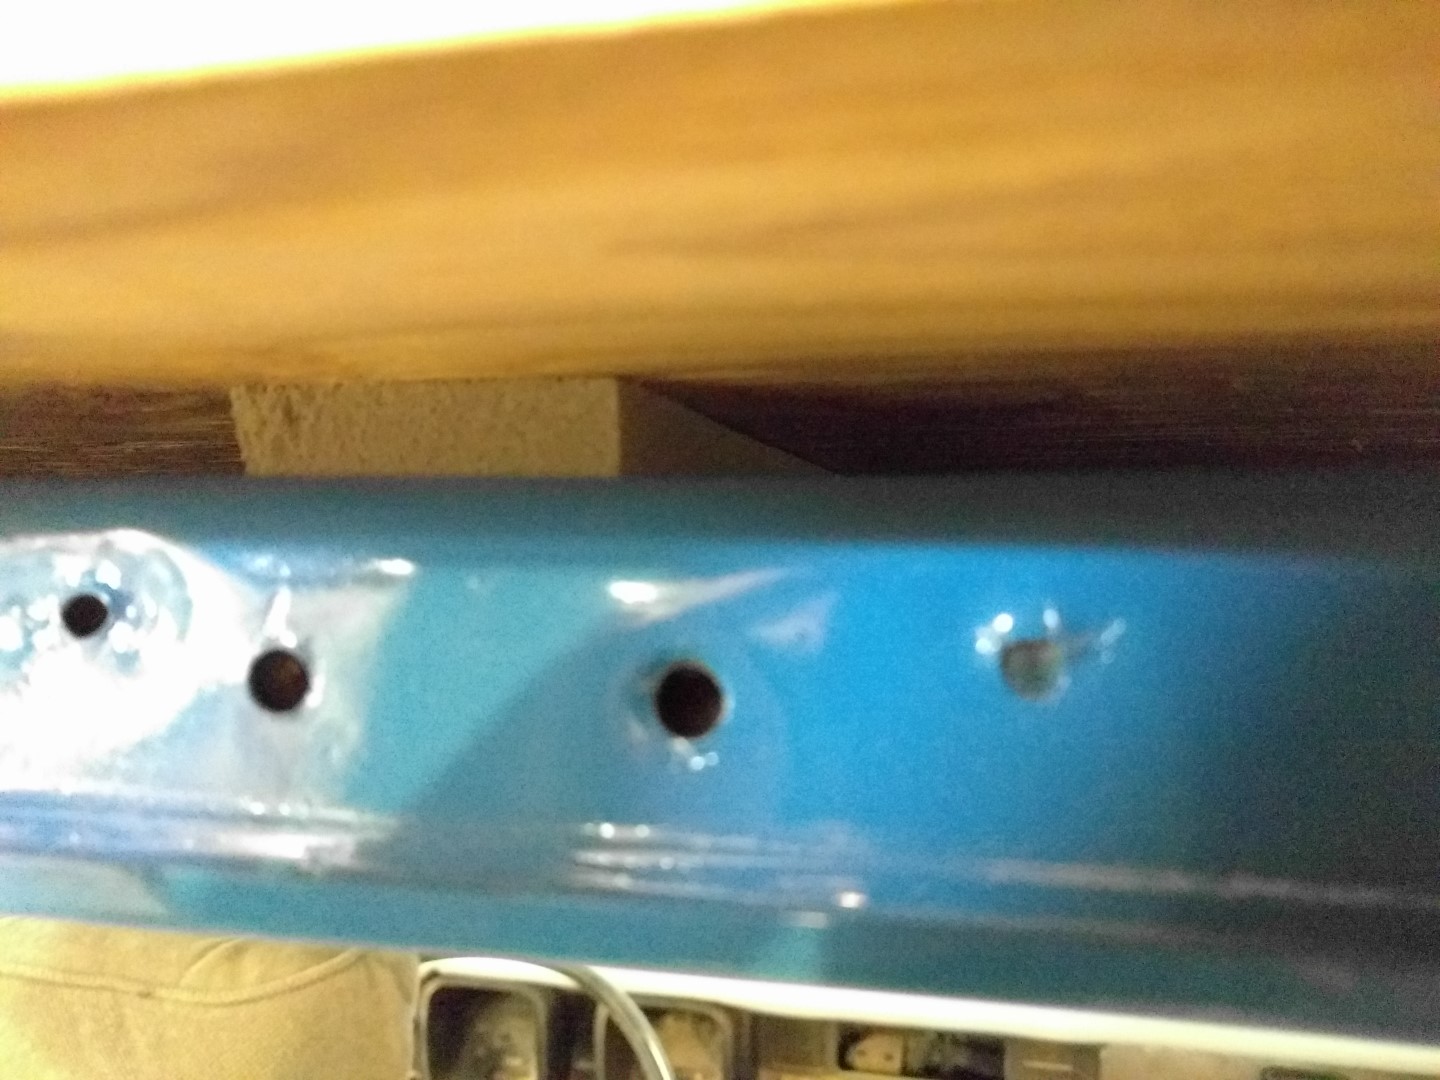
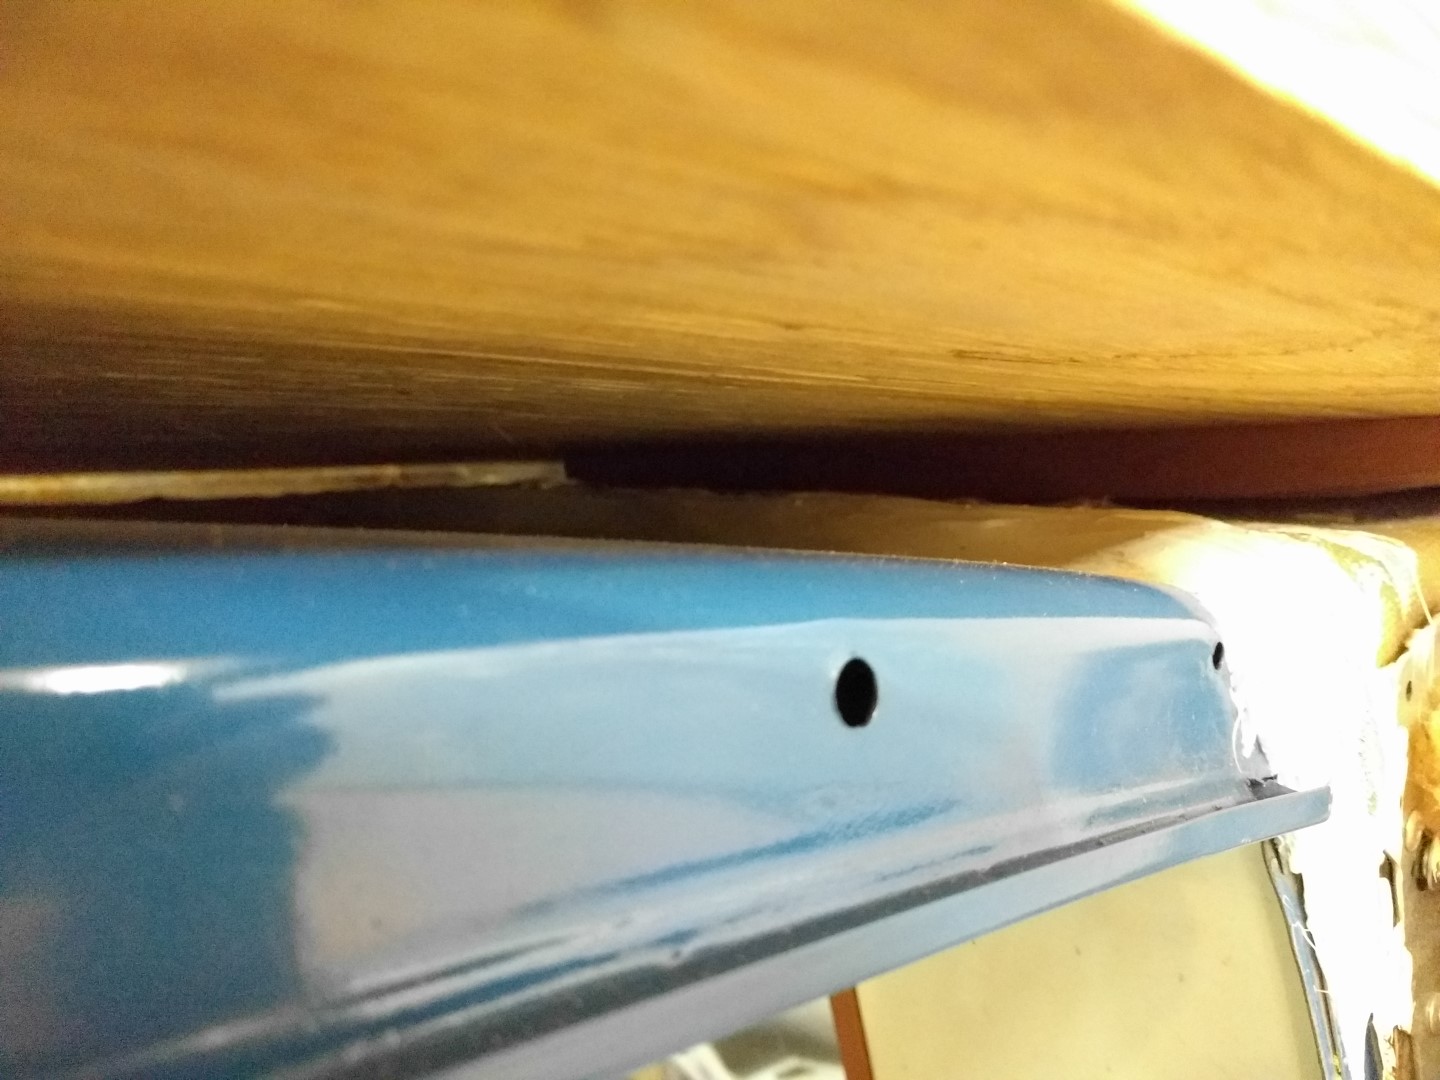
Attaching the Fiberglass Shell to the Truck Cab
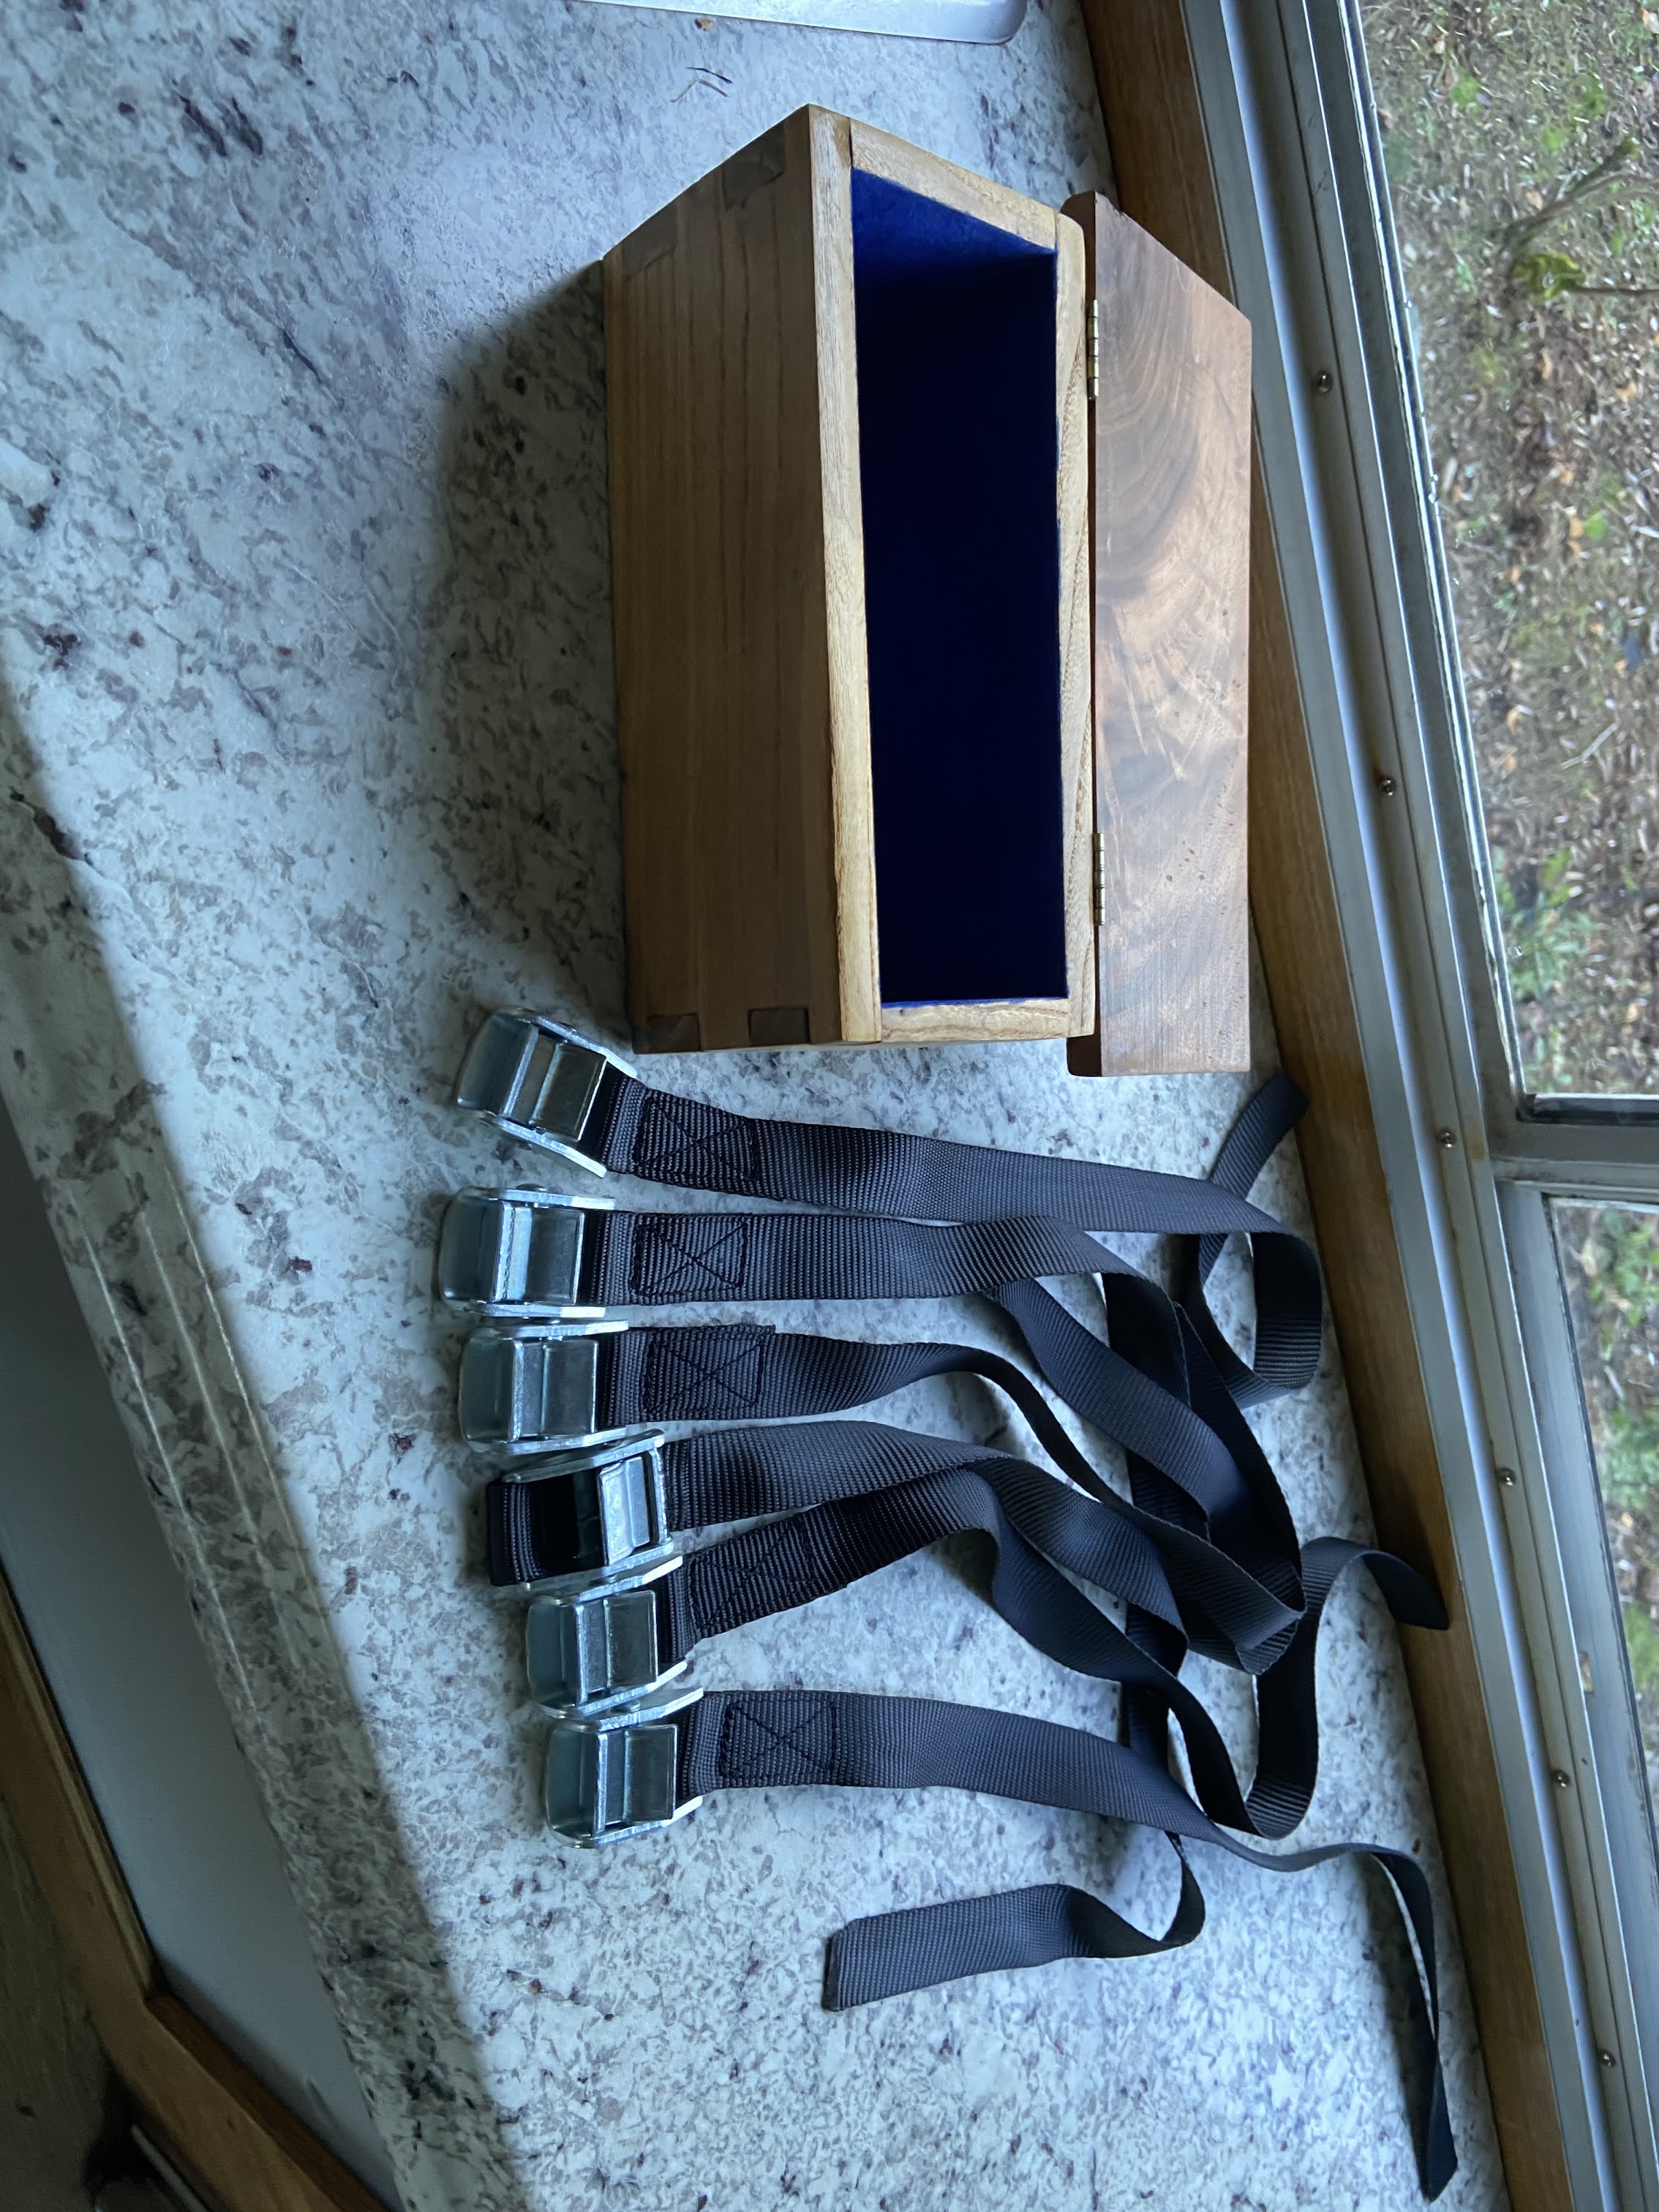
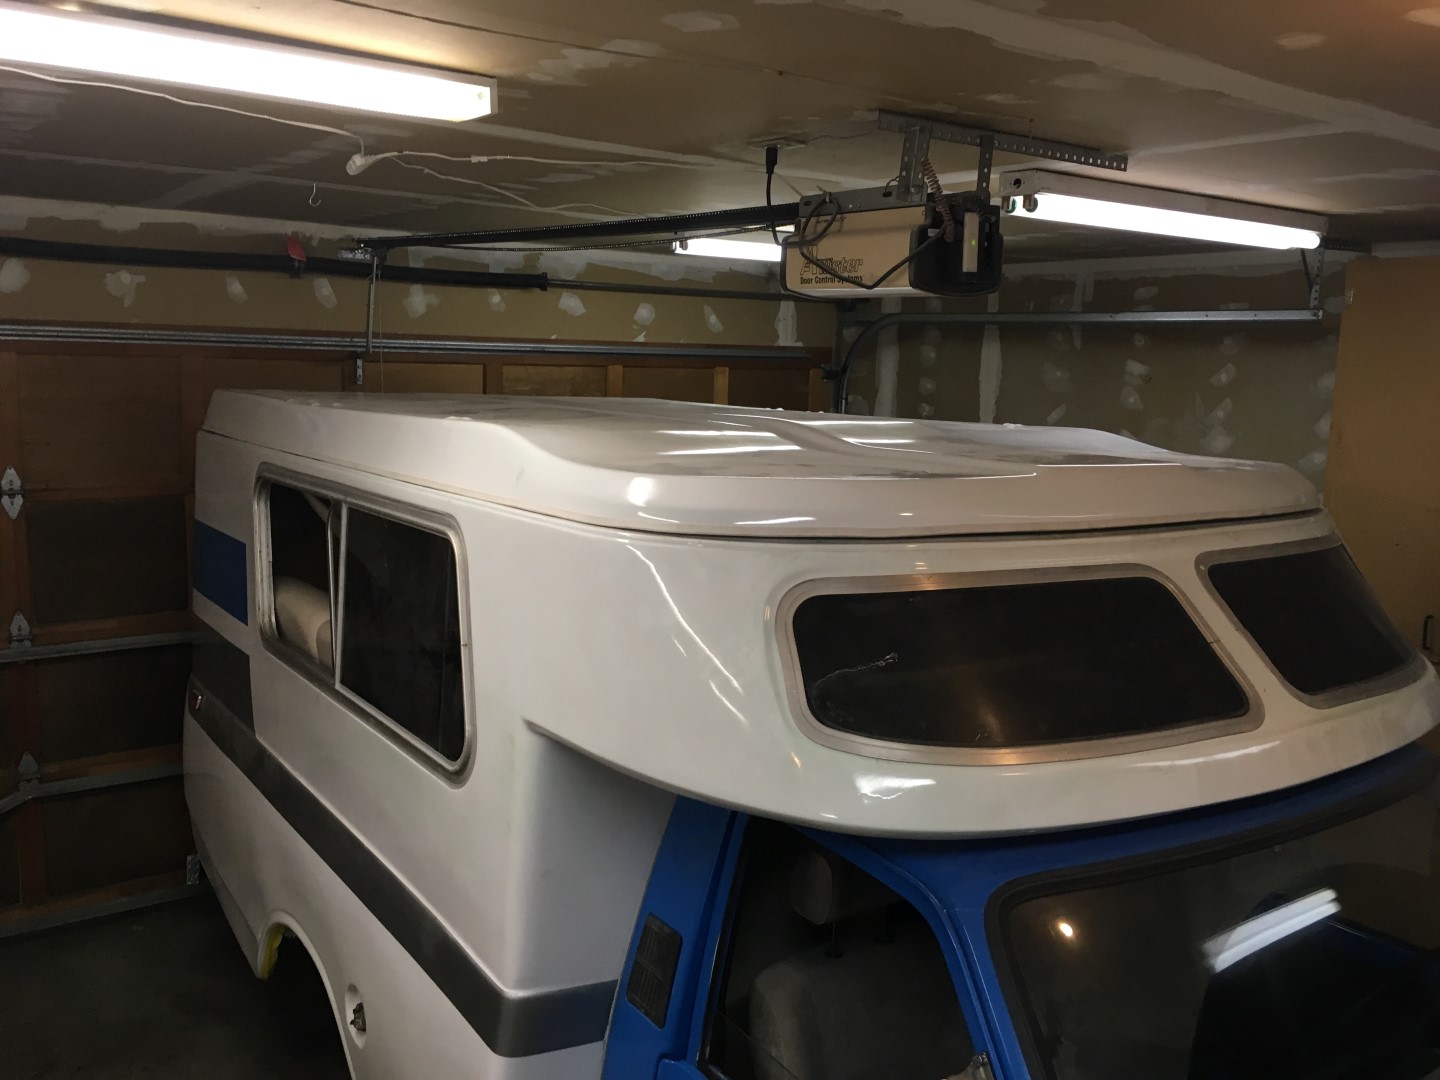
I lifted the shell up by attaching it to the roof on my garage on adjustable straps which were very useful for pushing the truck back and forth trying to get everything adjusted properly.
A combination of rubber expansion nuts and rivets were used with metal straps to attached the shell to the back of the truck cab. A 1/2” thick closed cell foam material was used to create a water proof seal between the fiberglass shell and the truck cab, both back and top. A polyurethane based sealant (Sikaflex 221) was used to seal it up even further and hold the foam material in place. You can get the Sikaflex 221 for about $6 on McMasterCarr or locally at RV shops for $12 a tube.
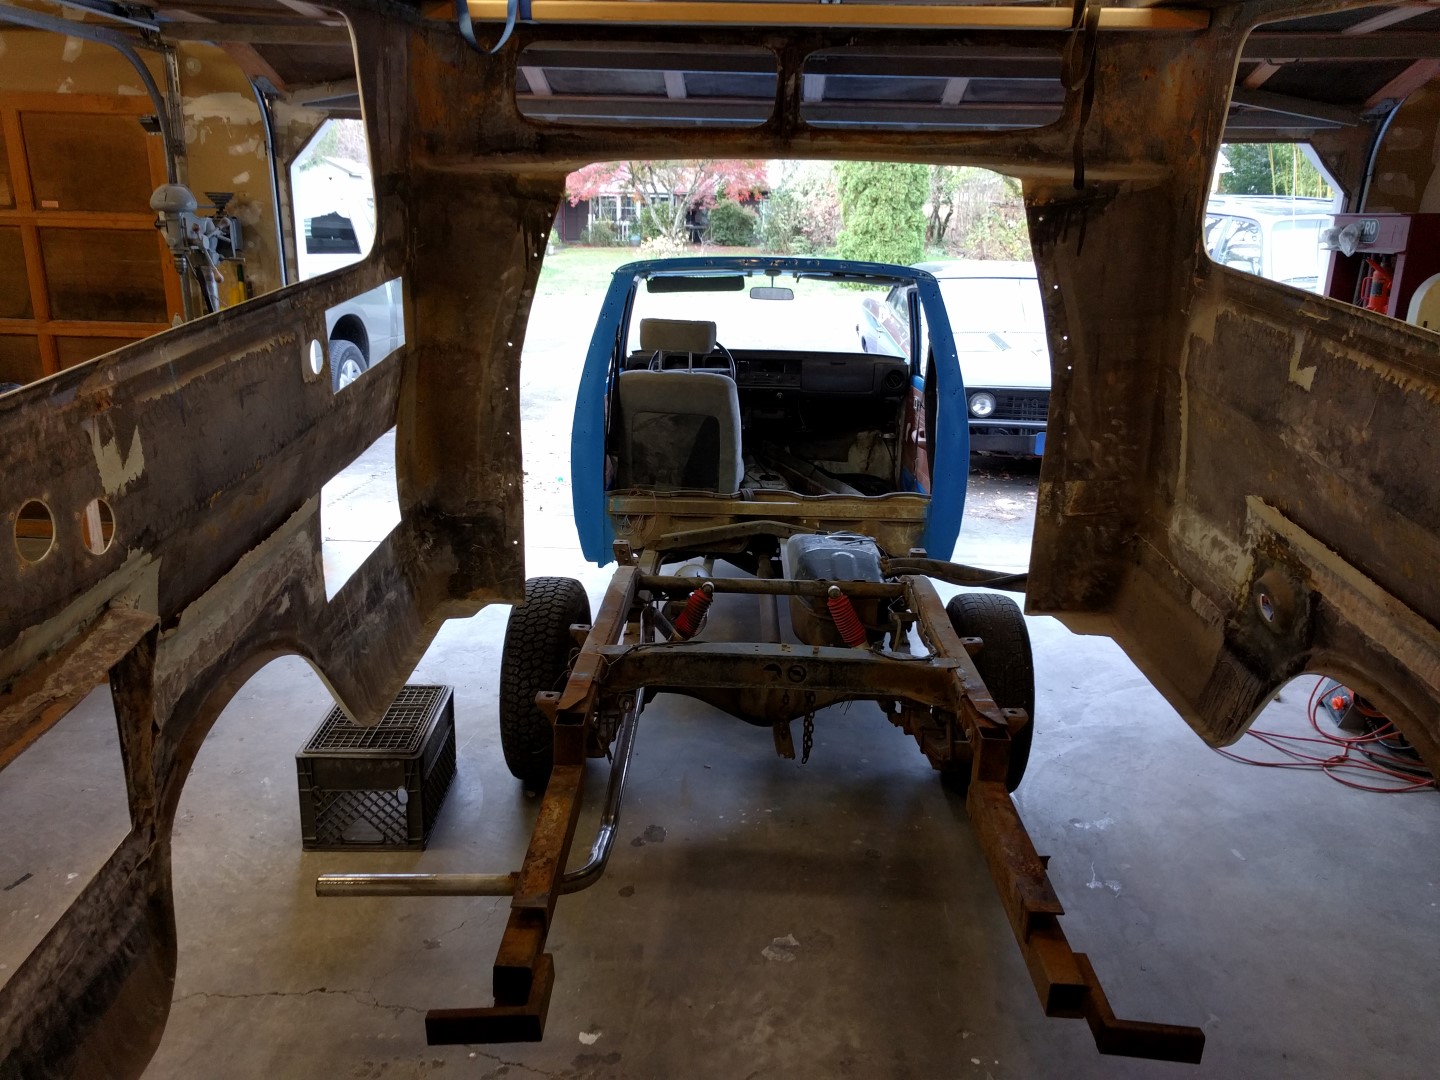


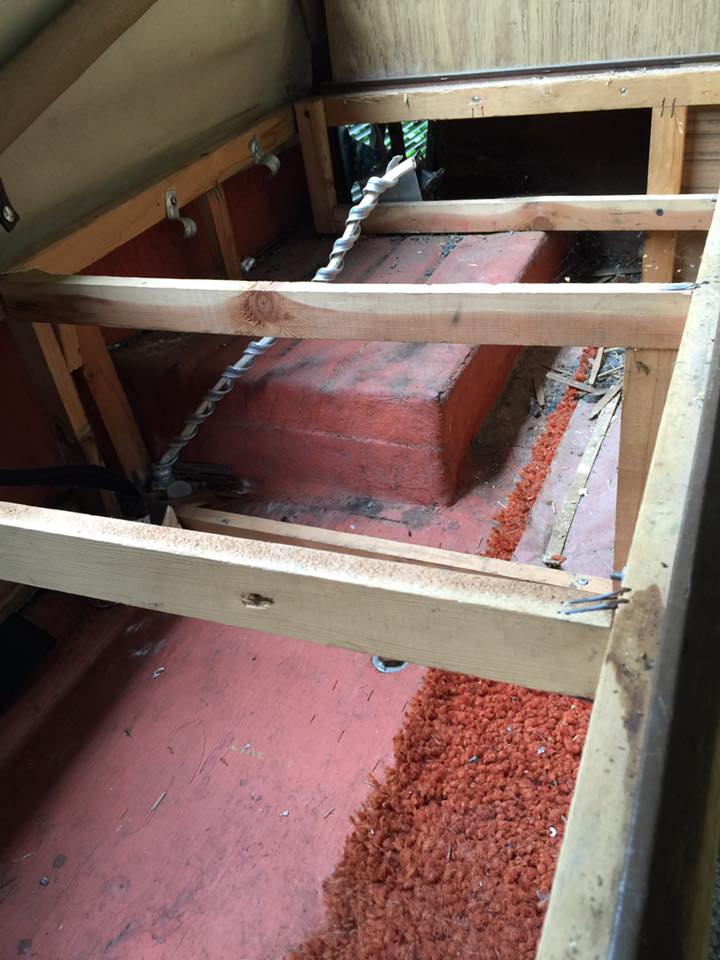
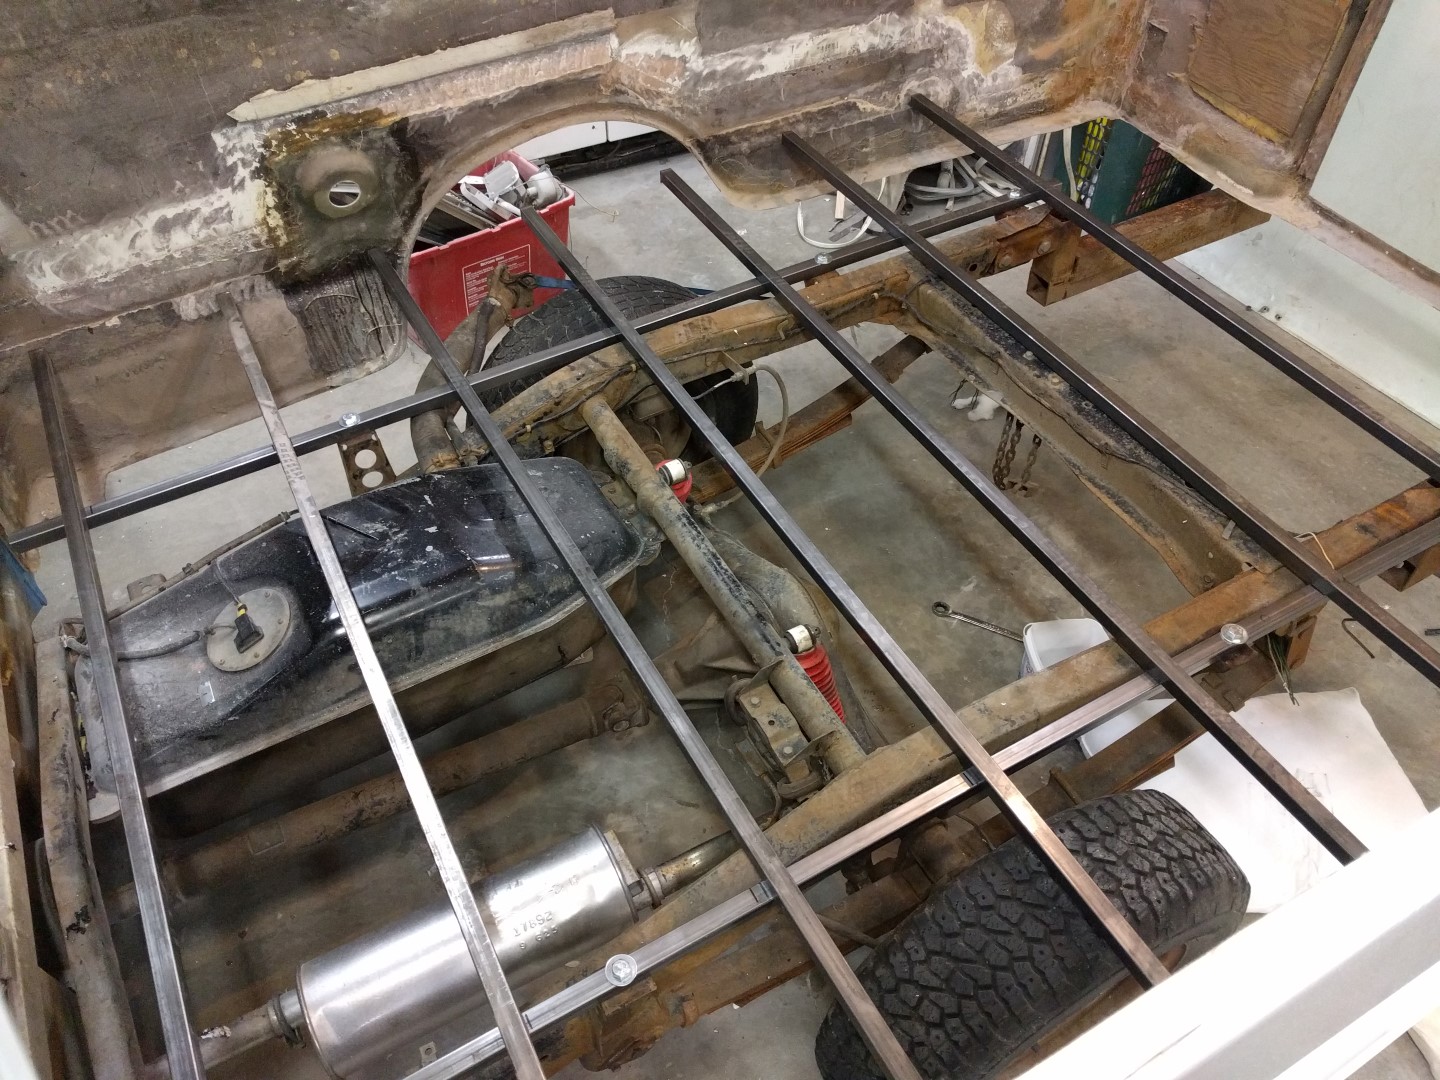
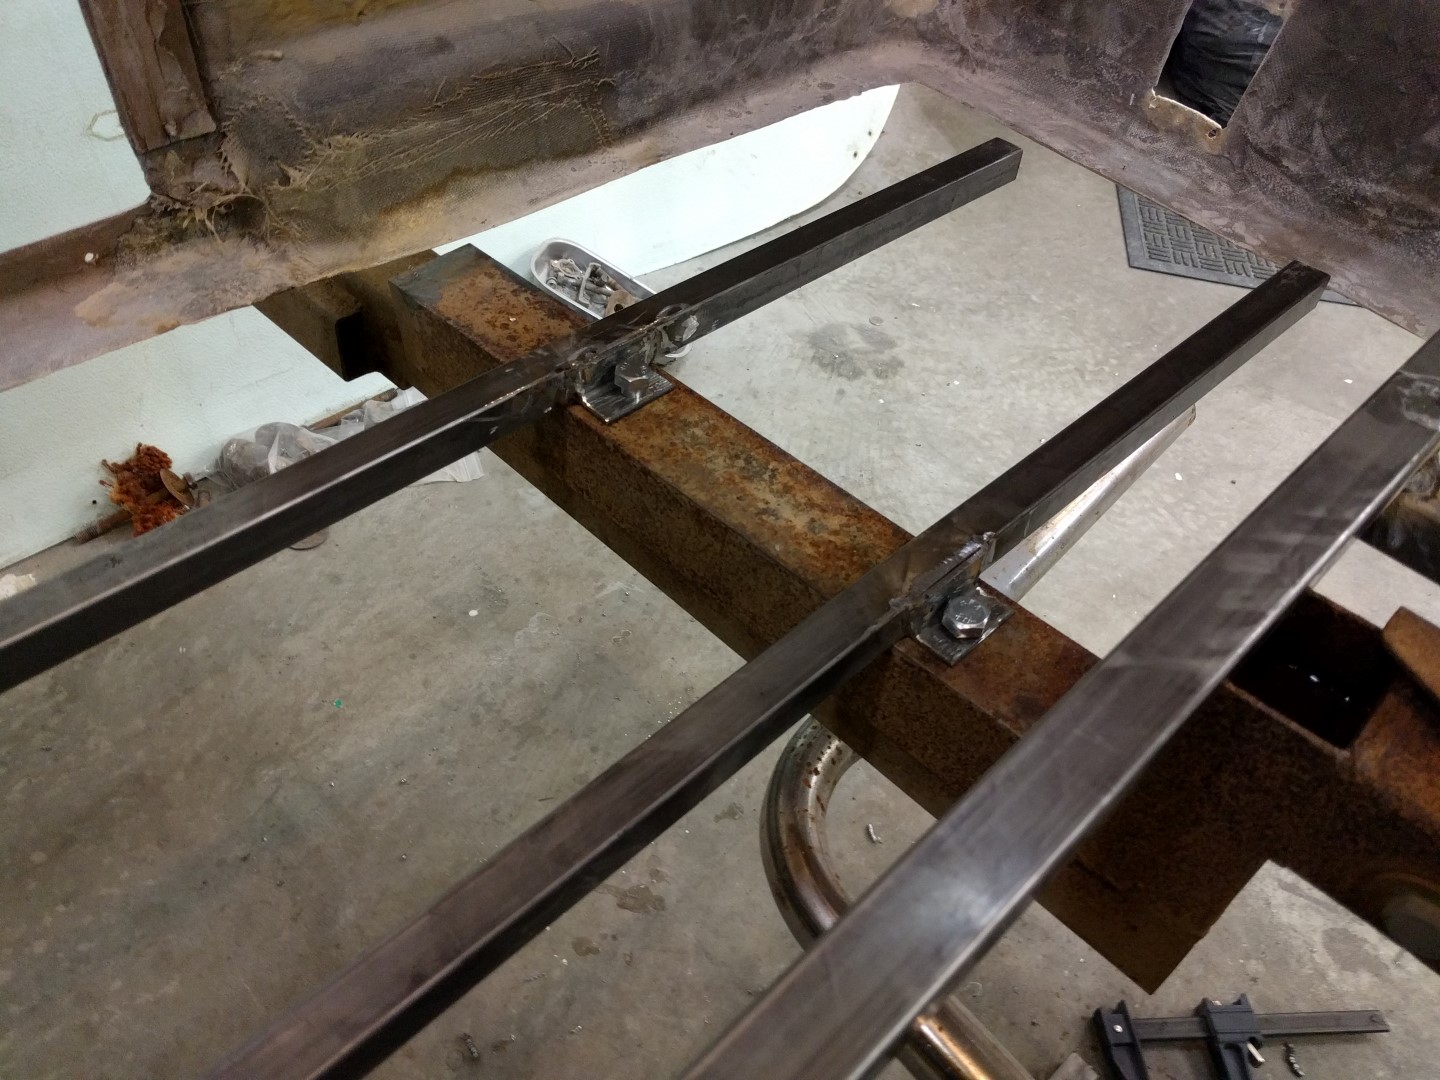
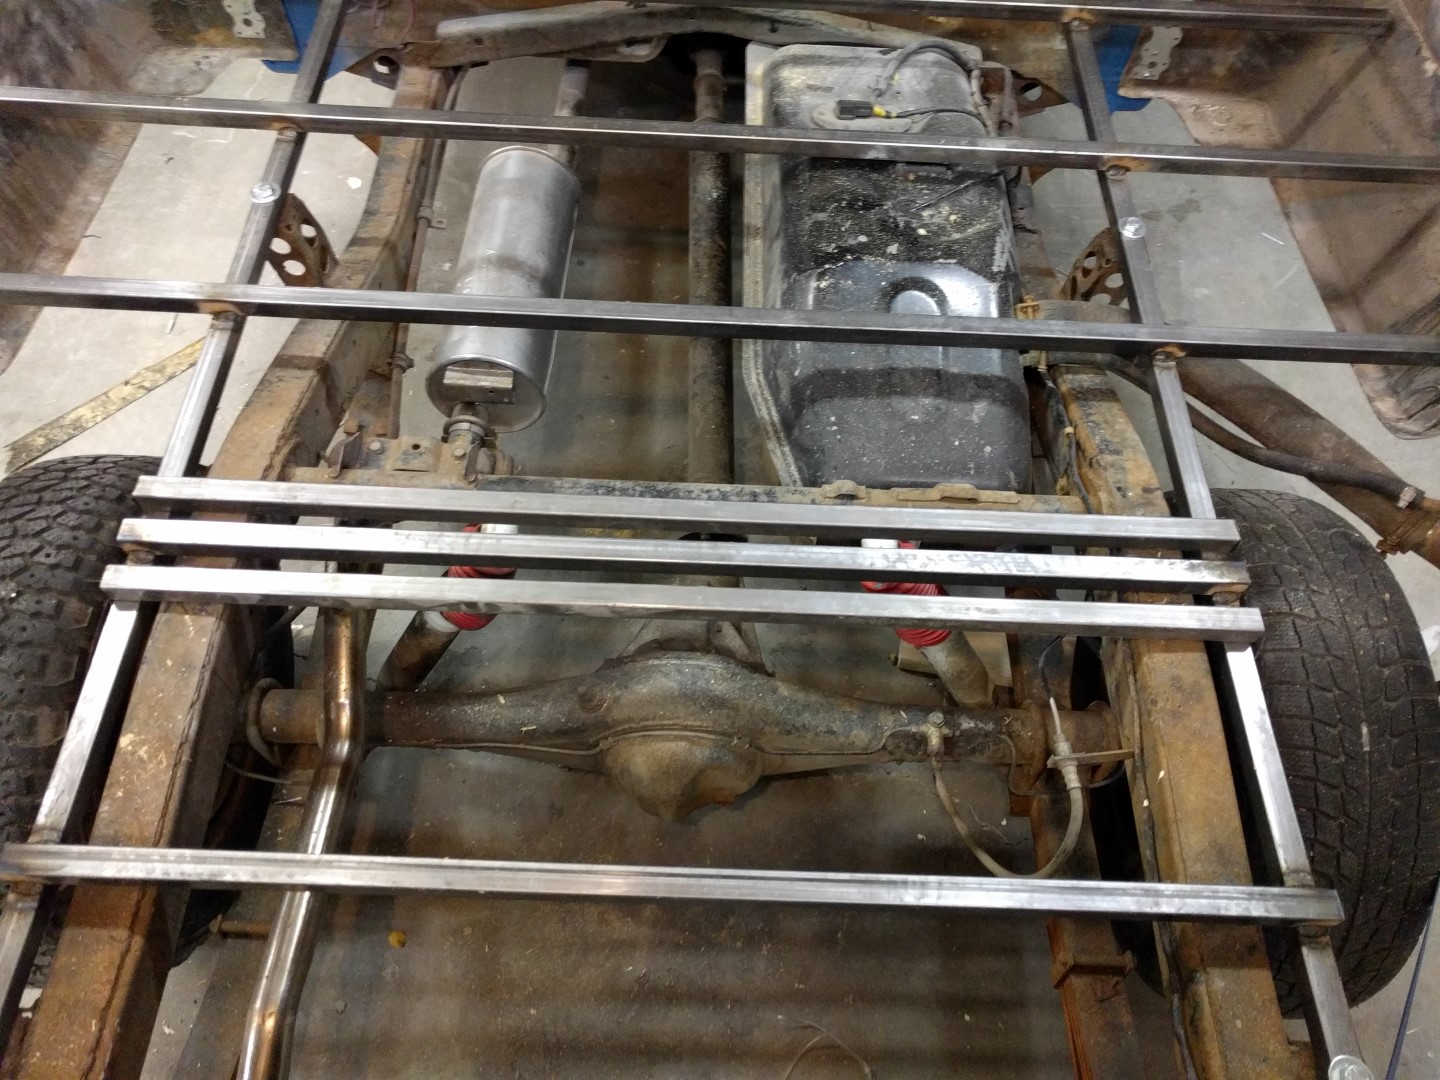
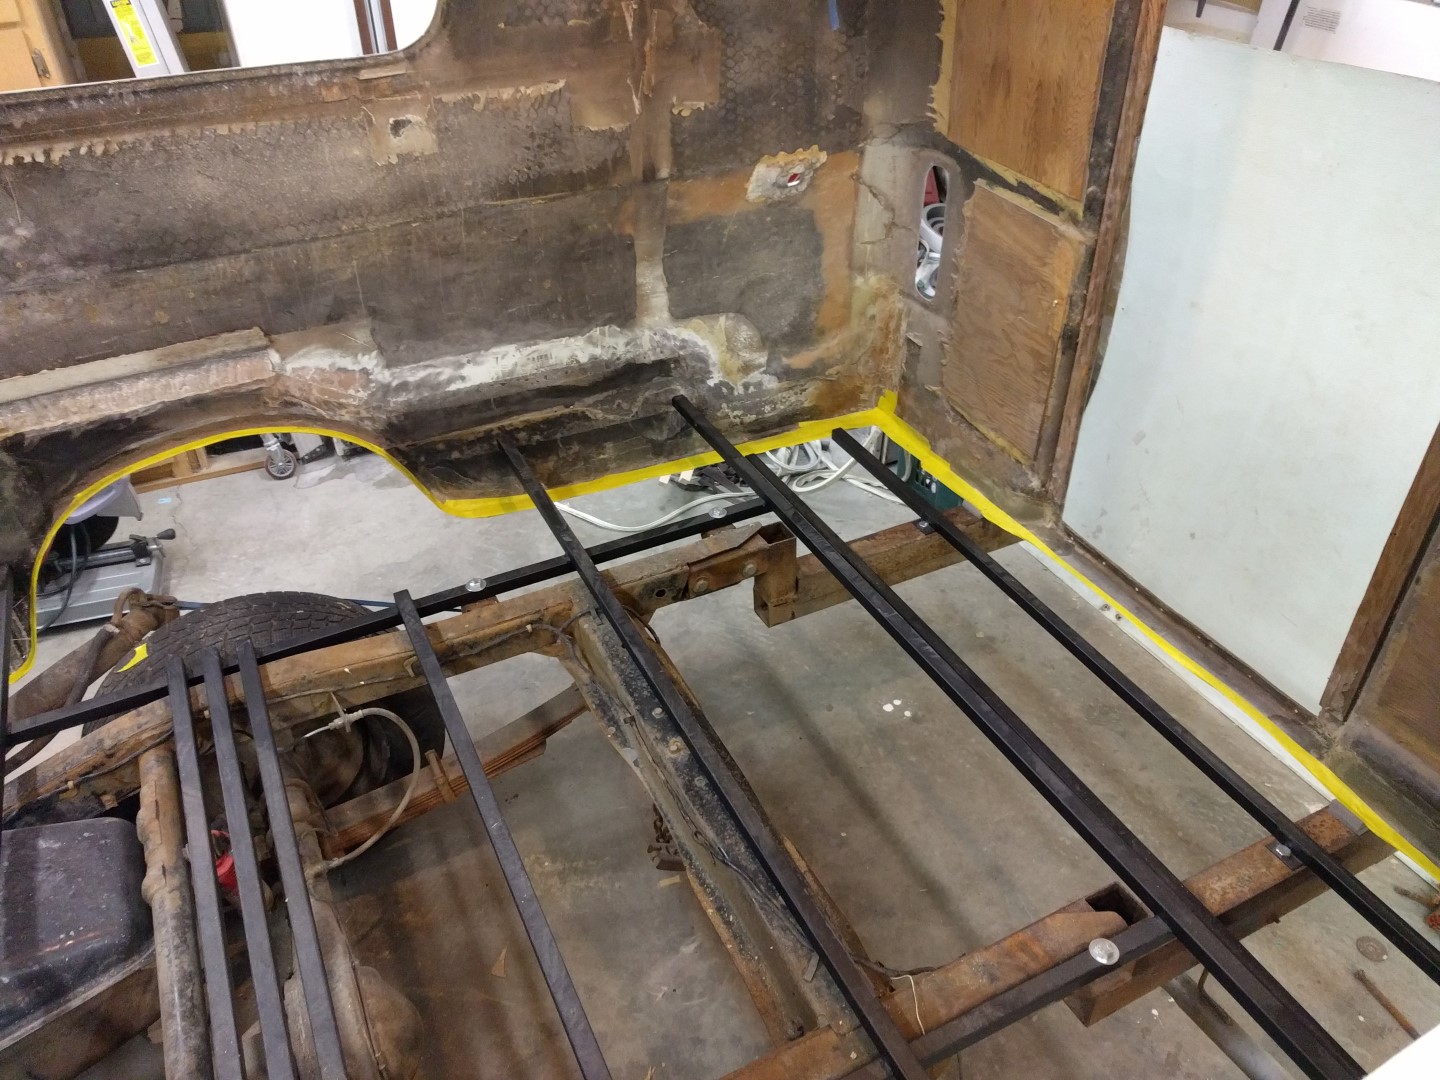
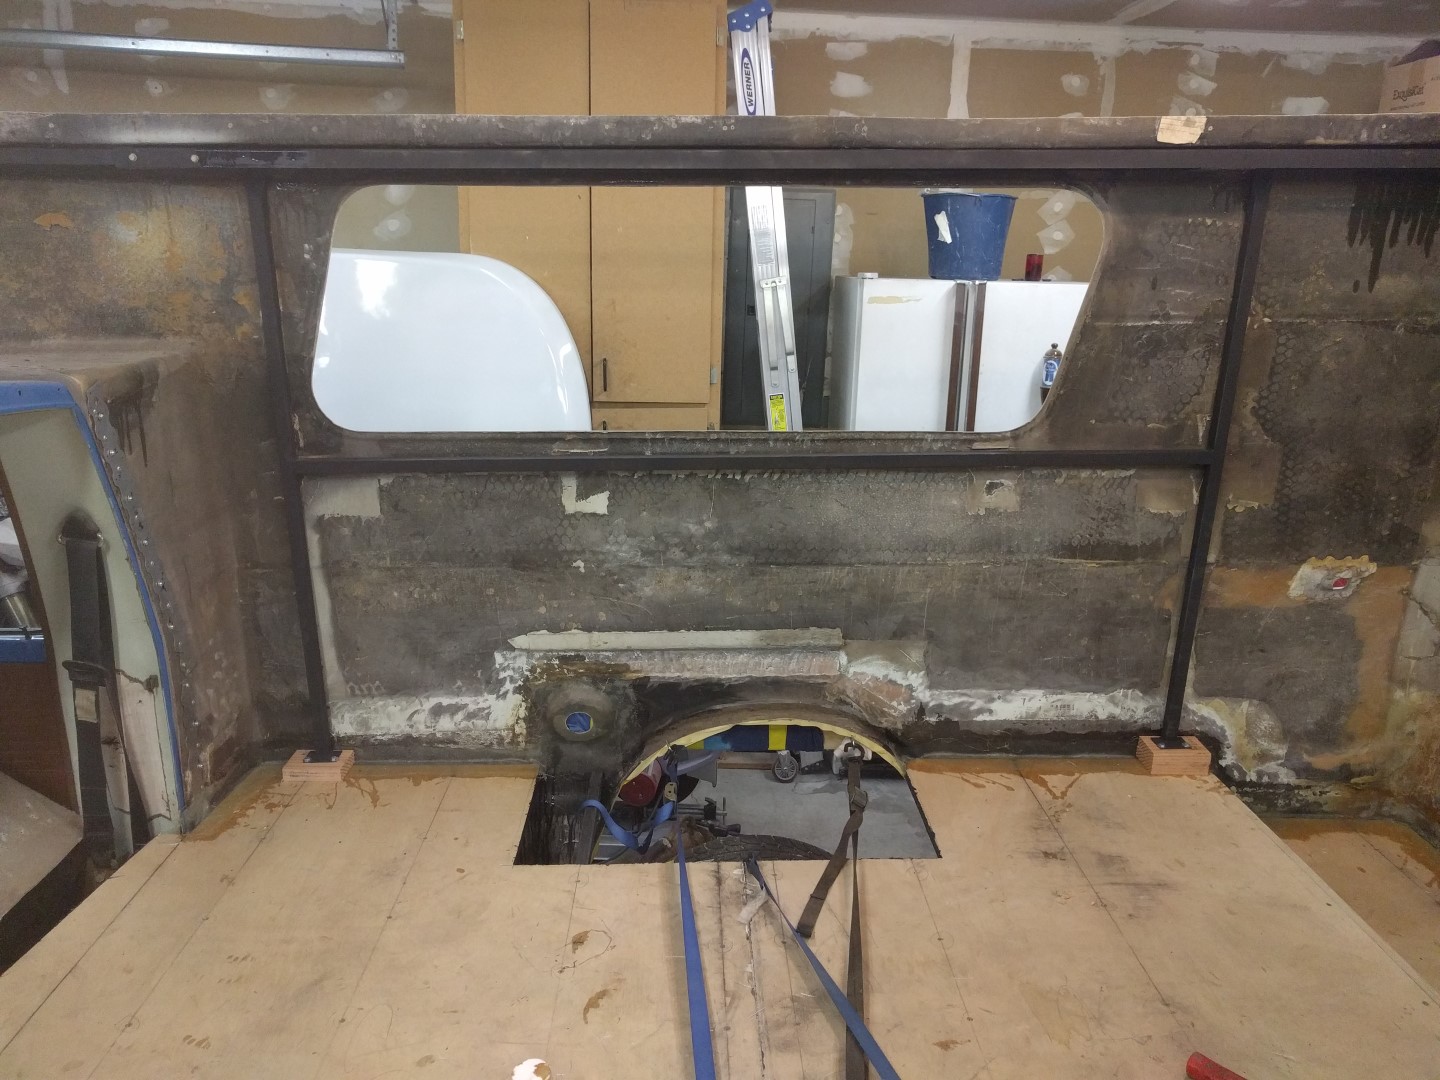
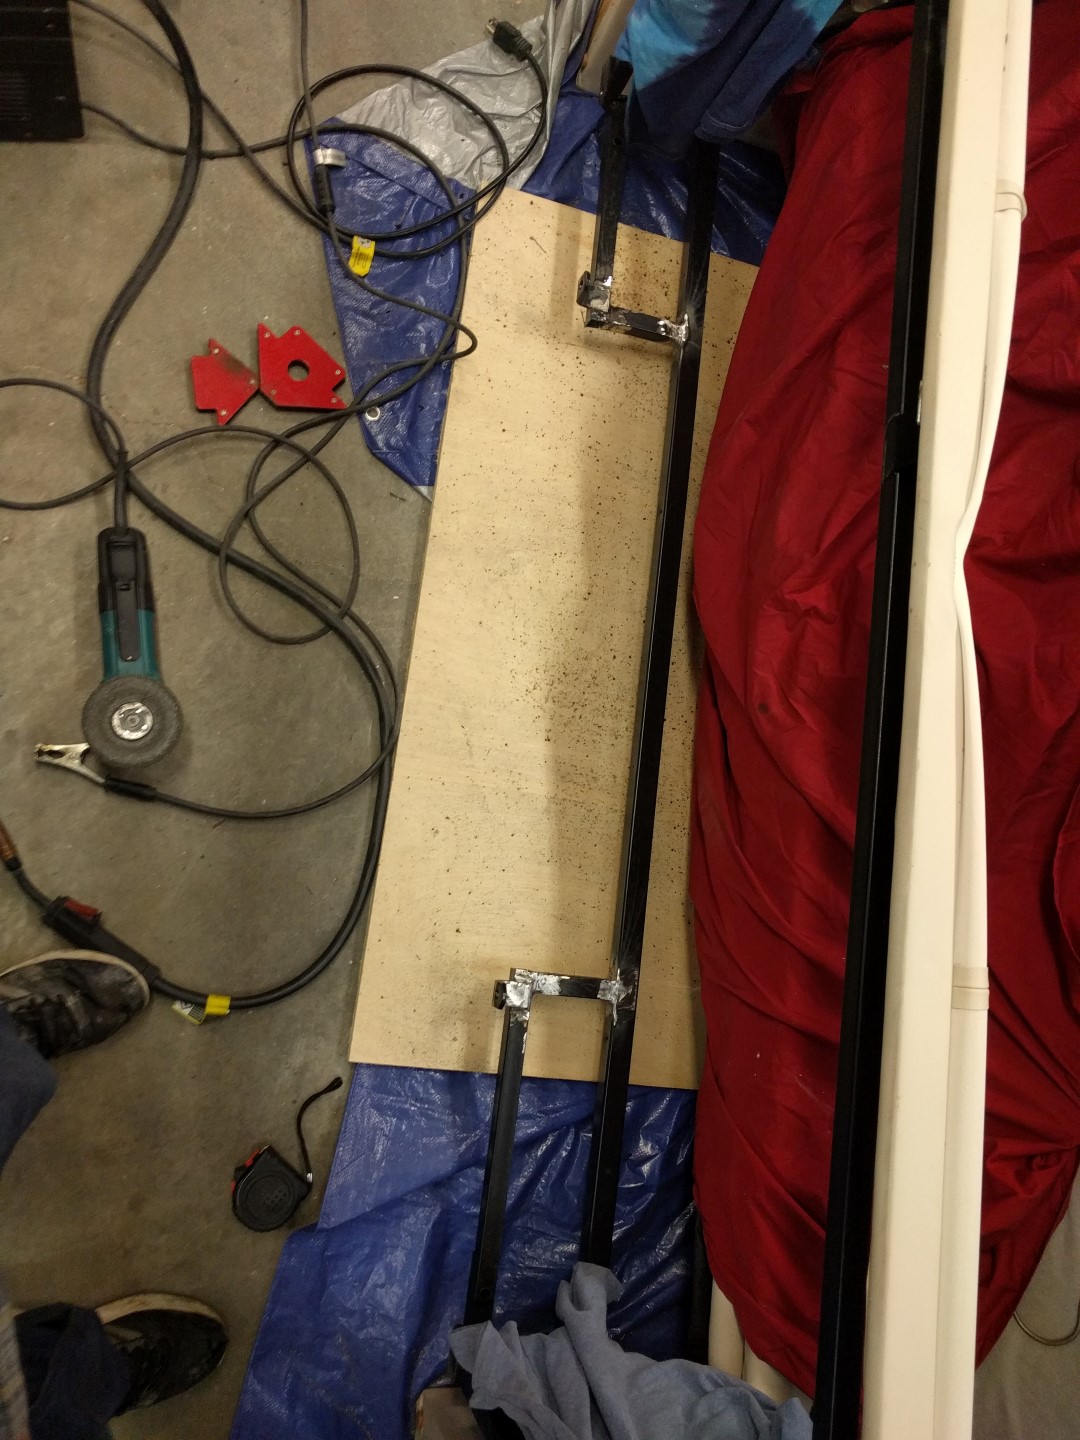
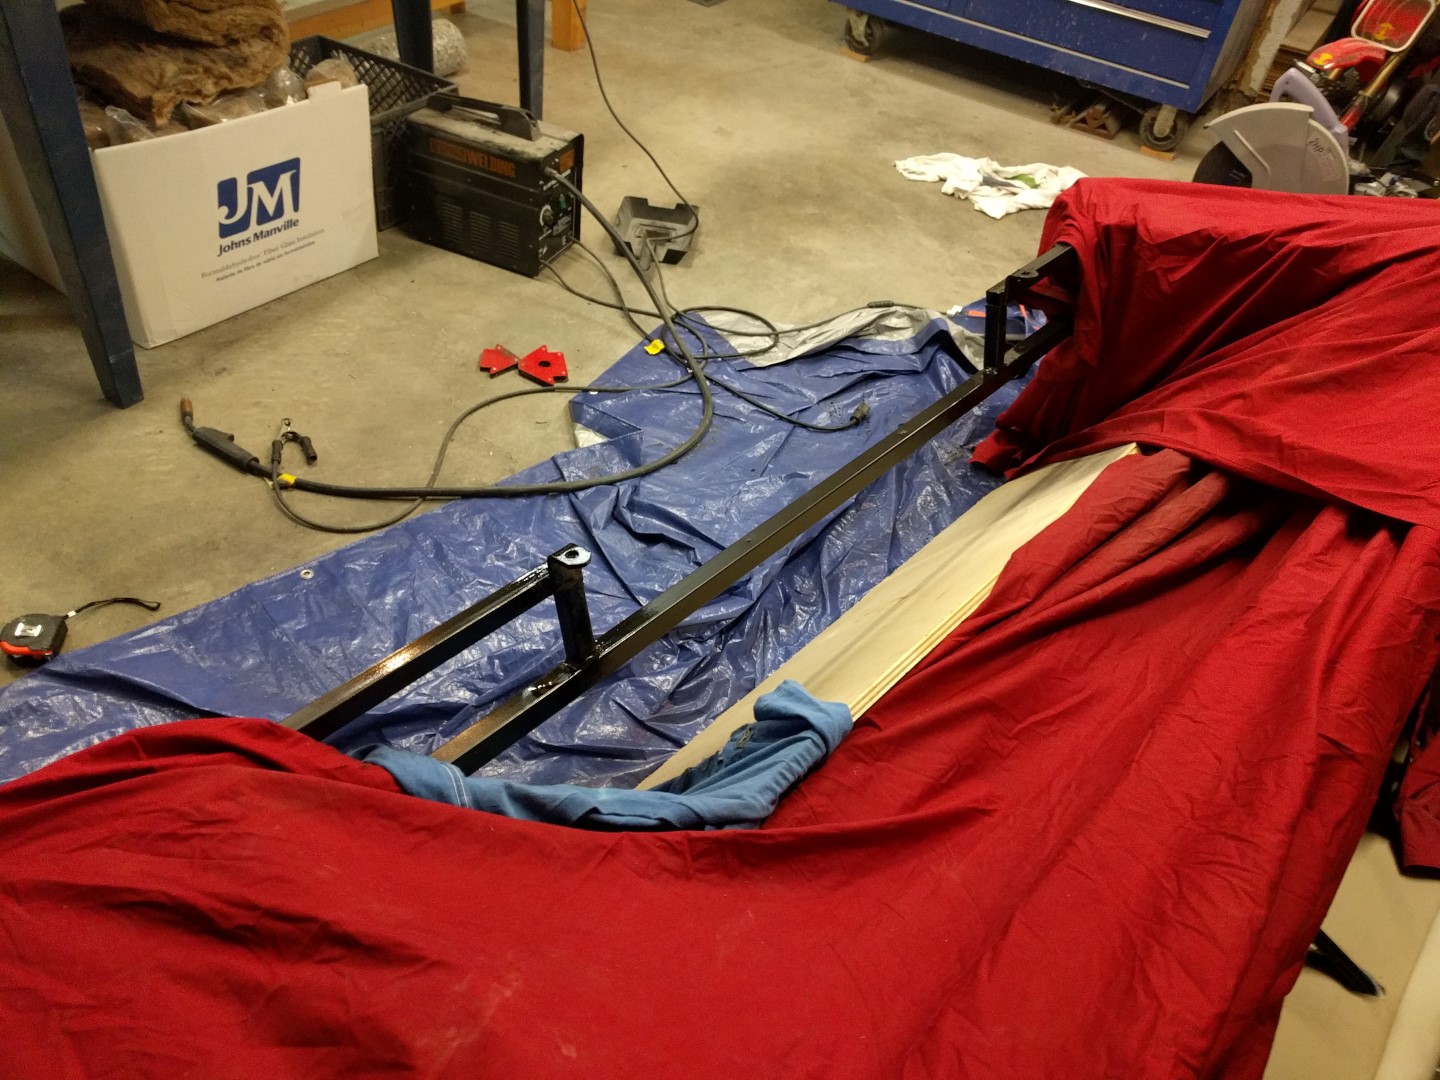
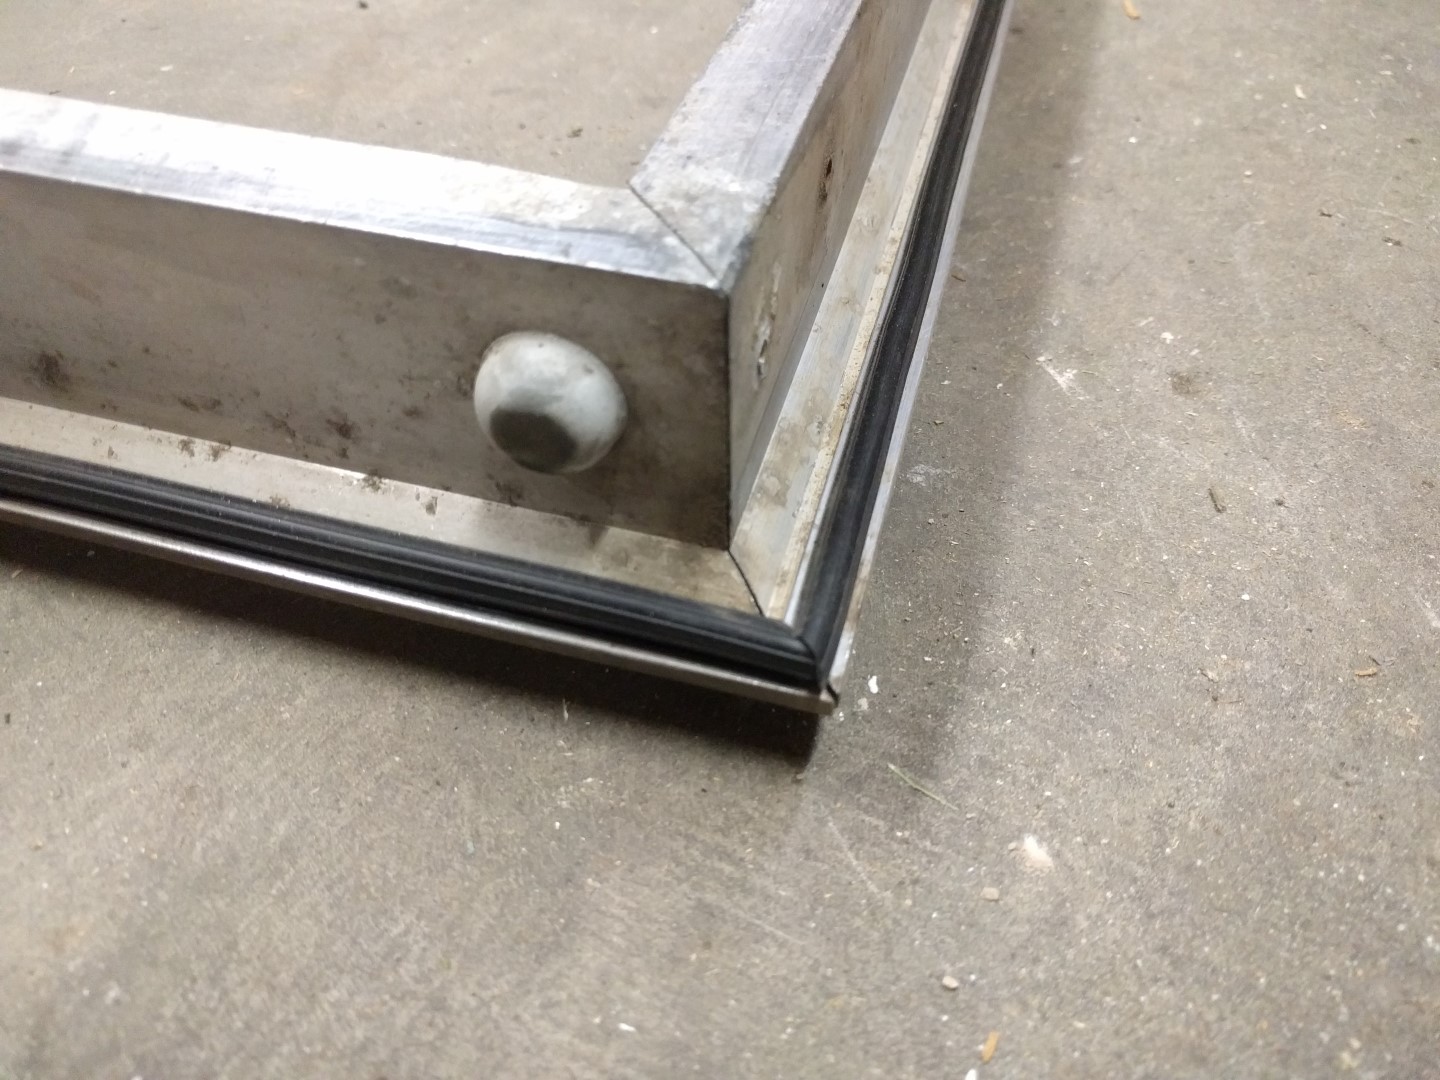
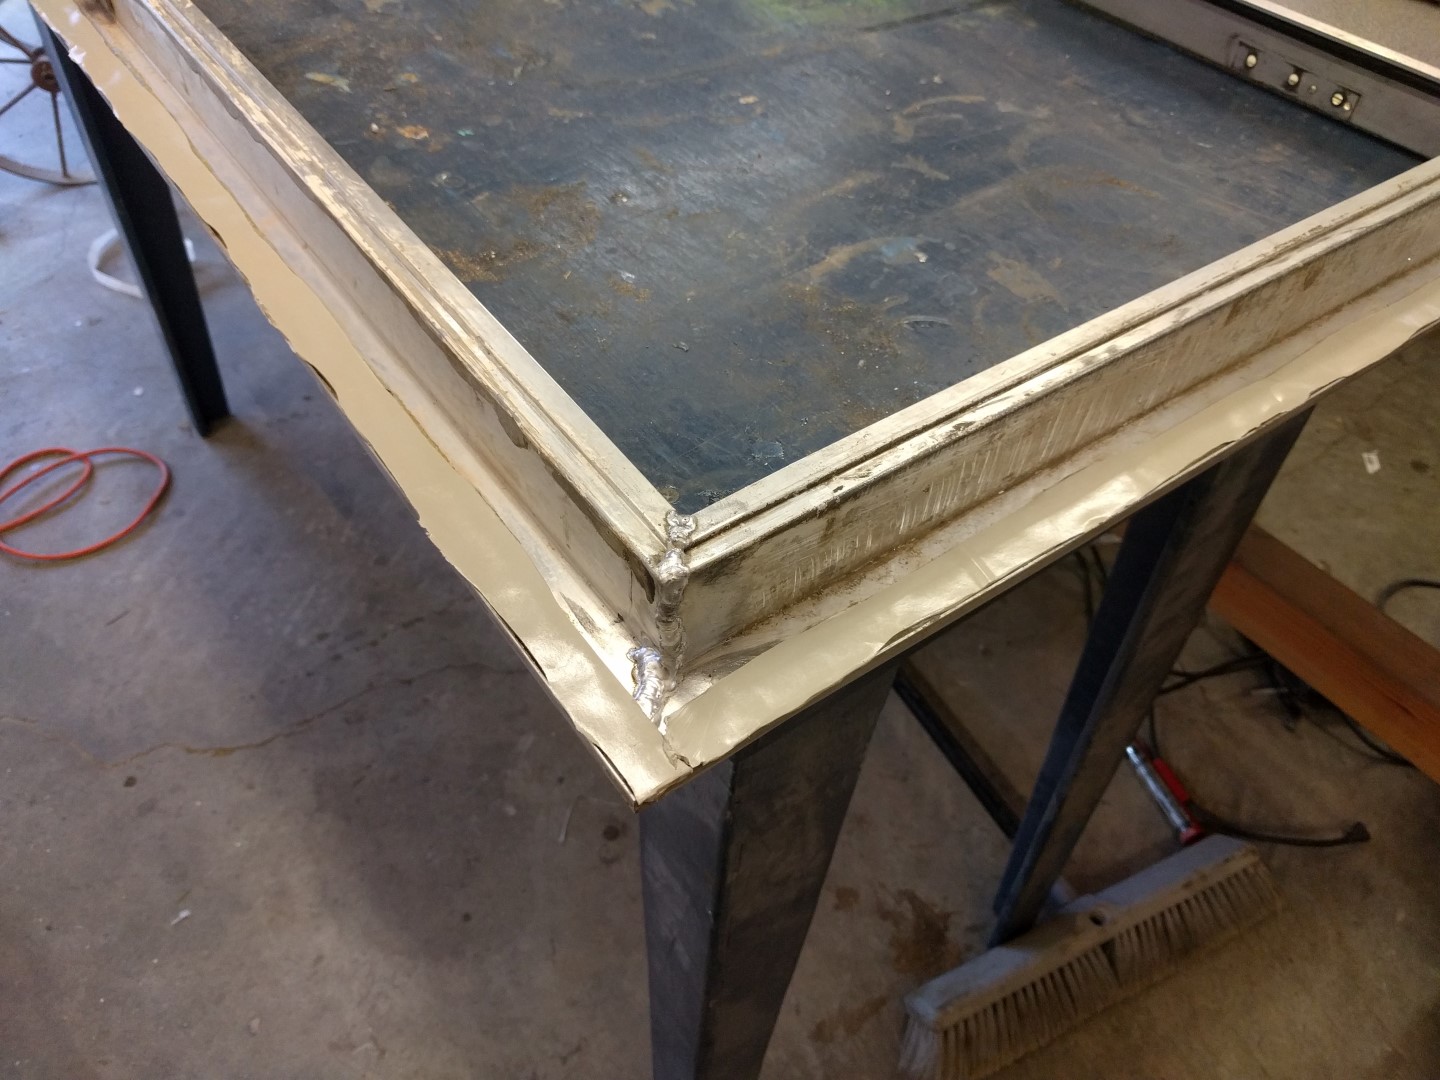
Rear Frame
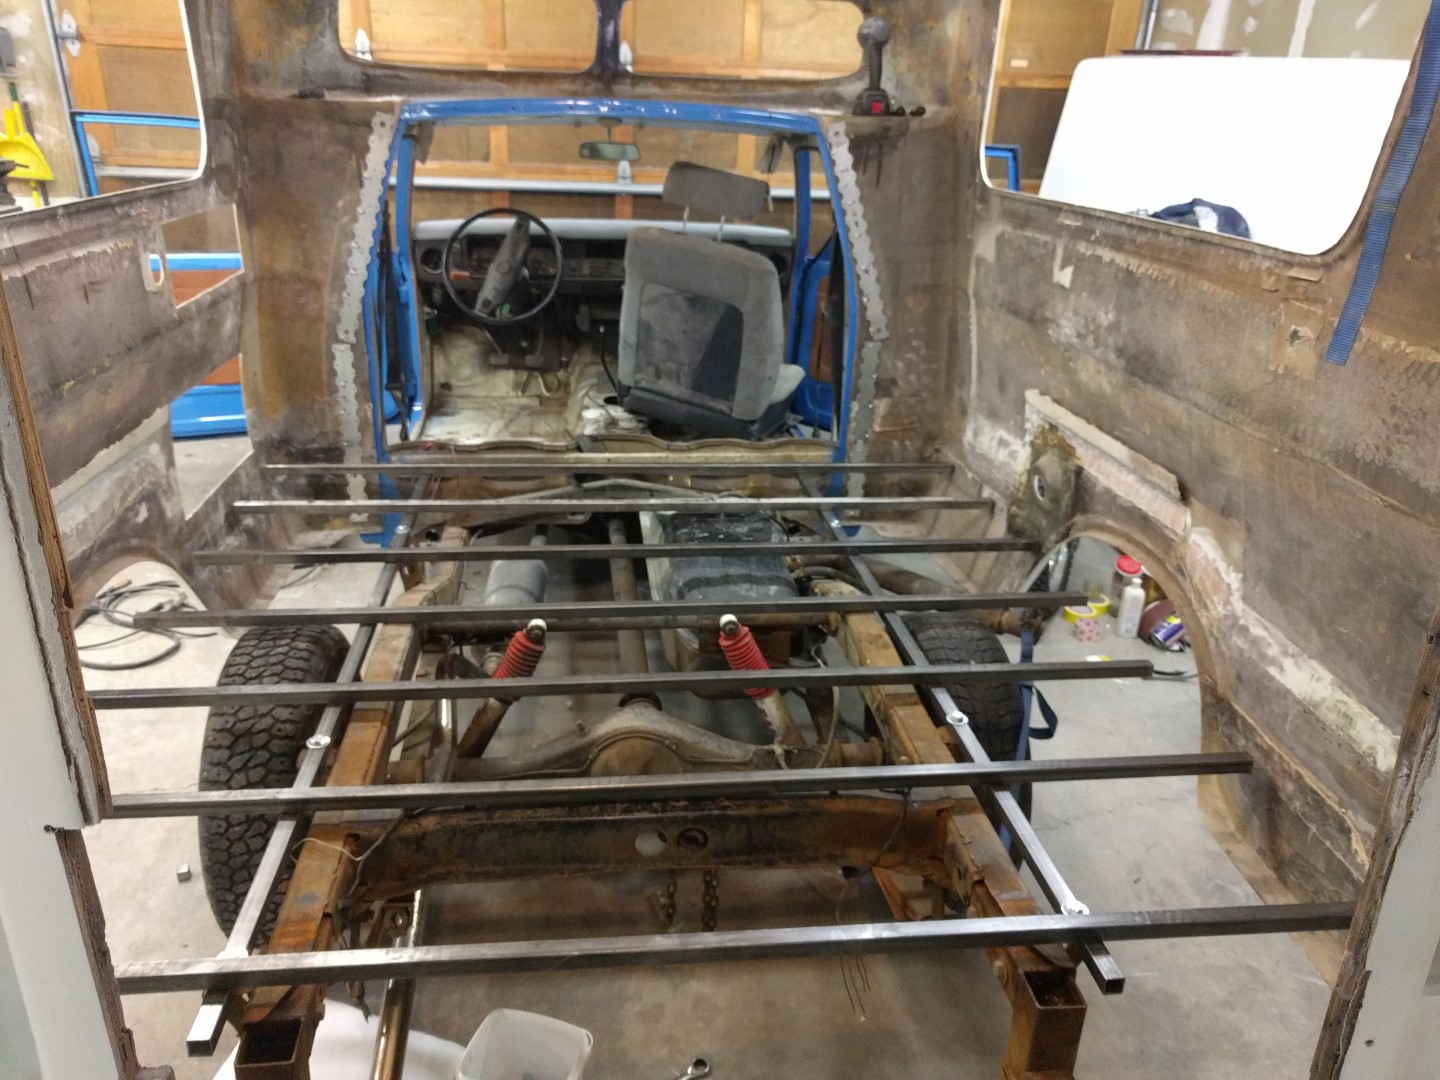
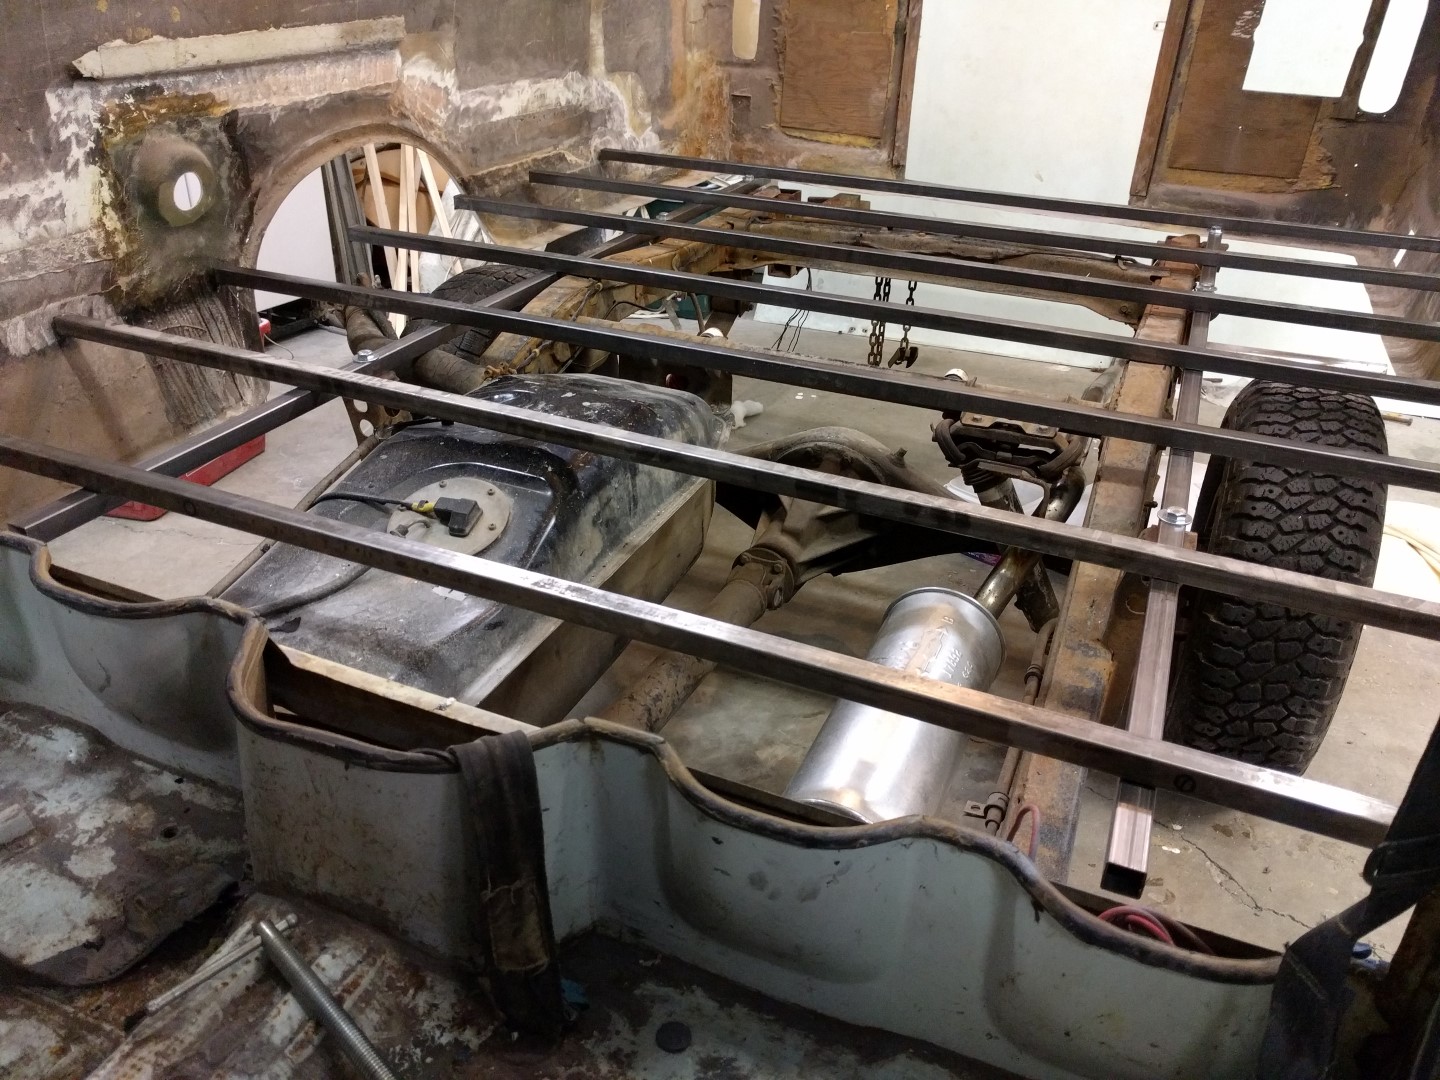
The stock frame was also lacking some intelligent engineering. There are six posts that the truck bed would have attached to if this wasn’t a camper and instead a pickup truck. Chinook decided to just attach a 1” plywood sheet and call it good. No good!!
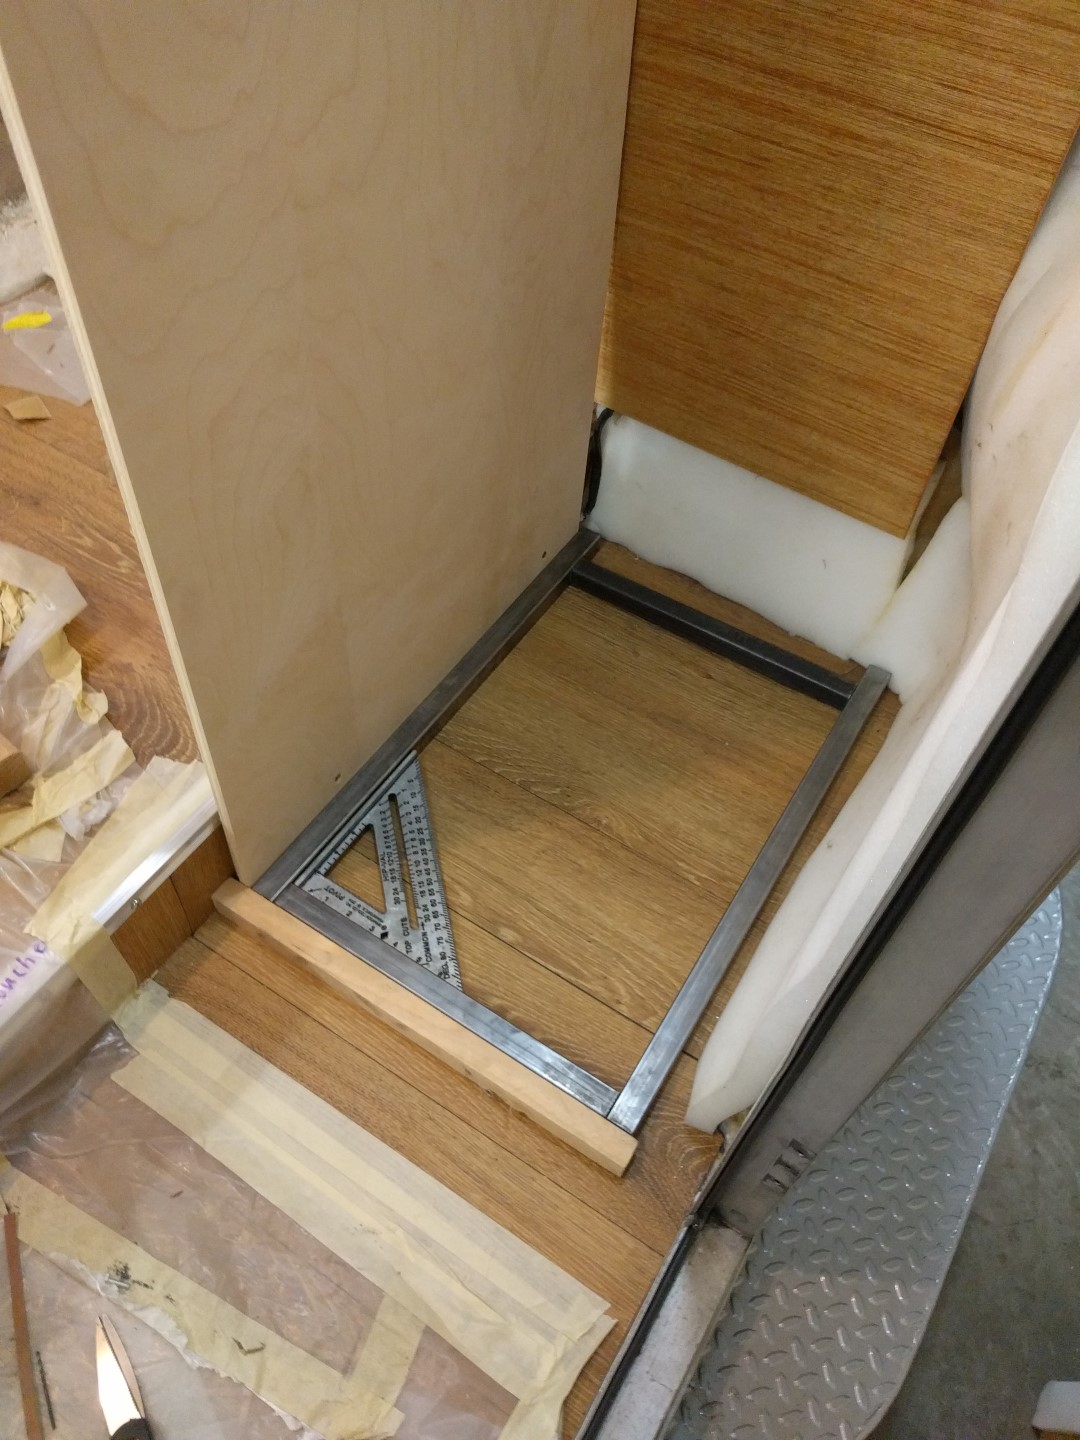
The new main frame is metal constructed from 1” square tubing in a lattice structure. The sub frame where the step down near the rear coach door is just used two square tubes relying directly on the truck frame for support front to rear.
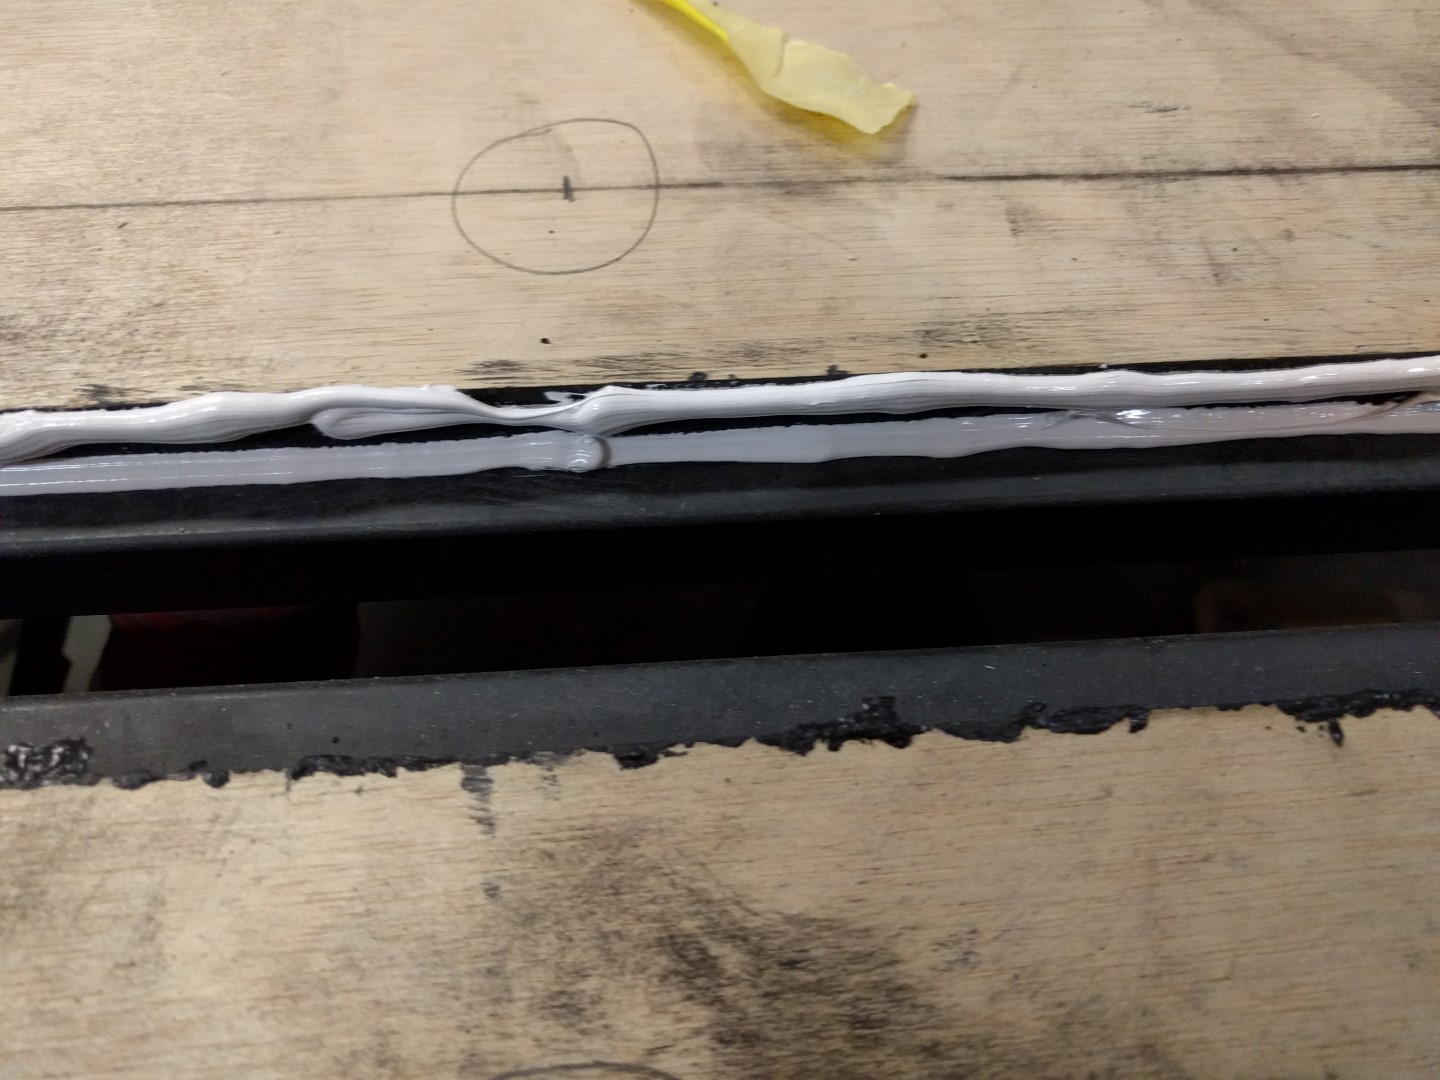
Sheets of plywood are limited to 4x8’ dimensions so I just cut two and tripled up underneath this joint on square tubing. Then used Sikaflex 221 polyurethane sealant between the two wood sheets.
The frame was painted with the leftover black epoxy primer from the main paint job; nothing else but the primer.


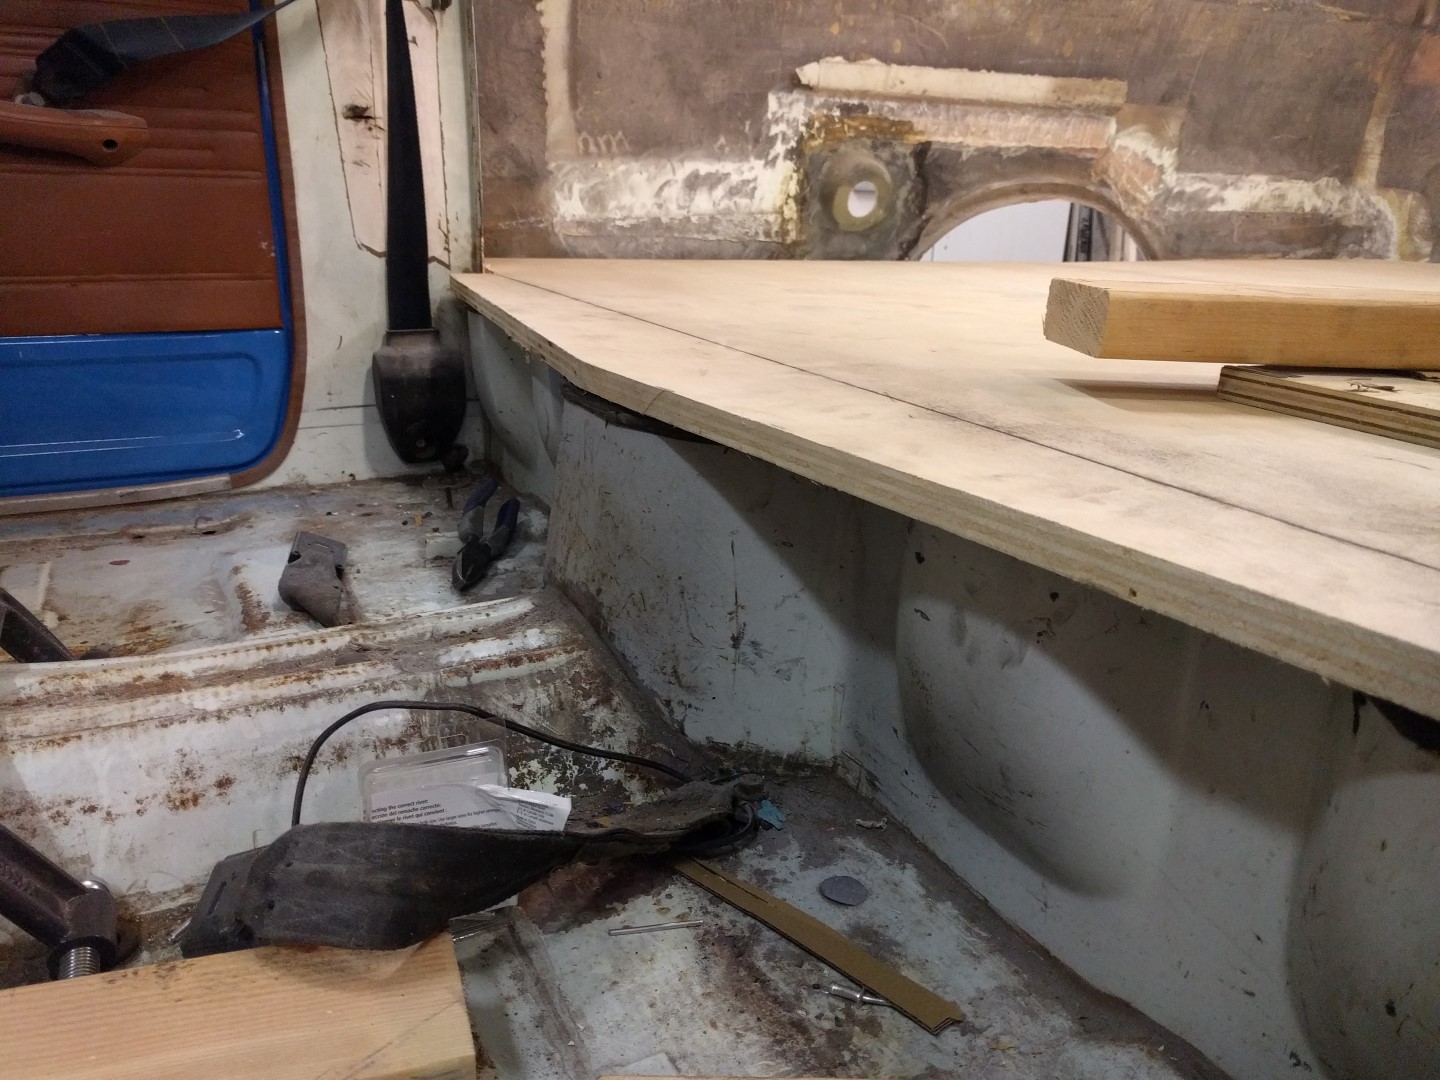
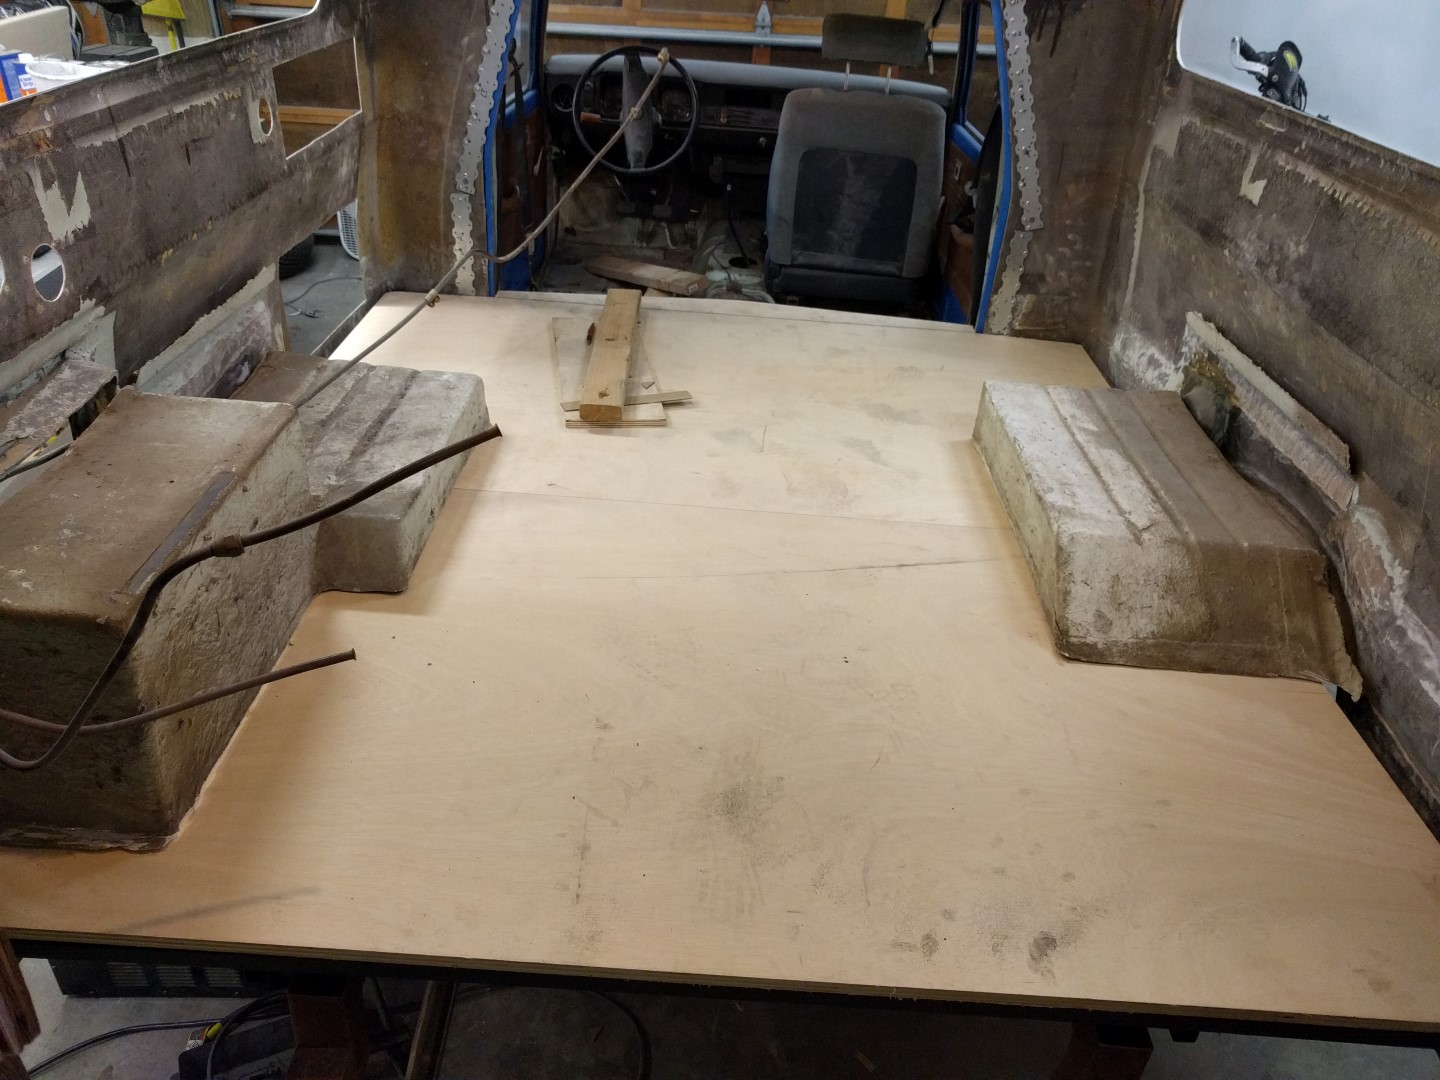
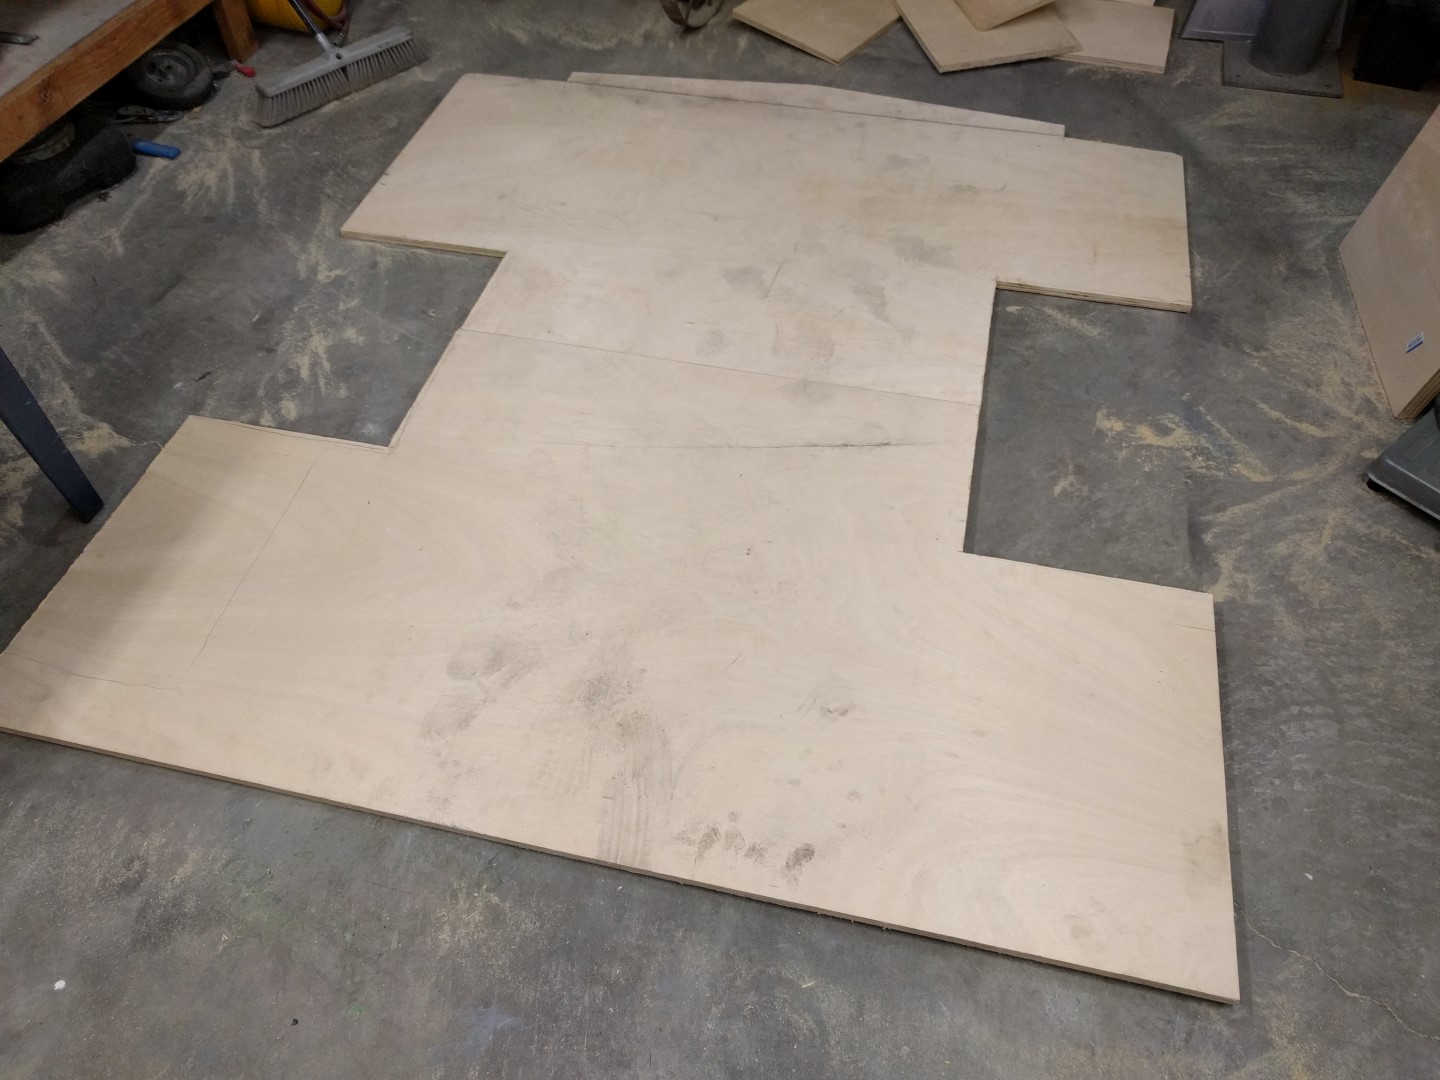
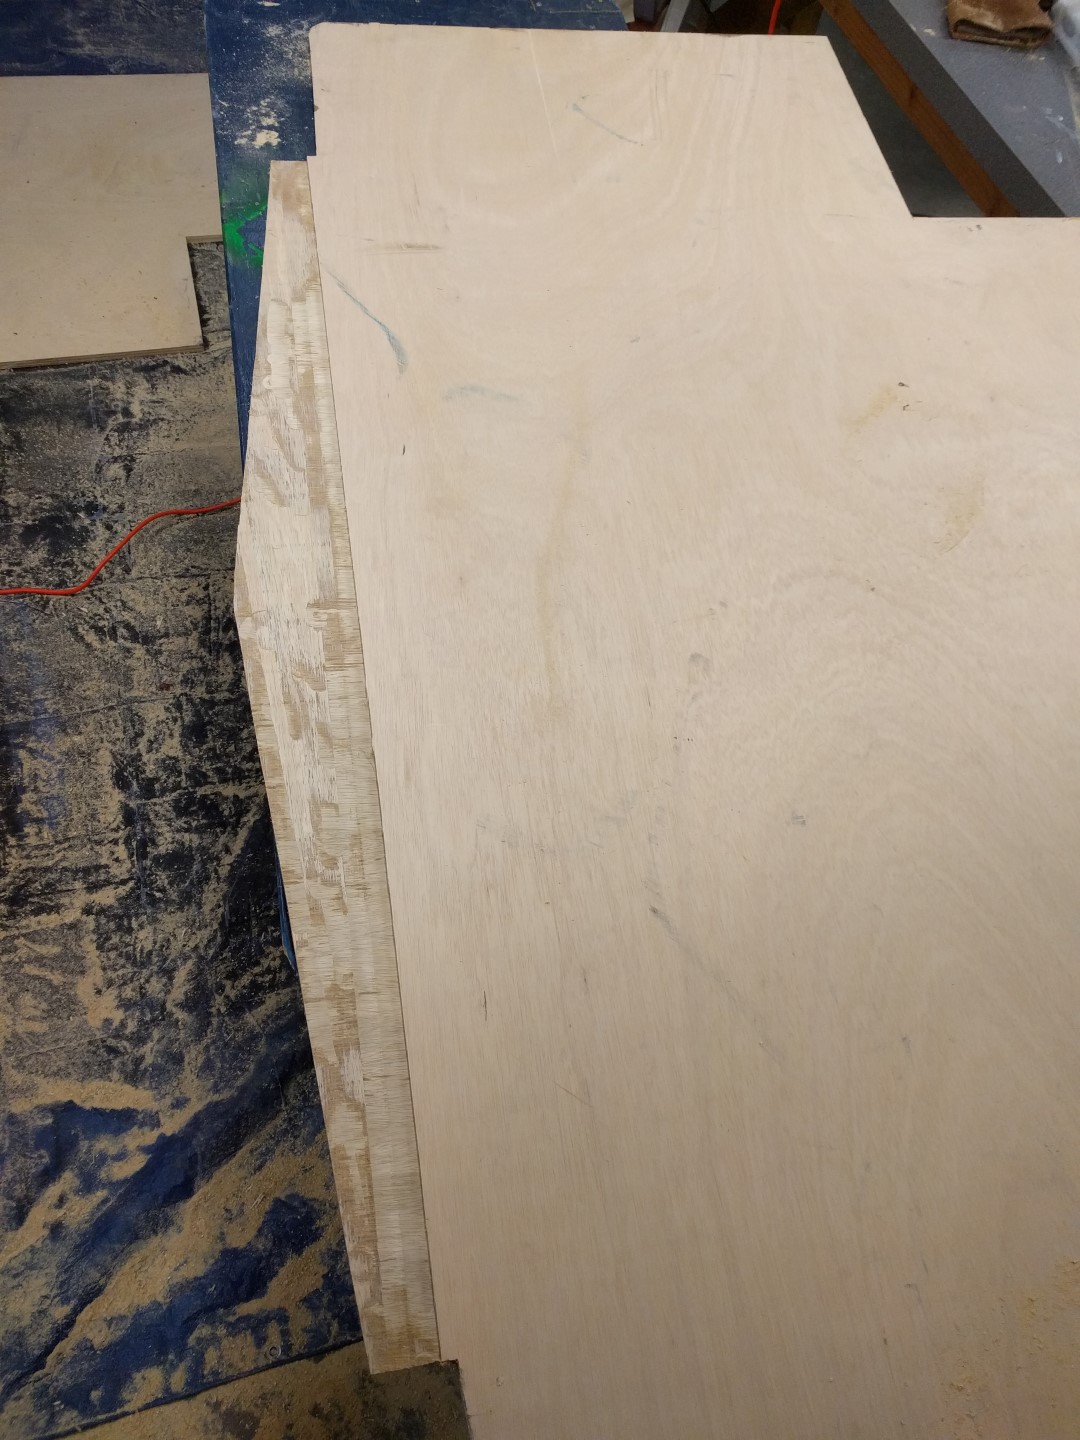
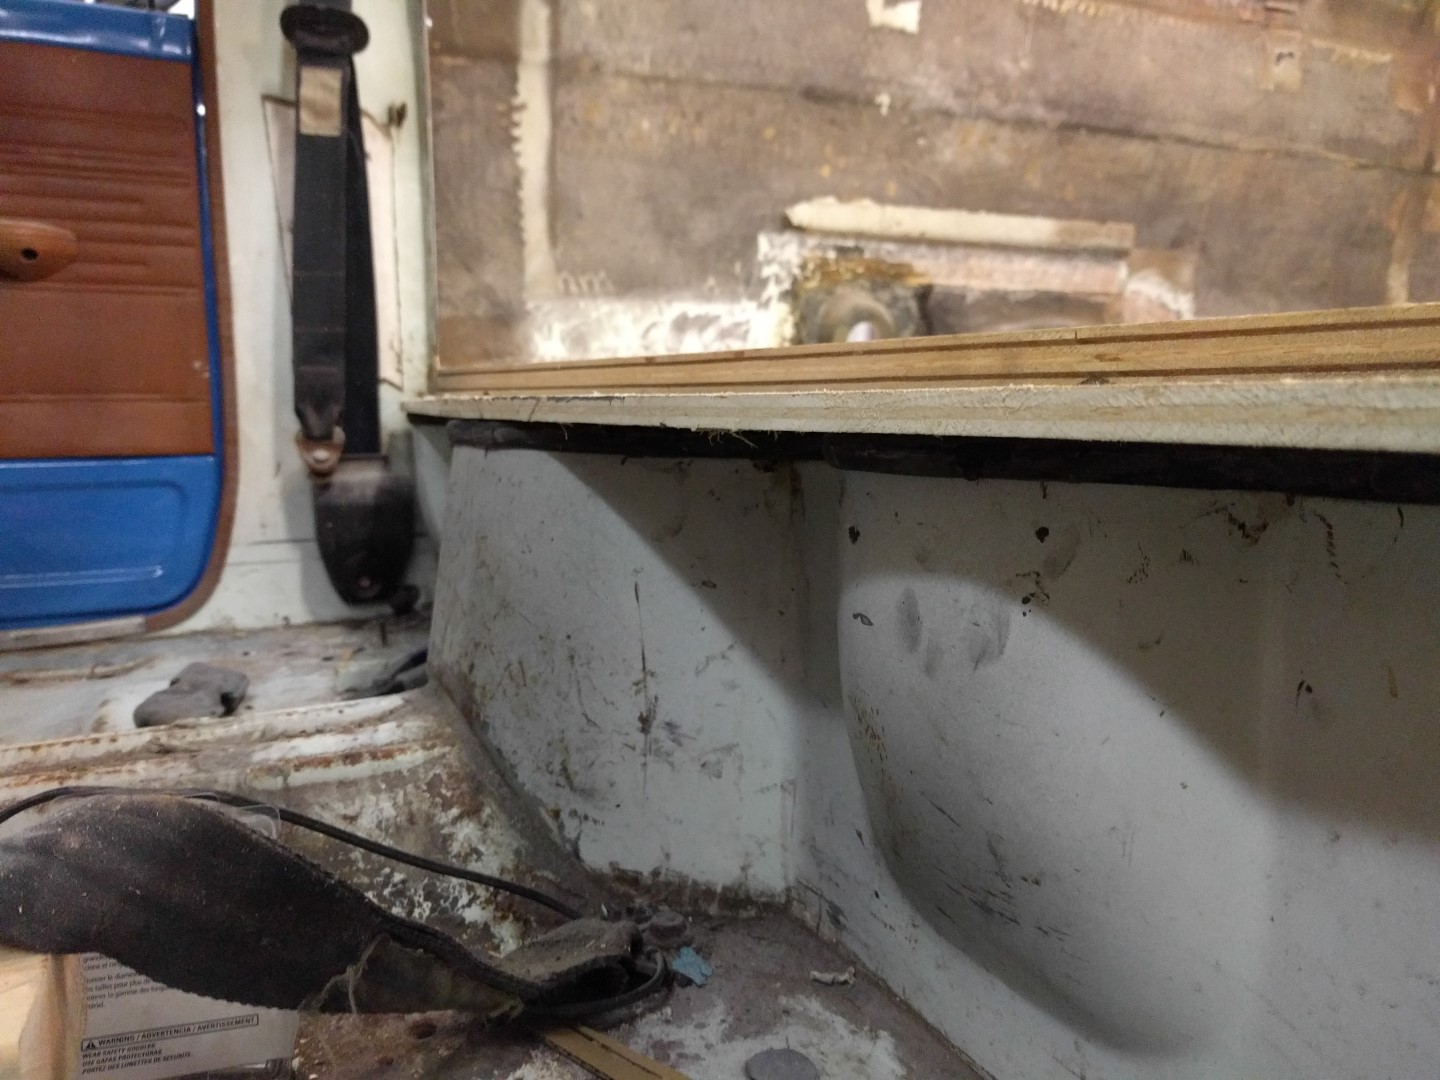
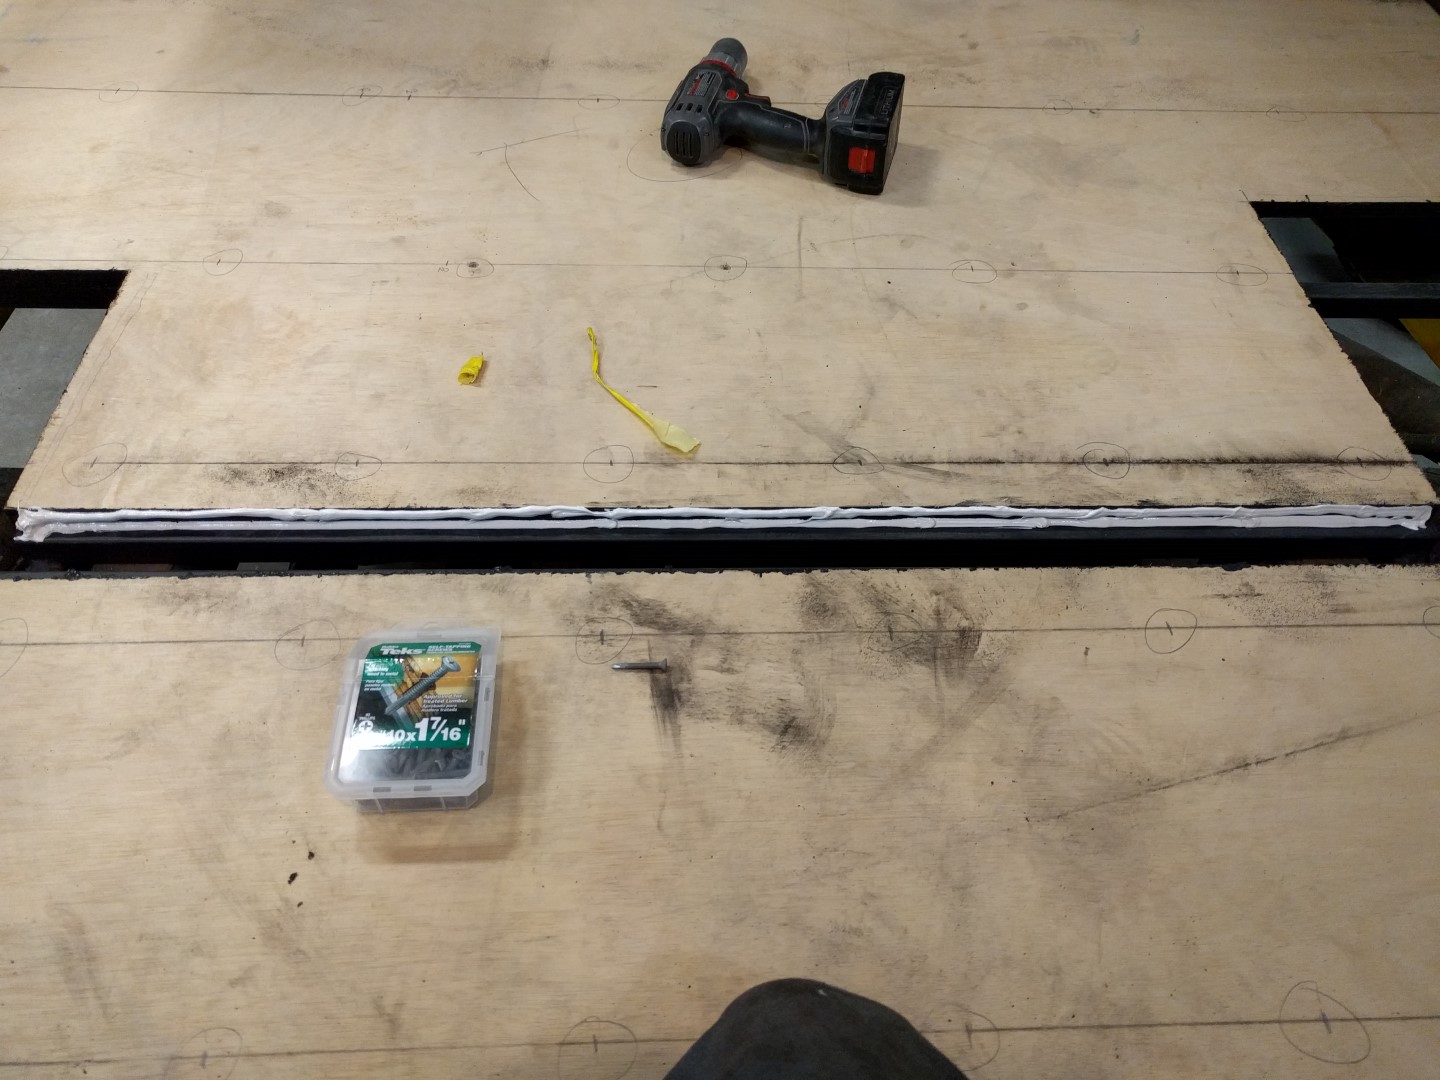
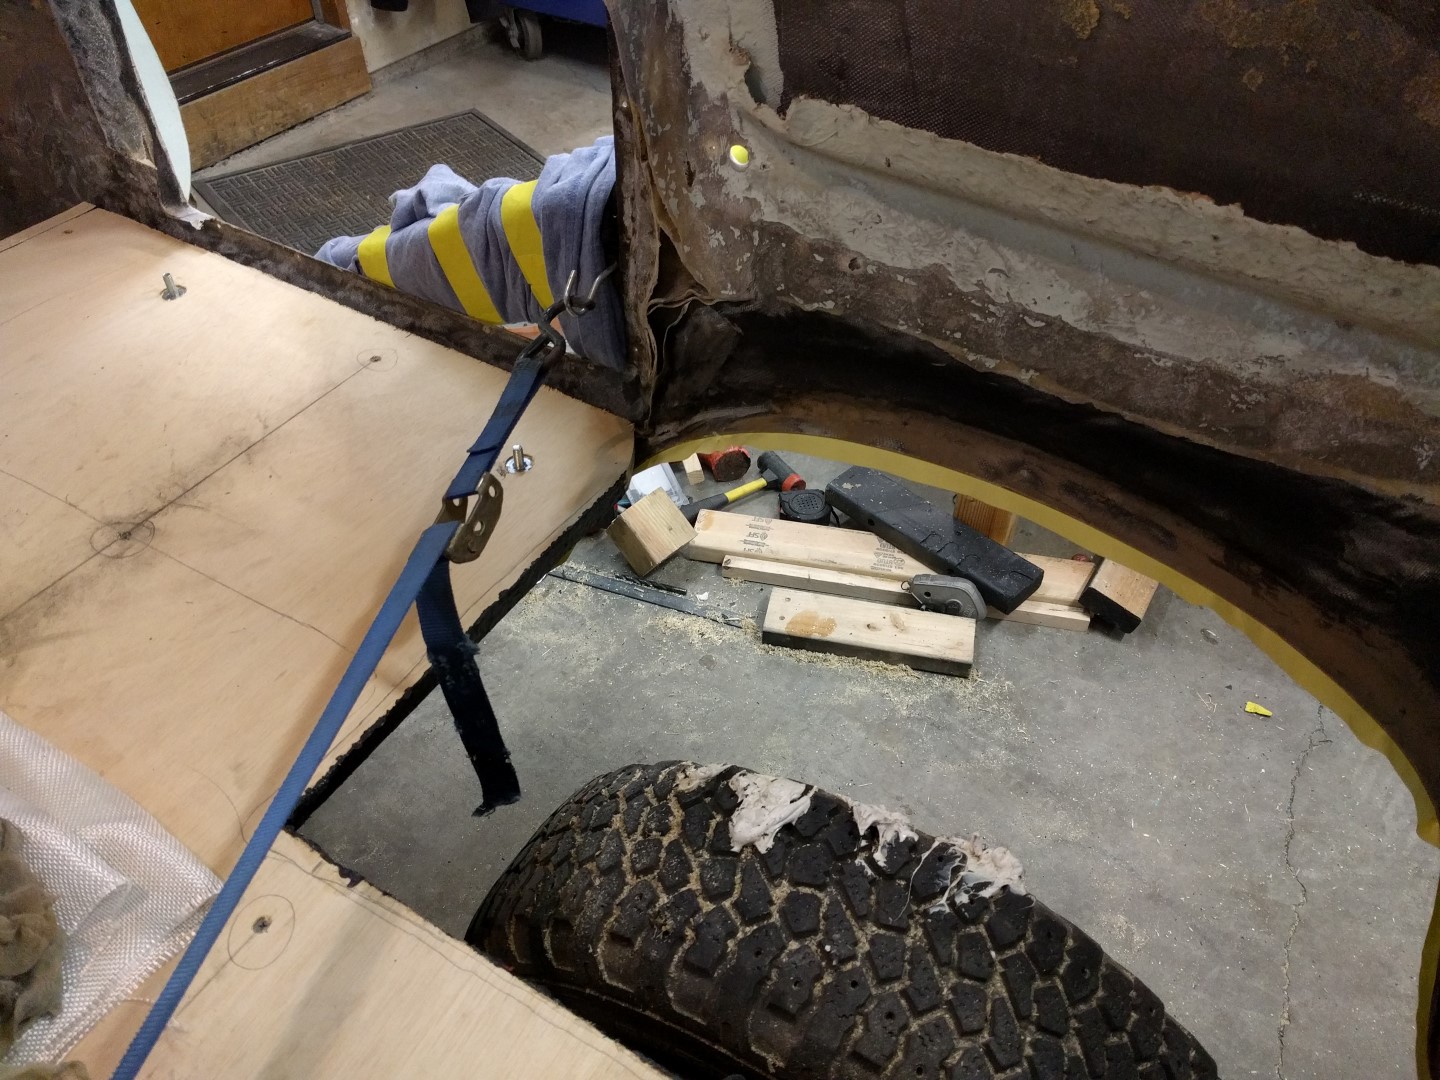
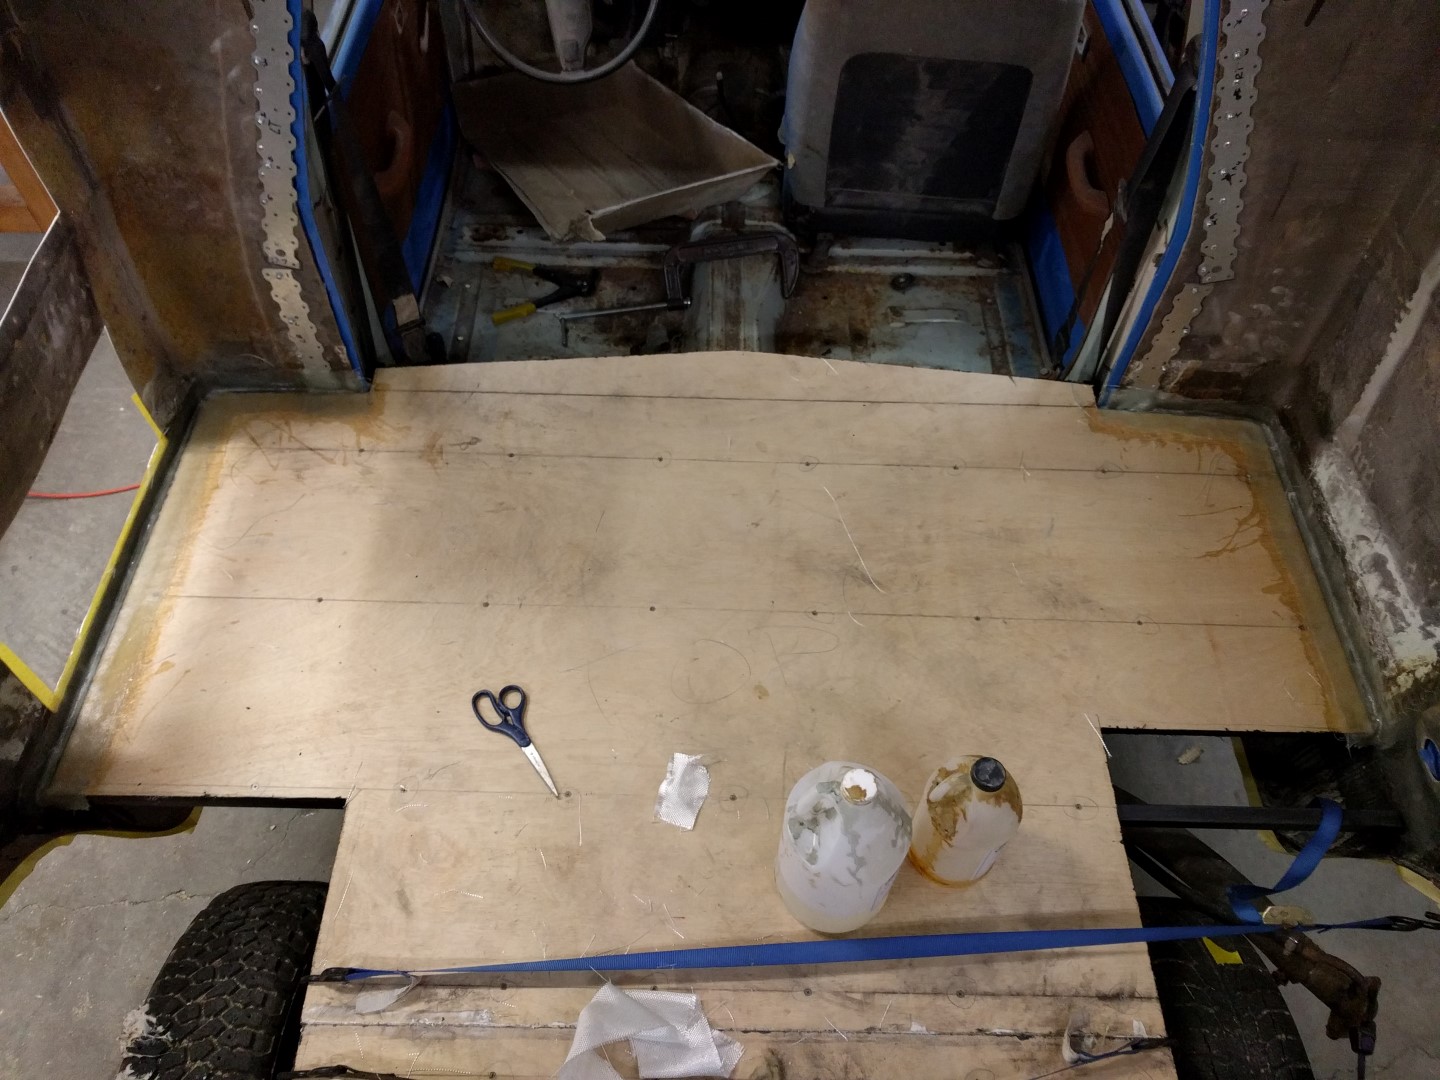
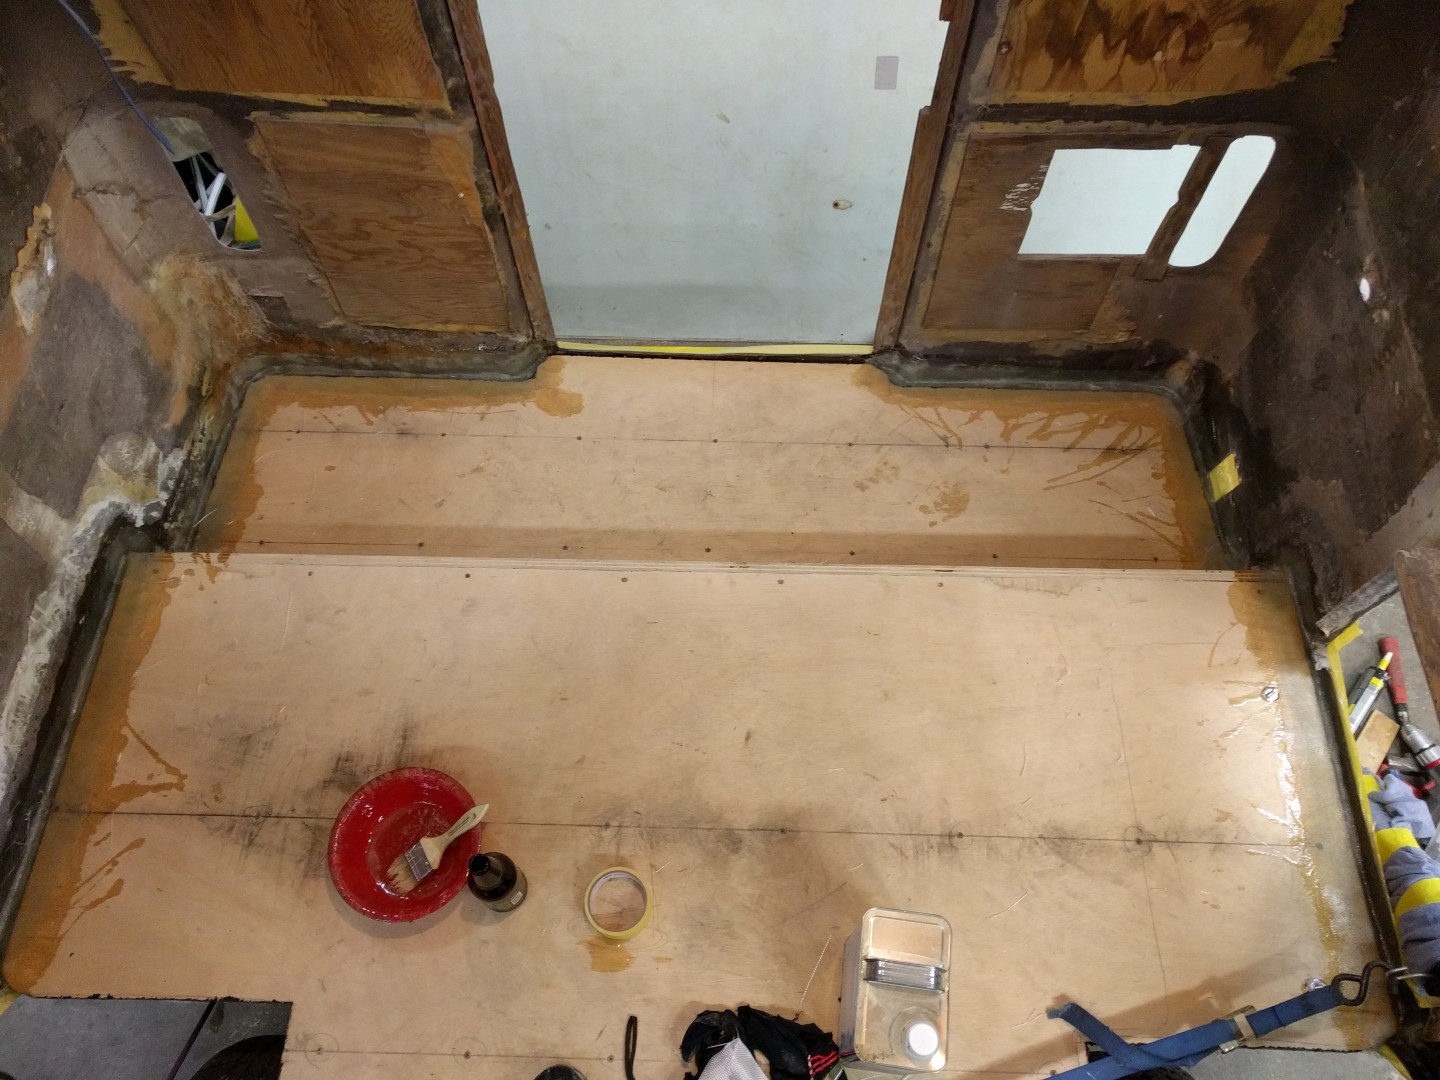
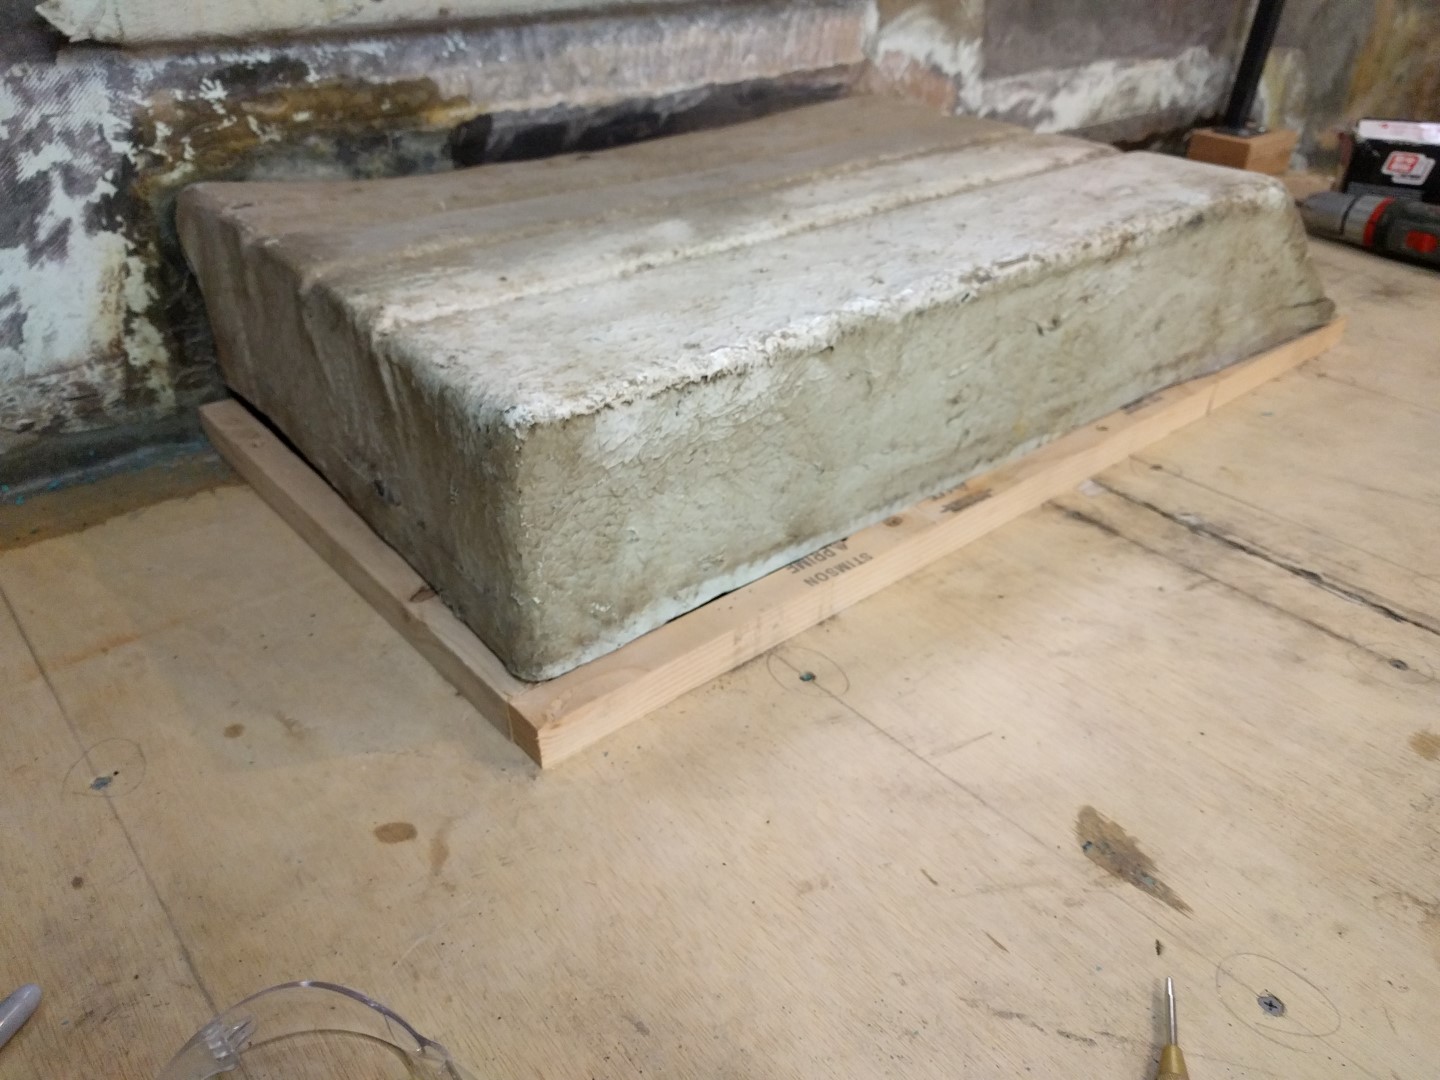
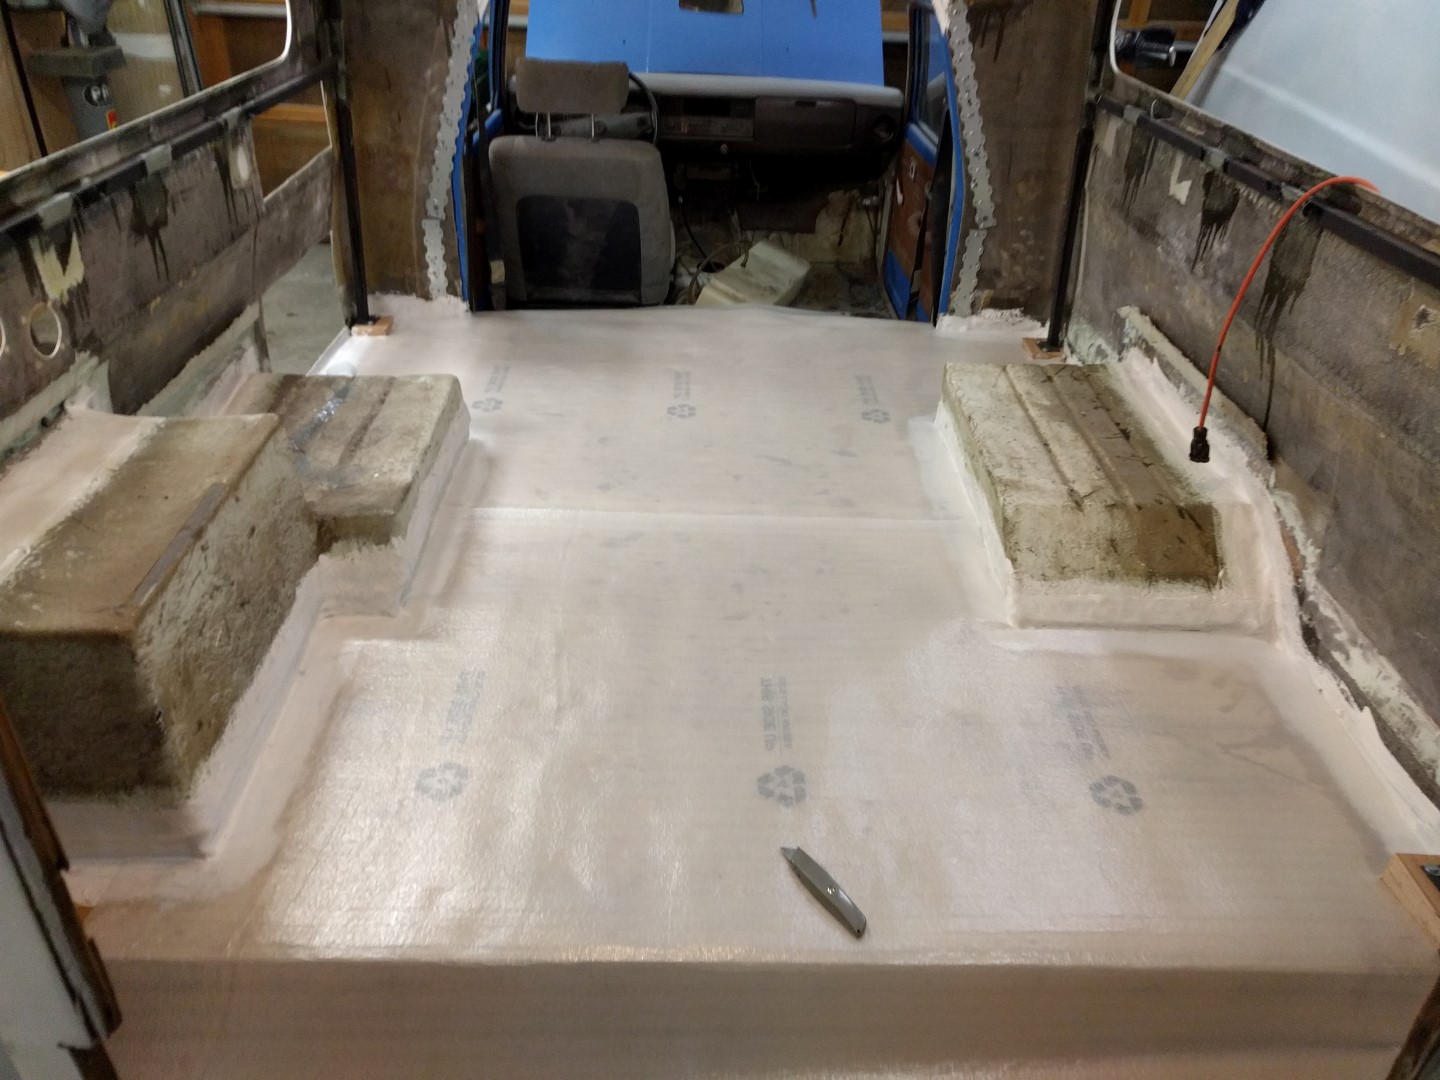
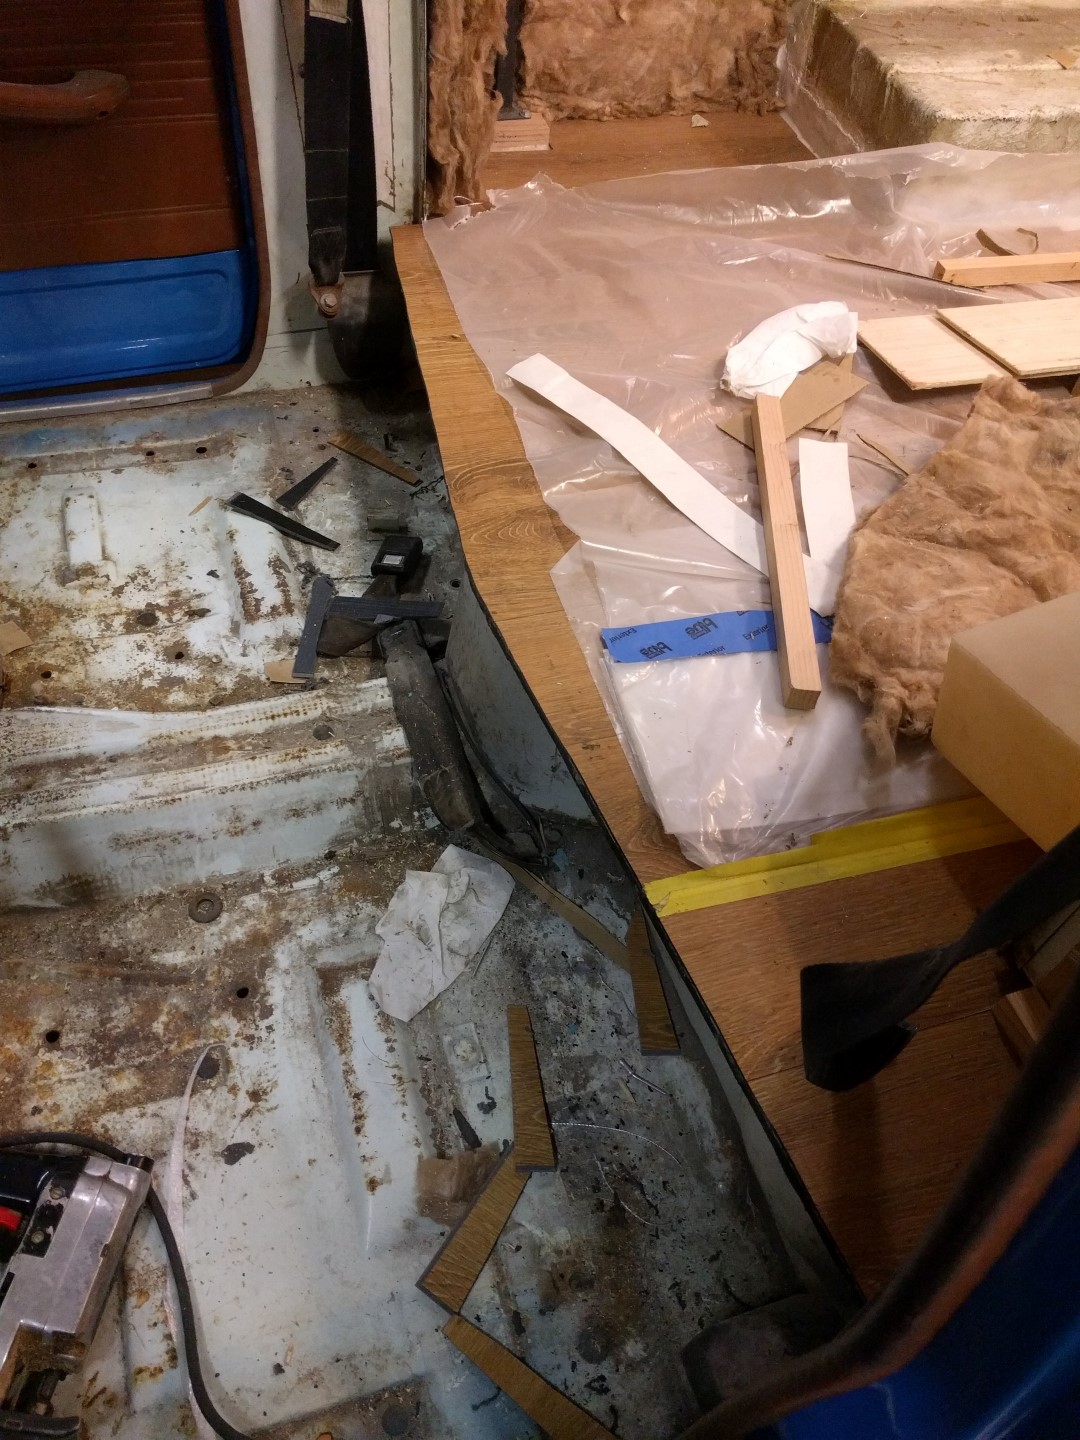
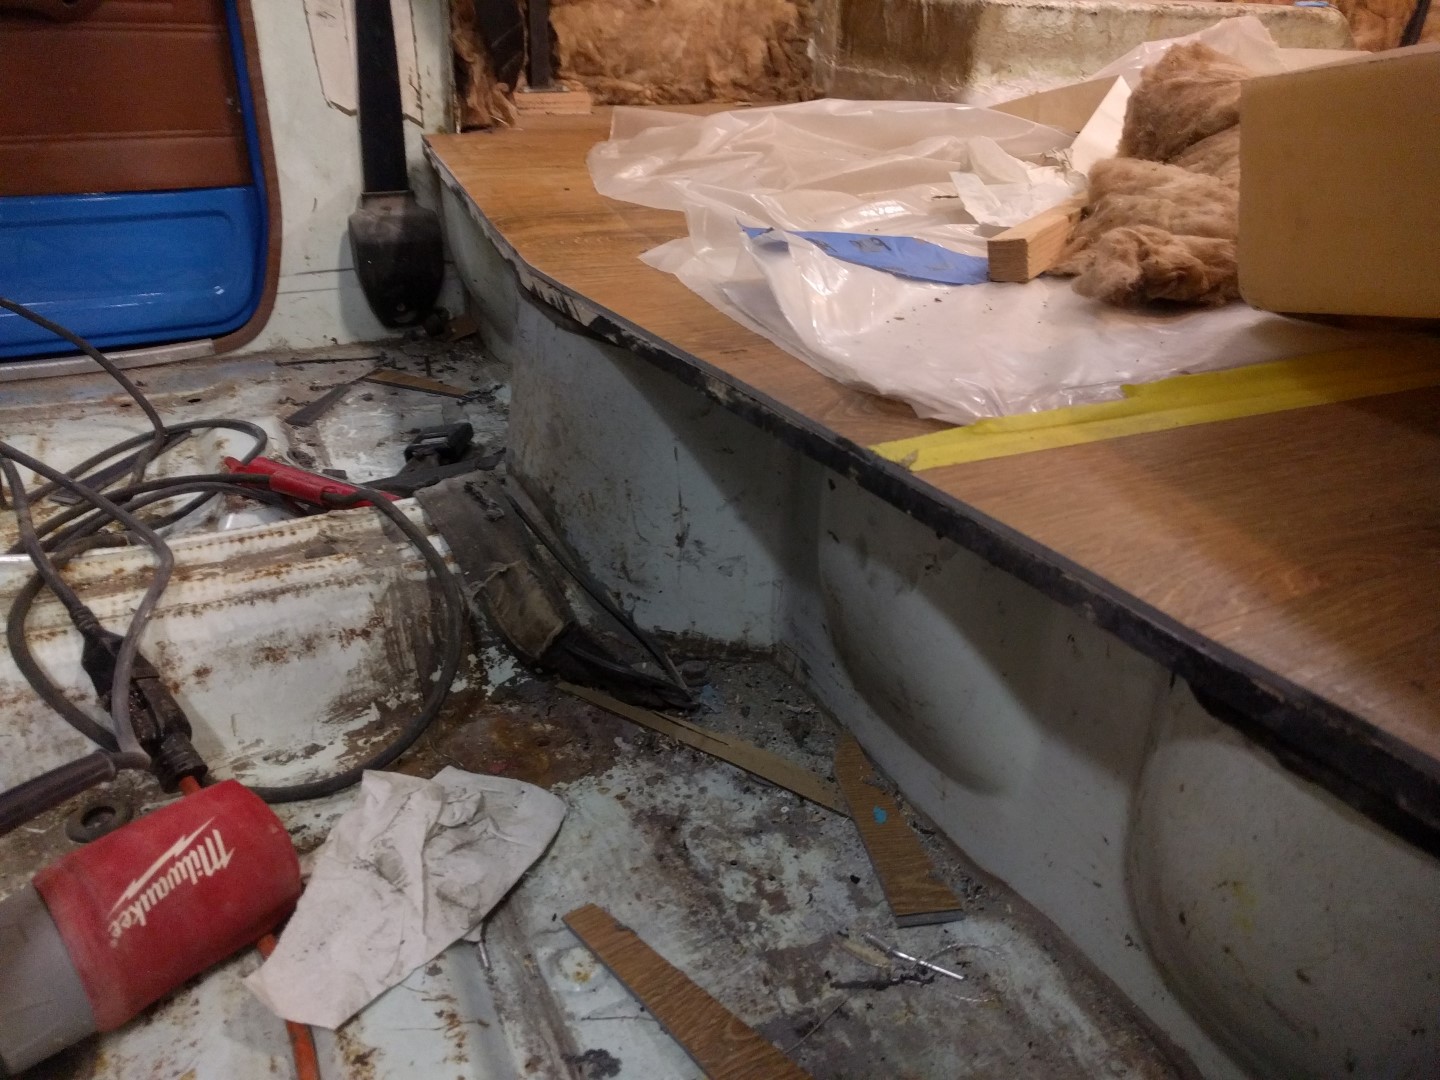
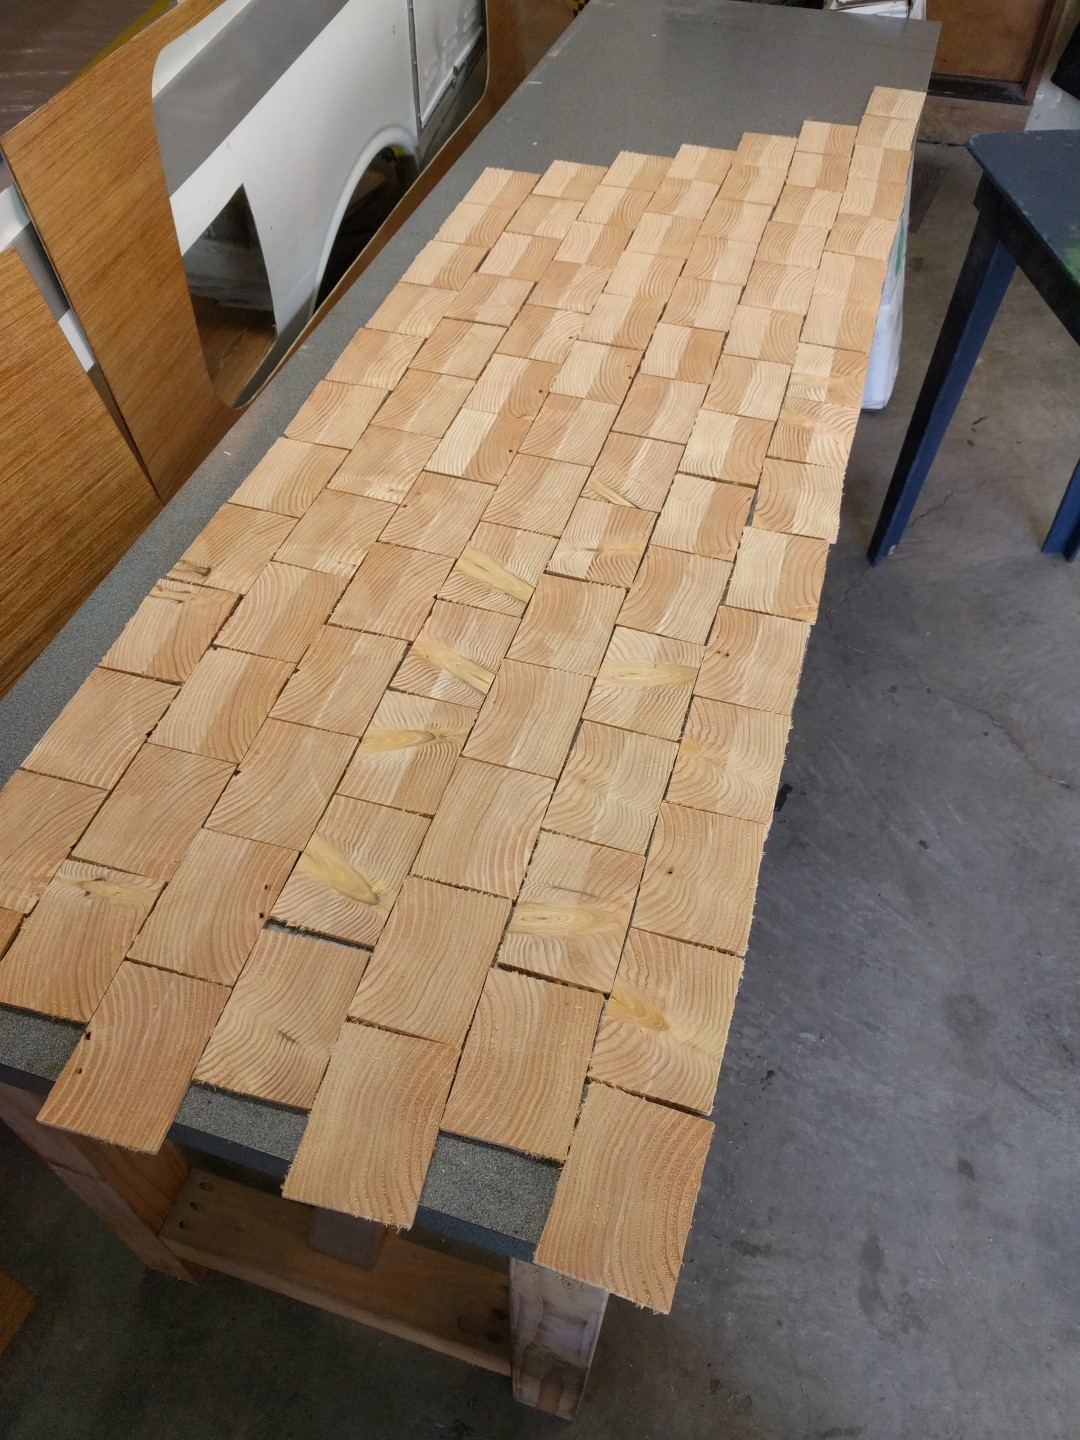
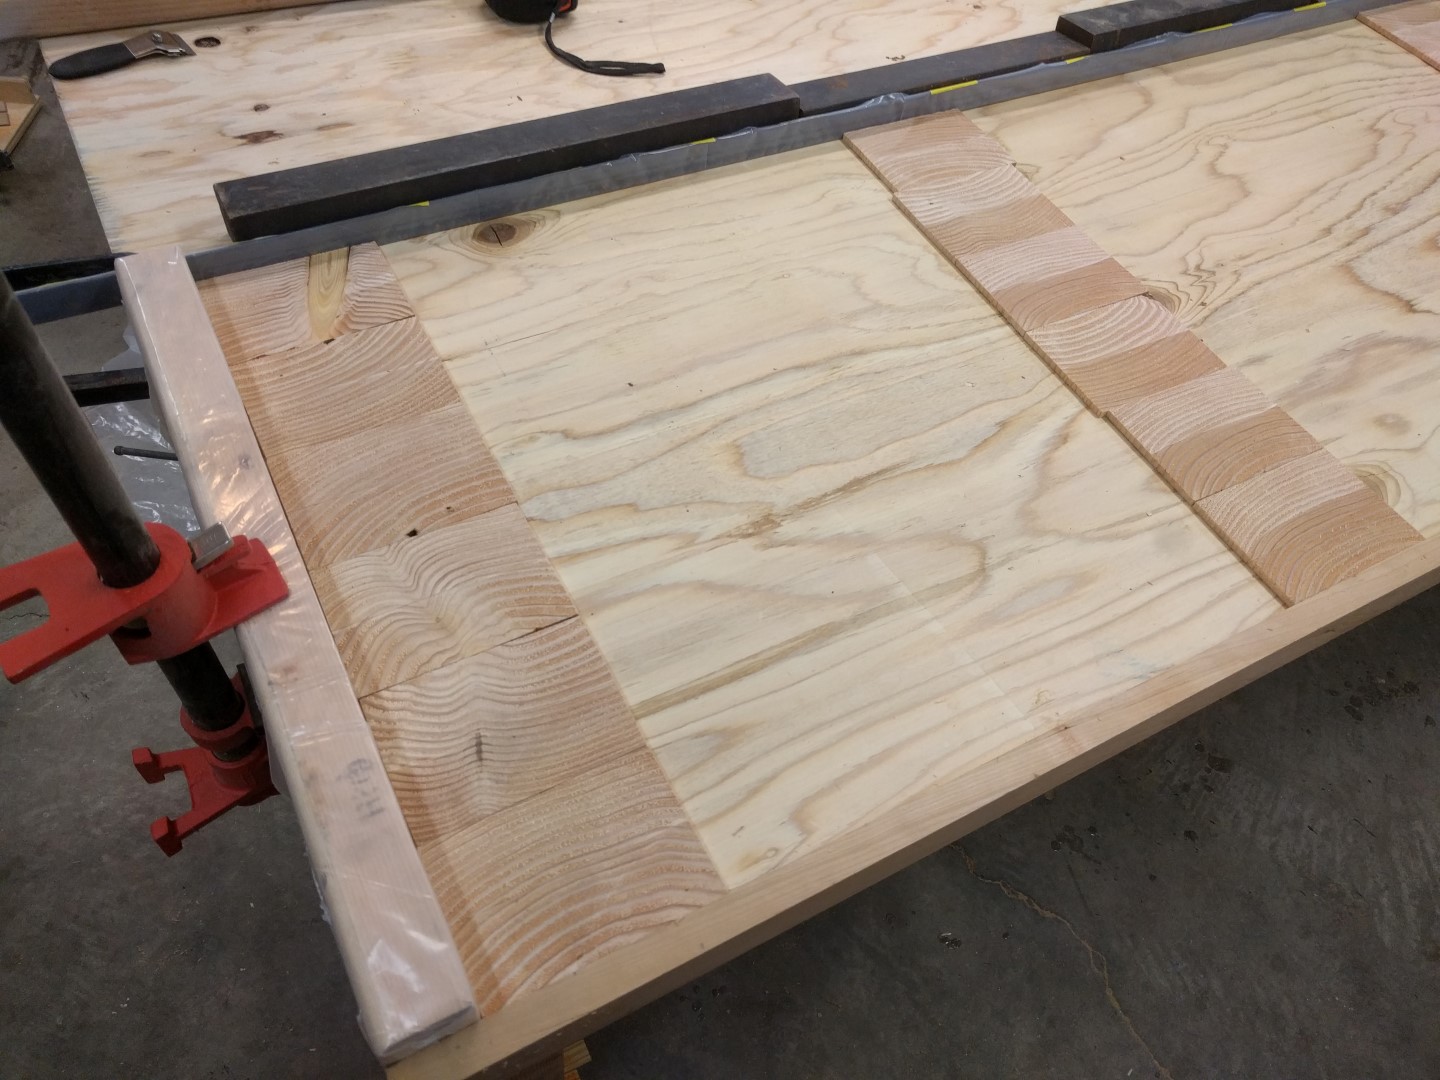
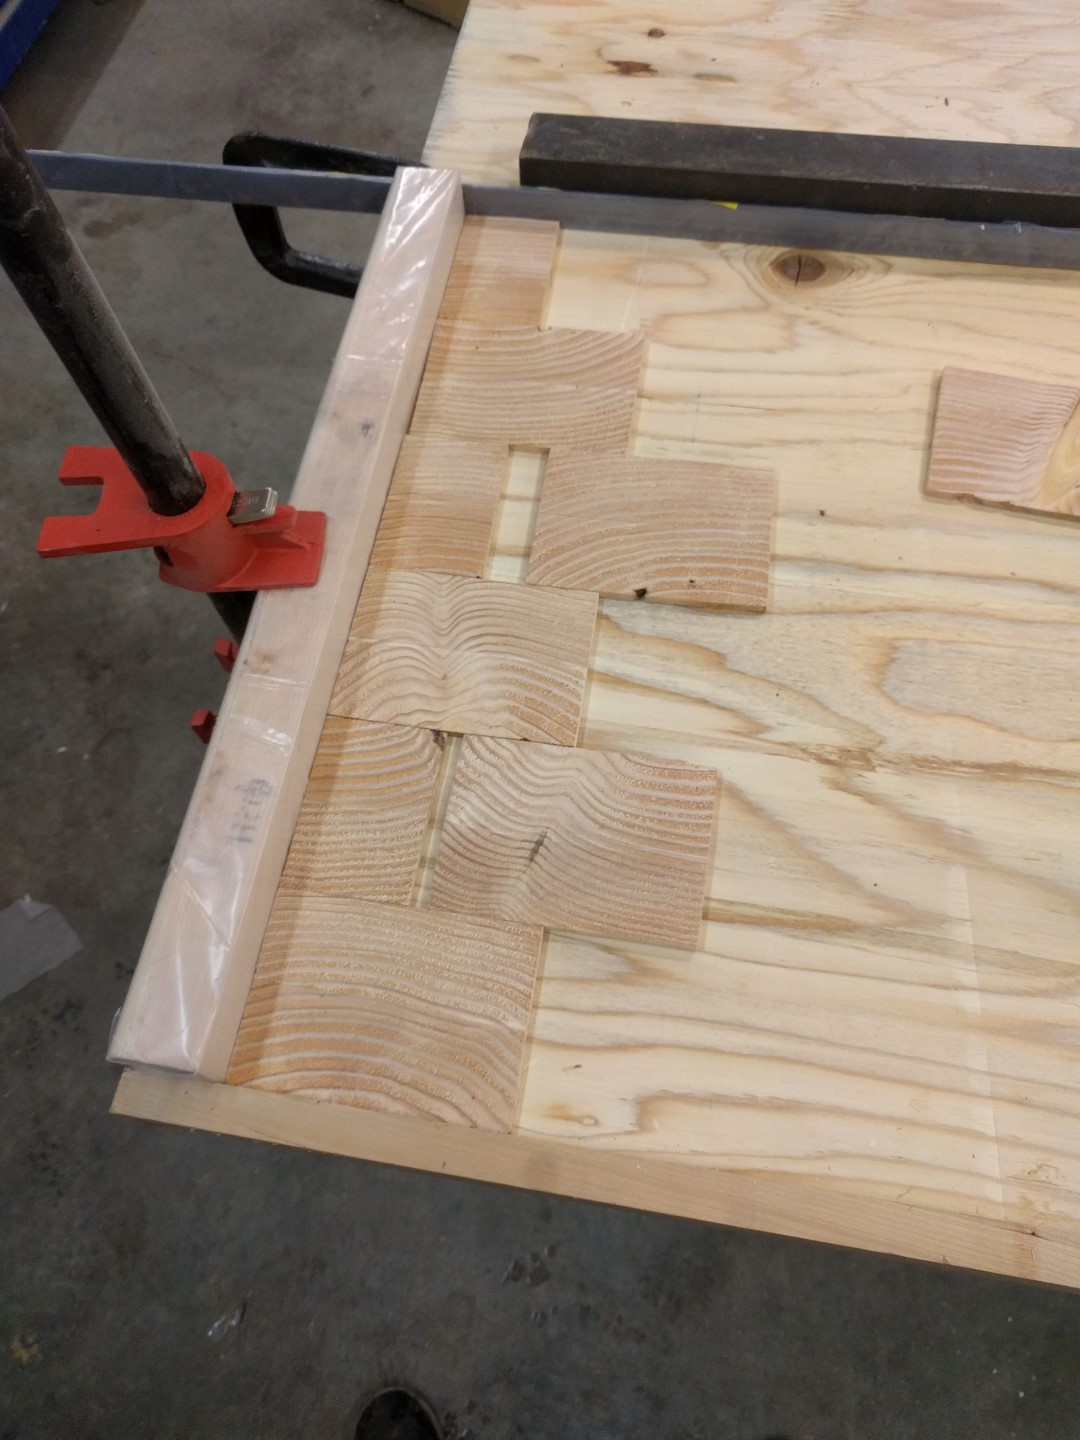
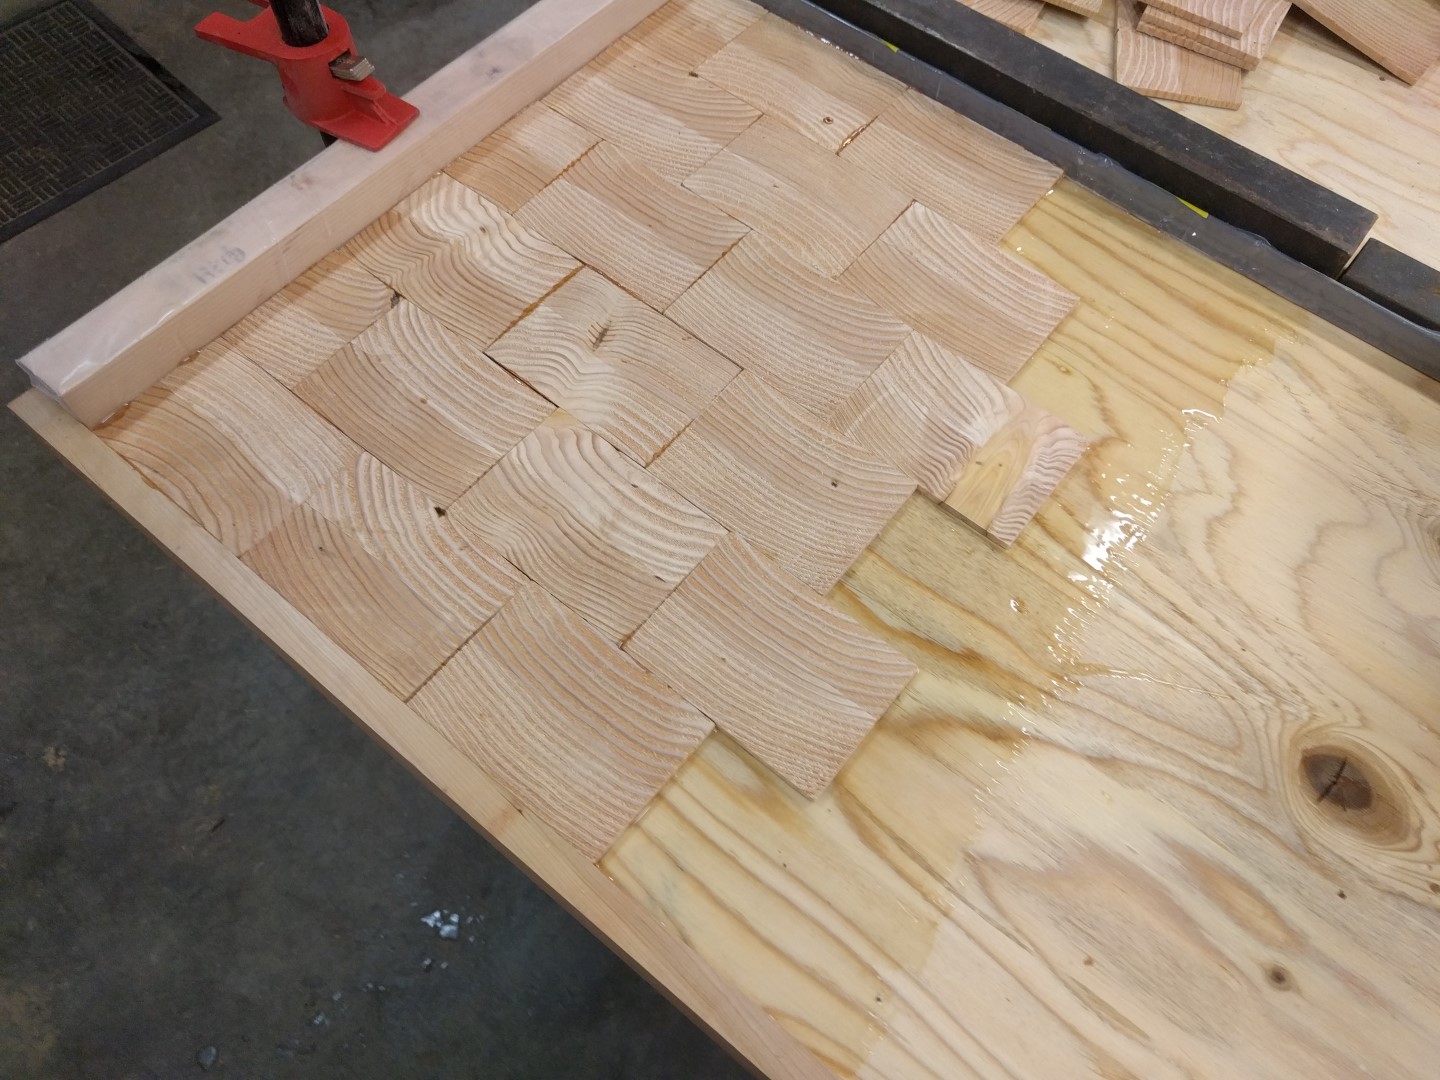
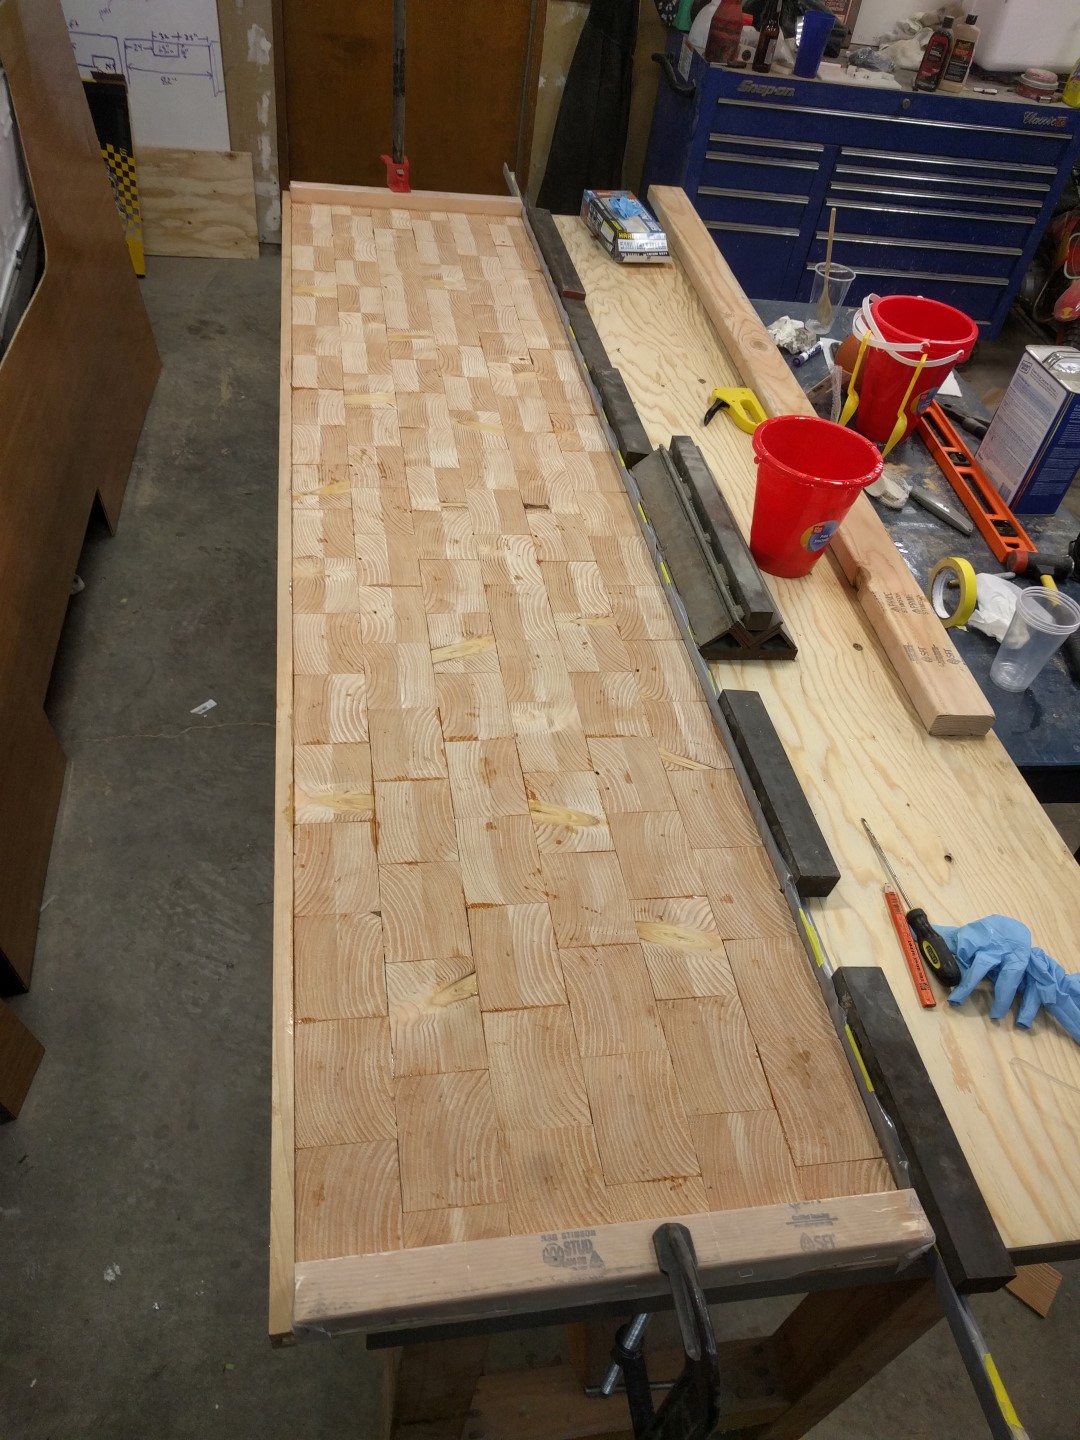
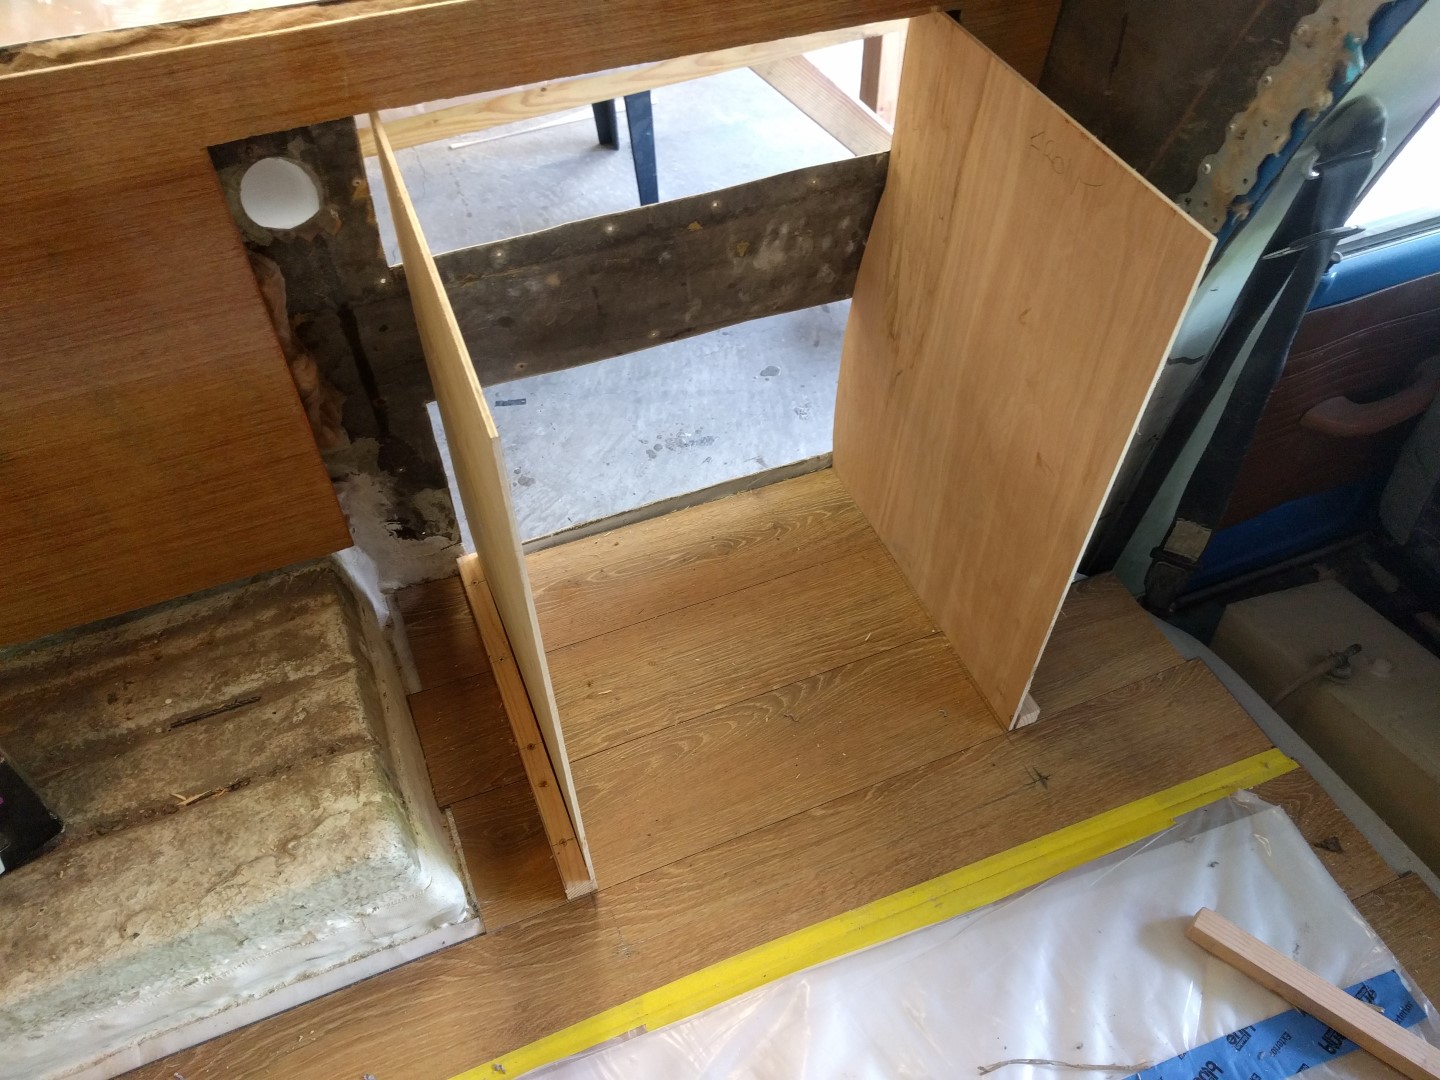
Floor Installation
The wood portion of the floor was built out of 3/4” laminated plywood in two discrete sections. Sheets of plywood are limited to 4x8’ dimensions so I just cut two and then used Sikaflex 221 polyurethane sealant between the two wood sheets.
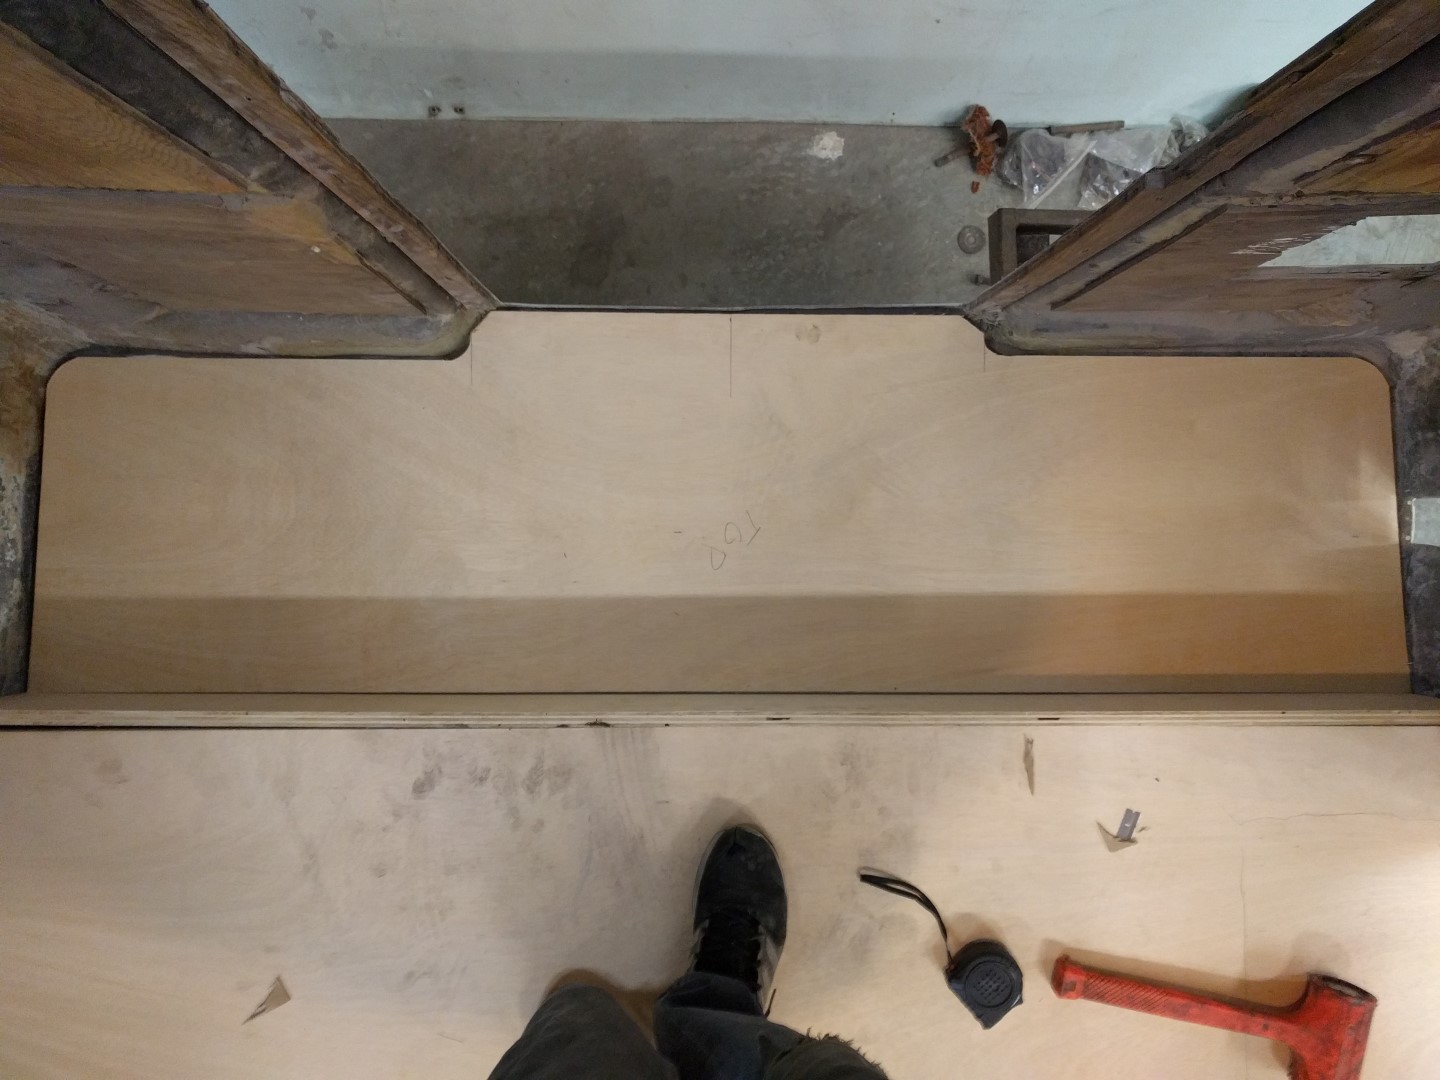
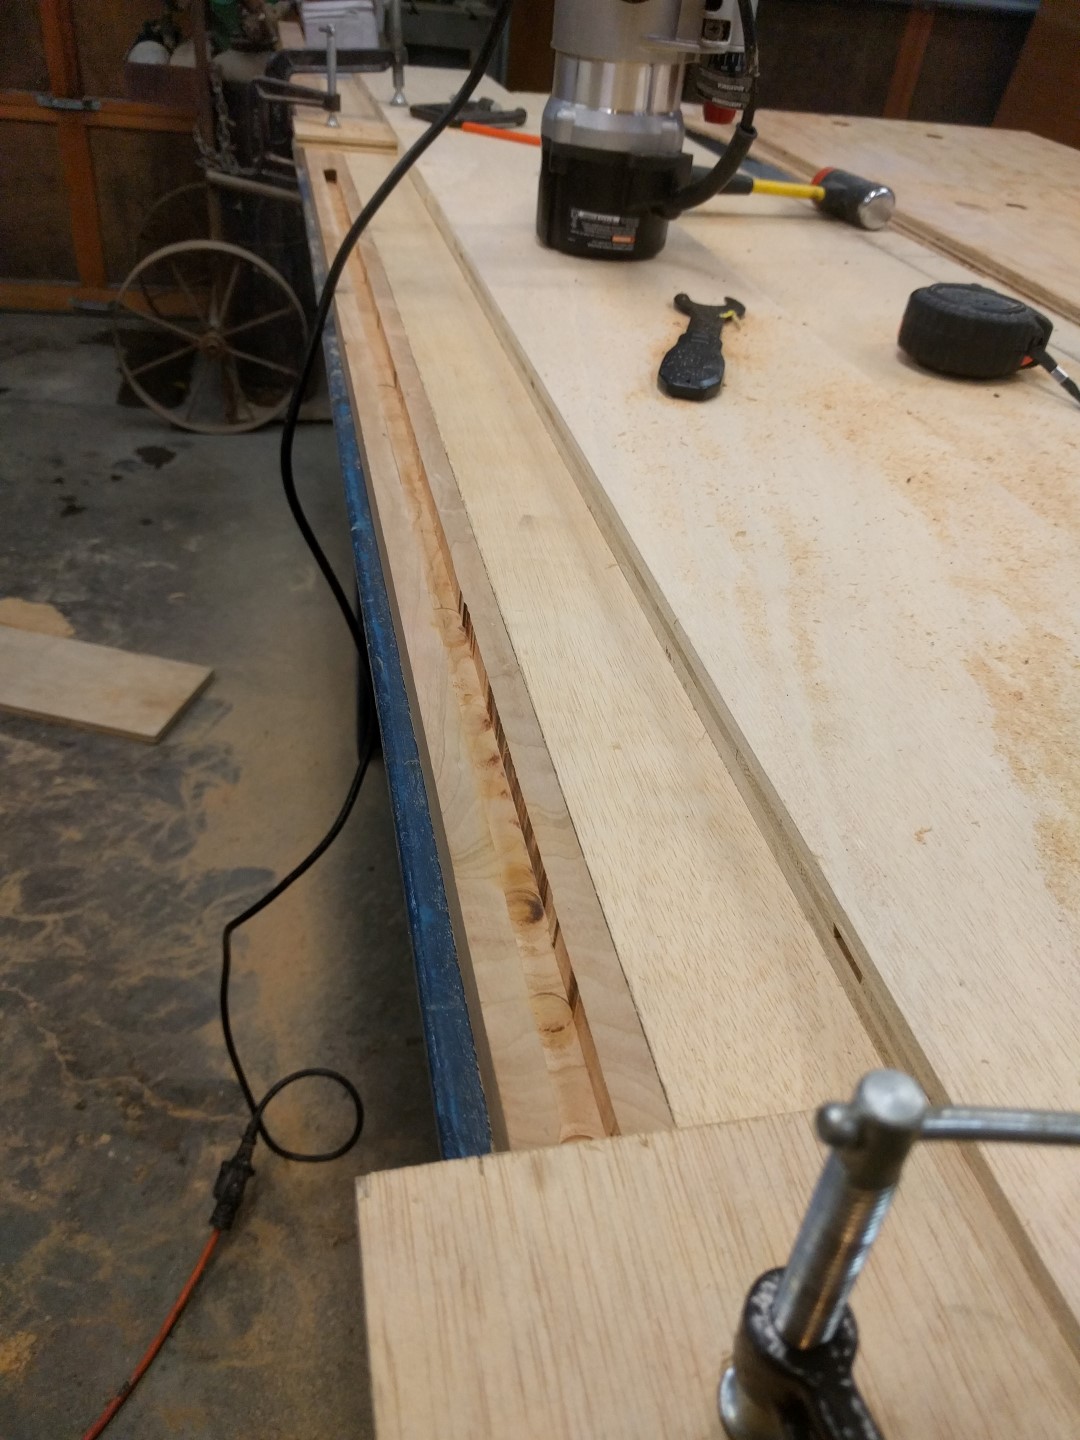
The area around the truck cab was cut first to fit slightly inside the cabin of the truck. The floor was lowered around 2” so some accommodations with the router had to be made near the cabin threshold to keep the floor flat on the frame.
The wheel wells were placed in the correct positions and the outline was traced and cut into the floor. T
The rear recessed sub-floor was made from the same material as the main floor.
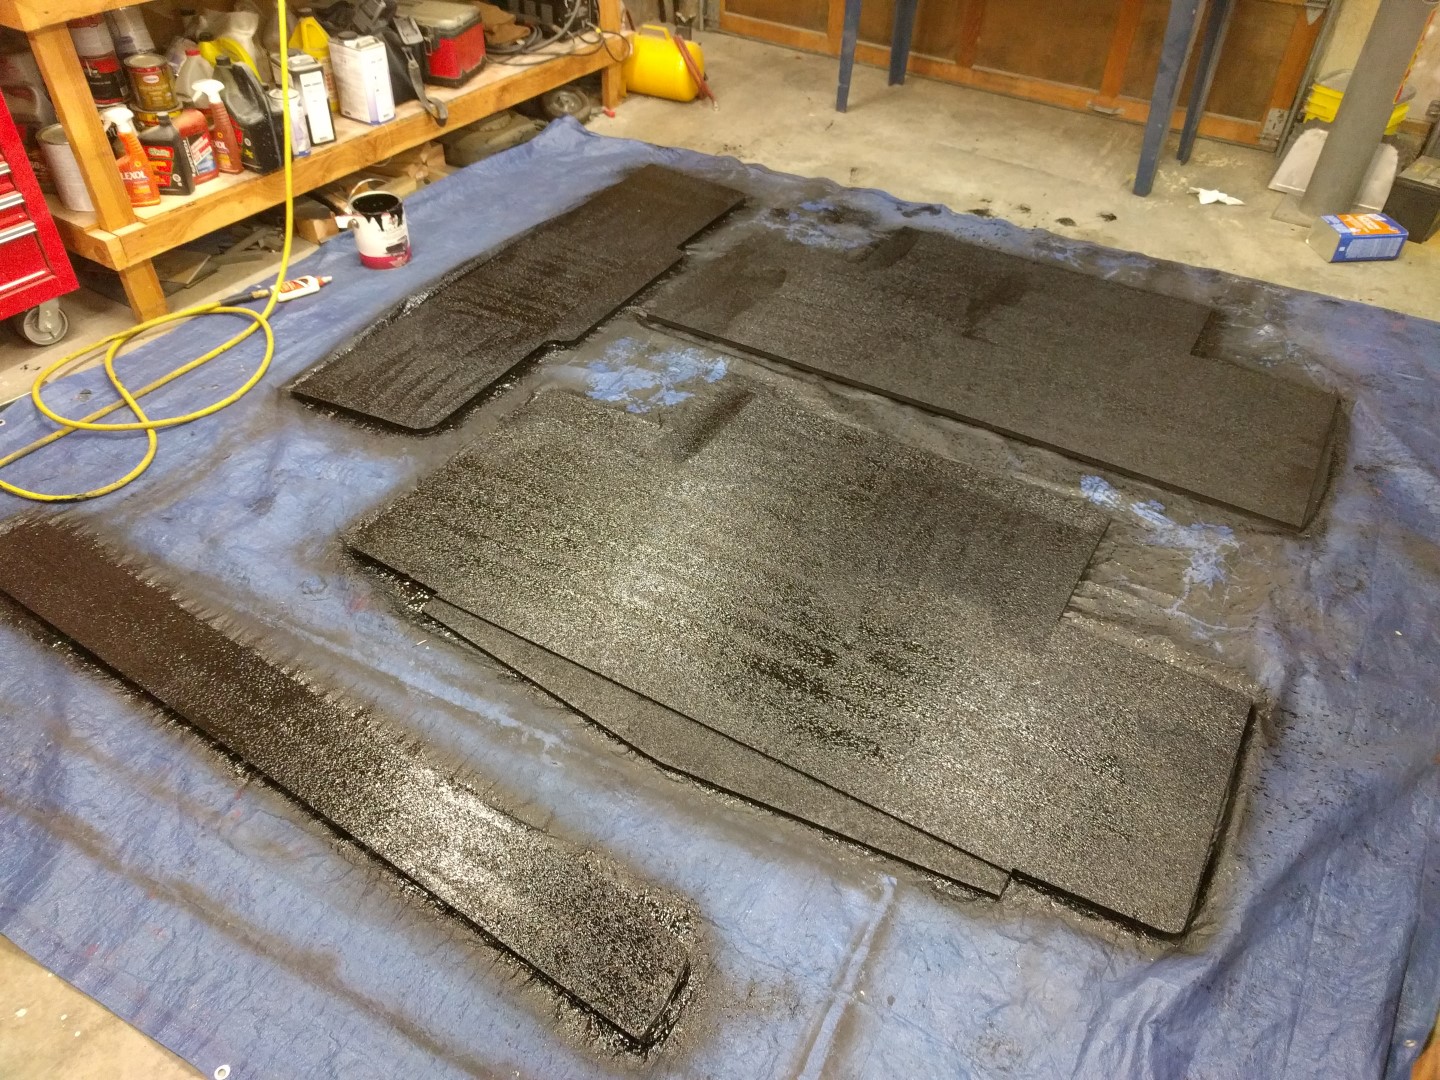
The underside was painted with the same black epoxy primer from the main paint job and then followed with truck bed-liner to protect from the elements underneath. The stock configuration actually uses sheet metal to protect the wood which is a decent idea unless the leakage comes from the top!!
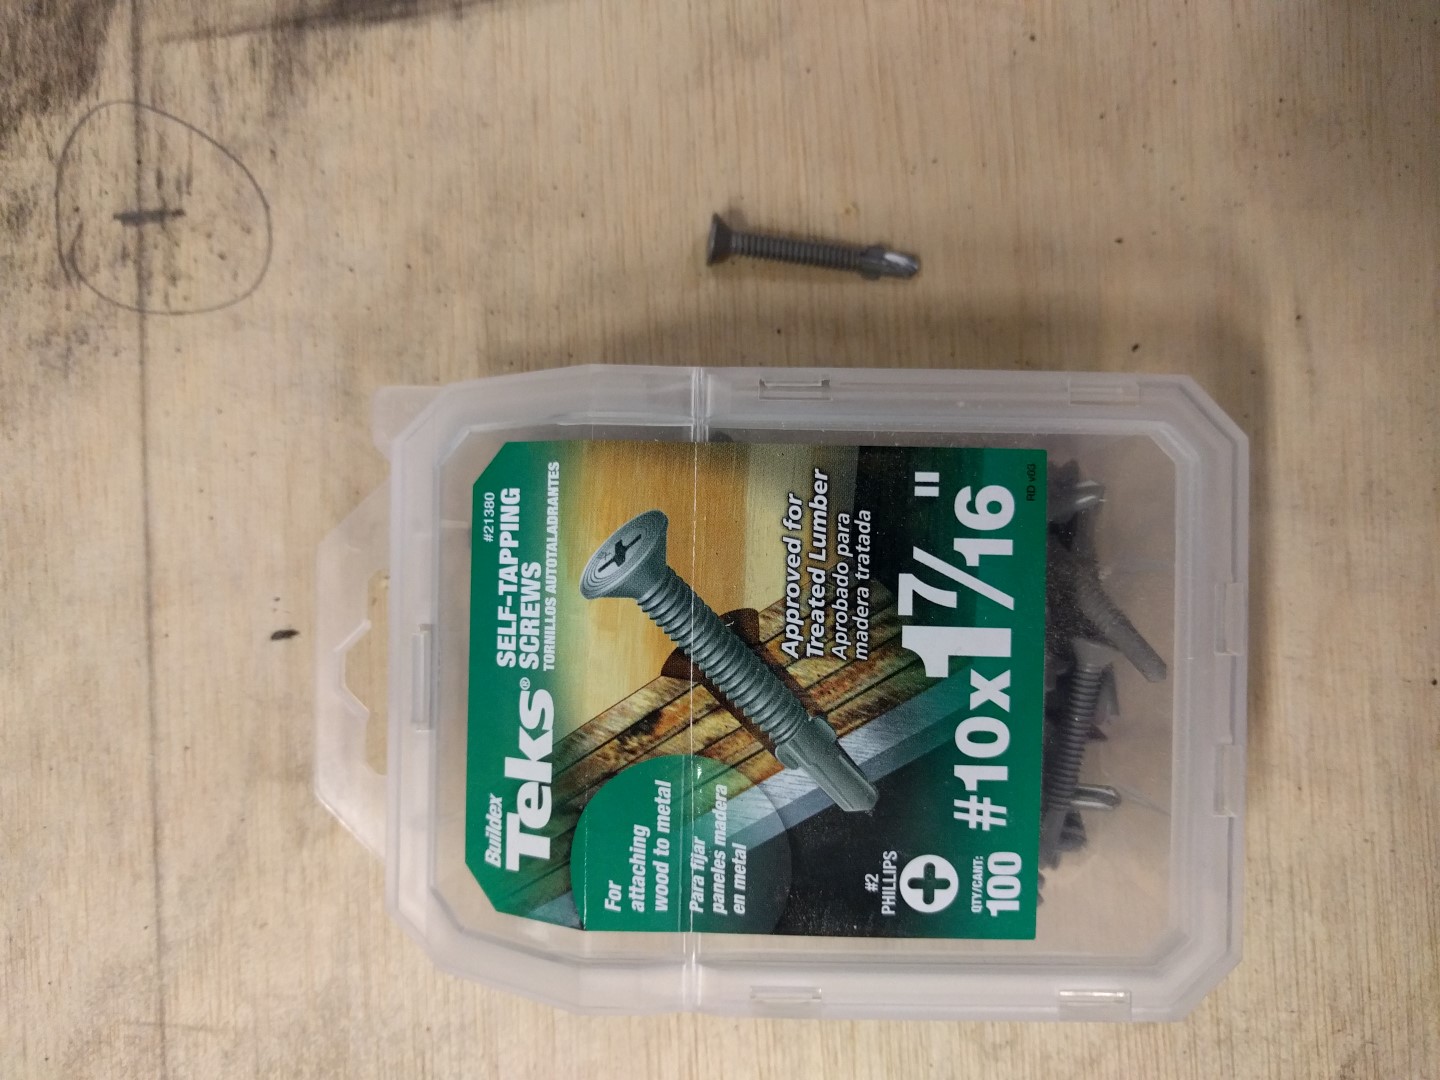
The floor was secured with these awesome wood to metal self tapping screws by Teks, see the picture below for a picture of the packaging.


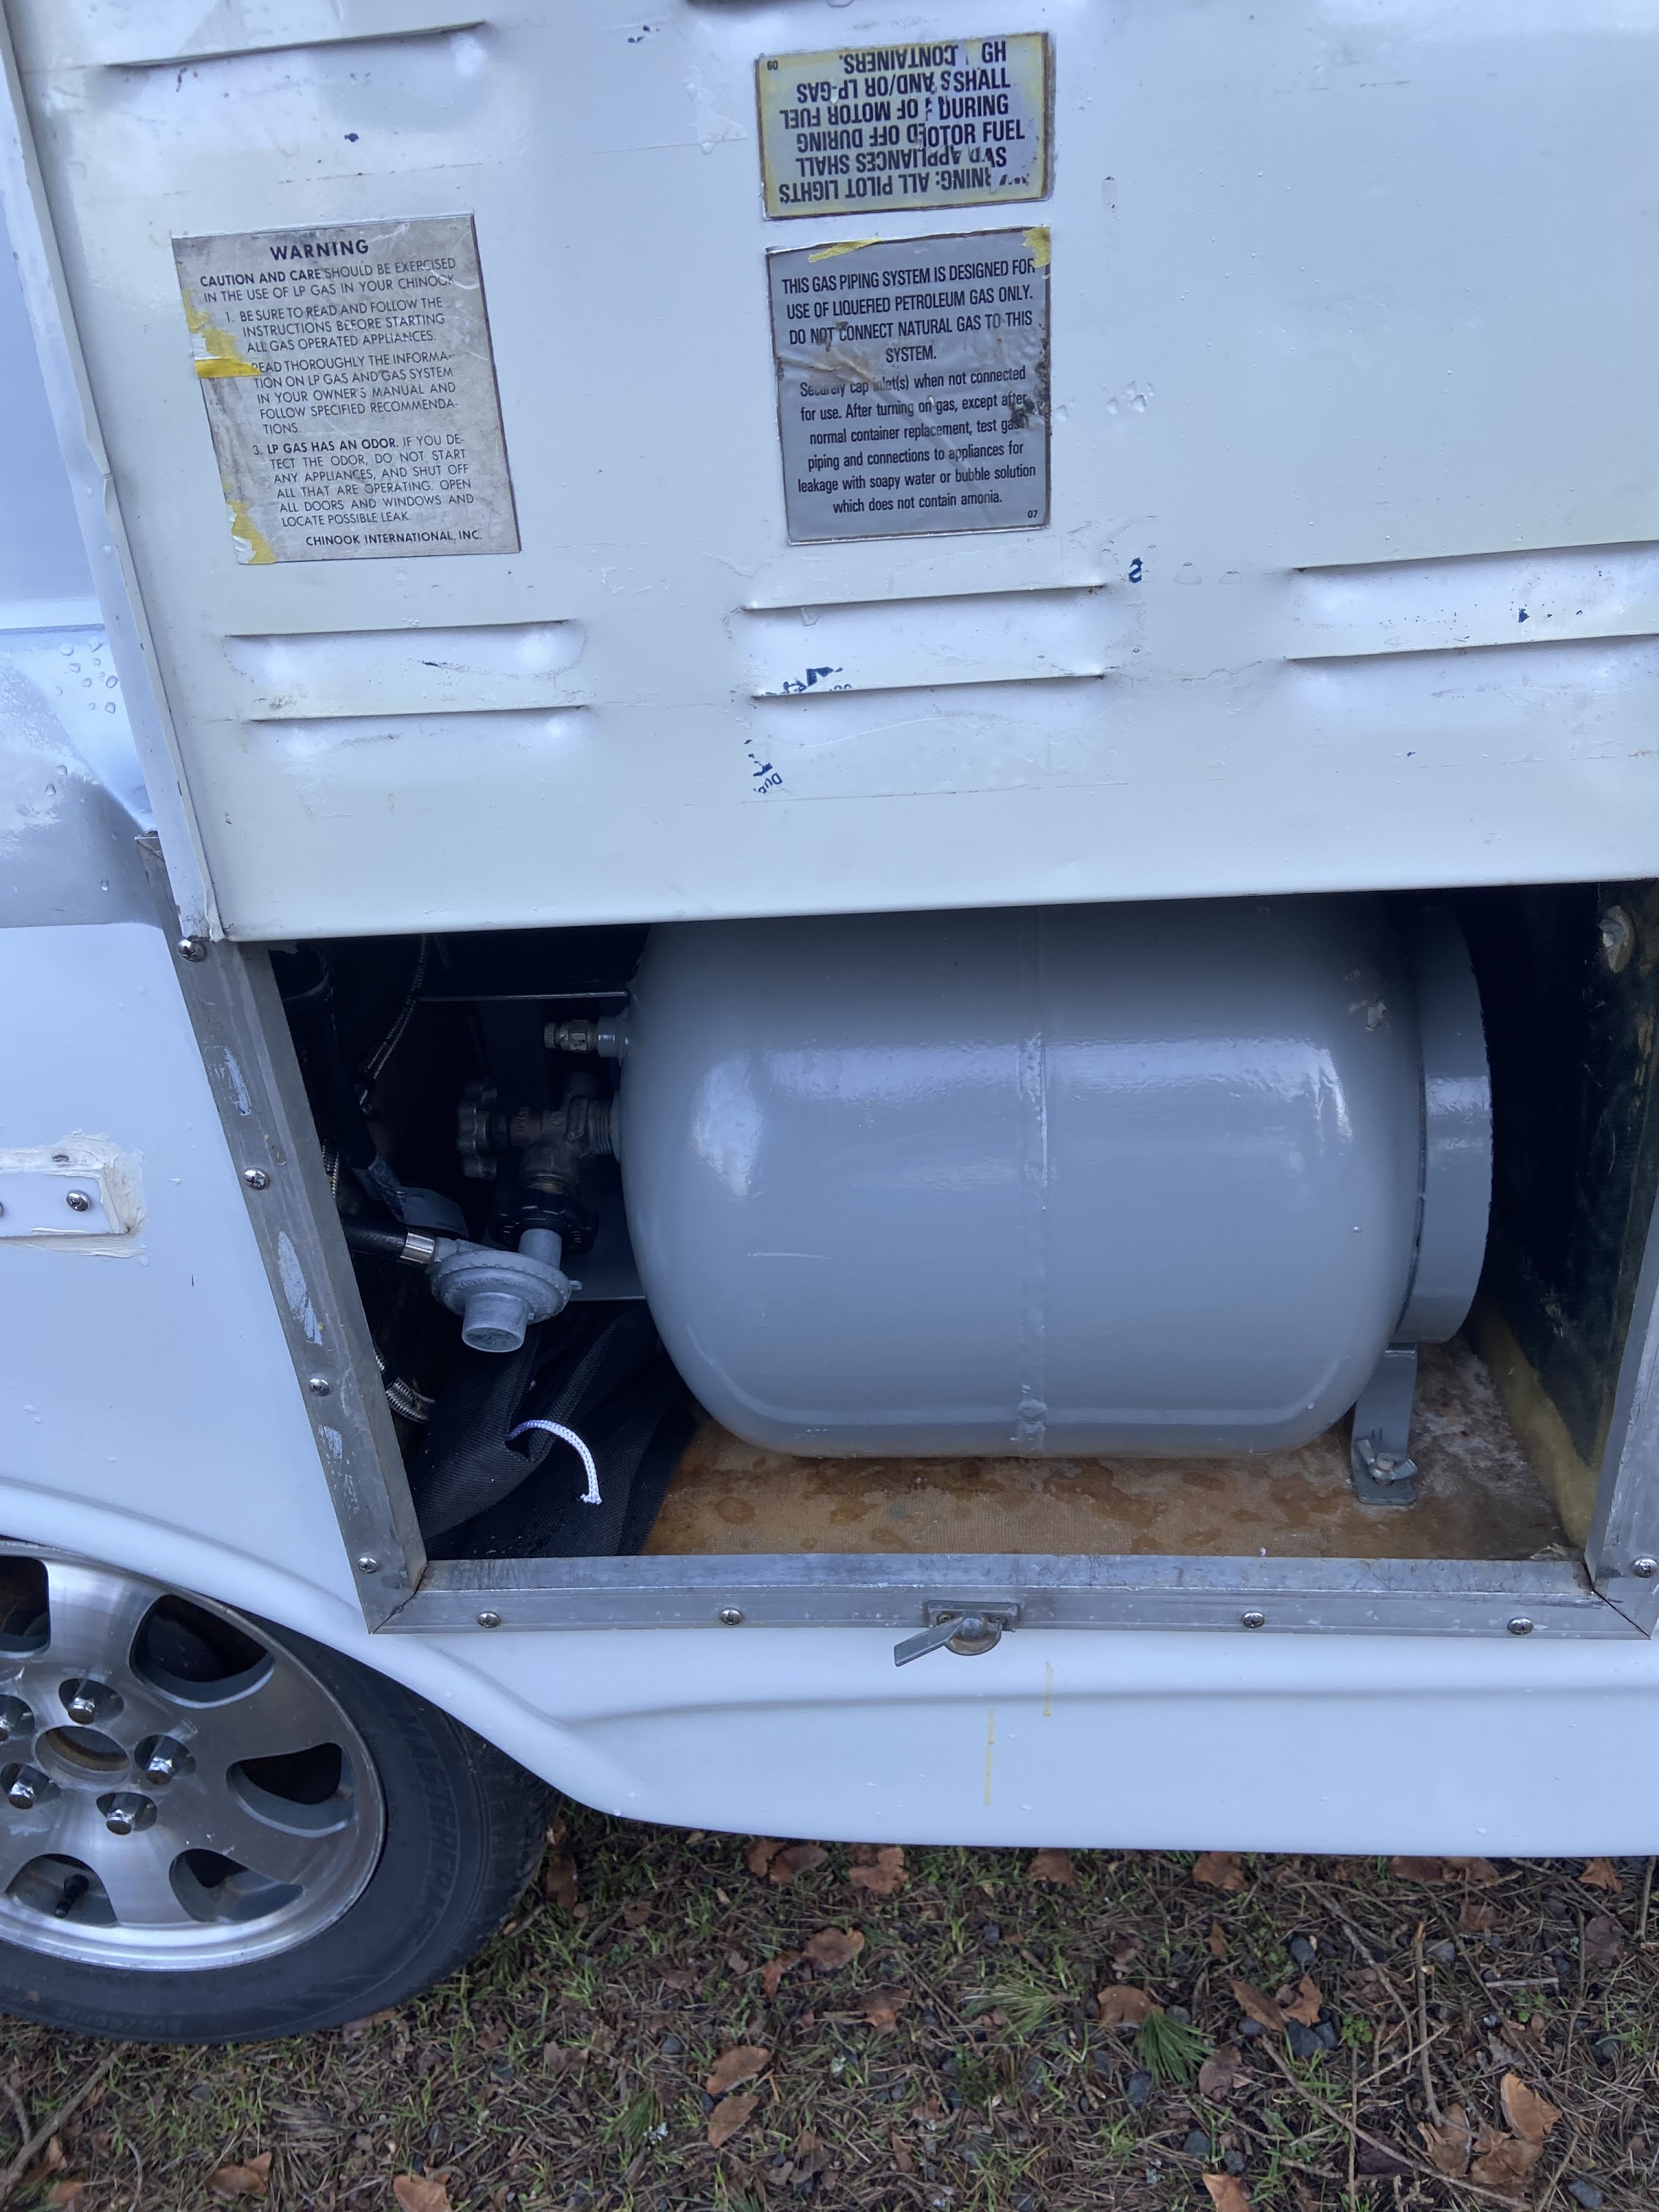
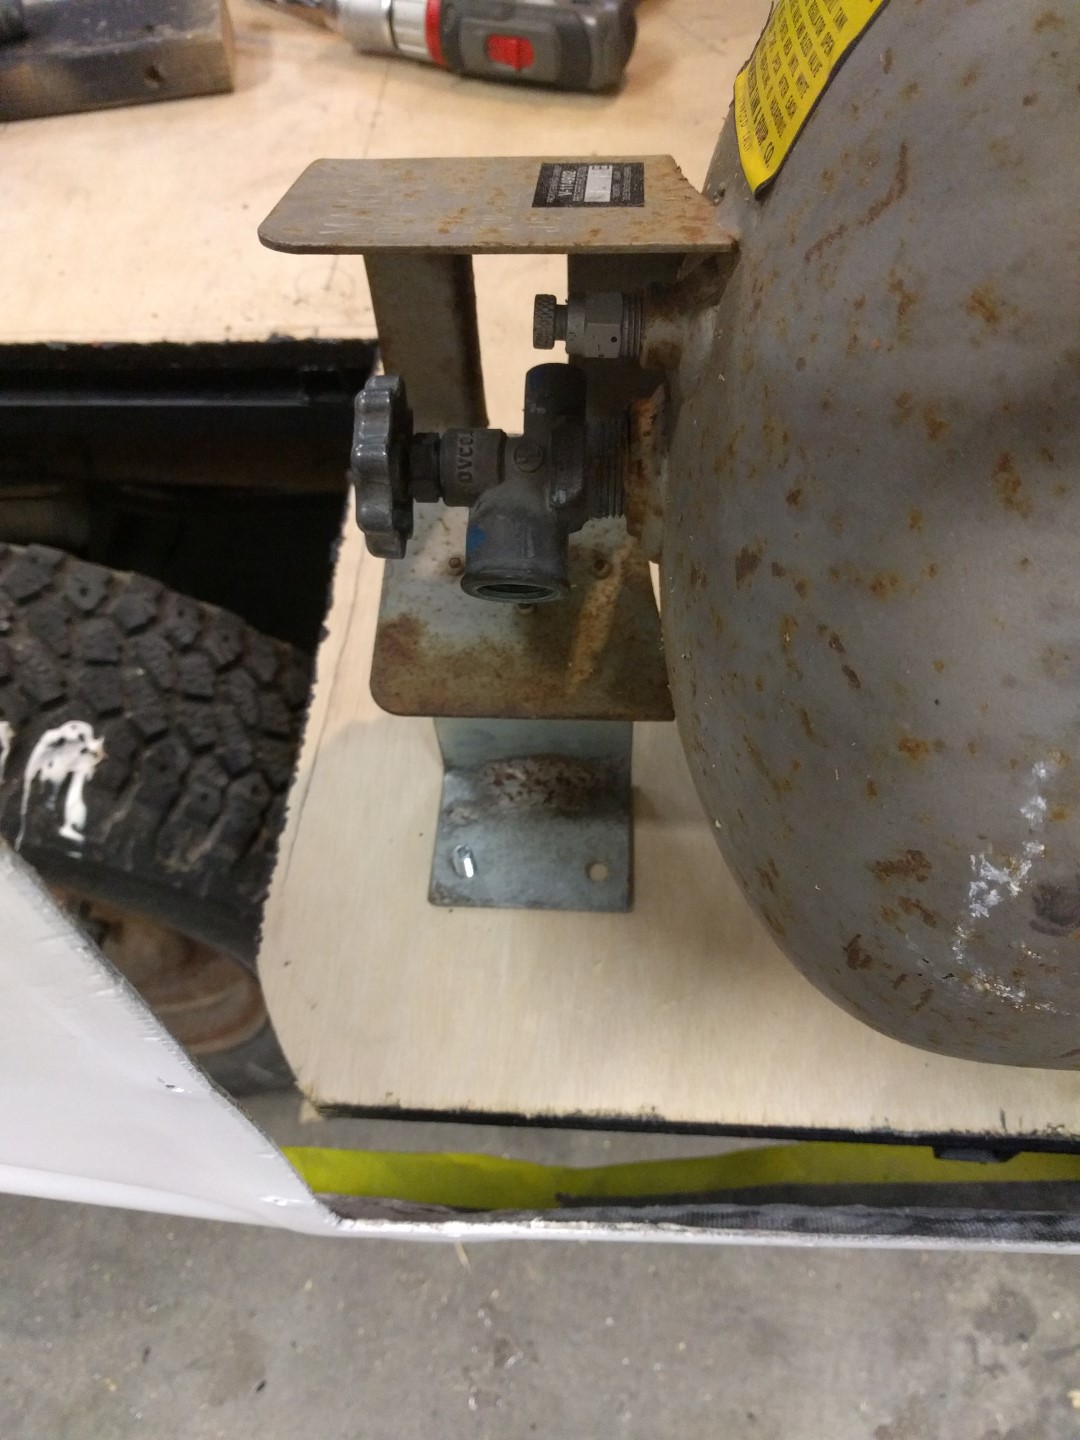
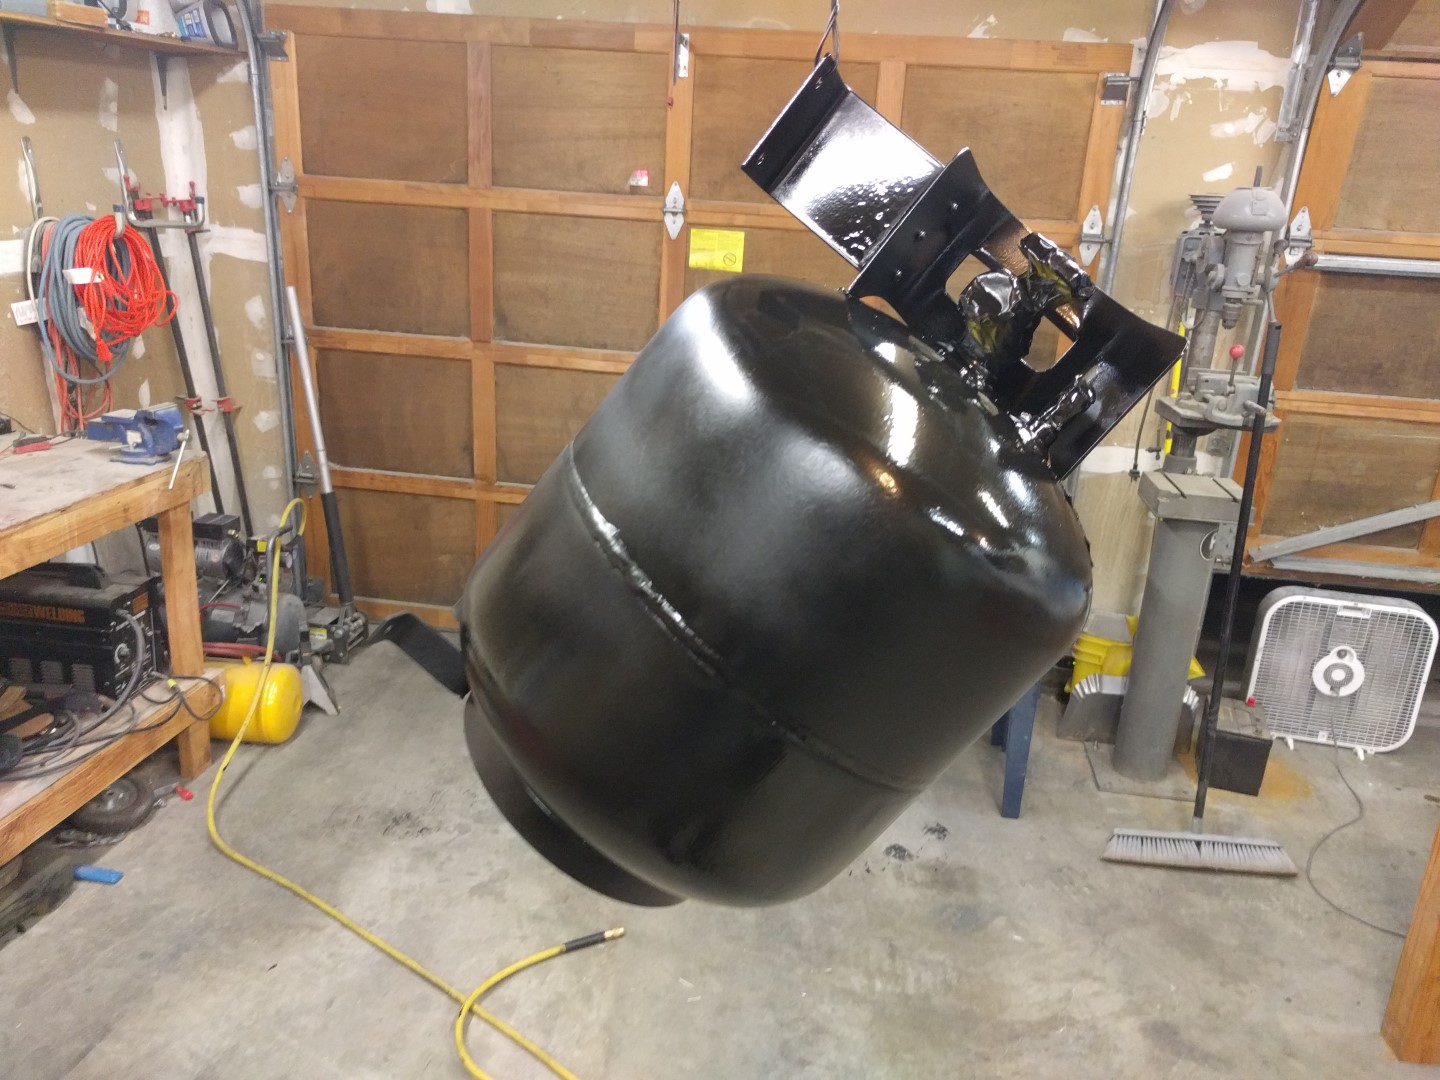
Propane Propane
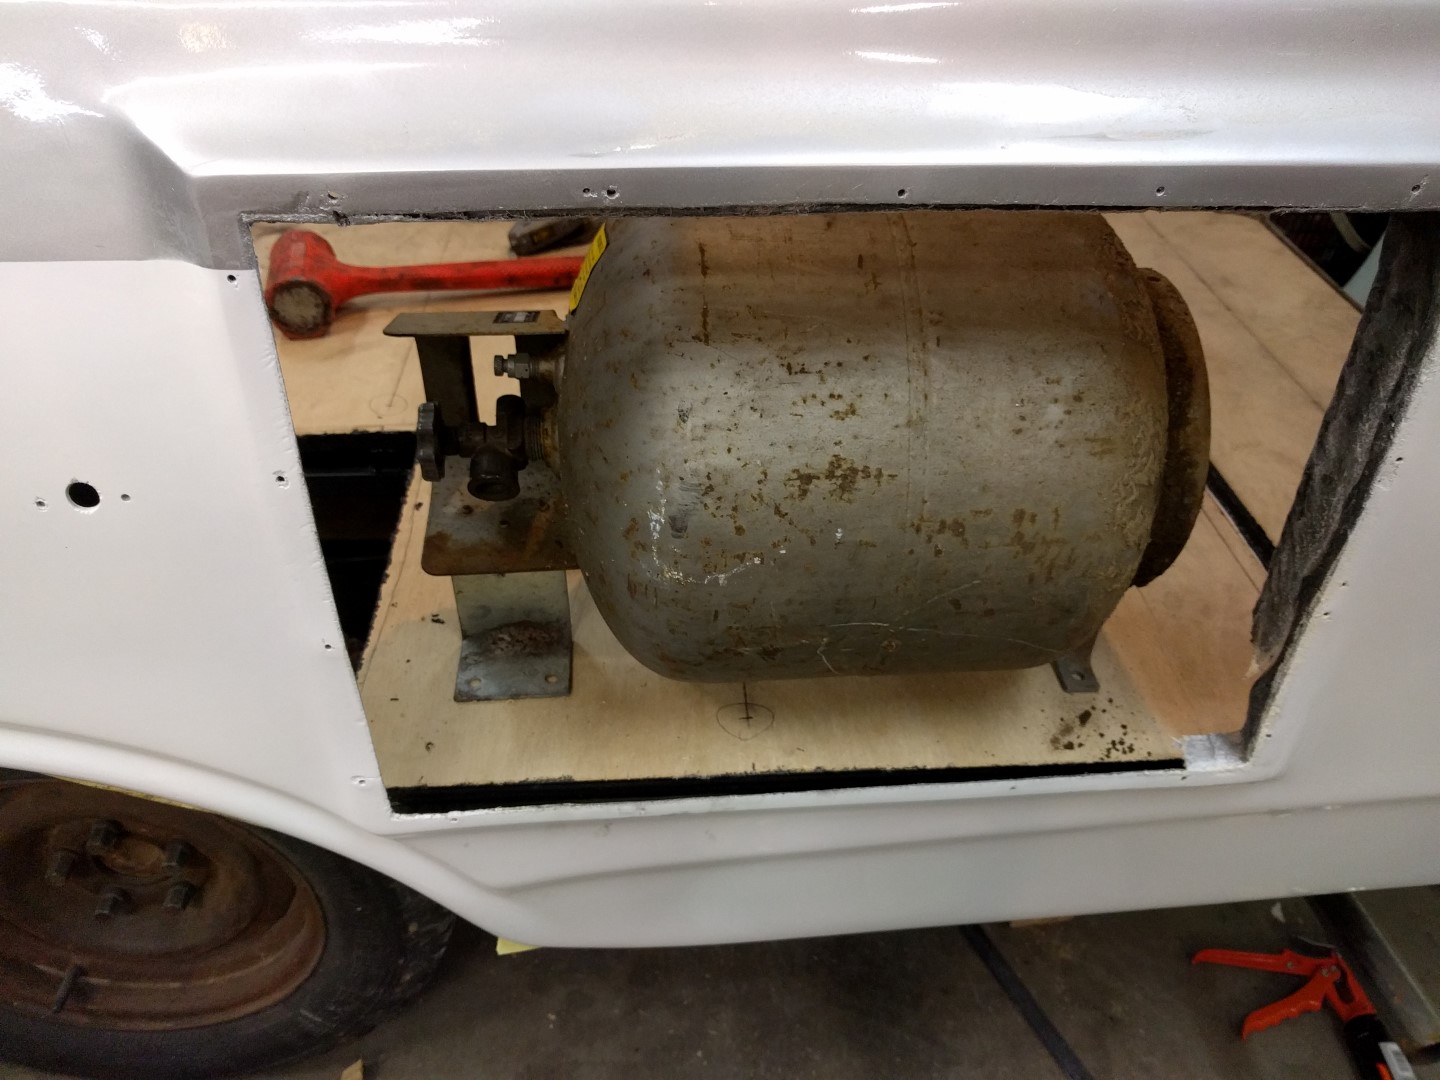
The stock tanks on some of these rigs is a horizontal 5 gallon tank. Neither my parts or restoration rig came with a tank. I thought about using a vertical one but could not for the life of me figure out a good way to install a vertical one. After scavenging CraigsList I found a guy selling used horizontal propane tanks and snagged one up with a new 5 year certification for $25! and it works great.
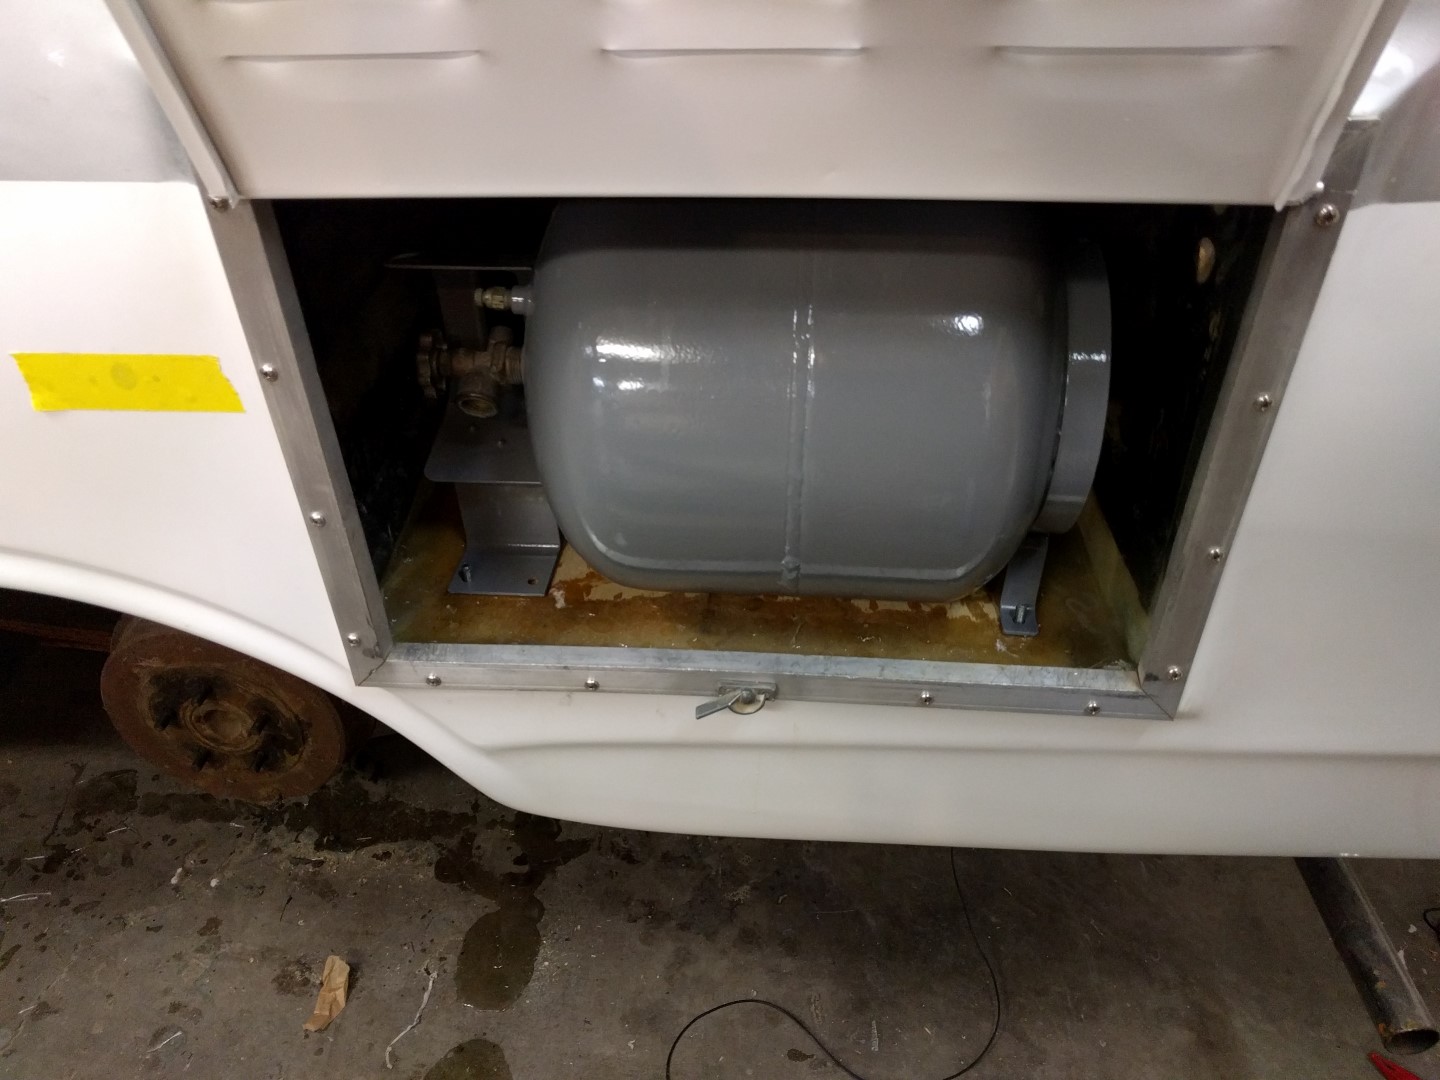
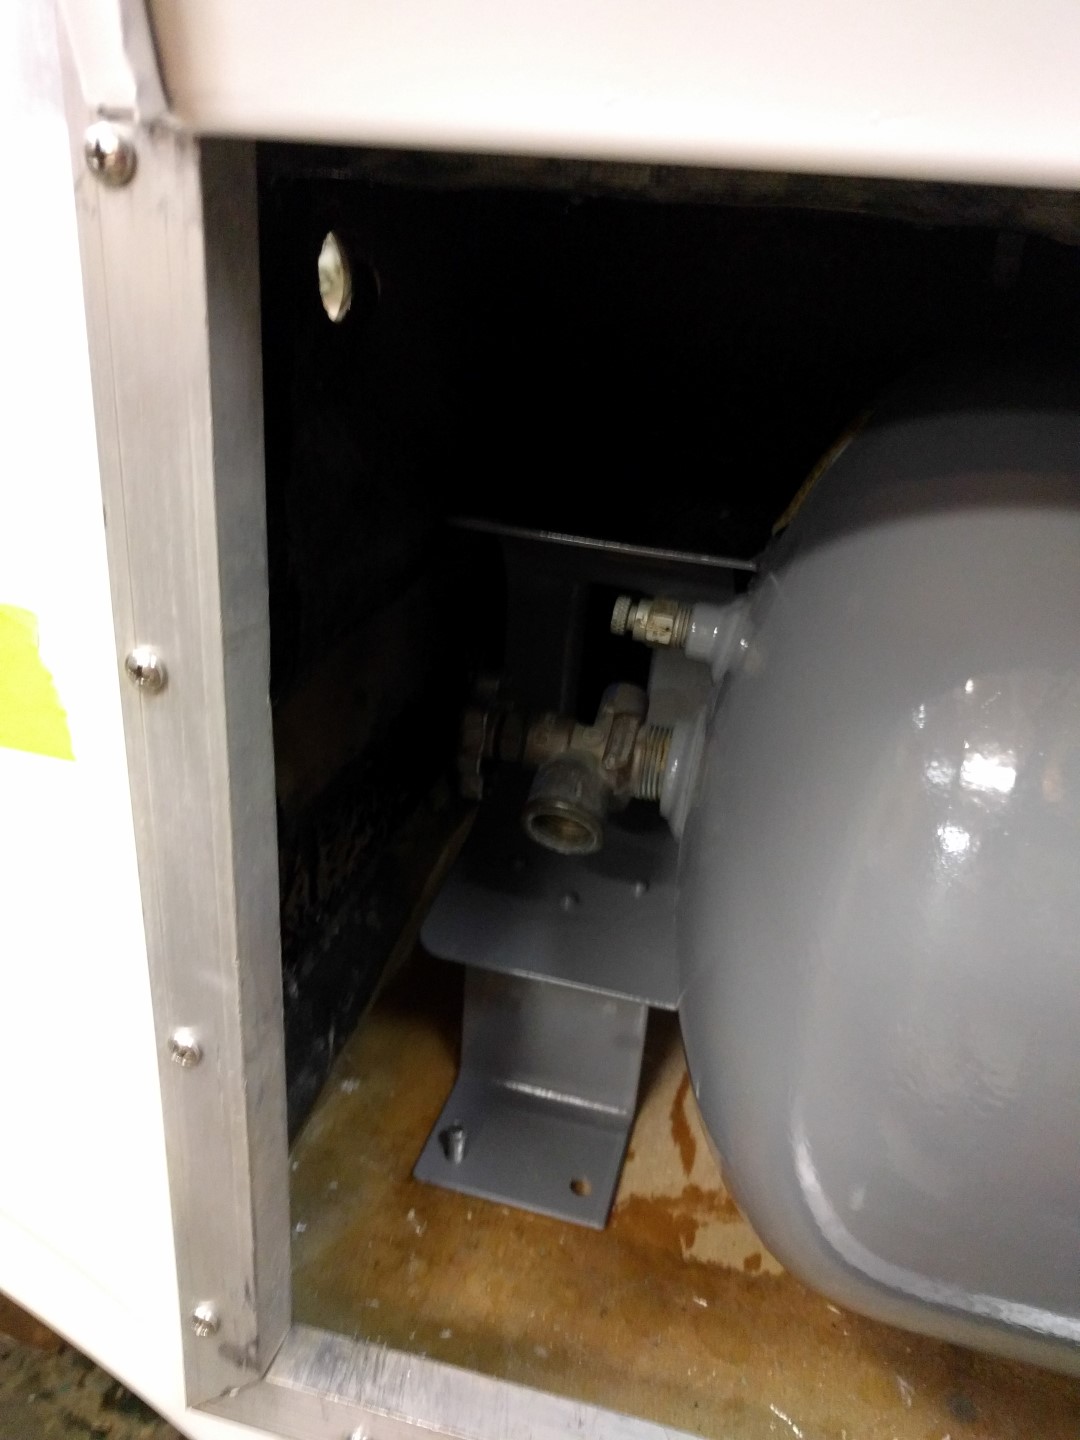
The propane tank was installed in the original position as the stock one and held down with two wing nuts.
The tank was primed with the same black epoxy primer, silver basecoat, and clearcoat as the main paint job.
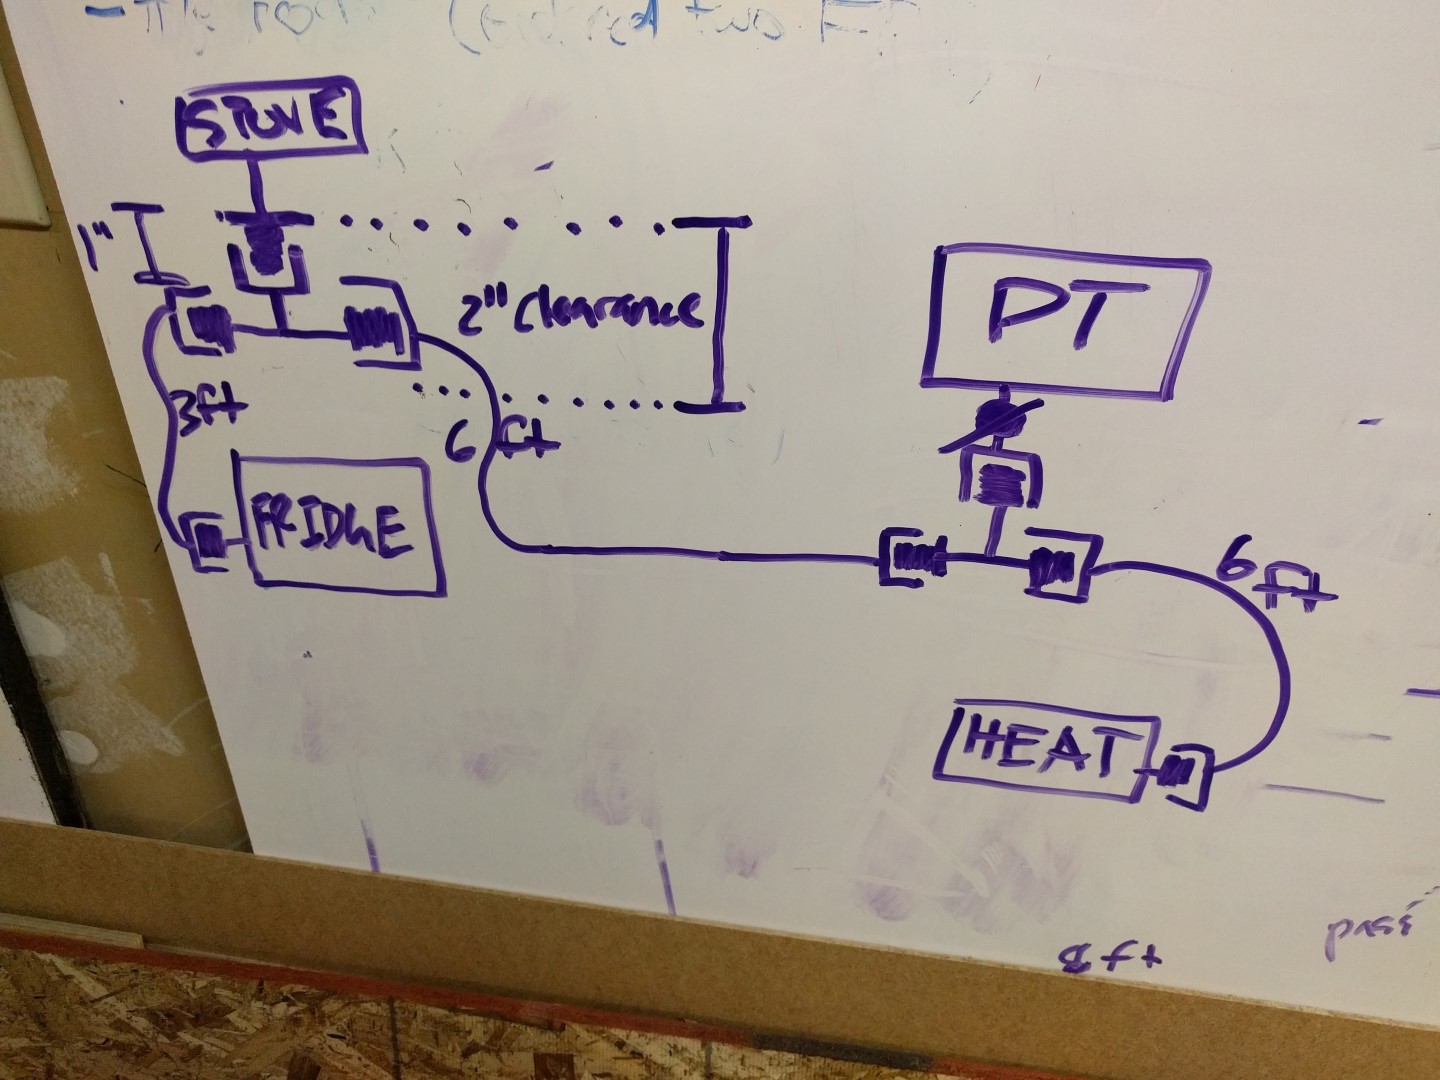
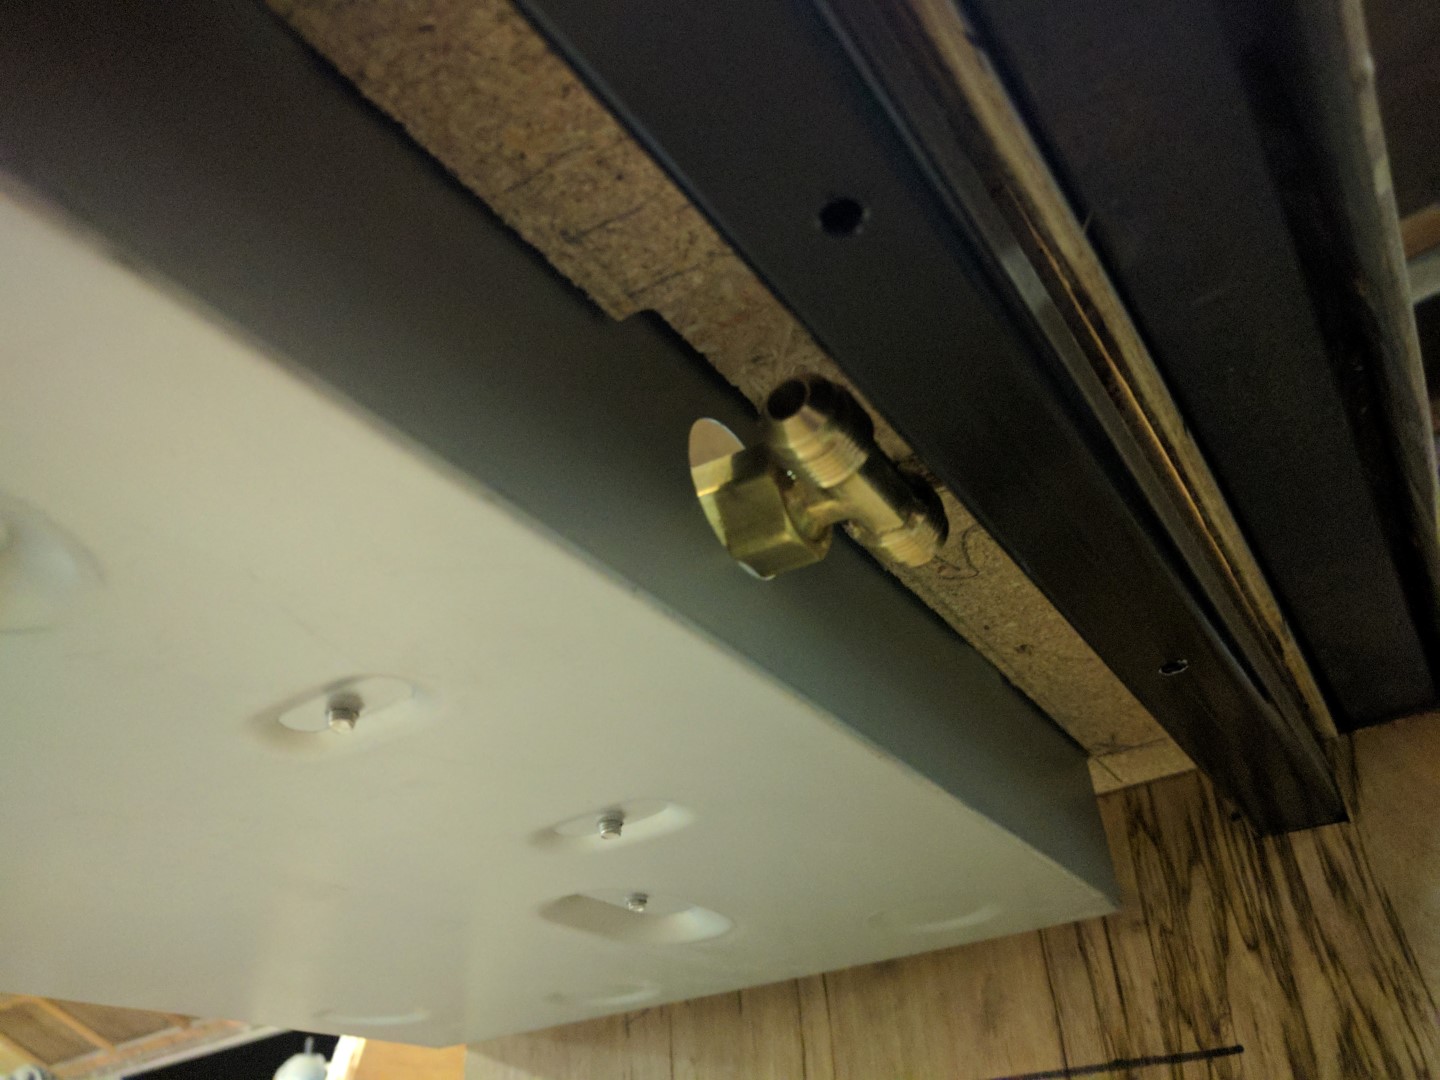
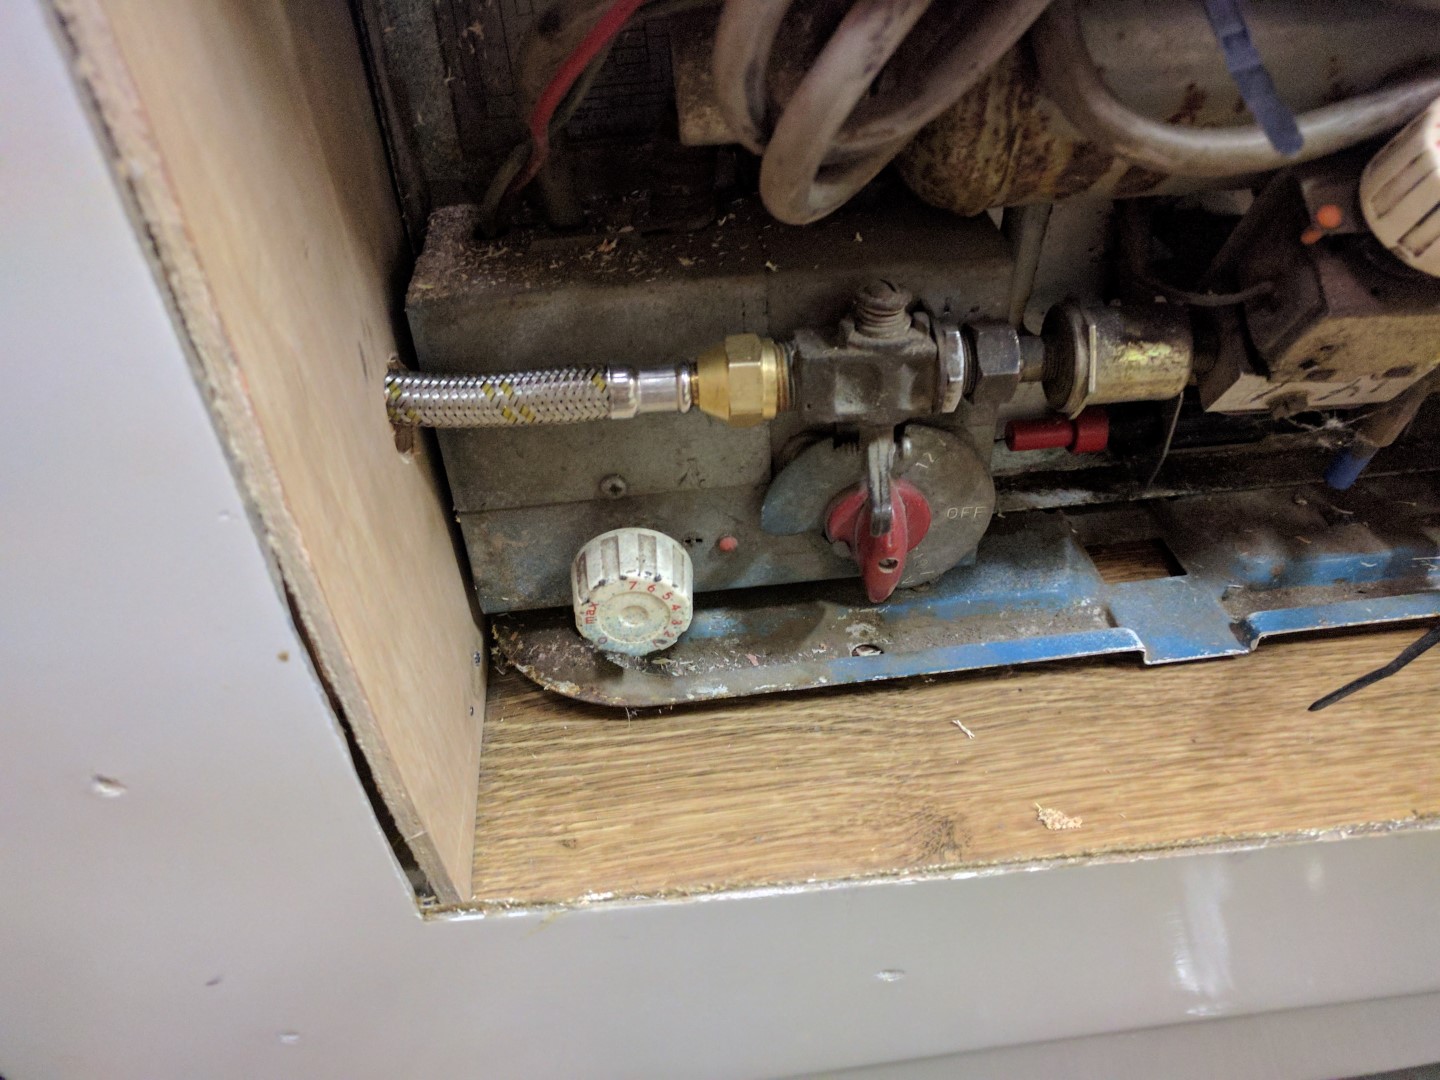
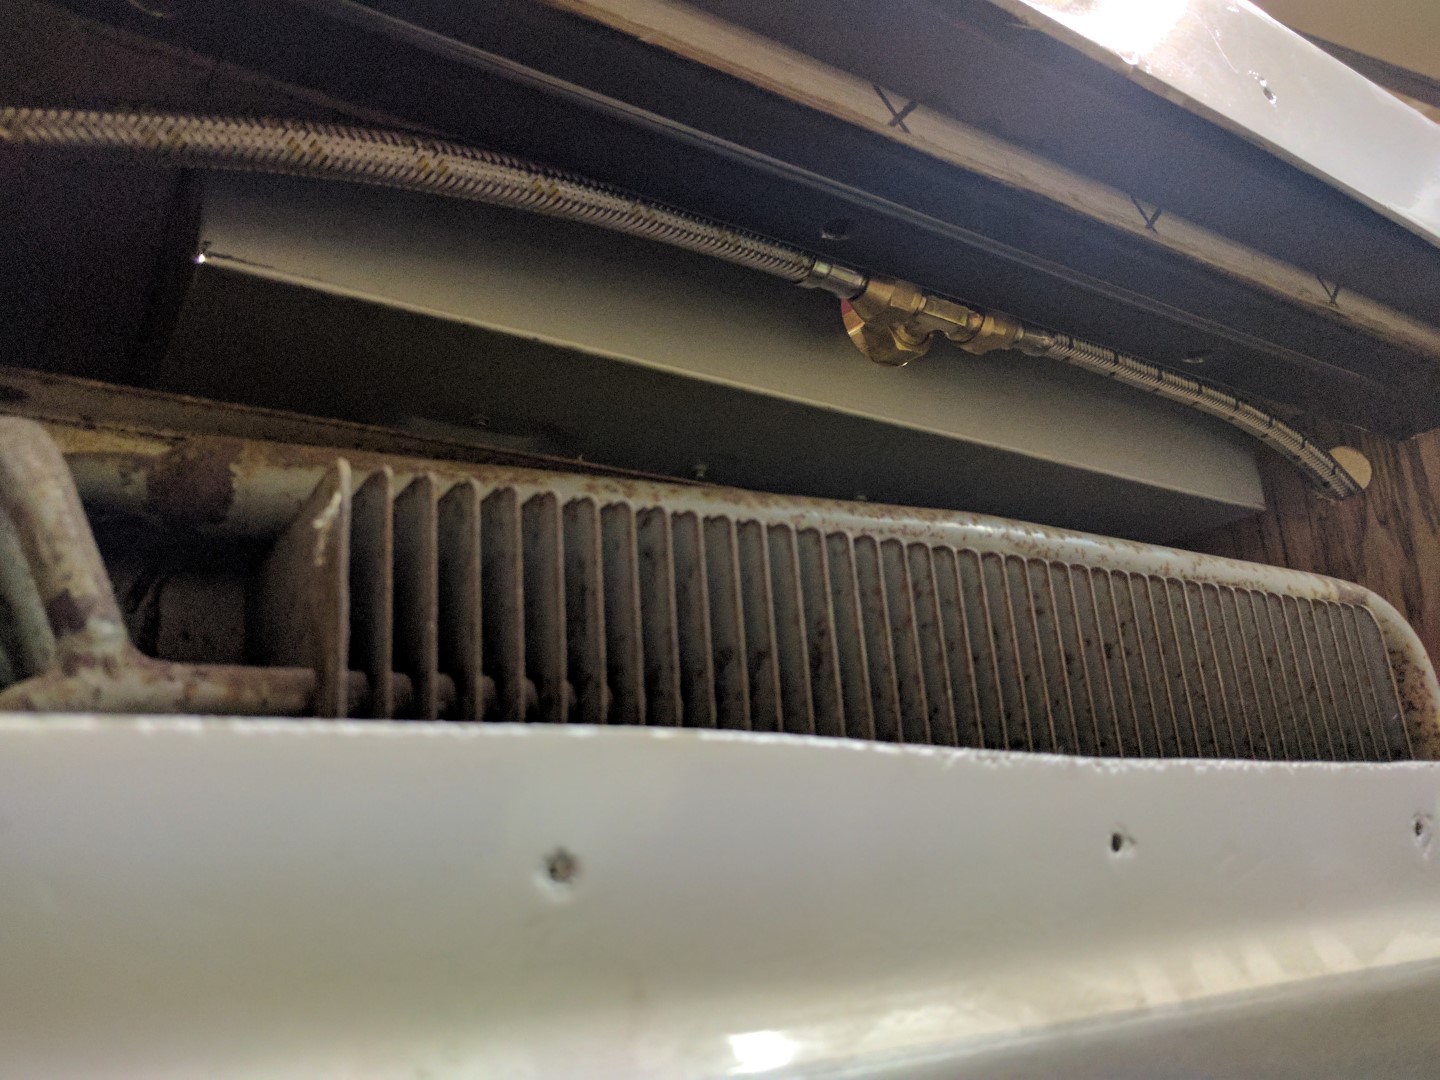
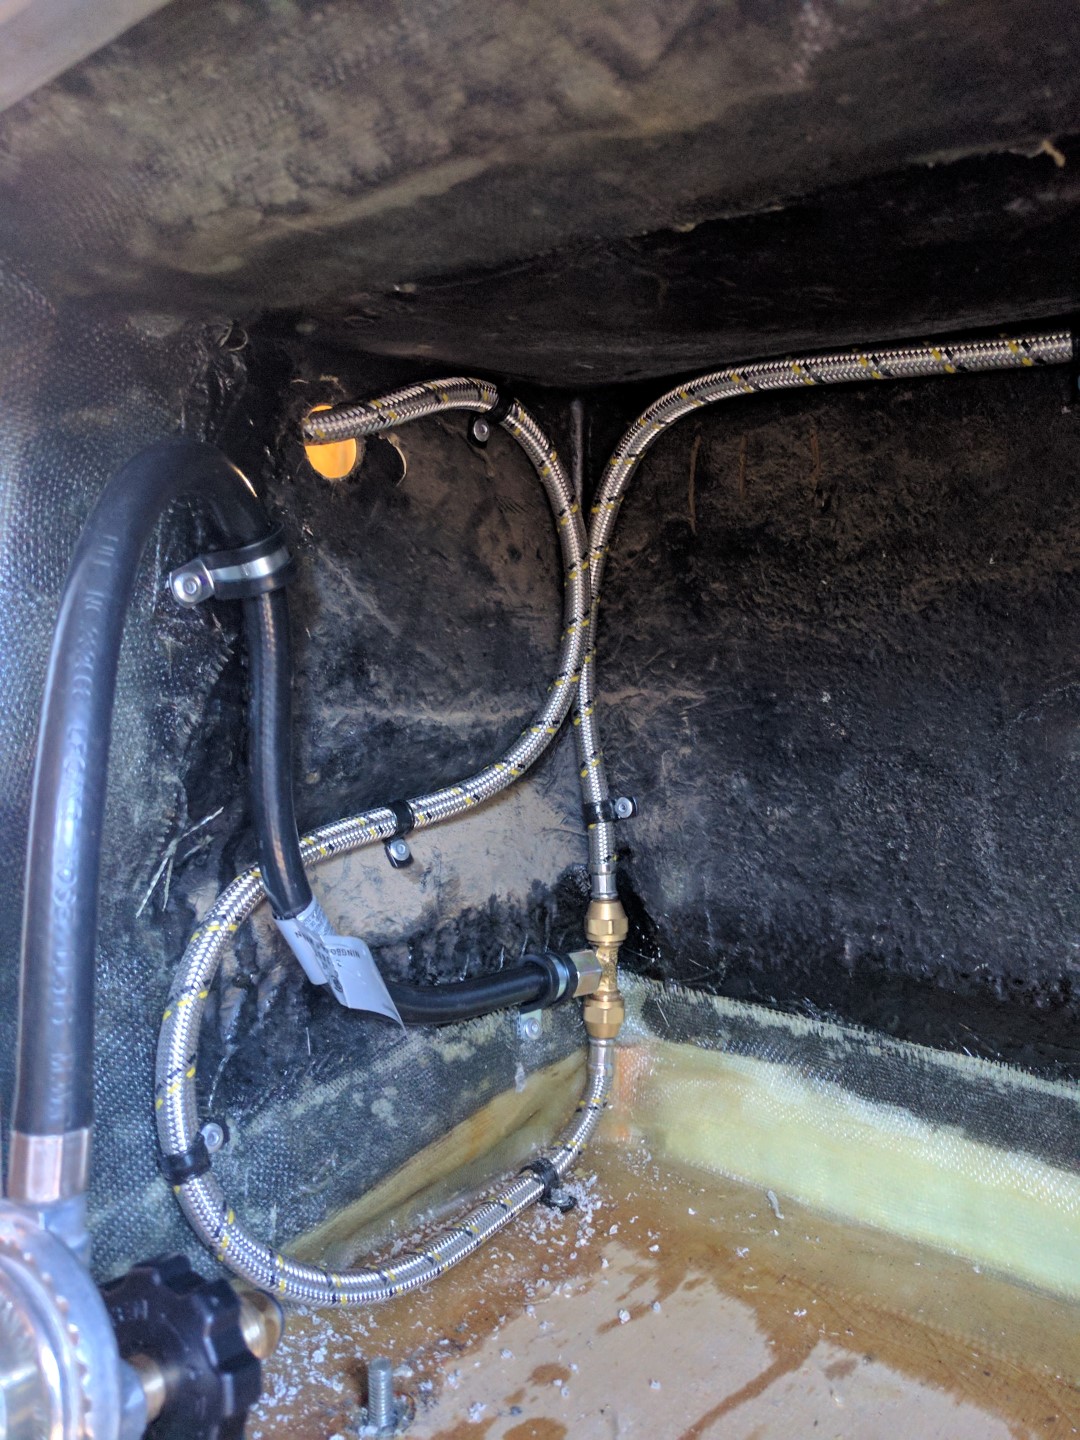
The propane tank feeds 3 different appliances in a double split configuration. Split once in the propane tank enclosure and again near the stove. See the picture below for a propane stove schematic.
- Heater
- Stove
- Refrigerator


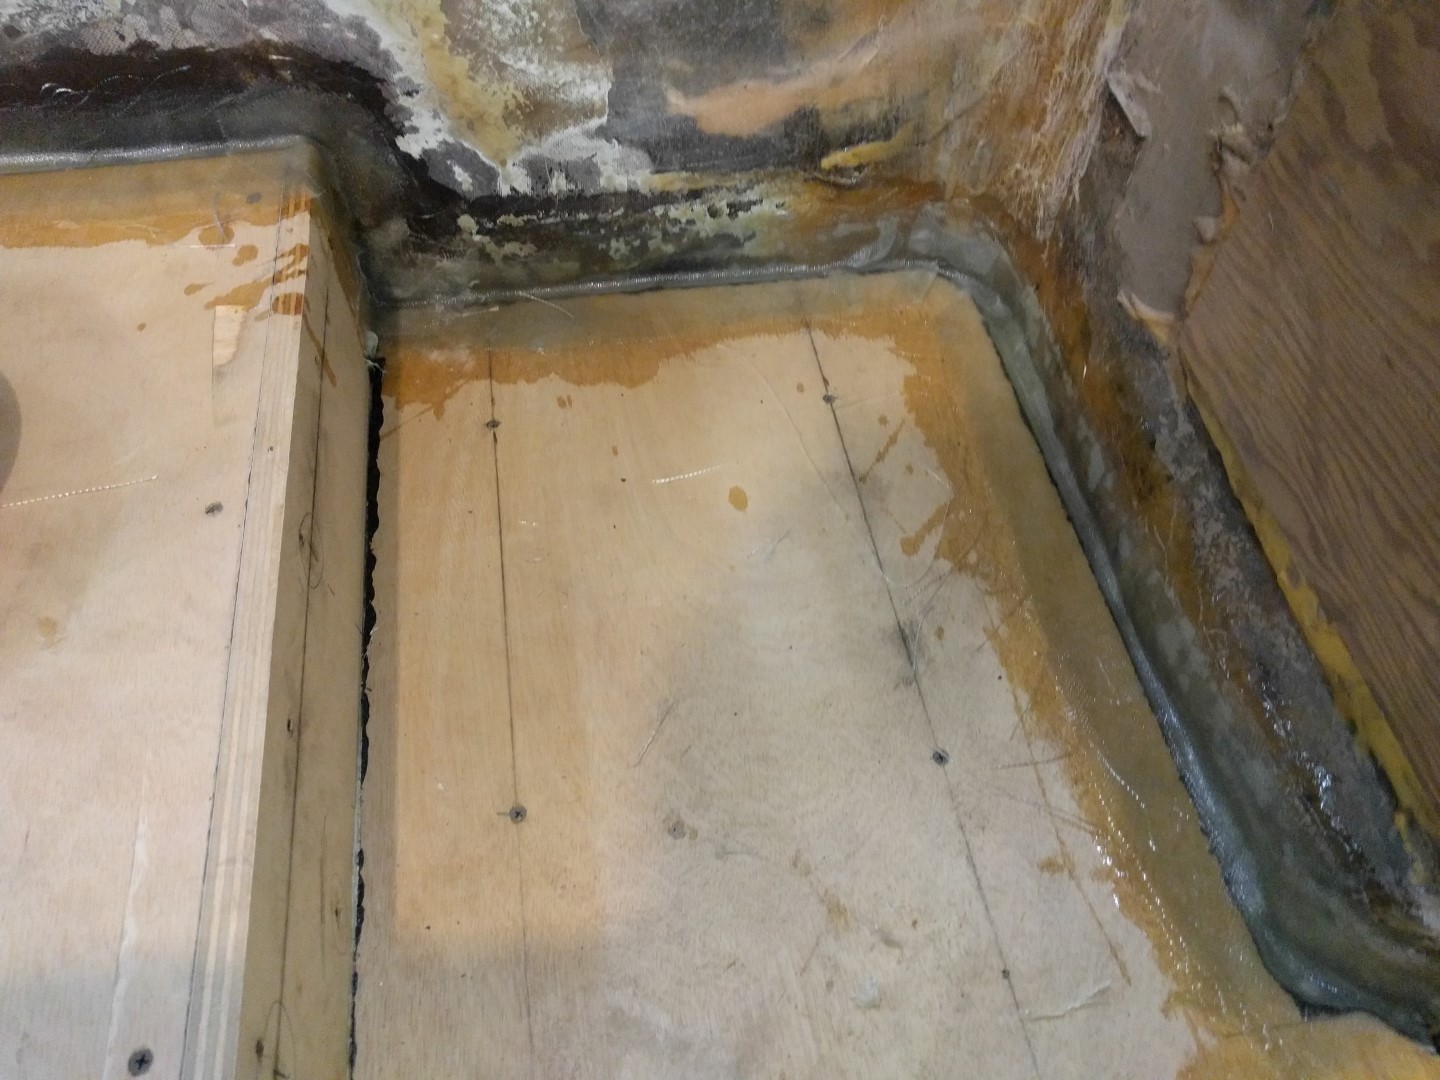
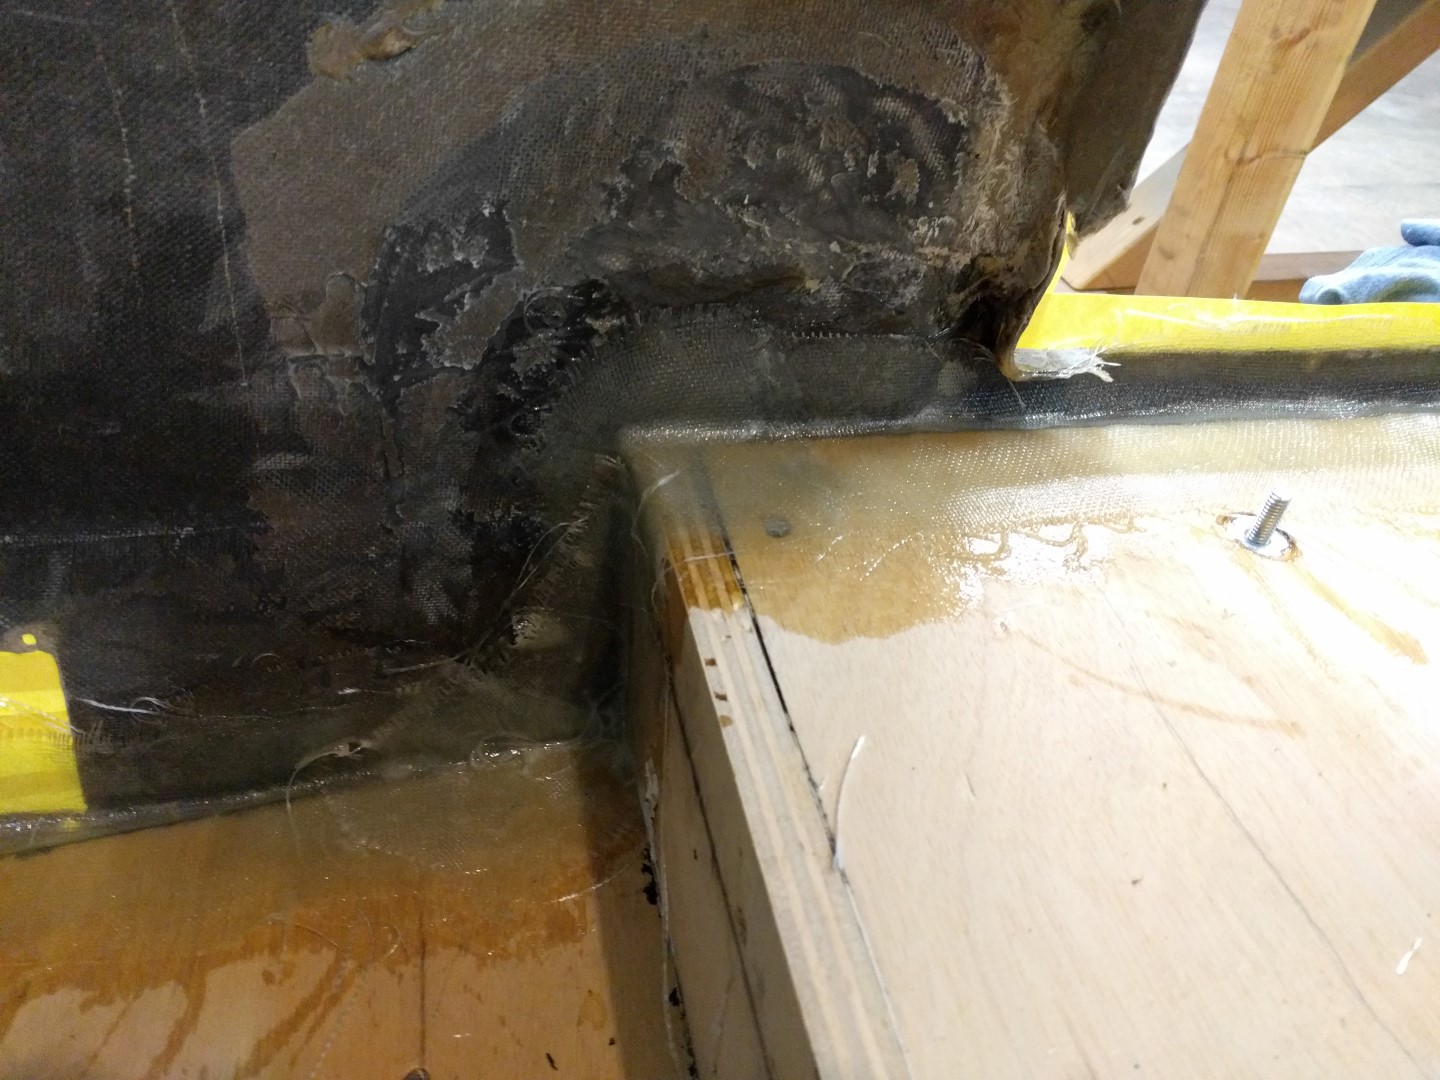
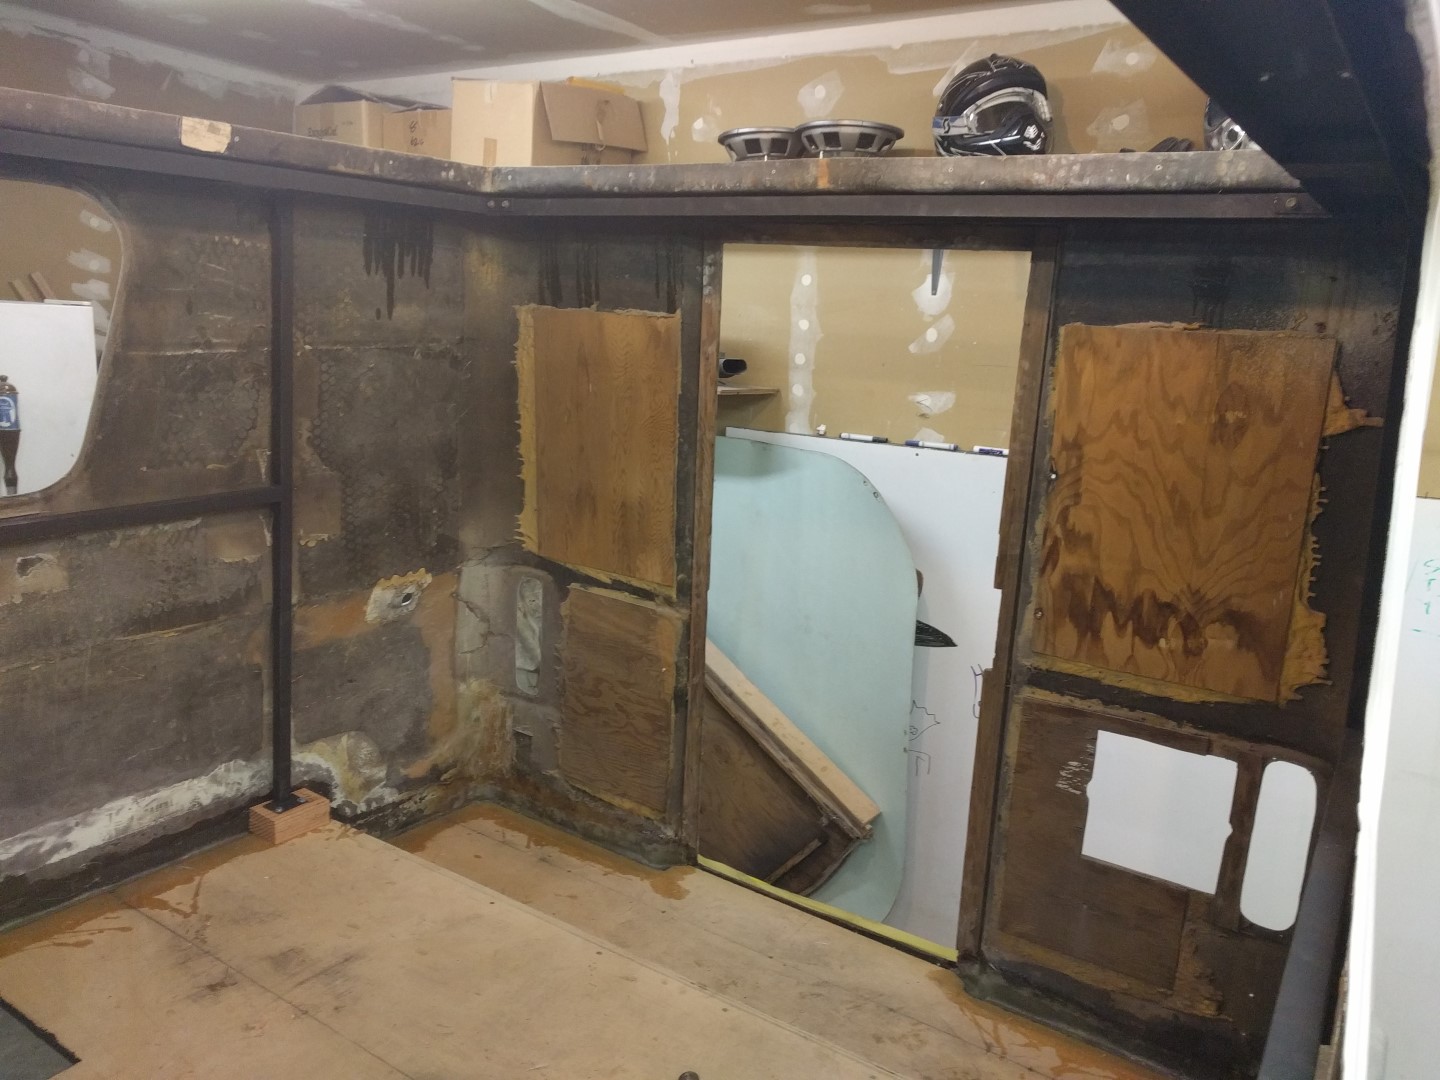
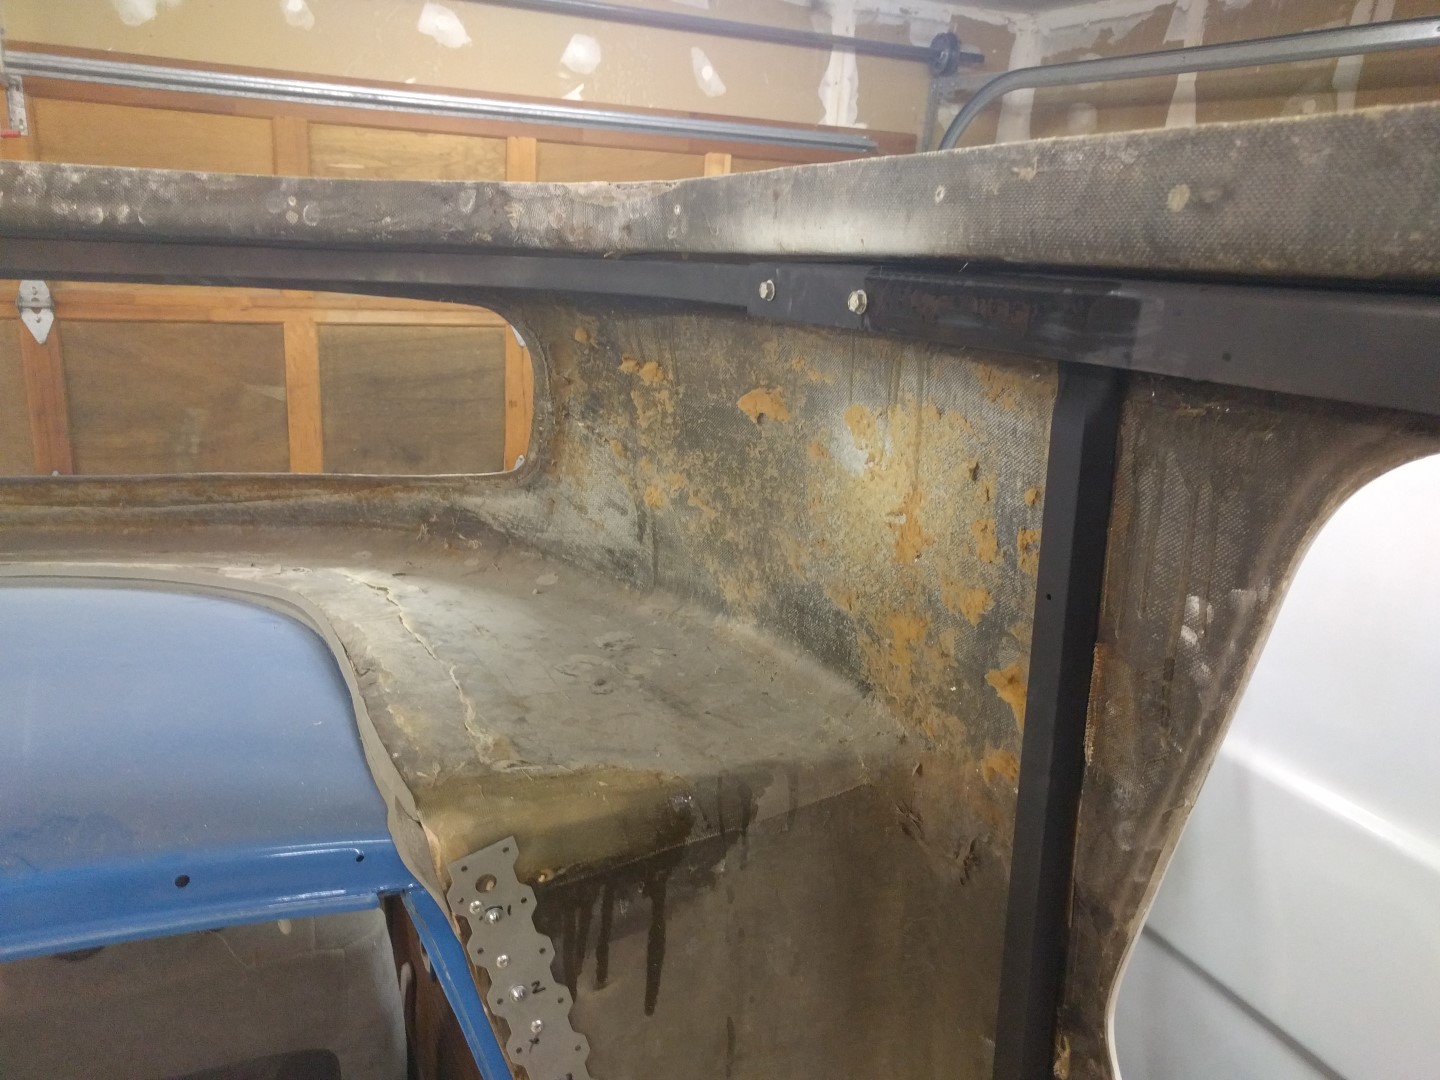
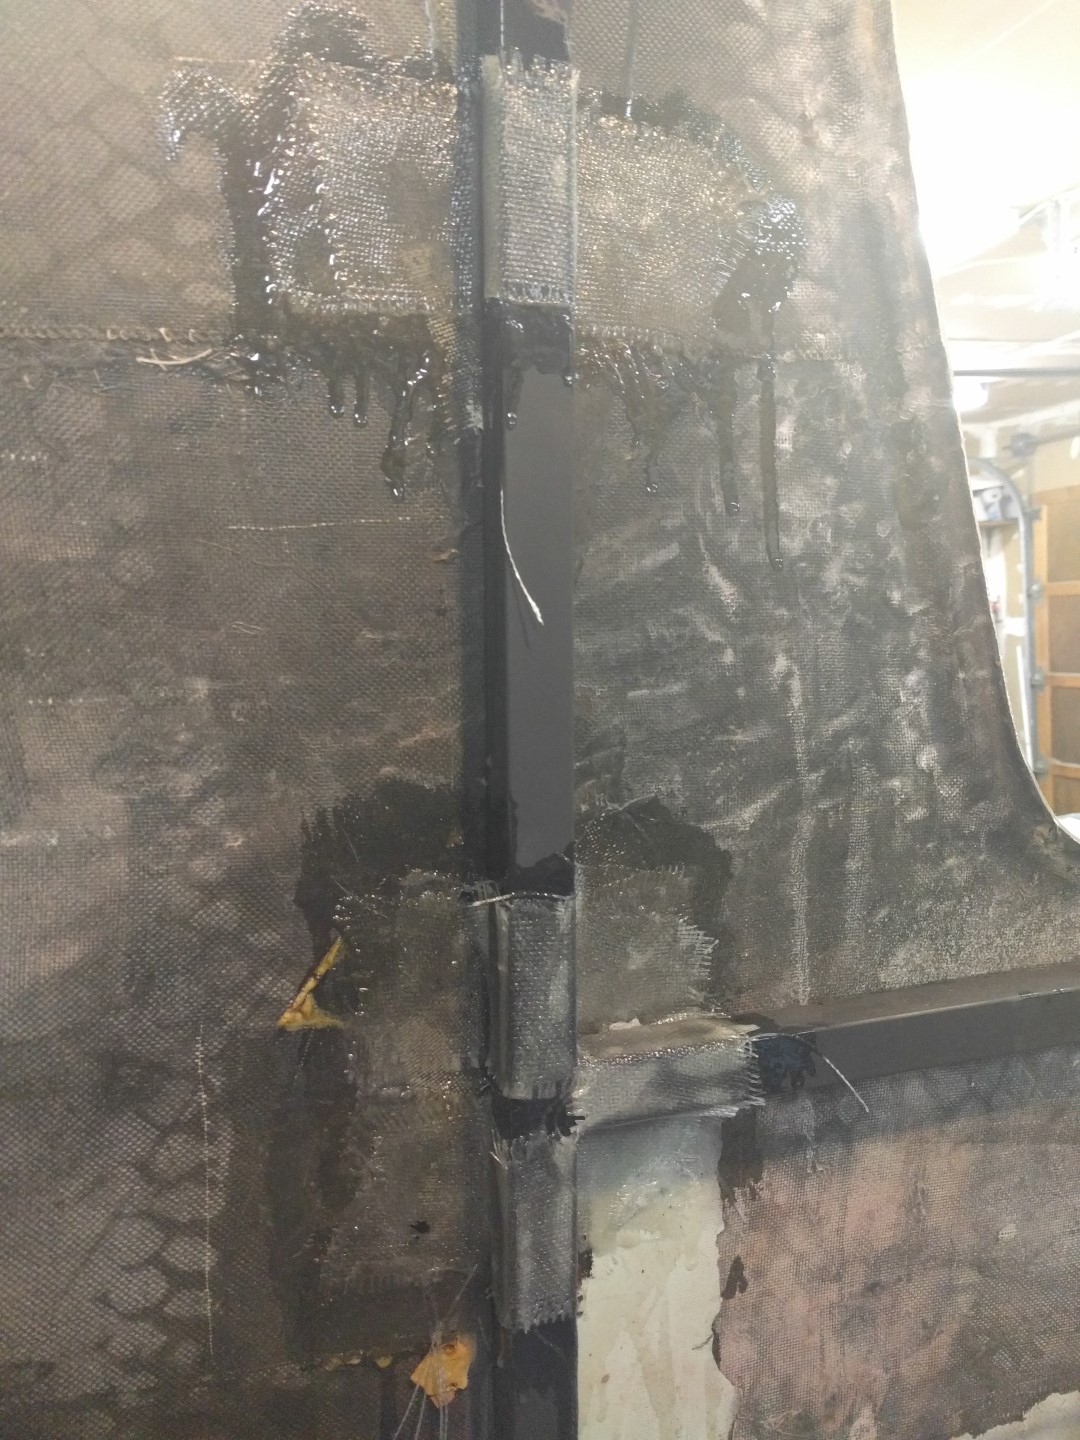
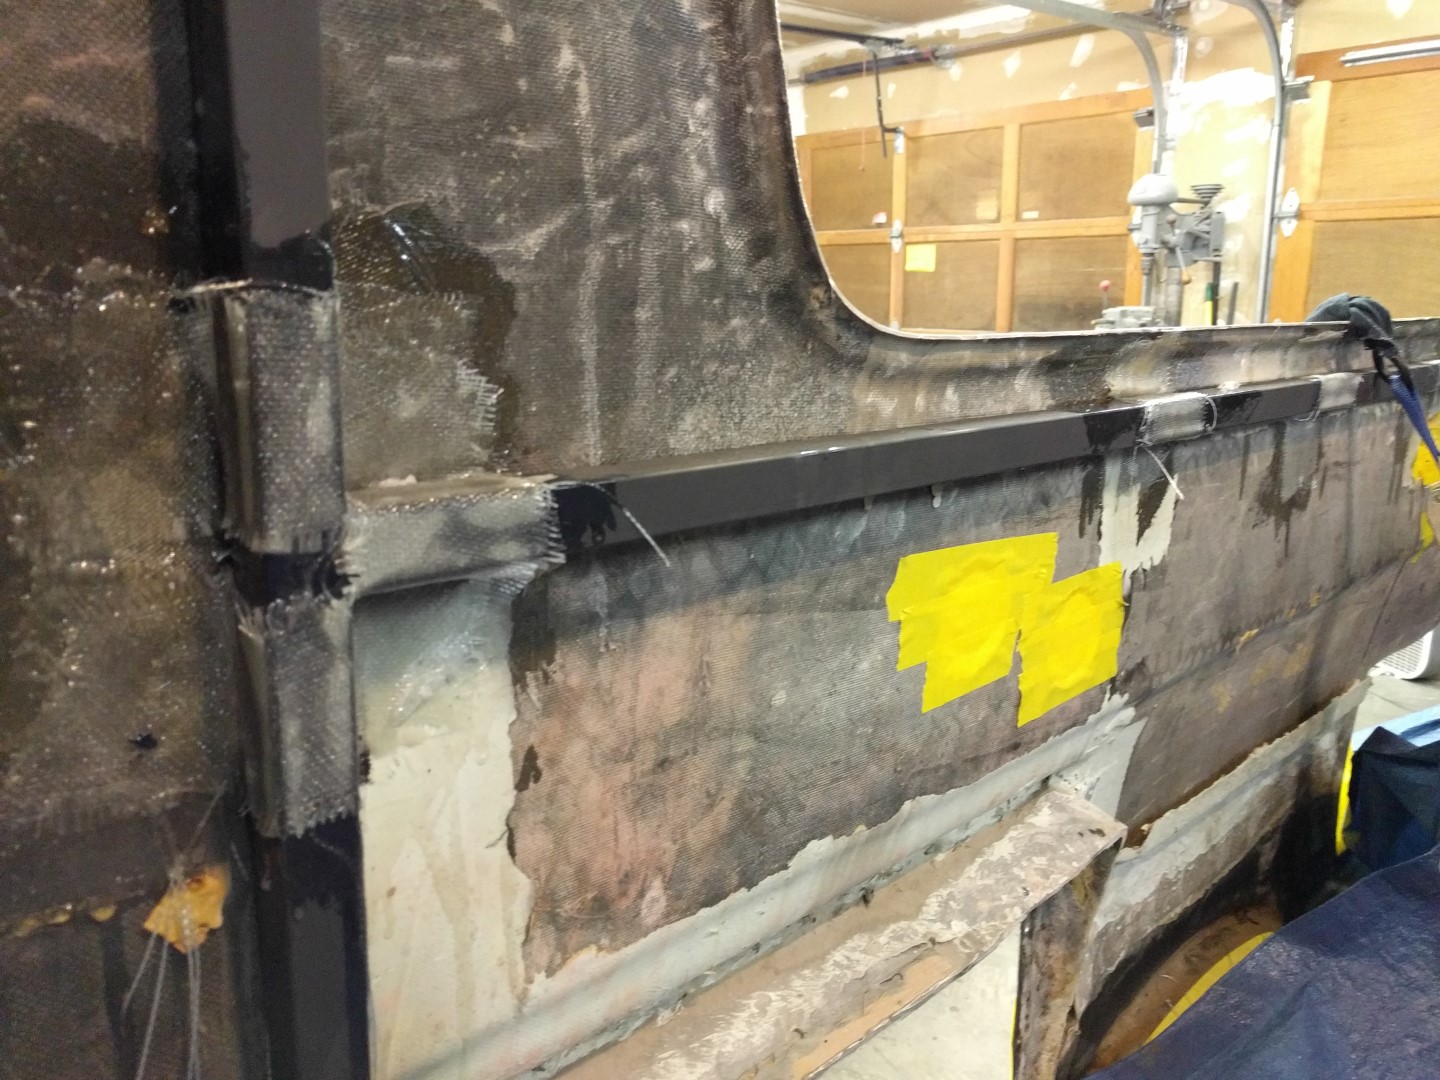
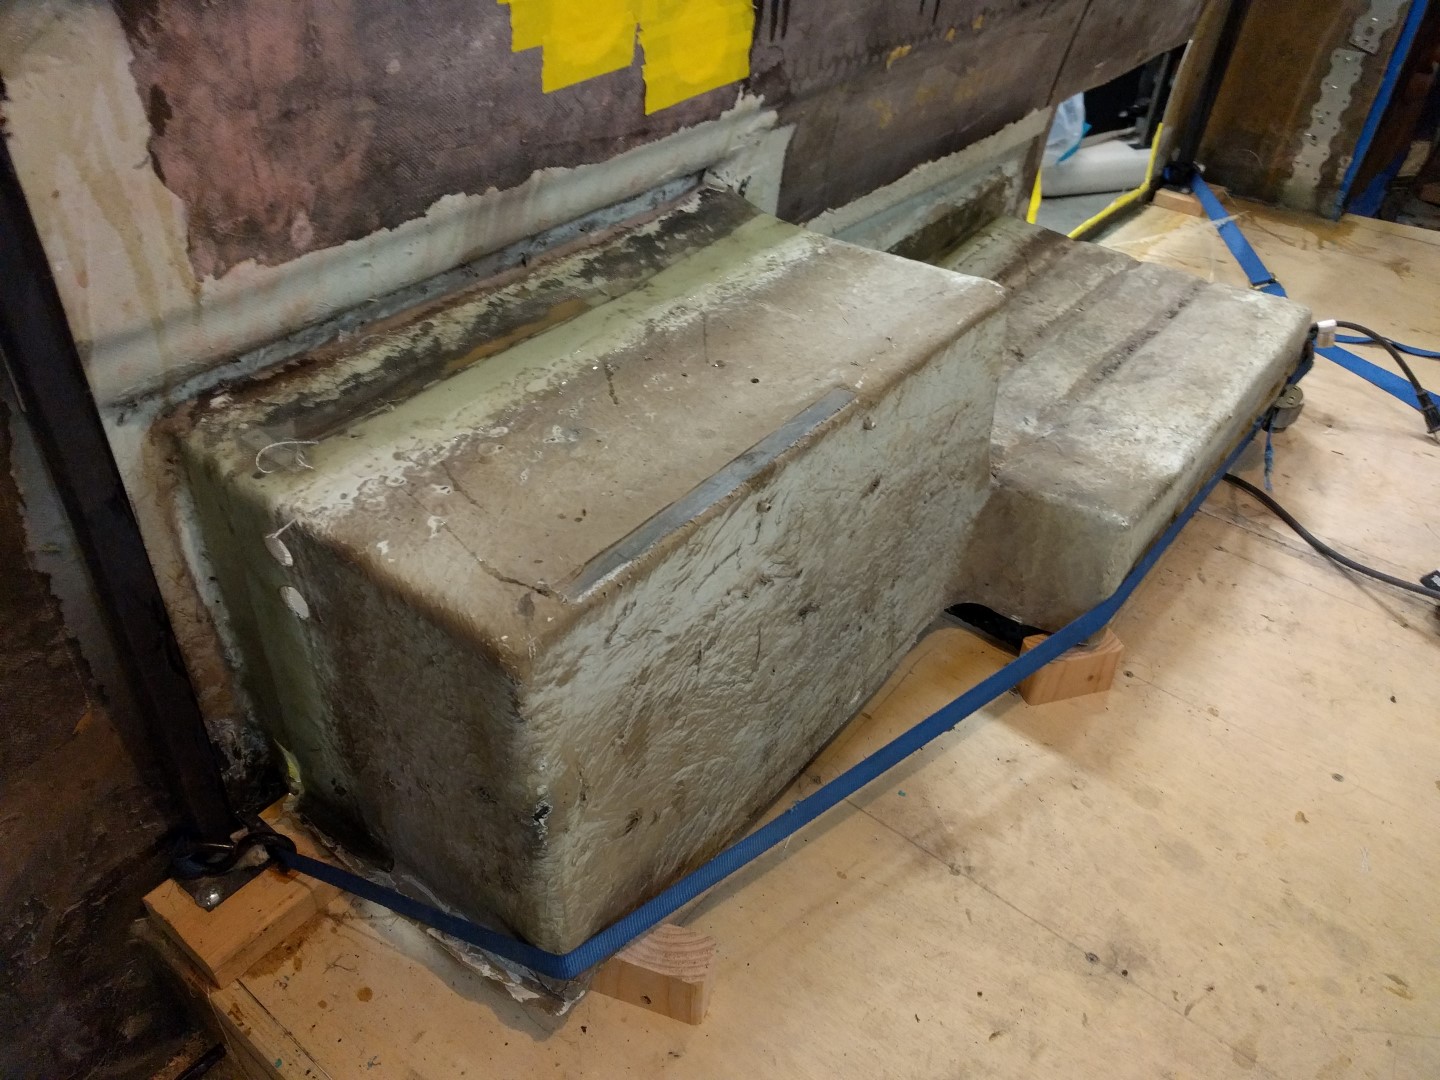
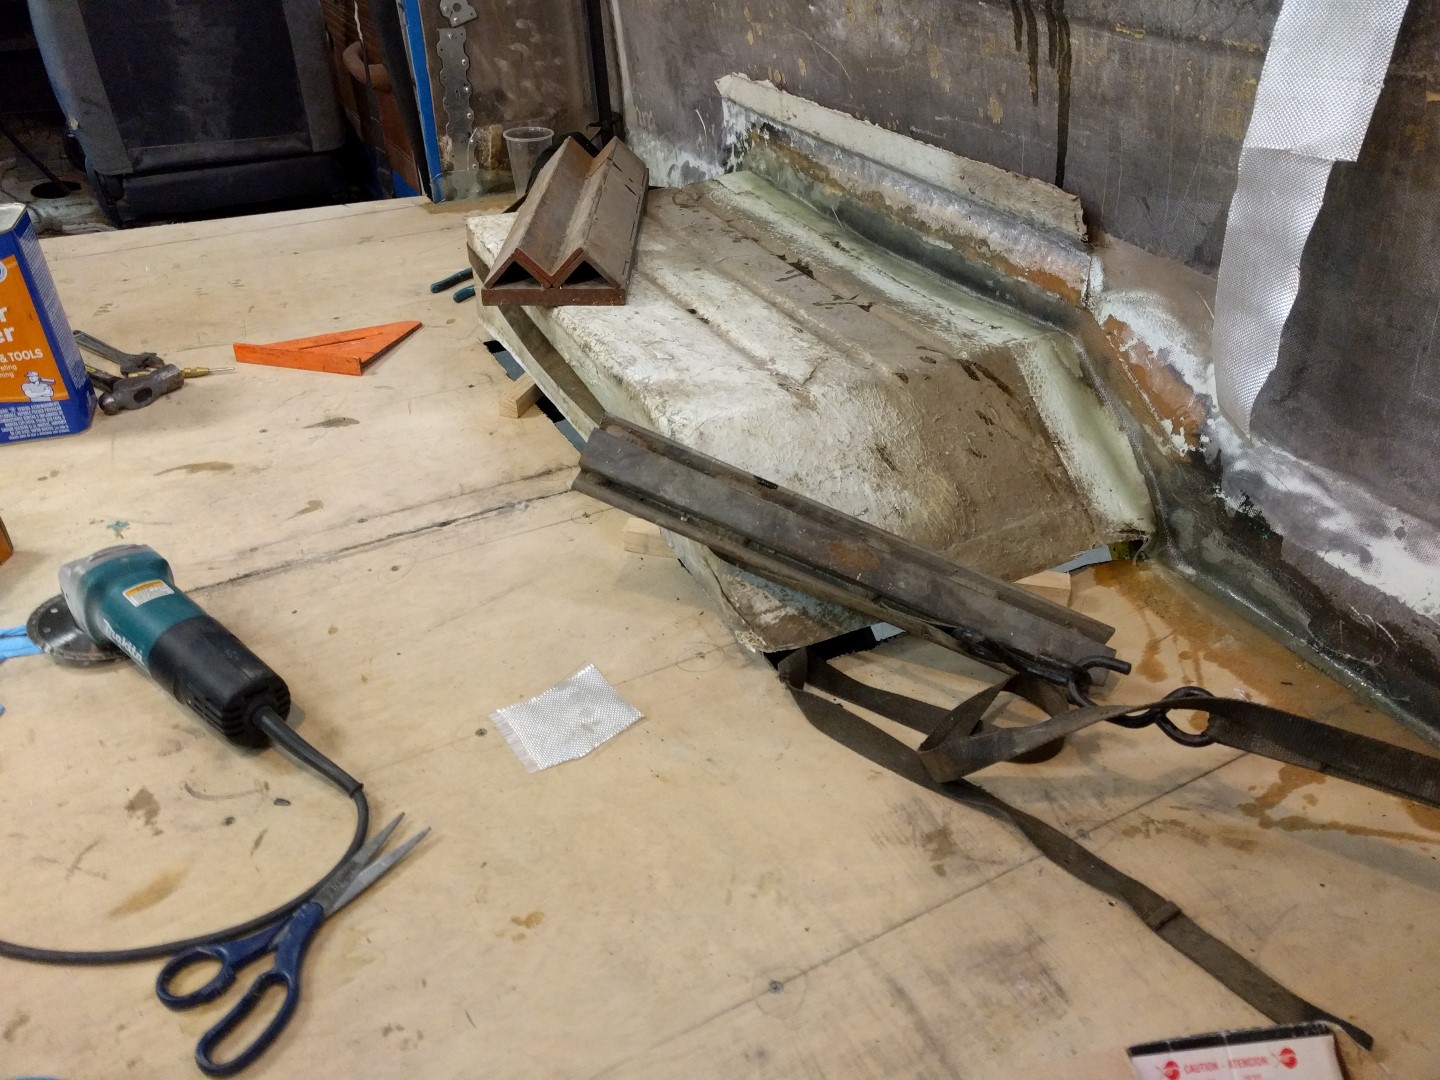
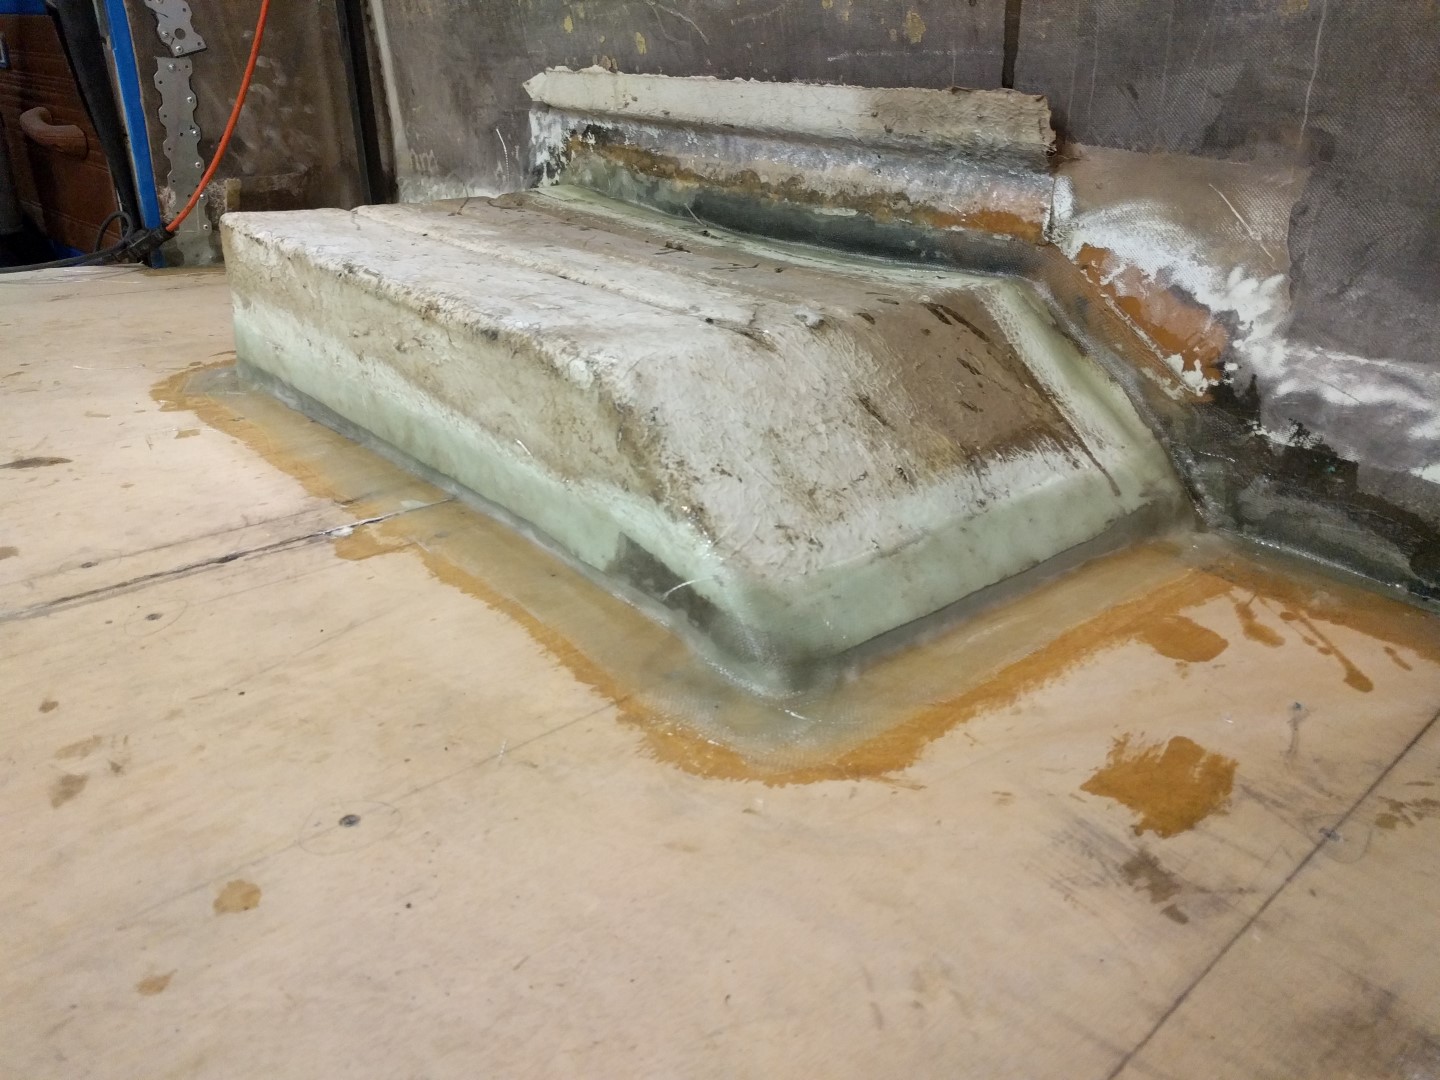
Attaching Shell and Vertical Frame to Floor
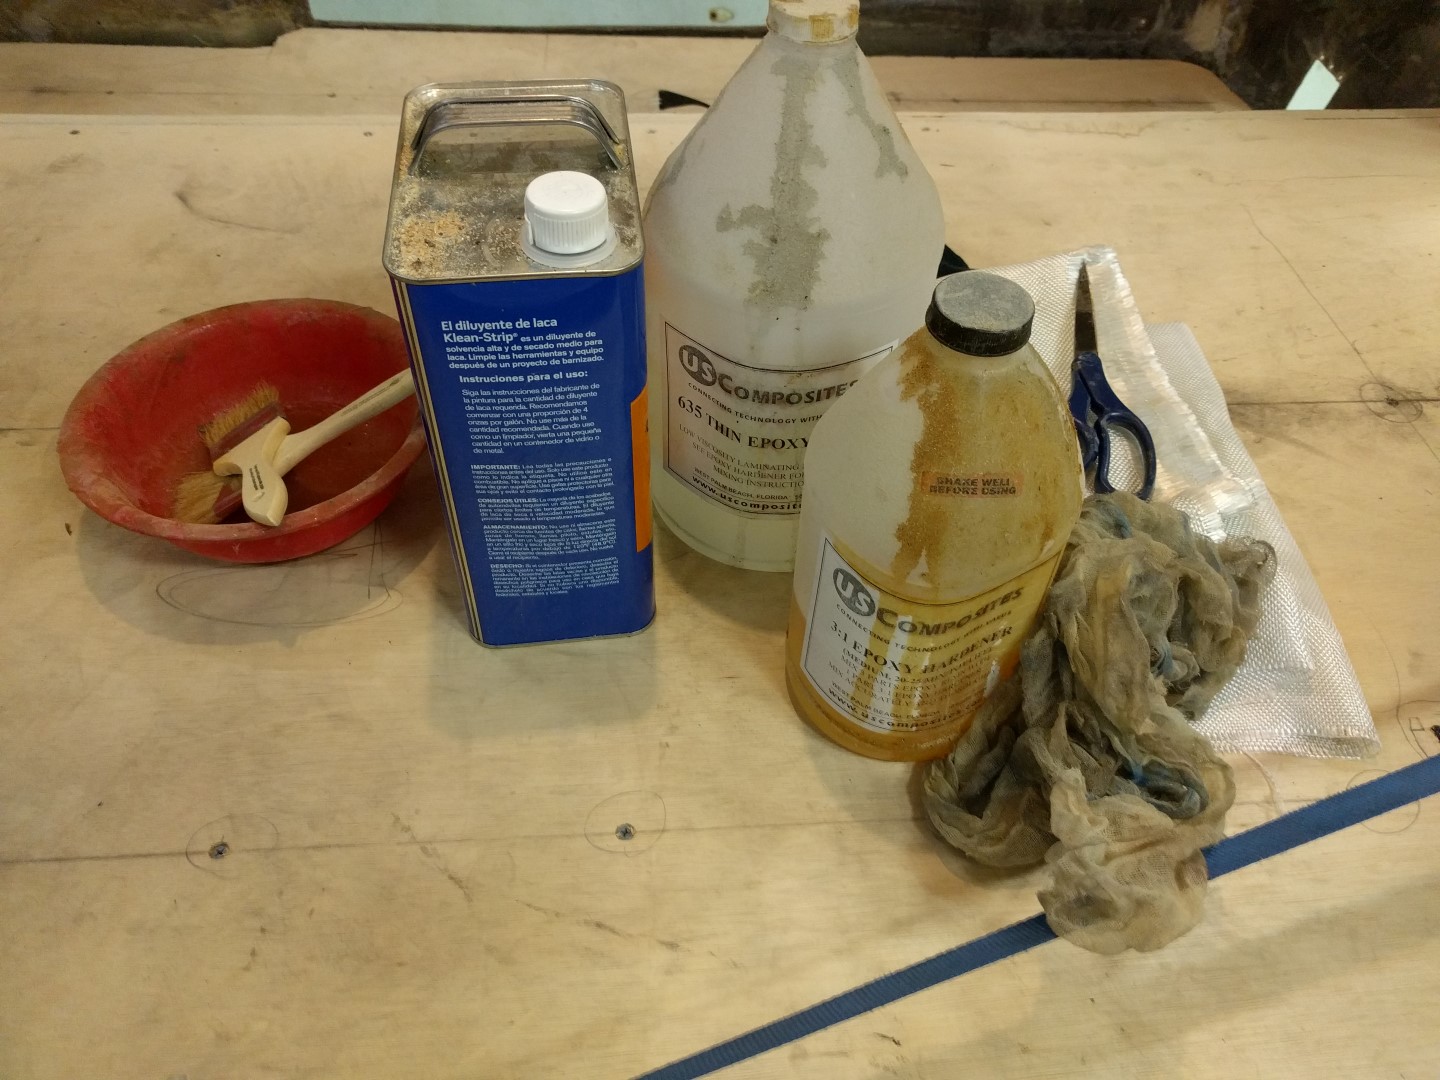
The shell is attached to the floor the same way it was done stock using fiberglass. The fiberglass resin used was epoxy from US Composites along with their fiberglass material.
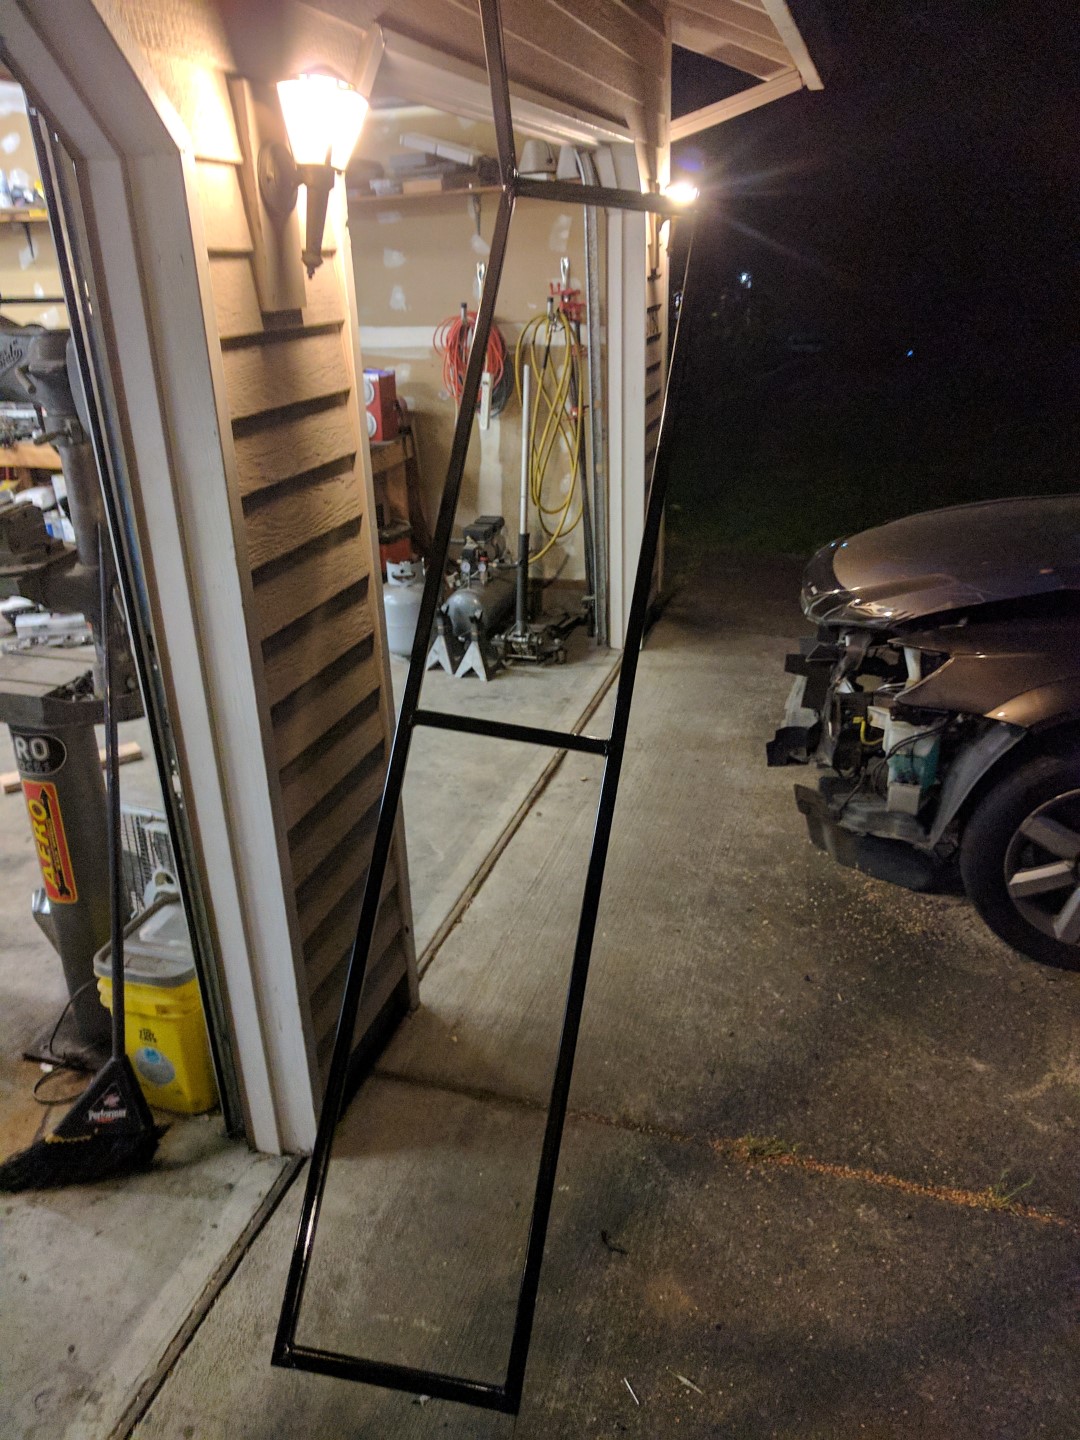
Straps were used to hold the inside wall of the shell flush against the floor. Then using a lot of fiberglass+resin the floor was attached to the shell all the way around the perimeter of the shell excluding the area where it meets the truck cabin. Make sure everything is cleaned!
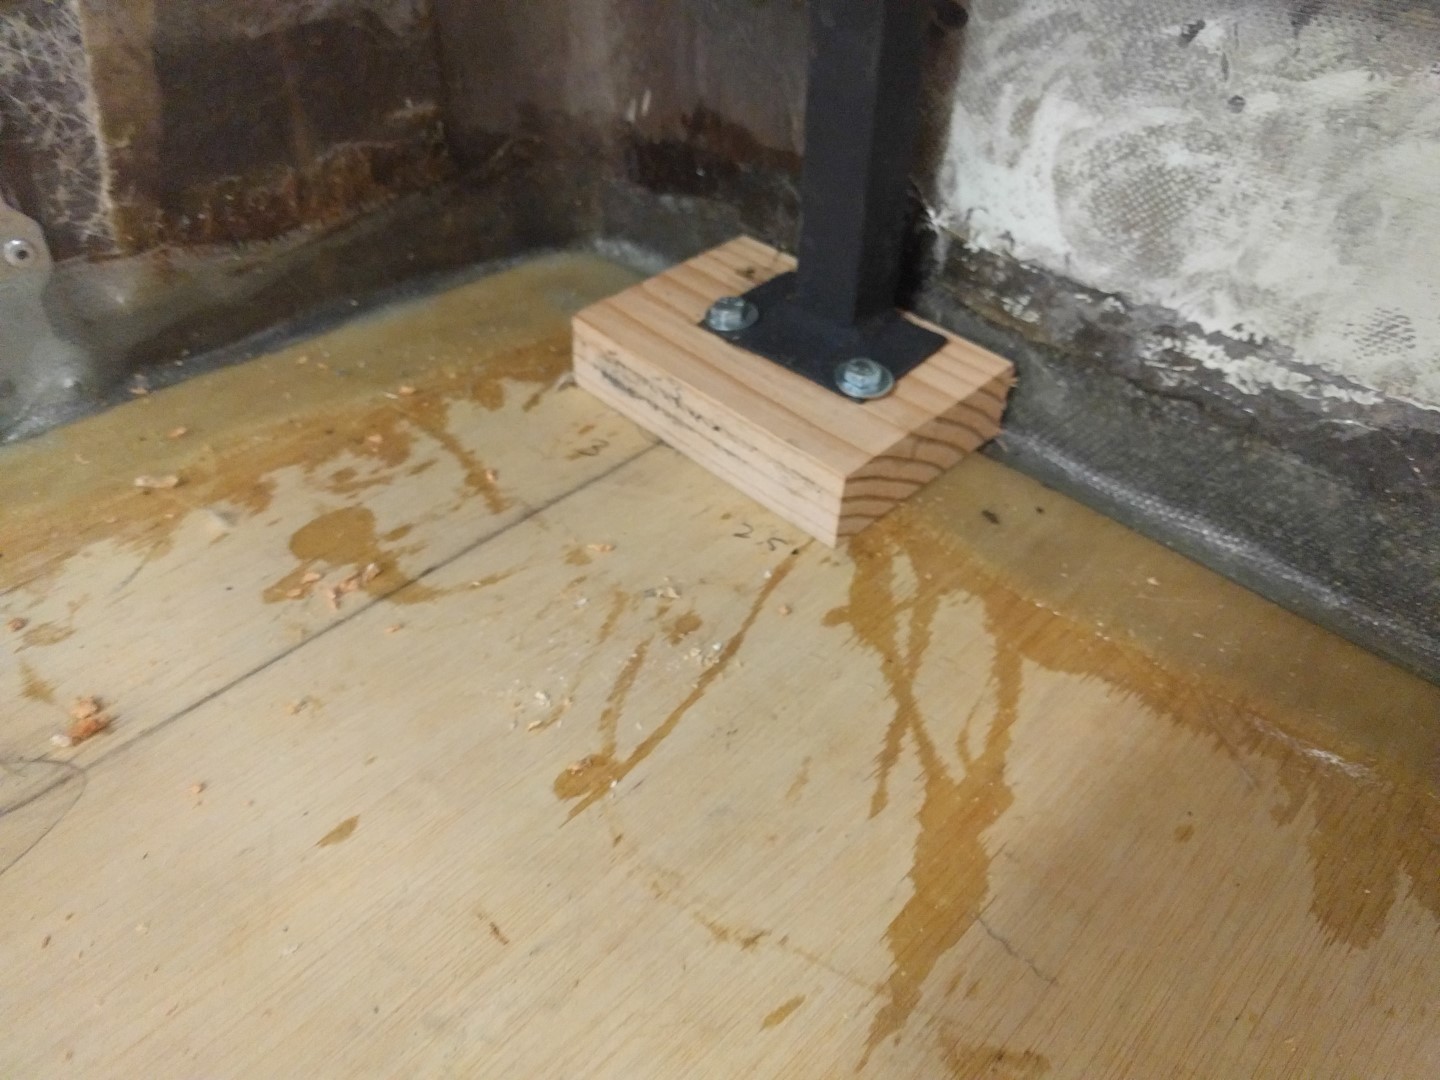
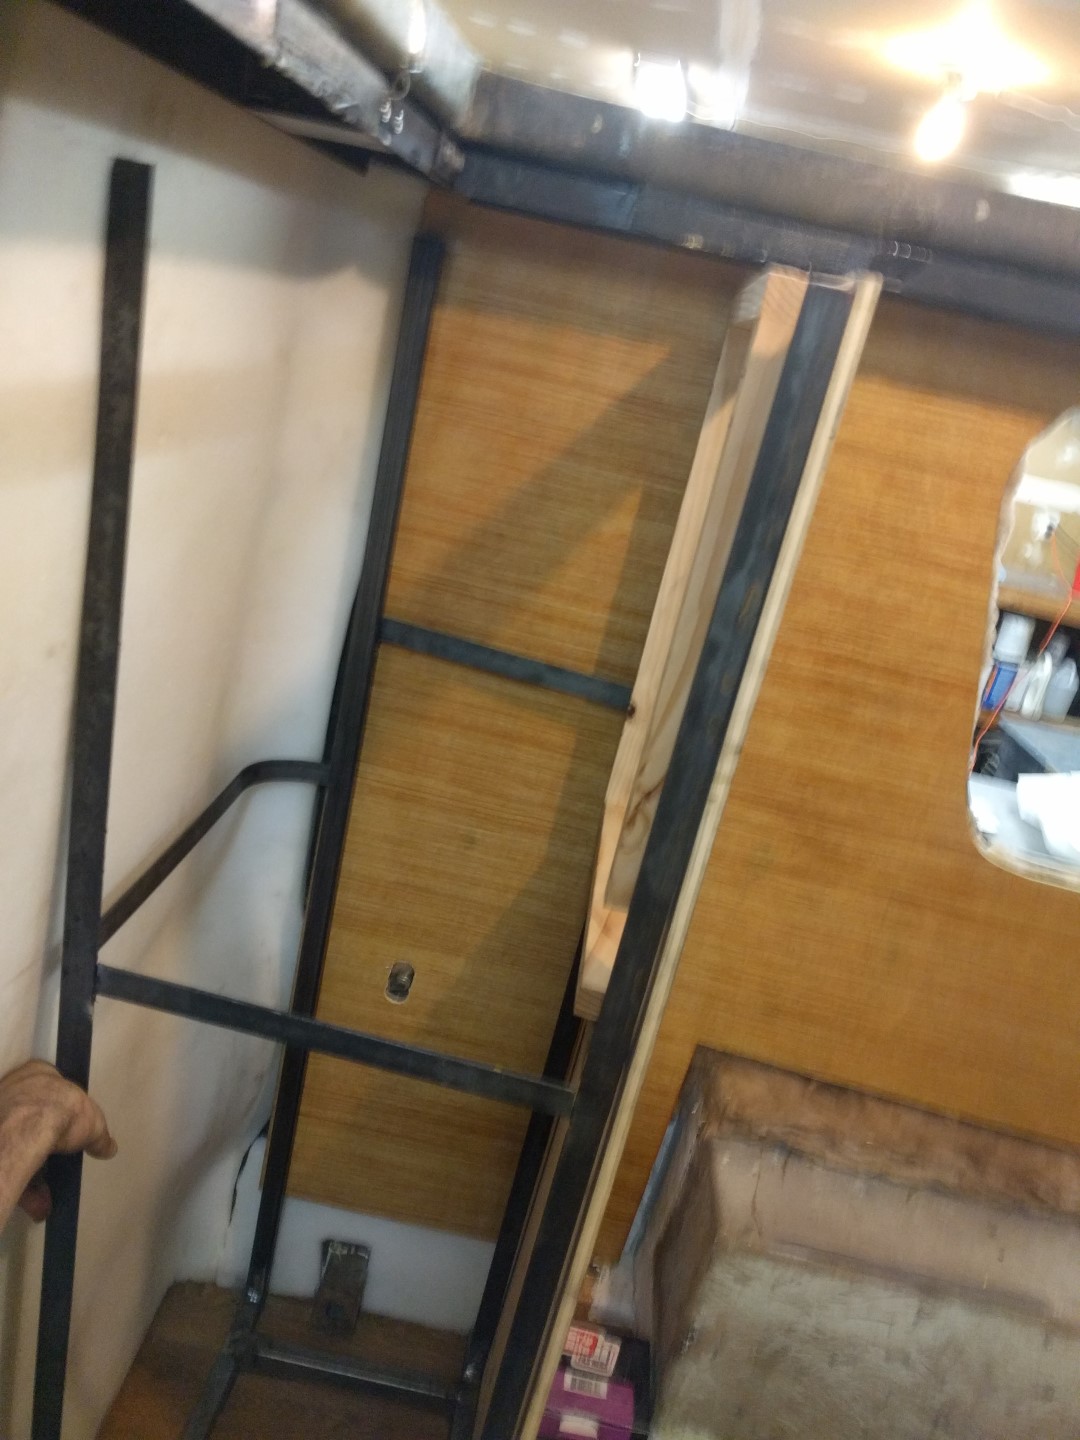
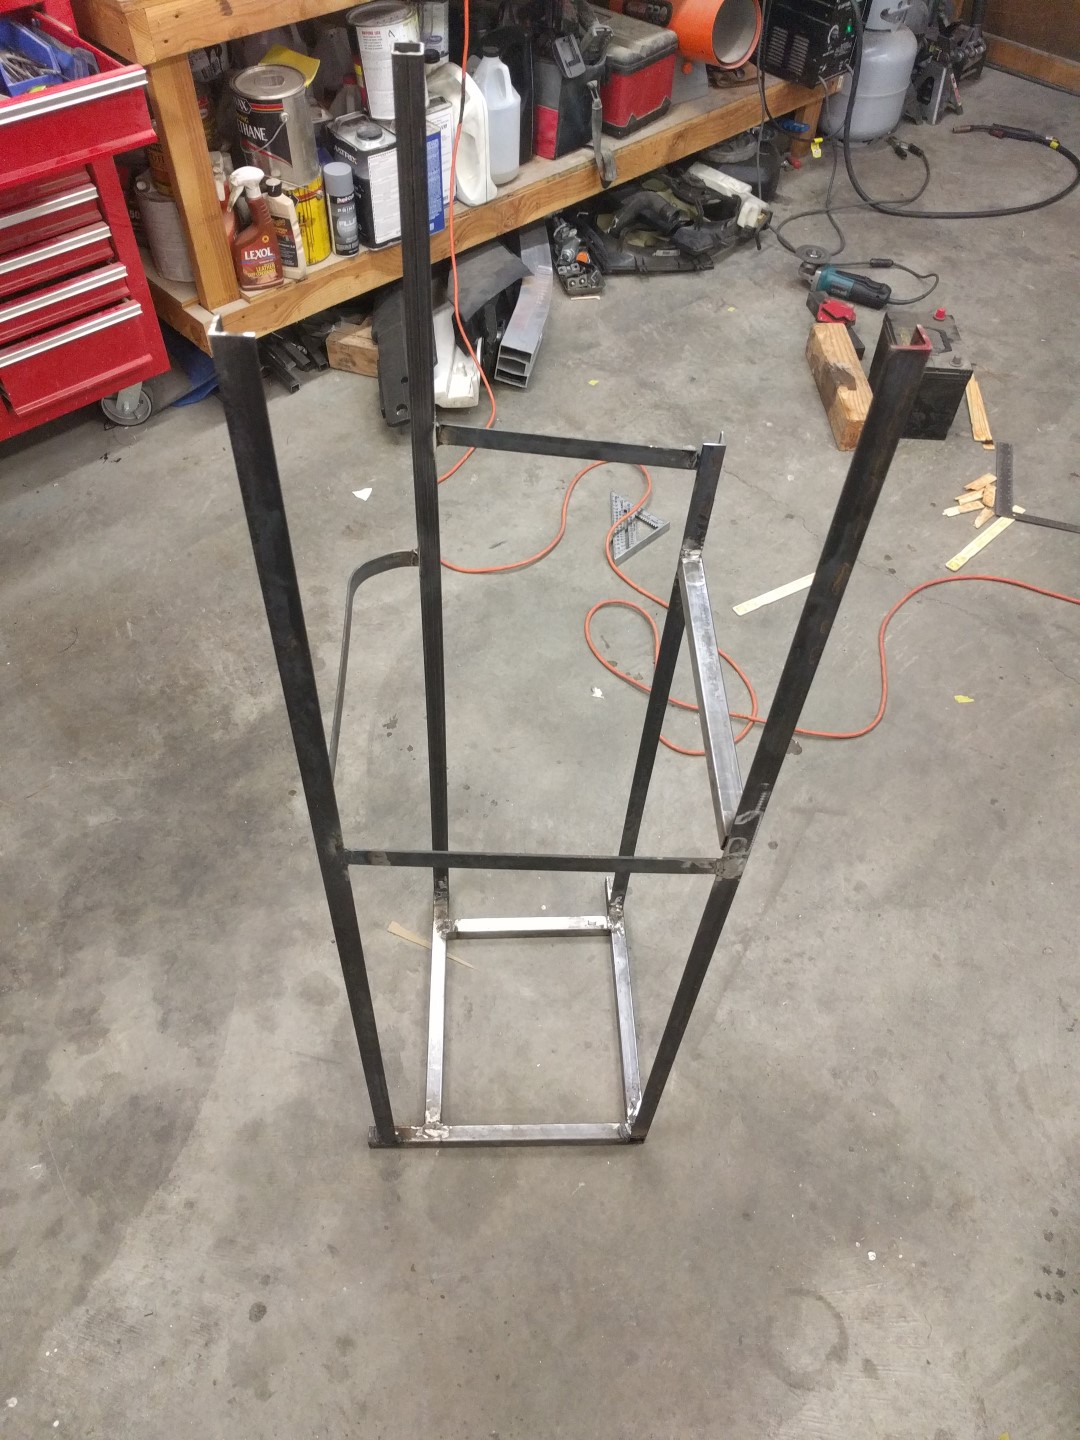
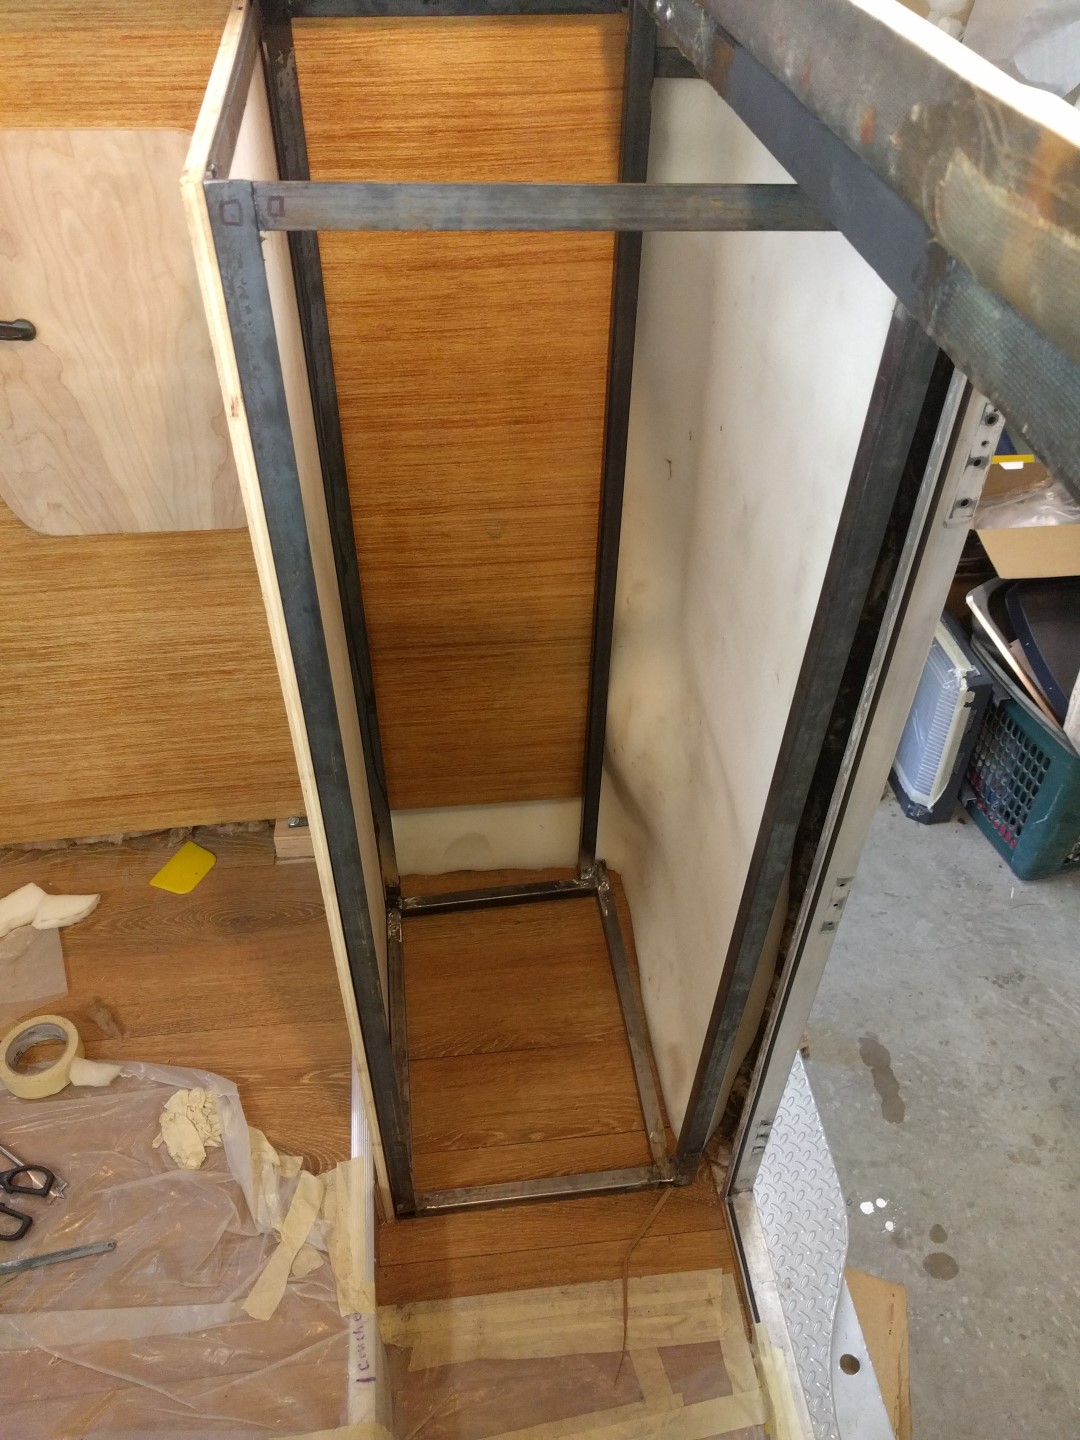
The vertical frame was another good stock feature. The “H-shaped” frame was secured to the walls with fiberglass strips and does a great job holding it place, nice and sturdy.
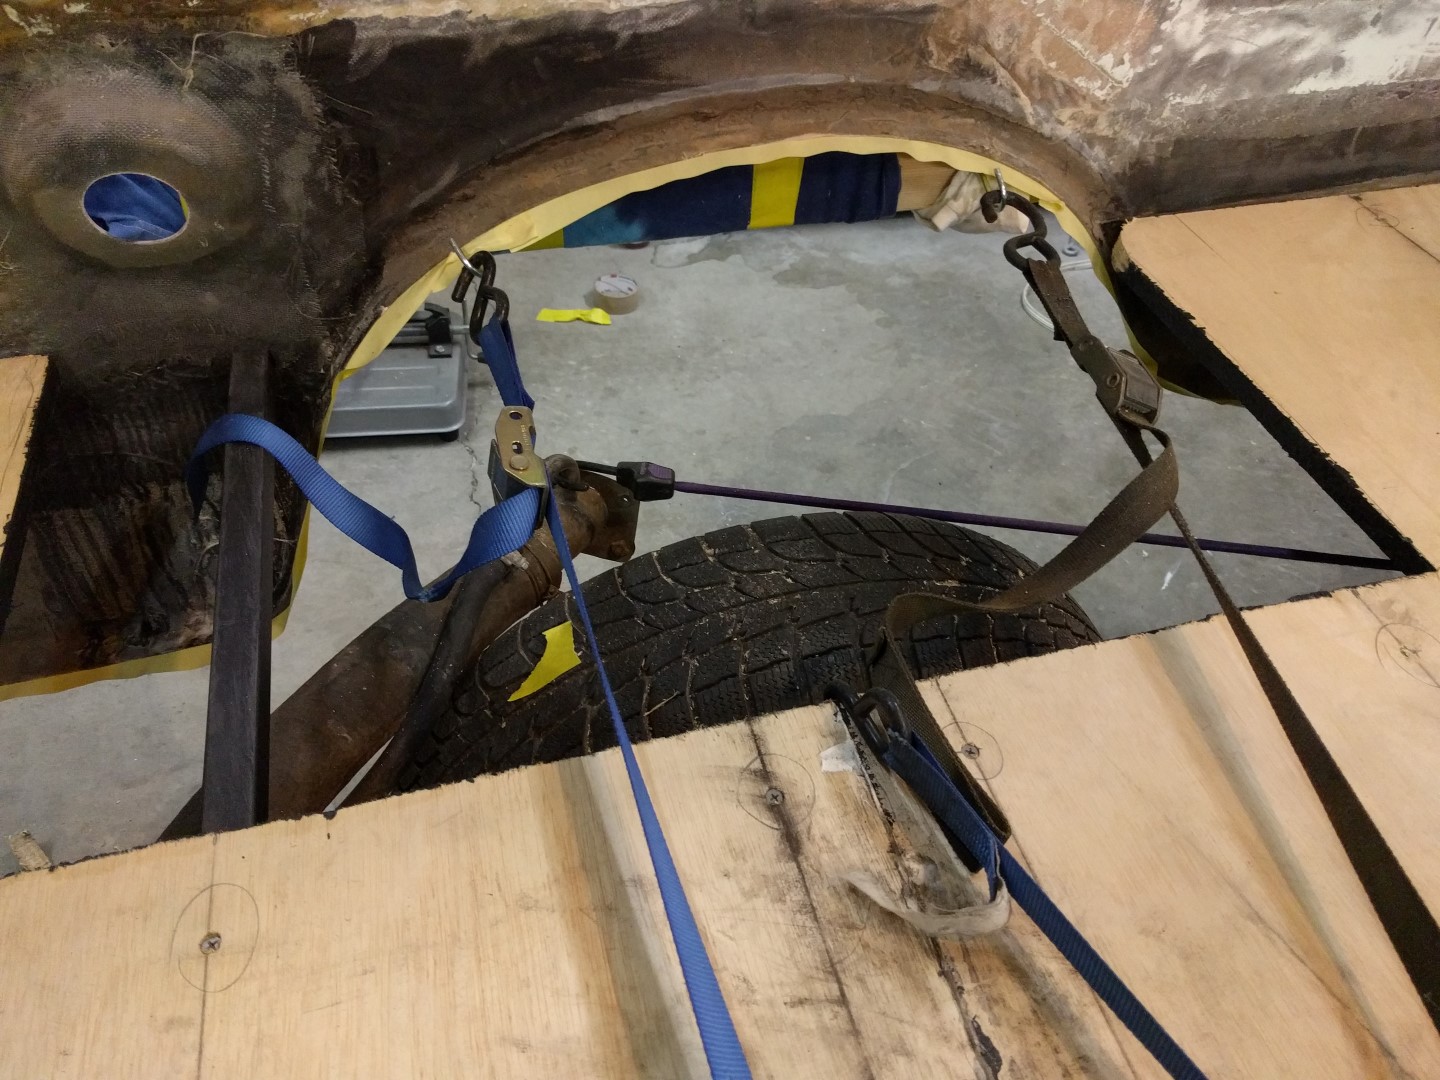

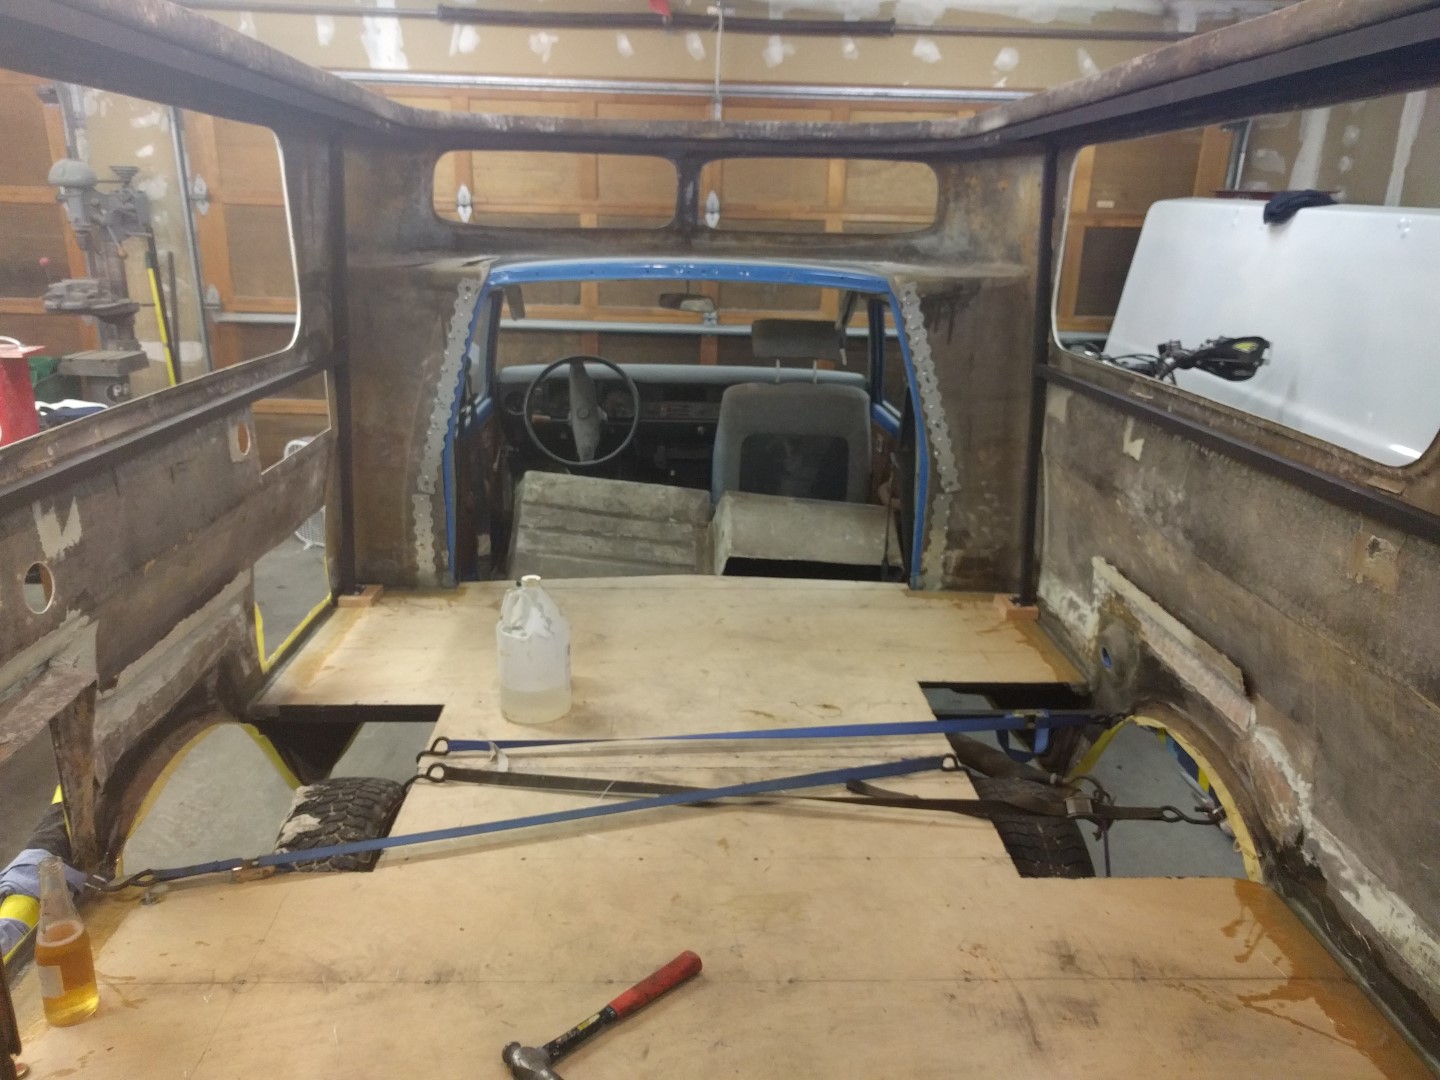
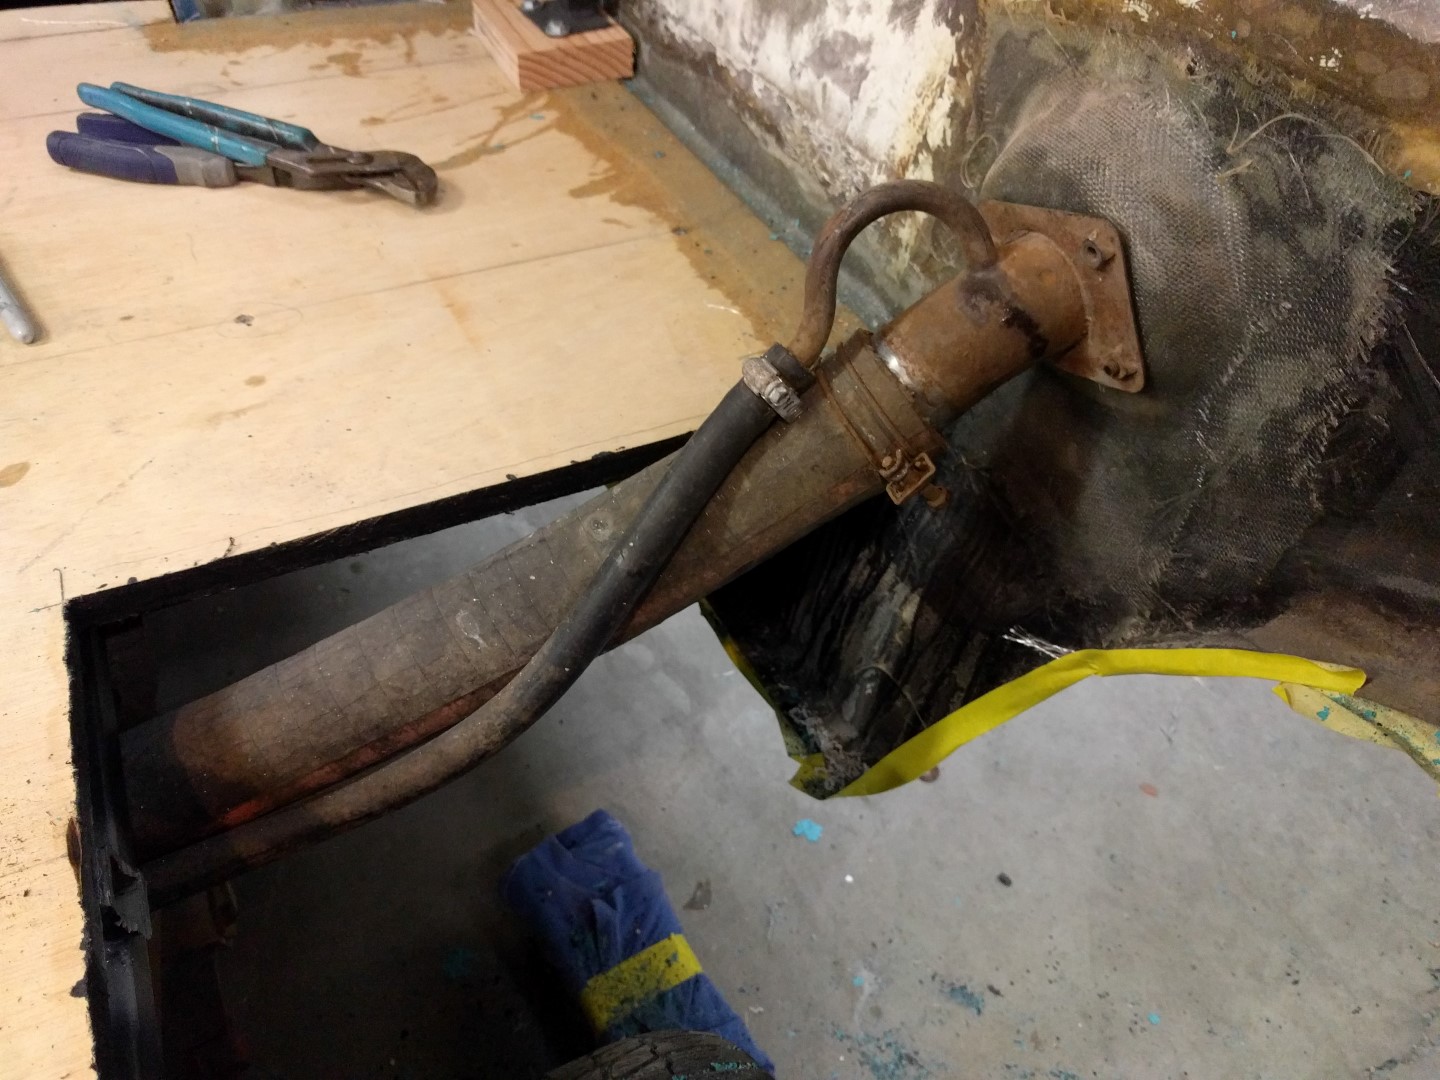
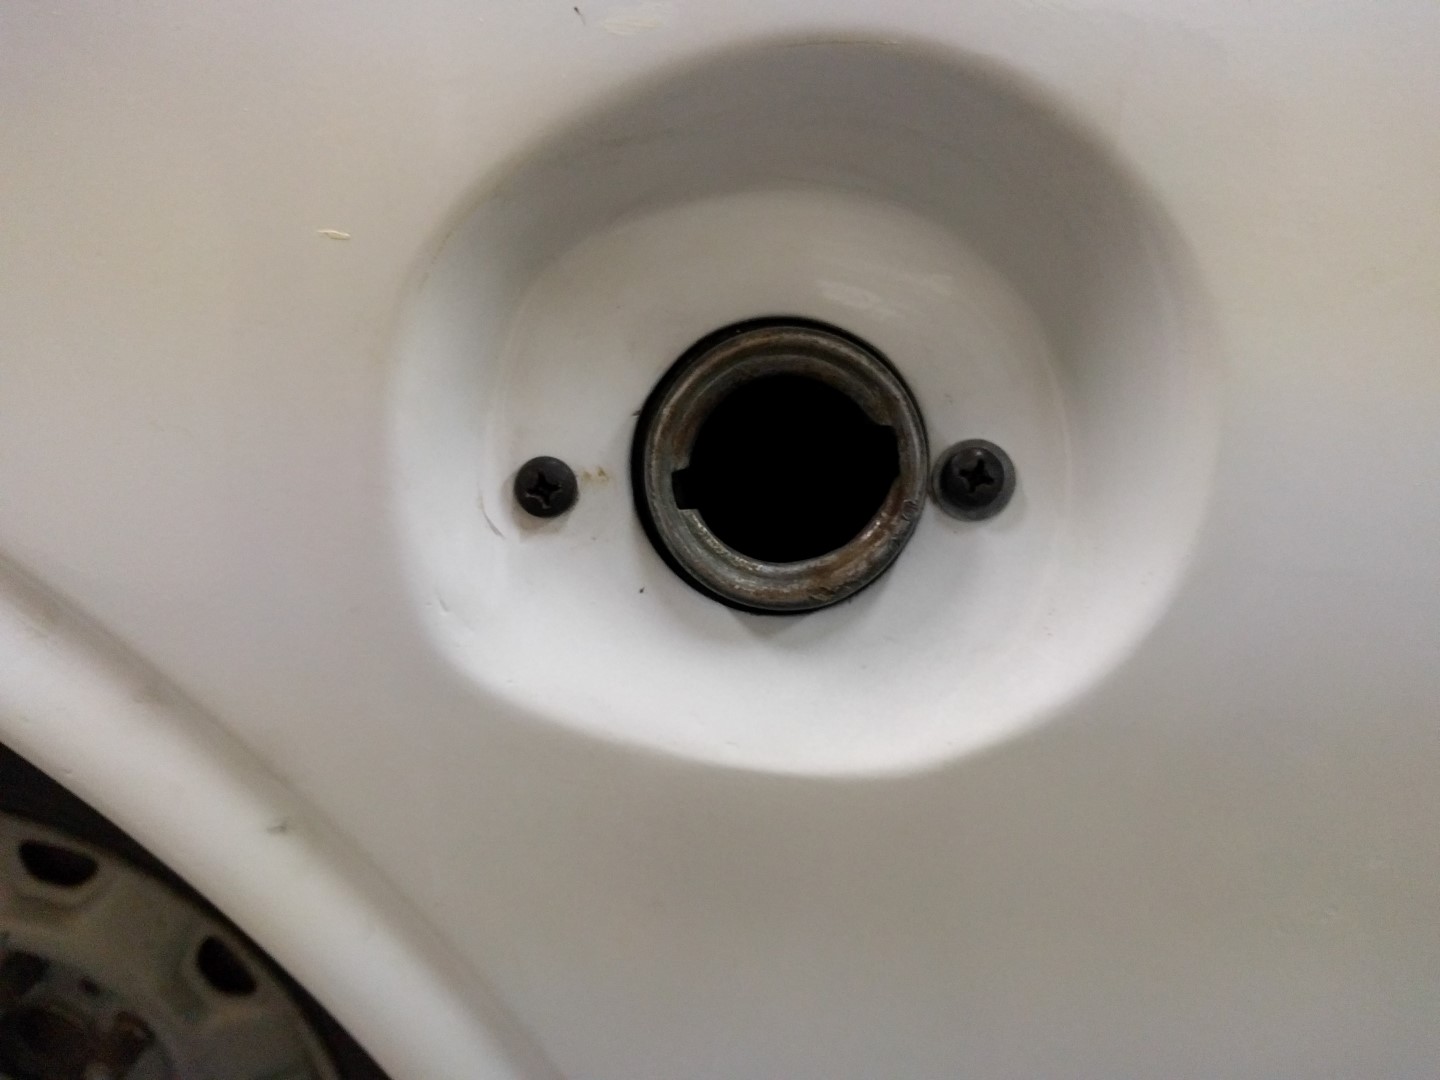
Gas Tank and Hose
The gas tank attaches through the passenger’s side wheel well with two bolts into the spout.

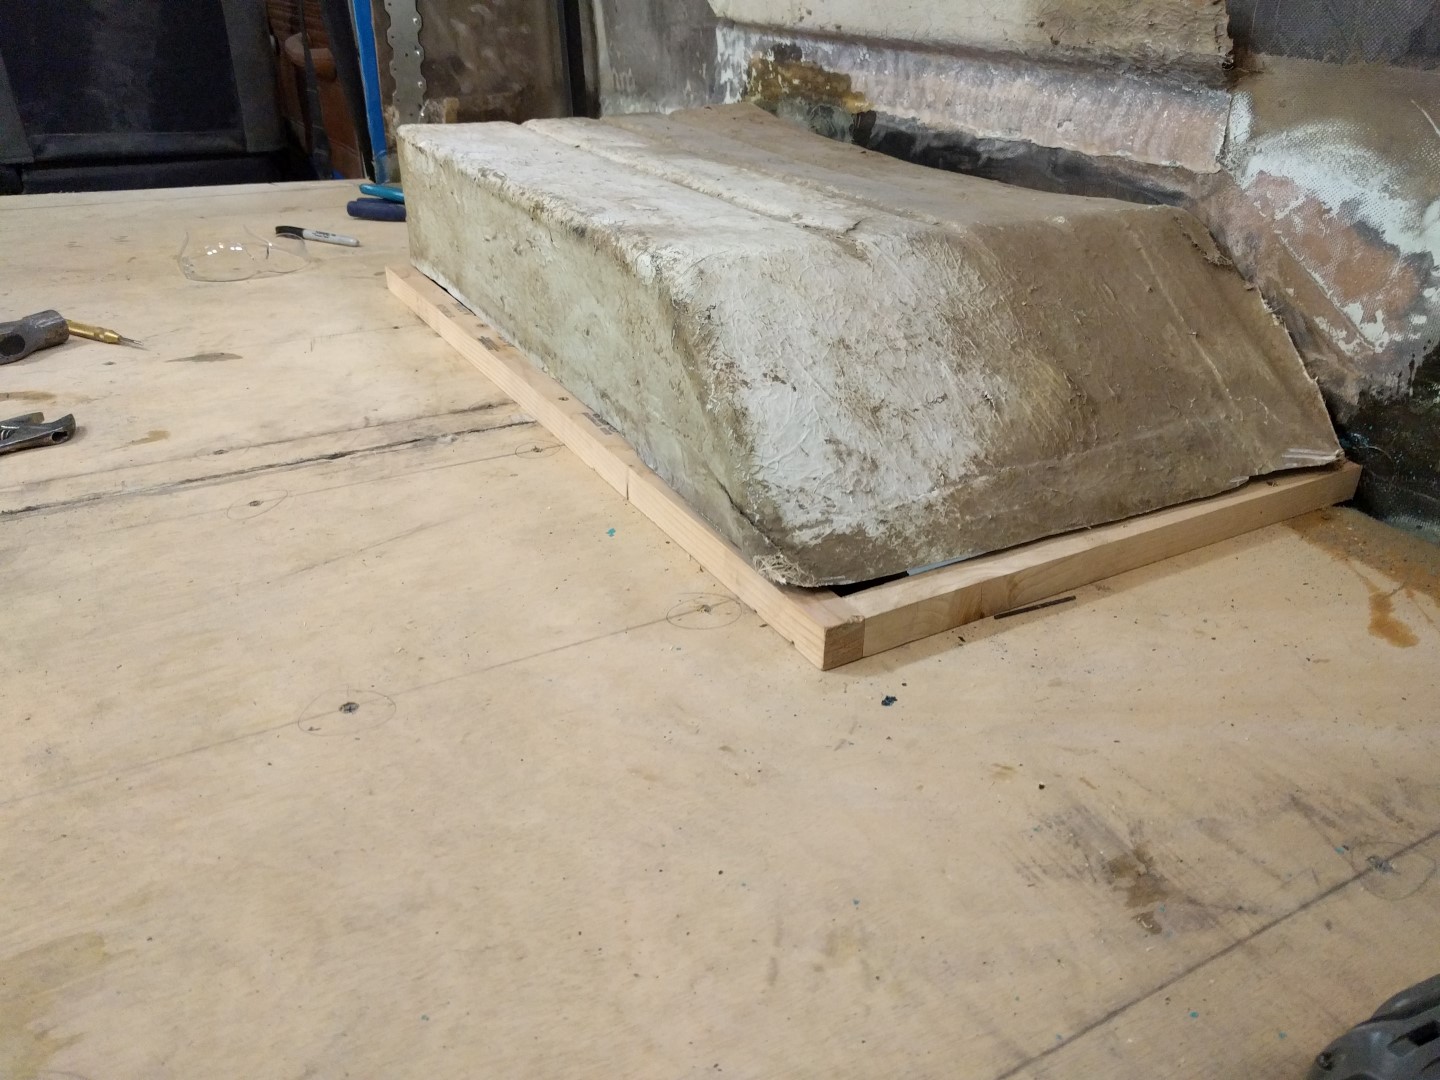
Wheel Wells
The whell wells were reused and the same method of attaching them with fiberglass to the floor+shell was used. After a bit of framing the wells in the correct spot (due to the 1-2” floor lowering), the same fiberglass resin was used to attach the wells; about 3 fiberglass layers.
Plastic sheet is of great usefulness in these fiberglass applications because the resin doesn’t stick to it at all. I wrapped some to-size 1/4” plywood in plastic to get a nice fiberglass joint.

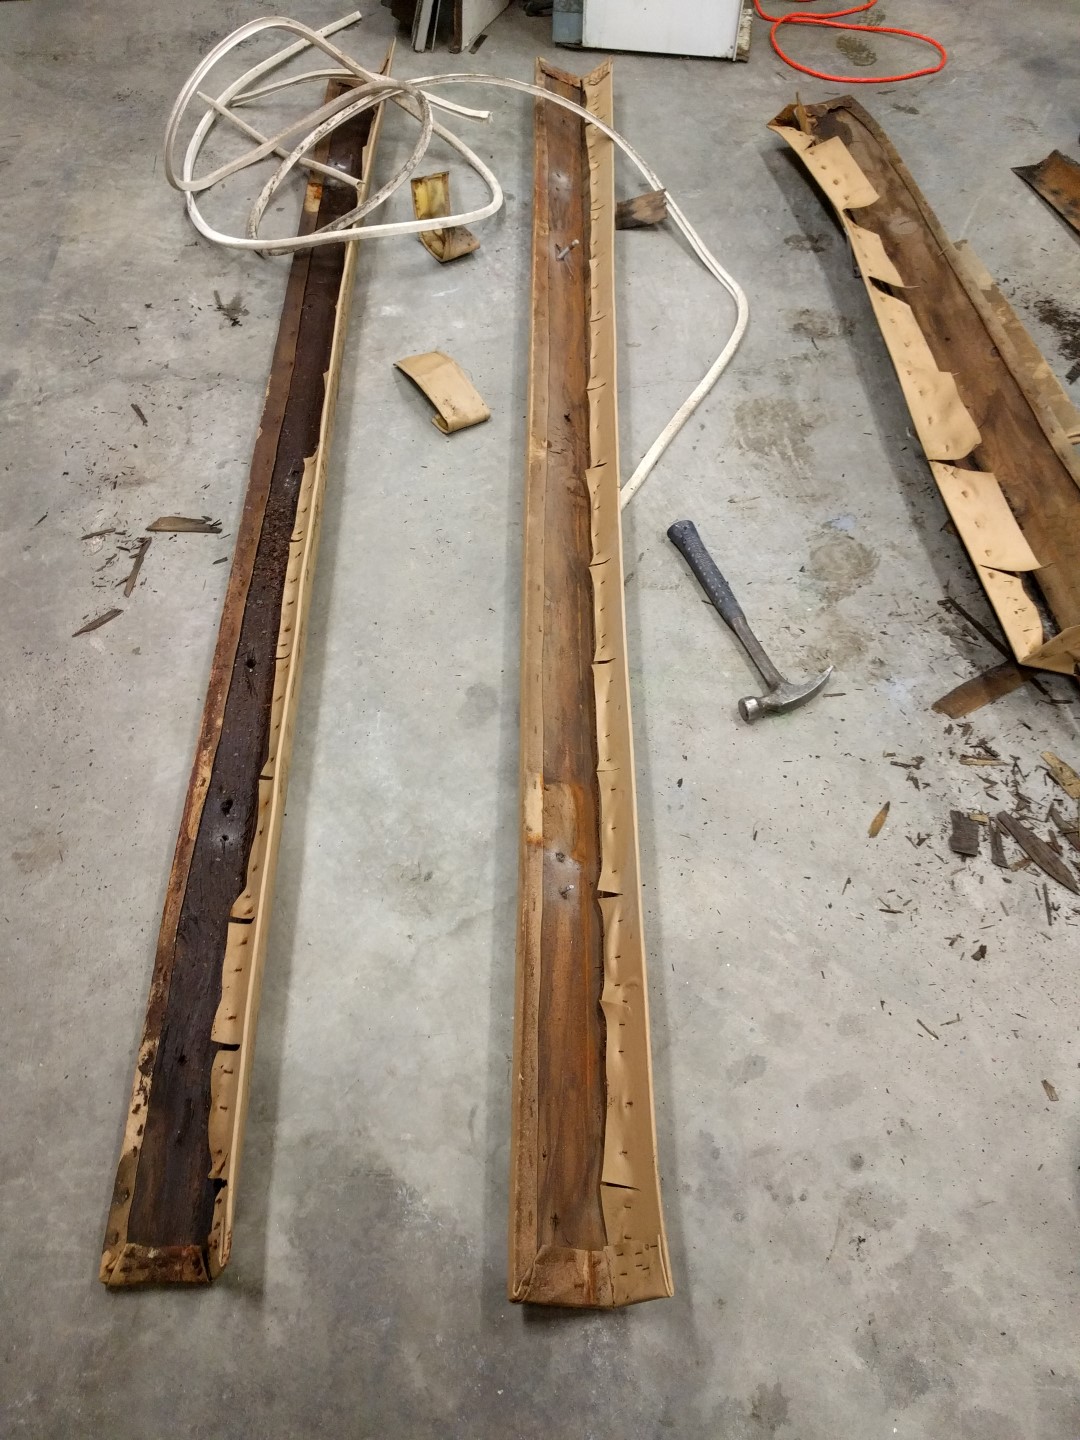
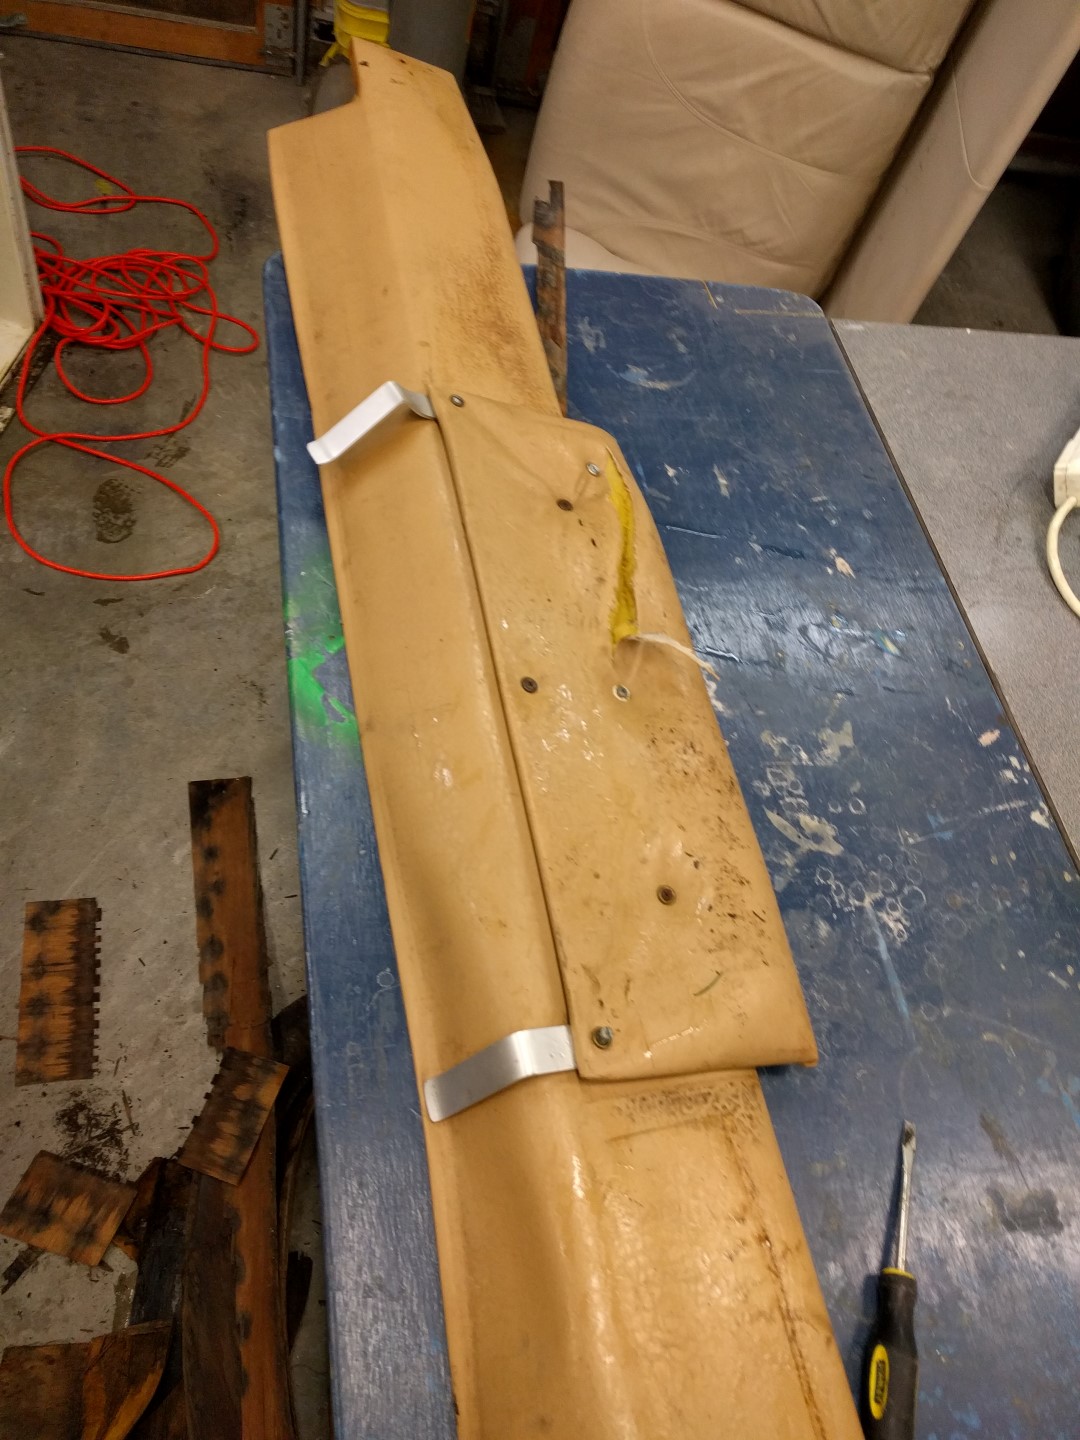
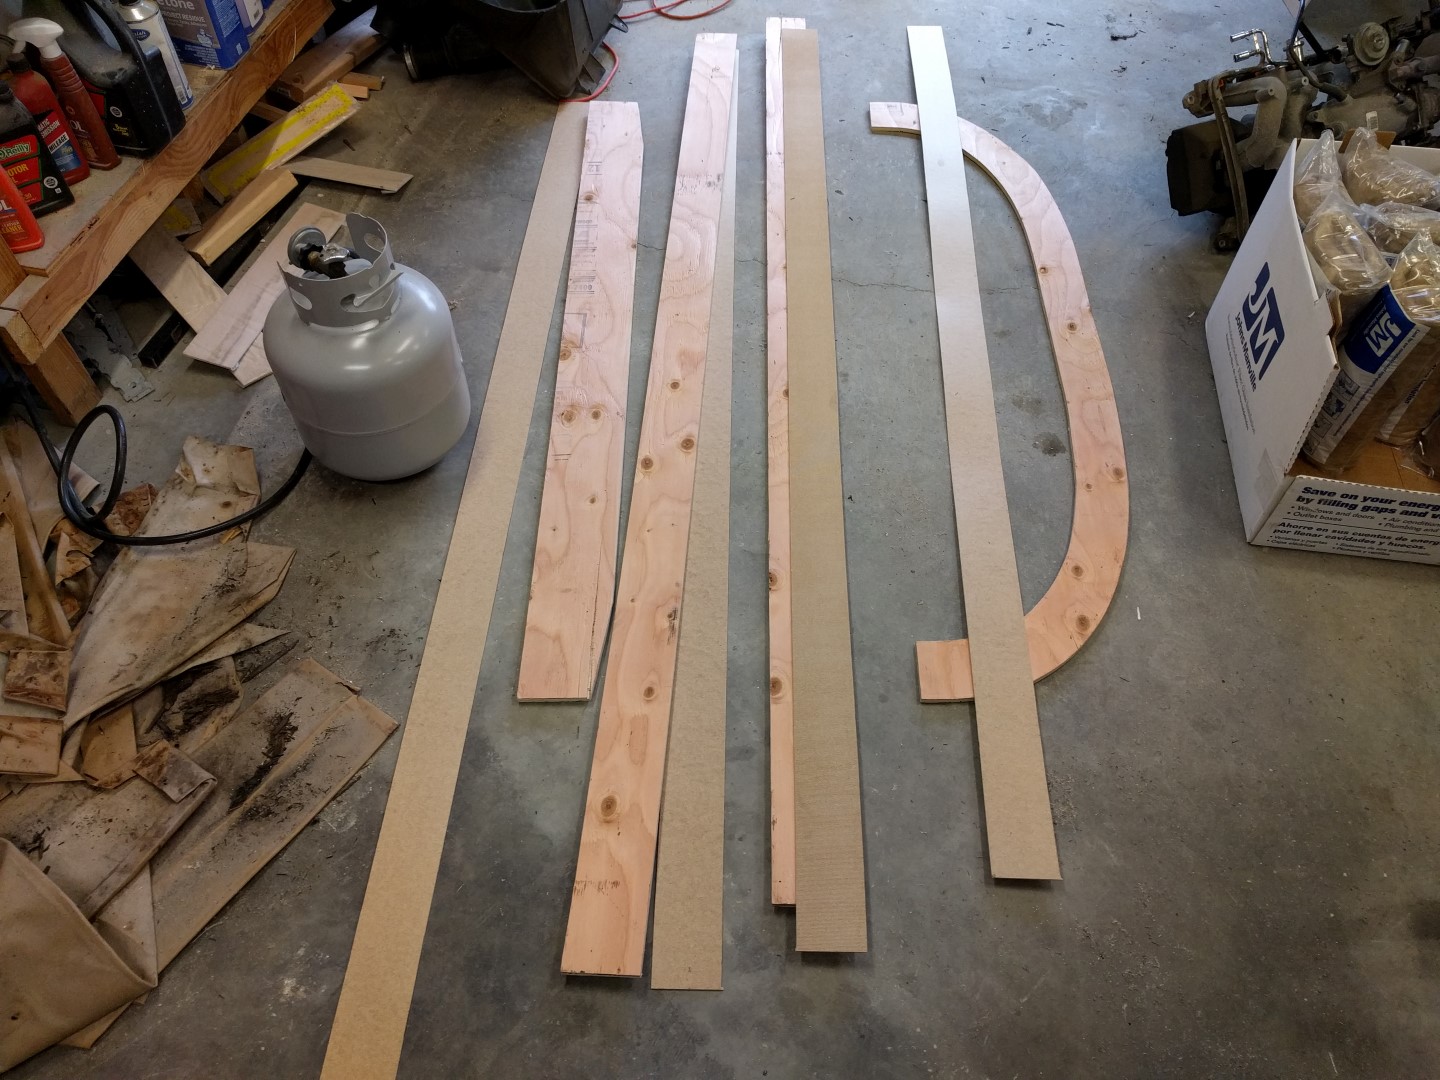
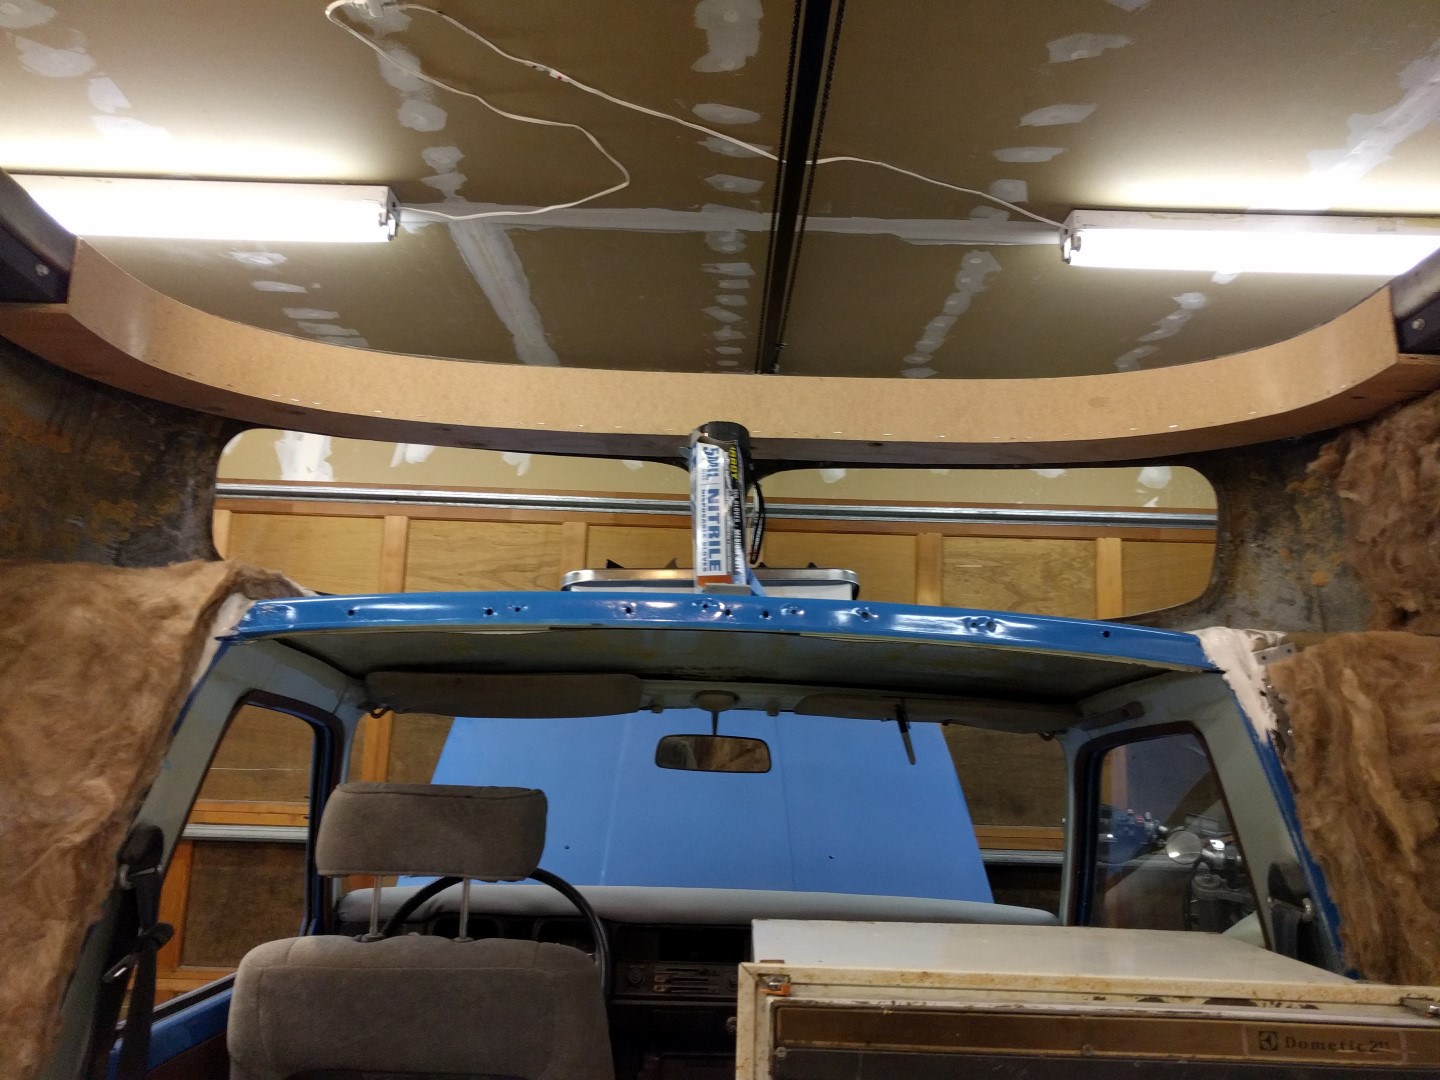
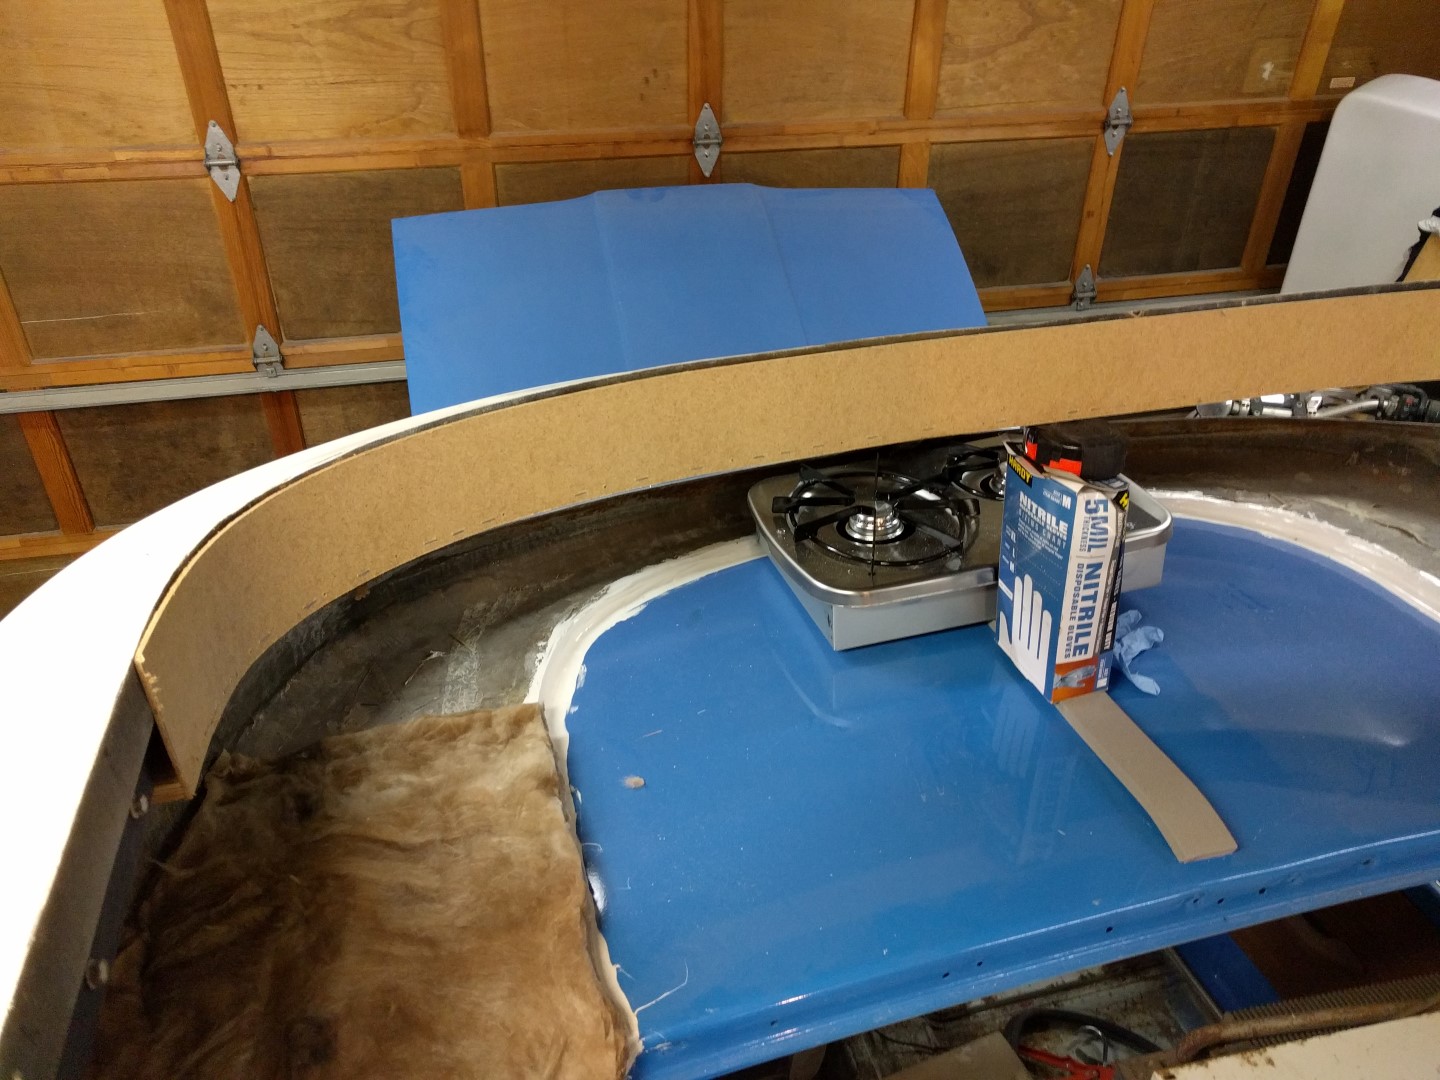
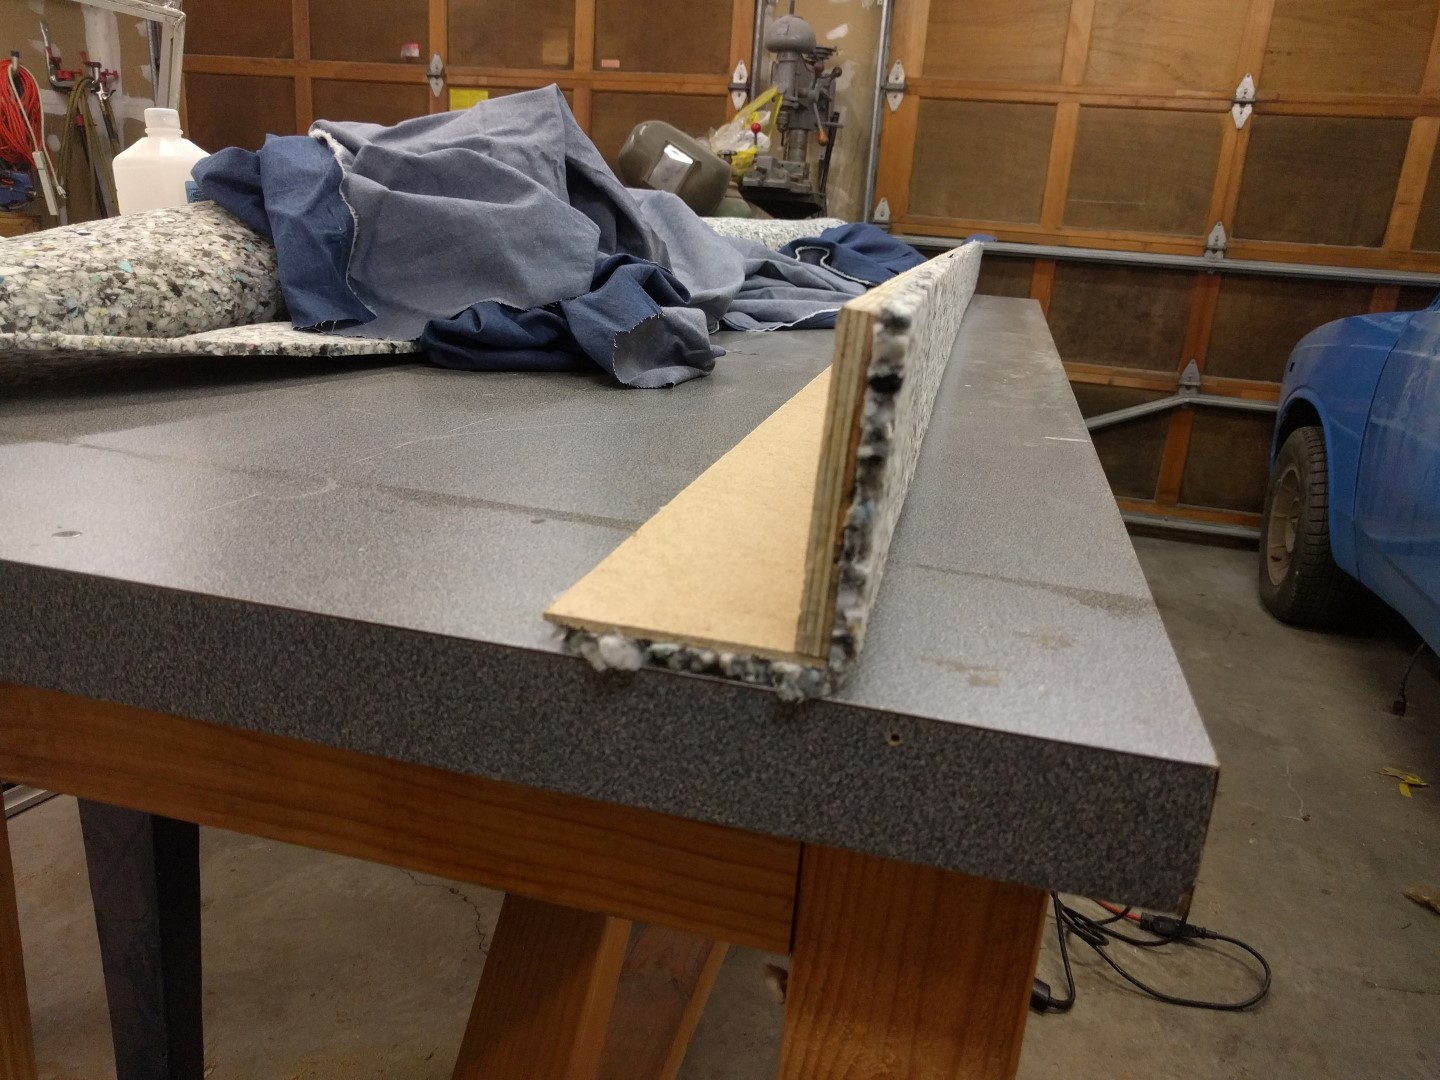
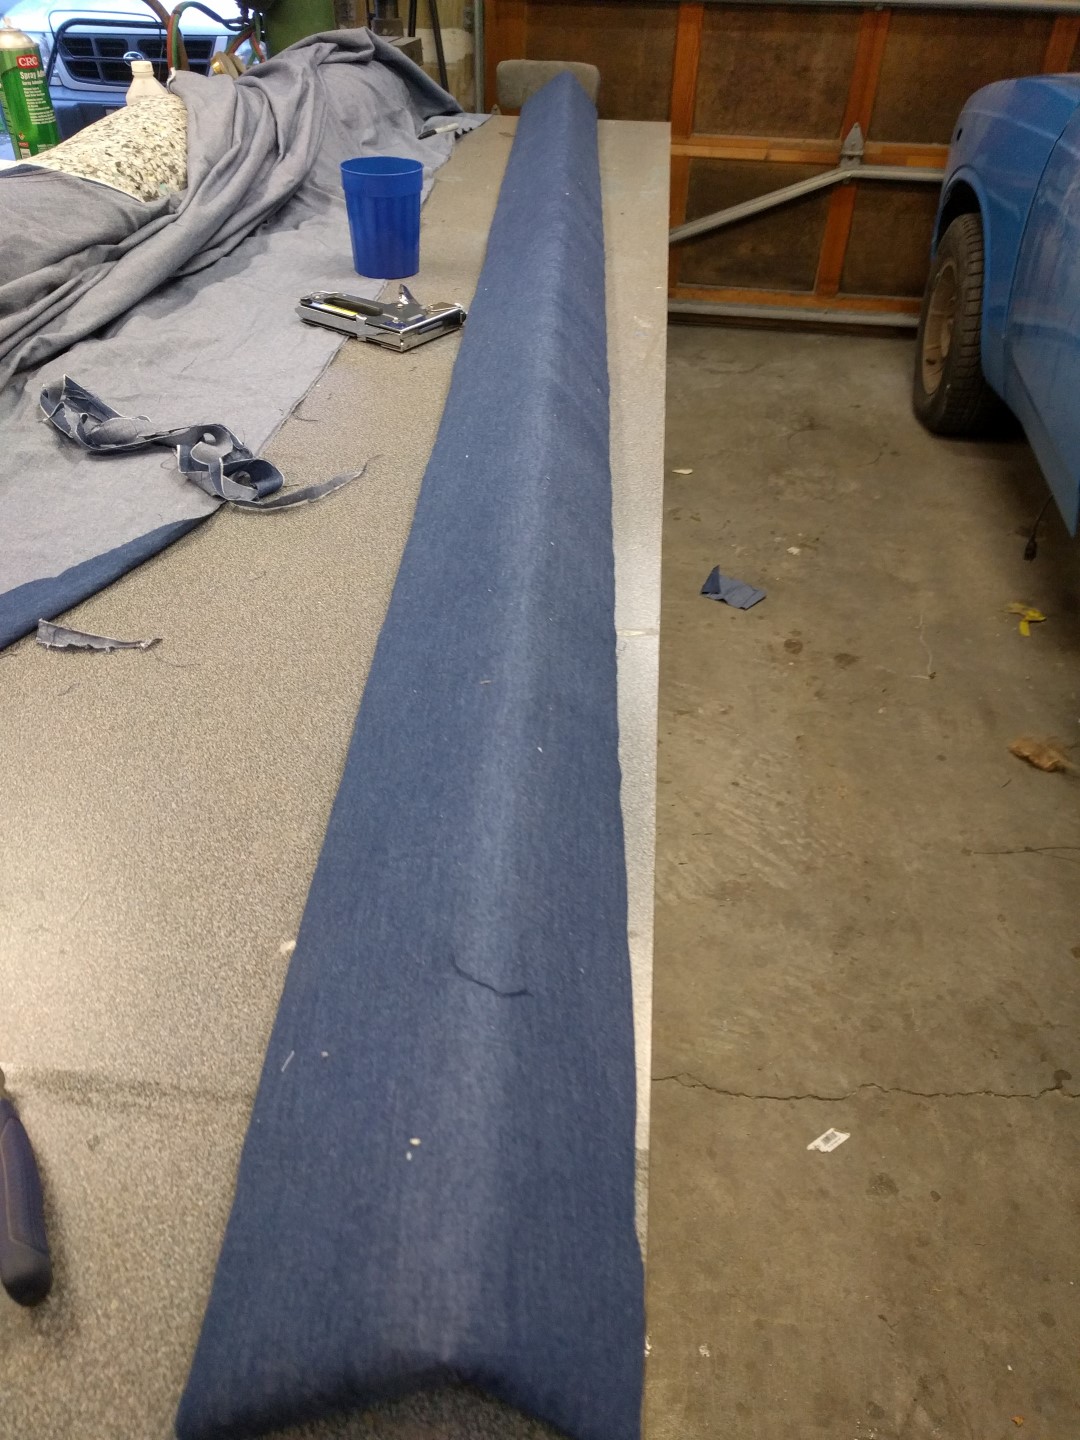
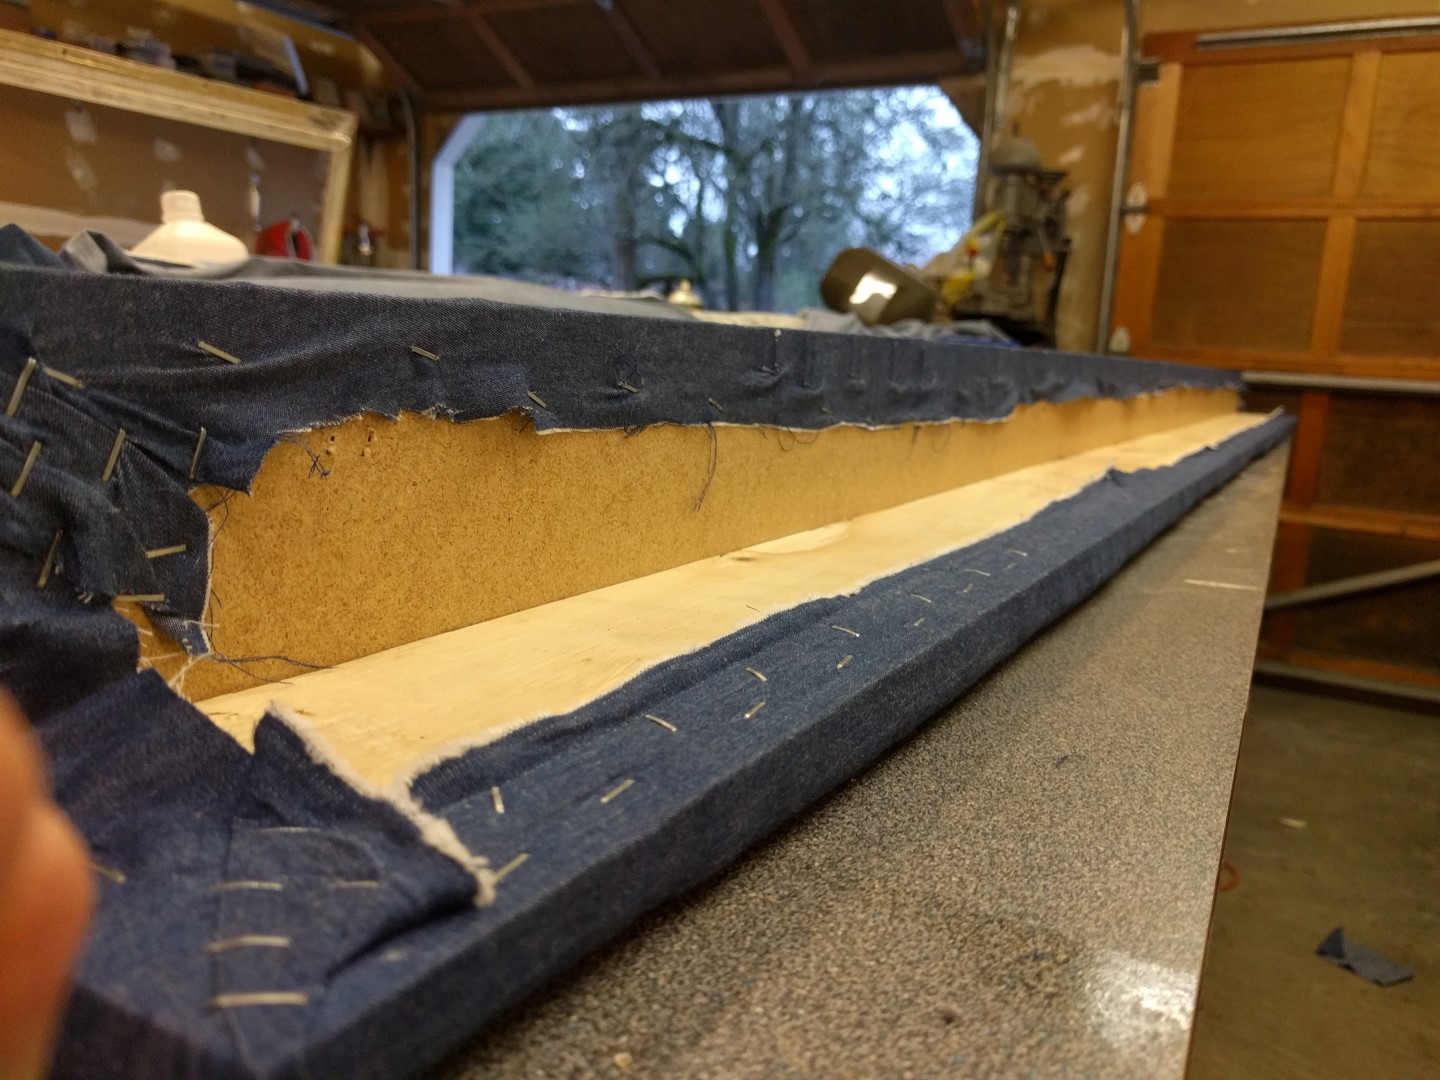
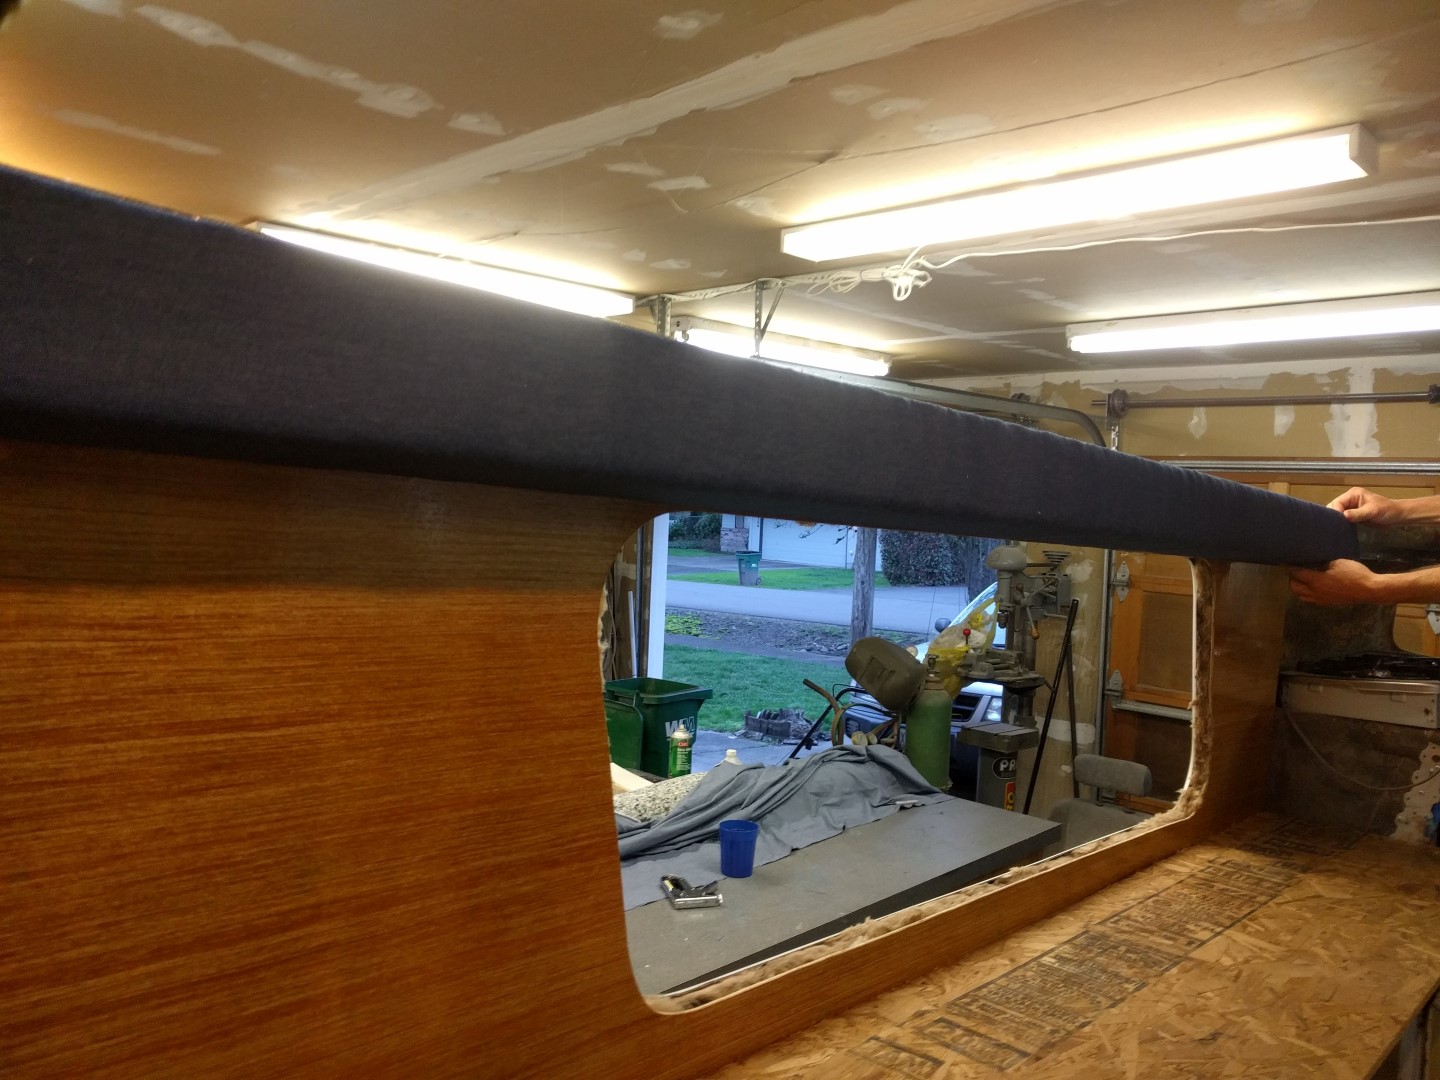
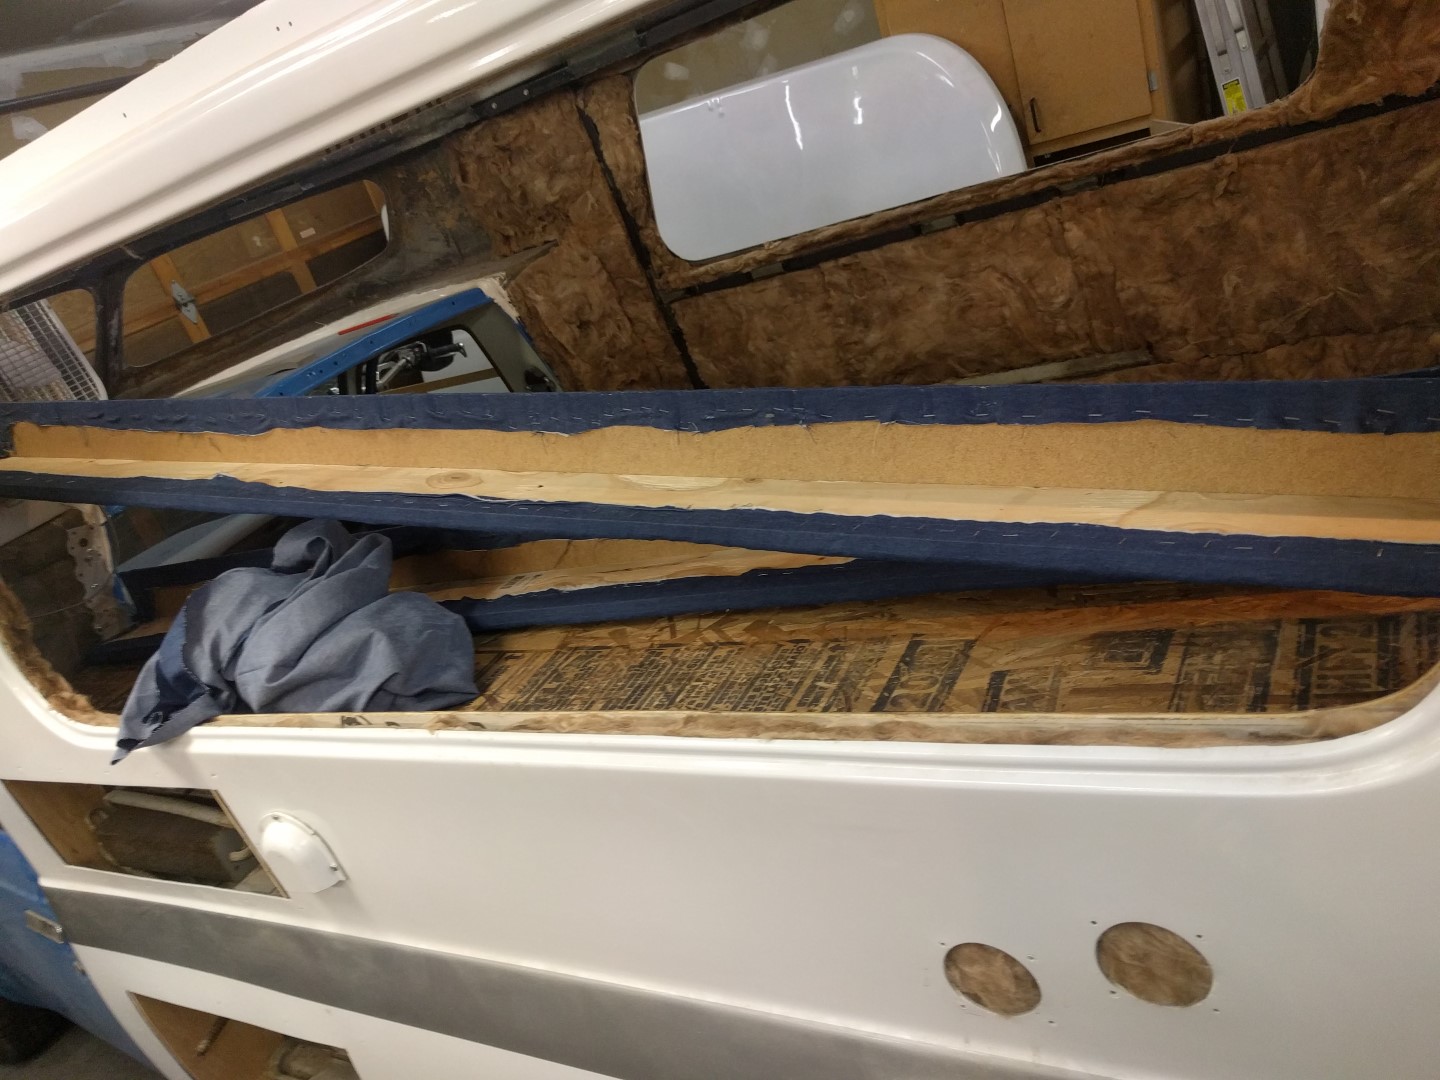
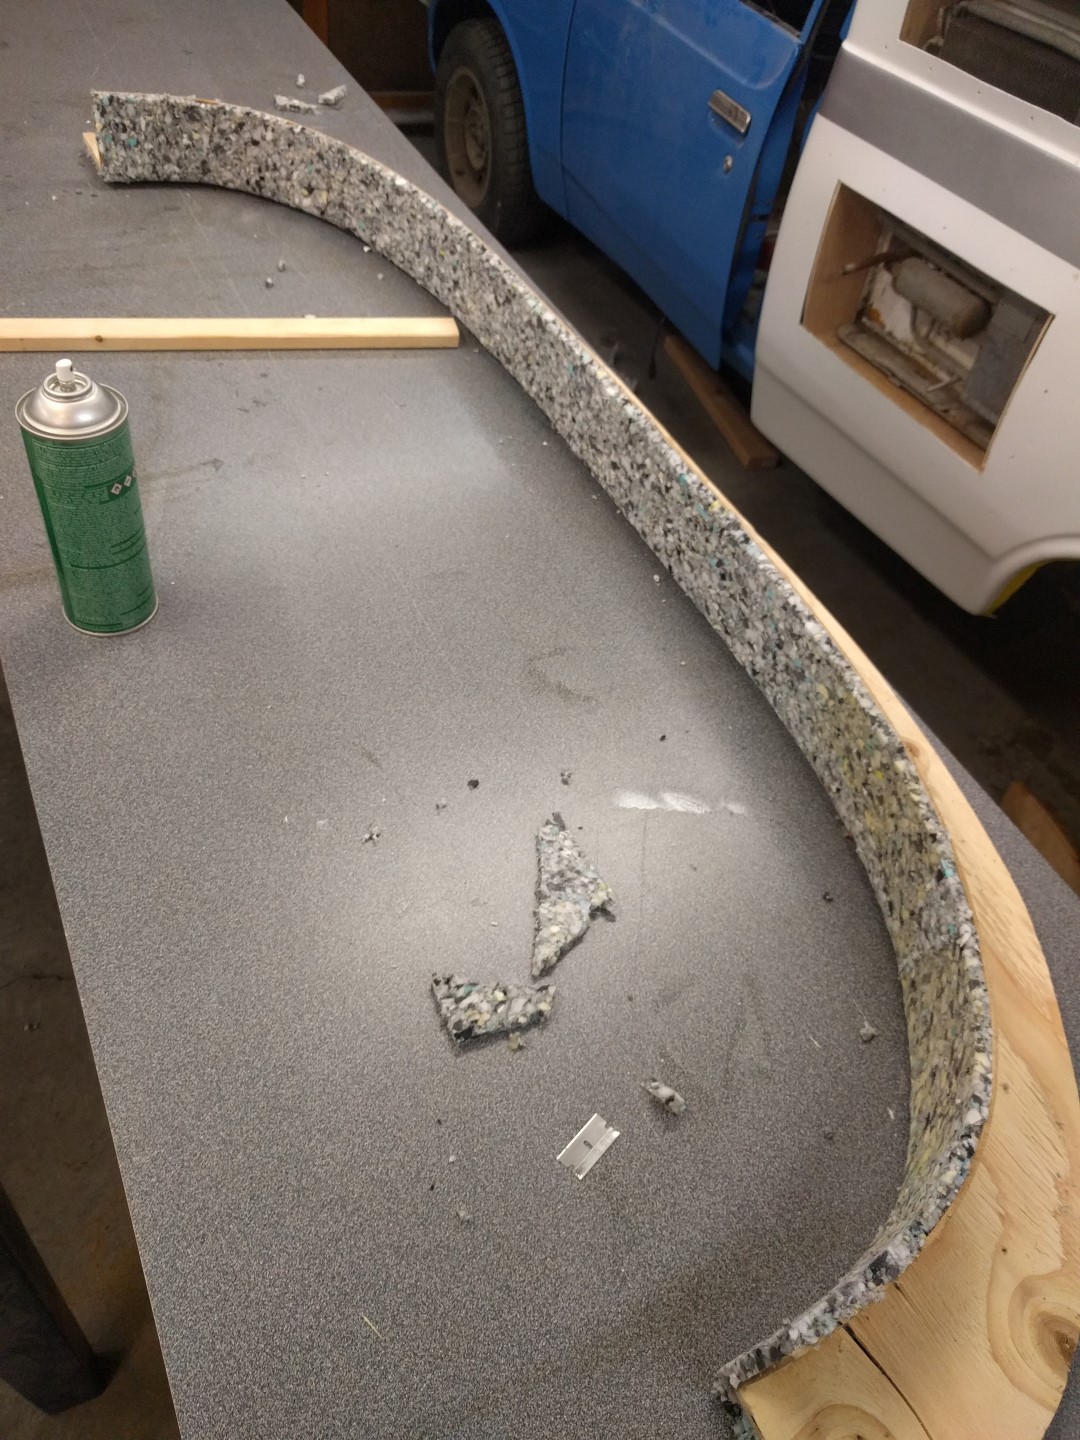
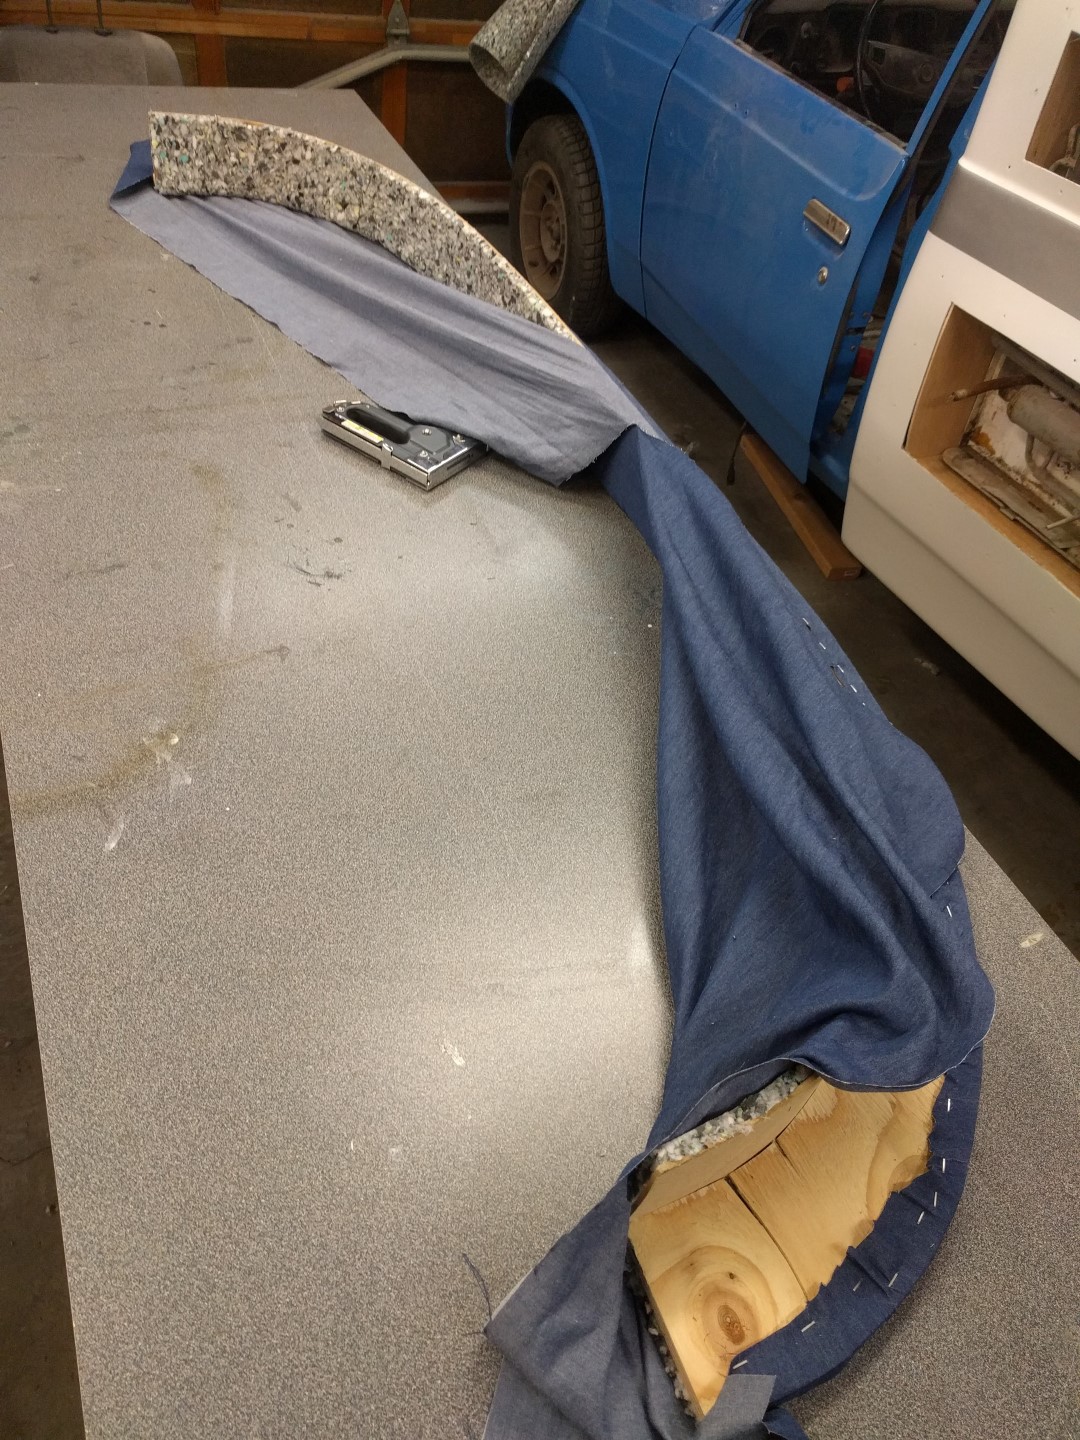
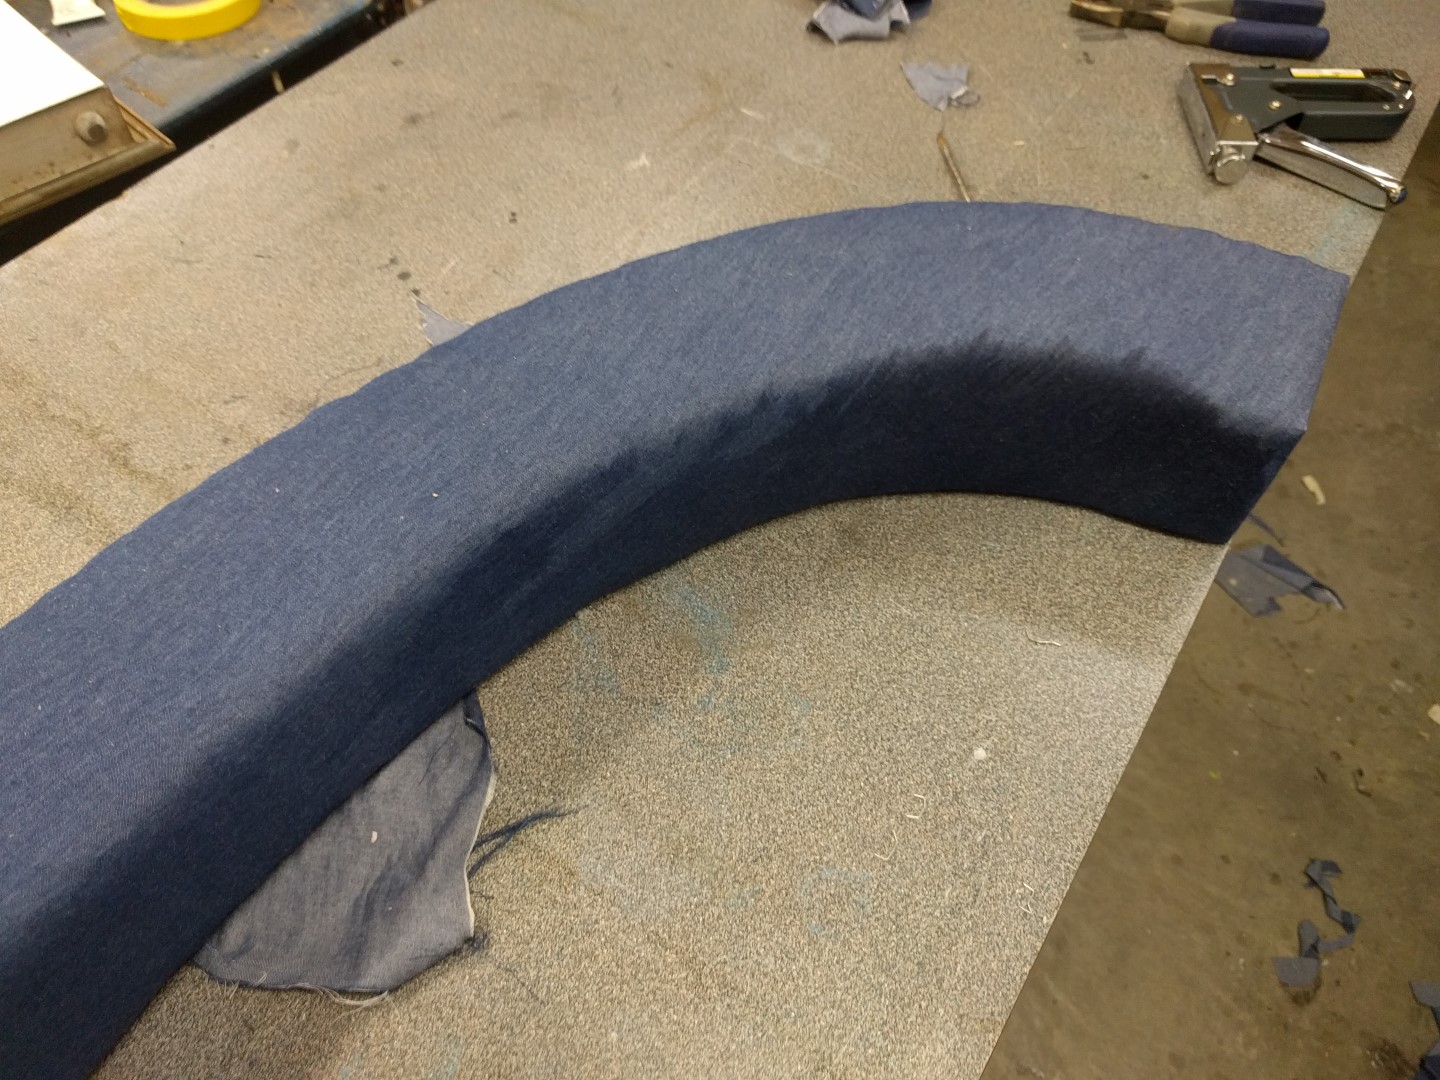
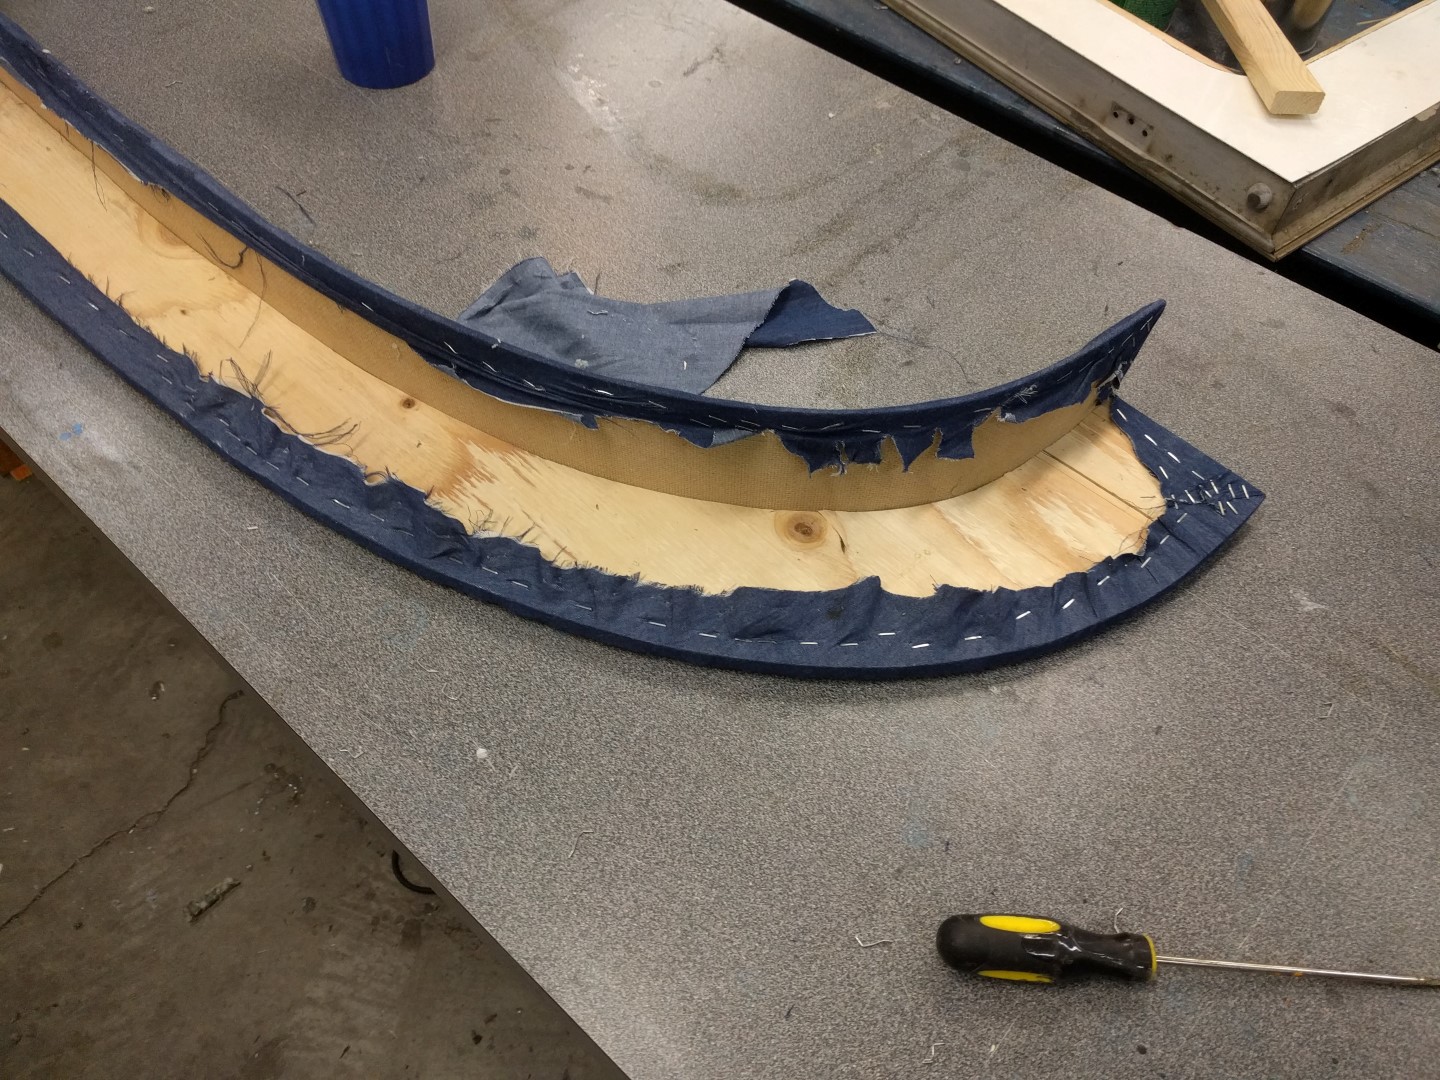
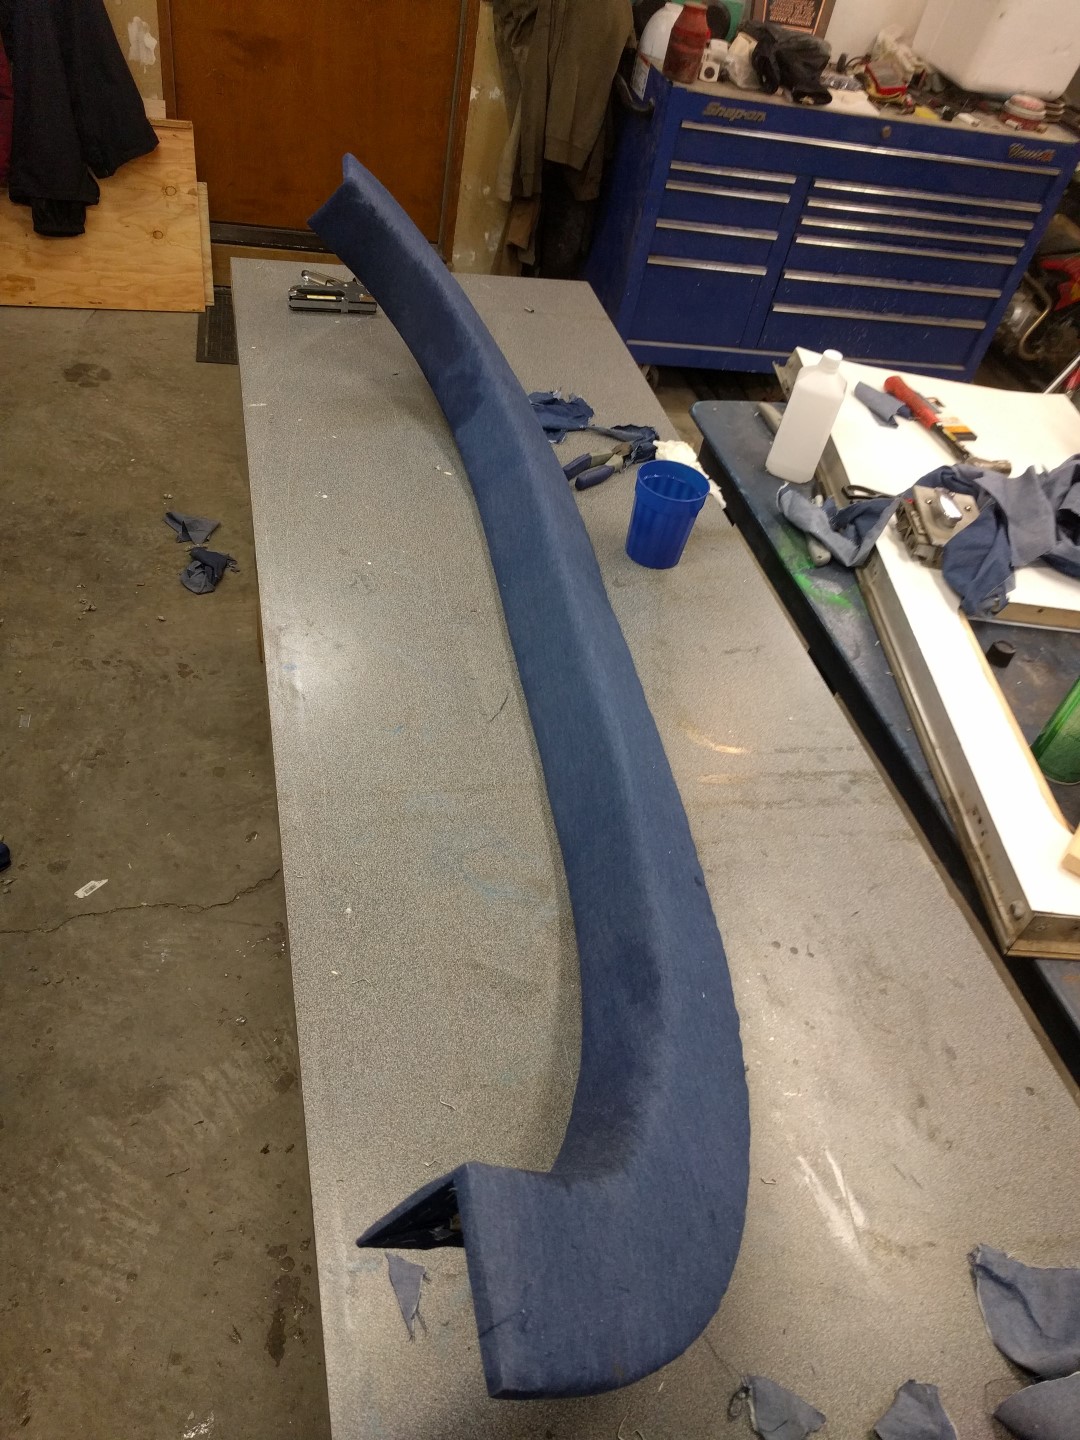
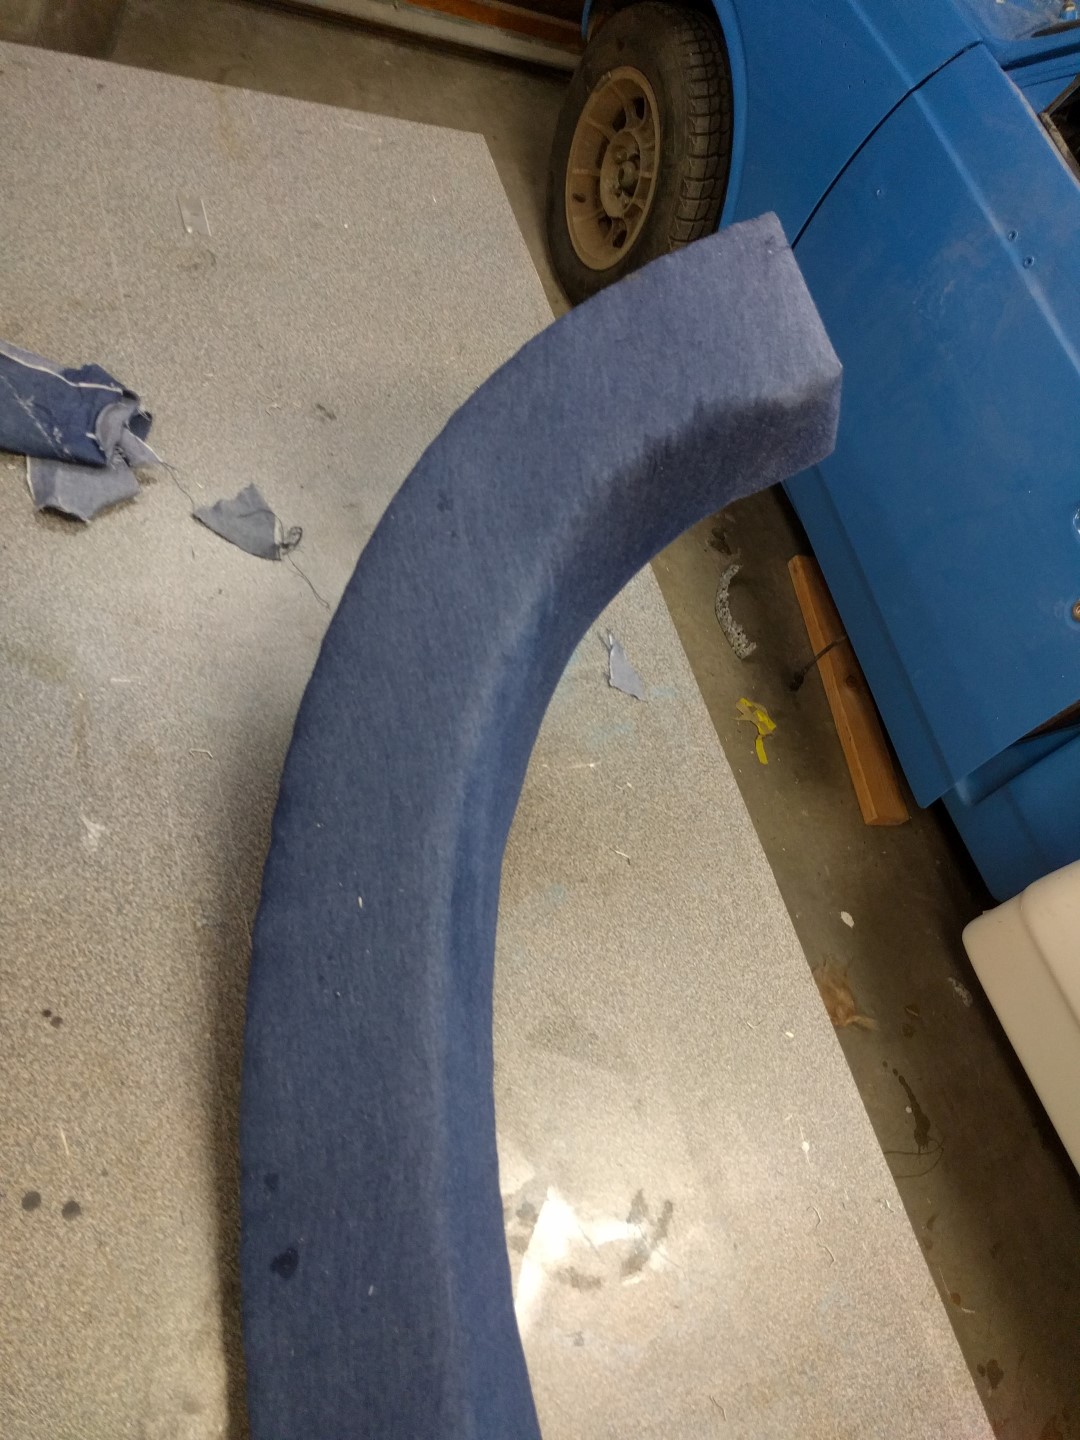
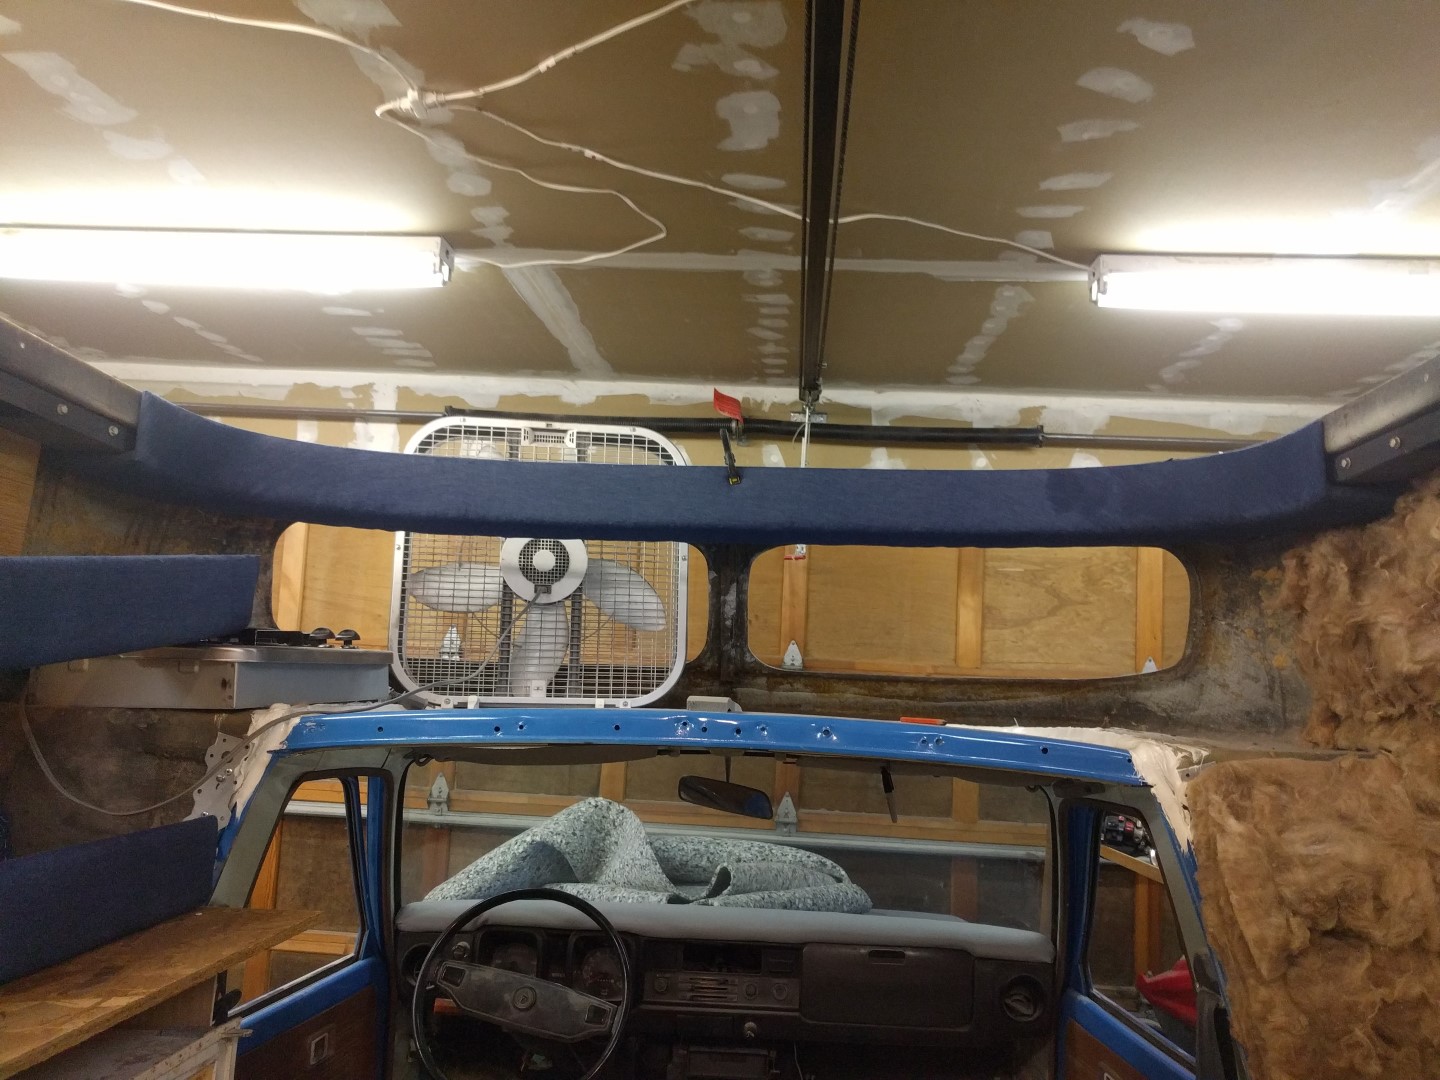
Roof Trim and Hold Downs and Bungee
Roof Trim
The original roof trim was rotted through but I was able to save the shape of the trim for new pieces. The trim on the bottom used 1/2” plywood while the vertical piece is this flexible 1/4” kind of hard plywood stuff that can be found at Home Depot but not Lowe’s evidentially. It conforms to the curve of the over-cab section very well. The two pieces are attached with staples and finishing nails.
Then trim was then covered with cheap-o carpet cushion material and covered in a blue denim fabric that fits with the blue/silver/white scheme on the outside. This was my first experience with upholstery and I think it went pretty good!
The curved sections over the cab I used water to soften the fabric to allow for more stretching. I can see how upholstery is an art now!
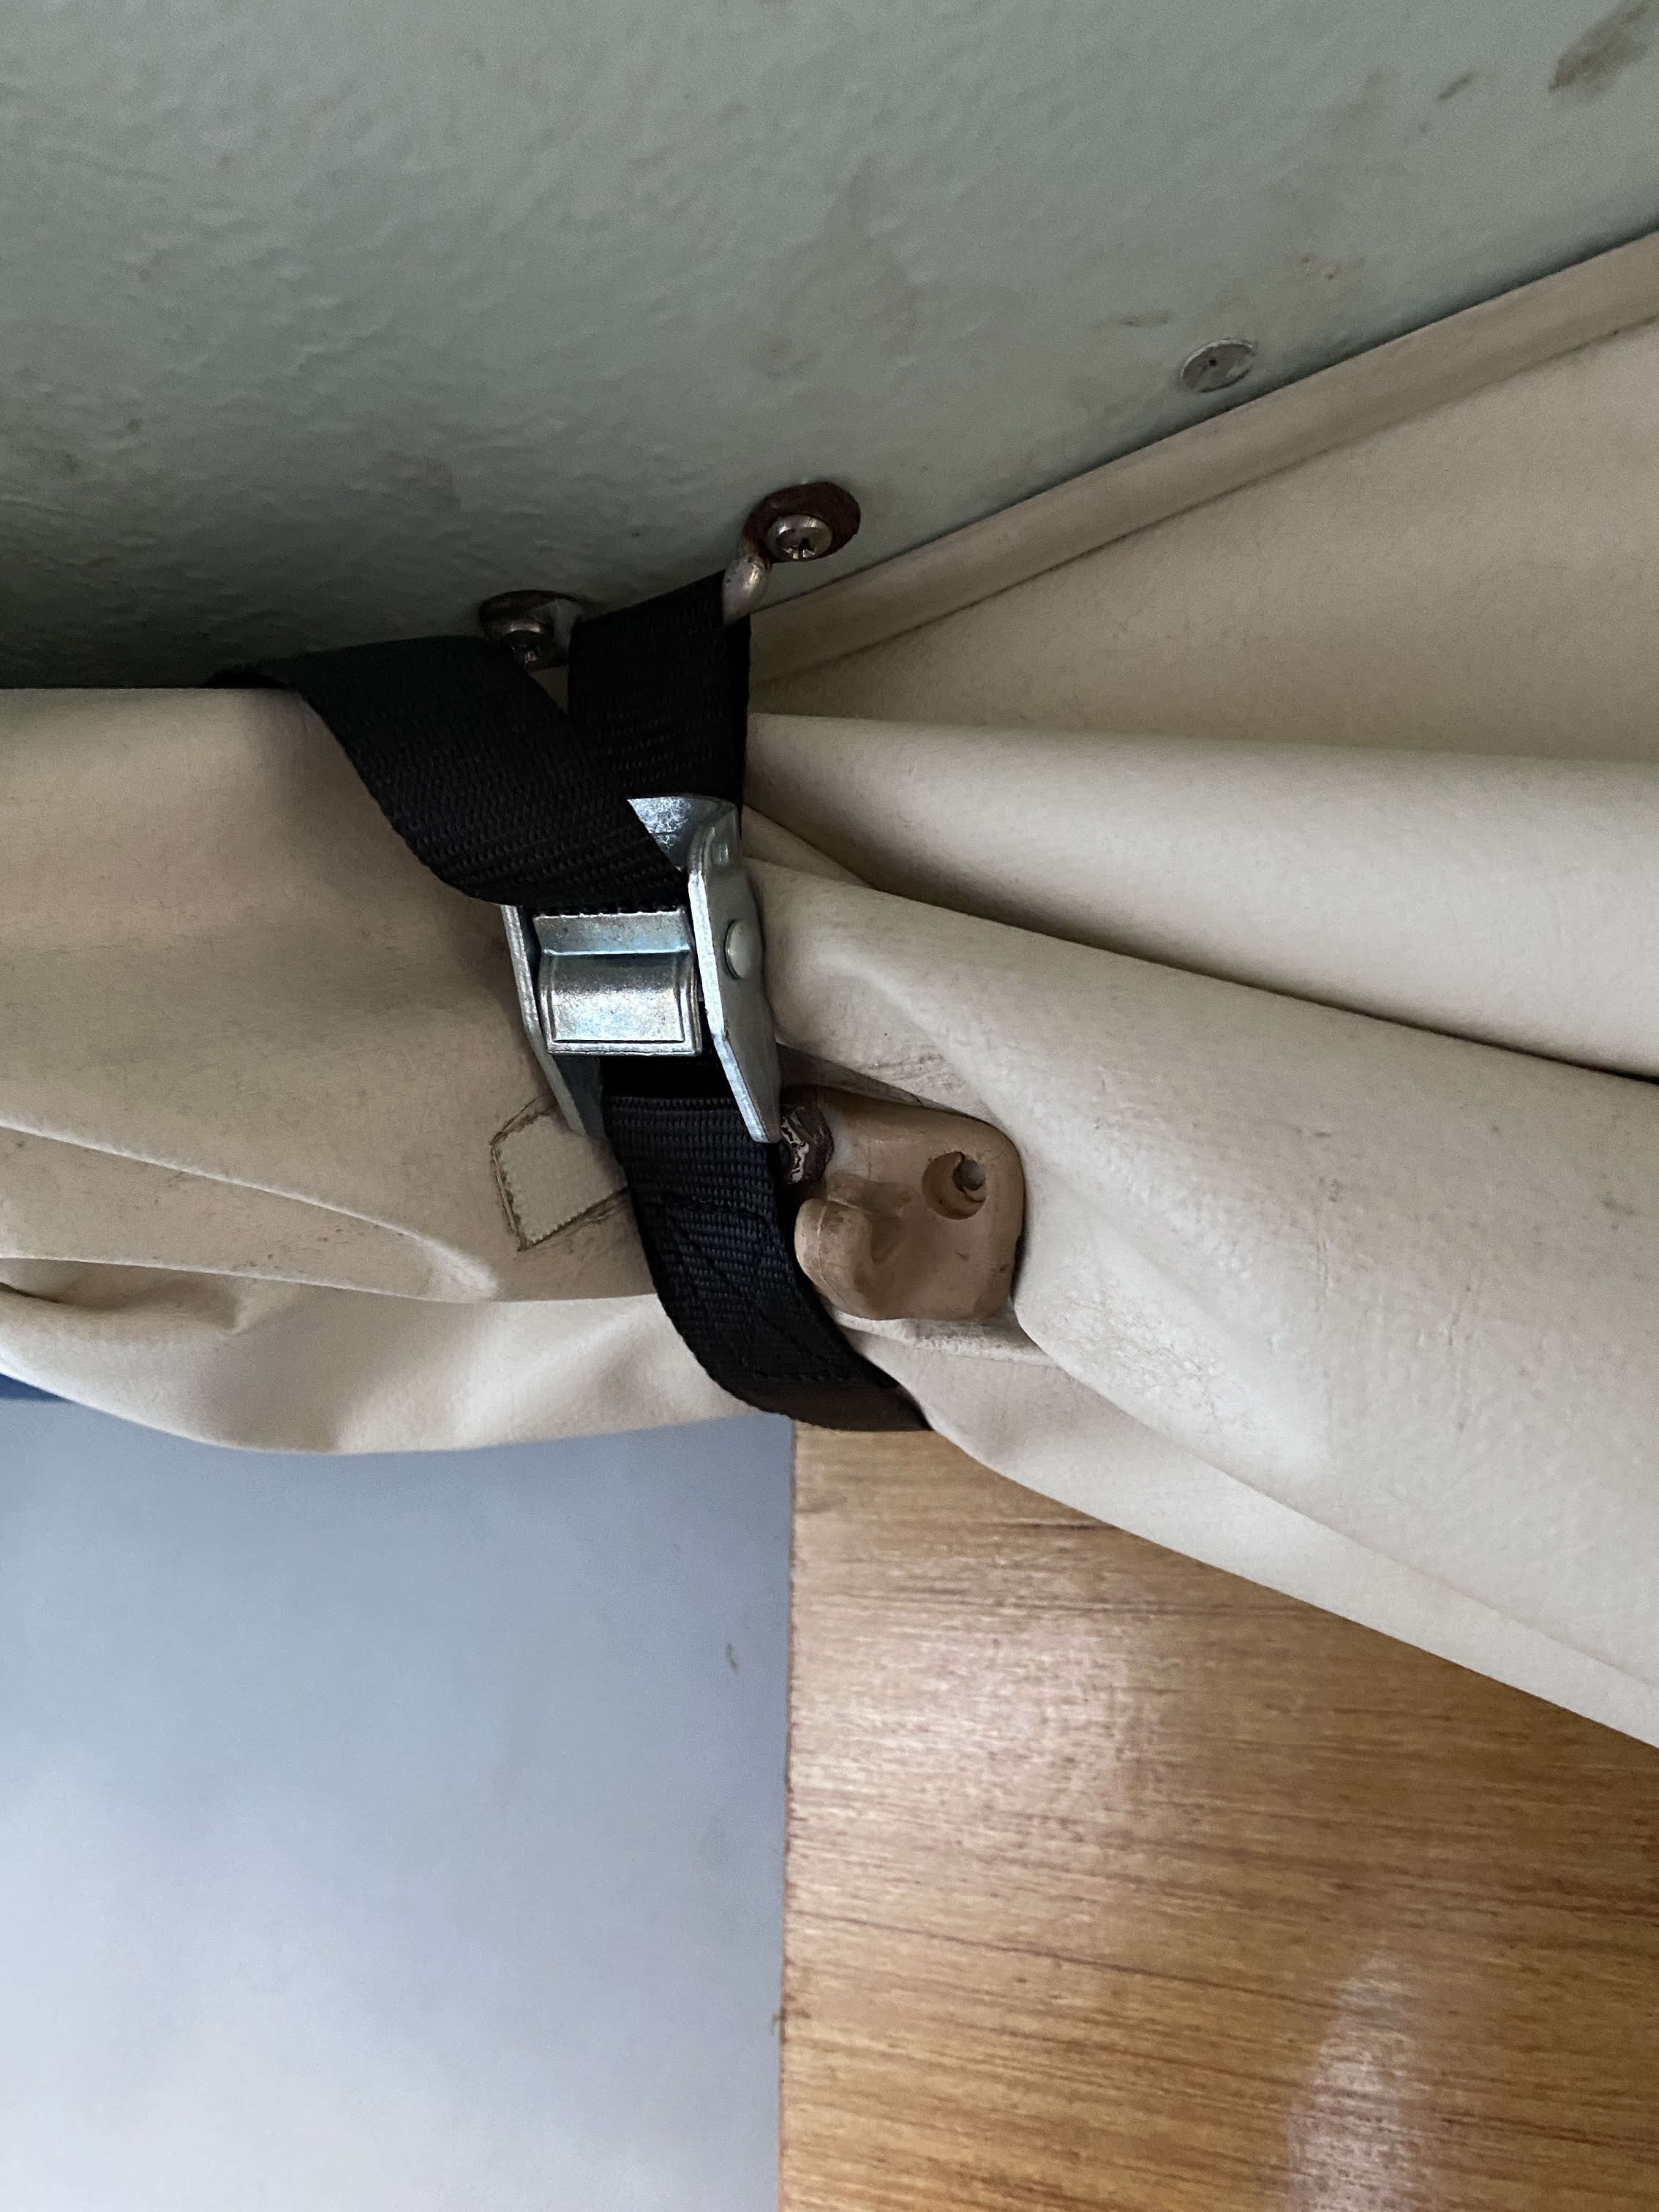
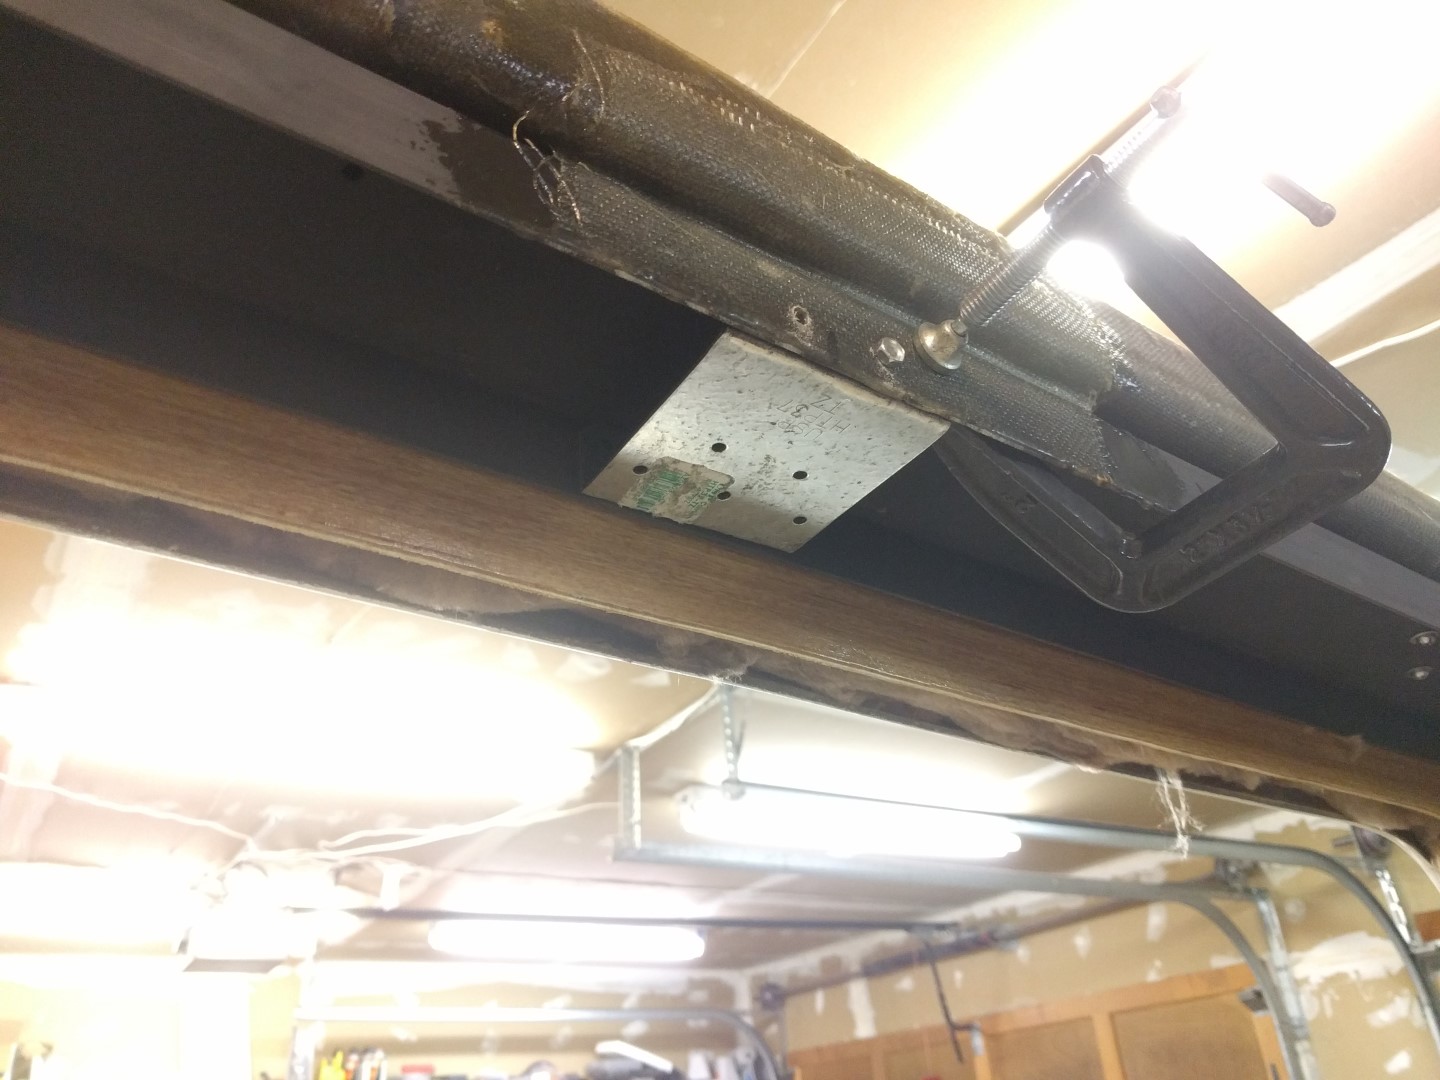
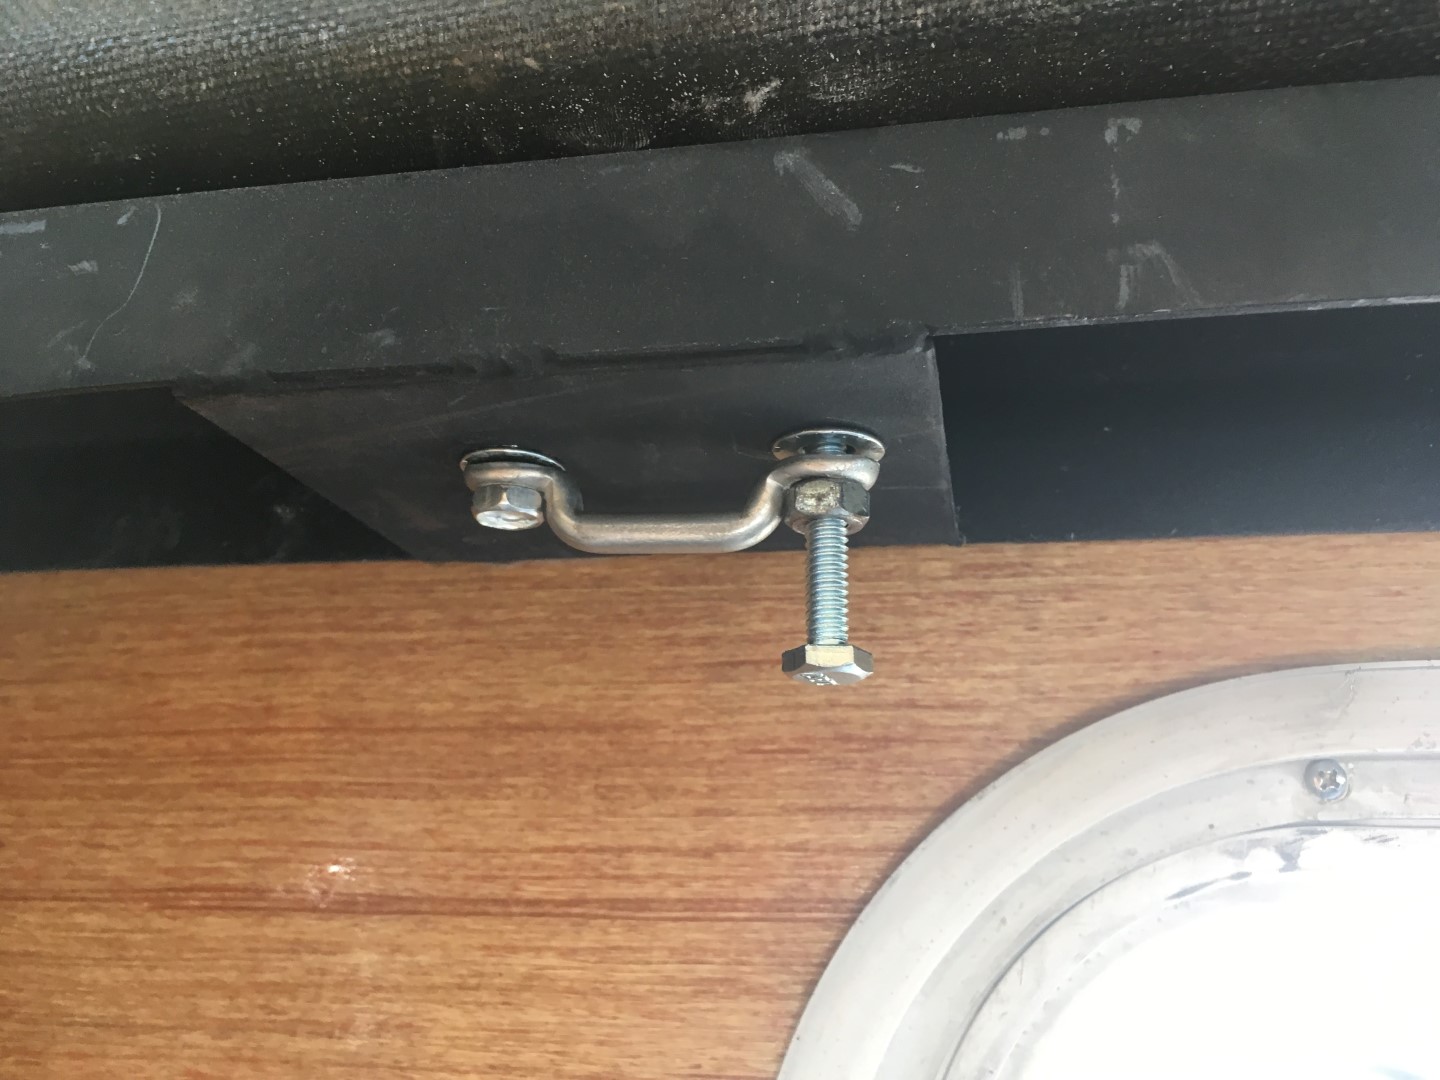
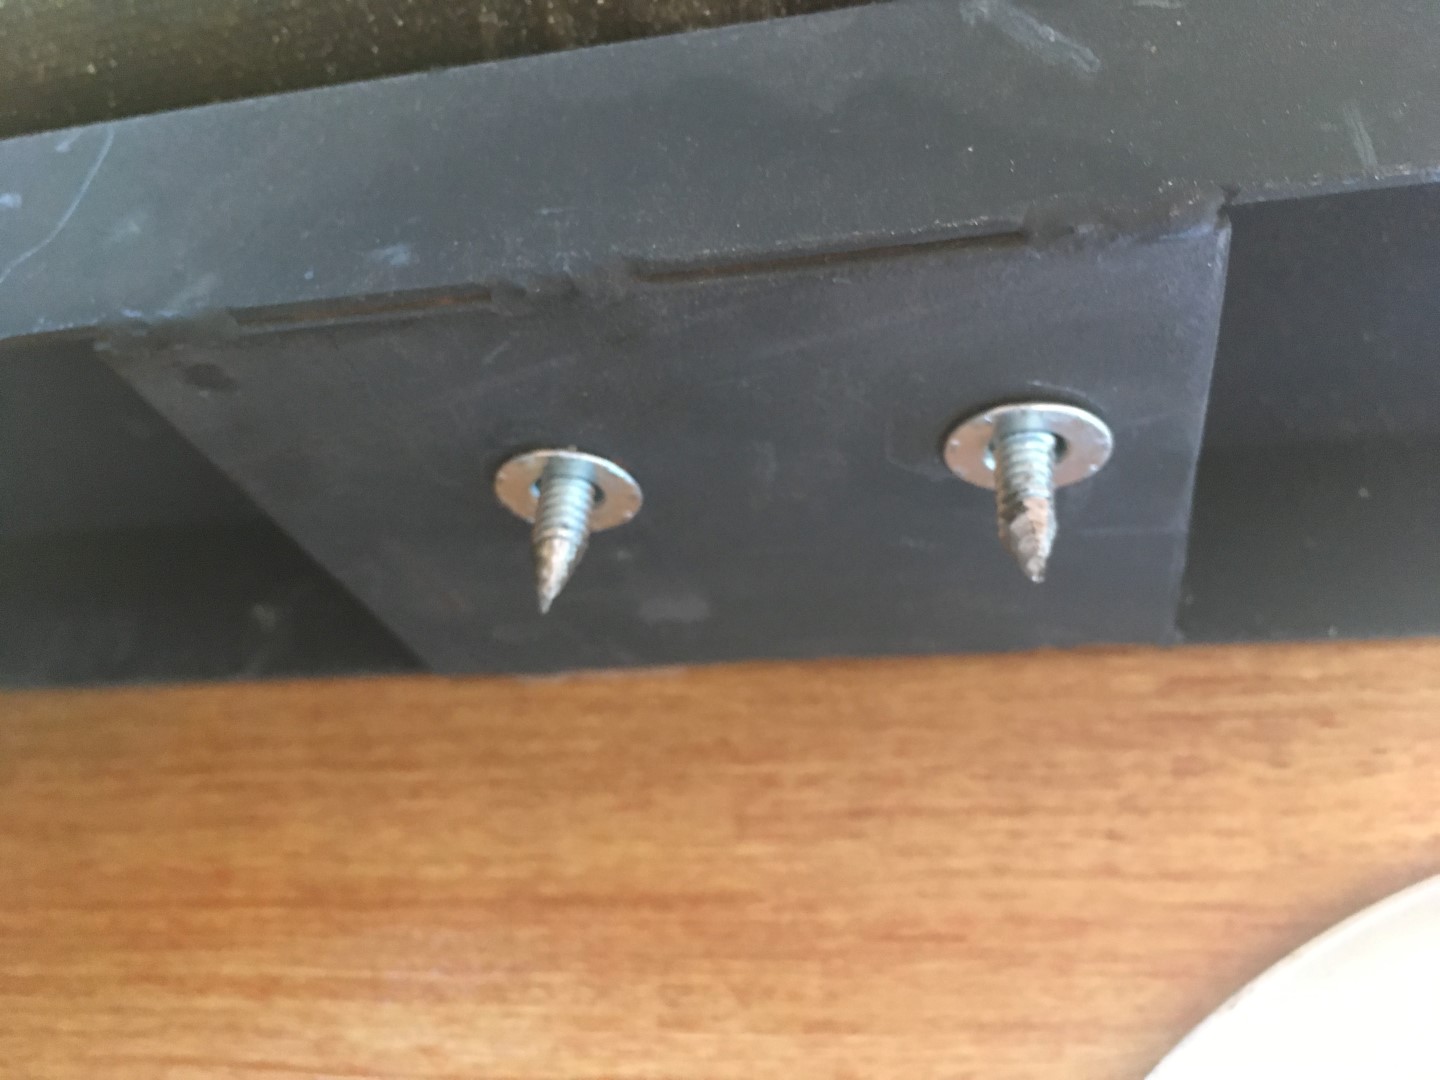
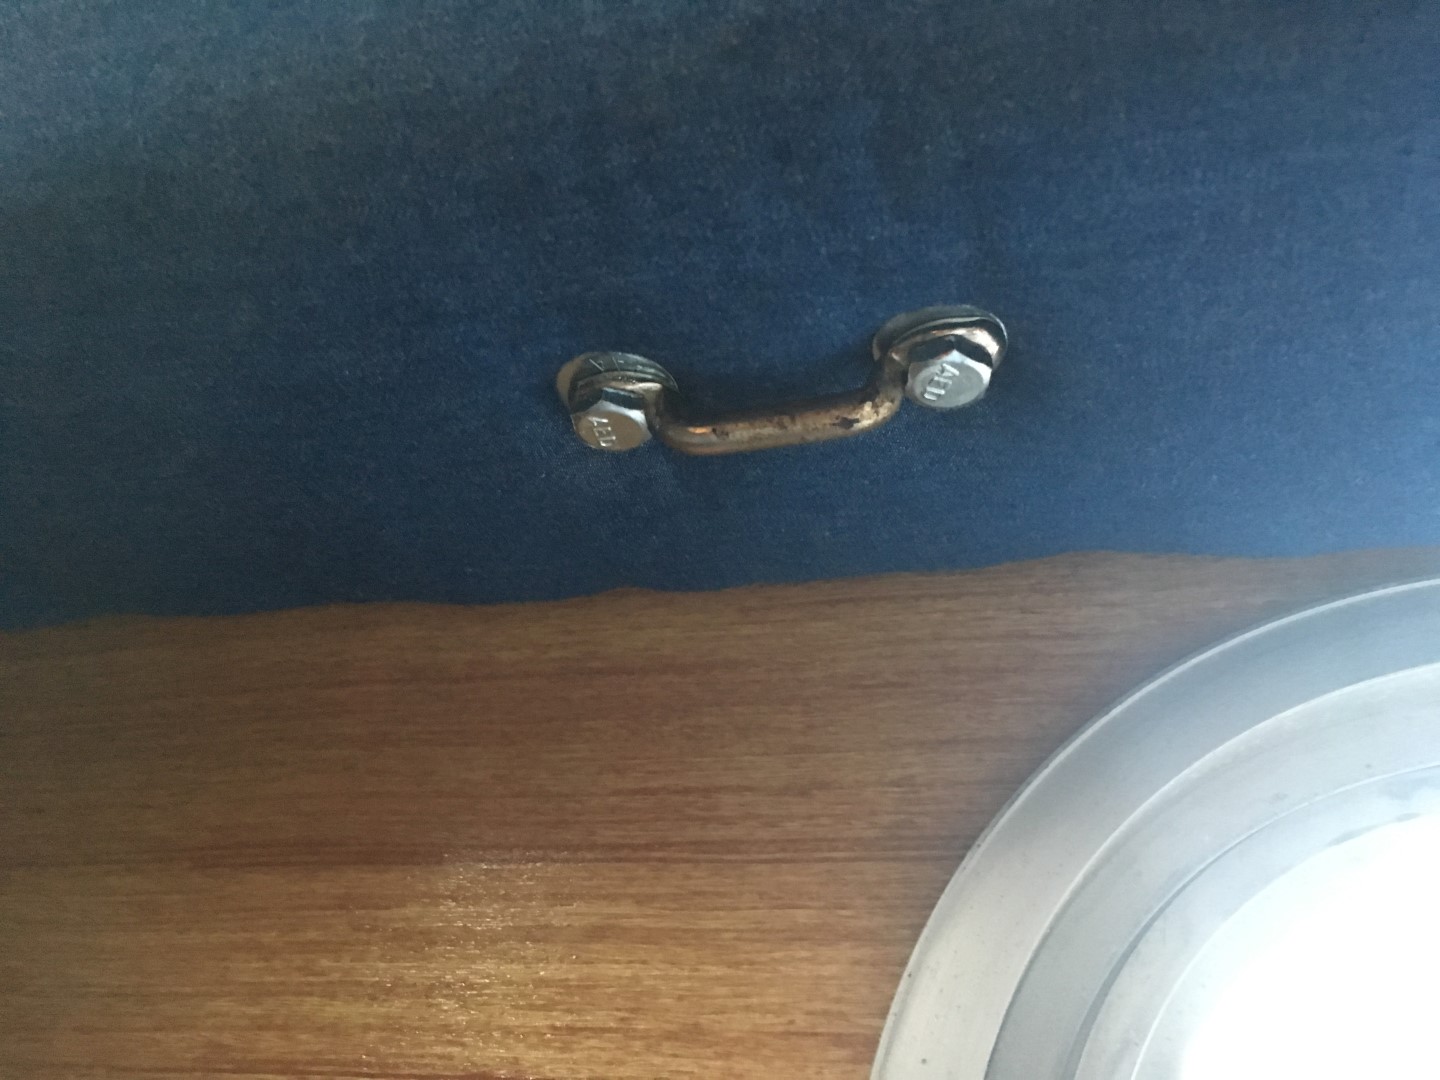
Hold Downs
The hold downs I decided to do quite a bit different than stock. Previous hold downs went through the roof and caused leakage. Instead a rectangular beam was created where the hold downs are required using a C-shaped piece of metal. Jack nuts were then used to secure the loop things for attaching the straps. I used a sharpened bolt with the head cutoff to make impressions in the 1/2” plywood for marking where to drill the holes for the hold downs.
The hold downs into the roof were secured with 3/4” screws into the 1” square wood frame perimeter covered in the Roof Repair section of this post.
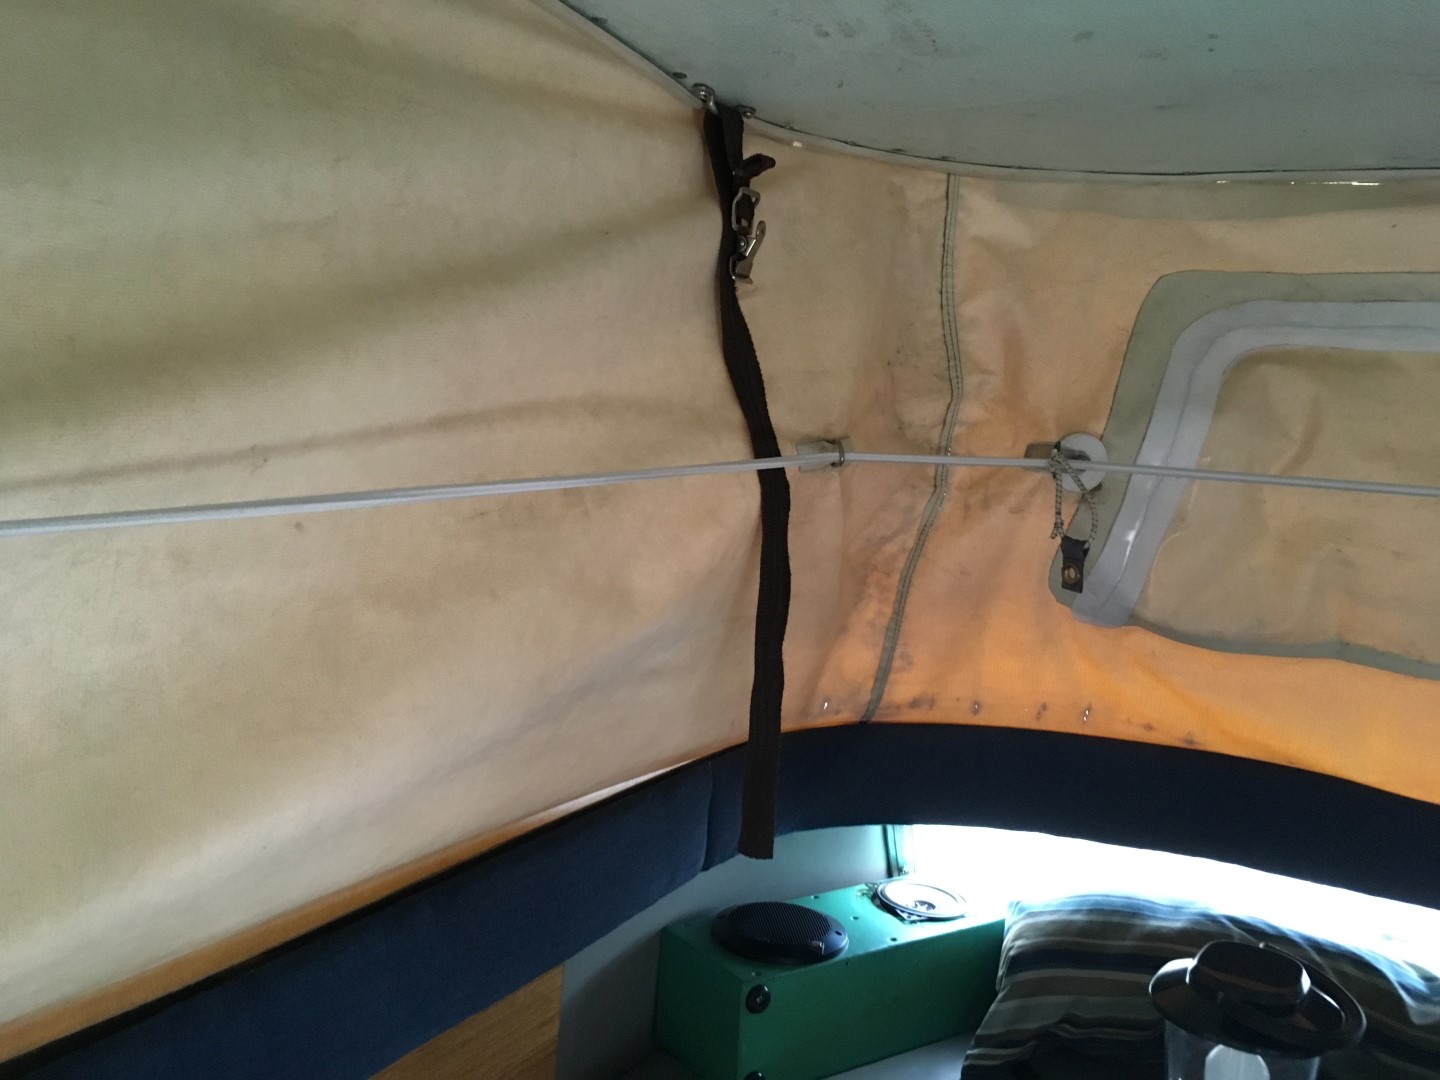
Bungee
The bungee on the canvas is required to prevent the canvas from interfering with the scissor mechanism creating holes in the canvas. A cheap-o bungee was purchased from eBay with a two slot holder to keep the bungee taught.


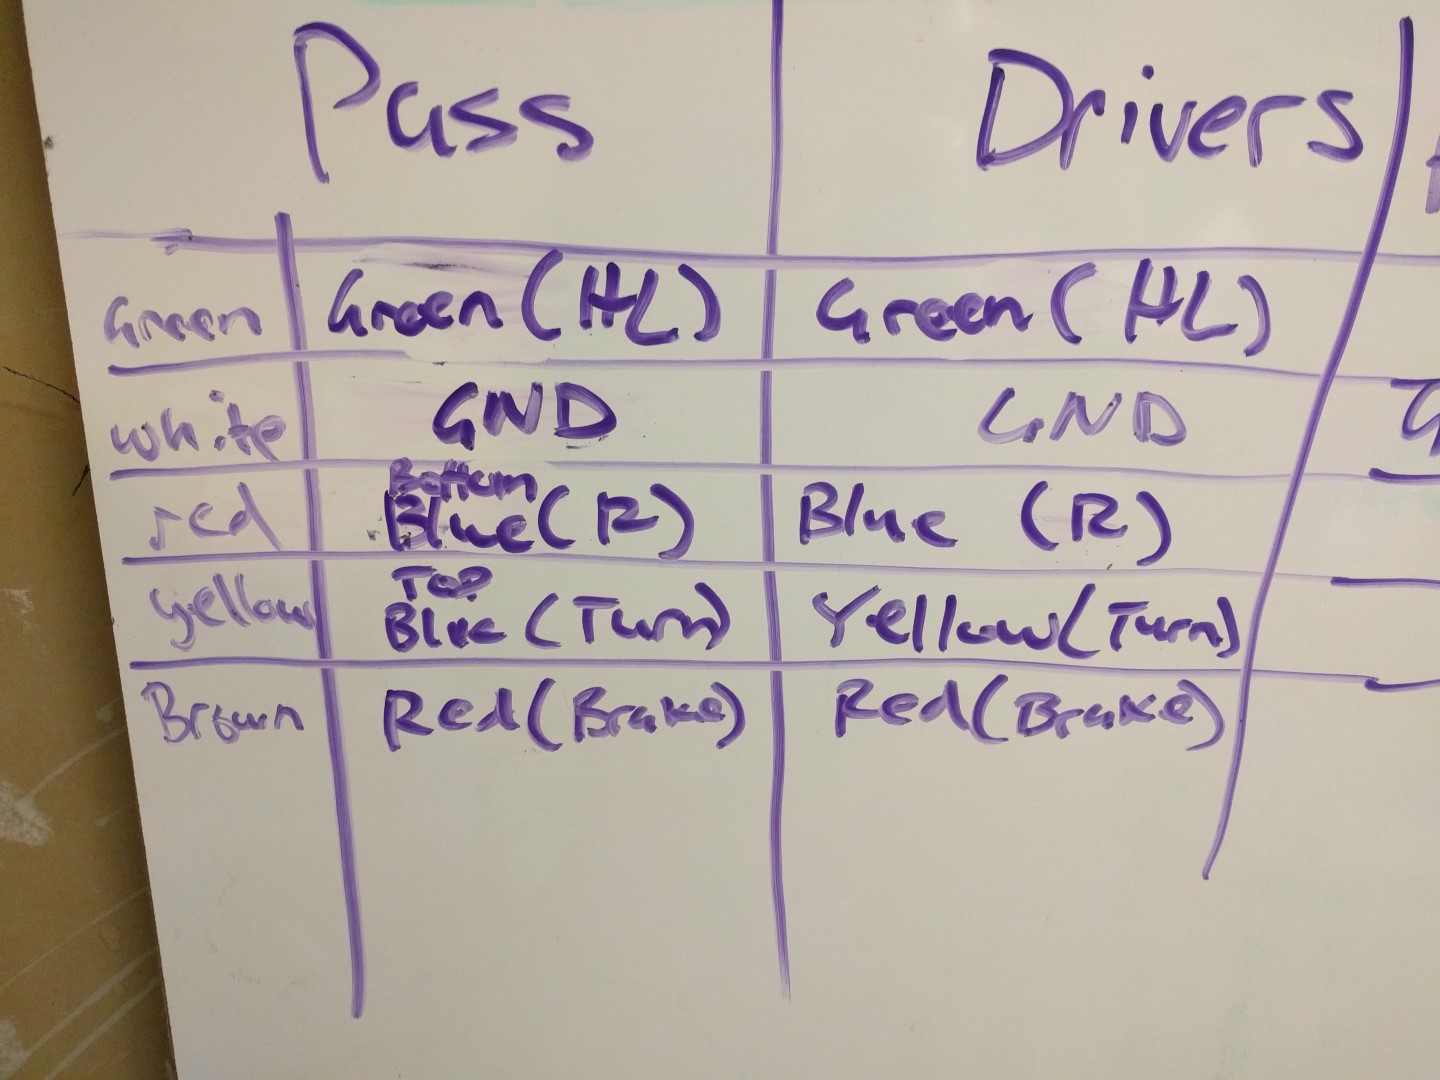
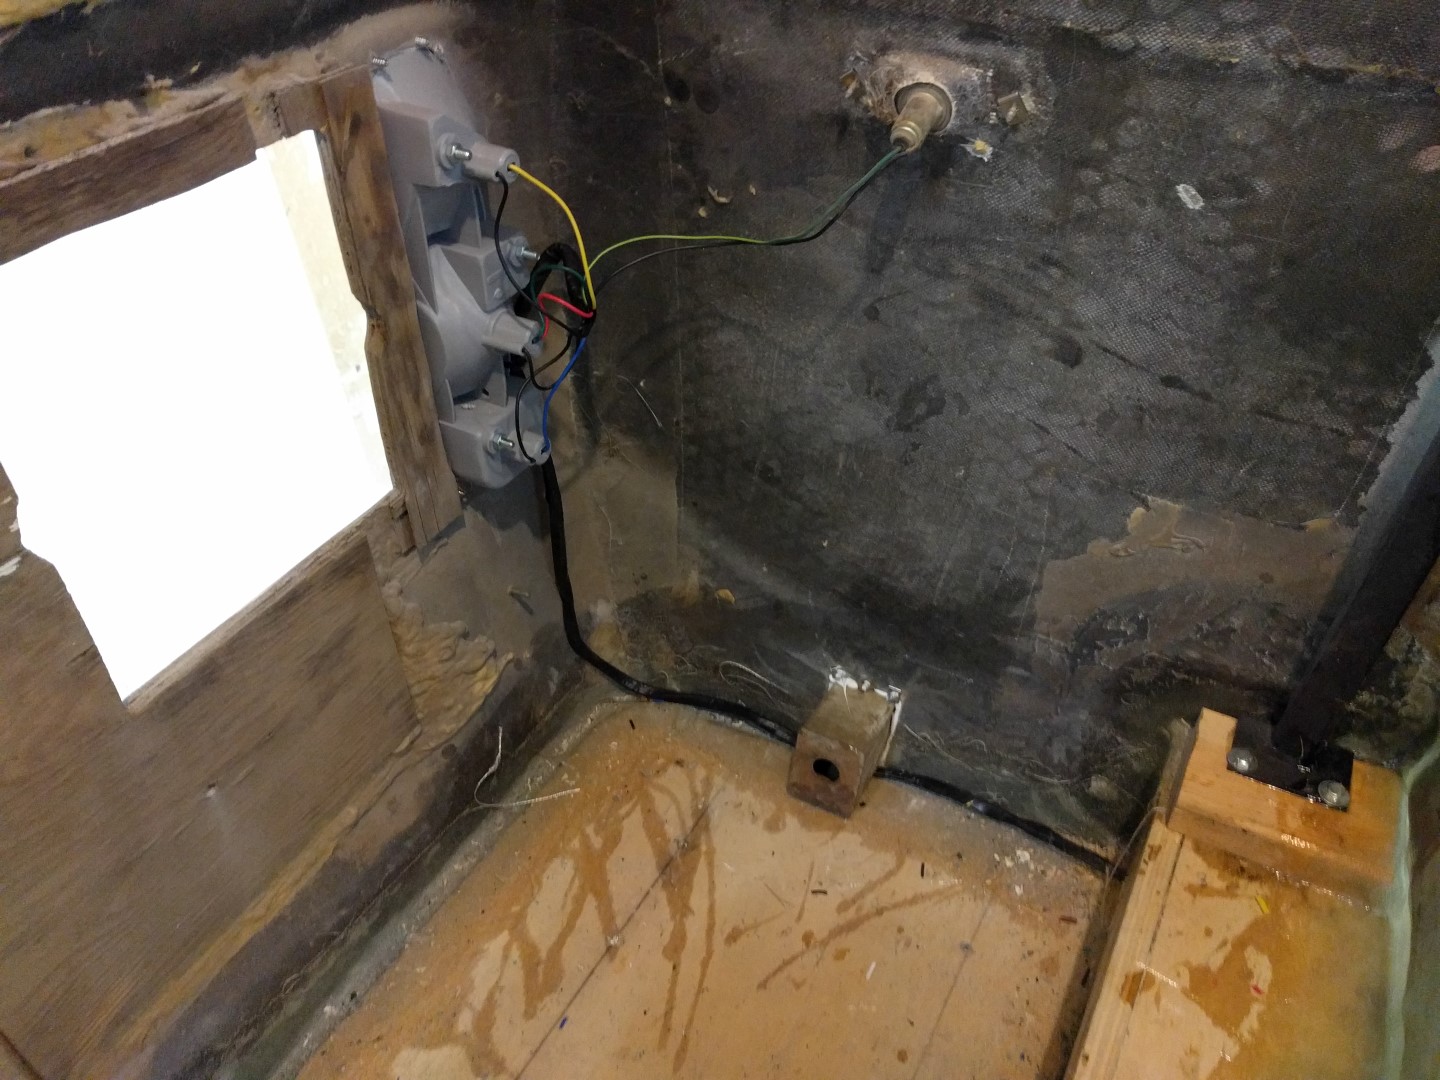
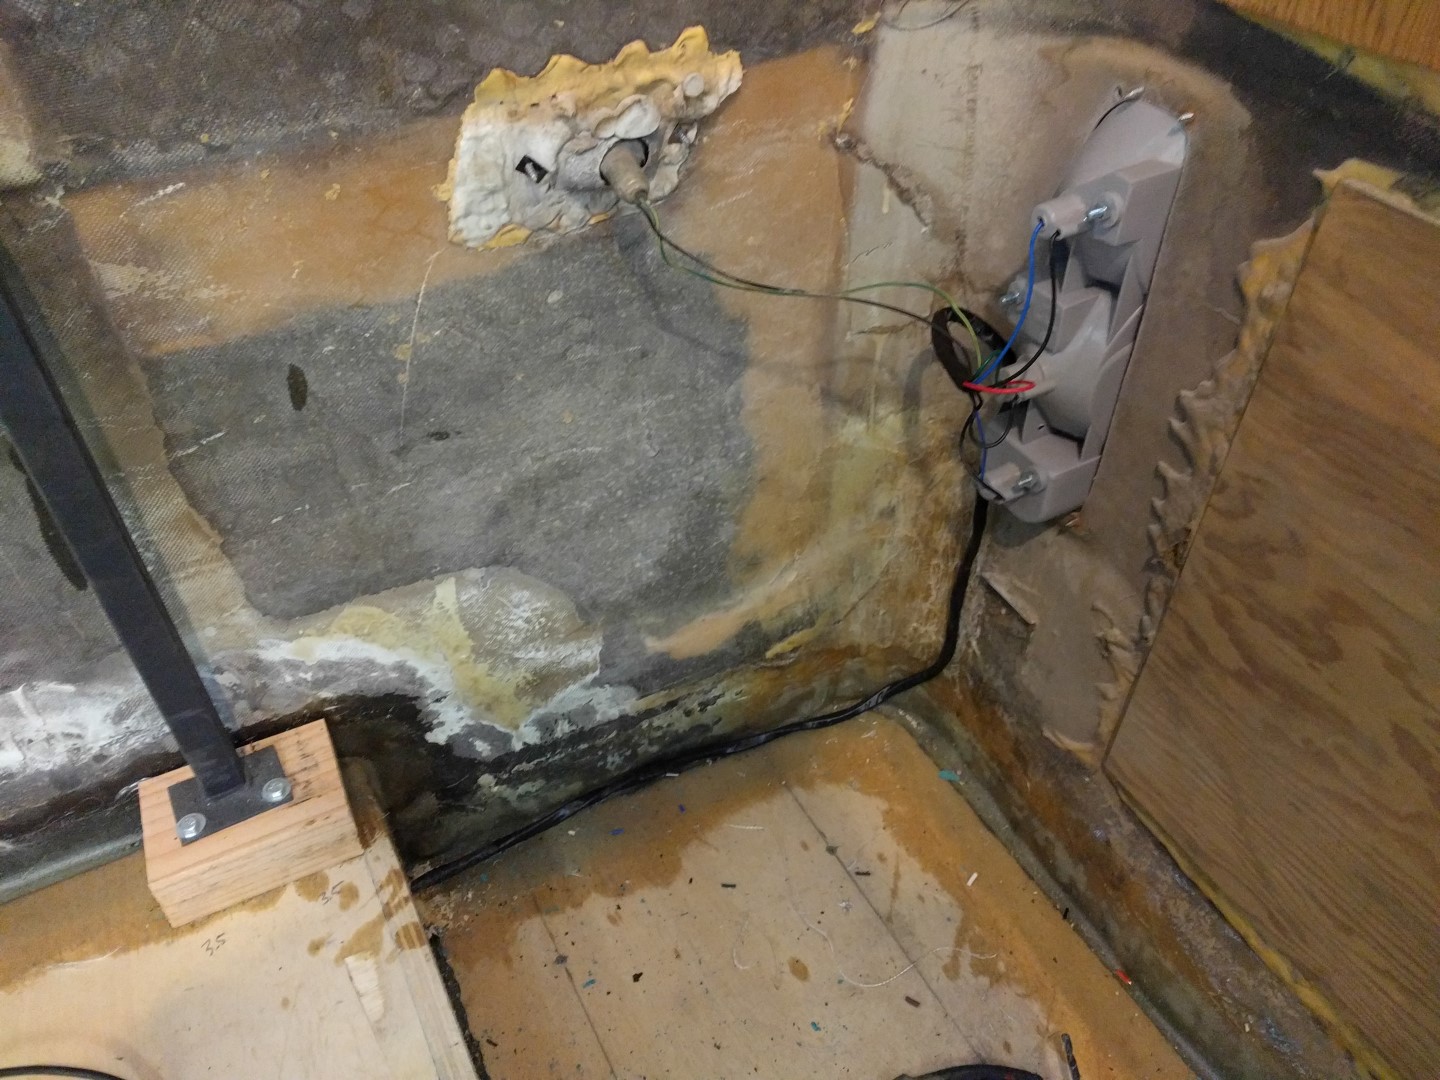
Tail Lights
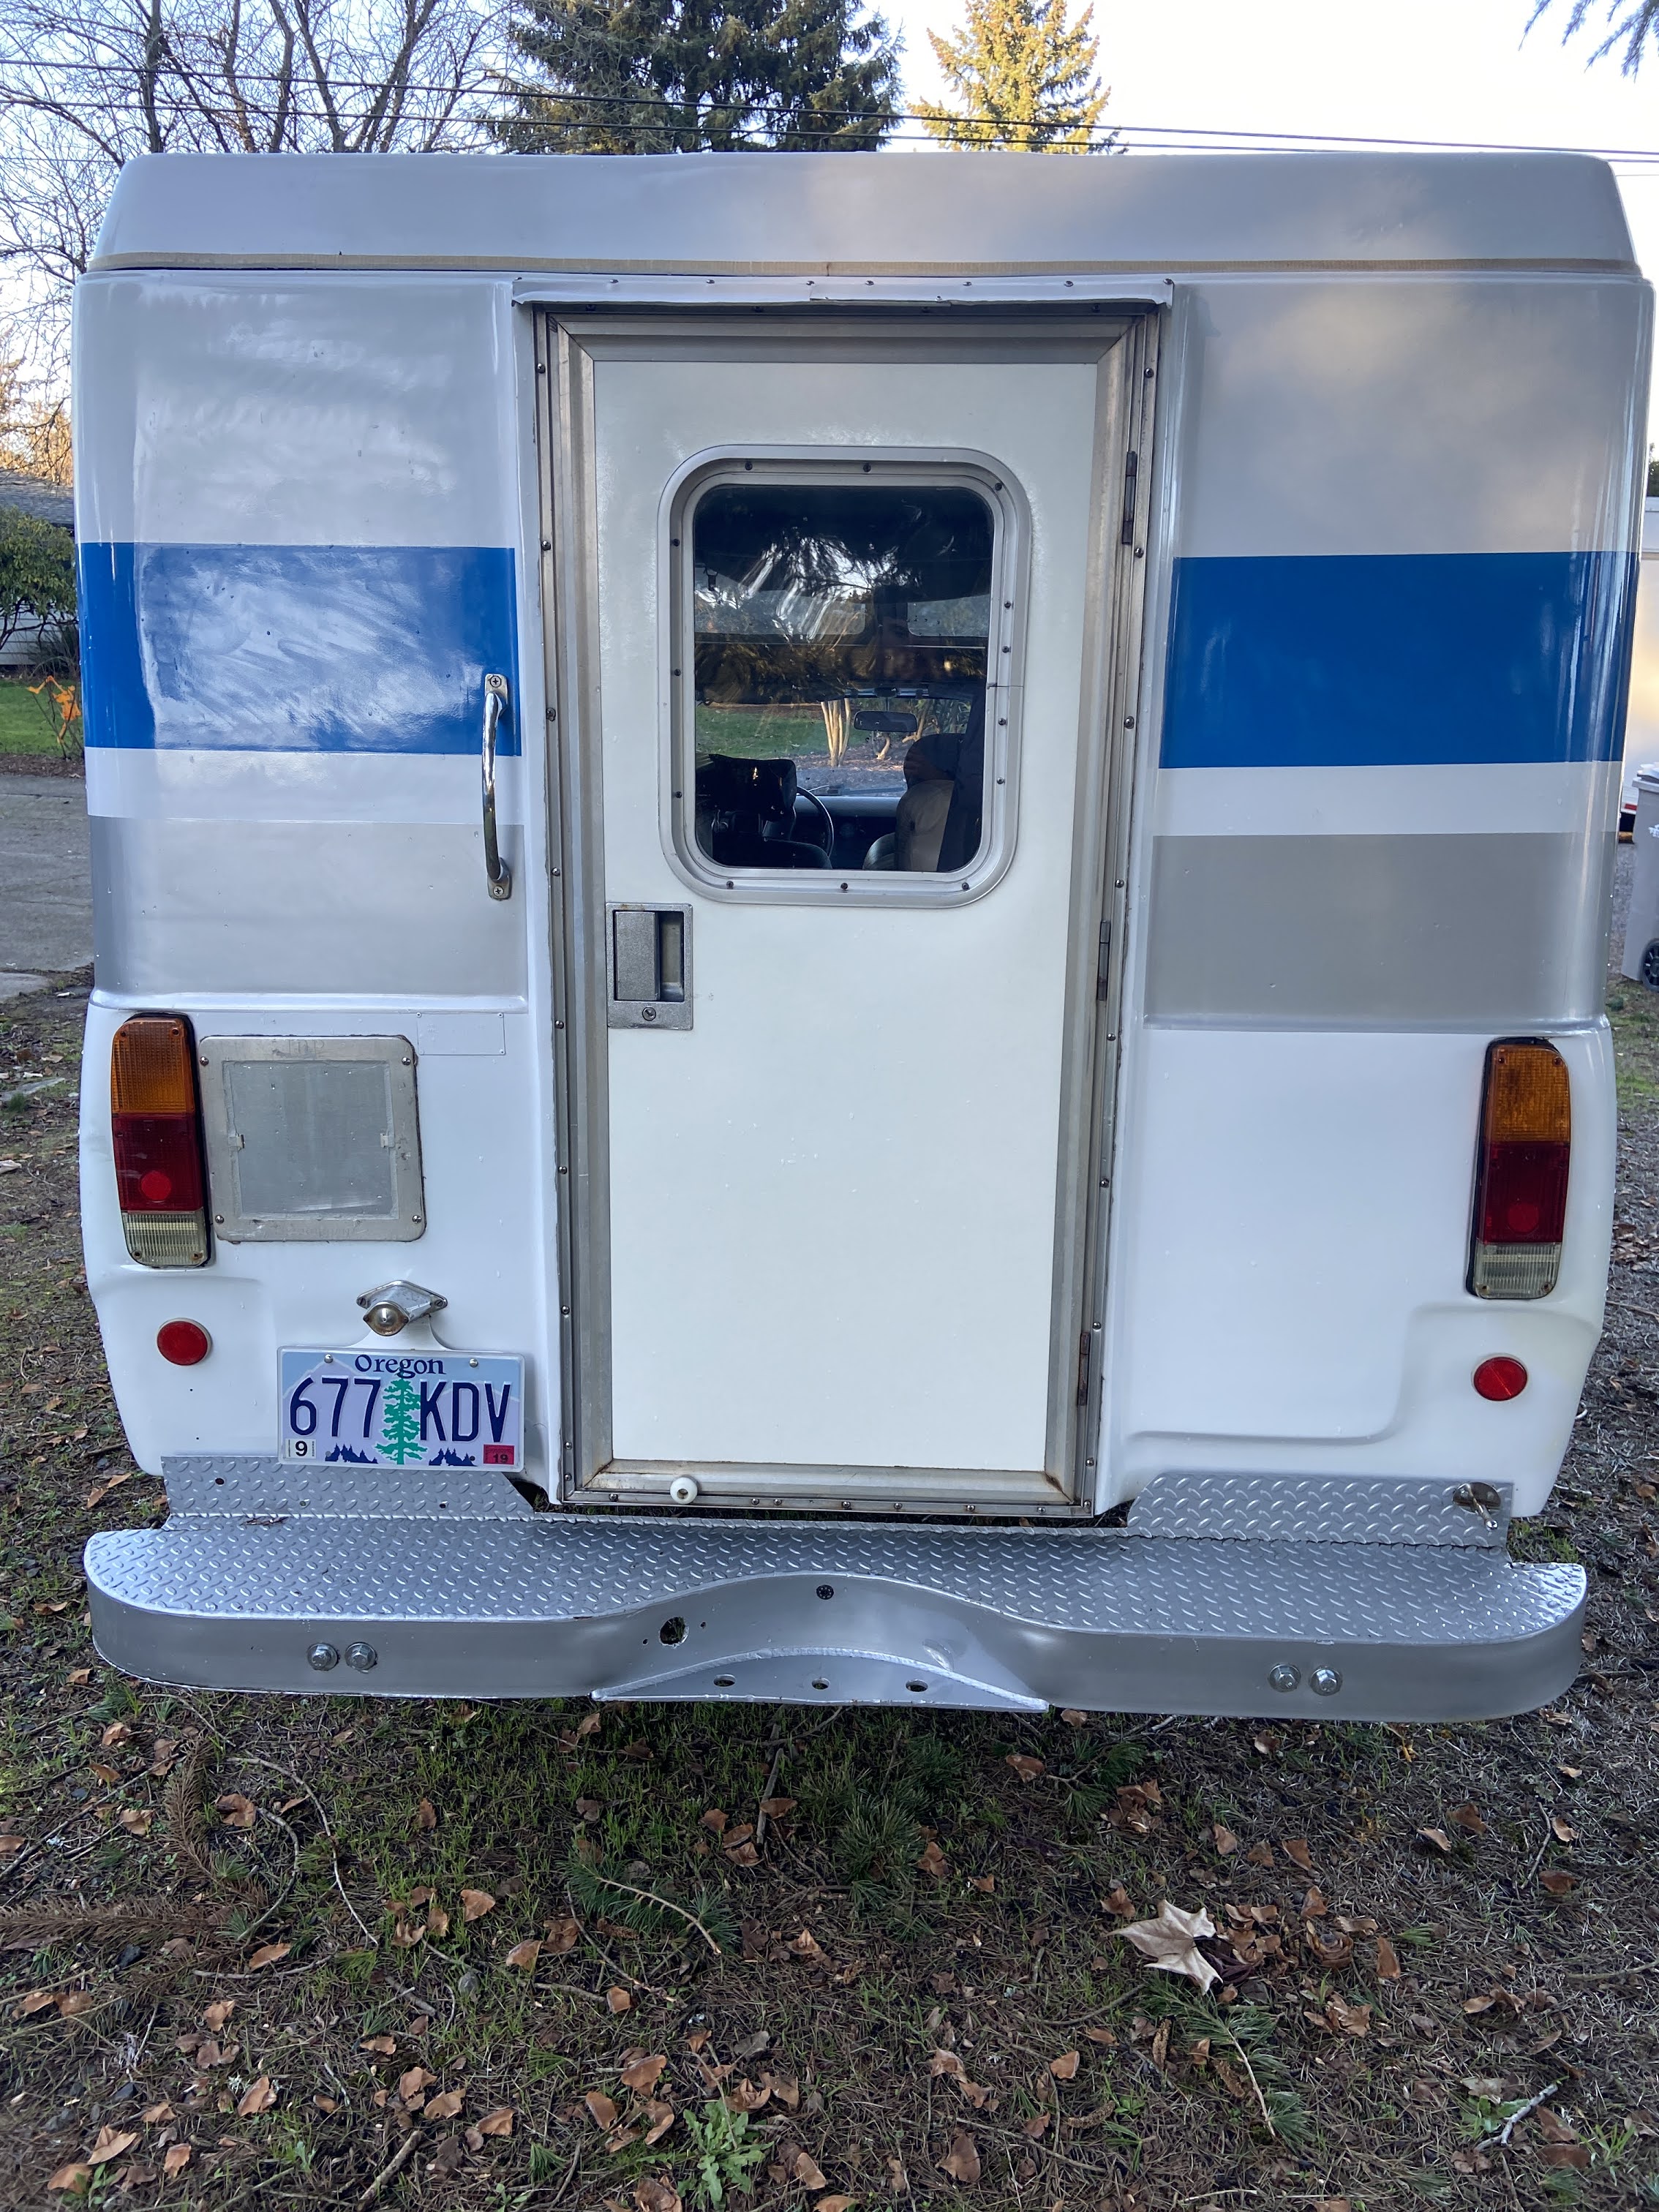
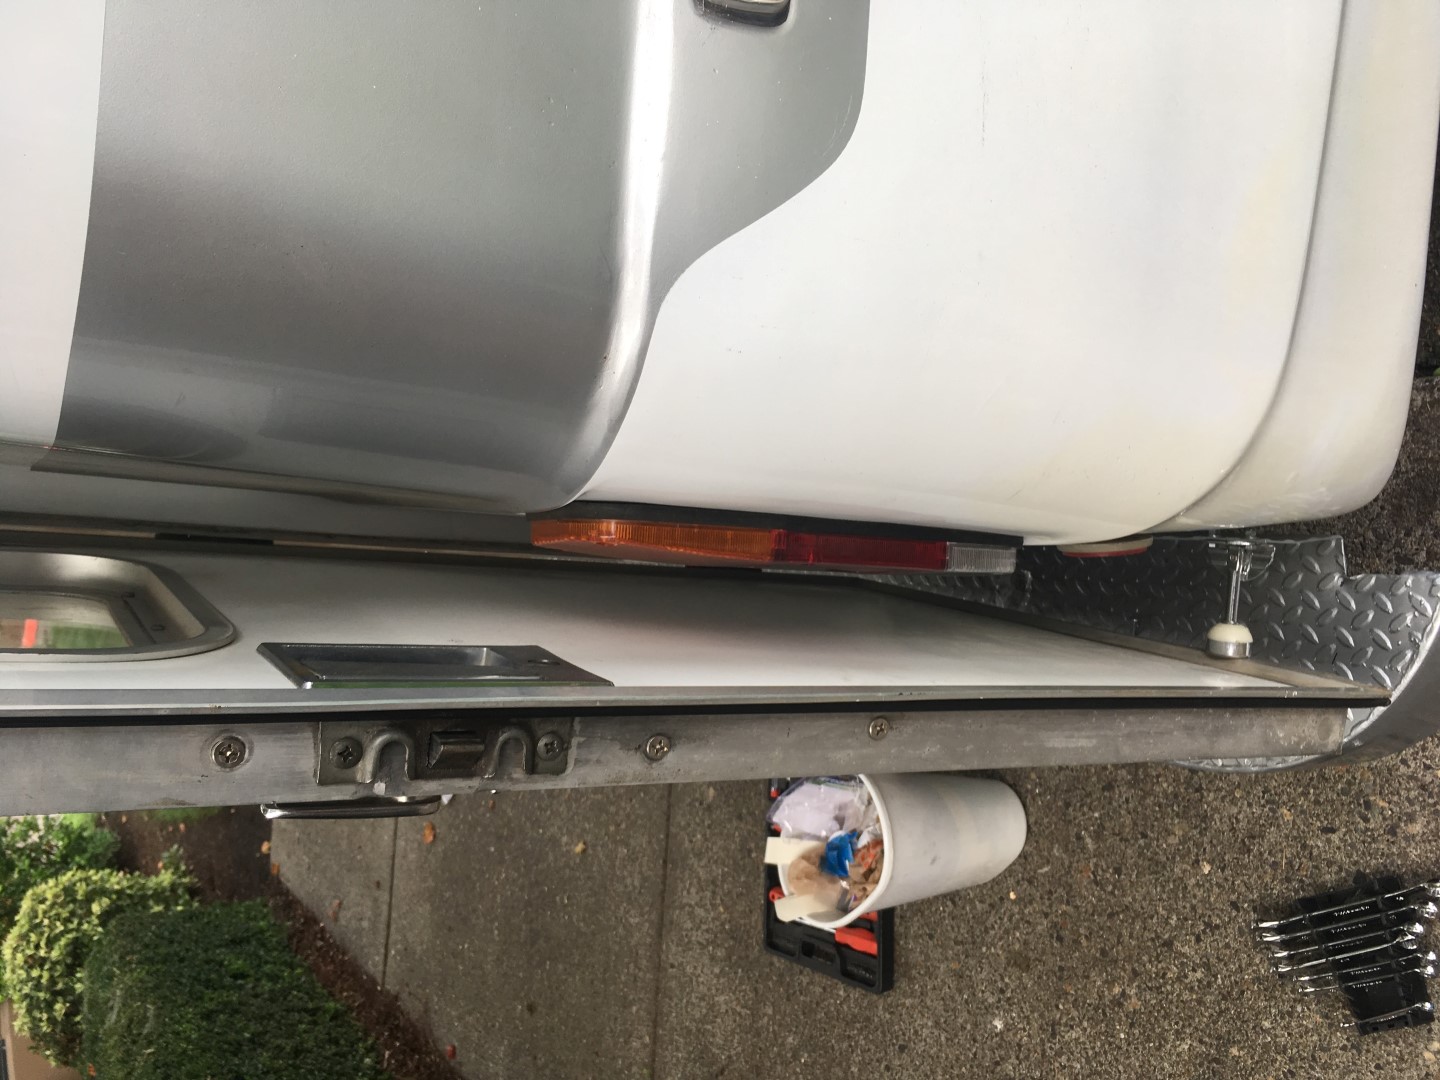
The rear tail lights on these rigs get smashed up over time. The passenger one in particular because the rear door will swing open and hit it. They are actually the same tail lights that are used for the Toyota Pickup truck just re-purposed for the fiberglass shell.
Replacements are scarce but eBay is your best bet. I found mine from the AutopartsPros eBay store. They ship with recessed plastic piece that is only for the truck, it is not required for the fiberglass shell. Not sure why Chinook wouldn’t use it because it makes the tail lights flush with the body.
The wiring was in very poor condition so I purchased some trailer wiring from Harbor Freight for a decent price and extended the wiring and taped it all up into a nice clean harness. All the extensions used solder joints with heat shrink tubing. Also, don’t forget to wire the side running light to the headlight rear running light.

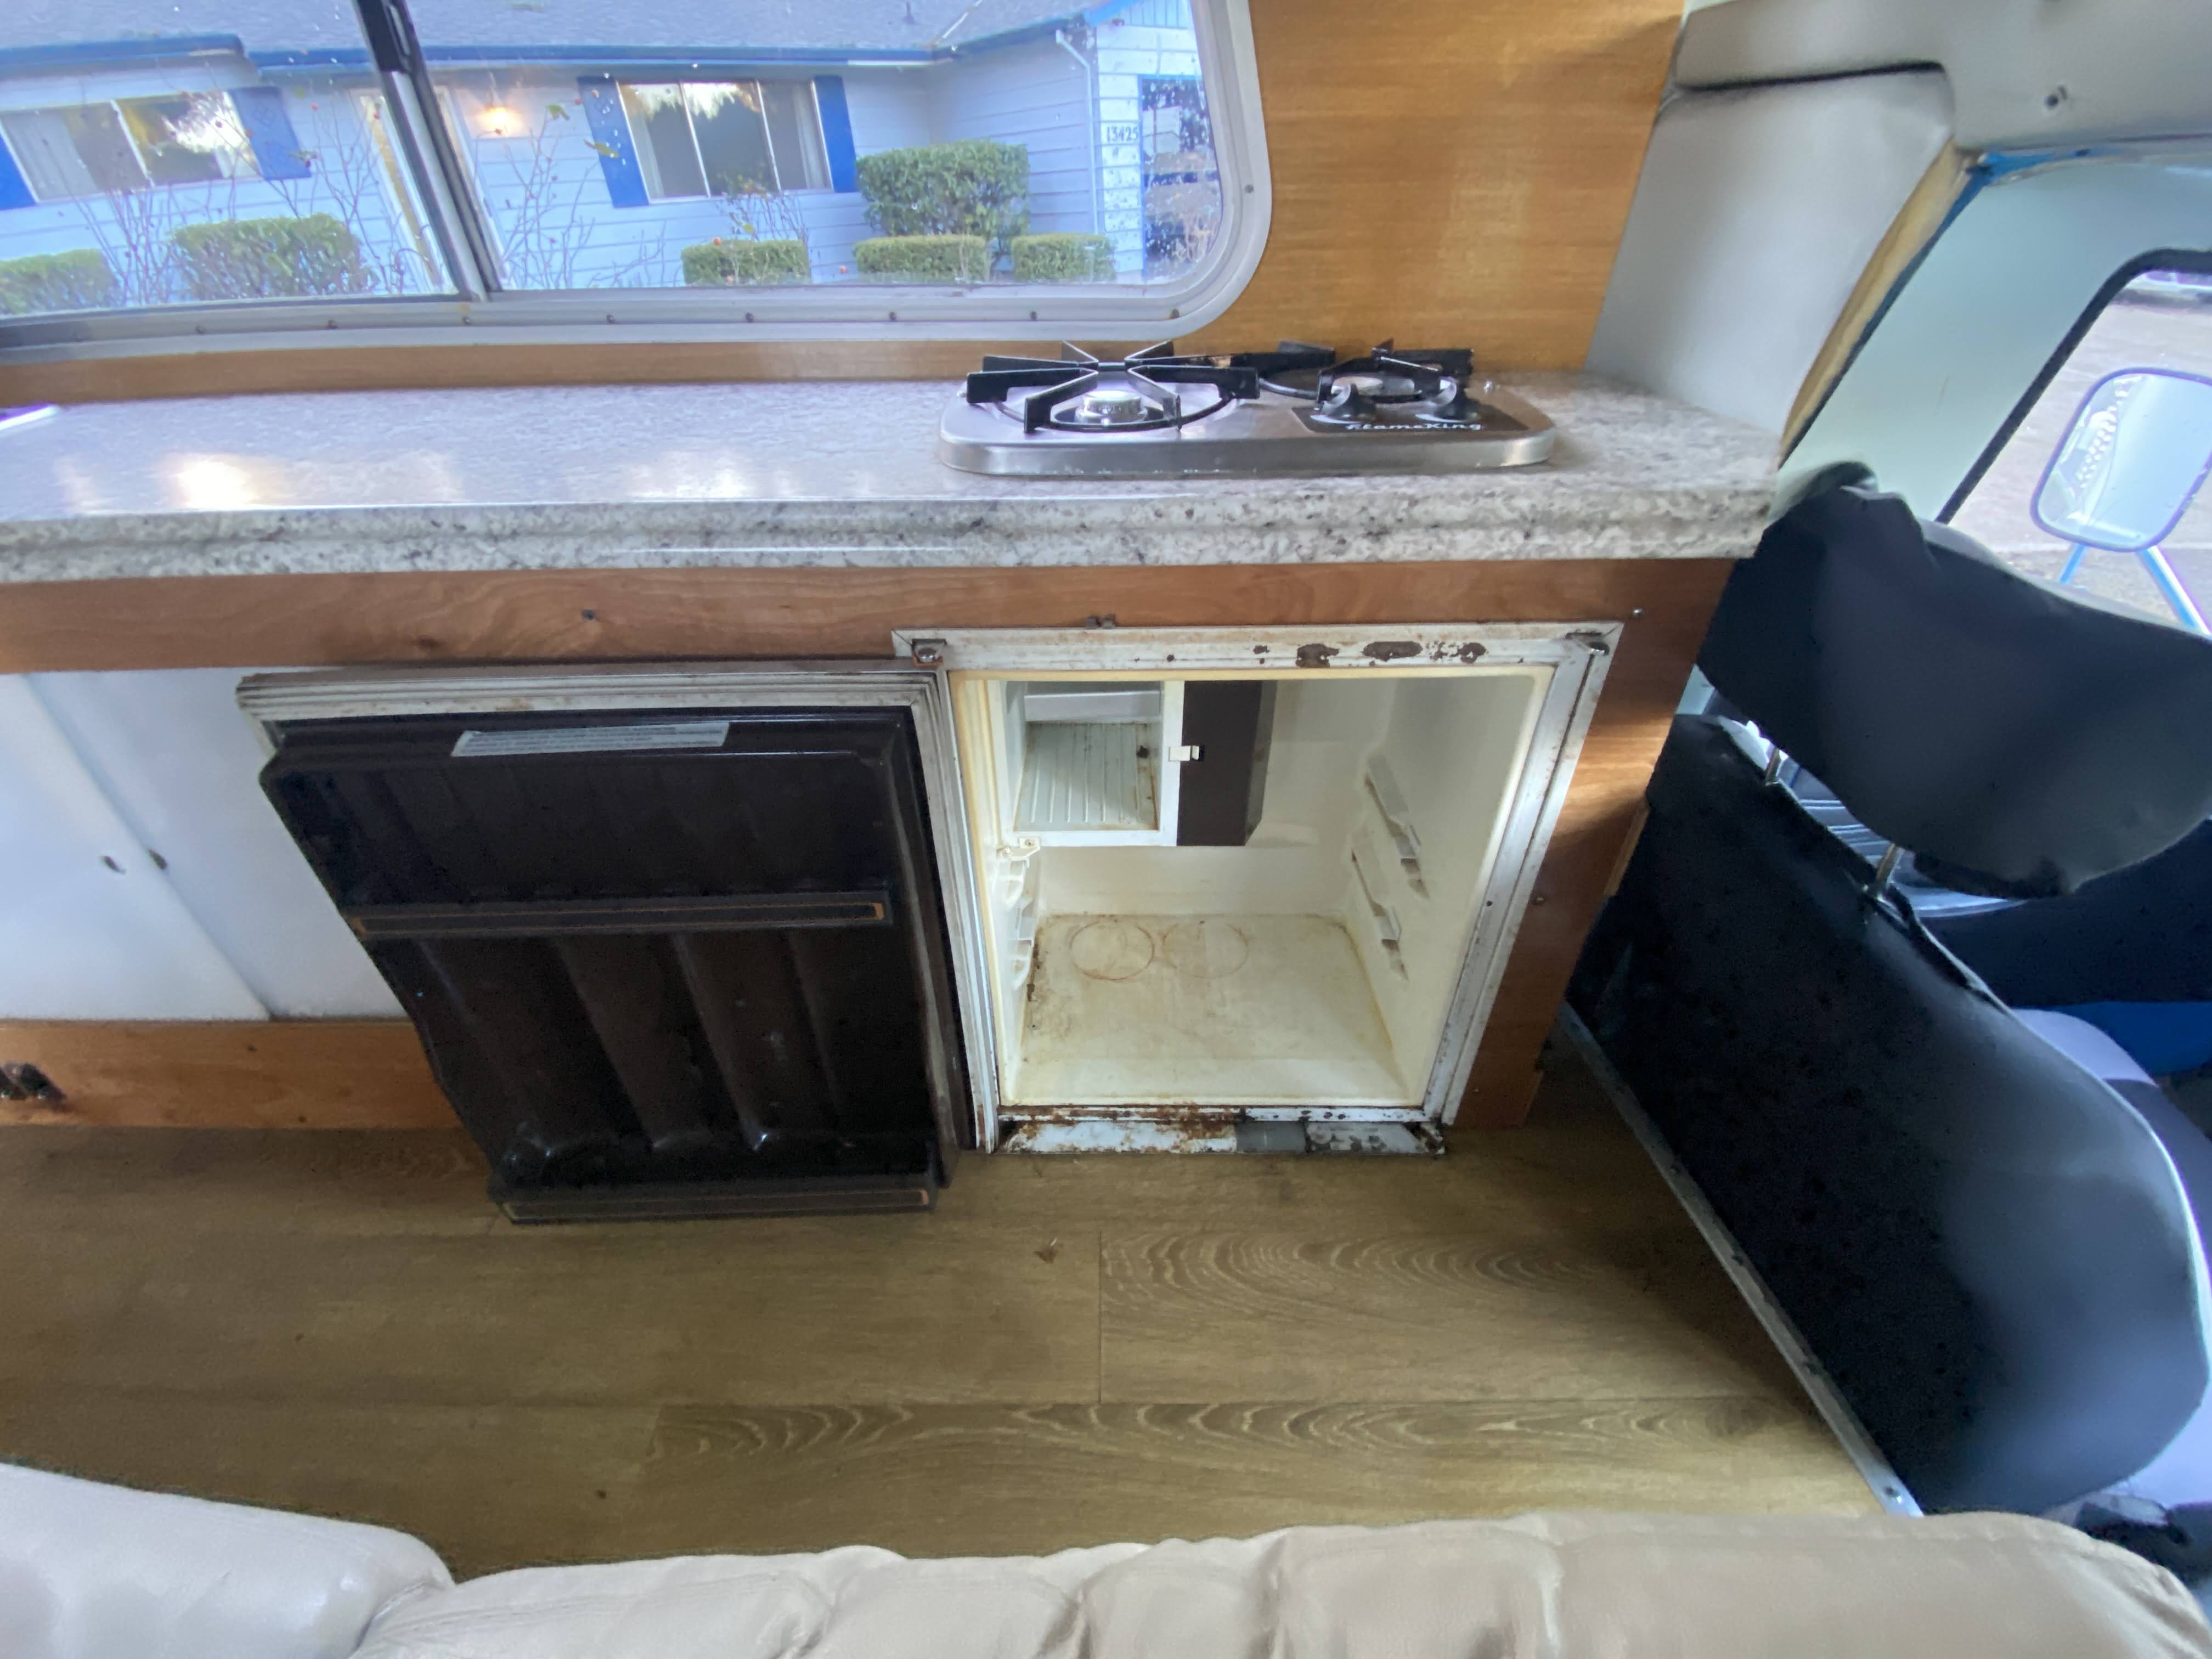
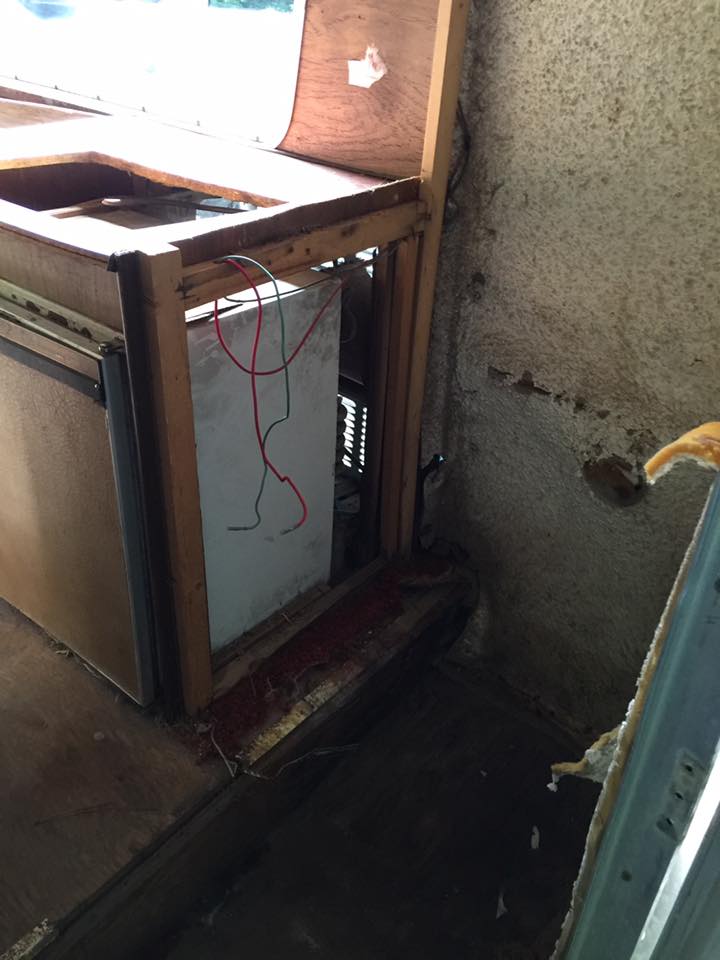
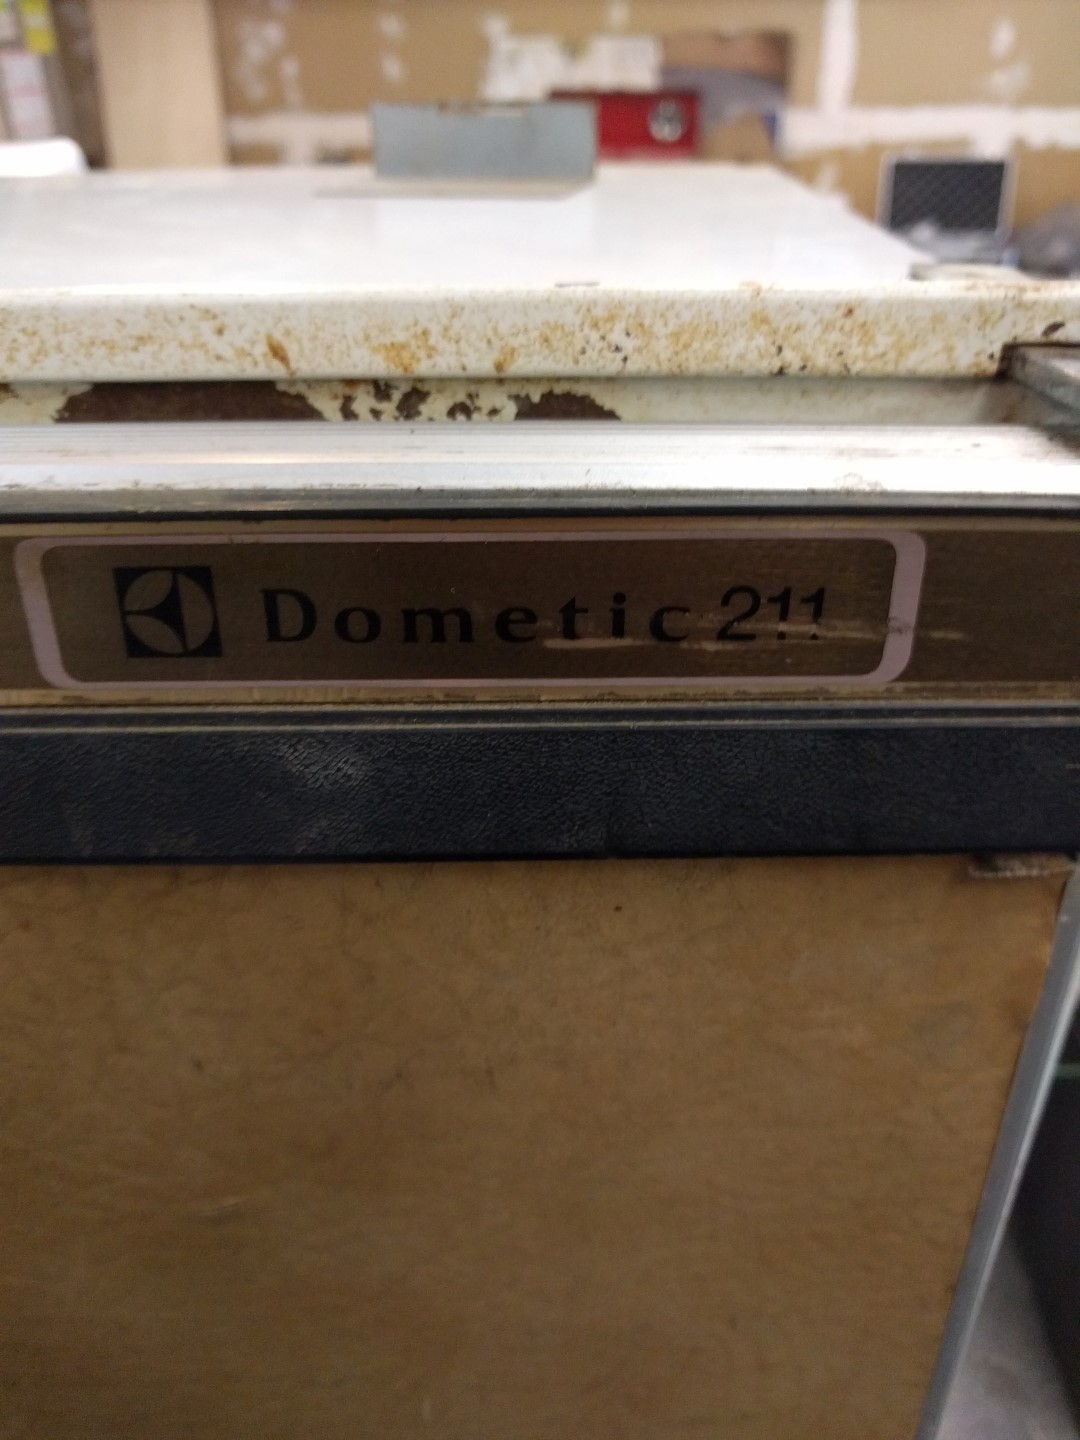
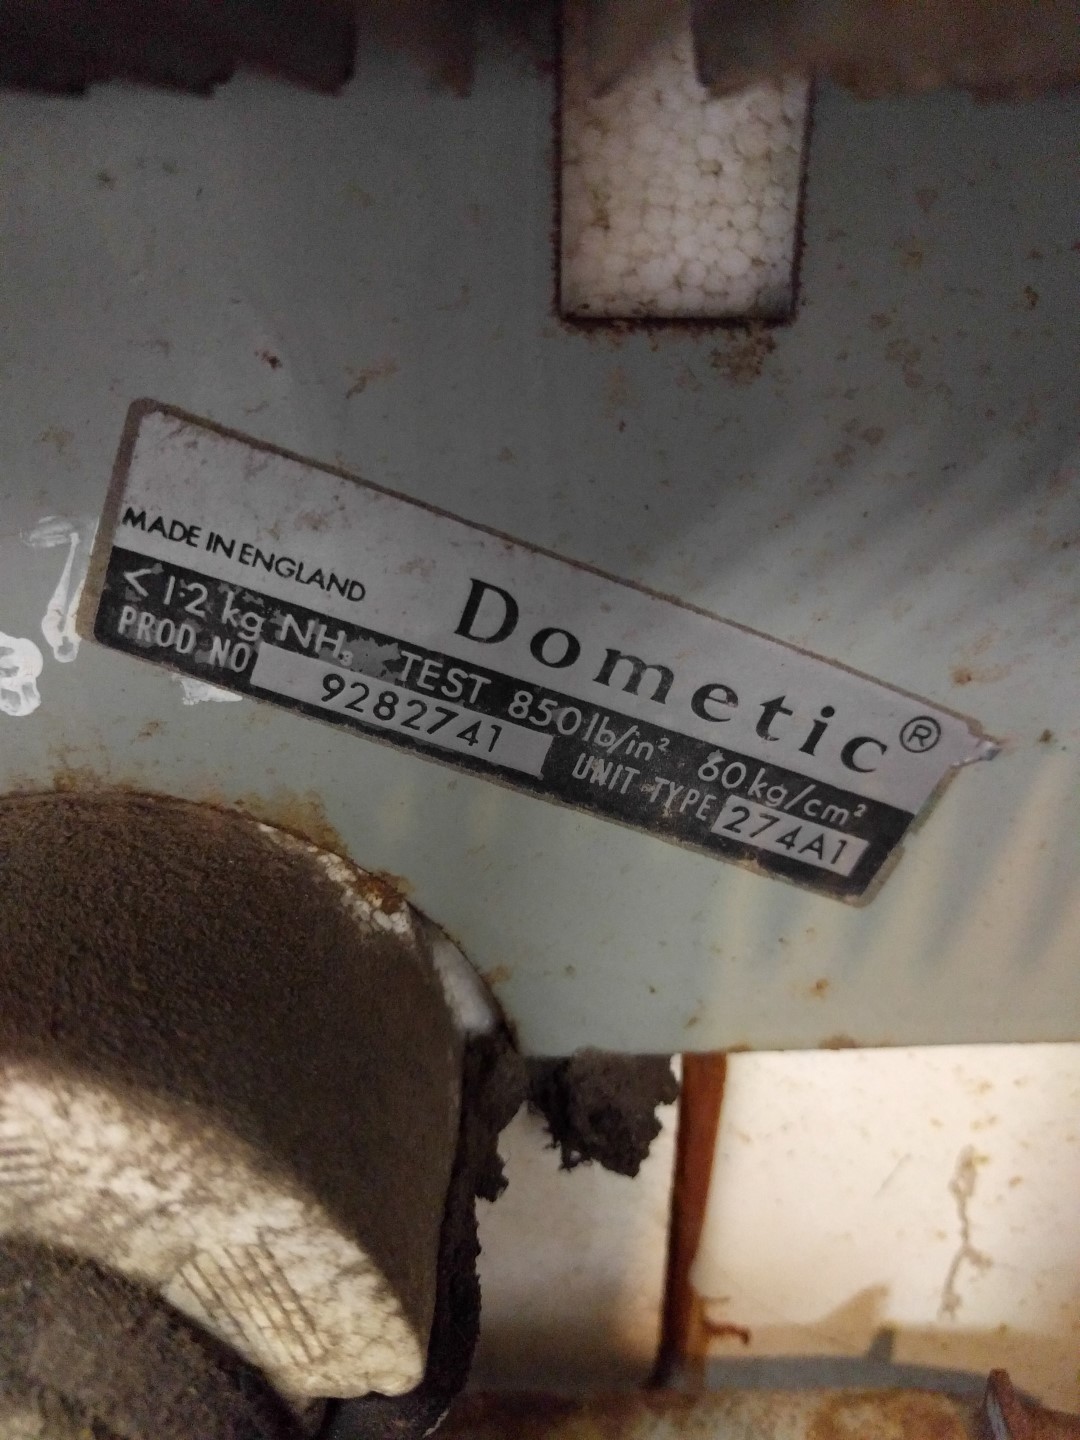
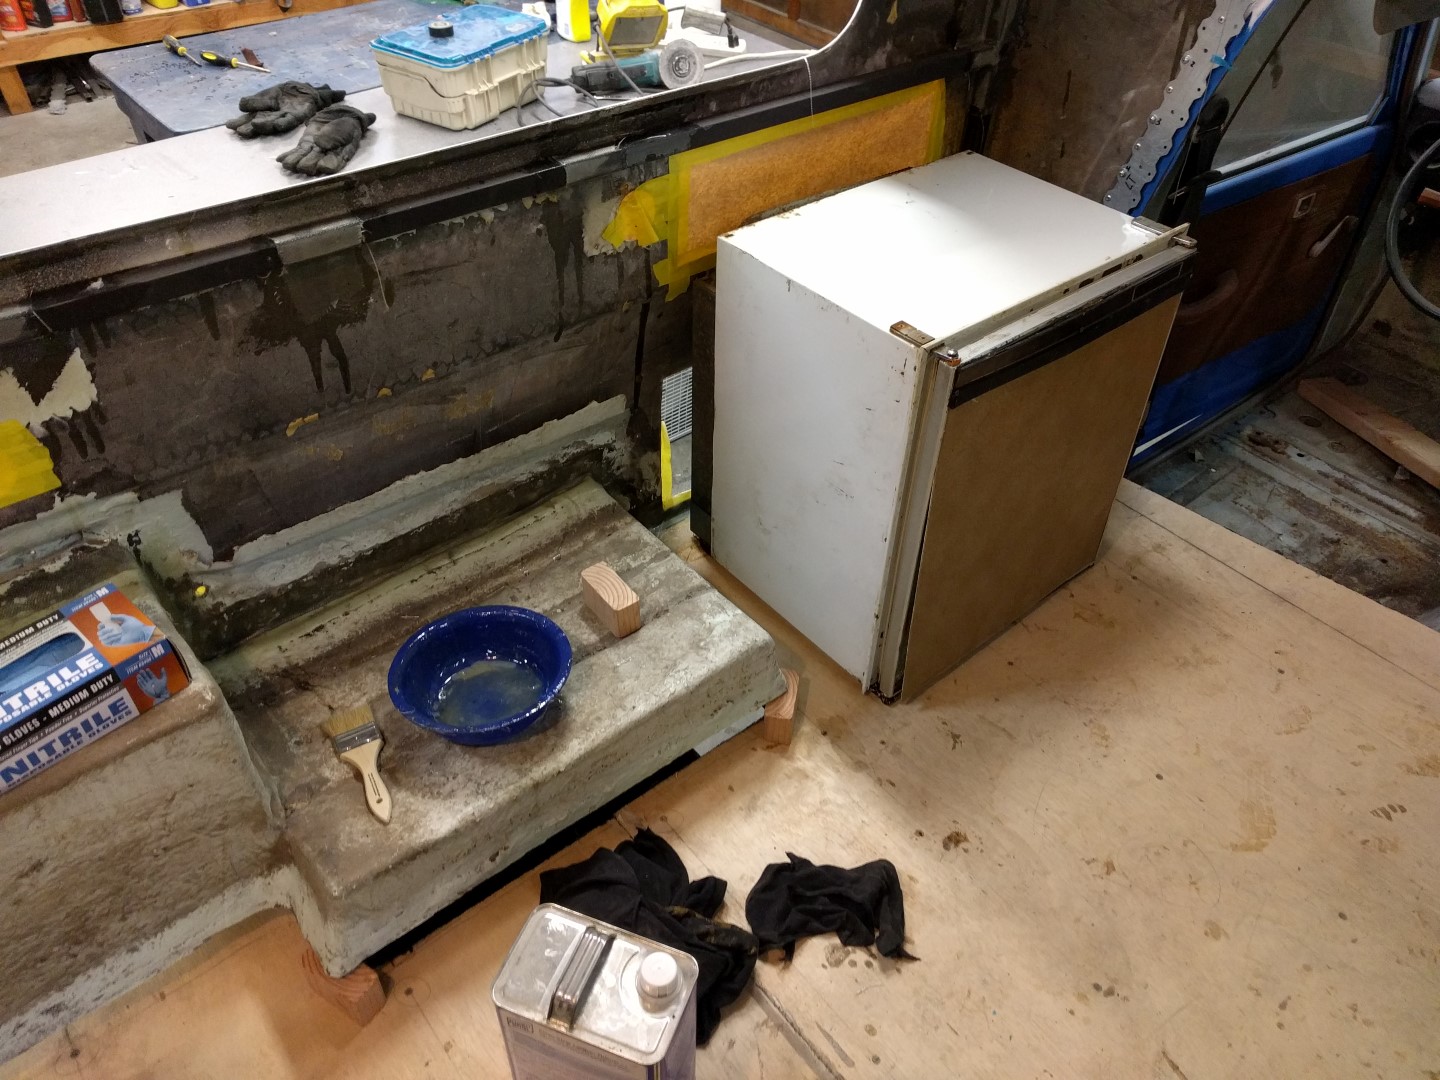
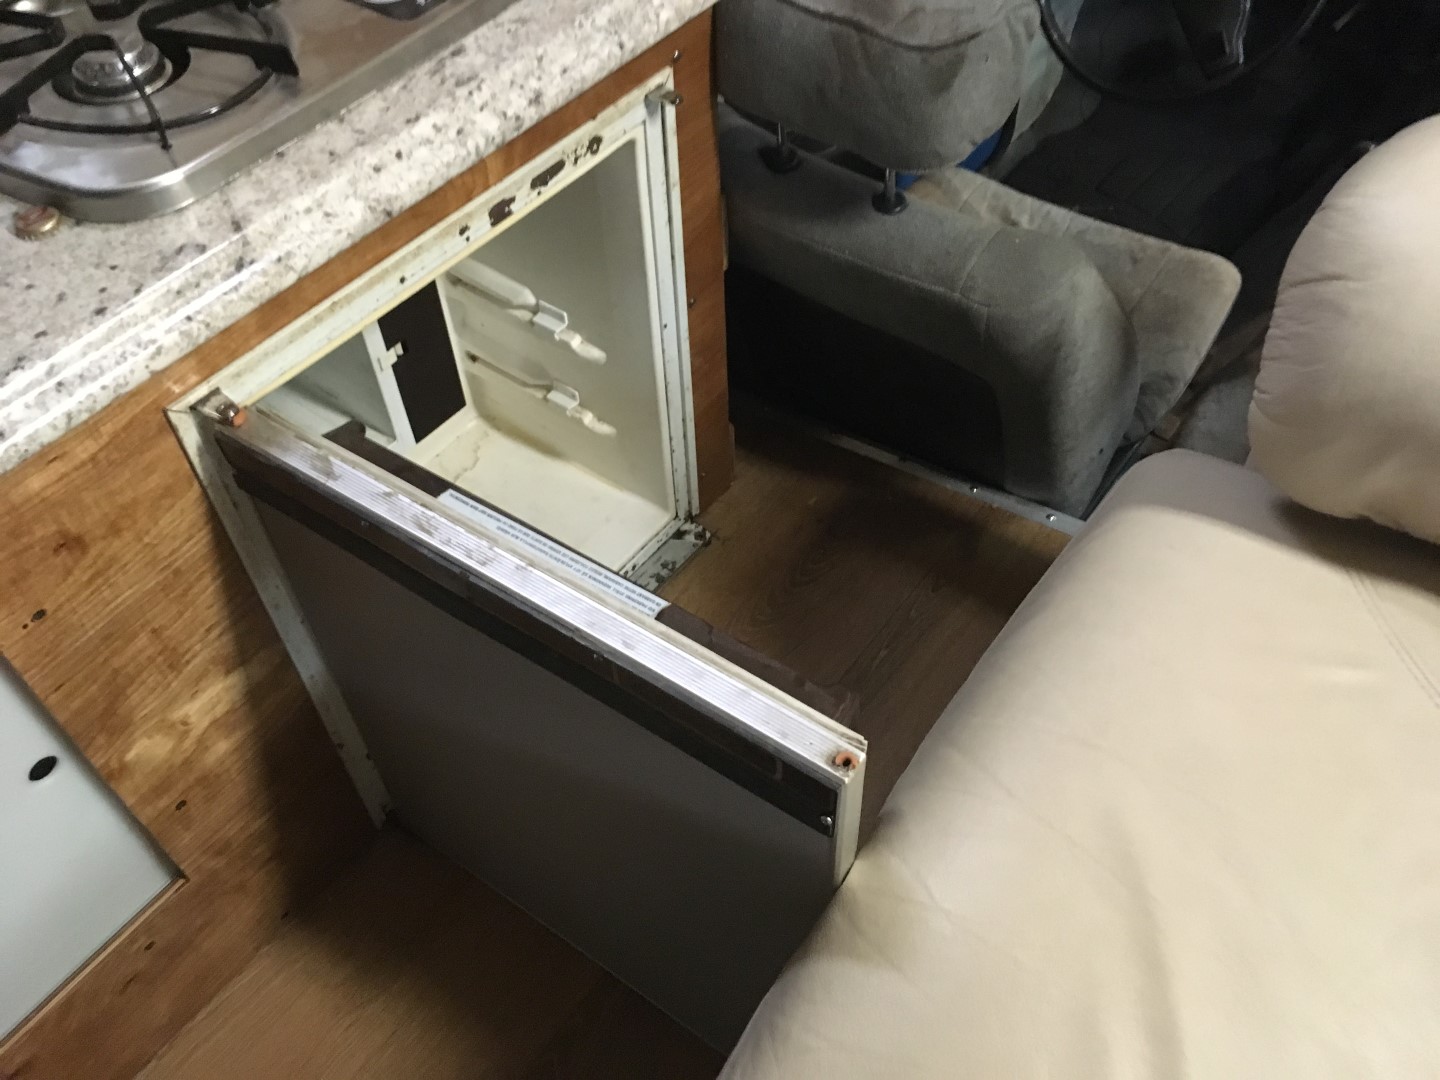
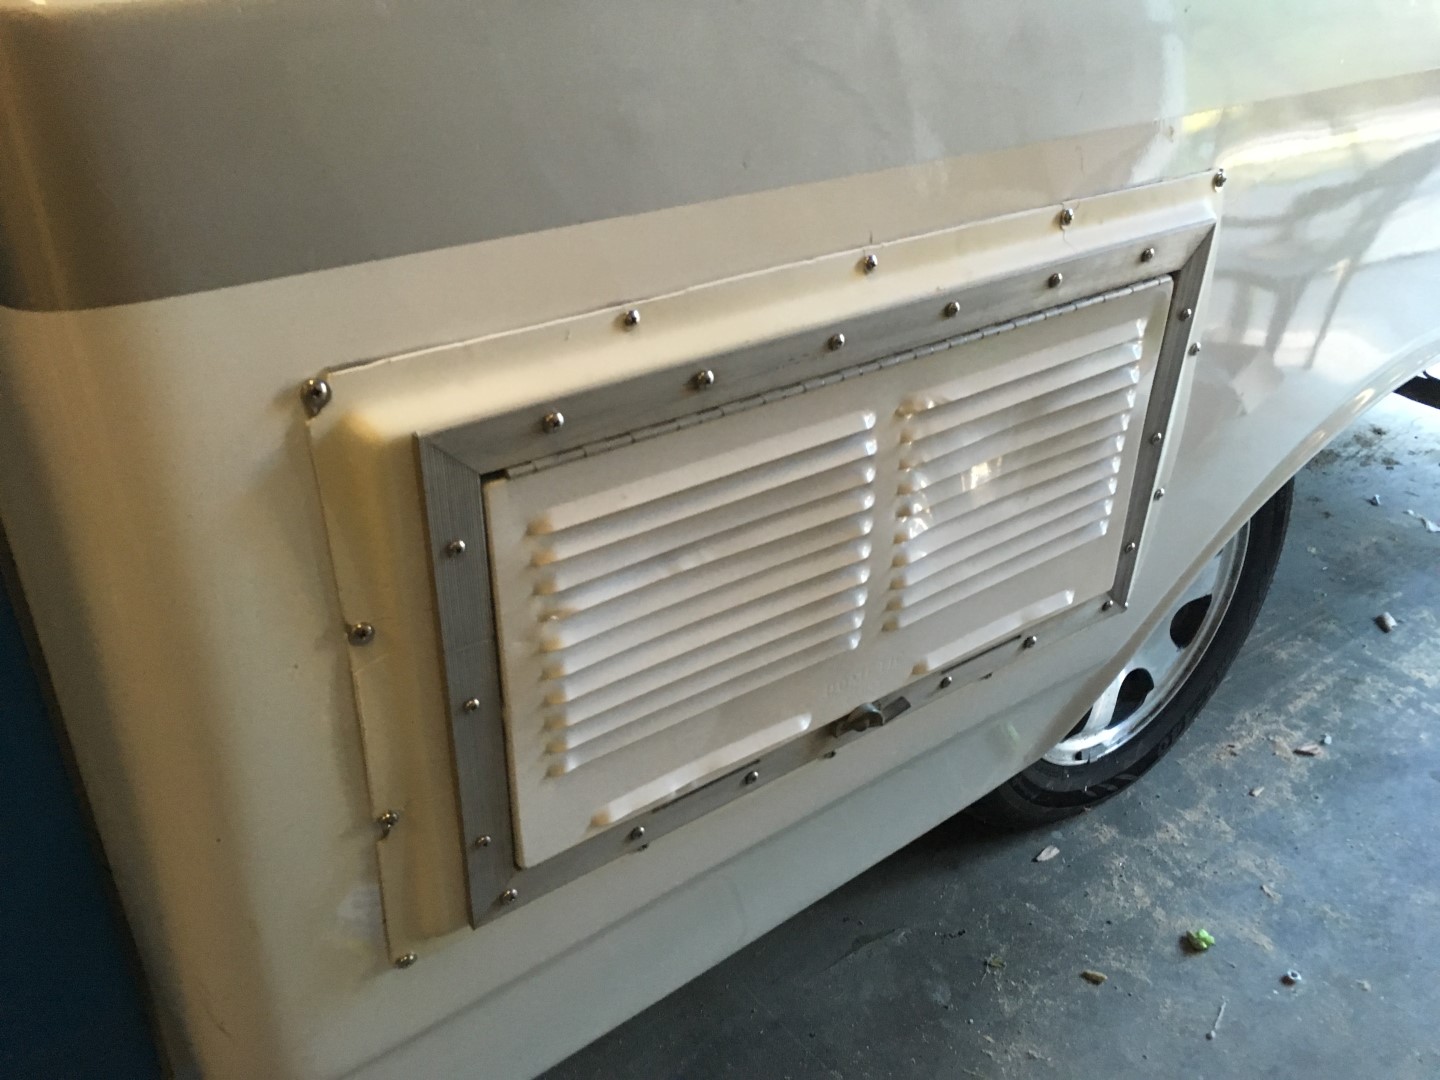
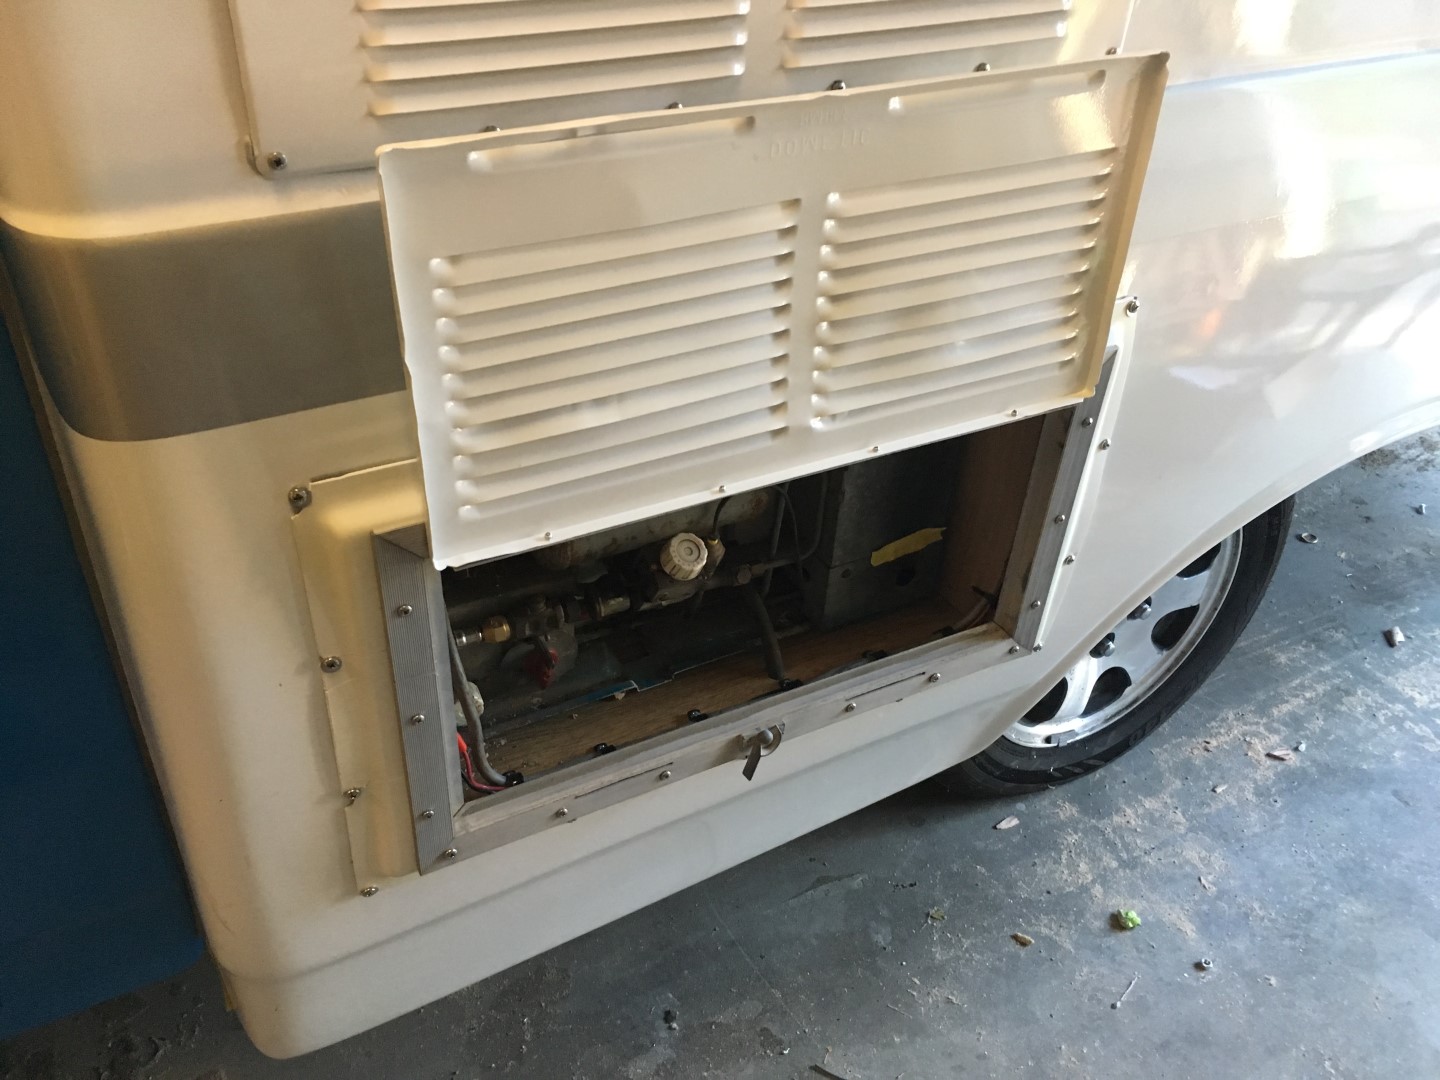
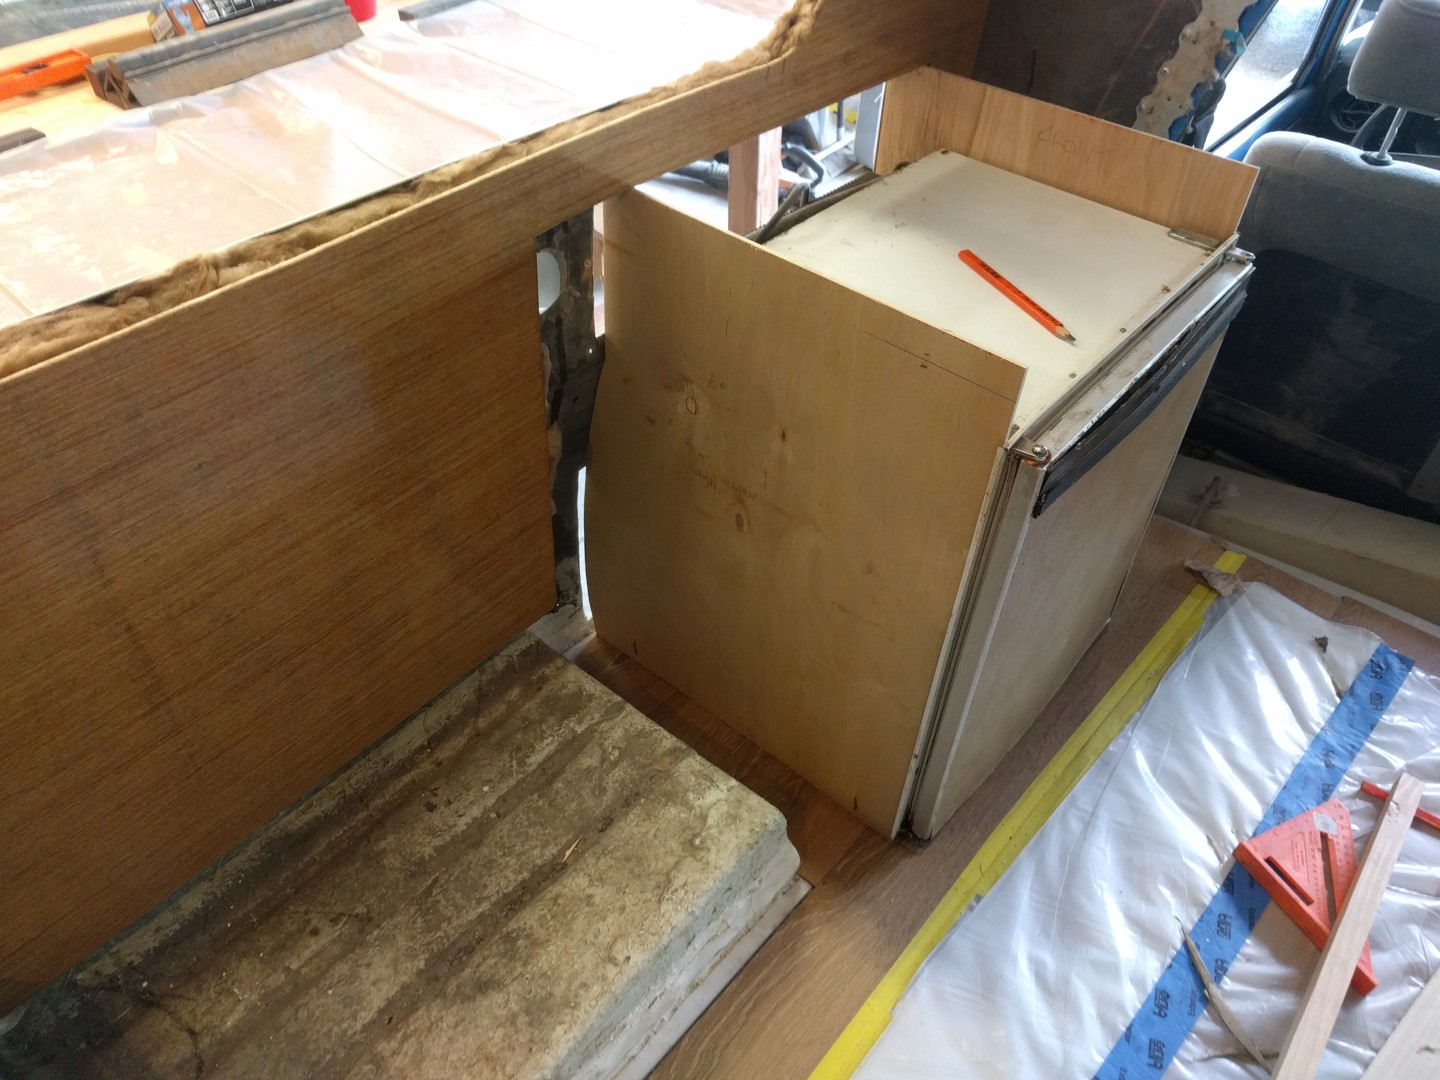
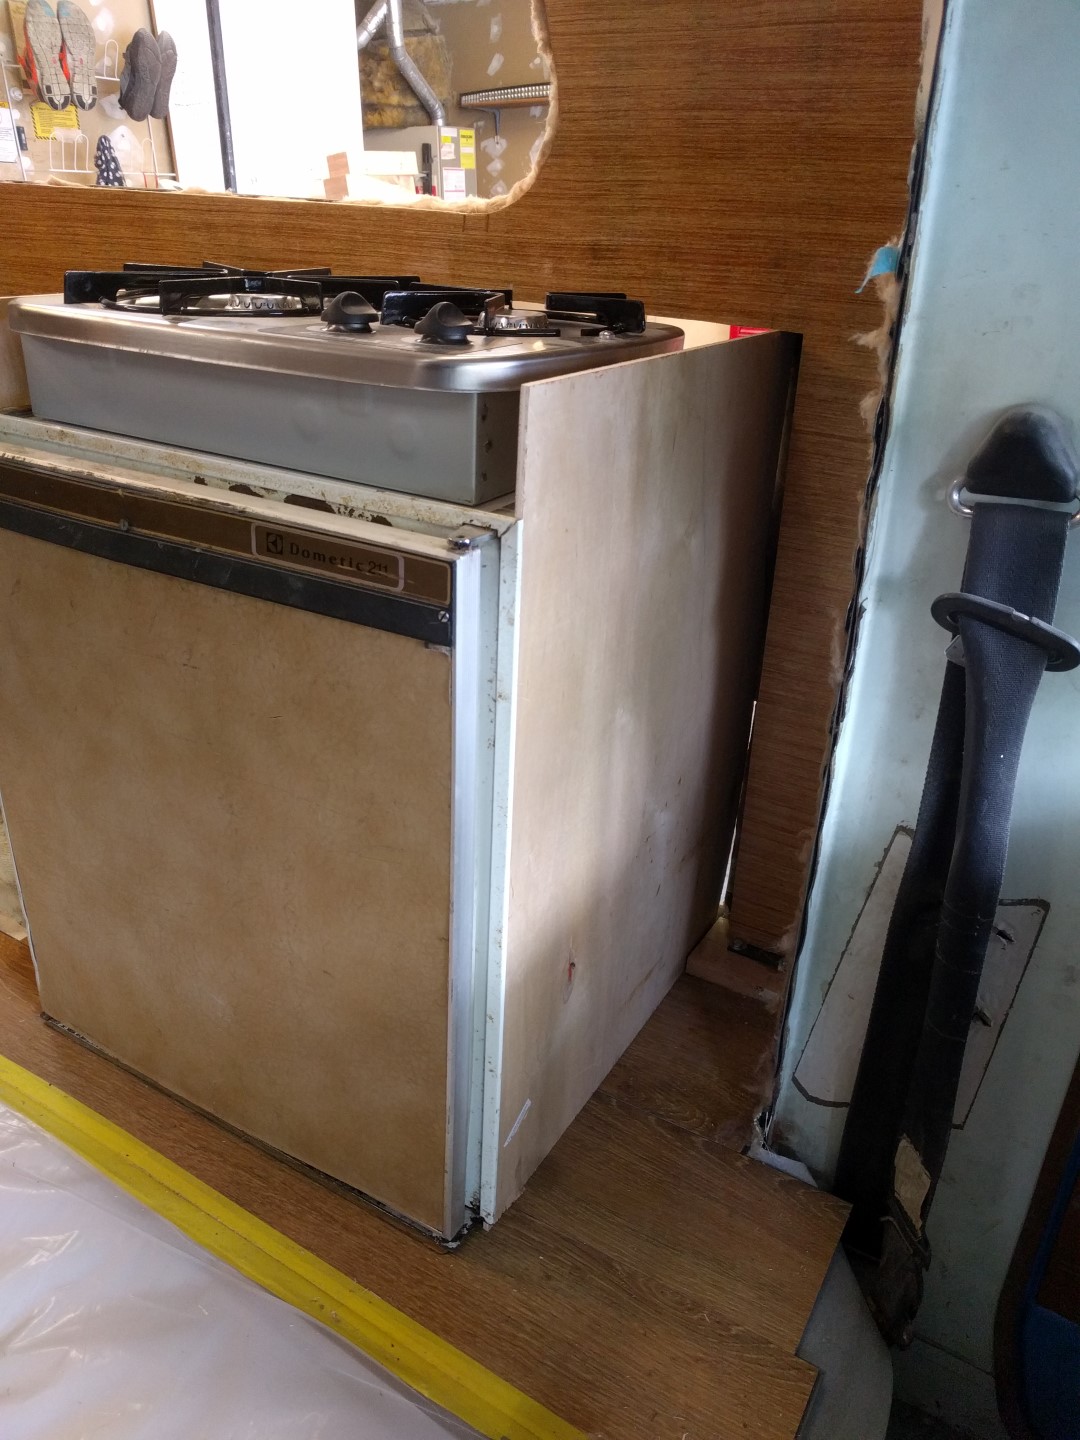
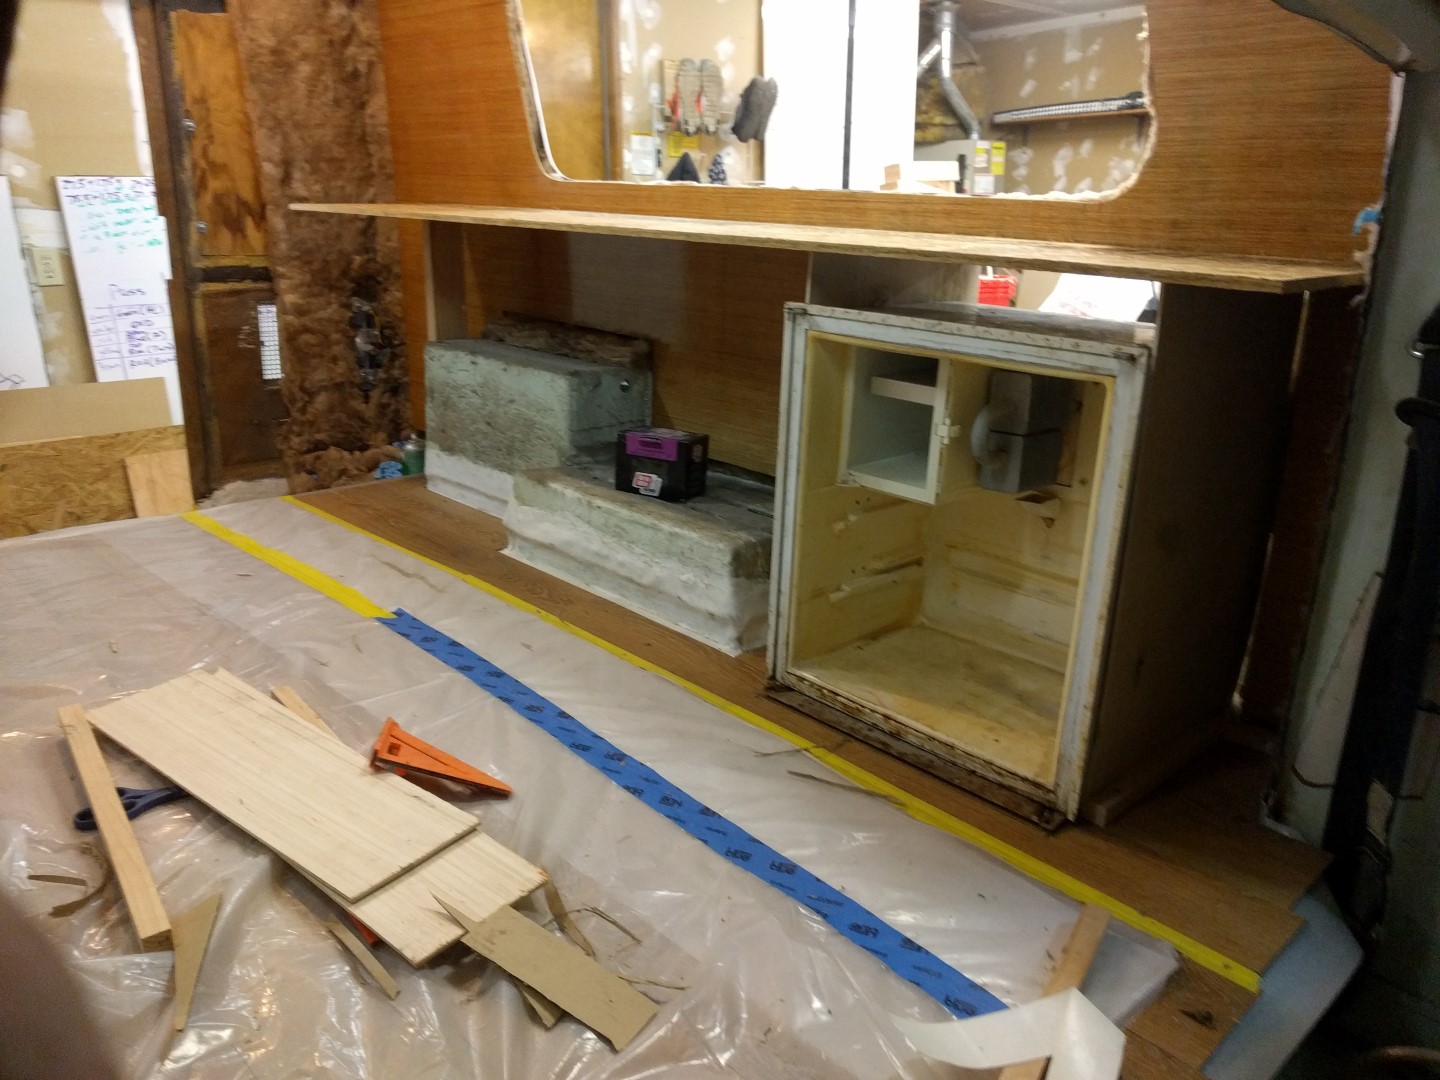
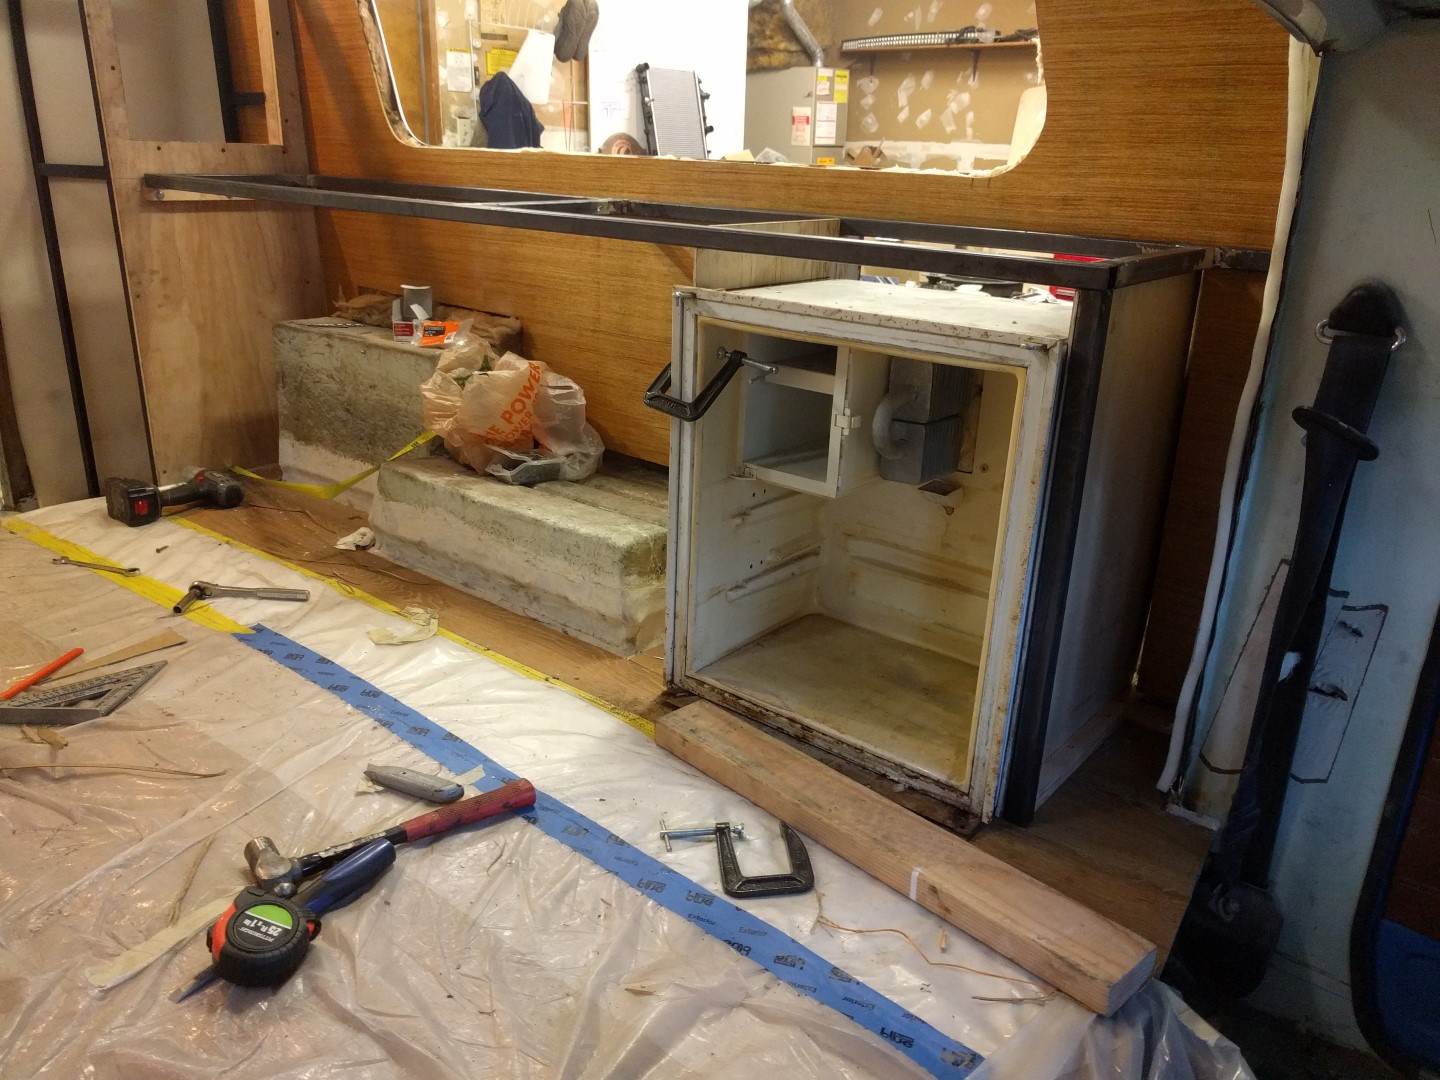
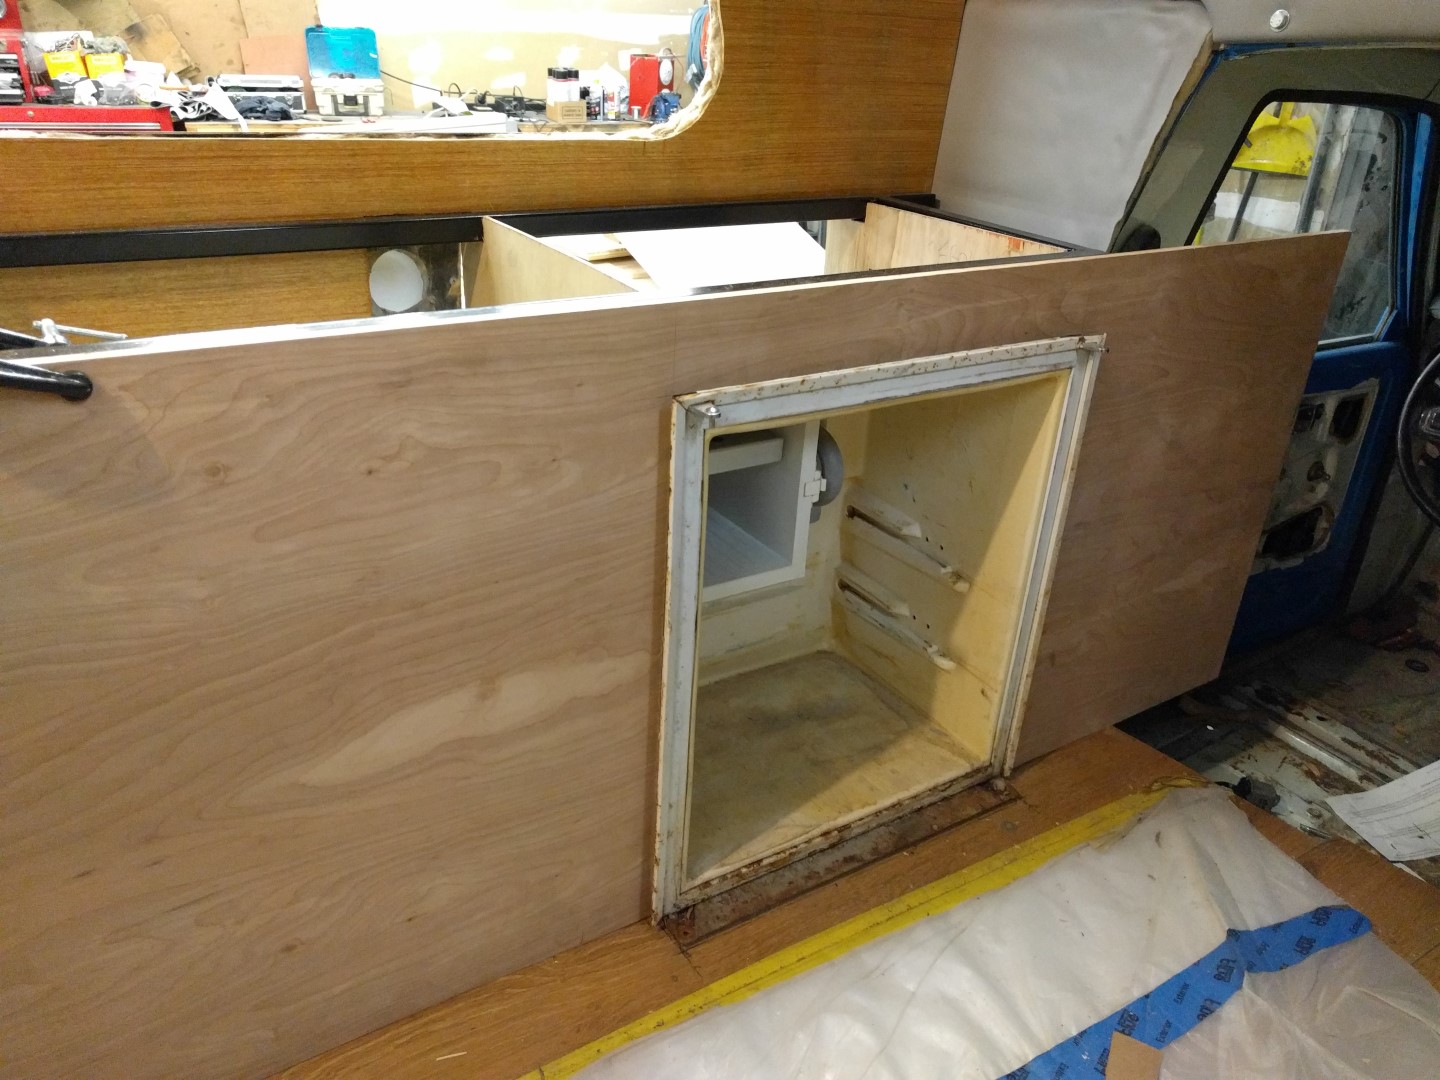
Dometic 211 Fridge
The fridge is the original Dometic 211. Luckily both my parts and rebuild rigs had fridges because I had to Frankenstein them together; mostly the trim/door pieces. The fridge components worked like a charm after a bit of cleaning. It is a 3-way fridge so it can run from: 1) 120 VAC (normal plug from your house), 2) 12 VDC (from car battery), or 3) liquid propane gas. The AC setting works great if you have shore power, the DC setting will drain a big deep cycle battery in less than a day, and the propane last for quite a while on a 5 gallon tank depending on the ambient temperature (think twice about running it in 90 degree + weather).
You can find the manual for this fridge online that details the proper installation method into an RV. The vents need to be in a specific location for proper ventilation. It also describes how to operate the fridge in the 3 modes.
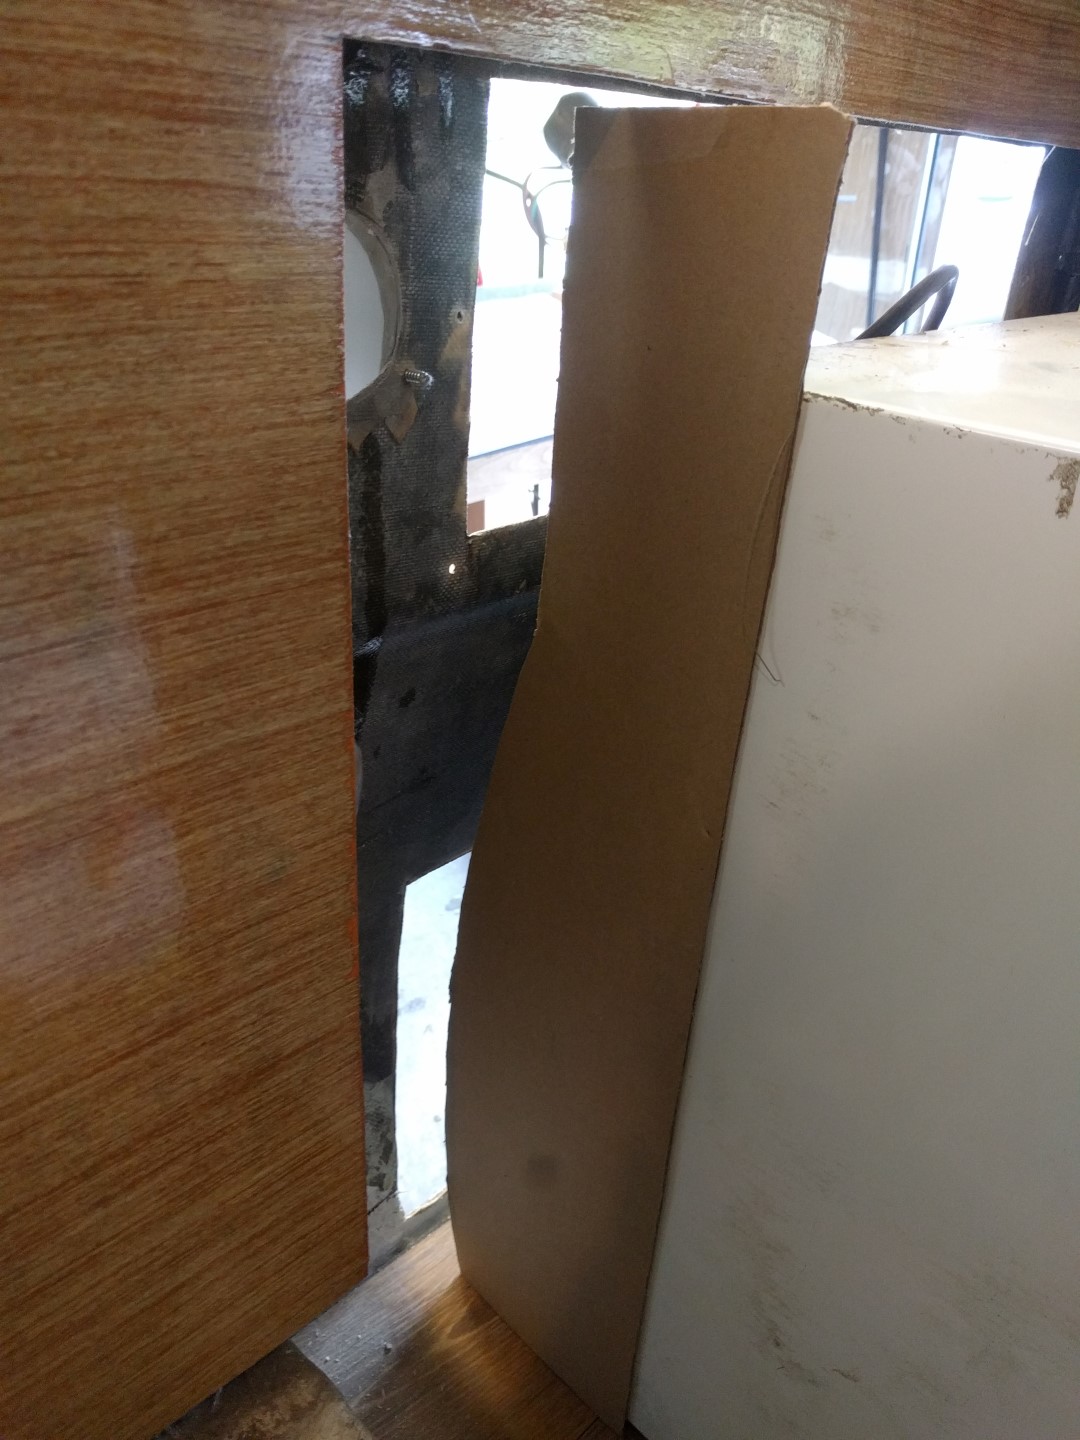
The fridge was framed in using 1/4” wood sheets that needed to be cut in a very particular shape to conform to the fiberglass shell’s curvature. Insulation tape and polyurethane sealant was used to seal up the fridge vent area from leaking into the inside. The front panel of the fridge was easy to frame because it has a 1/2” lip that trims up the front really nice.
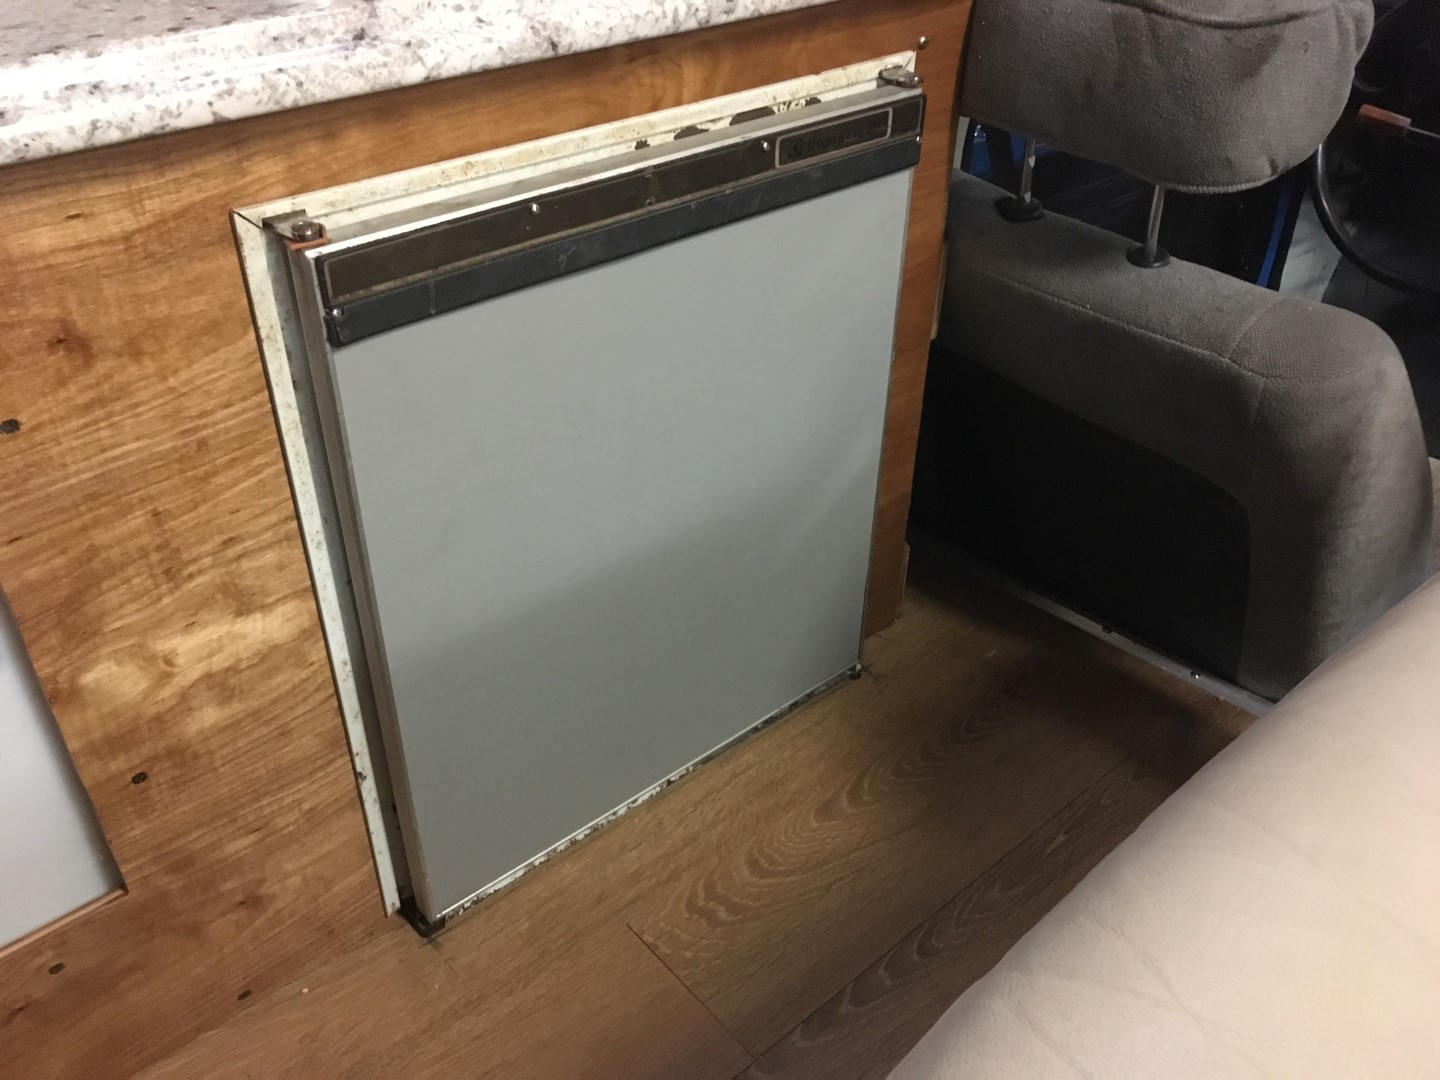
The front panel was that ugly brown color vinyl material attached to a rigid plastic sheet. The brown was torn off and replaced with the same silver vinyl from the walls.
The fridge will open all the way barely touching the couch. I would have hinged the fridge on the right side instead of the left but that was how it was done stock and it was worn out on that side.


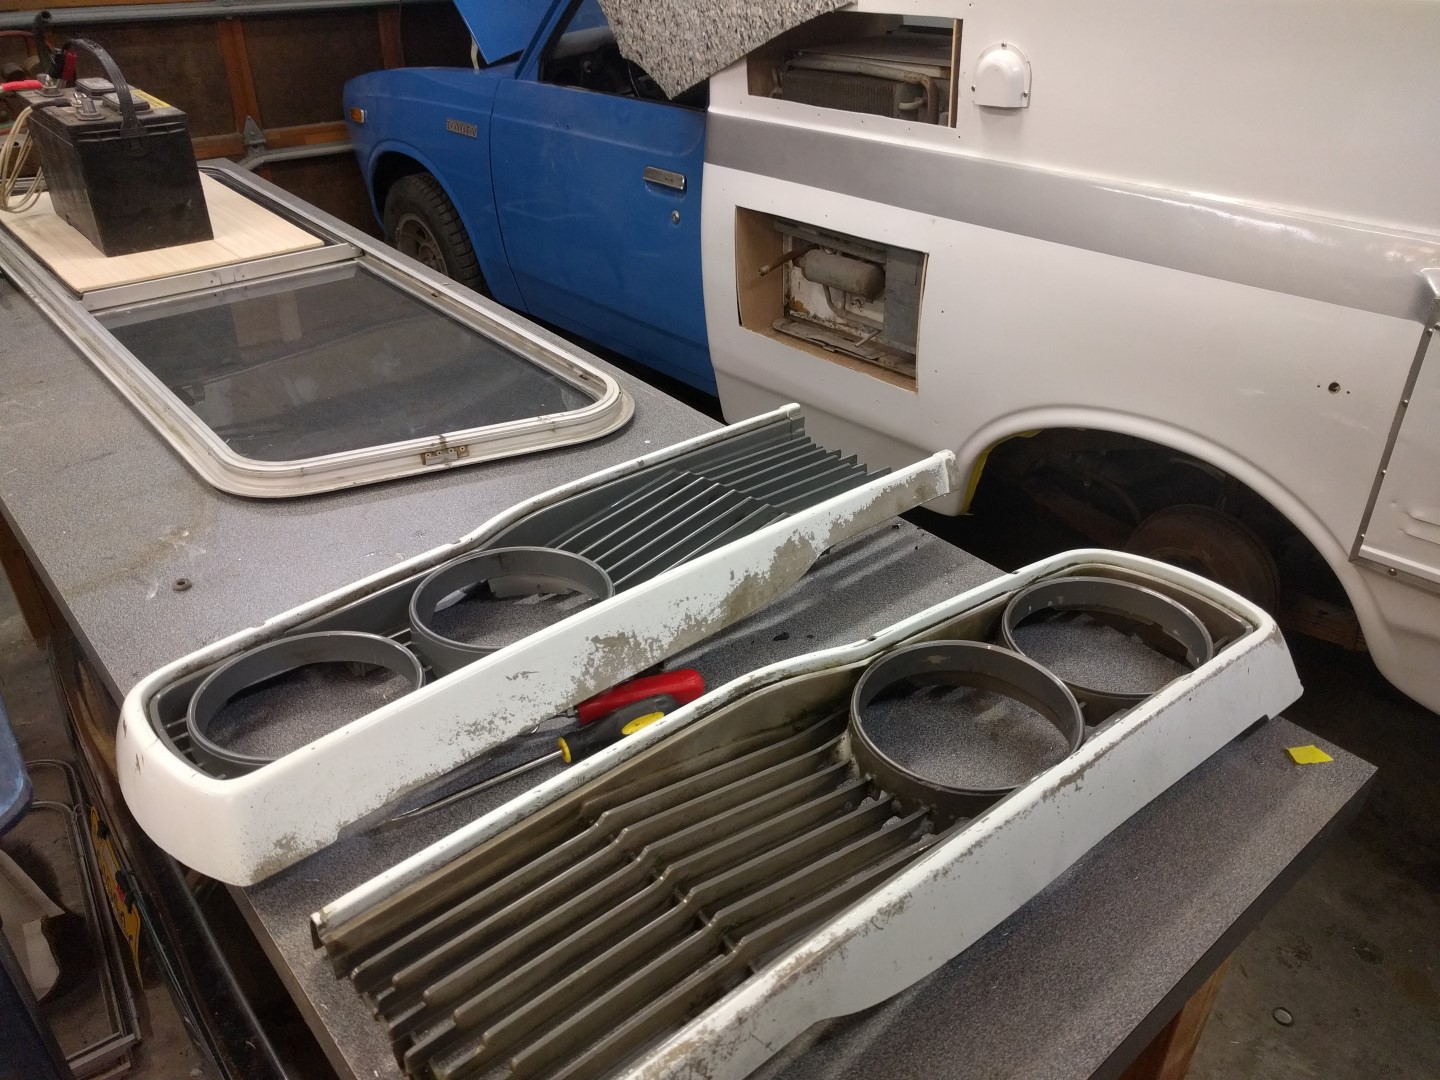
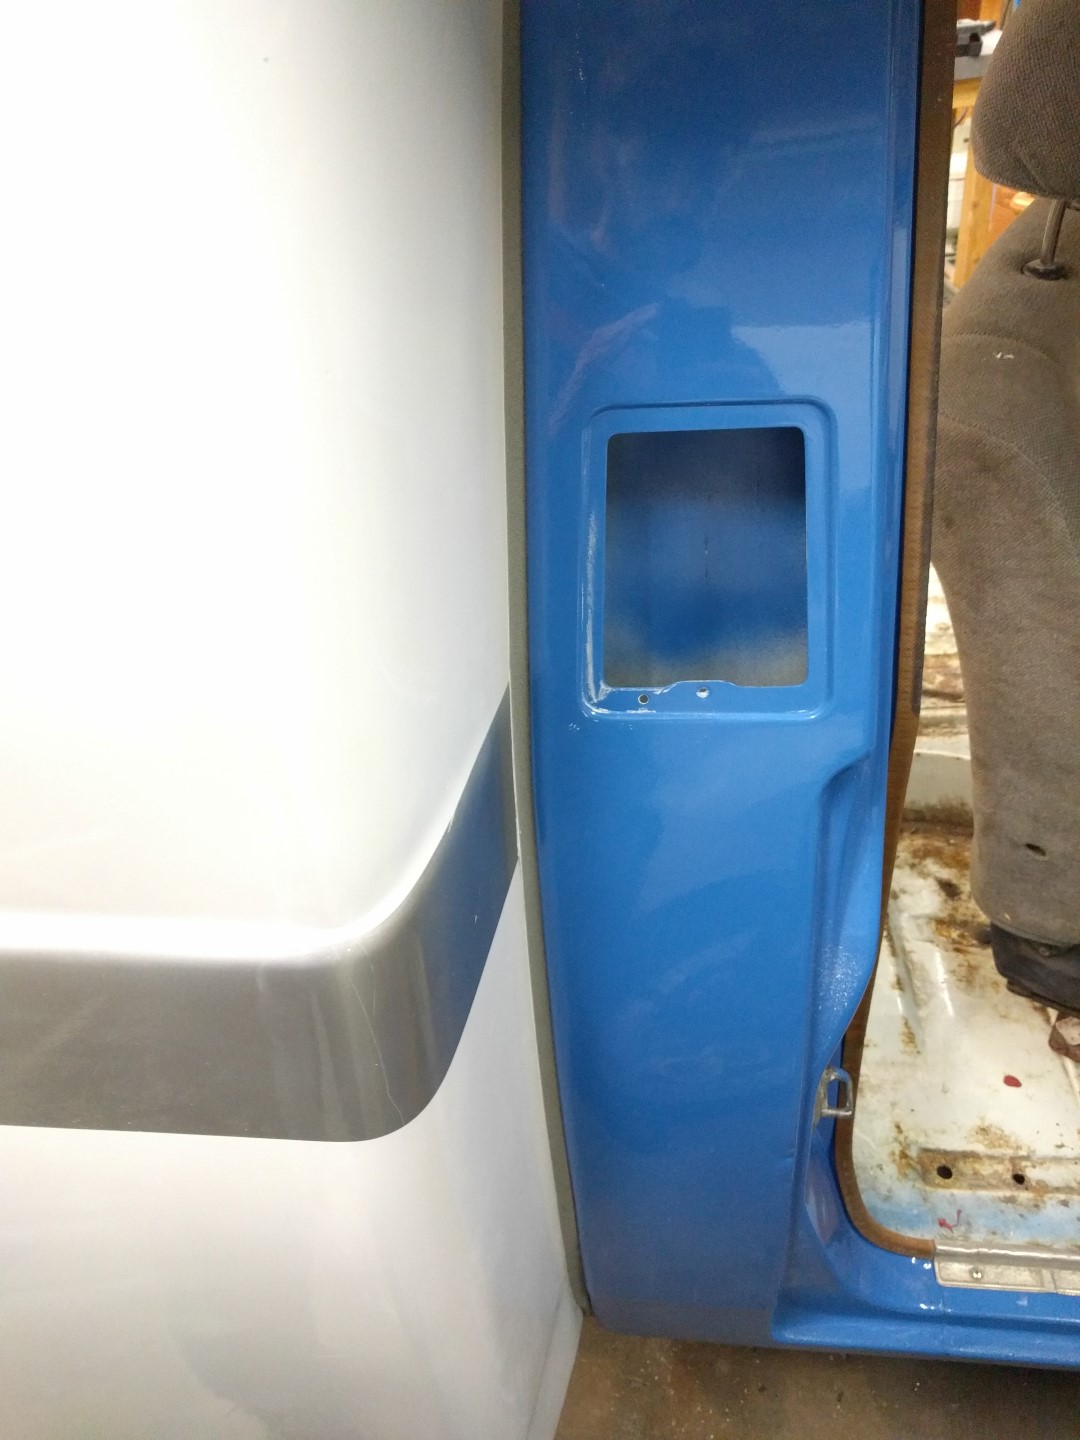
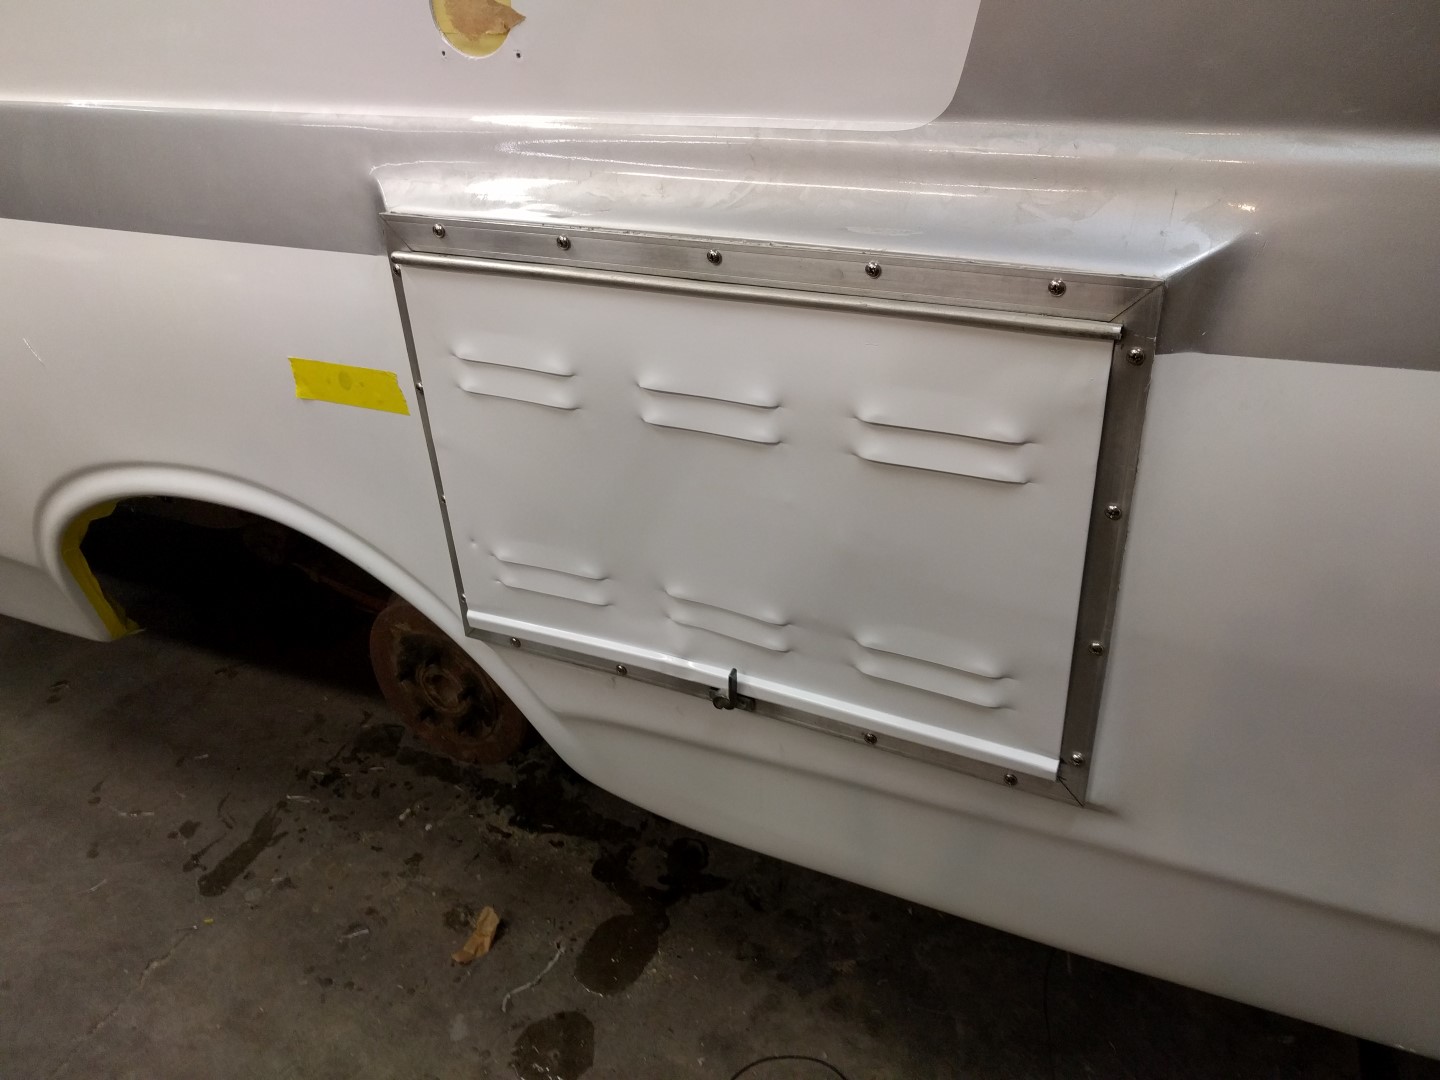
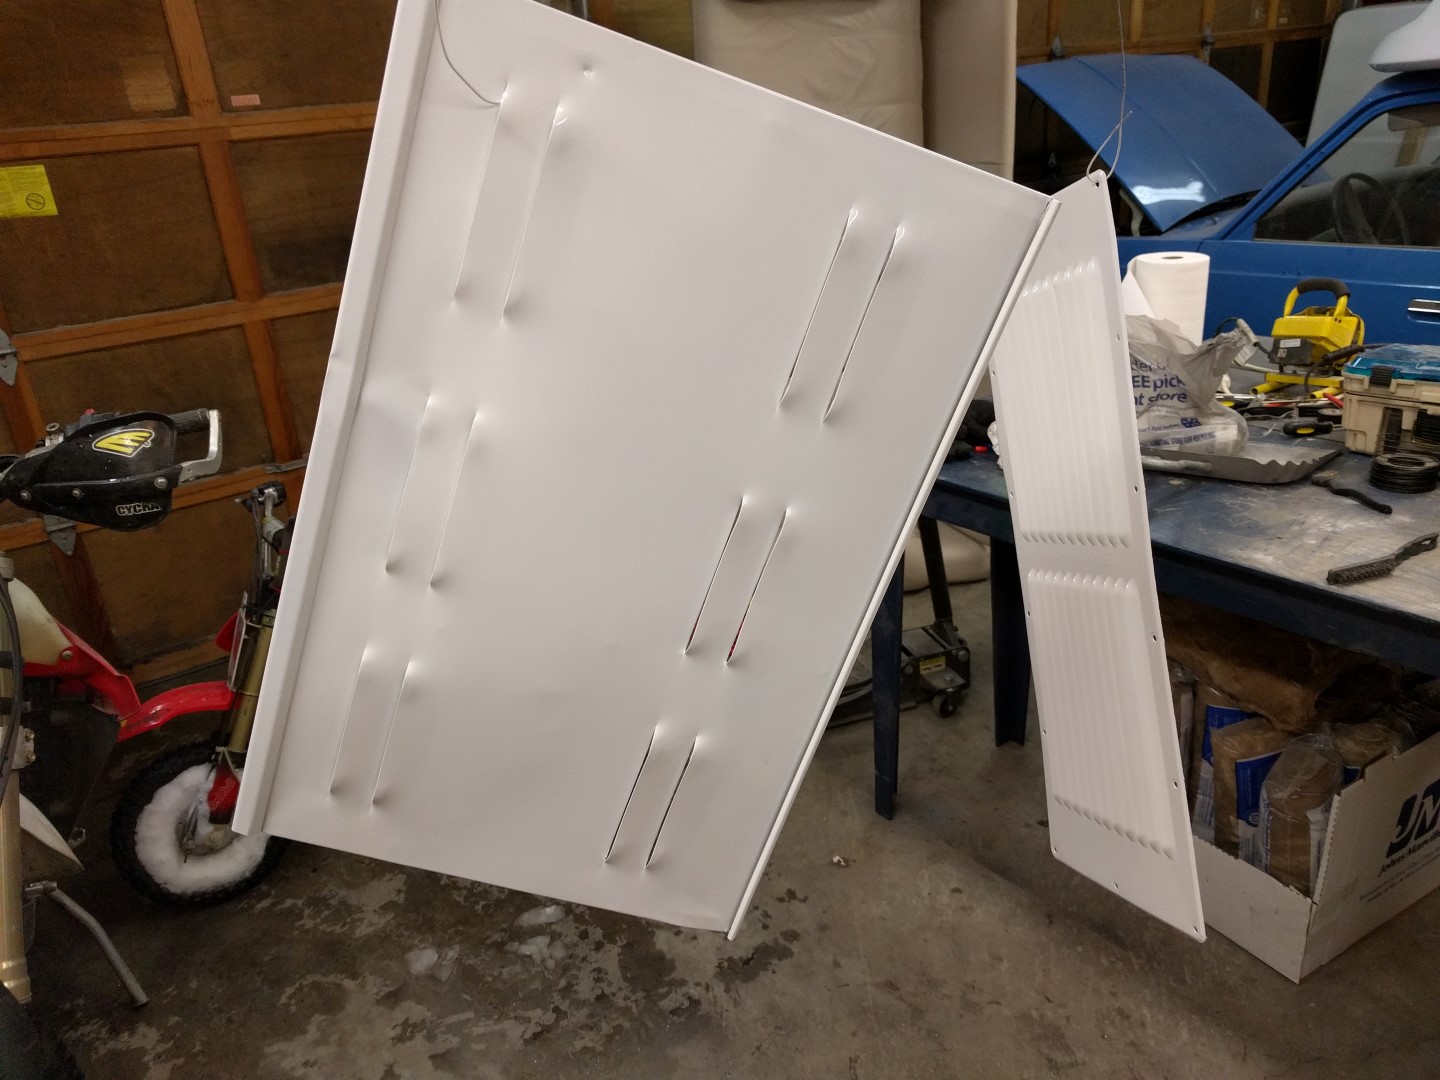
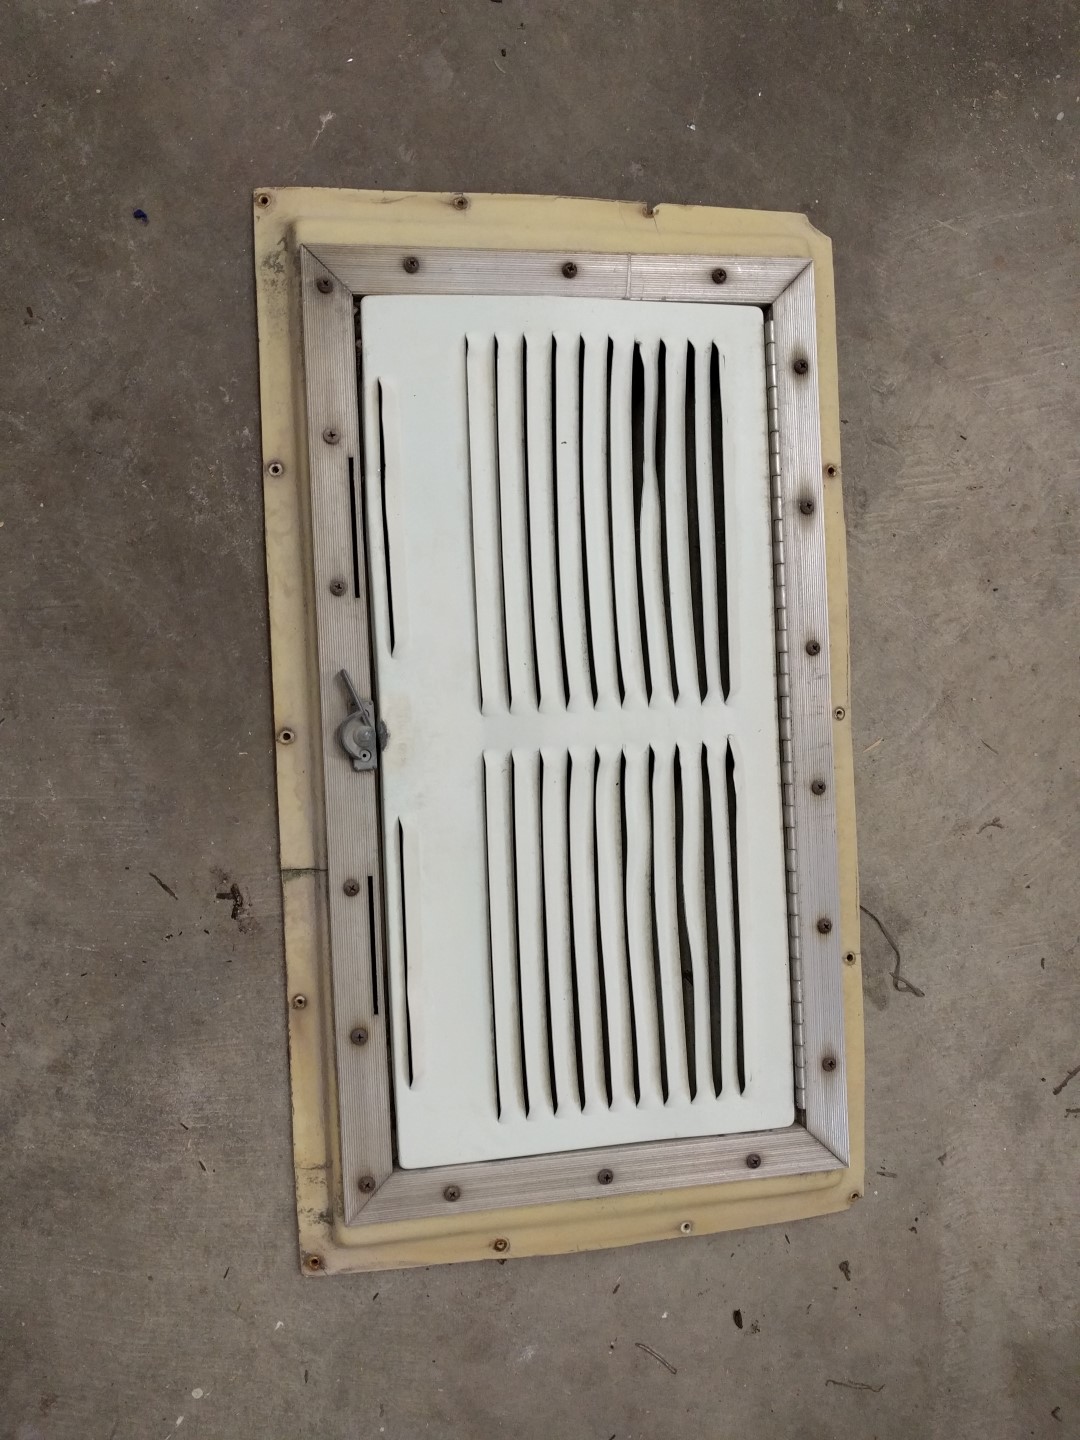
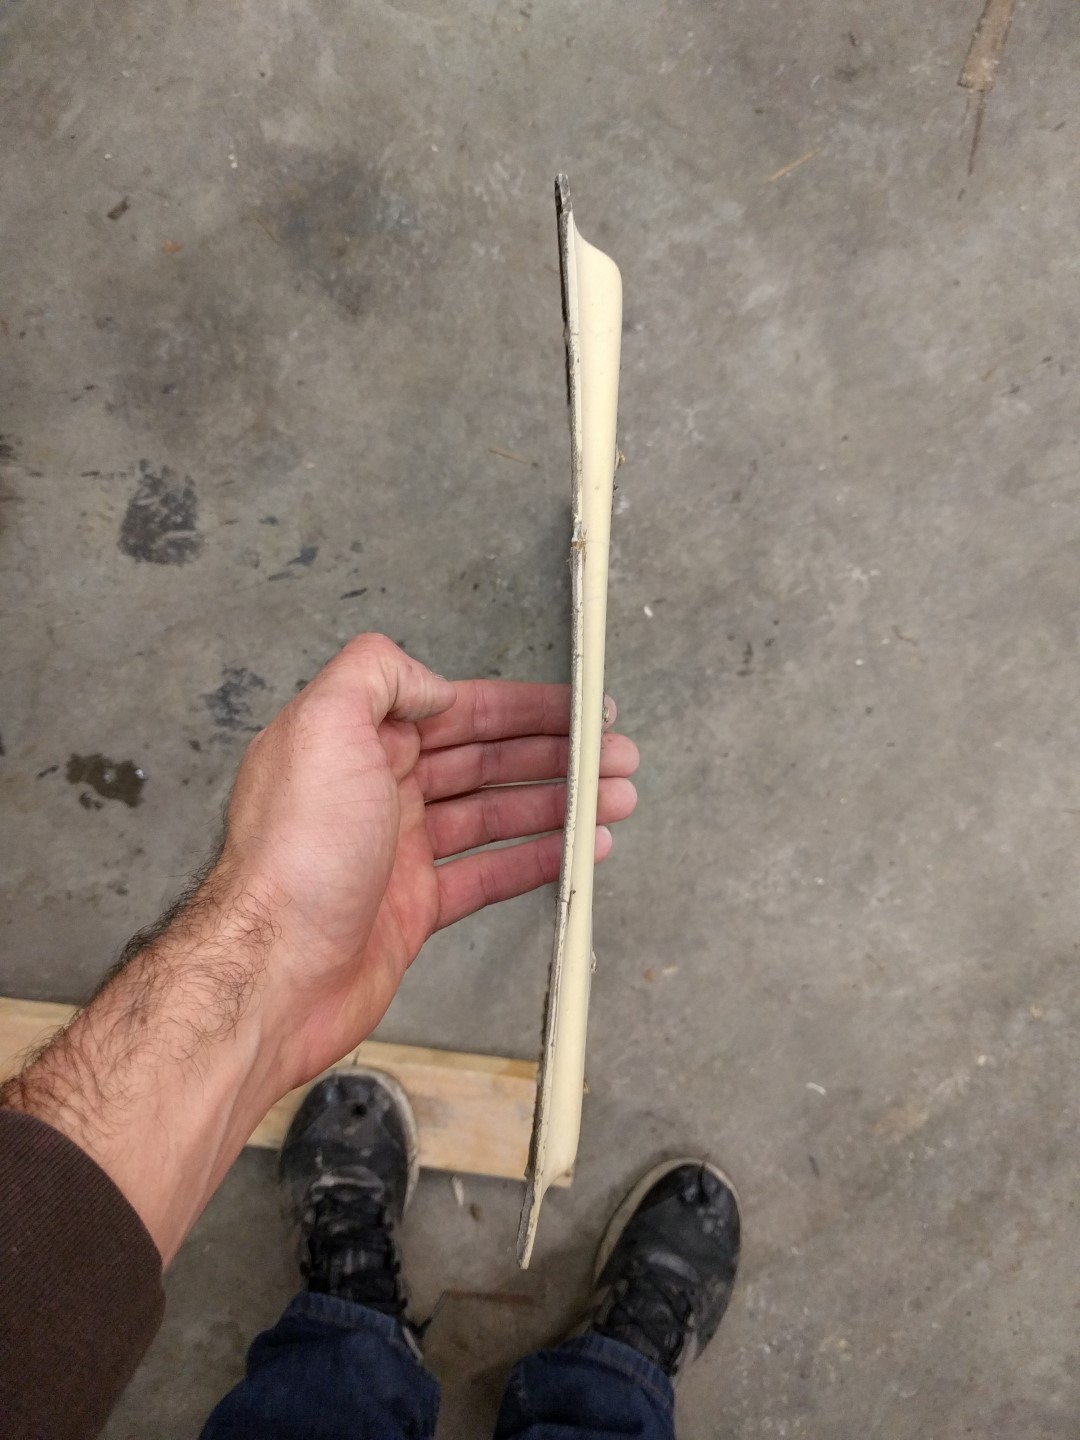
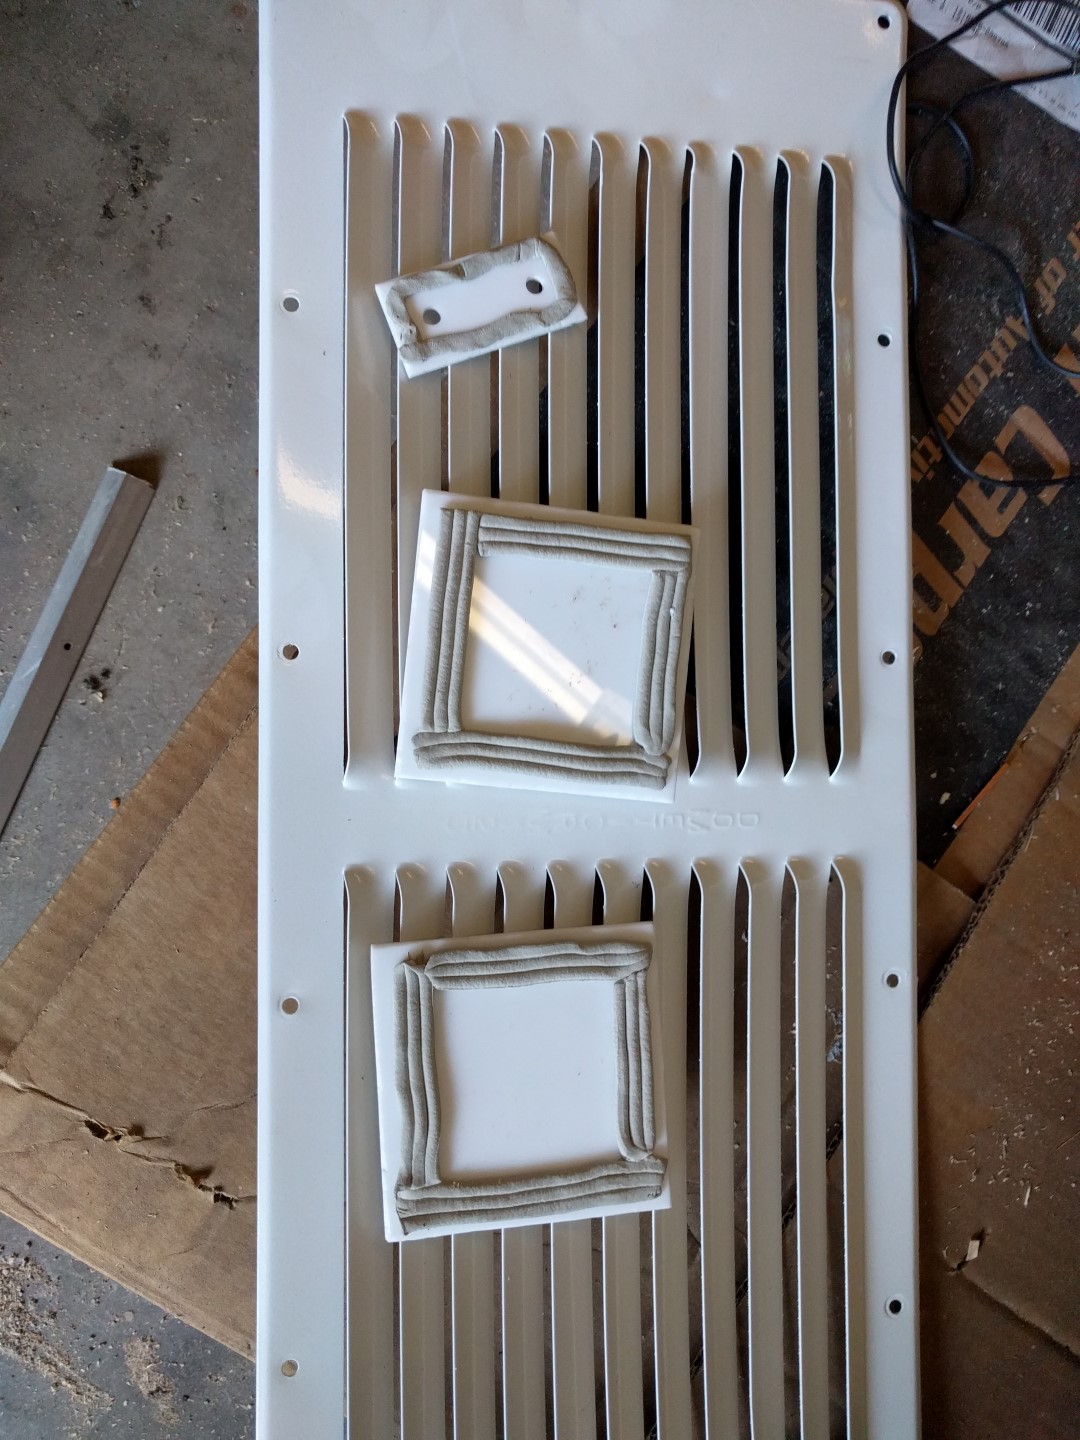
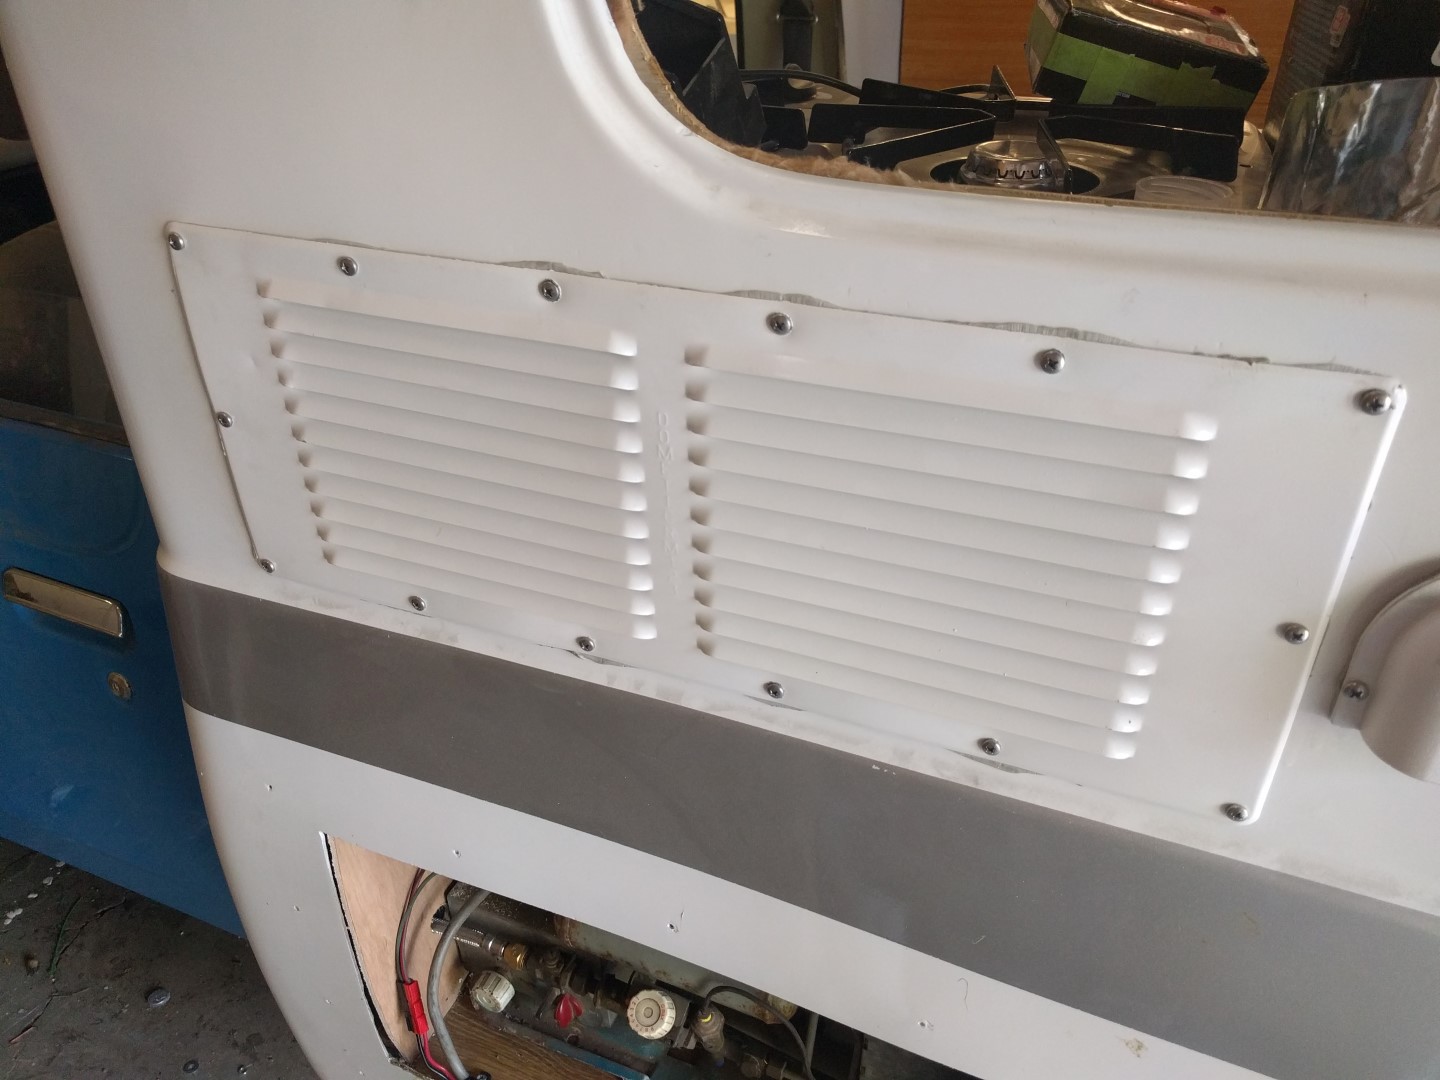
Exterior Panels
There are quite a few exterior panels on this rig; all in poor shape. They were all removed, cleaned up, painted white, and installed with butyl tape to seal from the elements. The water inlets were covered up because the water system uses a removable tank. The lower fridge vent was the panel in the worst condition. There is a plastic piece that conforms to the curvature of the fiberglass shell and was seemingly custom made by Chinook. I couldn’t find a replacement so I used the cracked one you see in the pictures, just sealing over the cracks with polyurethane sealant. There are at least two locations for the fridge vent depending on the original interior layout. The version with the table that converts into a bed has the fridge on the passenger side and the fiberglass shell is flat in that area that prevents the use of the curved plastic piece.


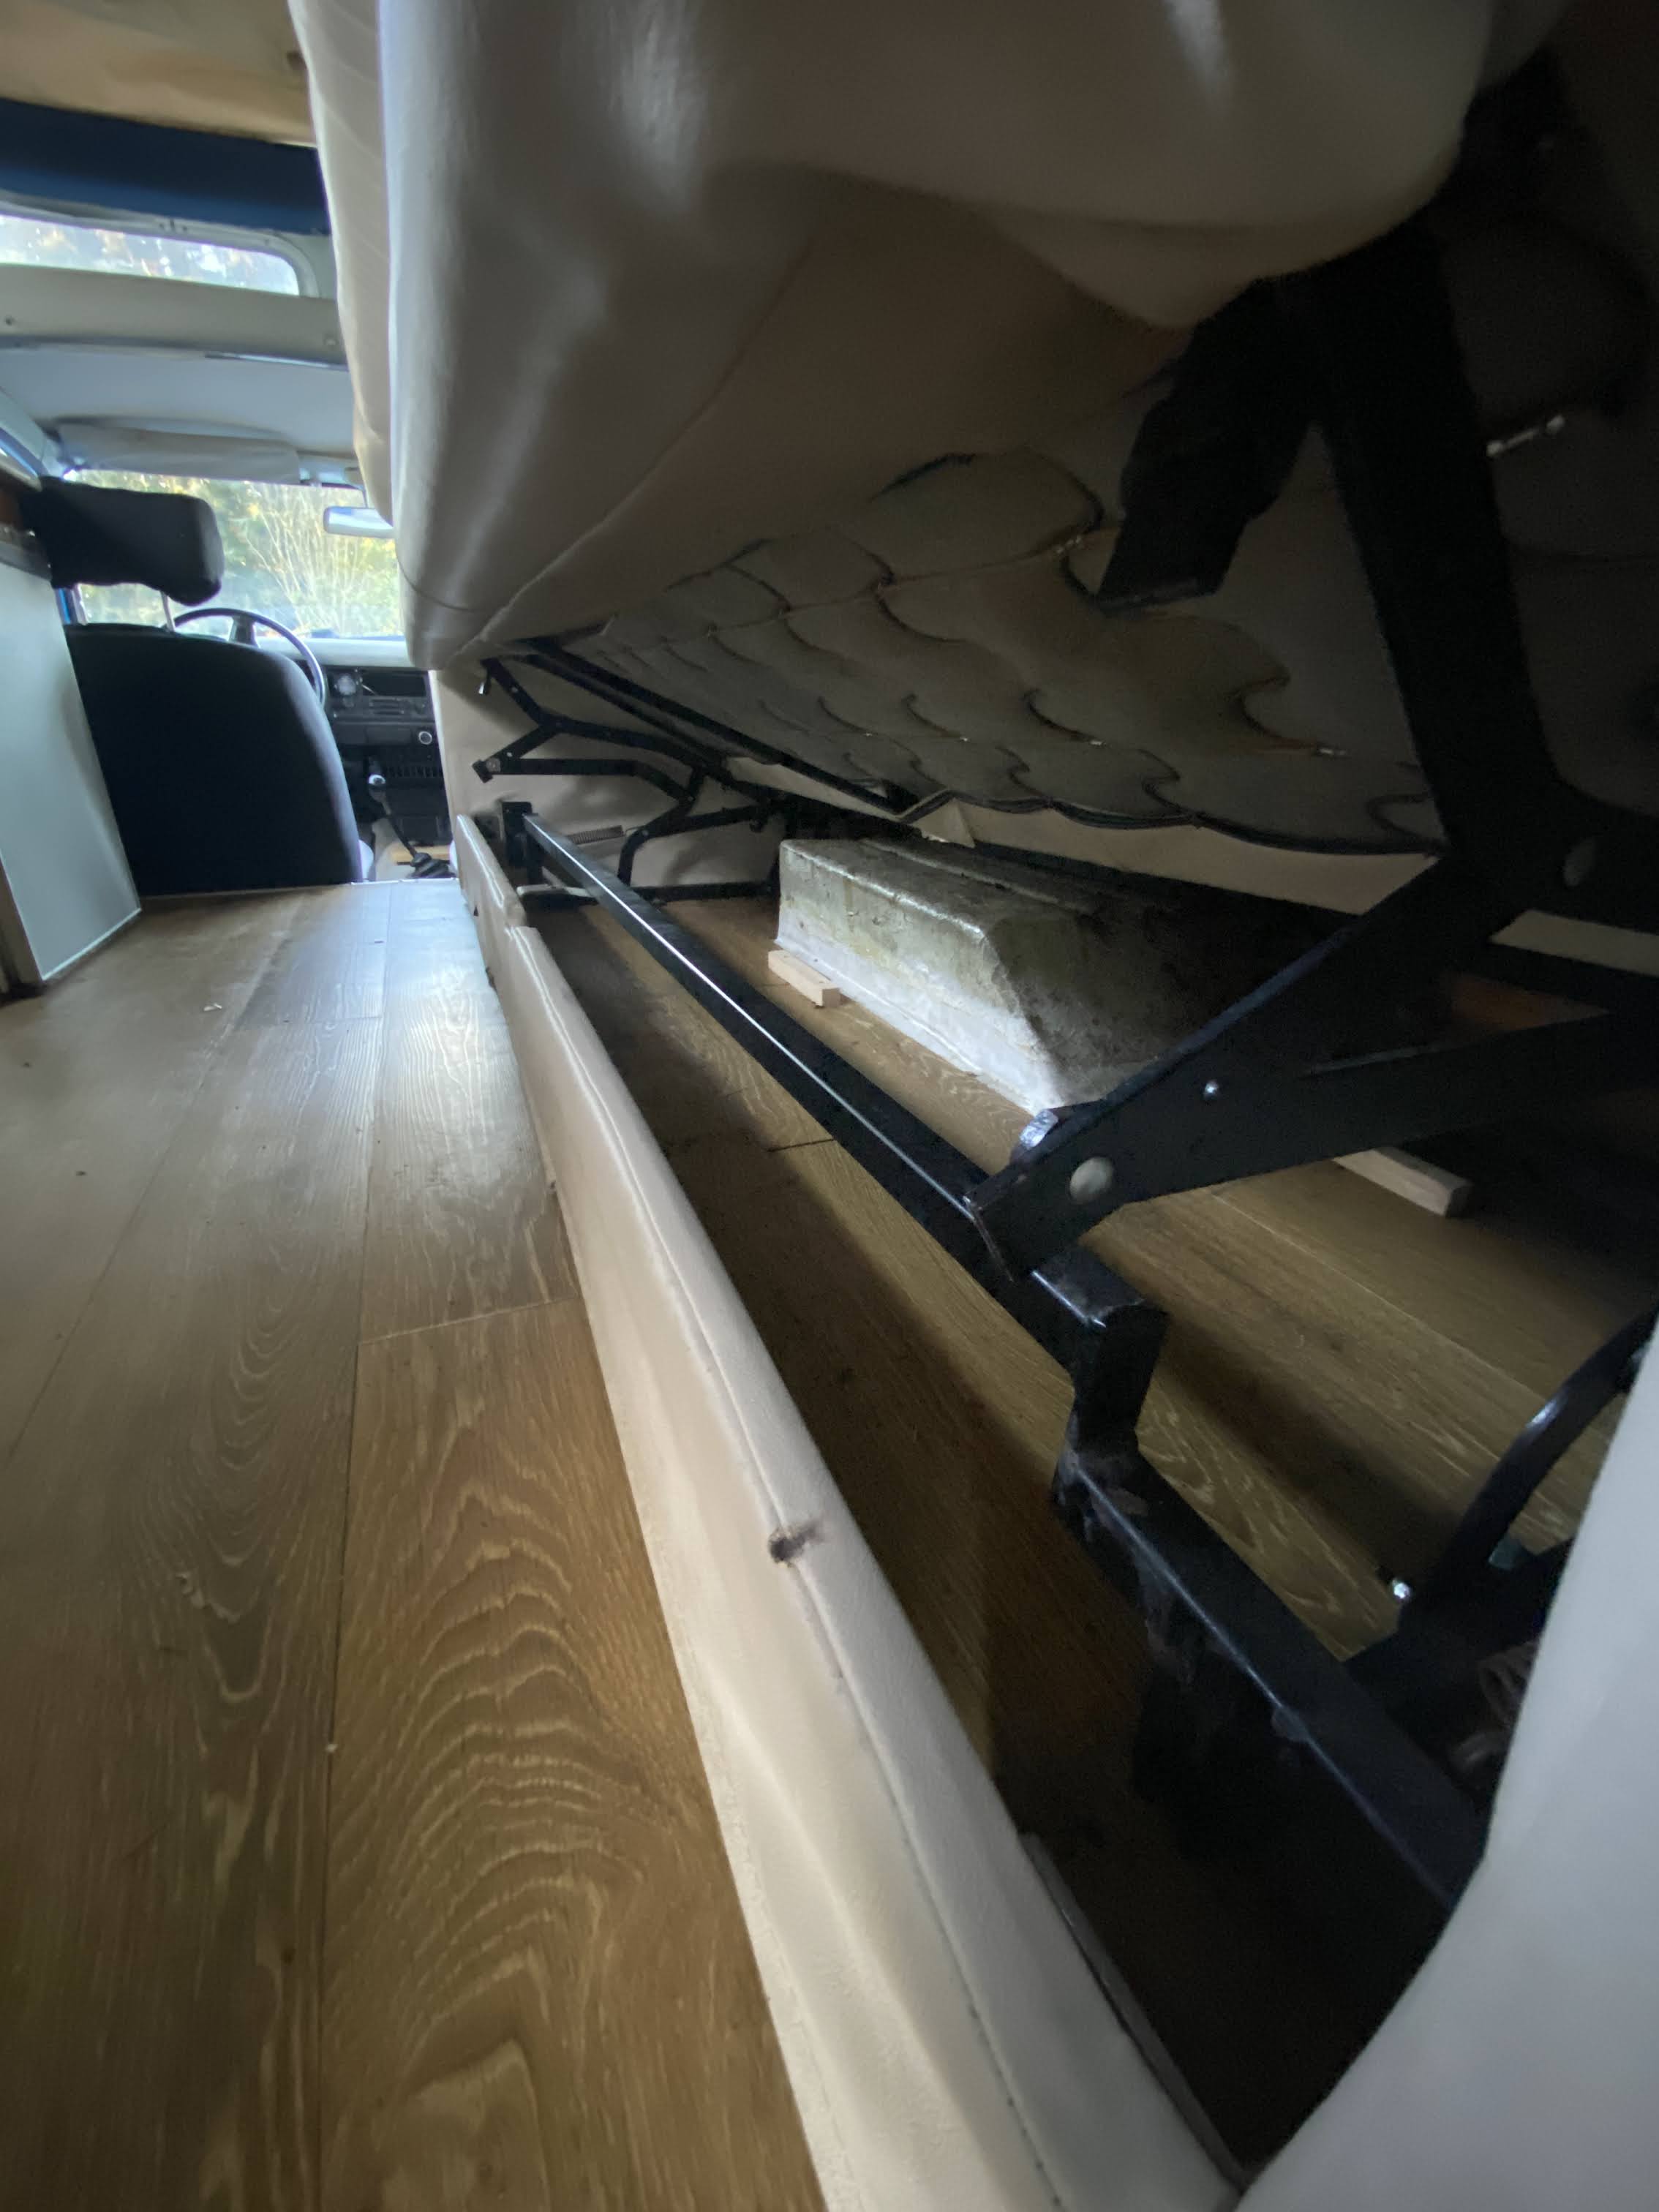
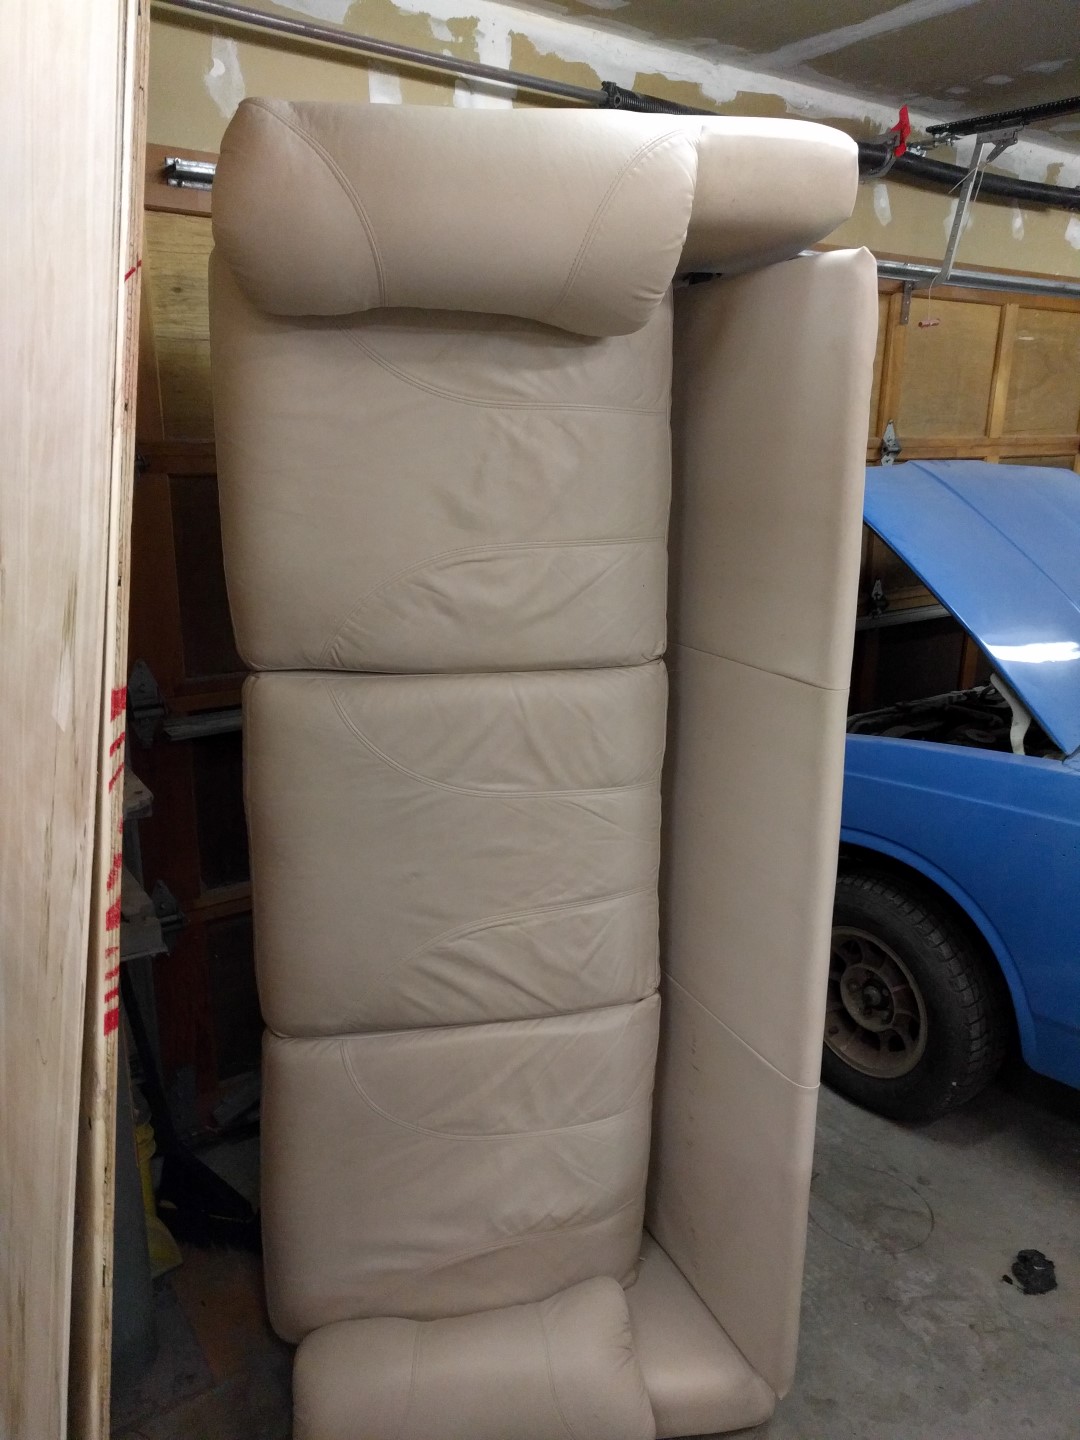
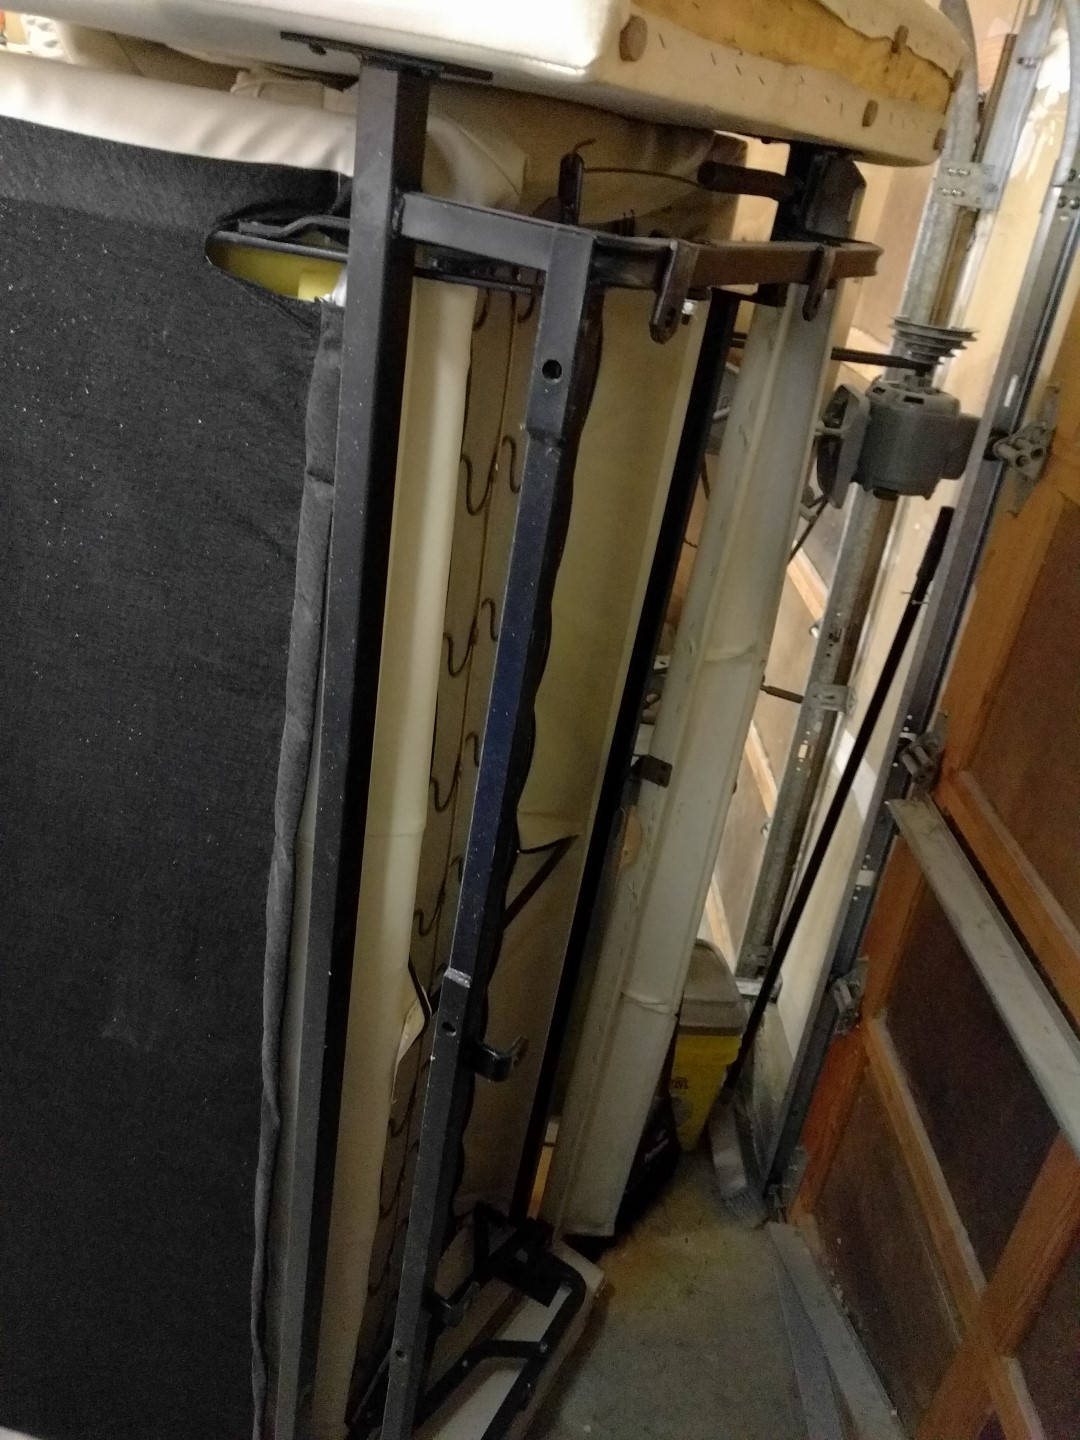
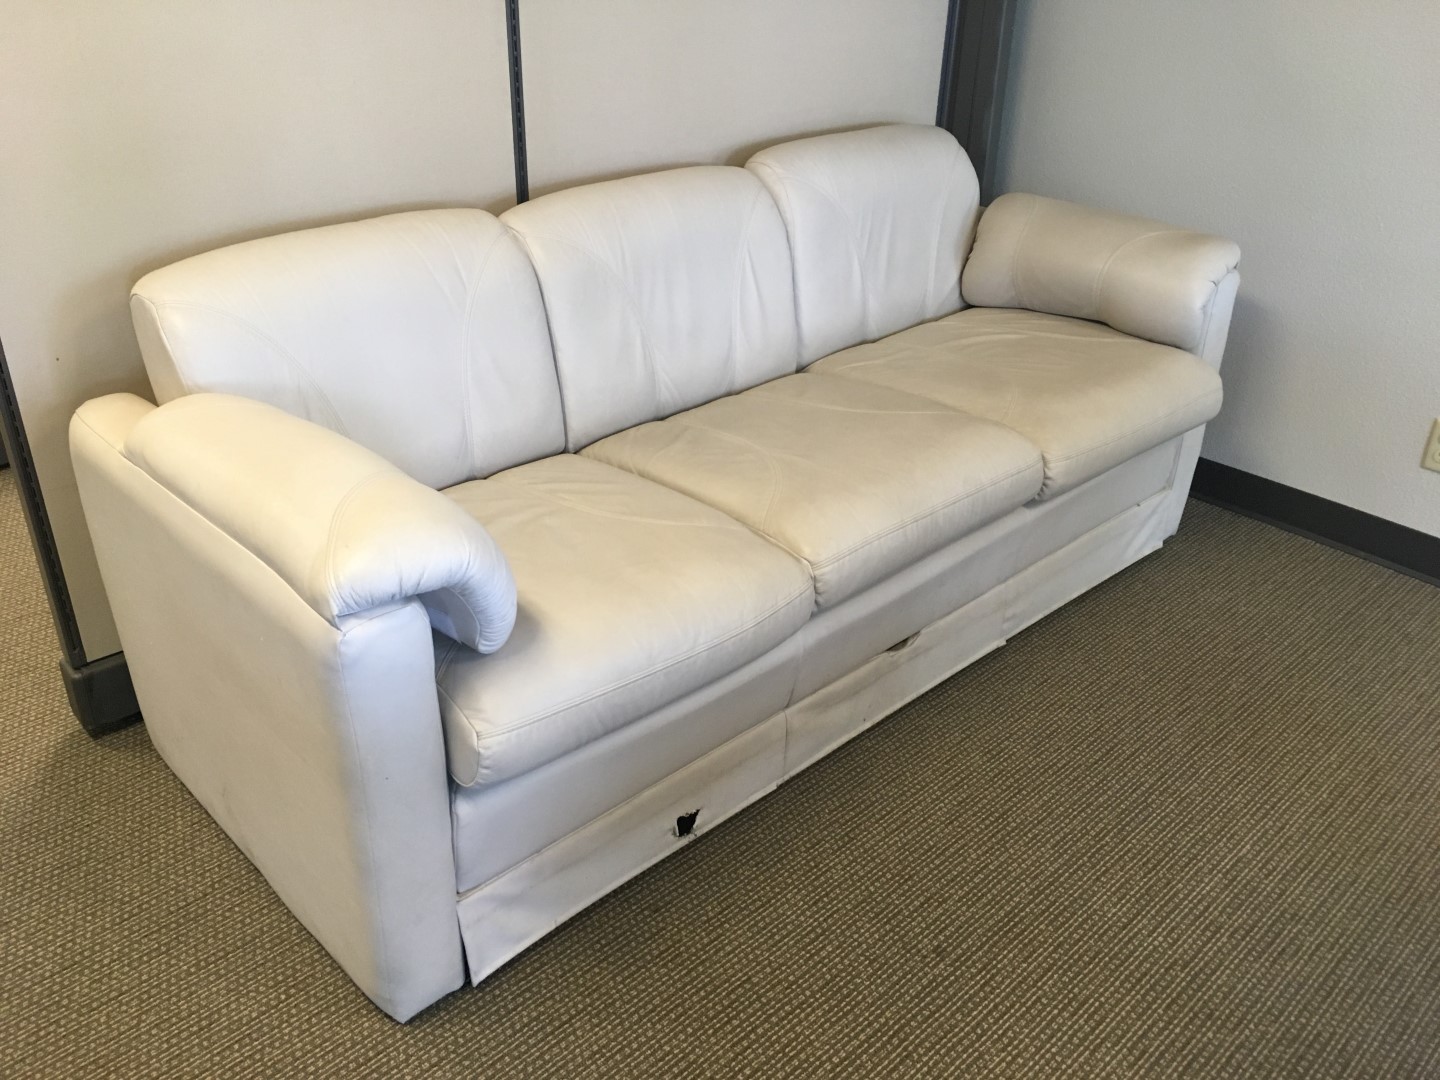
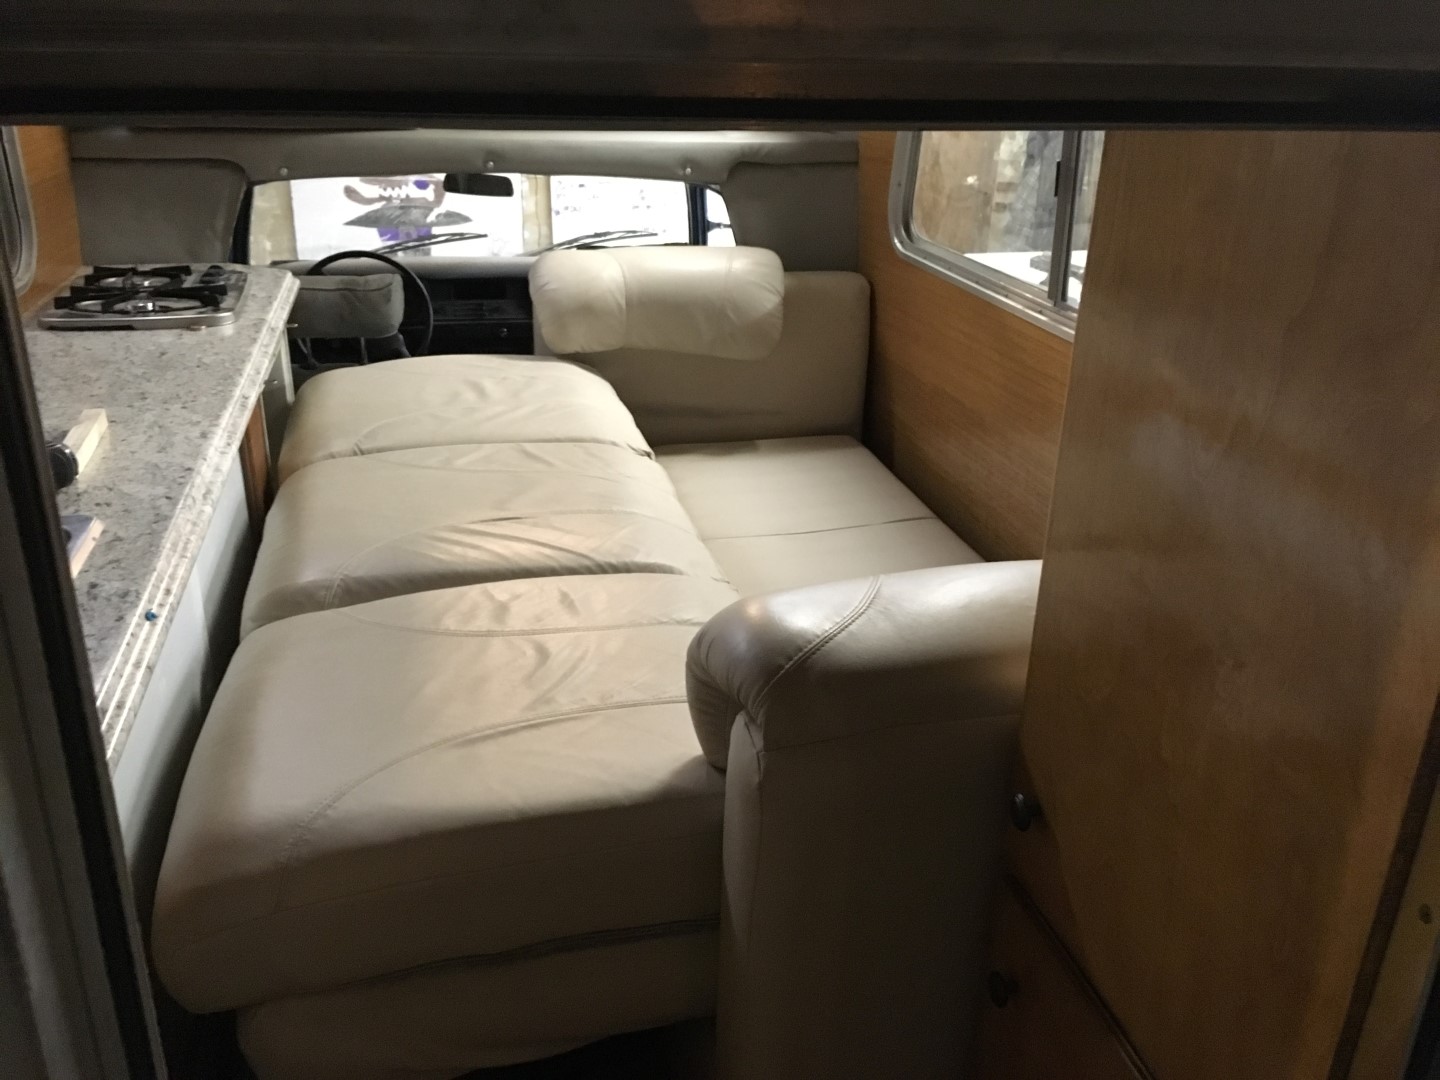
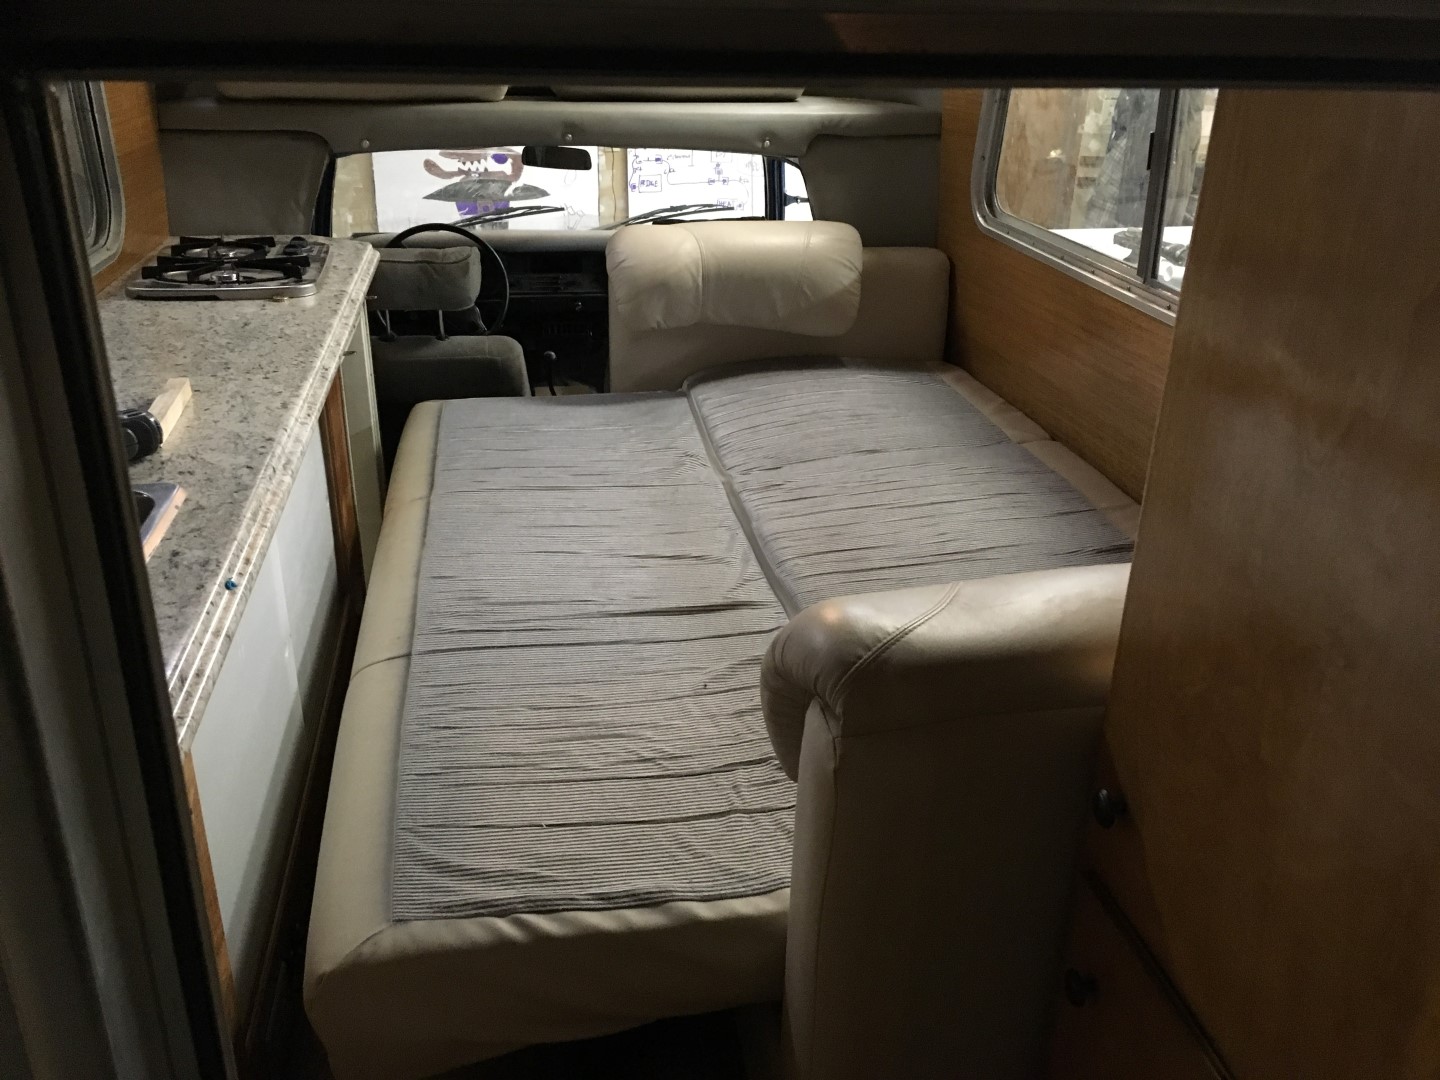
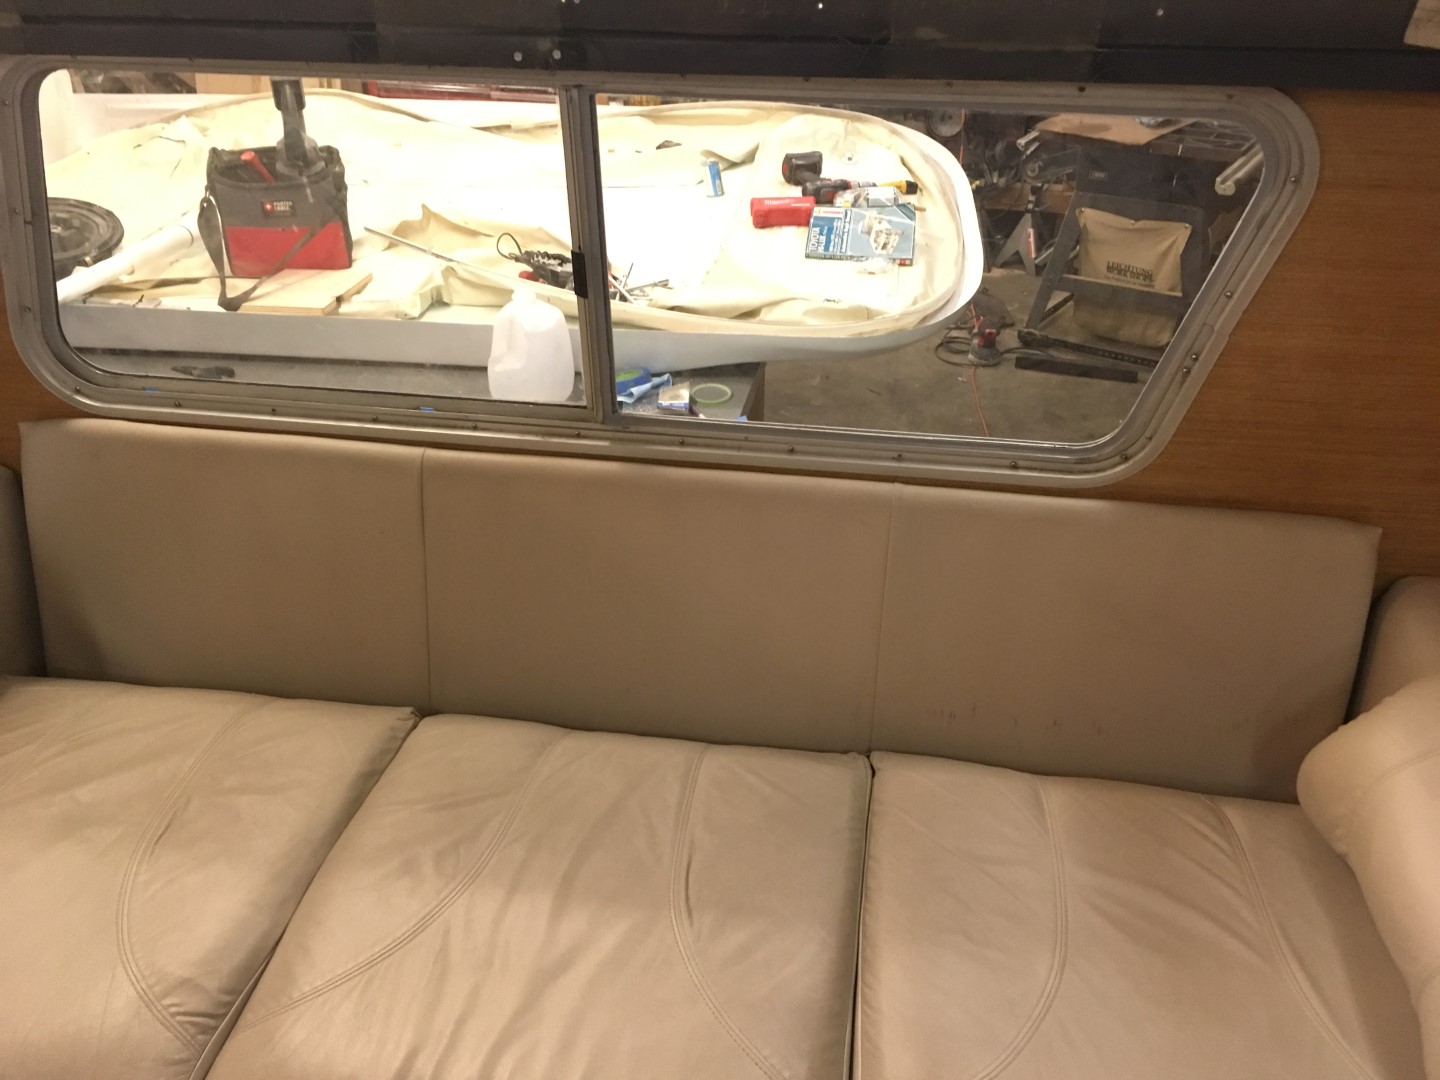
Couch Bed
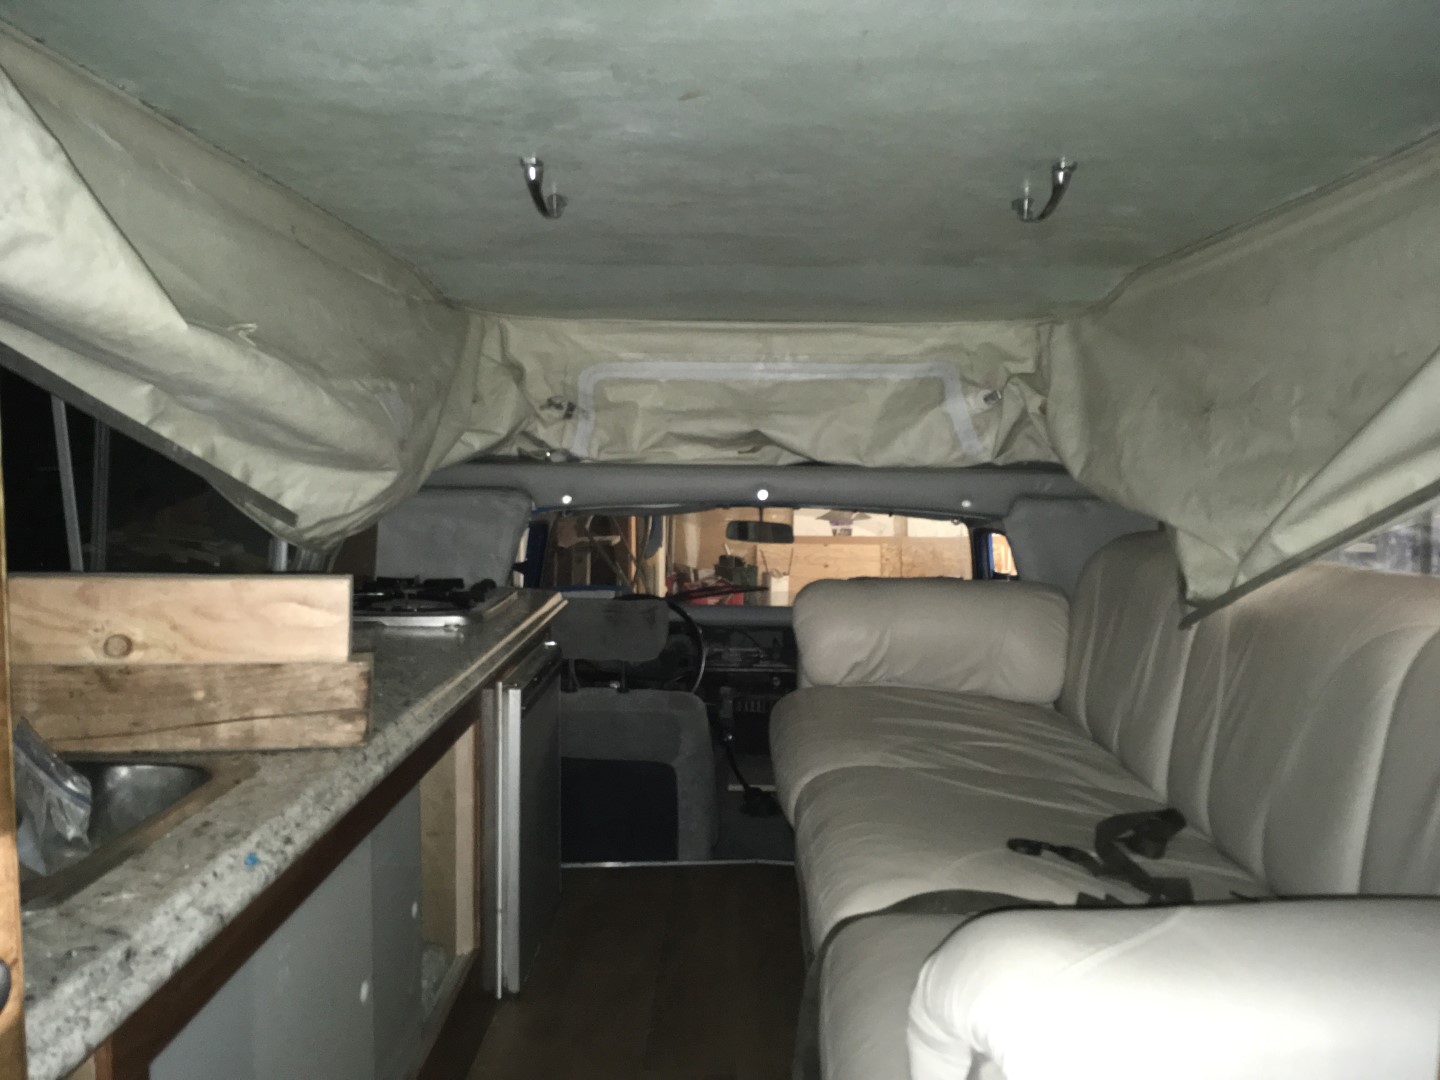
The couch I chose is from a fancy-pants Alfa See Ya motorhome that I found perusing CraigsList. The price tag was $300 but it is in great condition and was a perfect physical fit for my new interior layout configuration. The couch is a jack-knife couch; similar to a futon but has the ability to fold out while pushed flush against a wall.
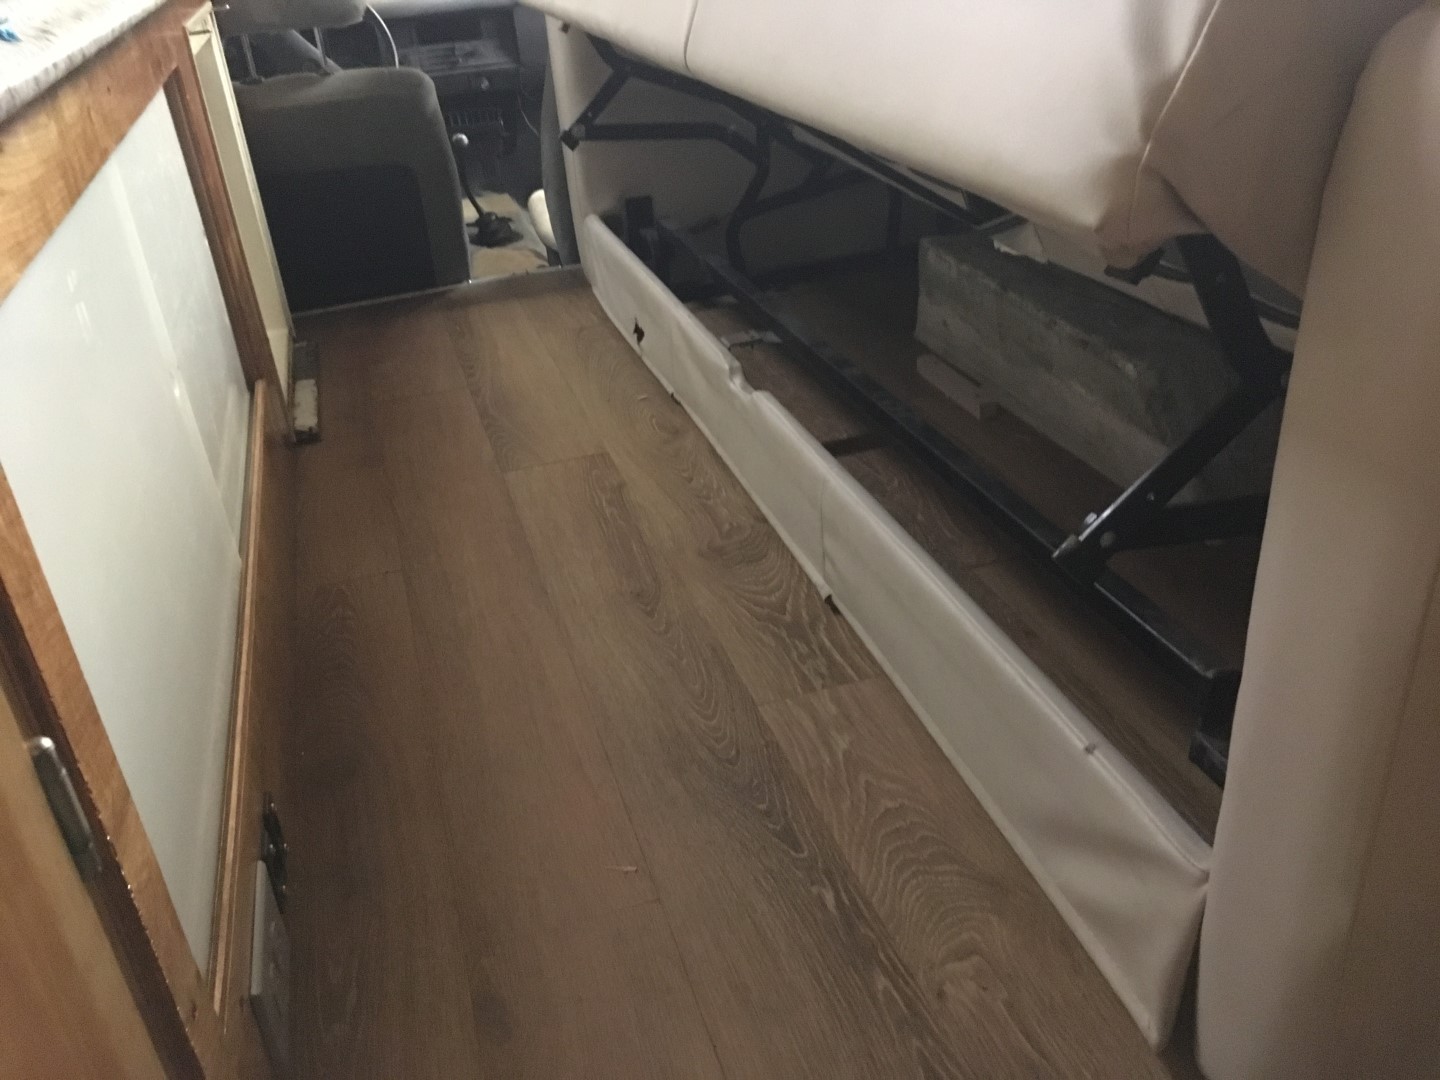
To convert it into a bed:
- Rear cushions need to be removed and stored elsewhere
- Arm cushions need to be lifted up
- Grab the bottom of the couch and pull up and it will lay flat
- The bottom cushions are on a fabric hinge that folds towards the wall creating a non-leather bed
When folded out there is about 1” of room between the counter top and the bed. Perfect fit!
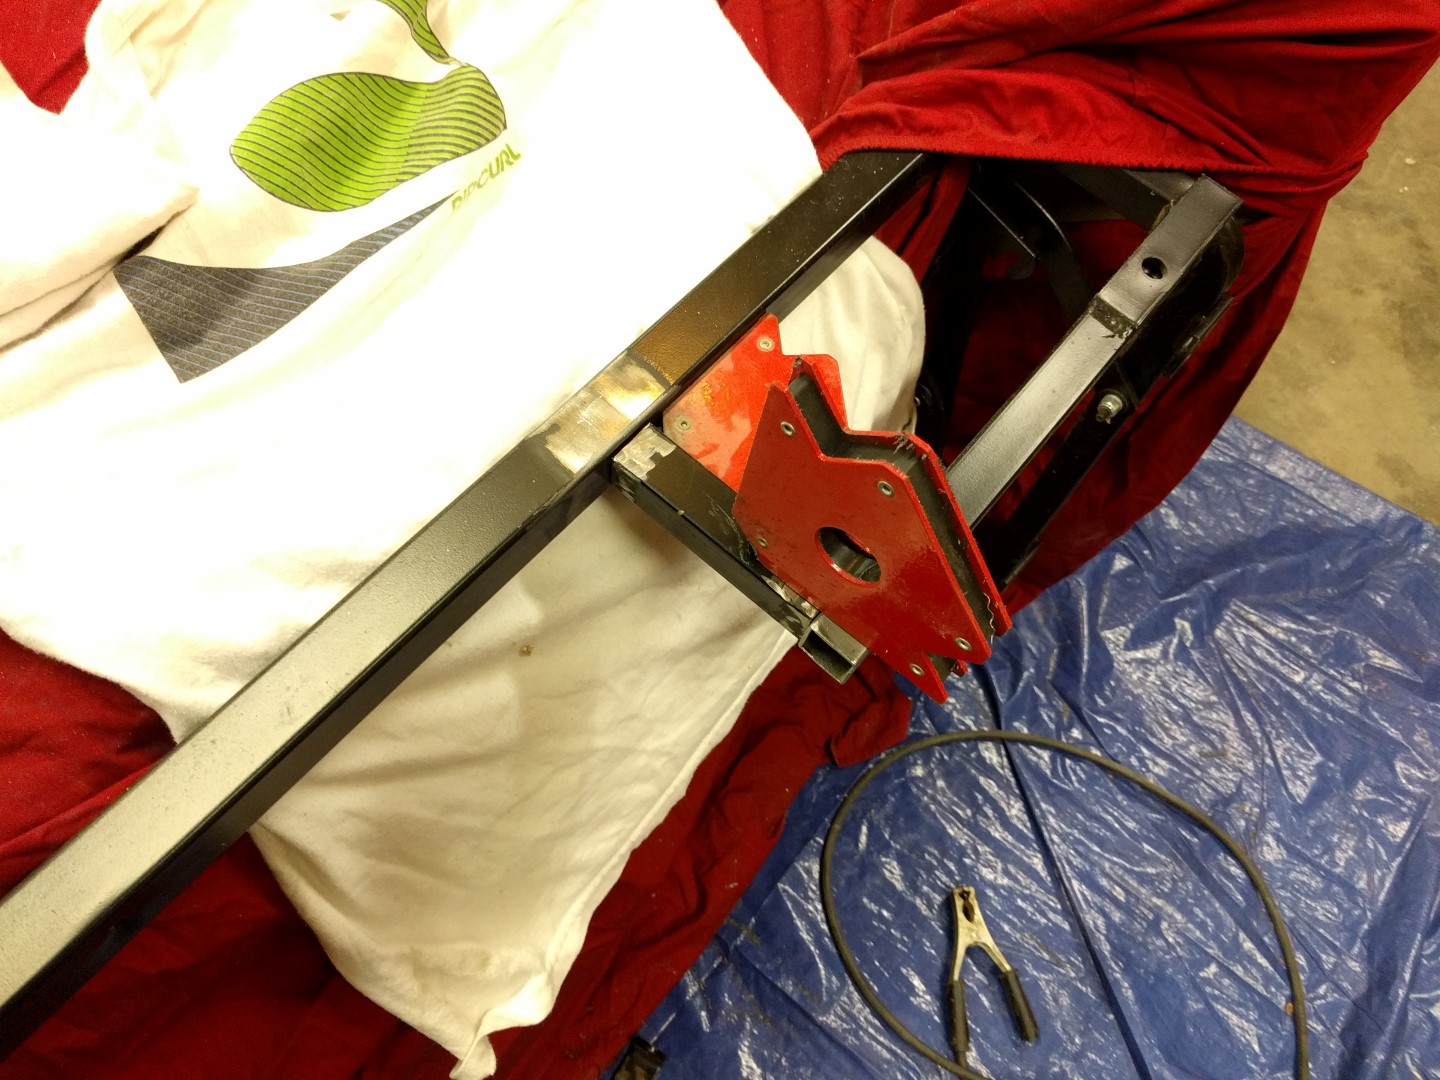
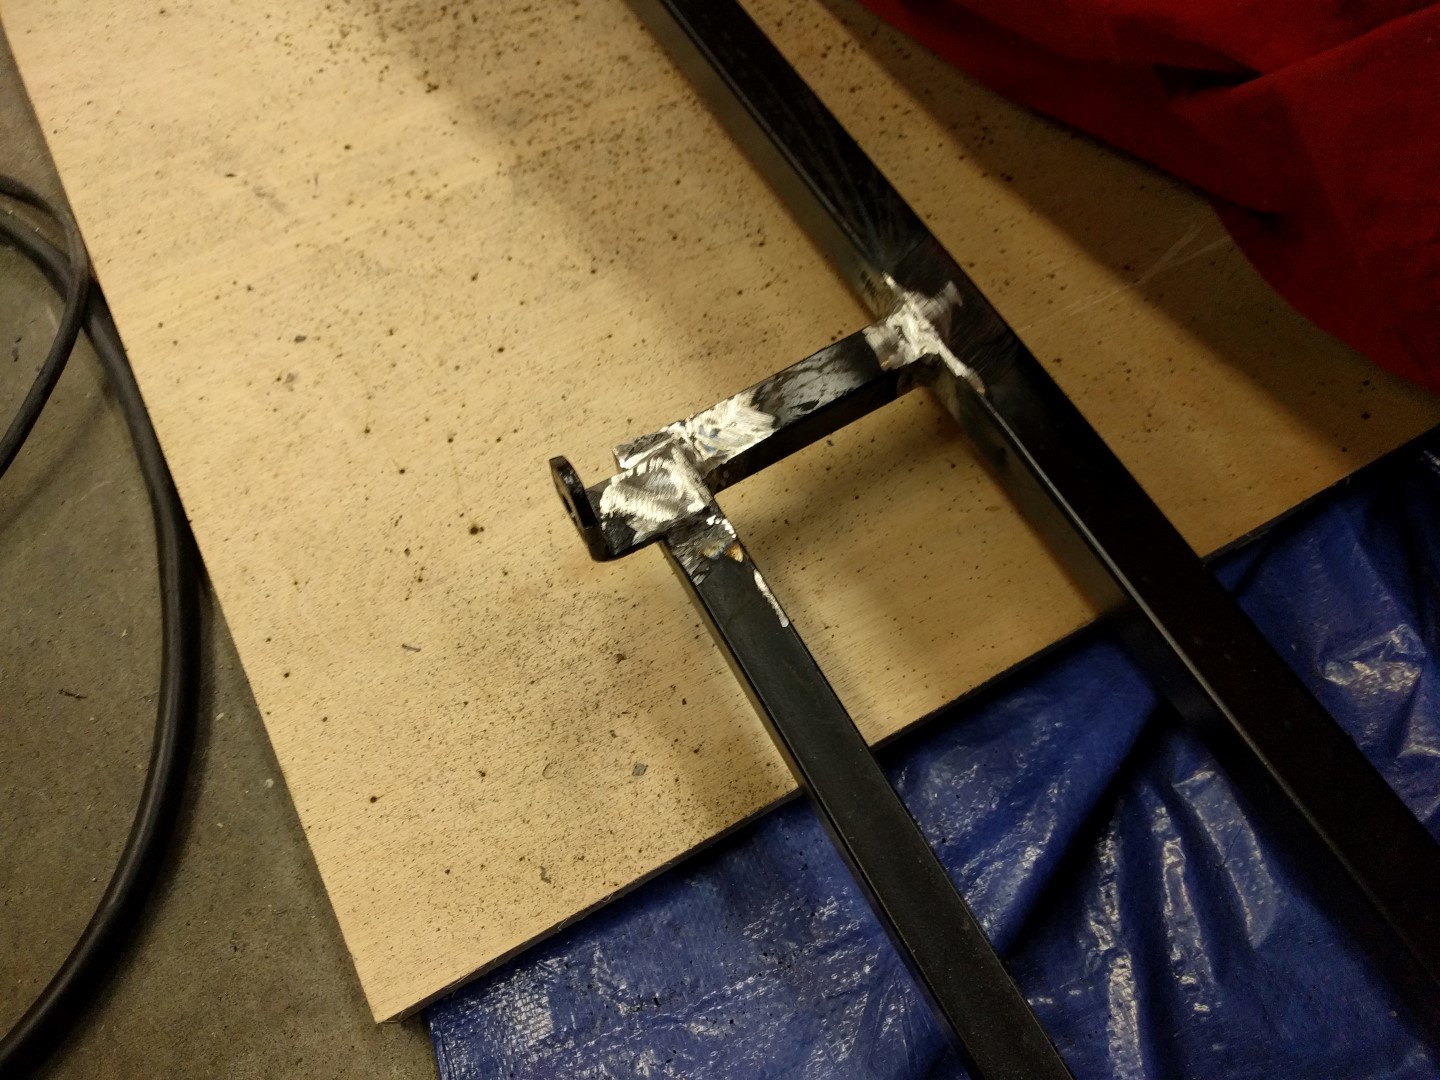
I did have to modify the frame of the couch a bit to fit up over the wheel well. A little bit of hacking, grinding, and welding accomplished that. An accidental fire burned a hole in the lower kick panel cover on the couch. Oops!!
The couch is one big piece so it was put in through the roof with the help of some strong friends. Then bolted down in the for corners to the floor.


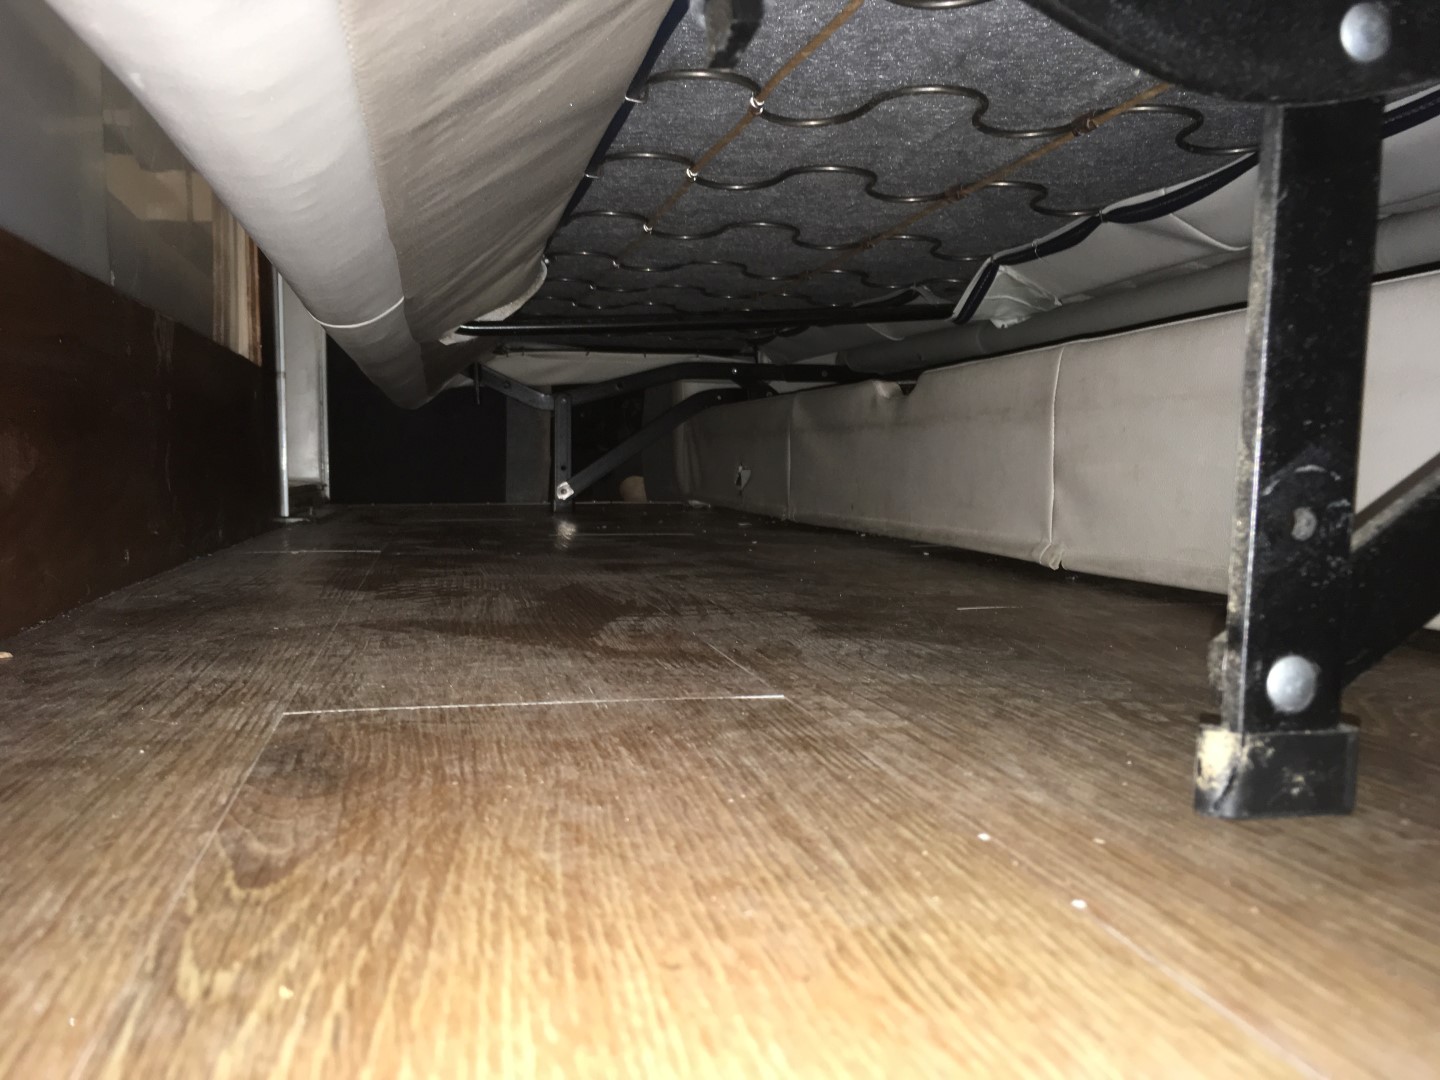
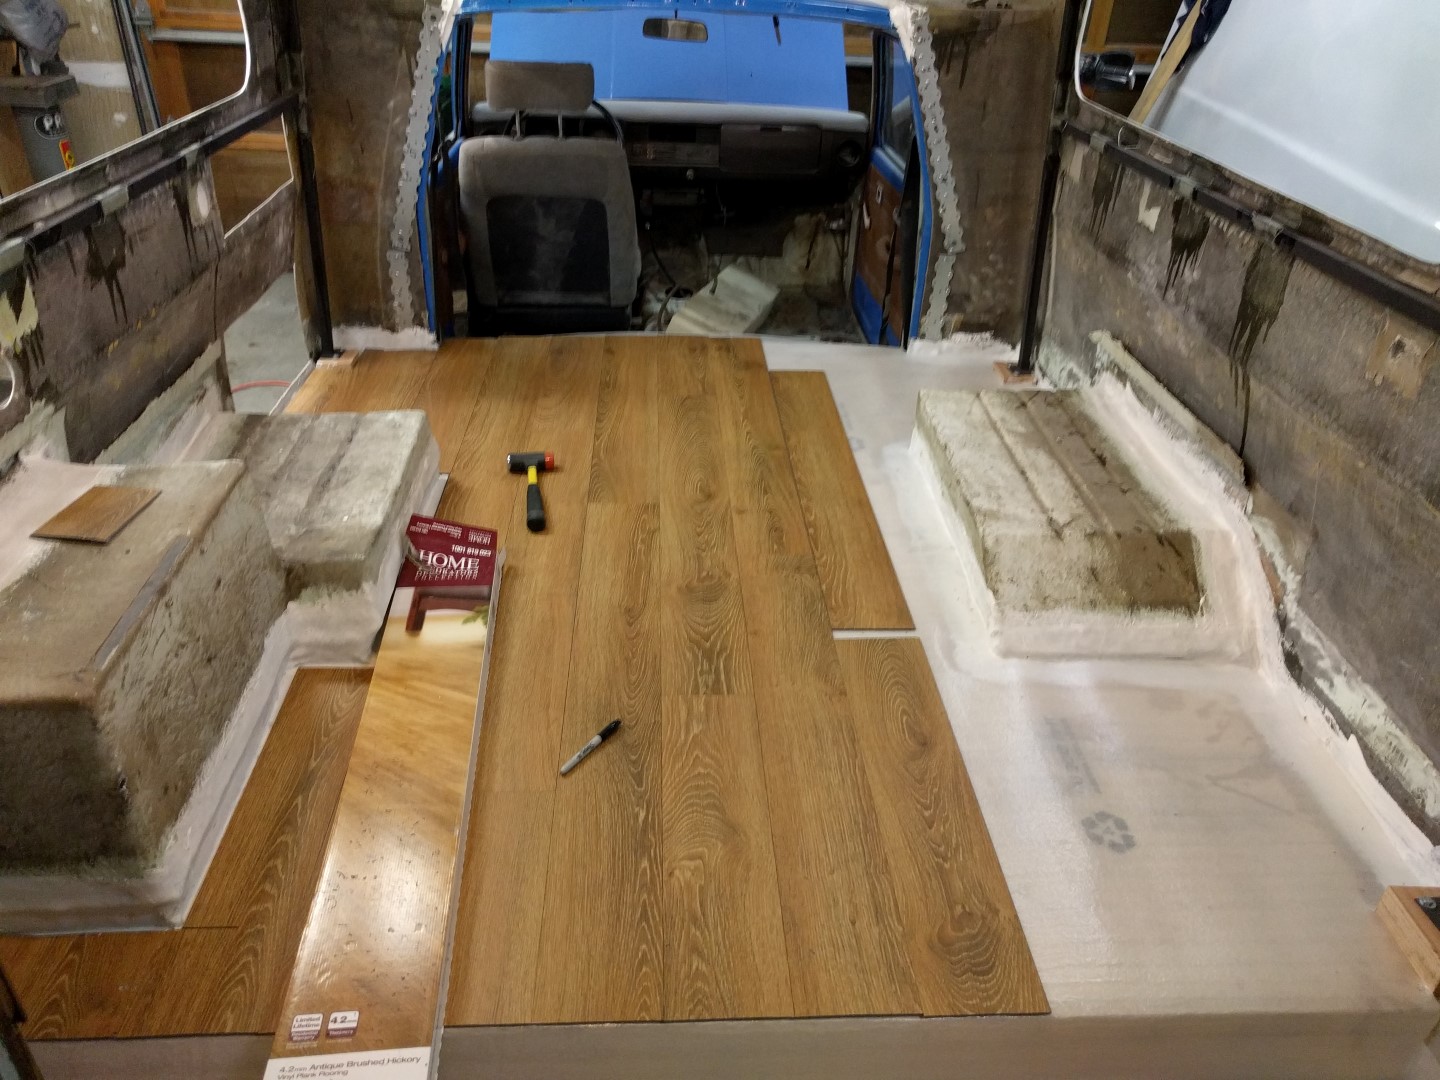
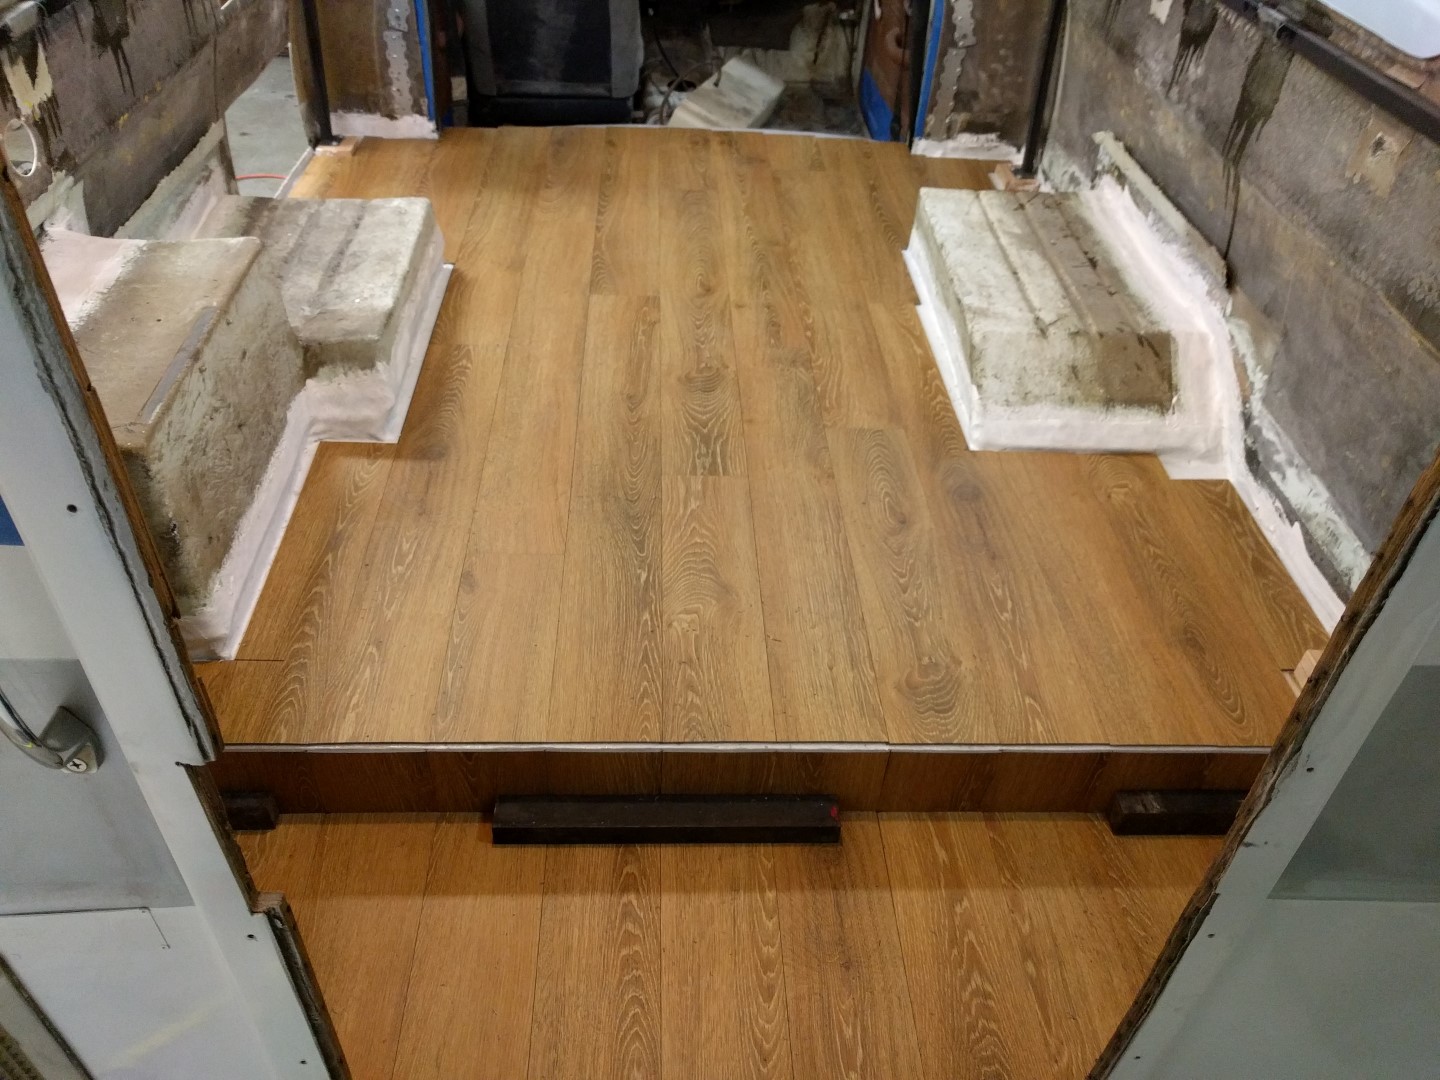
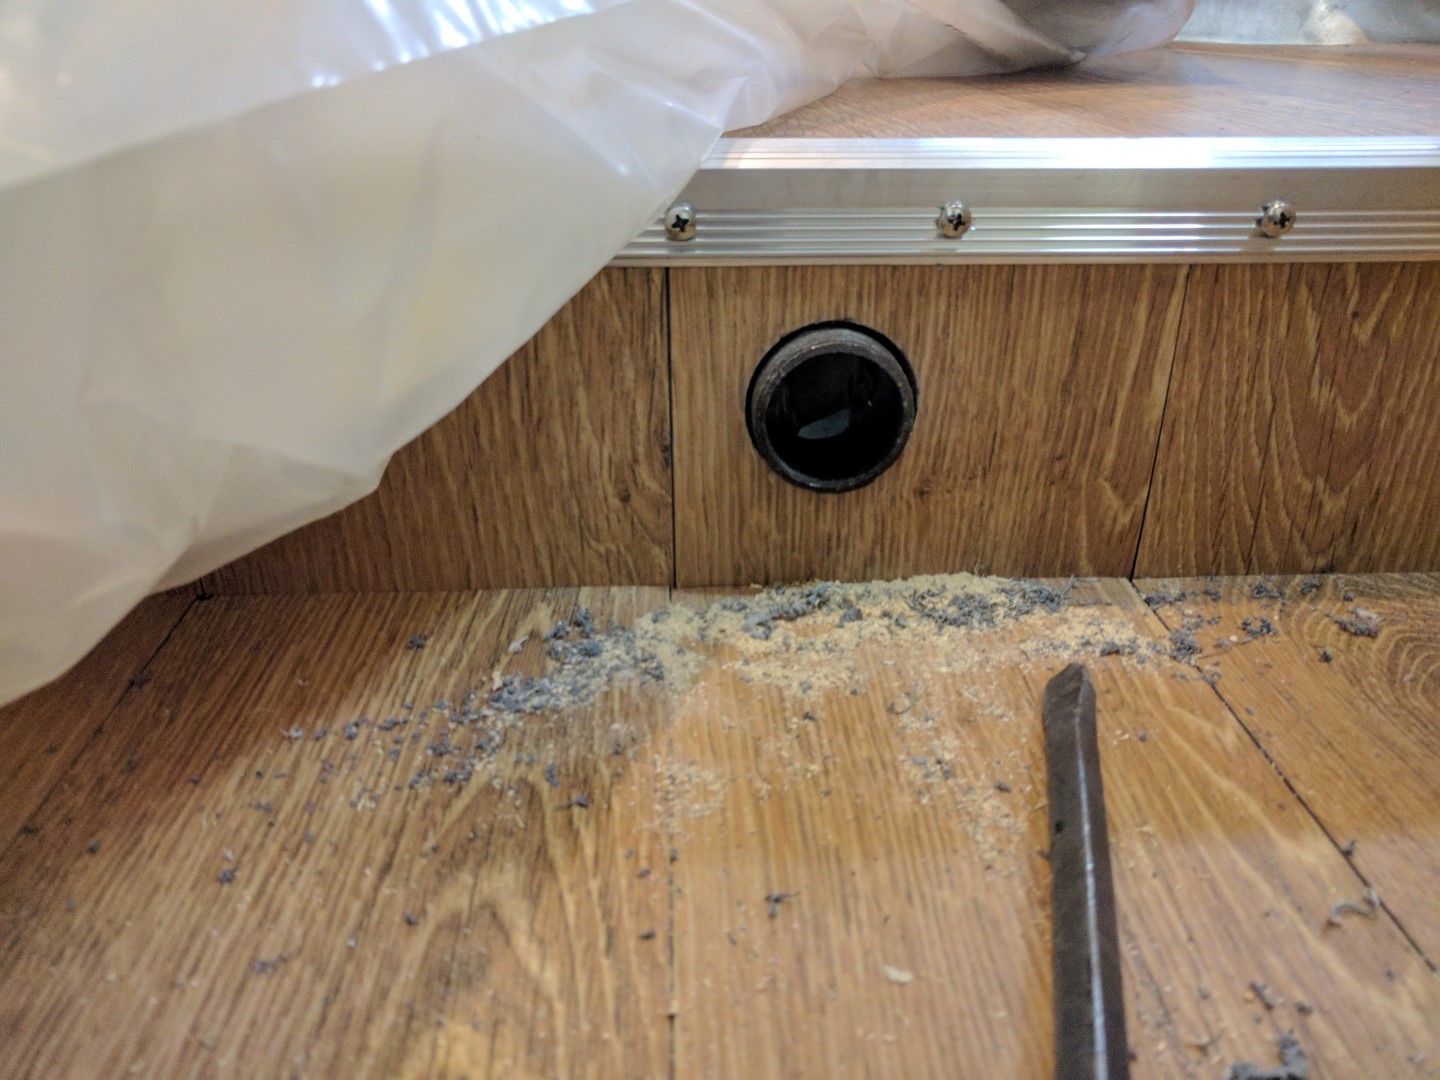
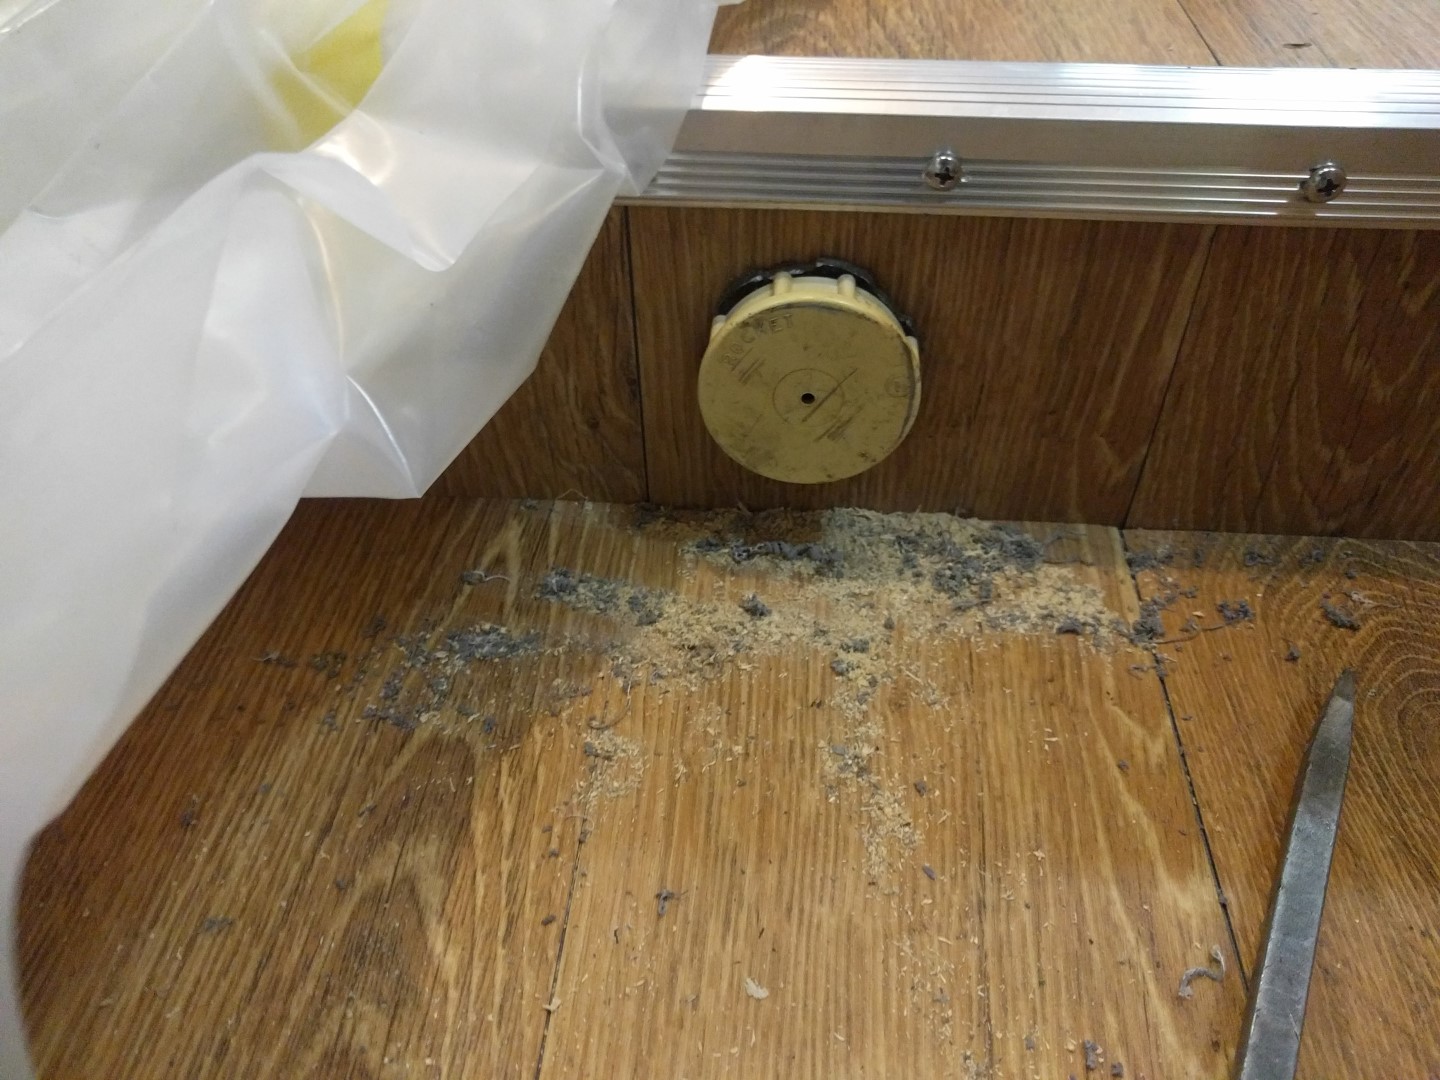
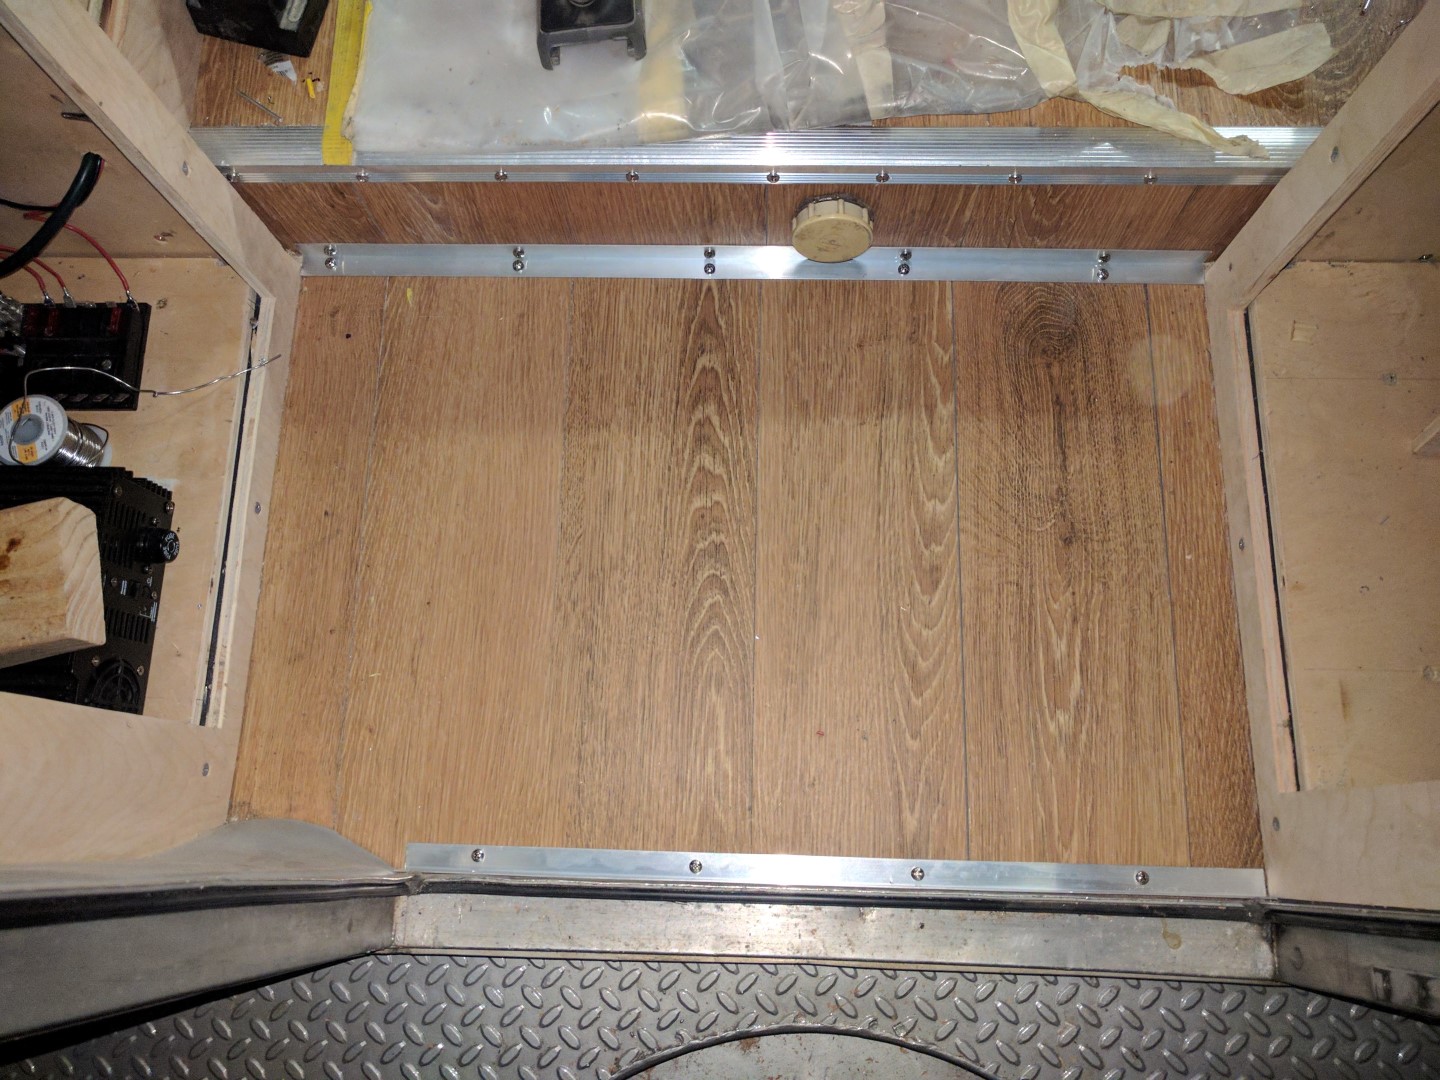
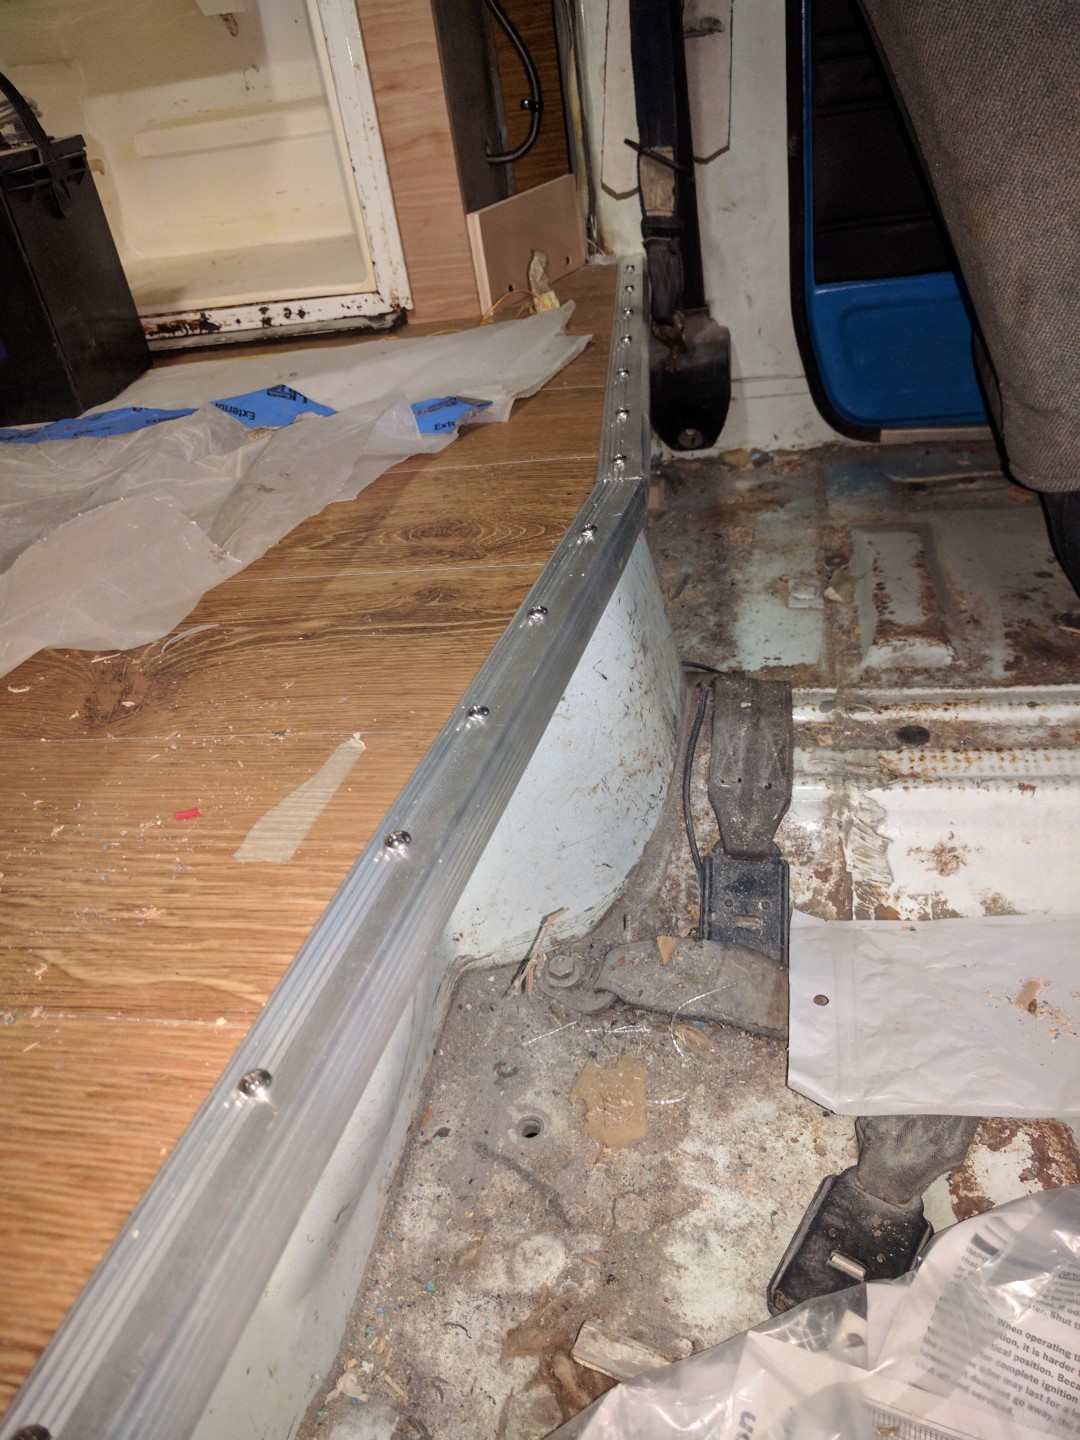
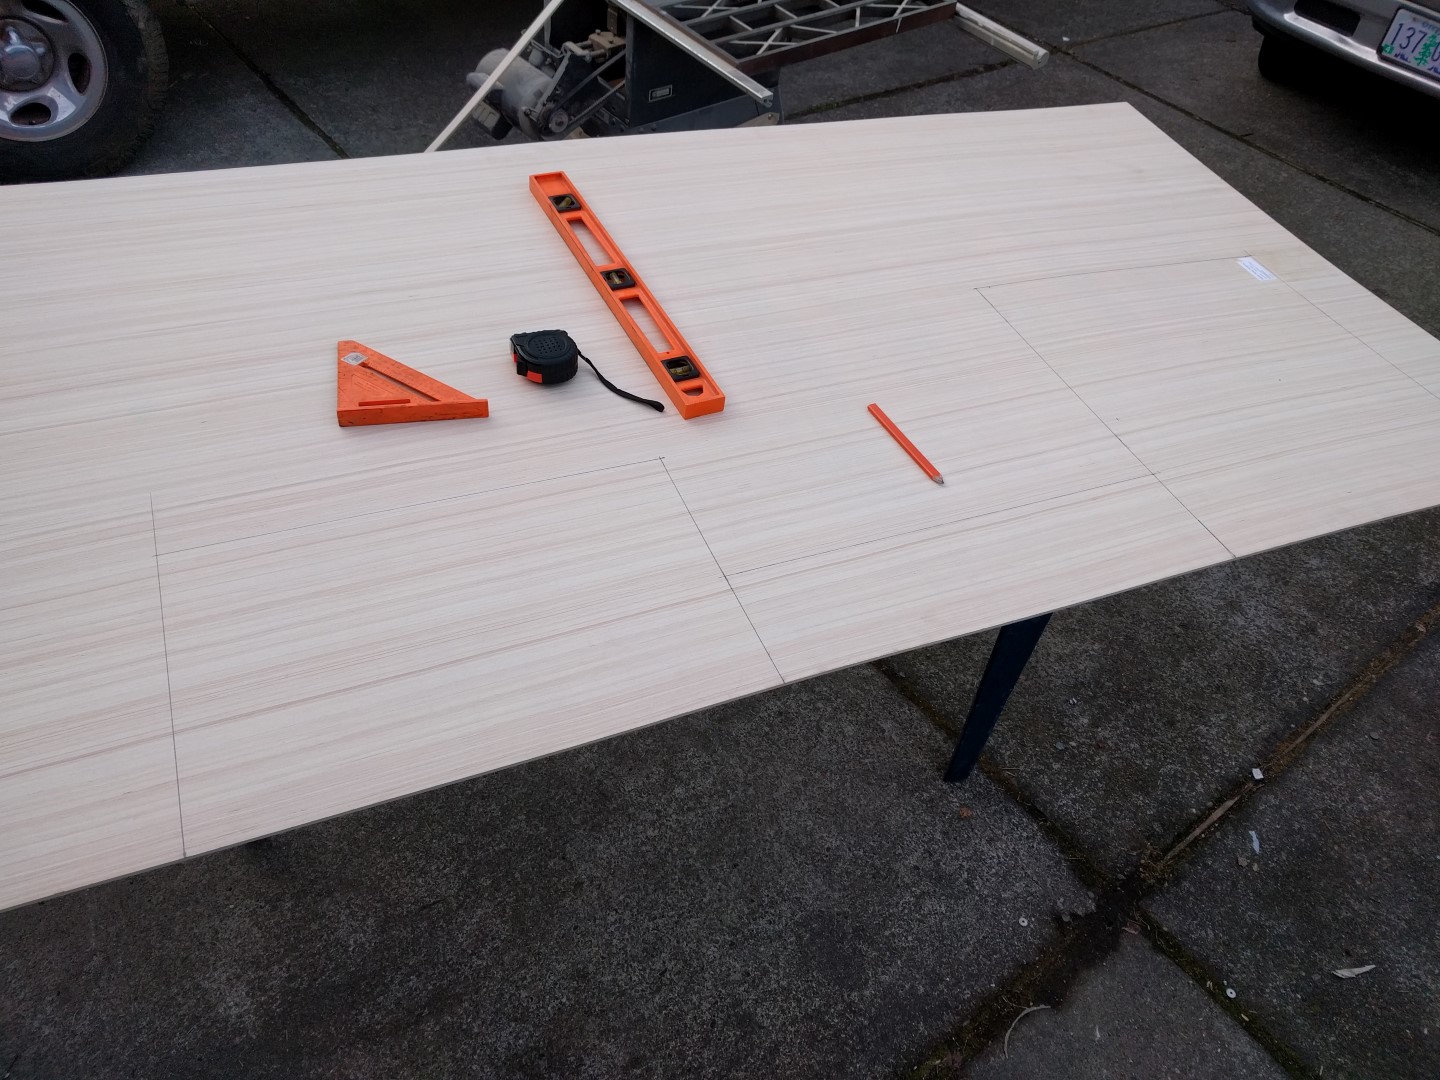
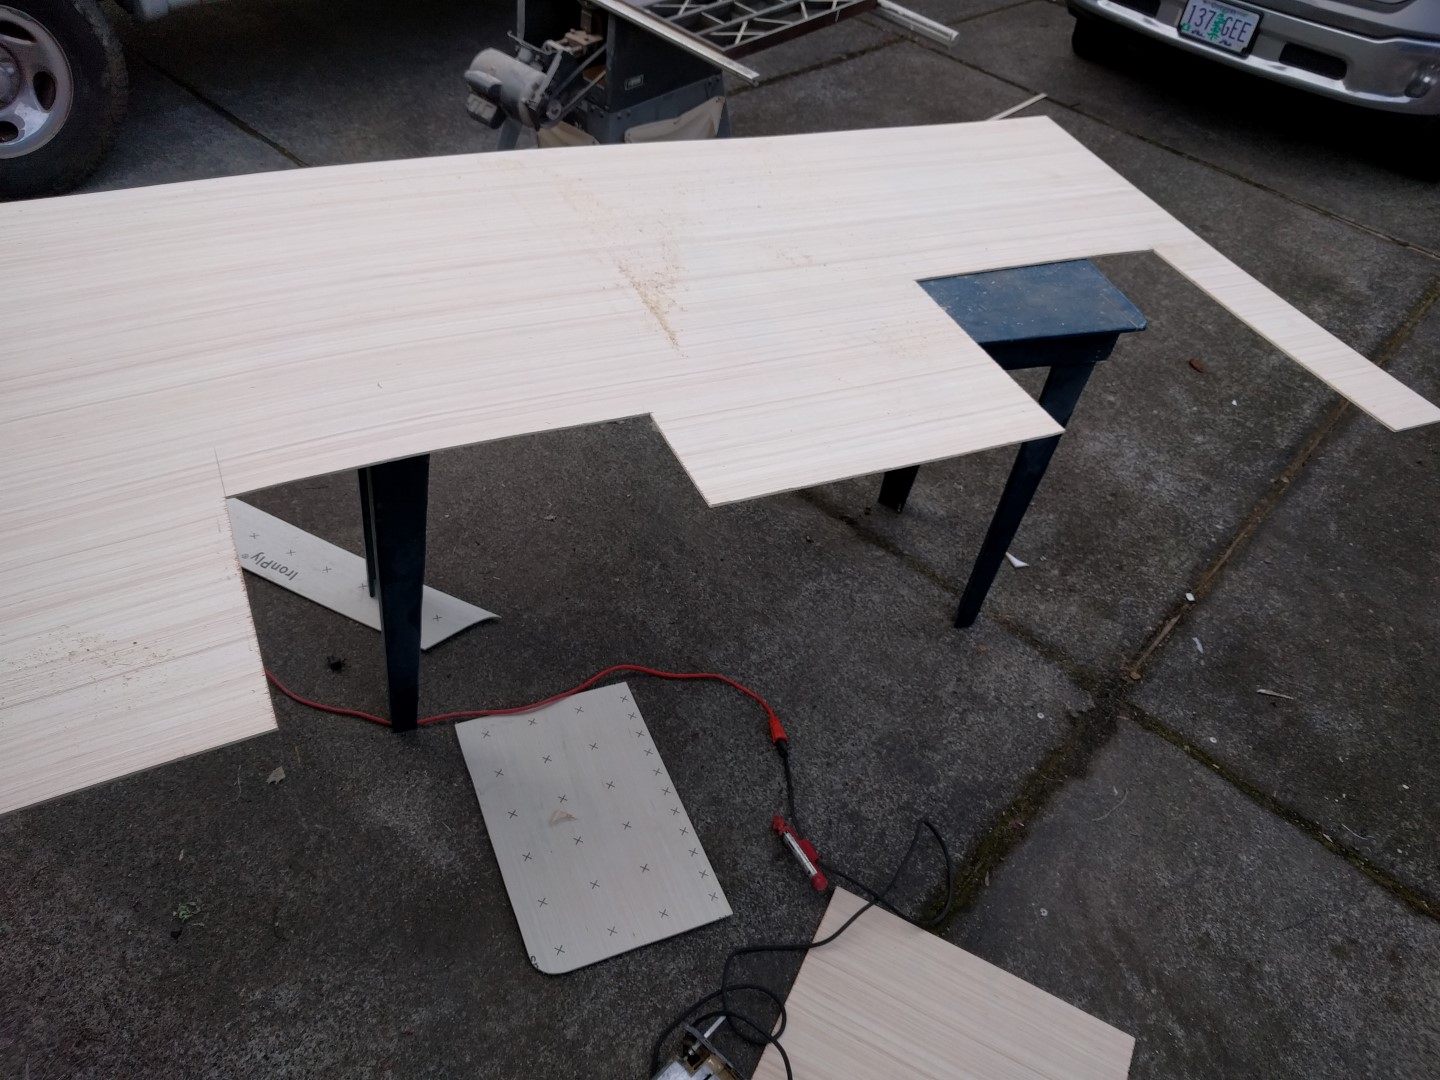
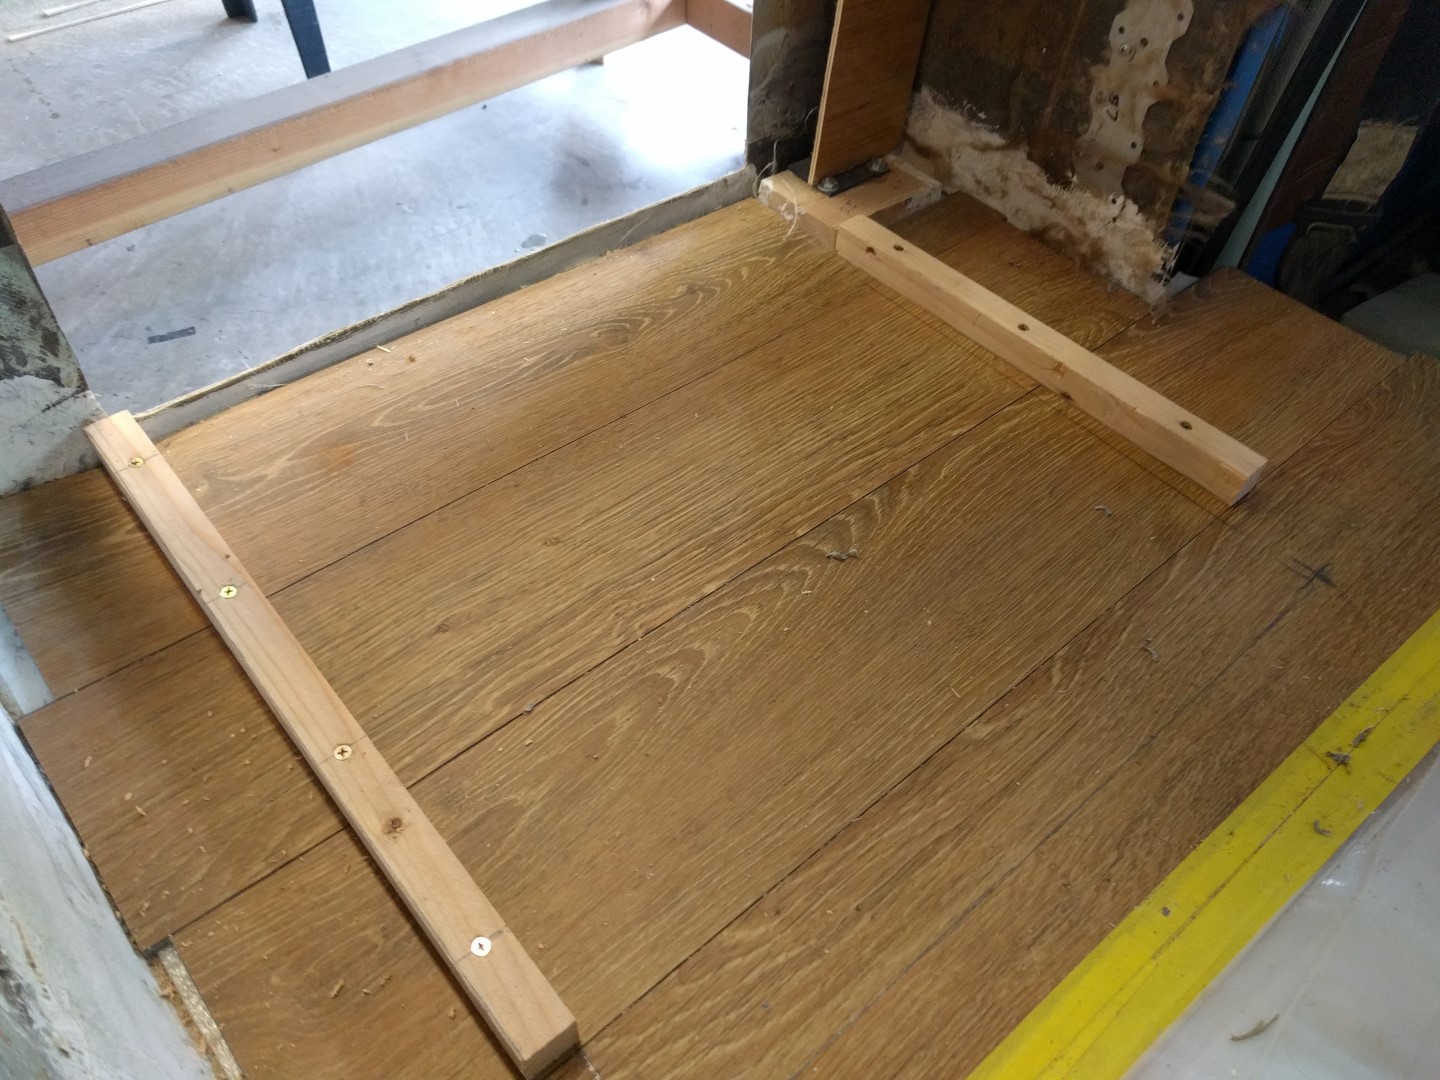
Vinyl Flooring
The new flooring is vinyl wood patterned “edge-lock” material. It matches the wall’s and counter’s light stain. Underlayment was placed first over the entire area of the interior then the vinyl flooring was cut to shape. The “edge-lock” flooring just snaps into place on the edges.
The stepped down area was the straight reference edge and the curved area near the truck cabin extra flooring was left there then cut off with a jigsaw. Right angle extruded aluminum trim was used on on the joints to hold the flooring in place.
A hole was cut in the stepped down stair for the spare tire lowering rod to go through, then capped with a plastic cap.


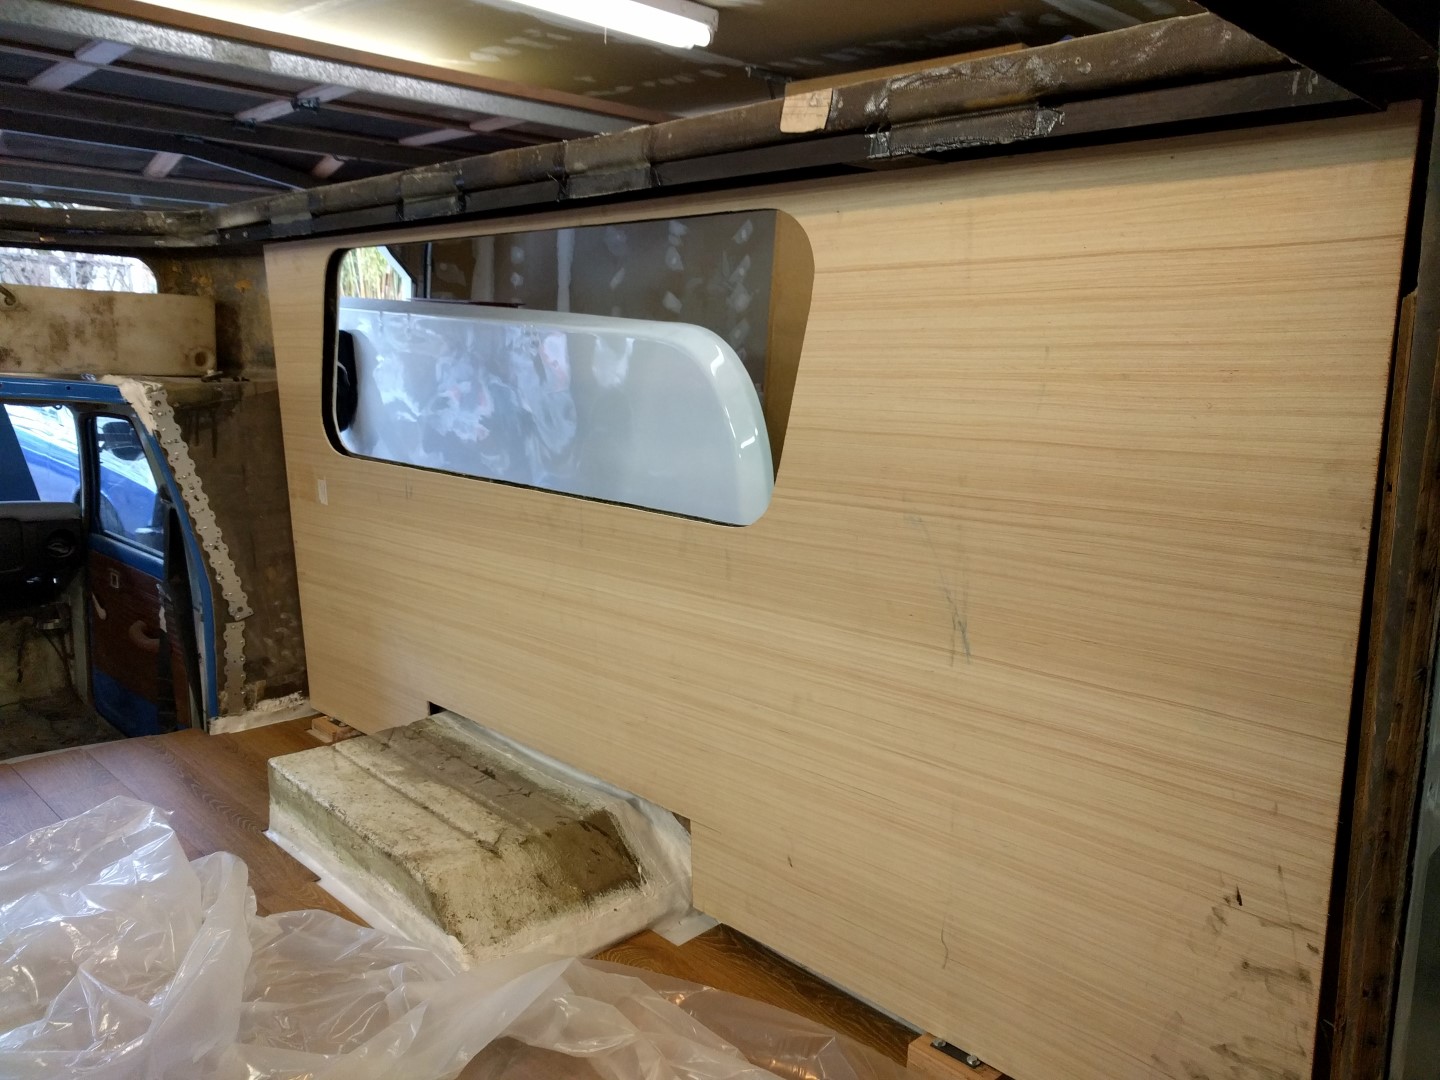
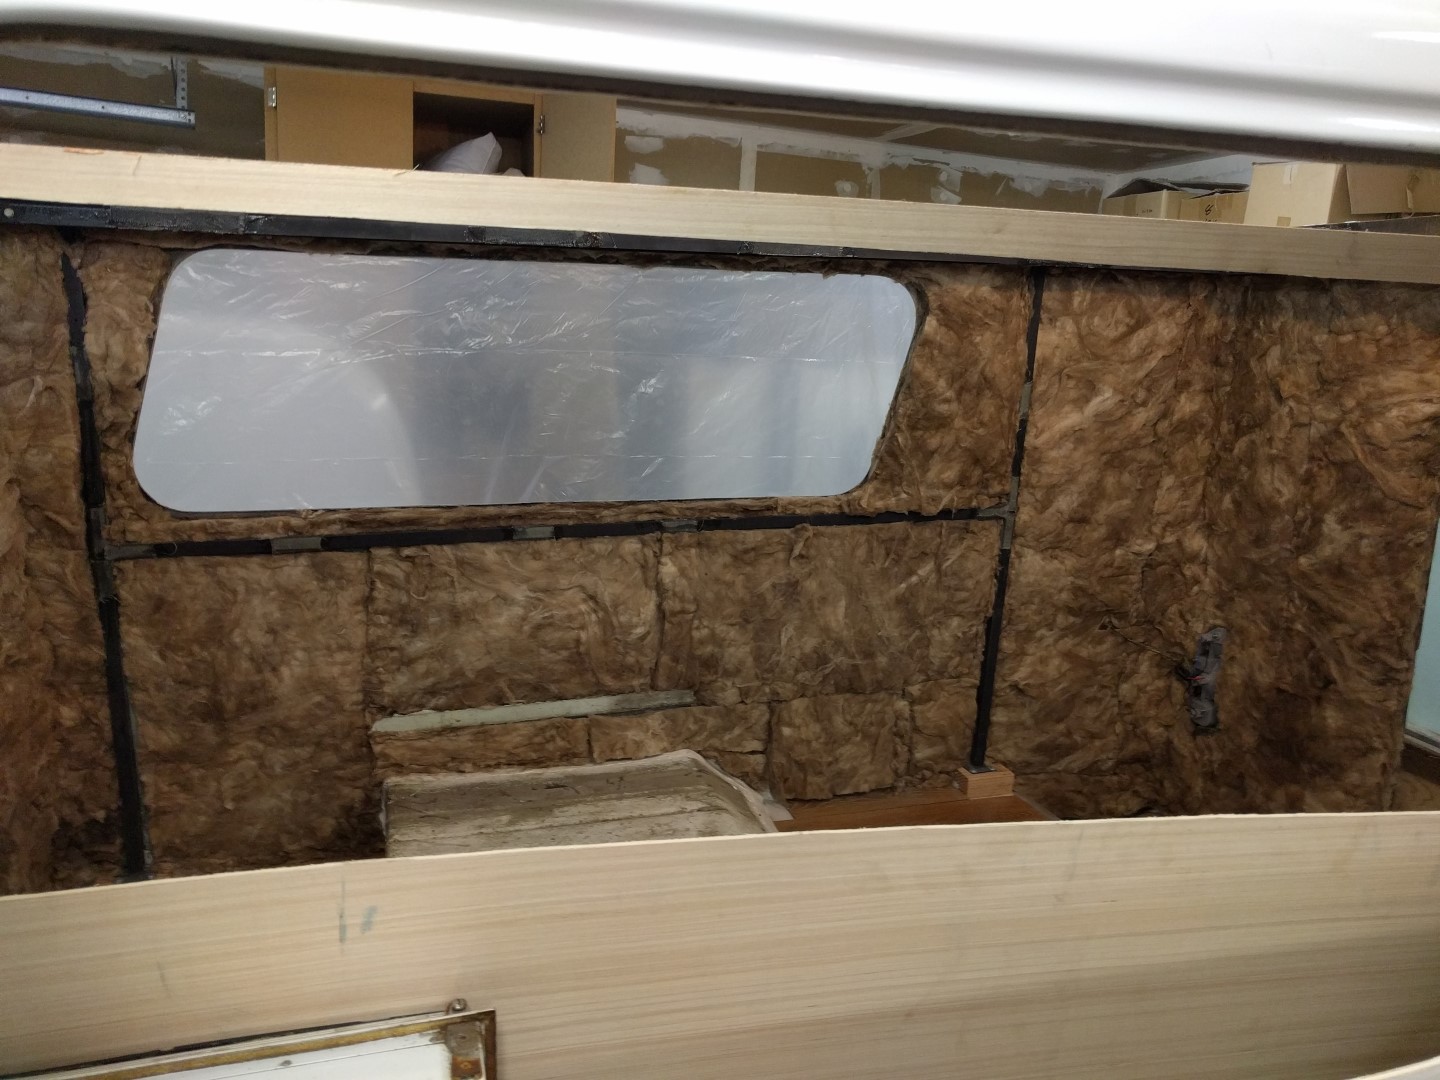
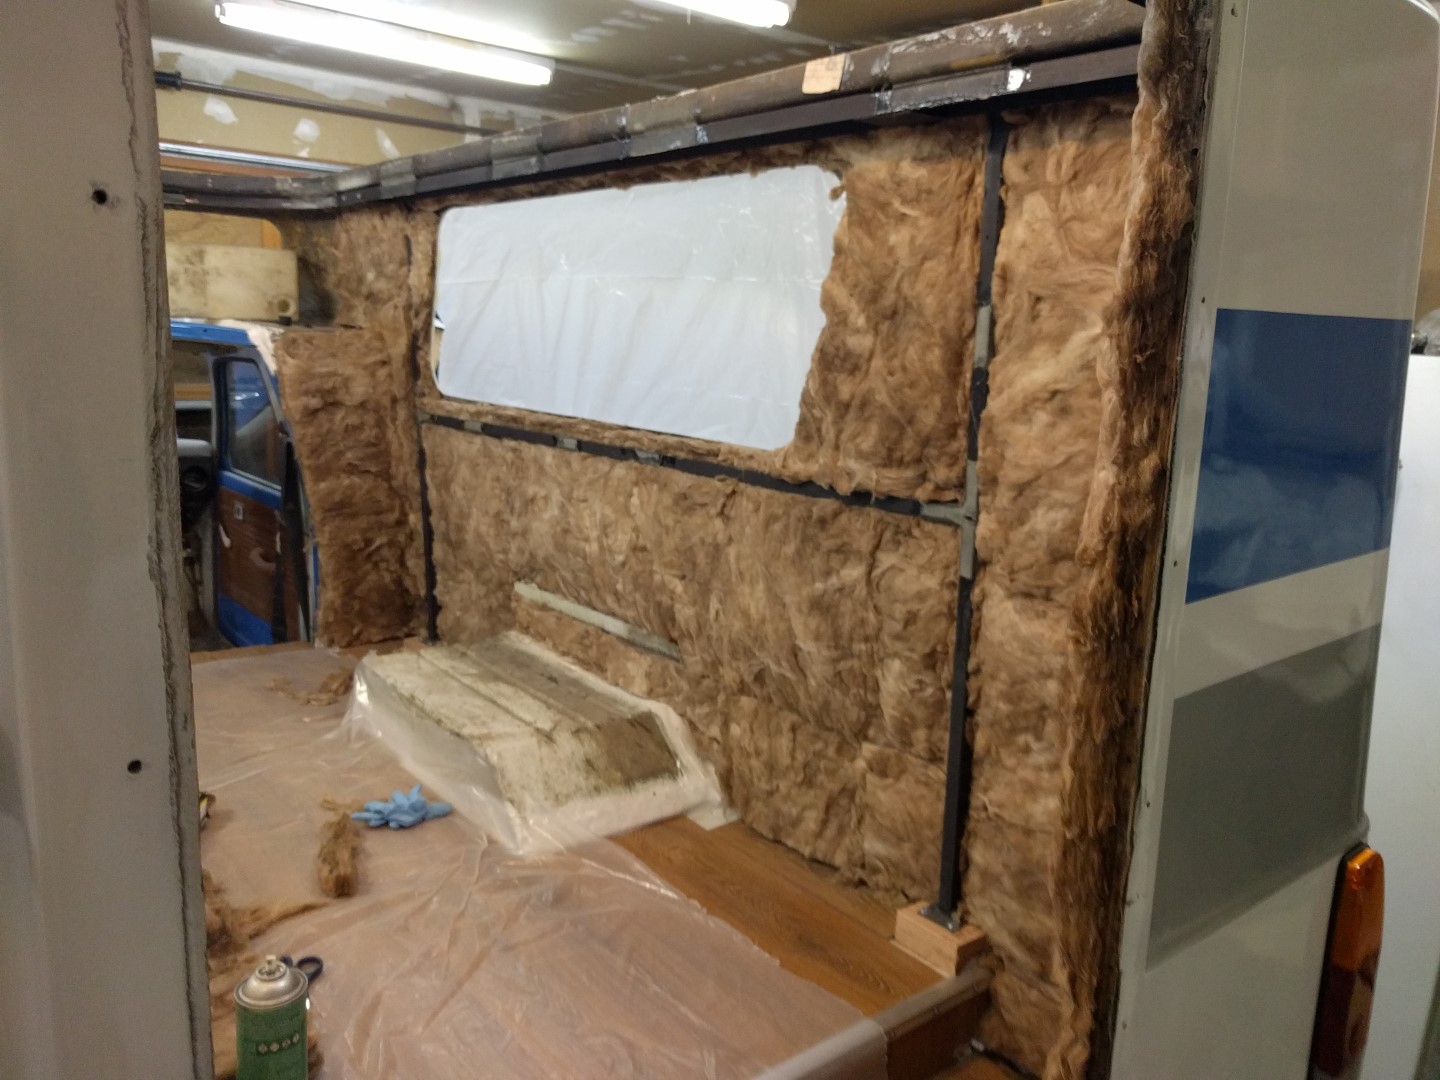
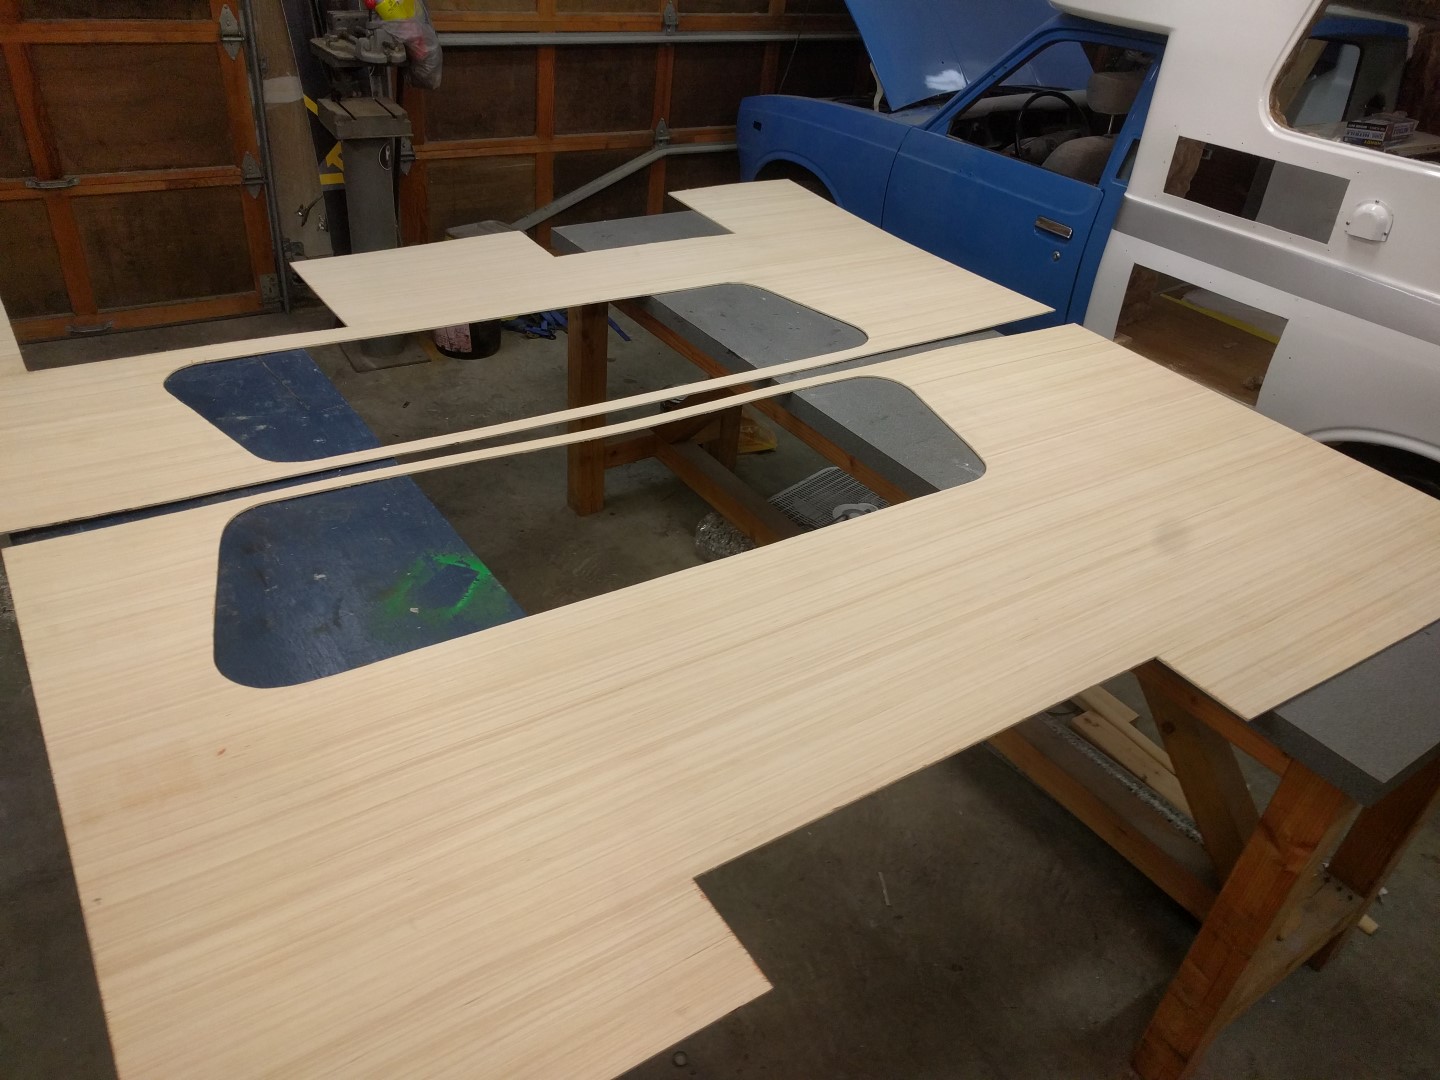
Walls
The side walls are each one big 4x8’ 1/4” wood panels. Cutting these things to size was quite cumbersome due to the awkwardness and specific curves of the windows. Before installing the panels 2” fiberglass insulation was placed behind them glued down with Weldwood glue. The walls were stained with a light oak finish and then sealed up with basic polyurethane sealer. The walls are just wedge in place between the ceiling and the floor with the table an couch holding them down in the middle.


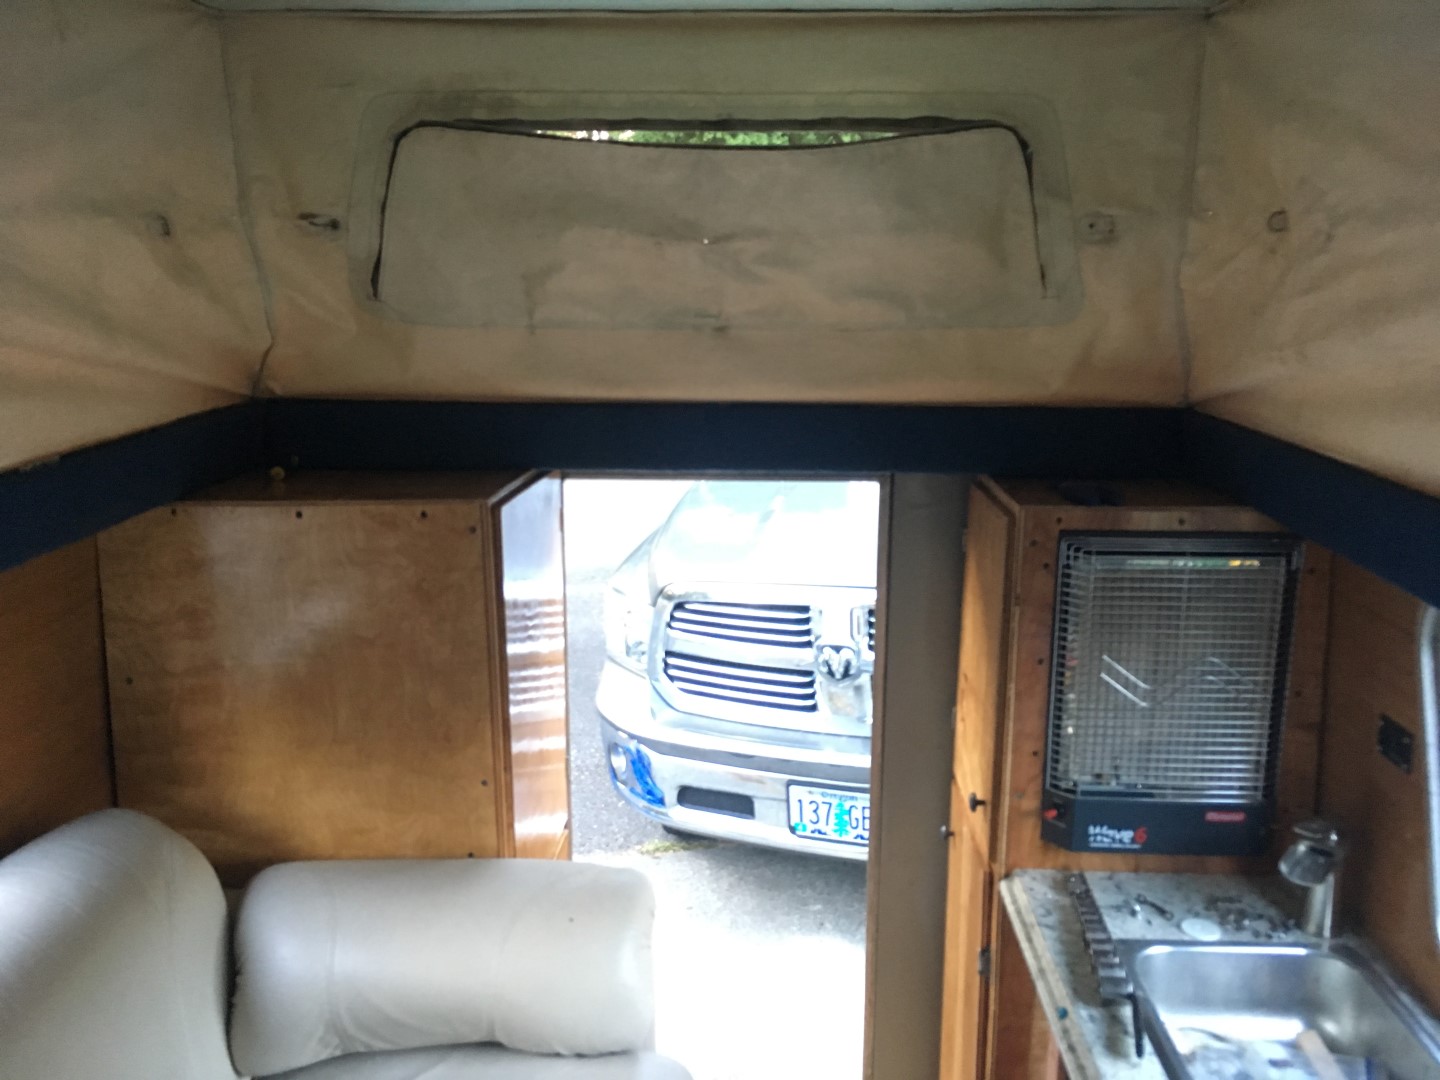
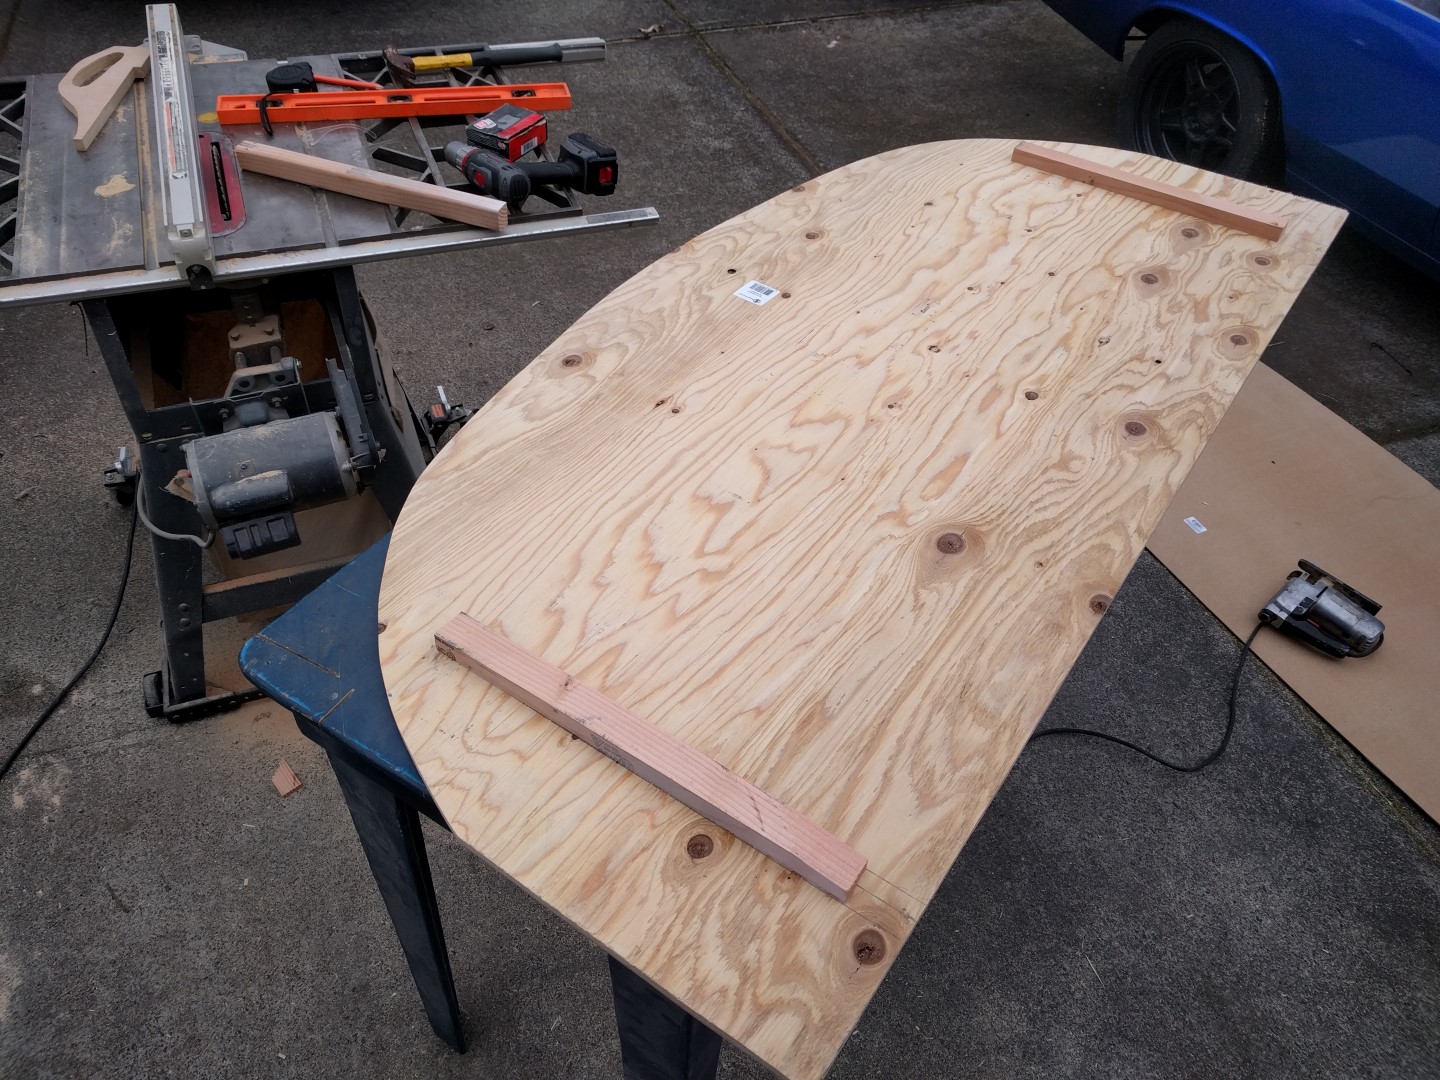
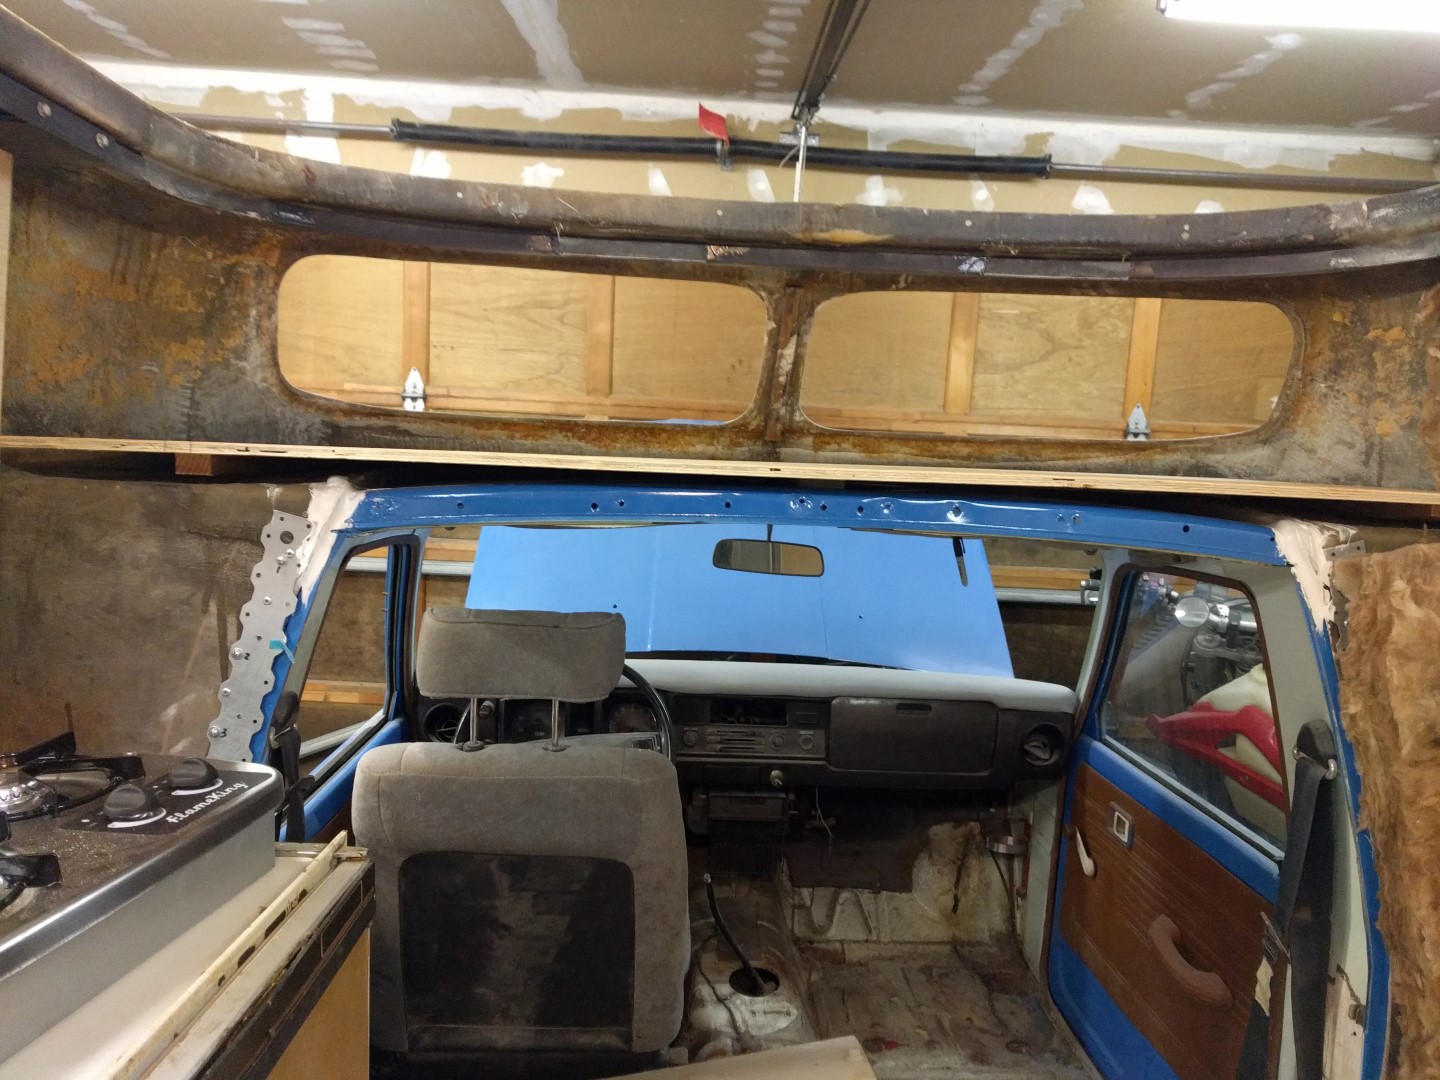
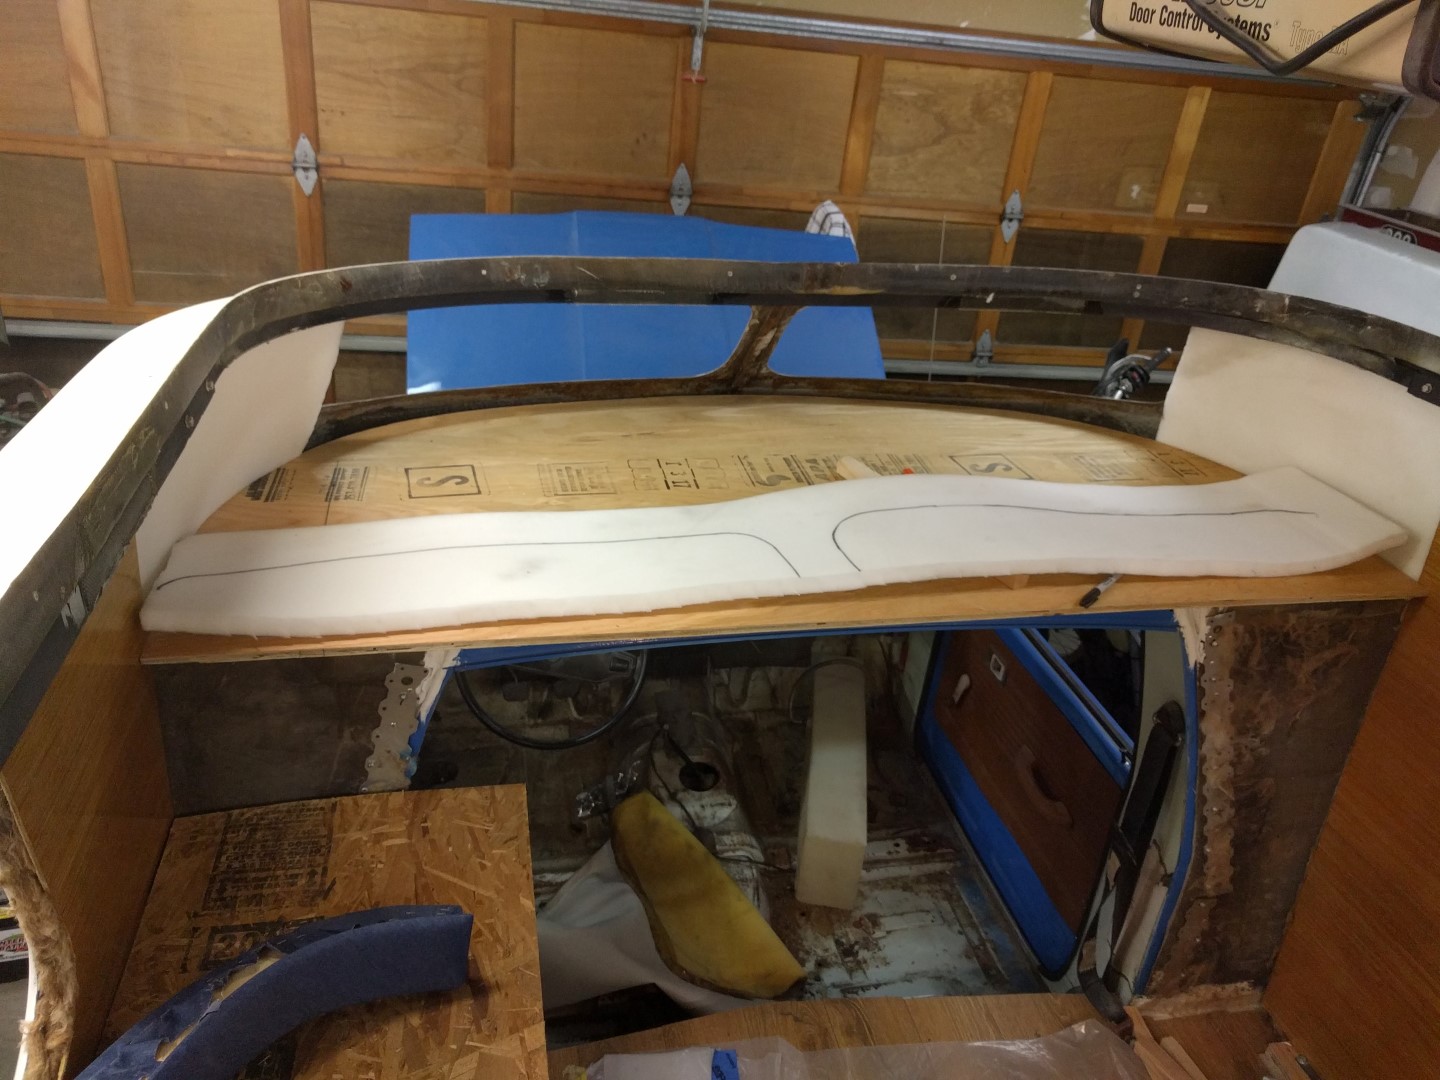
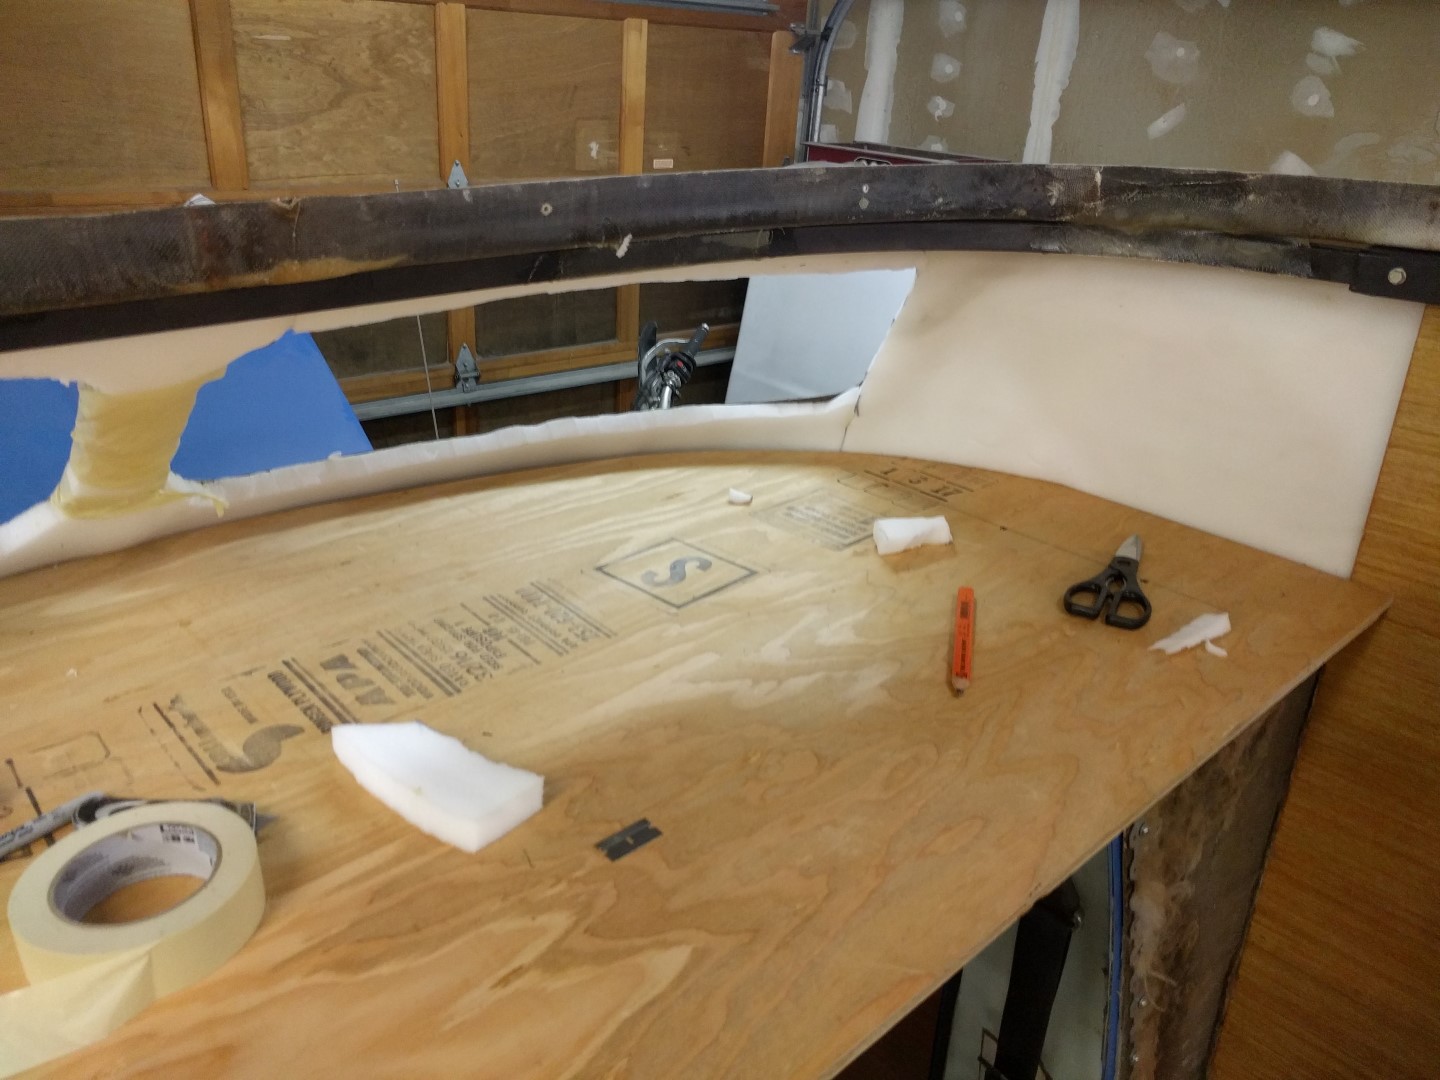
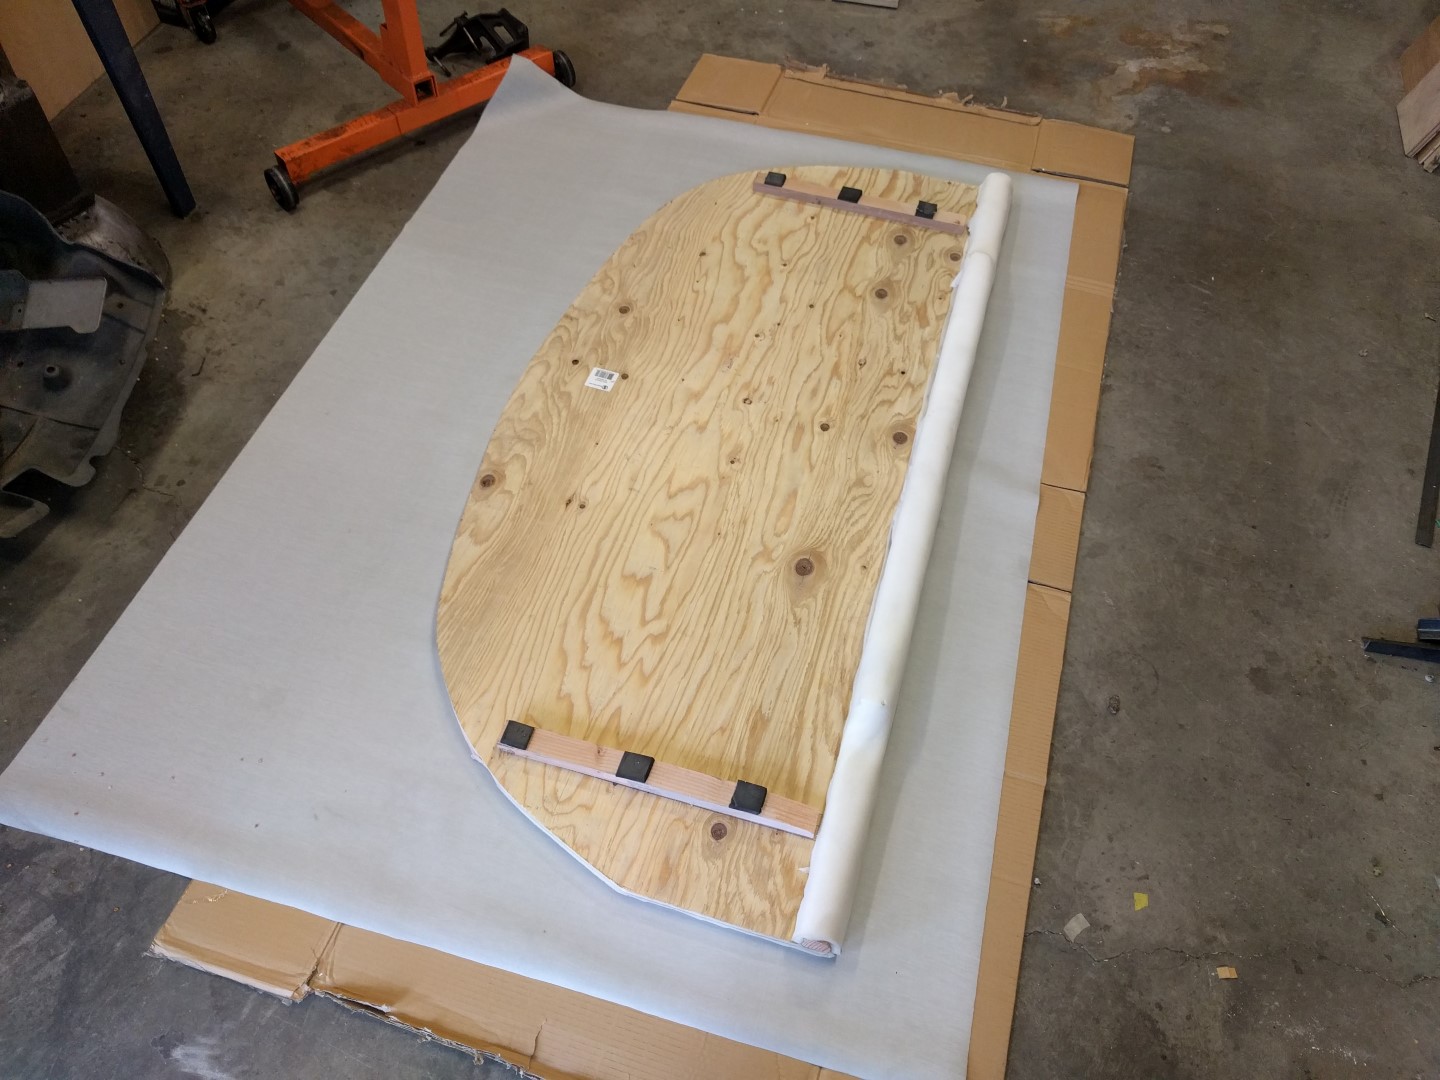
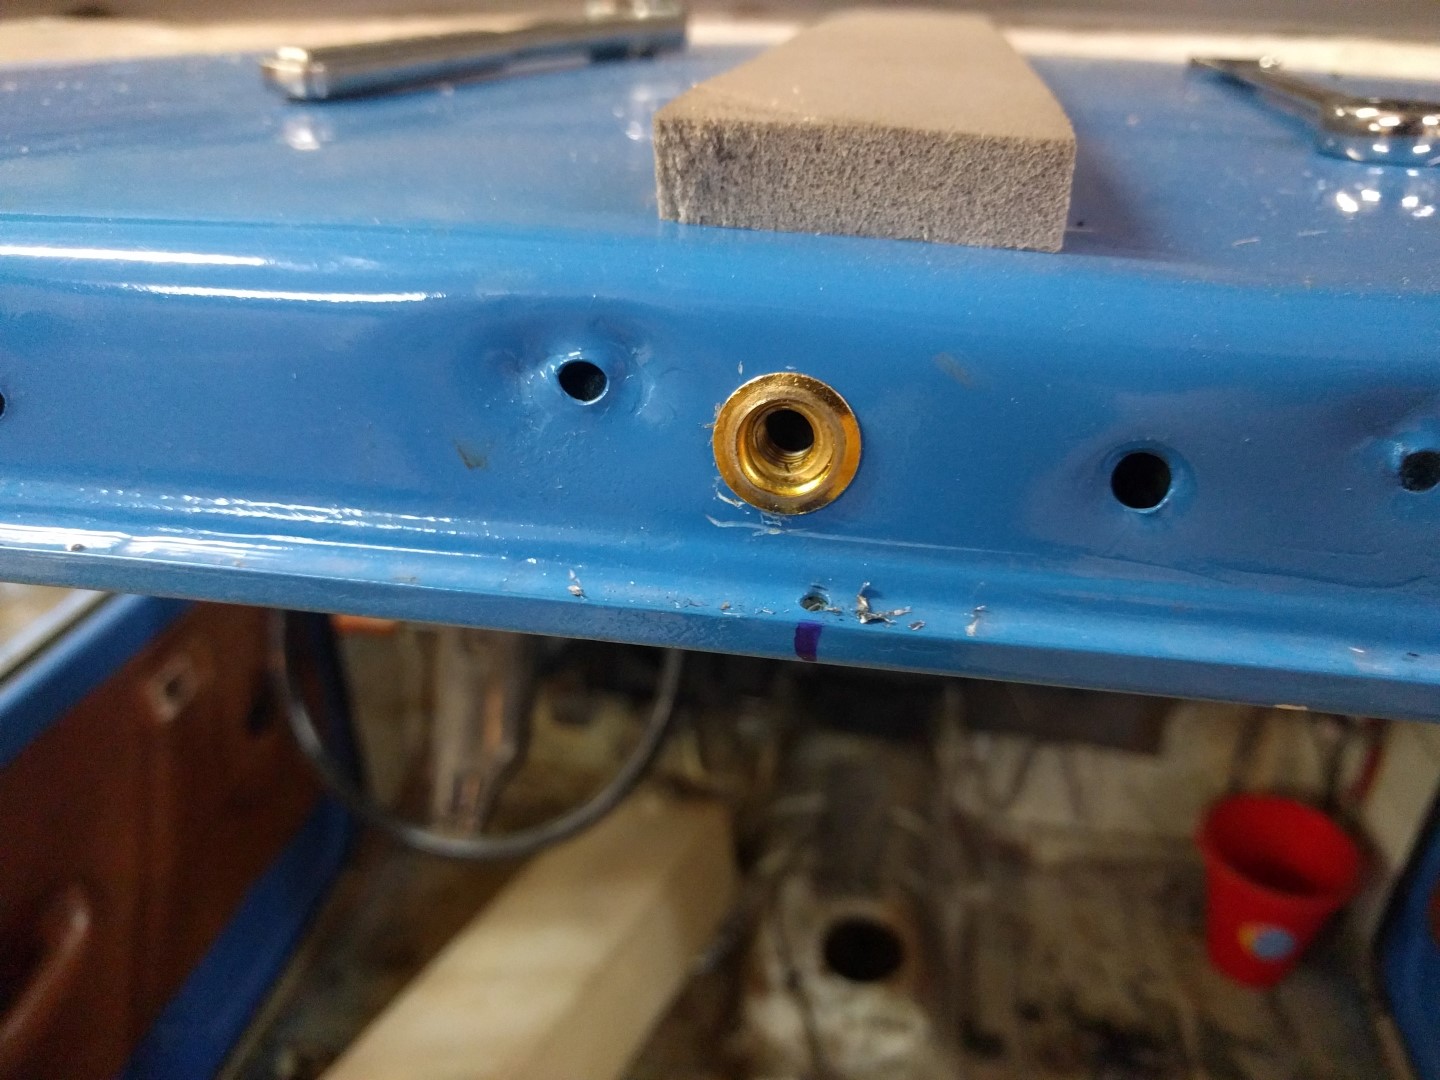
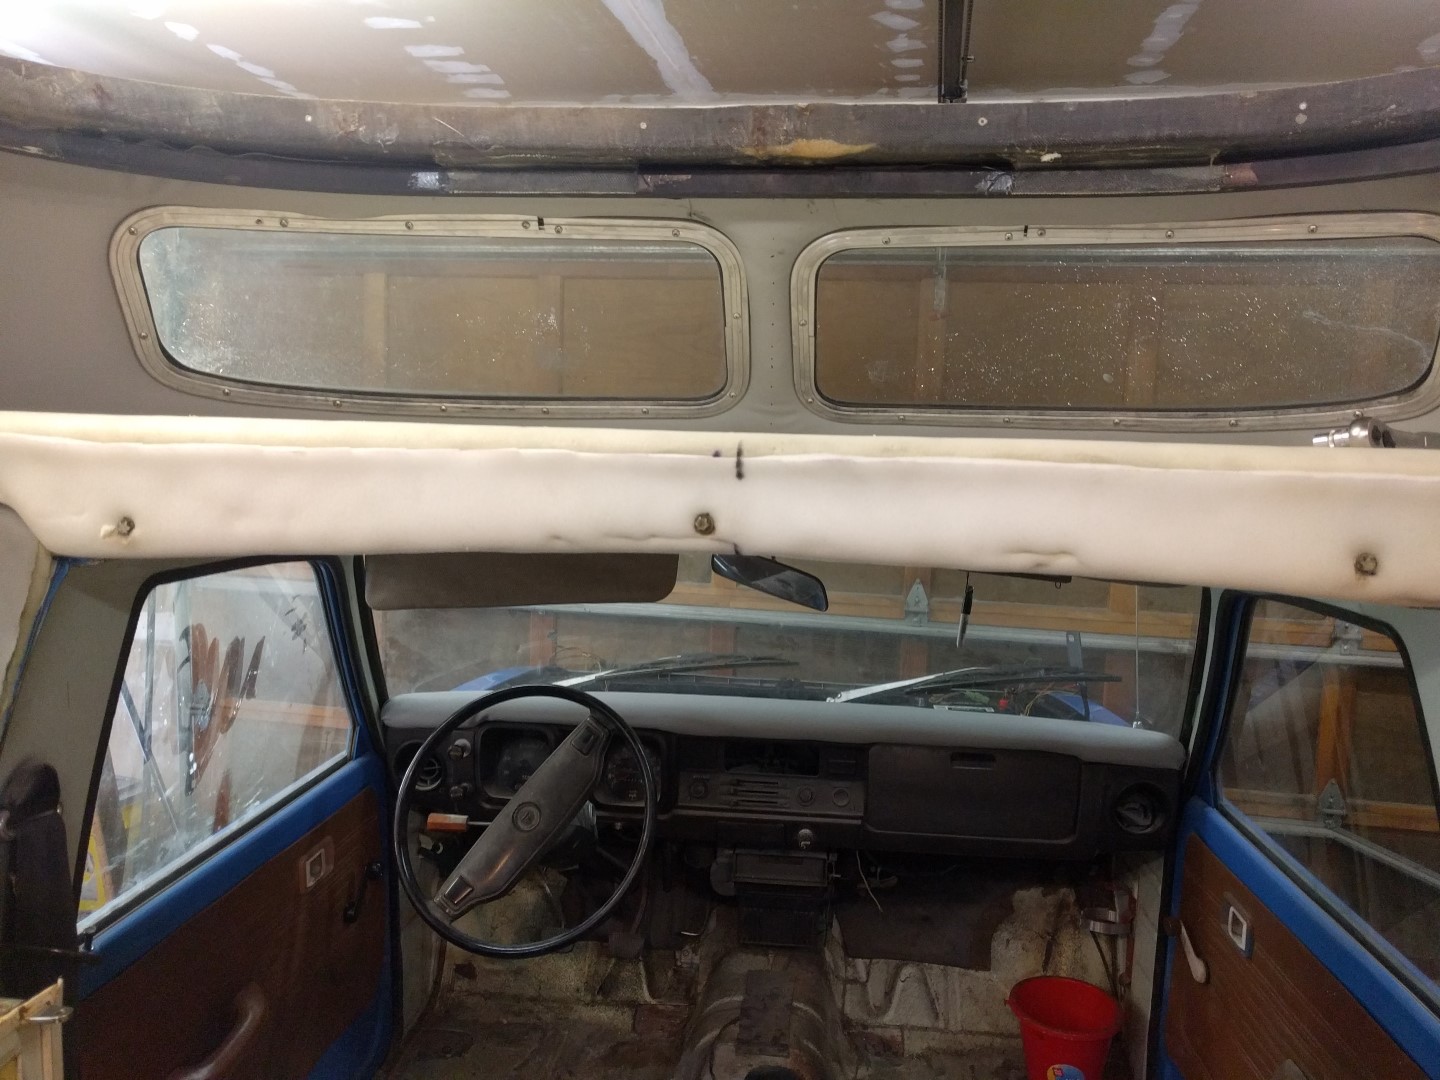
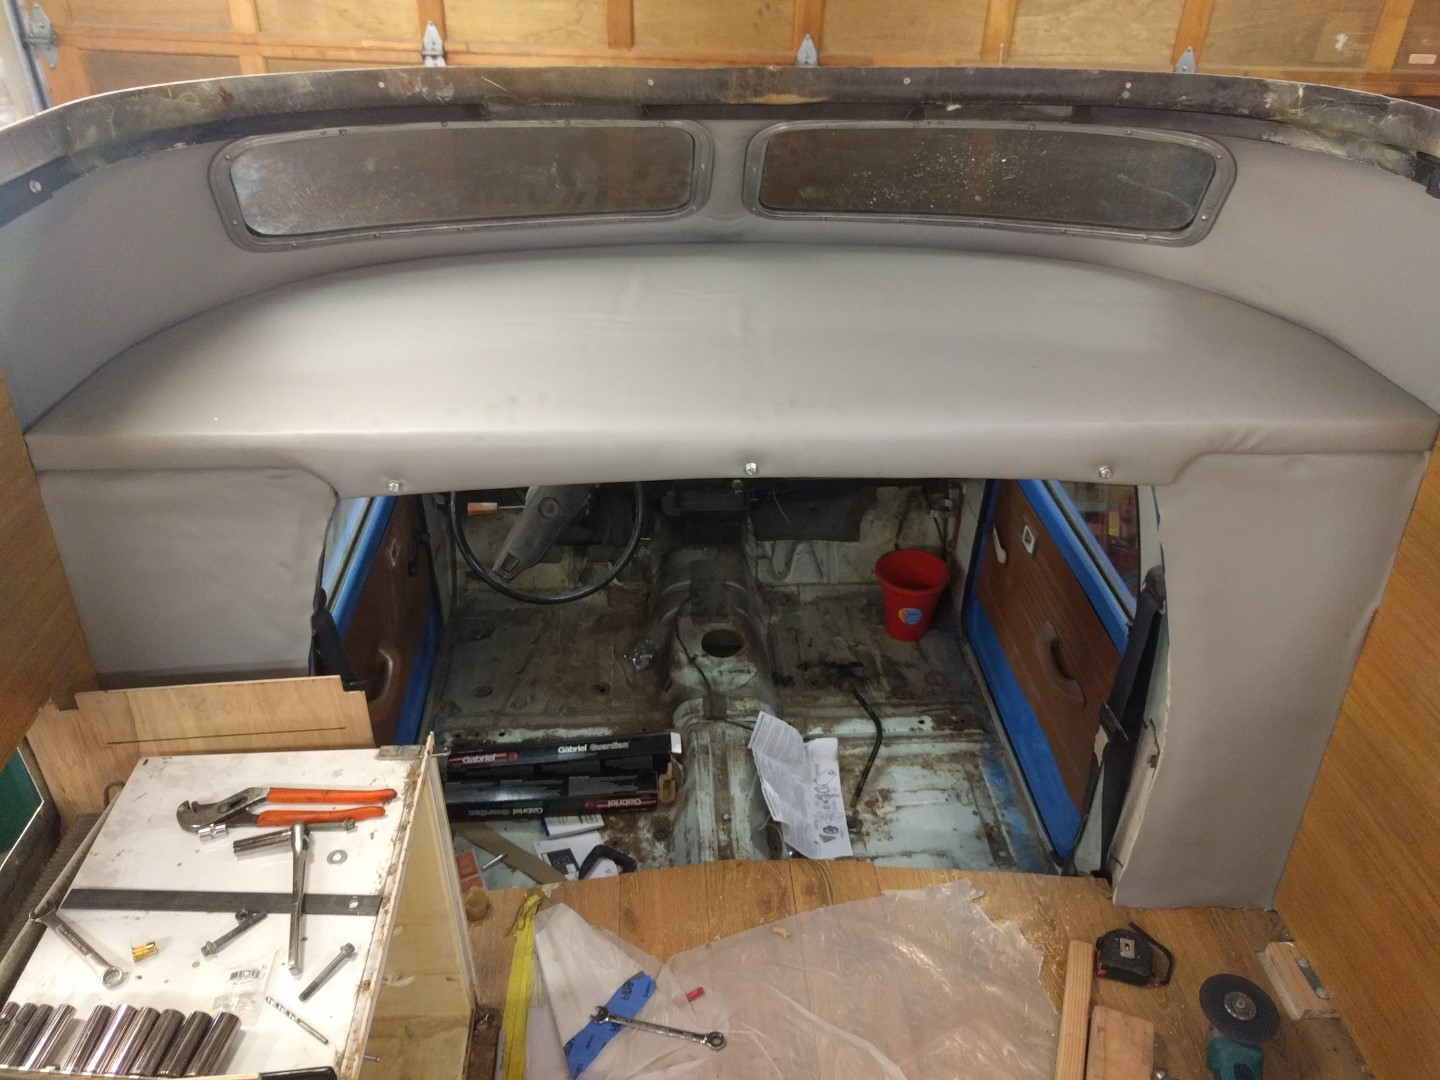
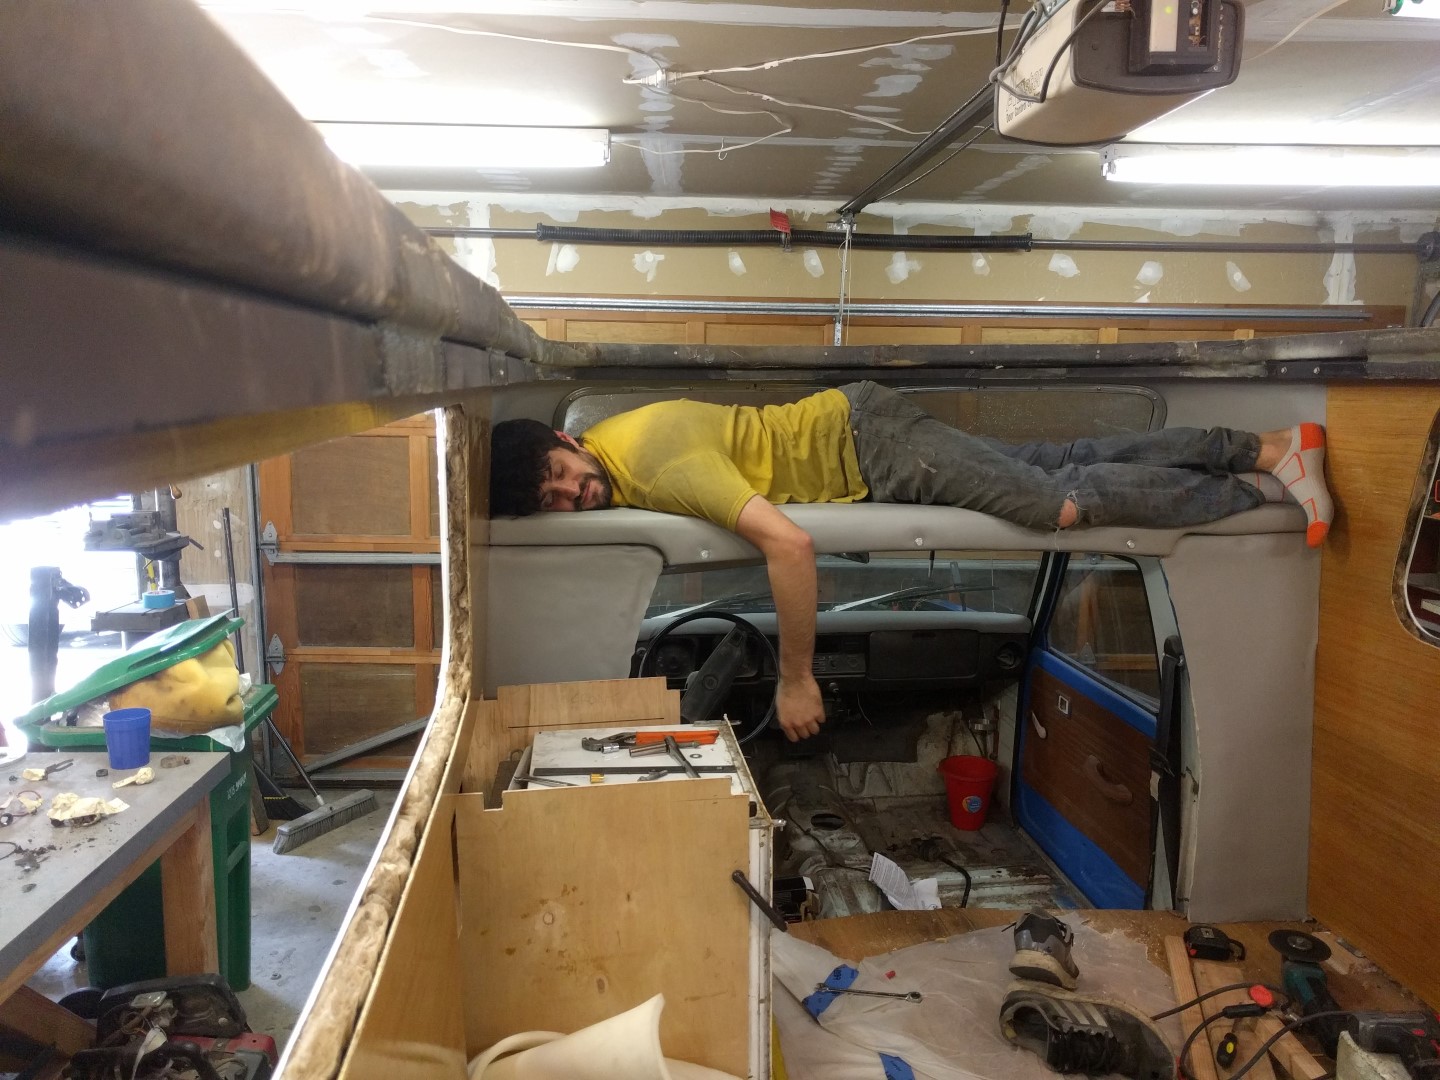
Over Cab Section
The section above the truck cab consists of a D-shaped 1/2” plywood sheet. This is the way it was done stock so the original sheet was use as a template. Two wood strips were screwed to the sheet to evenly support it on the fiberglass shell. A 1/2” strip of foam was placed on the center of the truck roof to support it further. Half inch craft foam was used as the insulation in the curved wall areas and glued to the walls using Weldwood. The D-shaped sheet was covered with the same 1/2” foam. Silver marine grade vinyl material was then glued with Weldwood to cover all the foam. A word of advice here: cut the vinyl material much larger than you need!
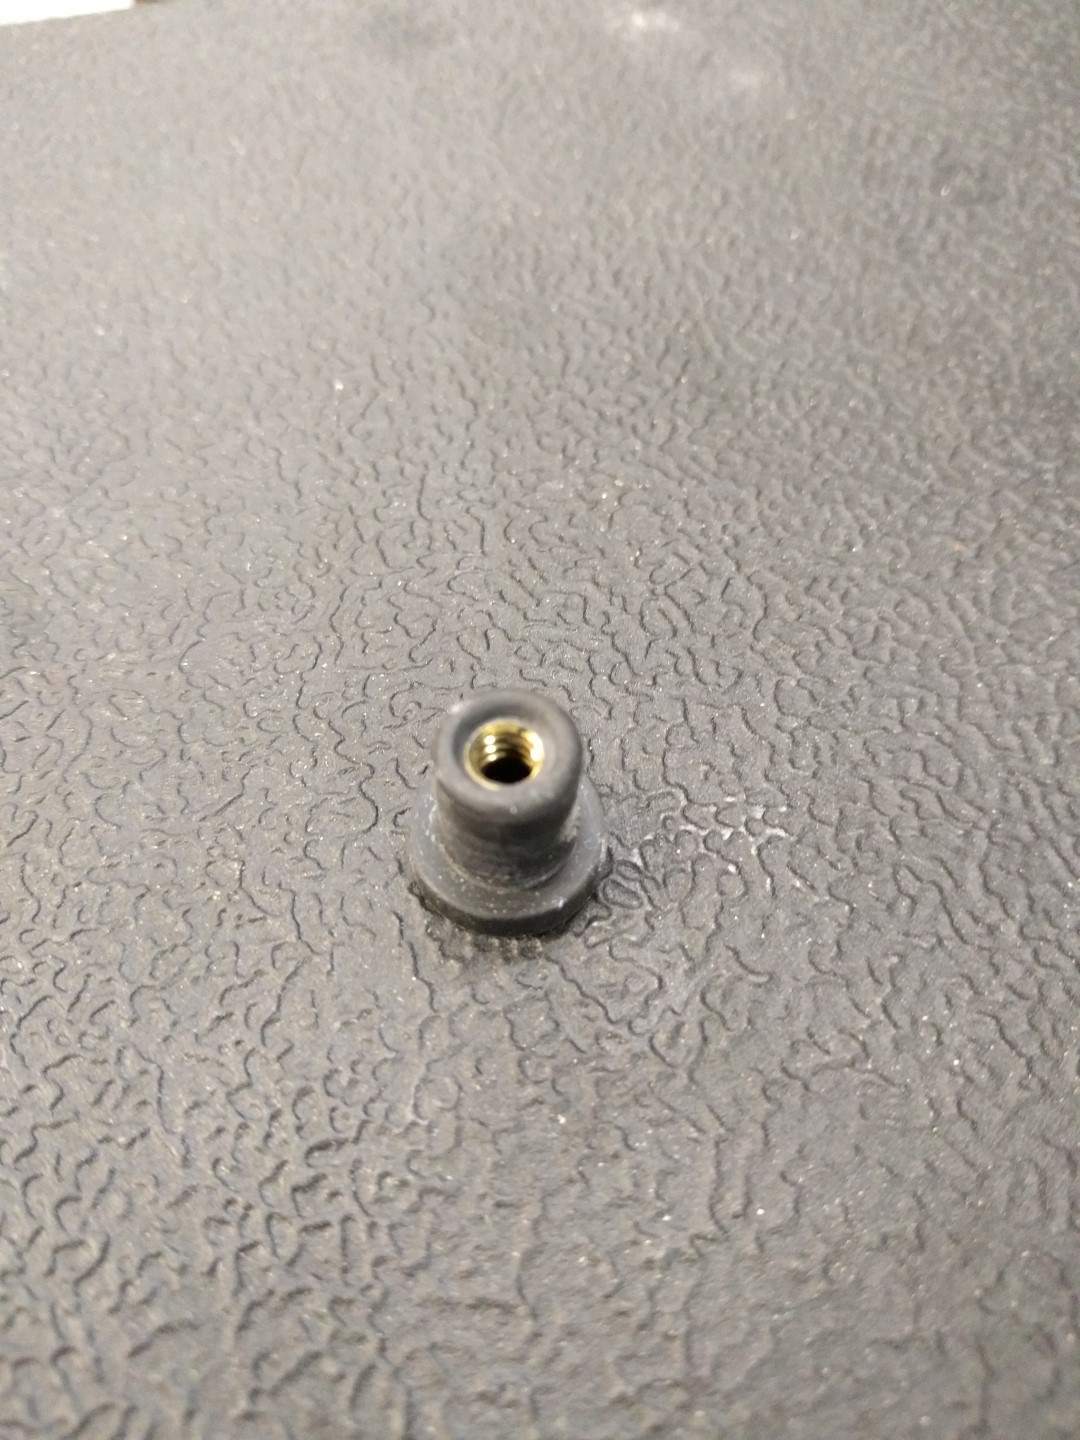
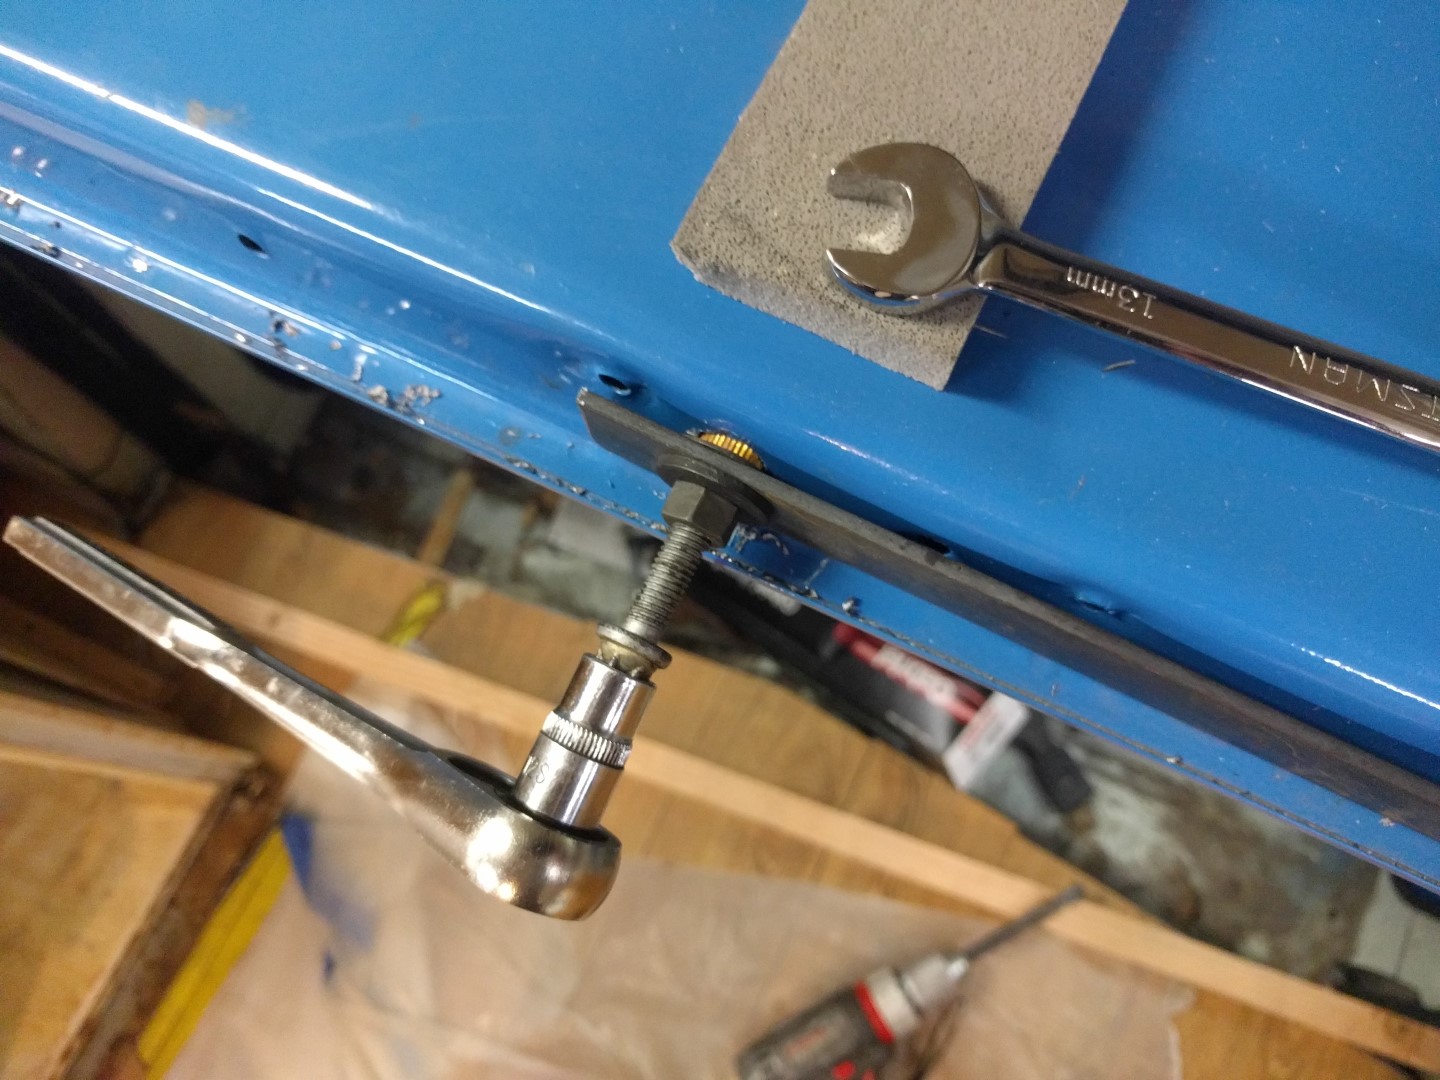
The D-shaped sheet is attached using rivnuts (see pictures for a custom rivnut installer) so it can be removed in case of a leak to access the seal between the truck roof and the fiberglass shell.


Wall Insulation and Vinyl Trim
In the sections where the fiberglass shell is curved 1/2” or 1” craft foam was used to insulate the cabin. Weld wood glue was used to hold the foam to the walls. Vinyl marine grade fabric was then glued to the insulation to create a nice looking finish.
The vinyl marine grade fabric does not stretch very much so it is required to use patience and a little bit of heat to coerce the fabric into position. The over cab section, vertical walls near the truck cabin, inside closets, and rear walls were all covered in vinyl.
A word of advice here: cut the vinyl material much larger than you need! Especially for the over the cab section since the vinyl doesn’t stretch the curves have to be accounted for by using a much larger piece of fabric.
The windows are installed with the aluminum frame pinching the foam and vinyl to the fiberglass shell. Polyurethane sealant was used between the window frame and the outside of the shell and then more was applied to create a leak proof seal.

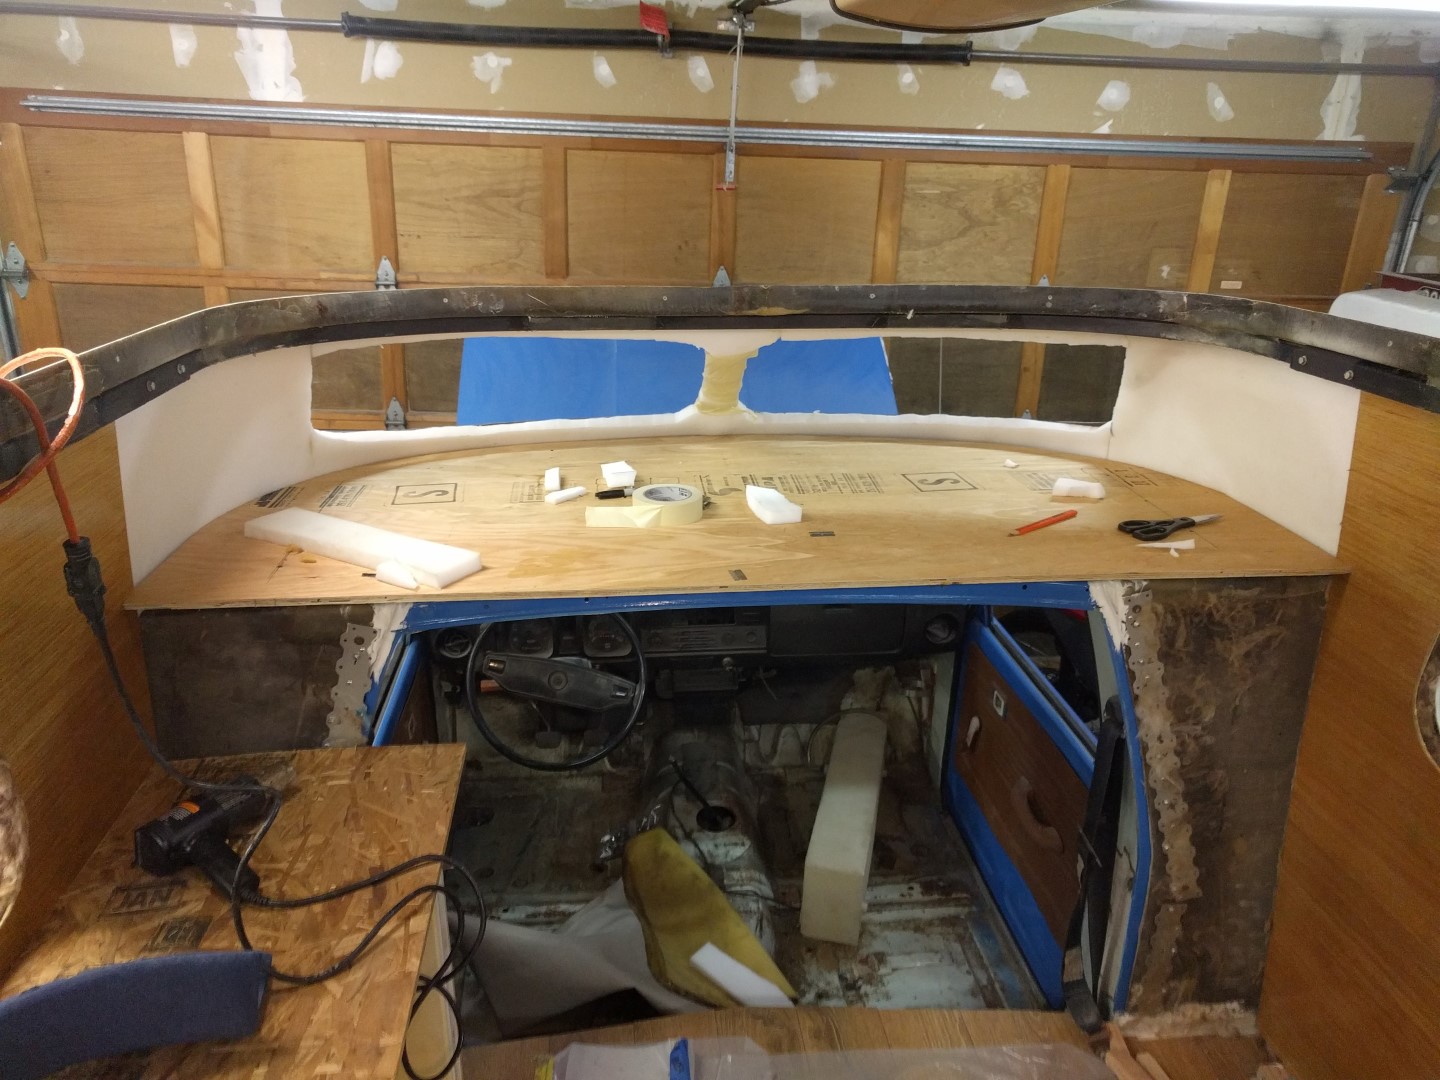


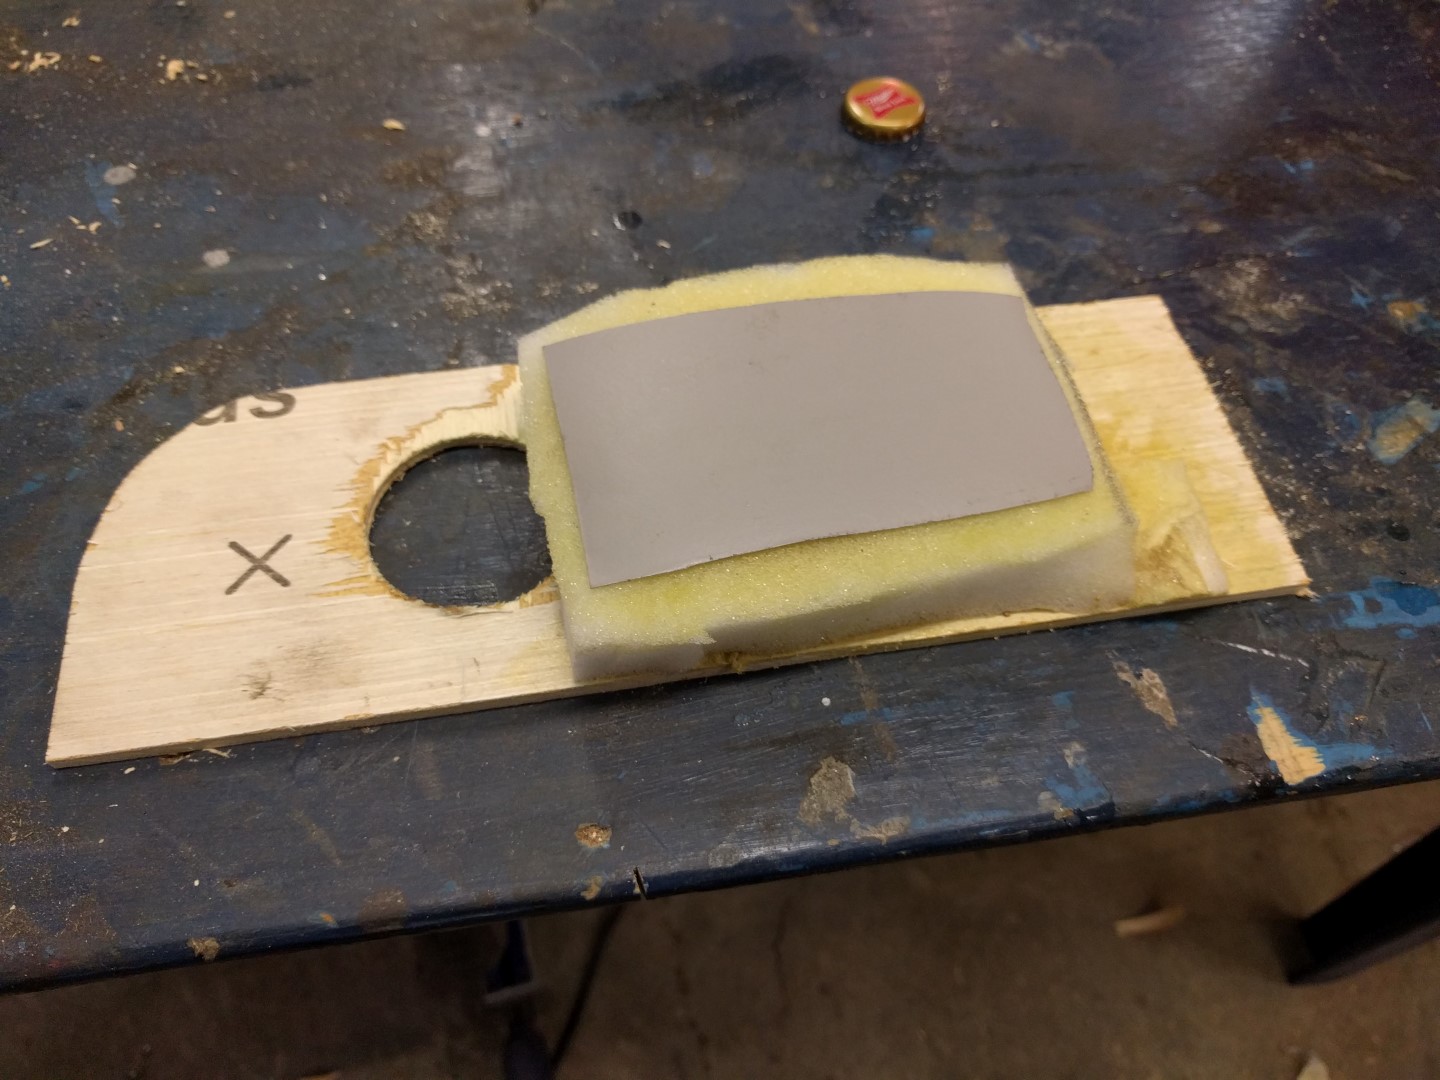
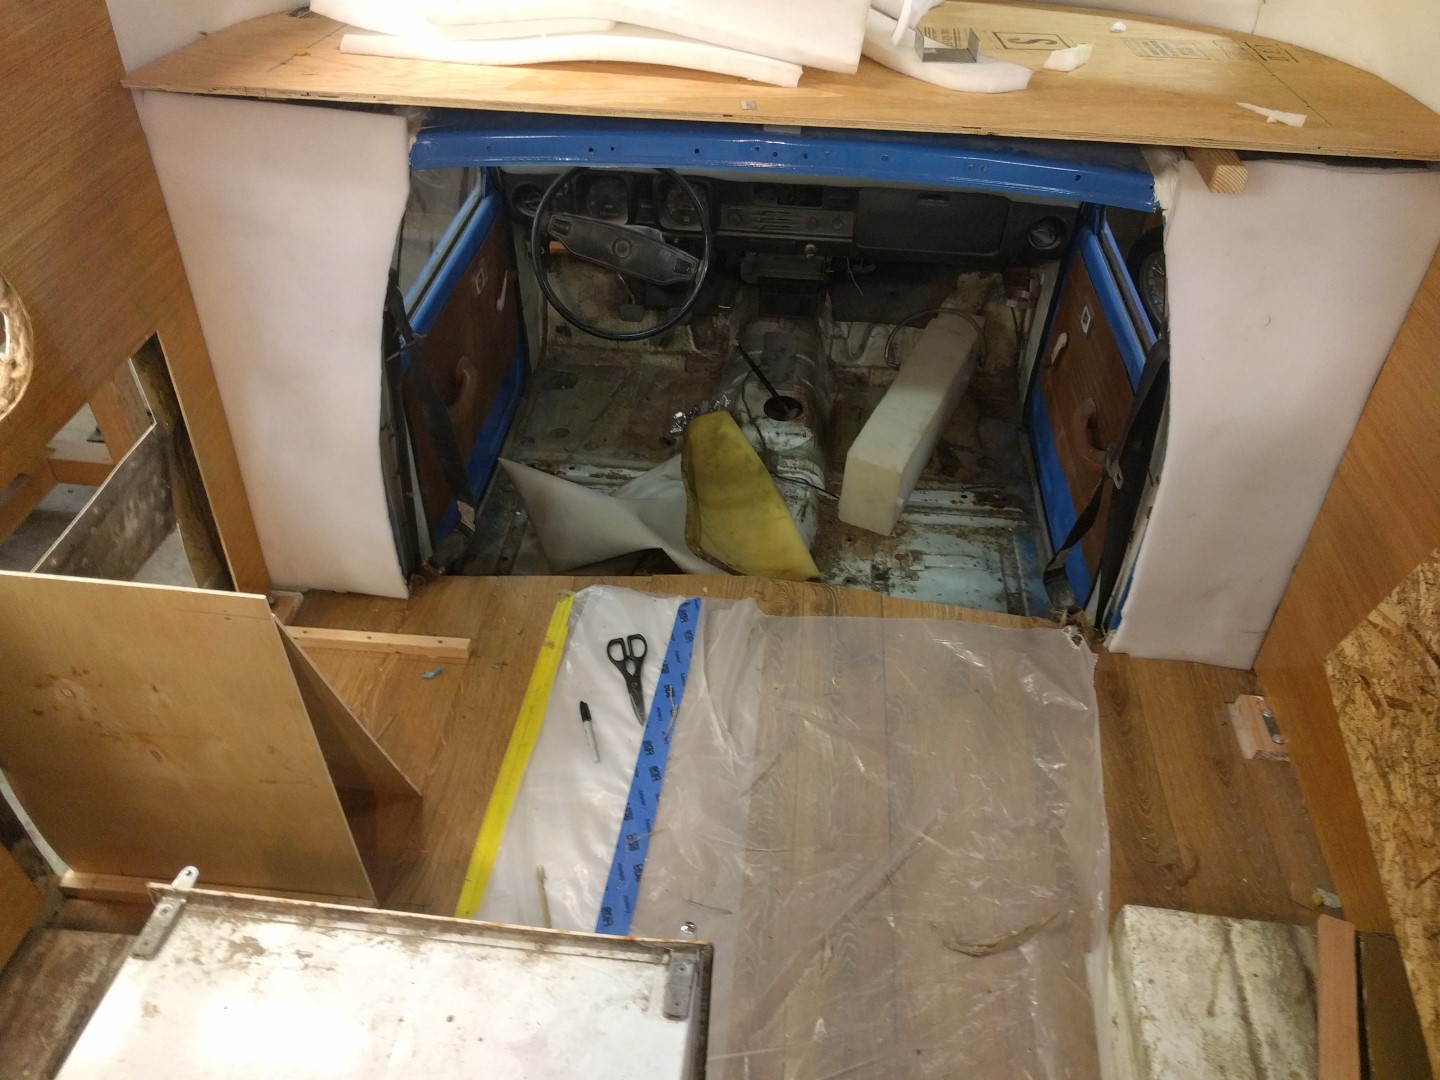

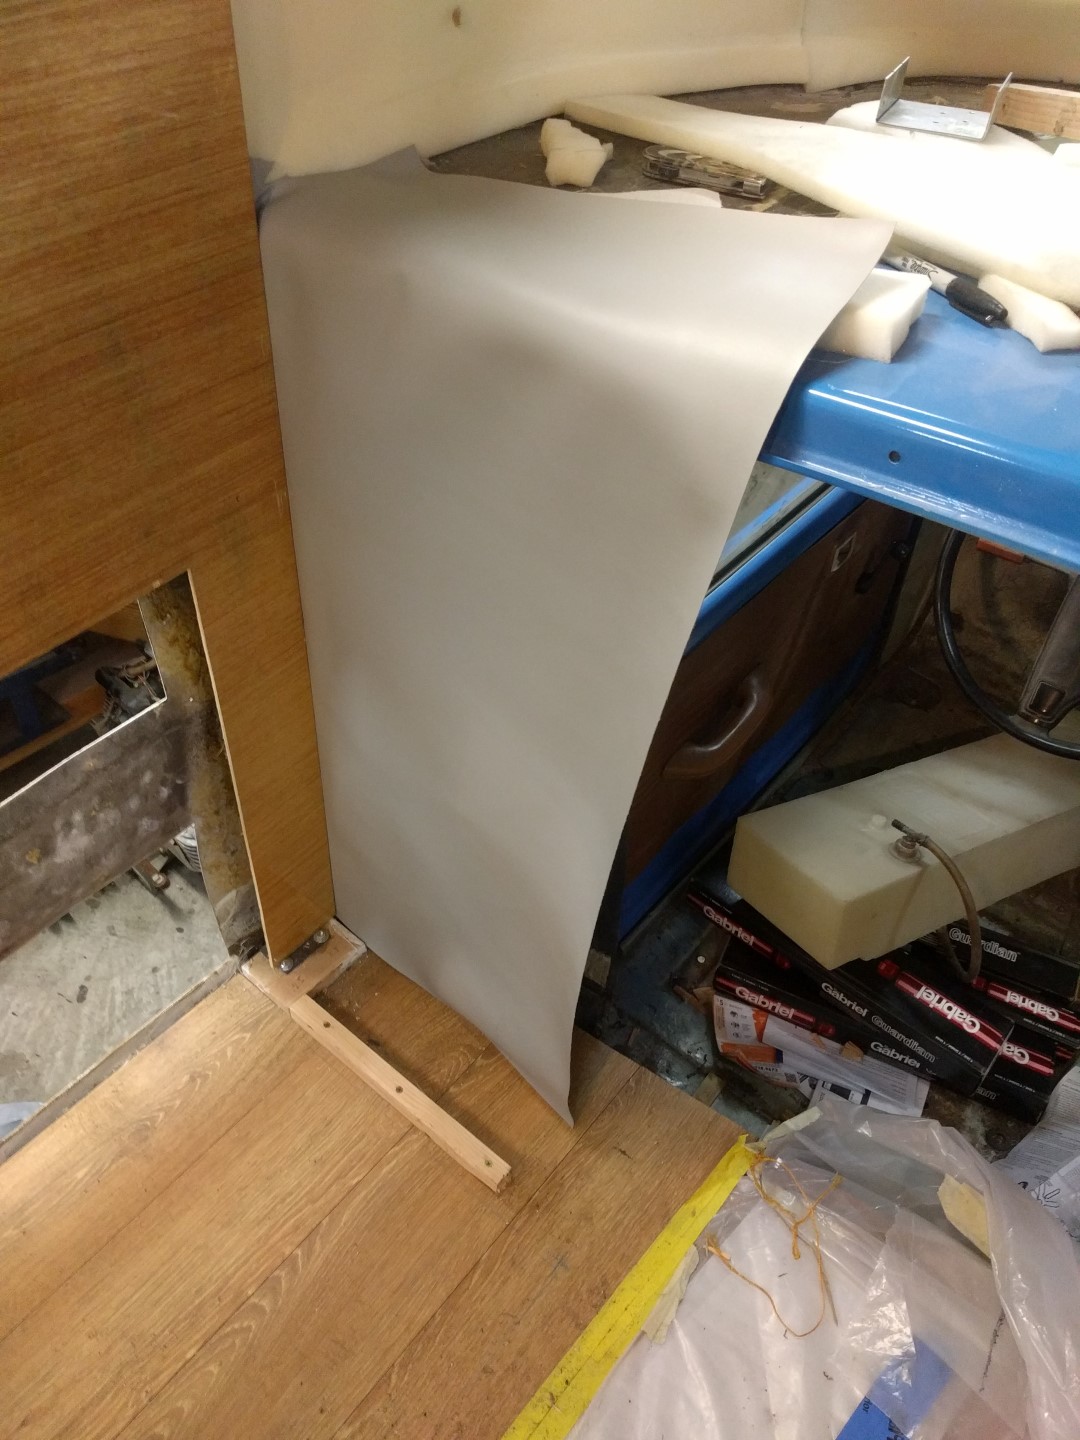
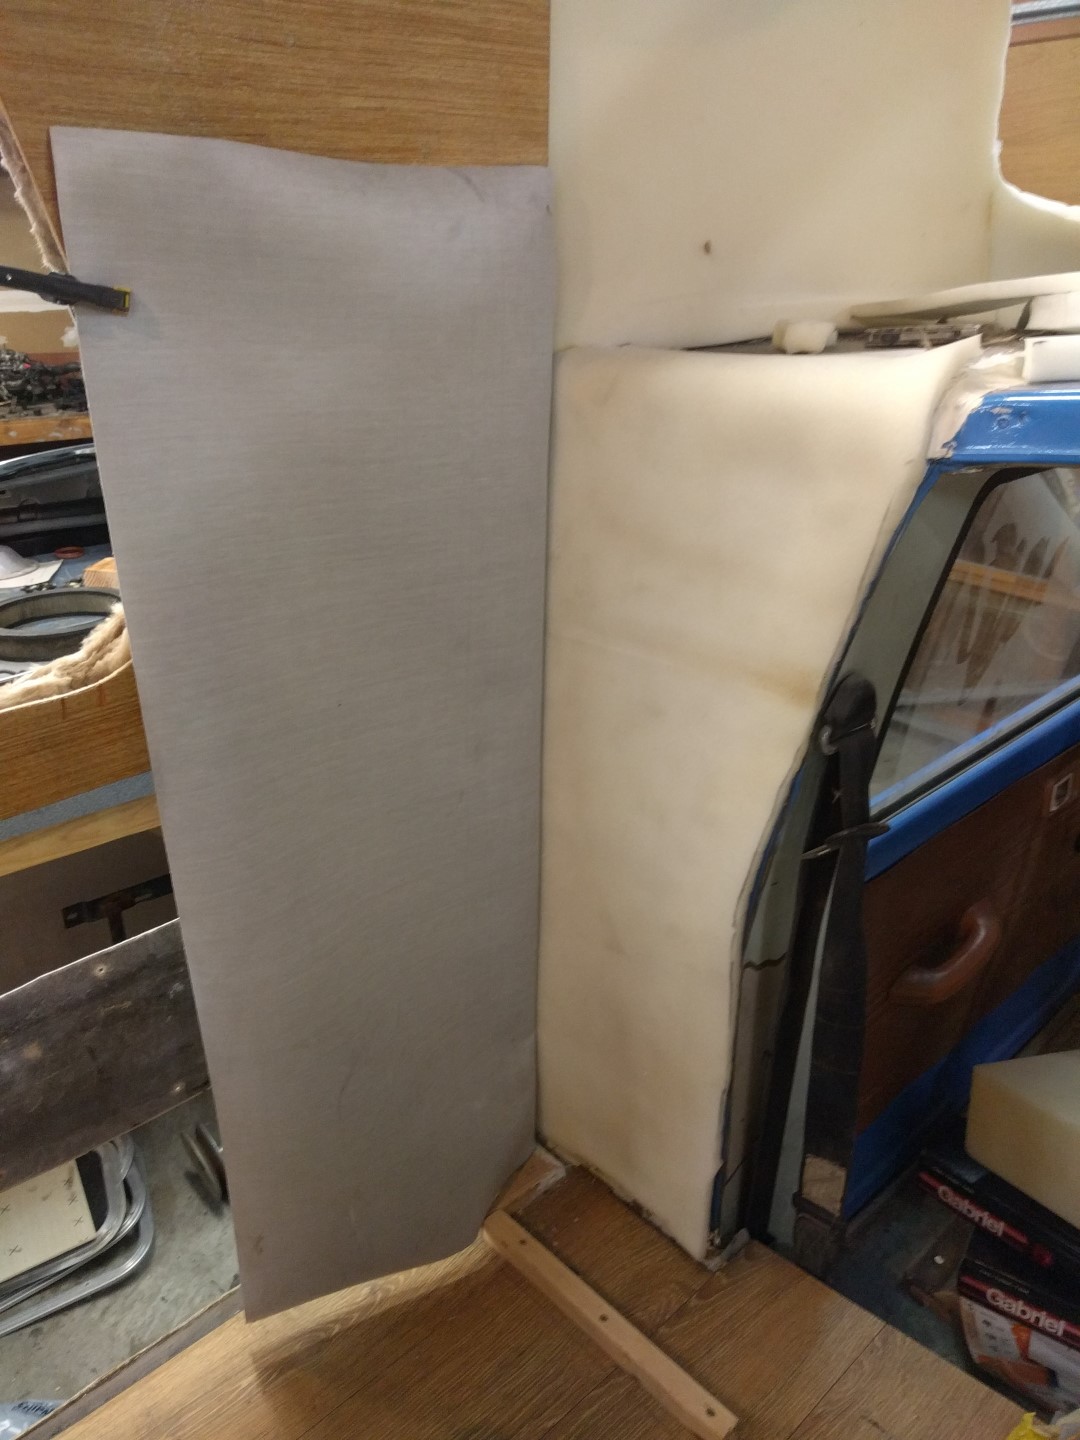
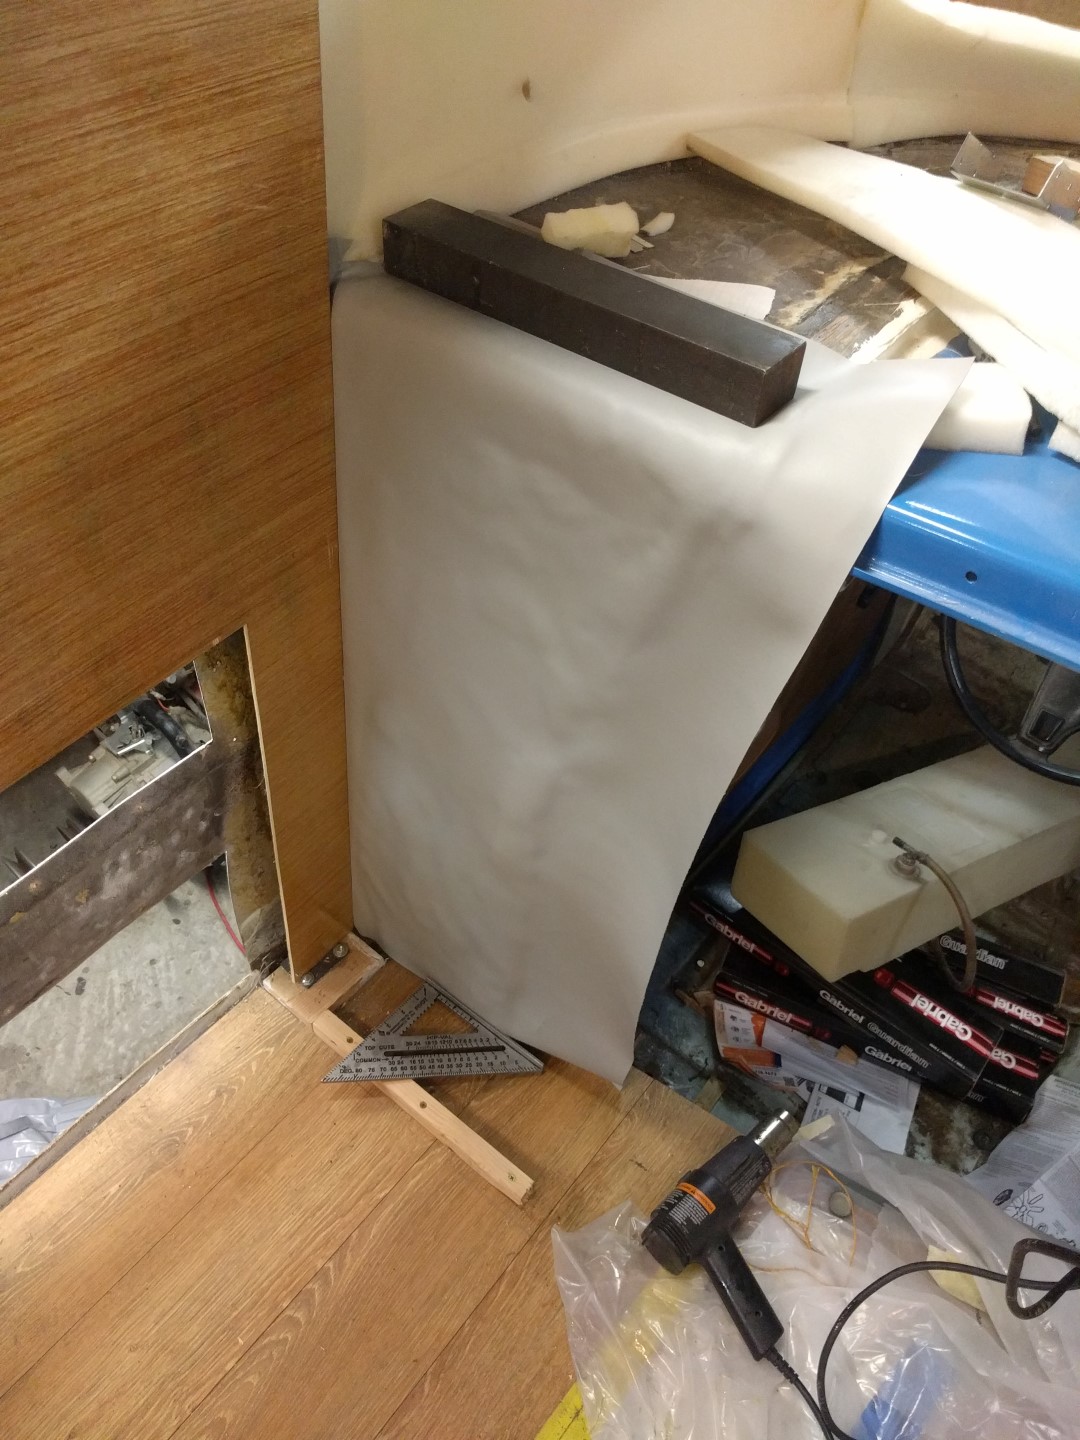
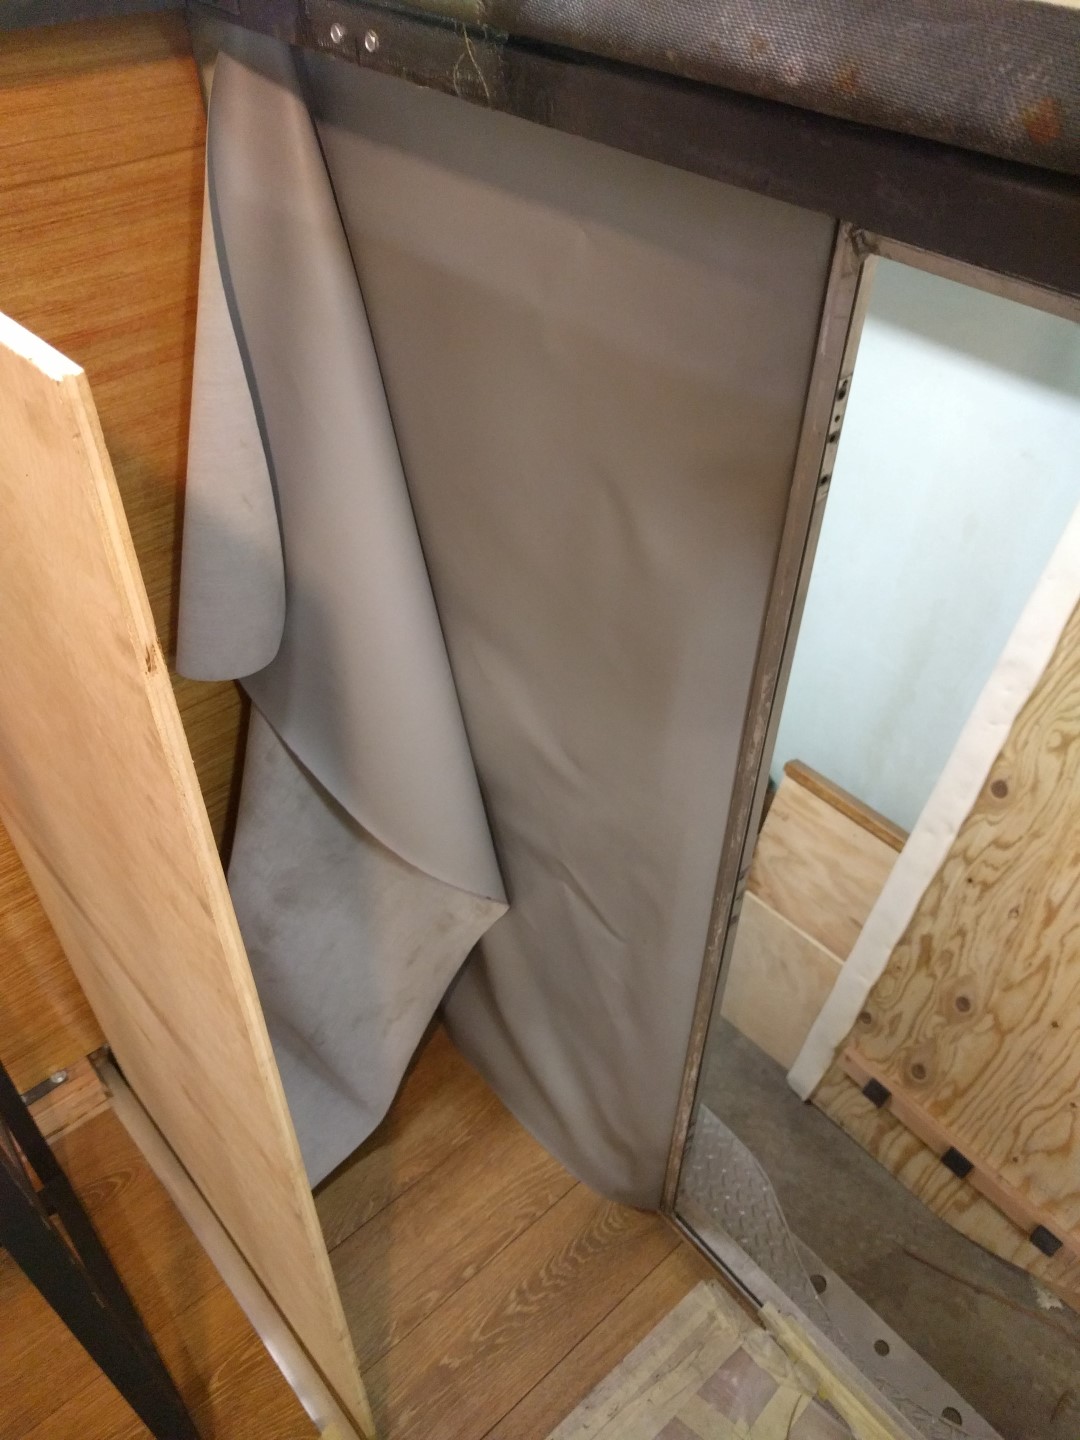
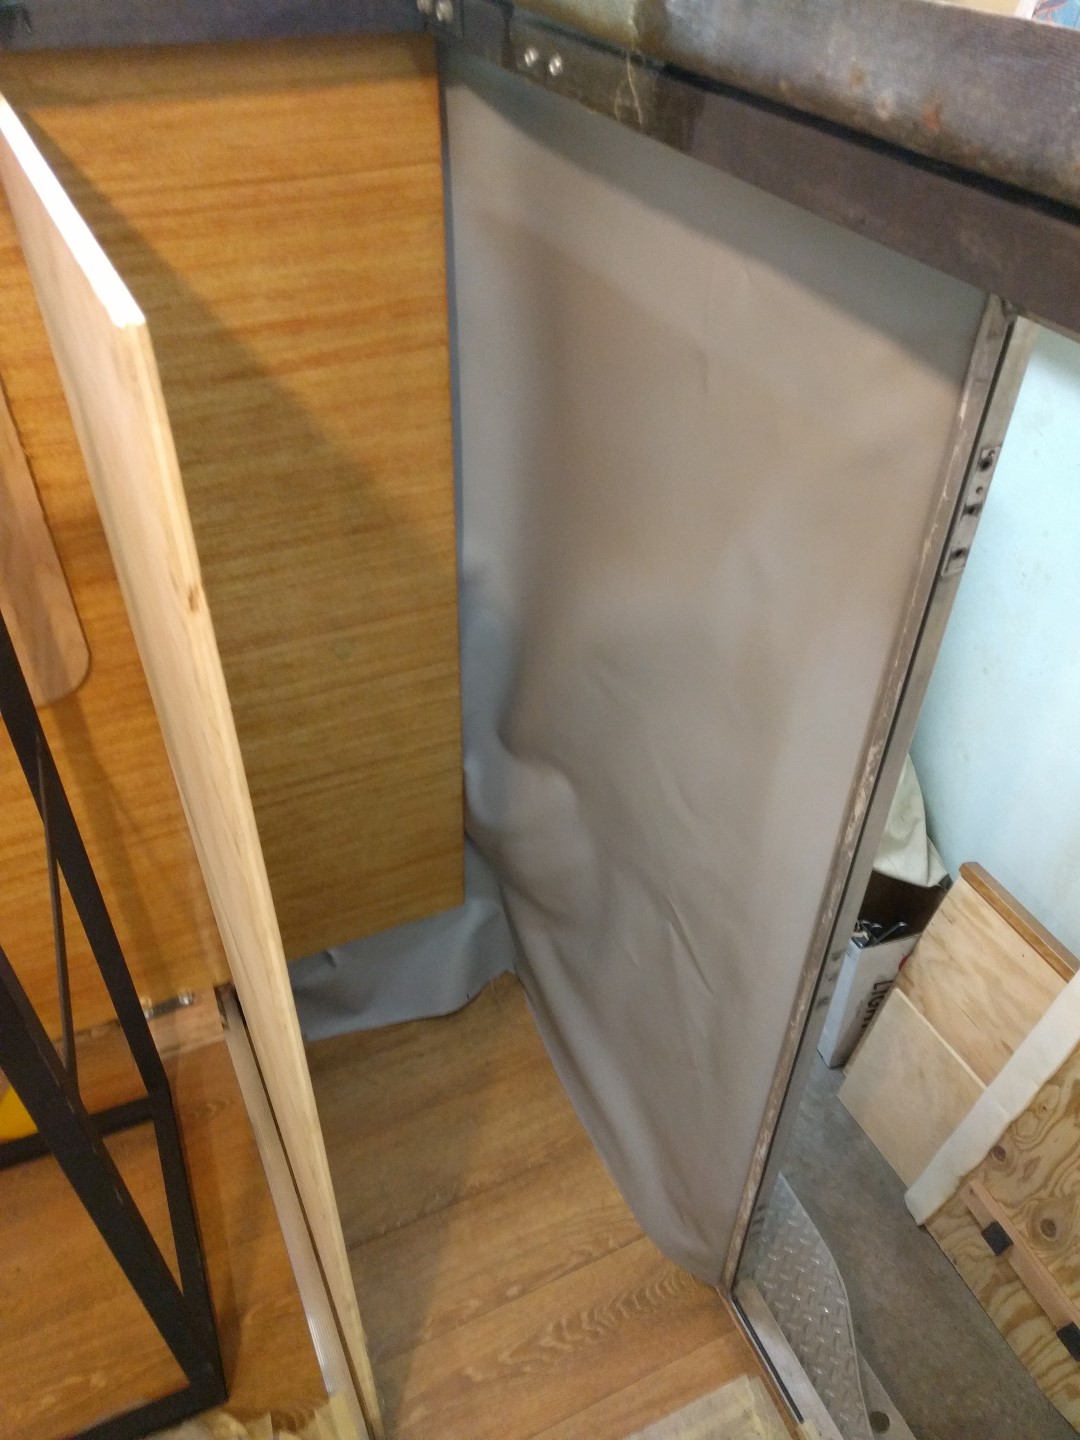
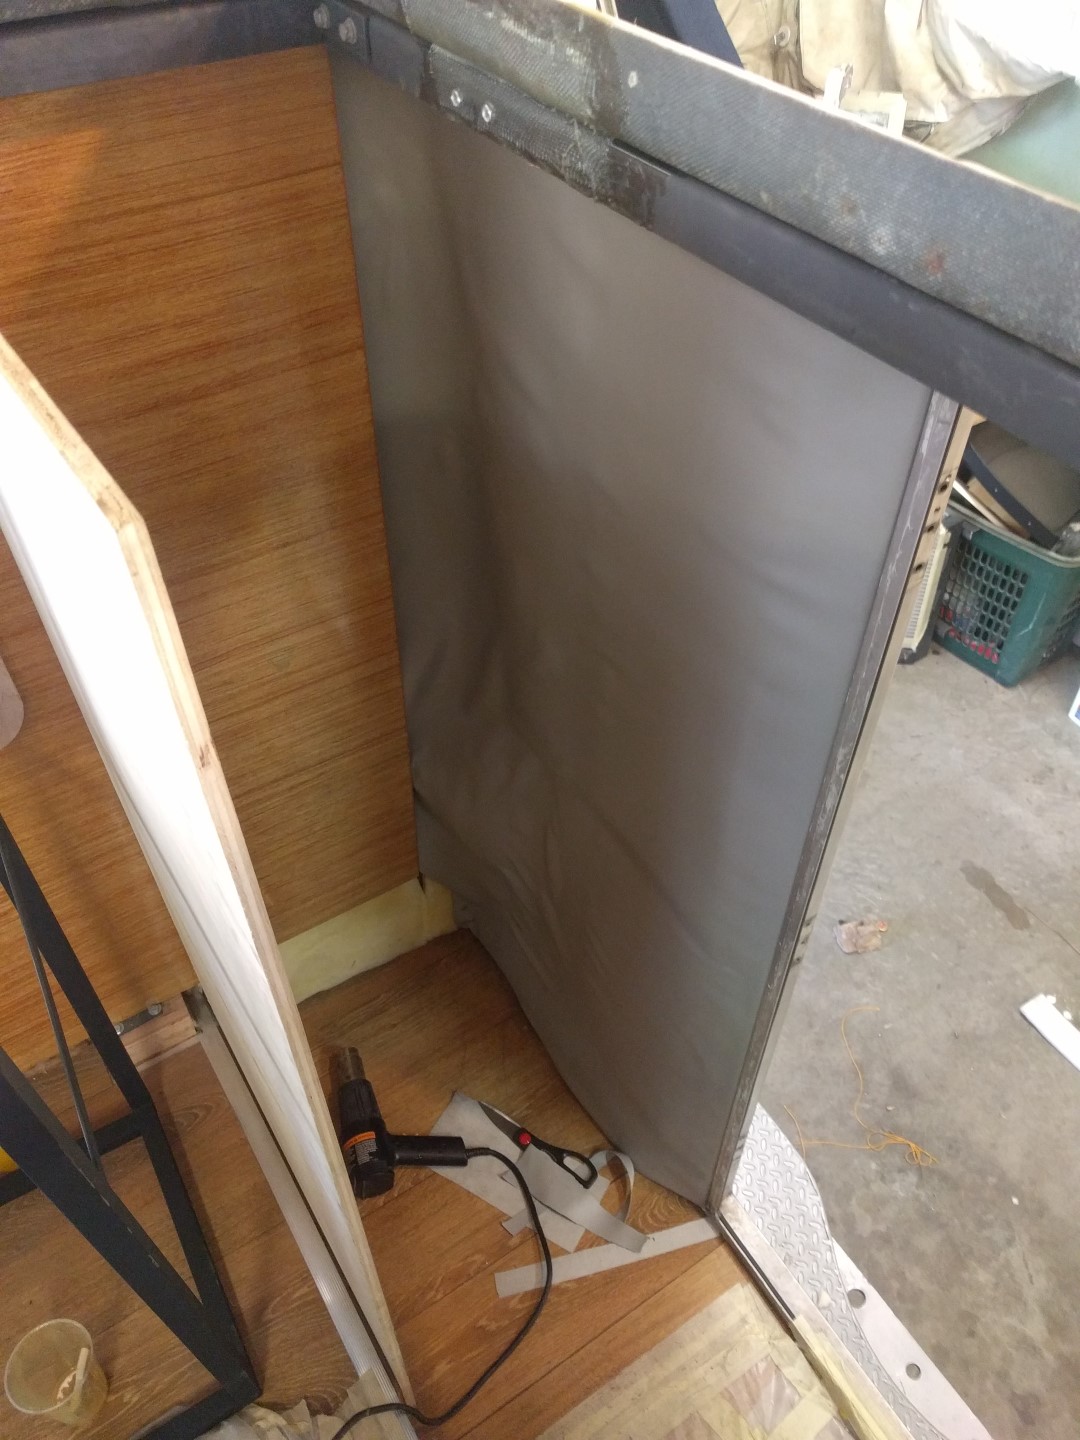

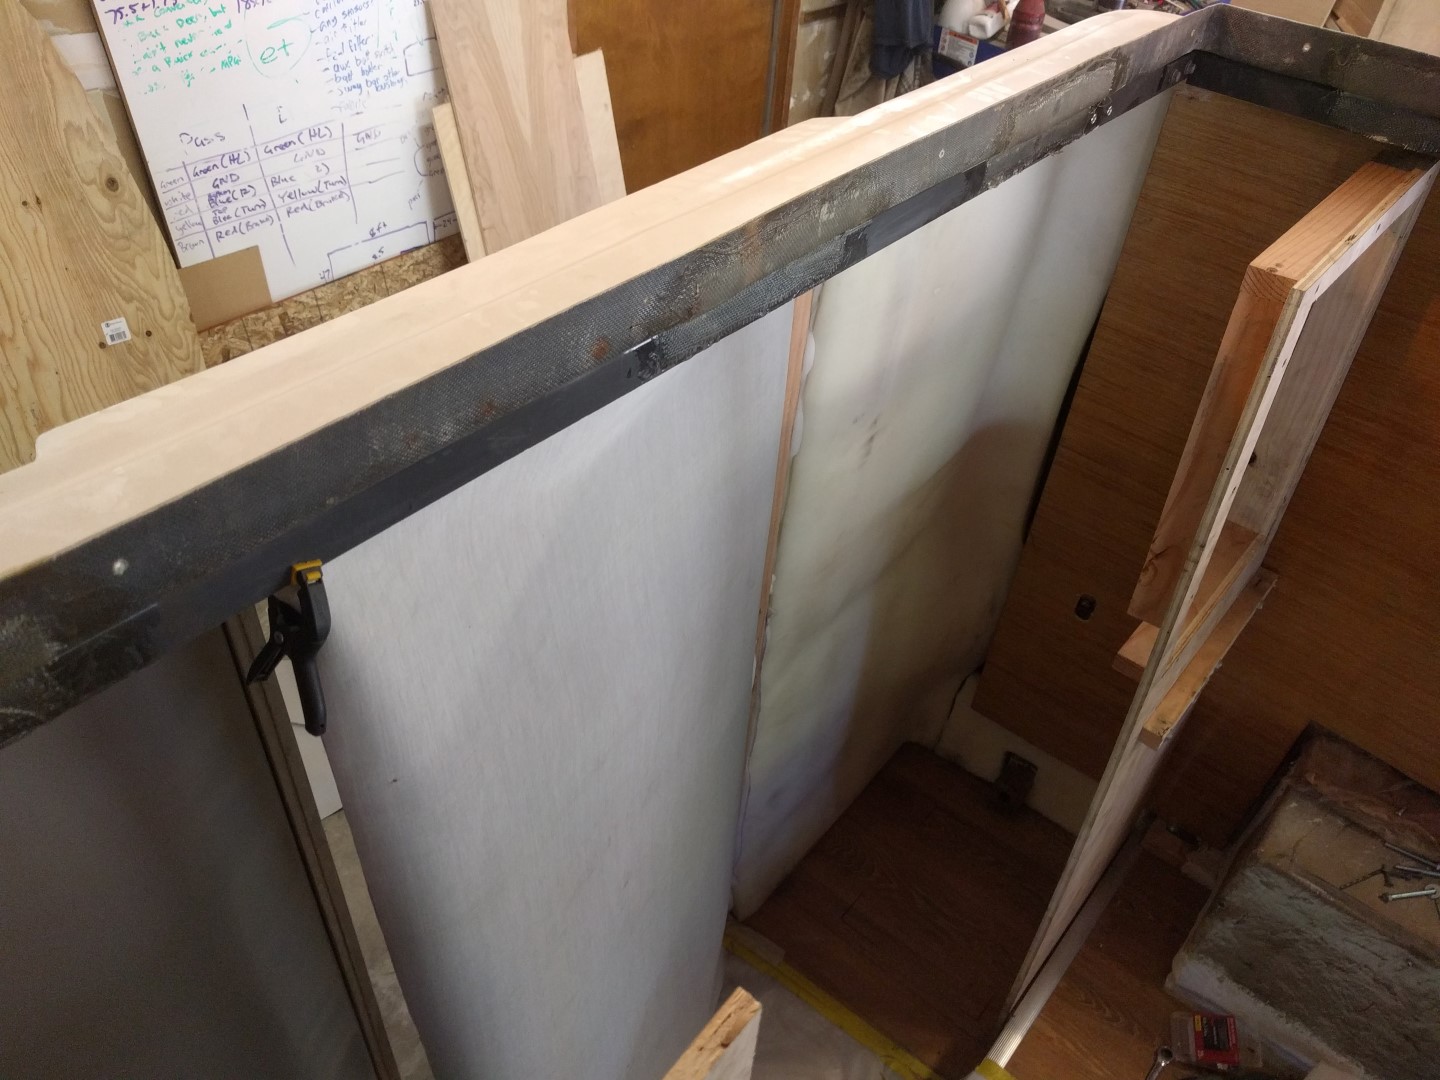
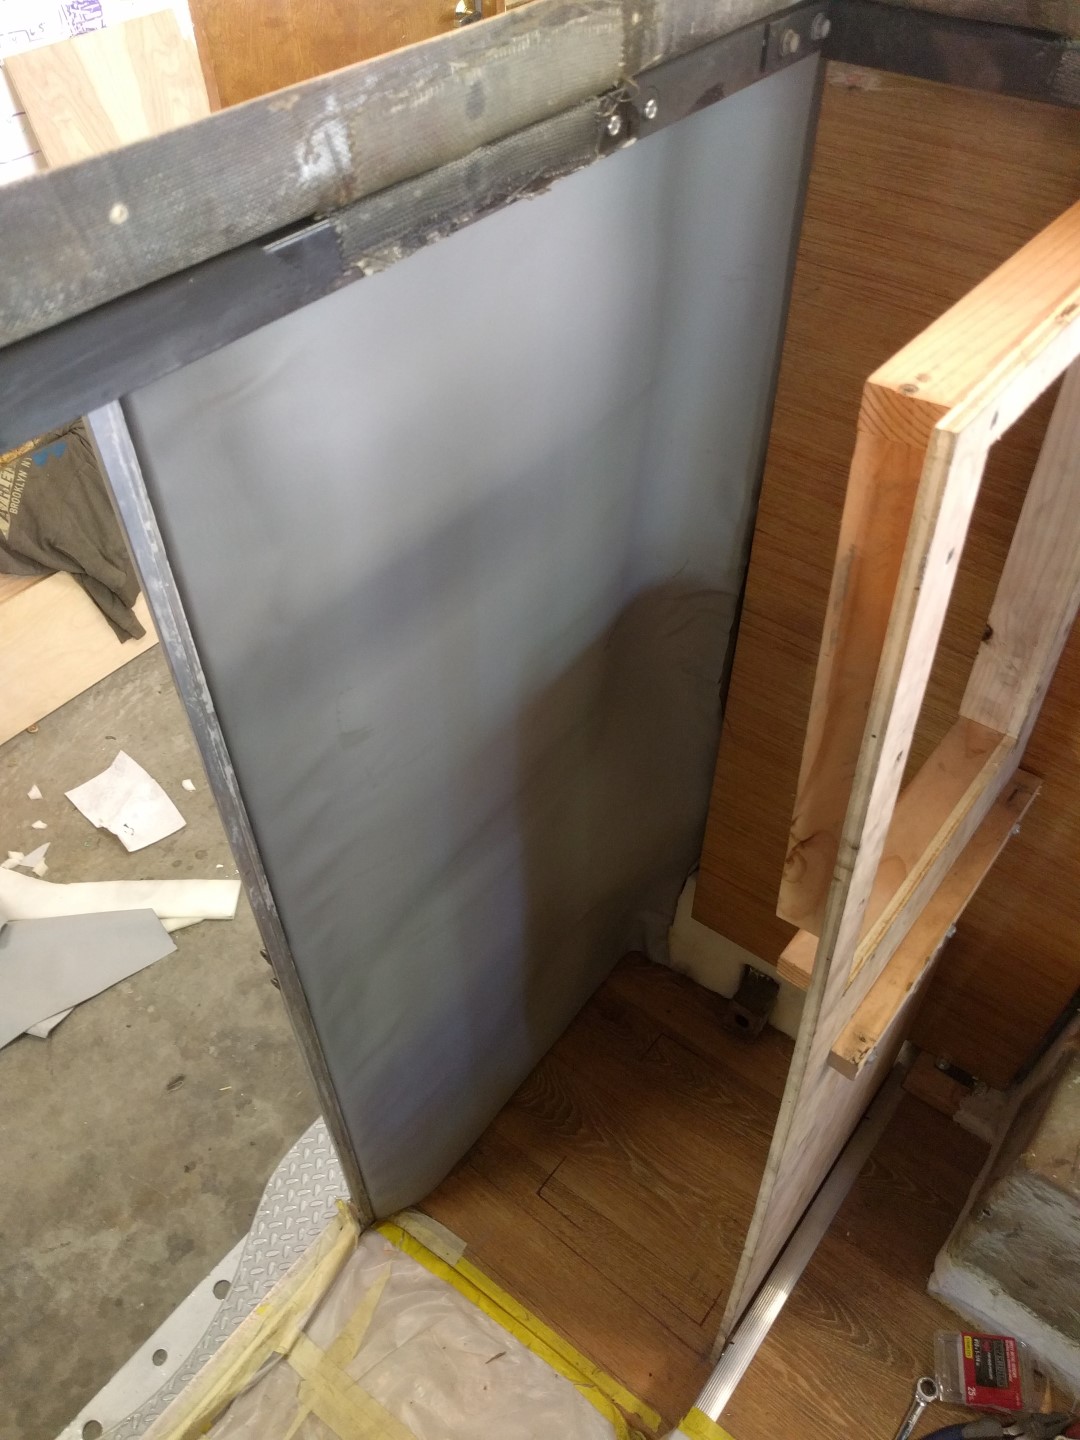

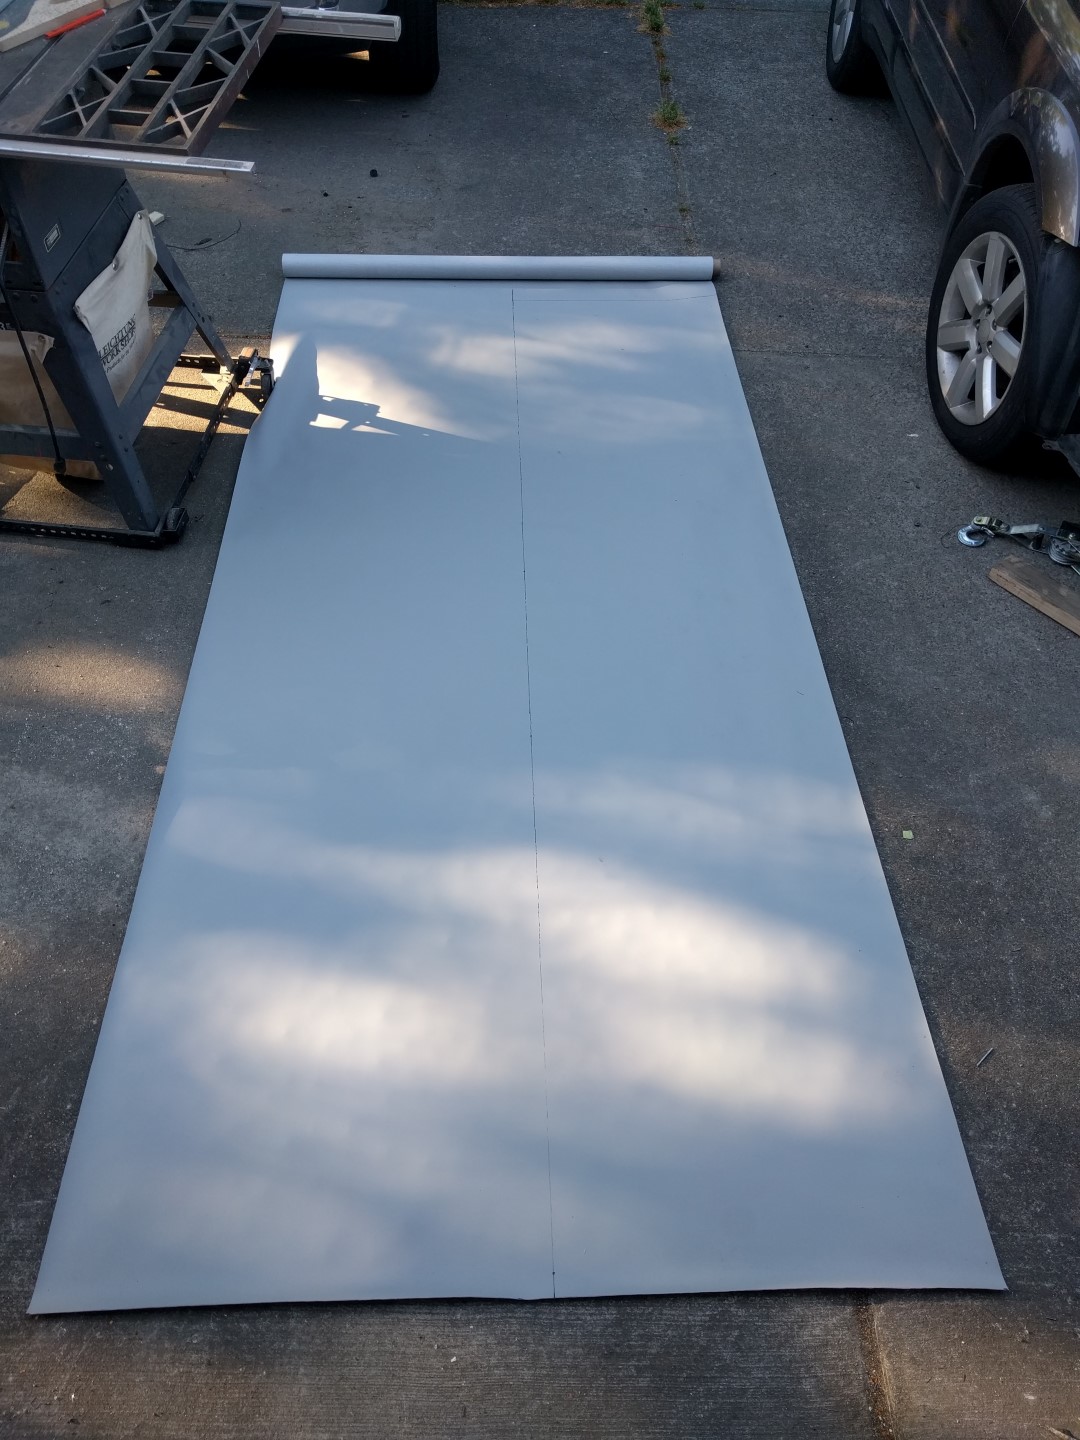
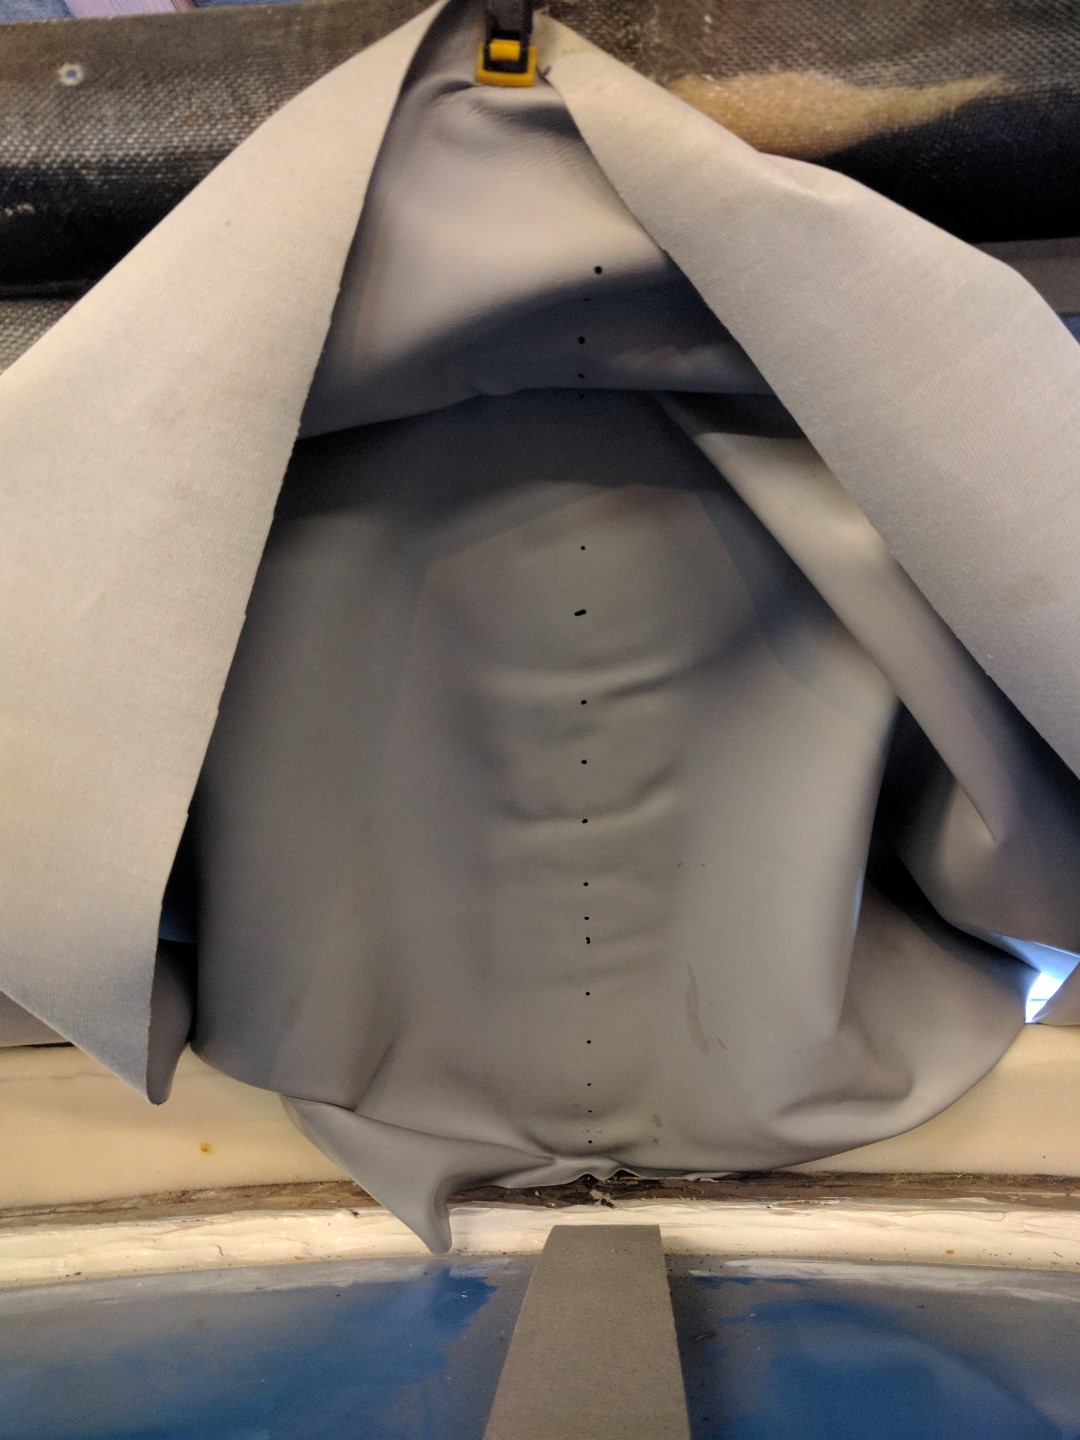

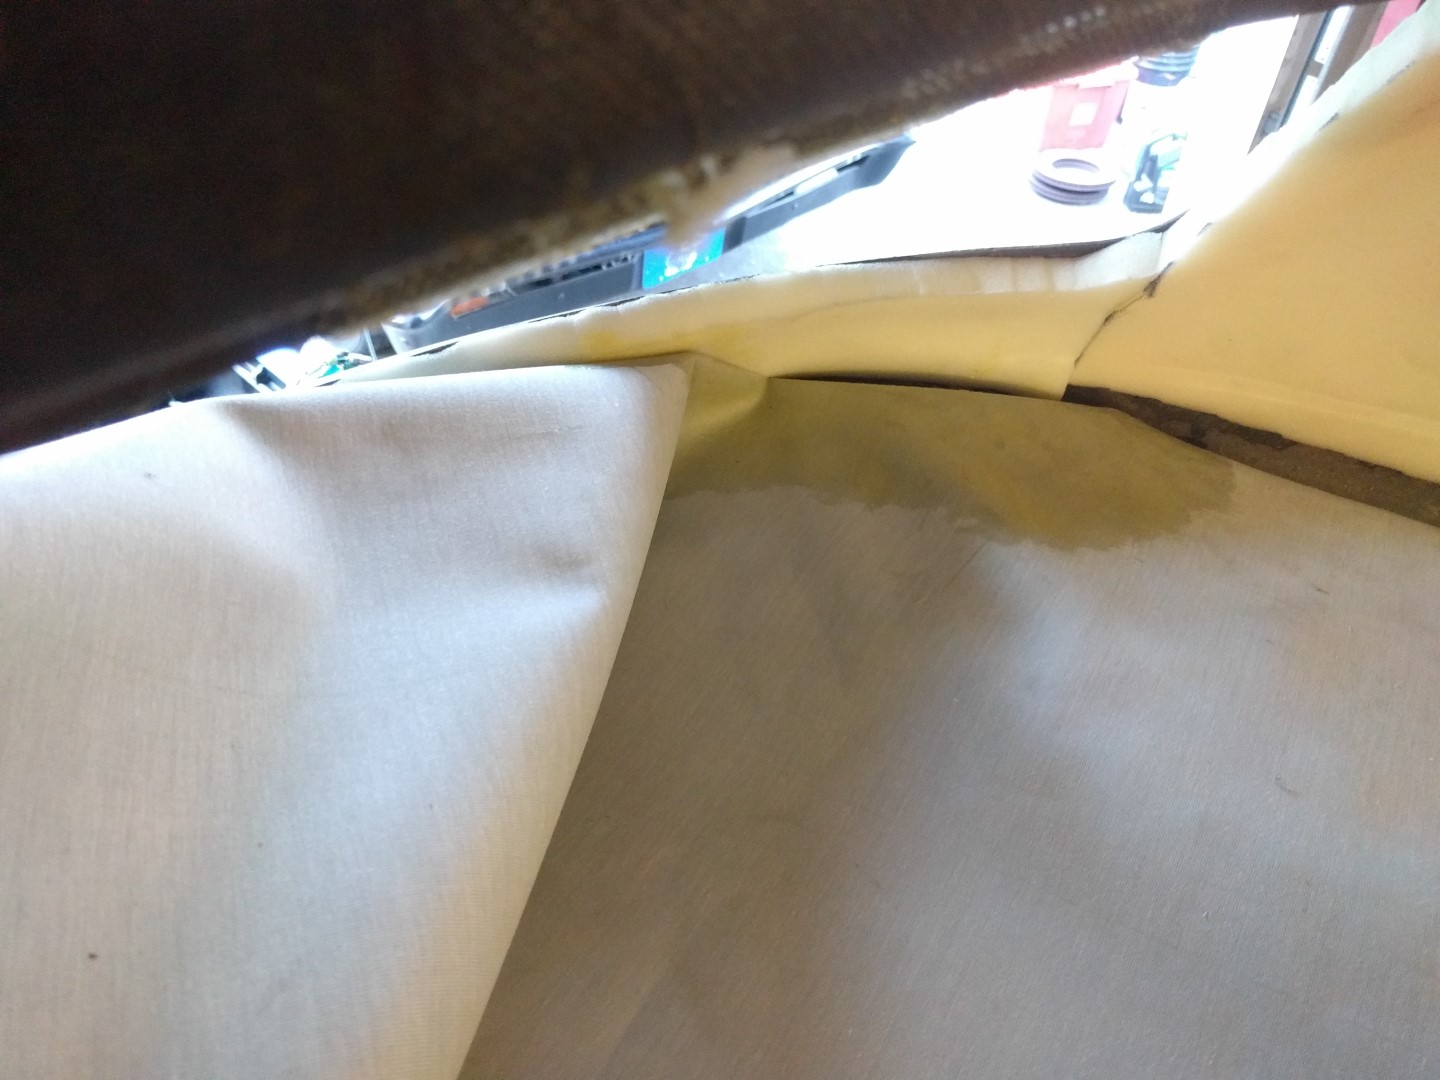
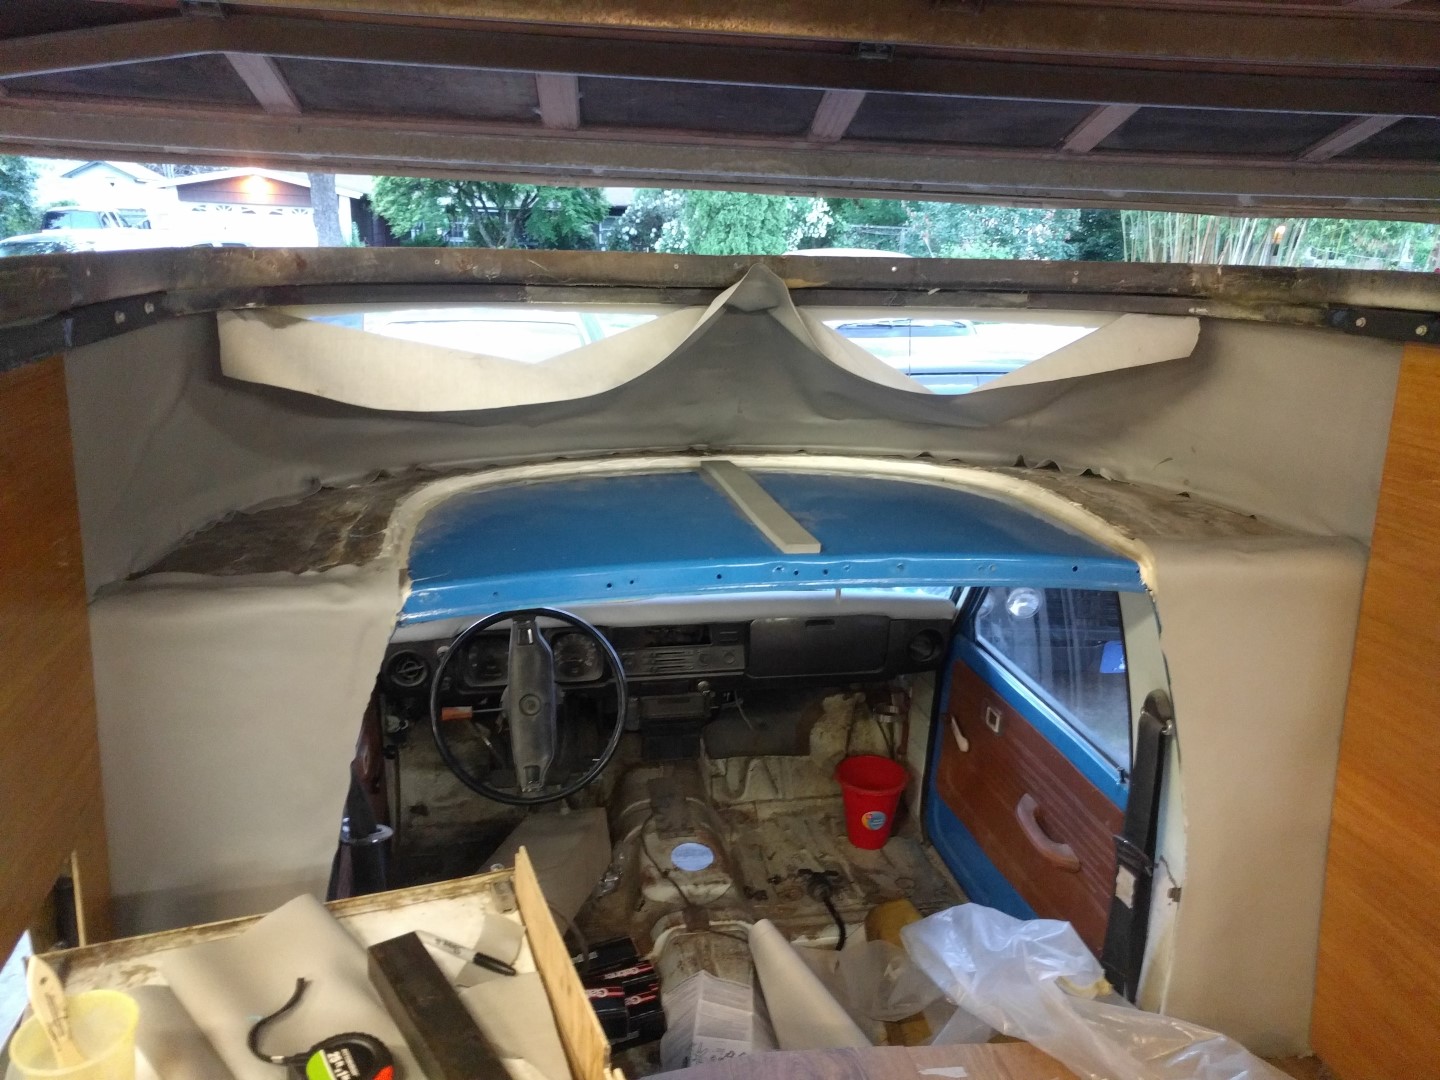
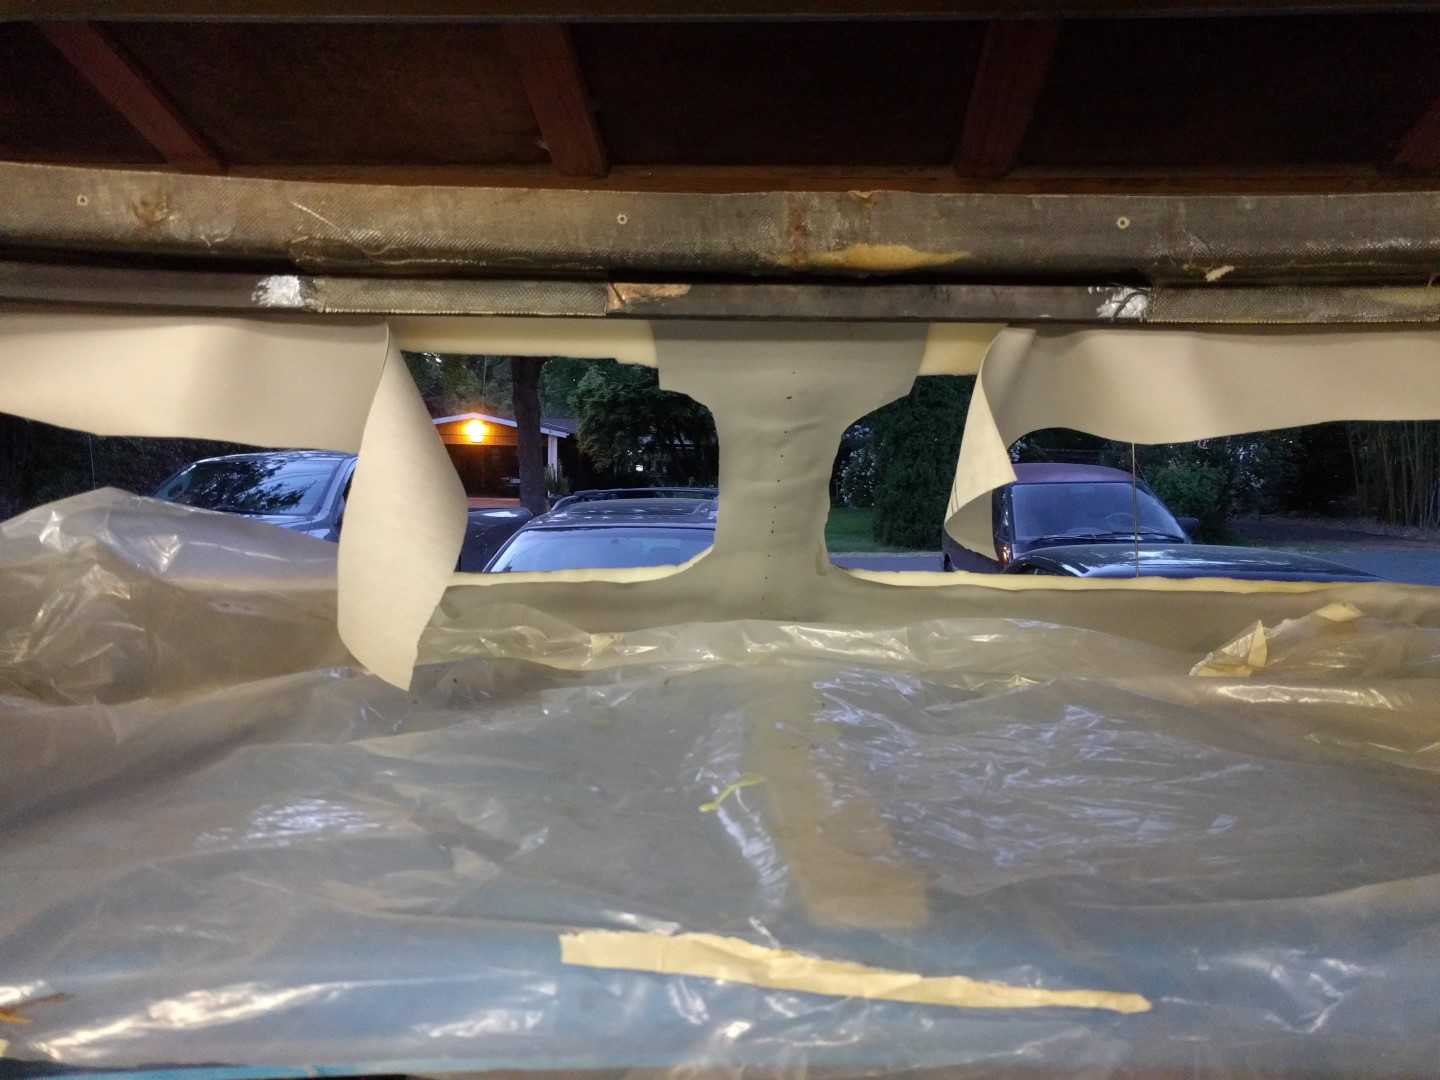

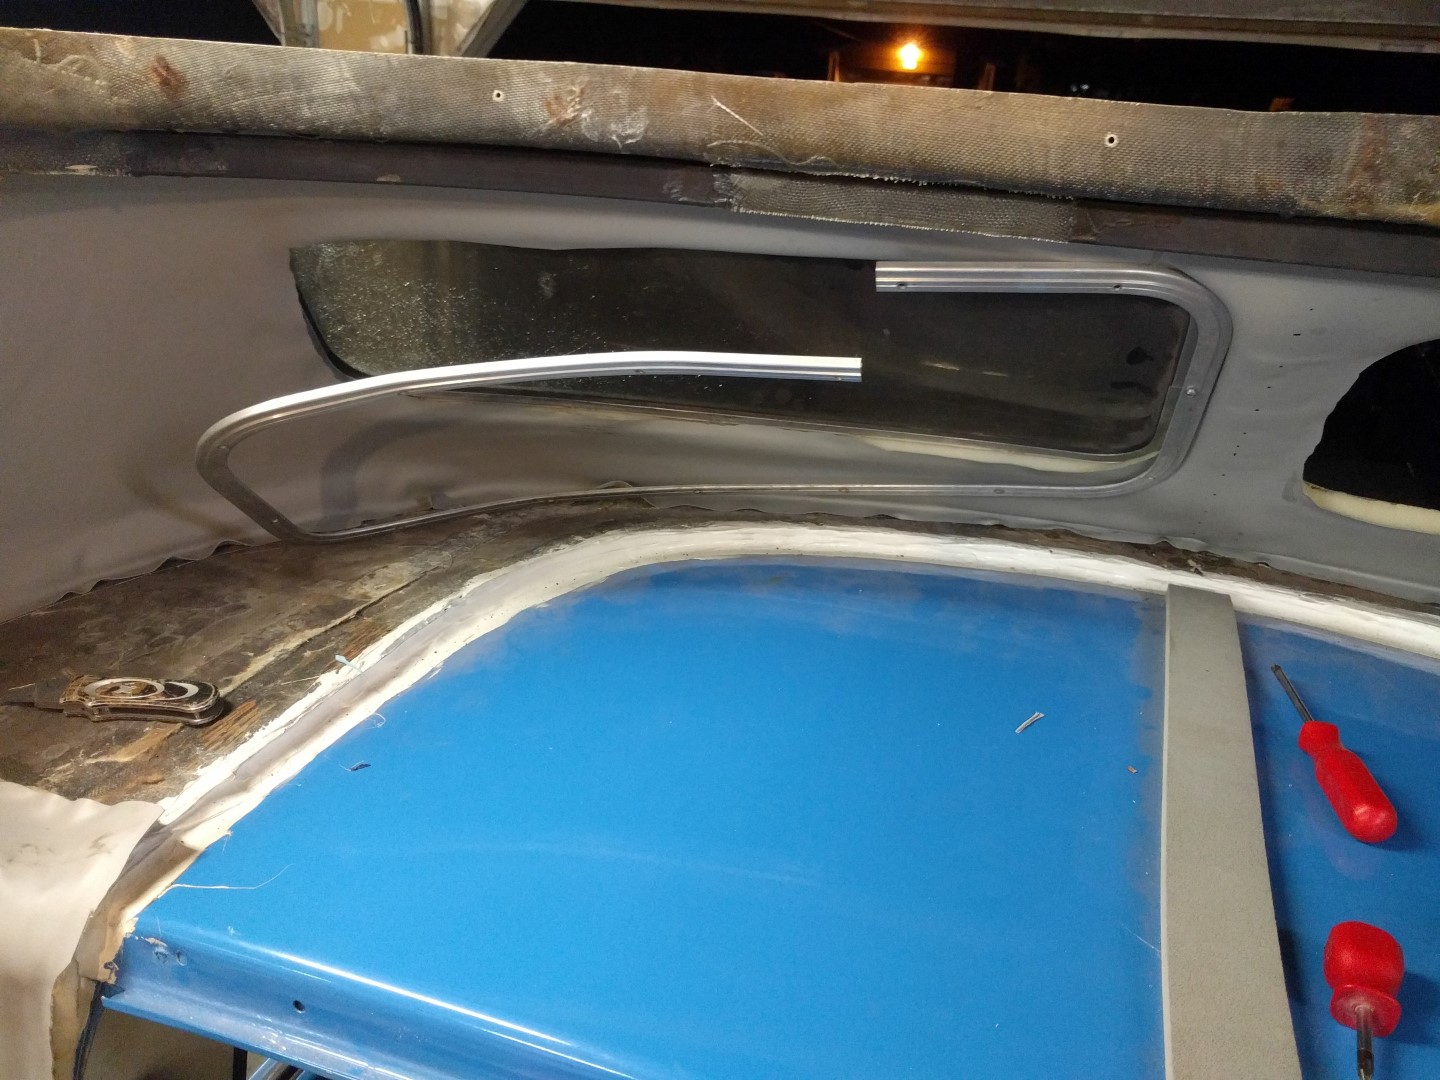

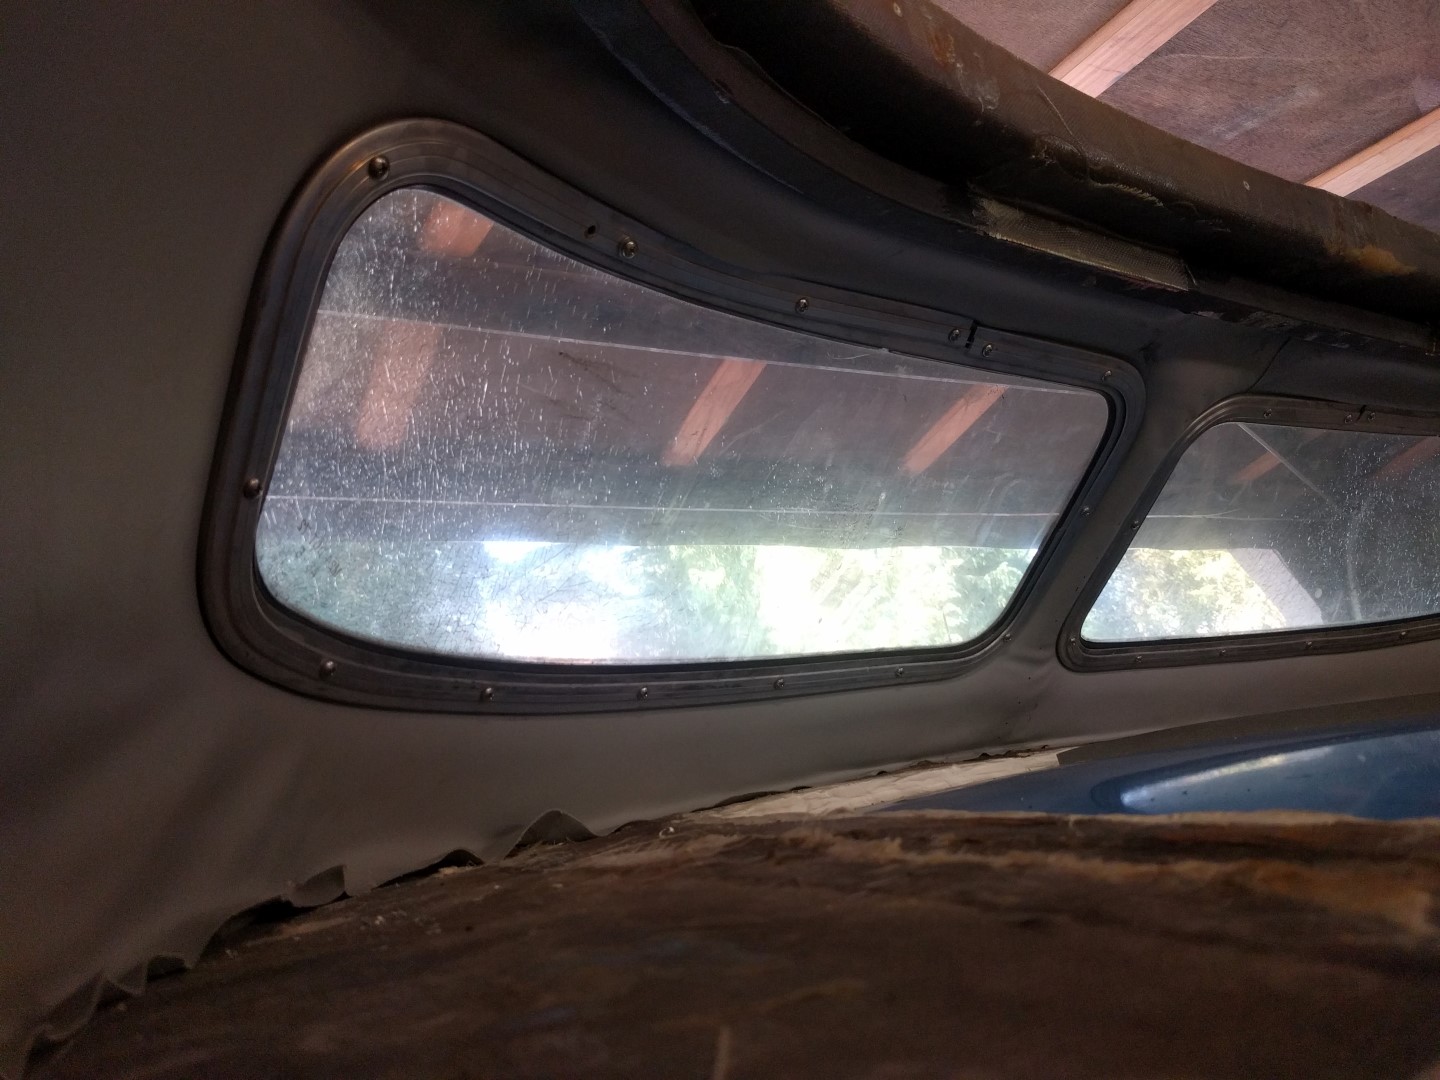
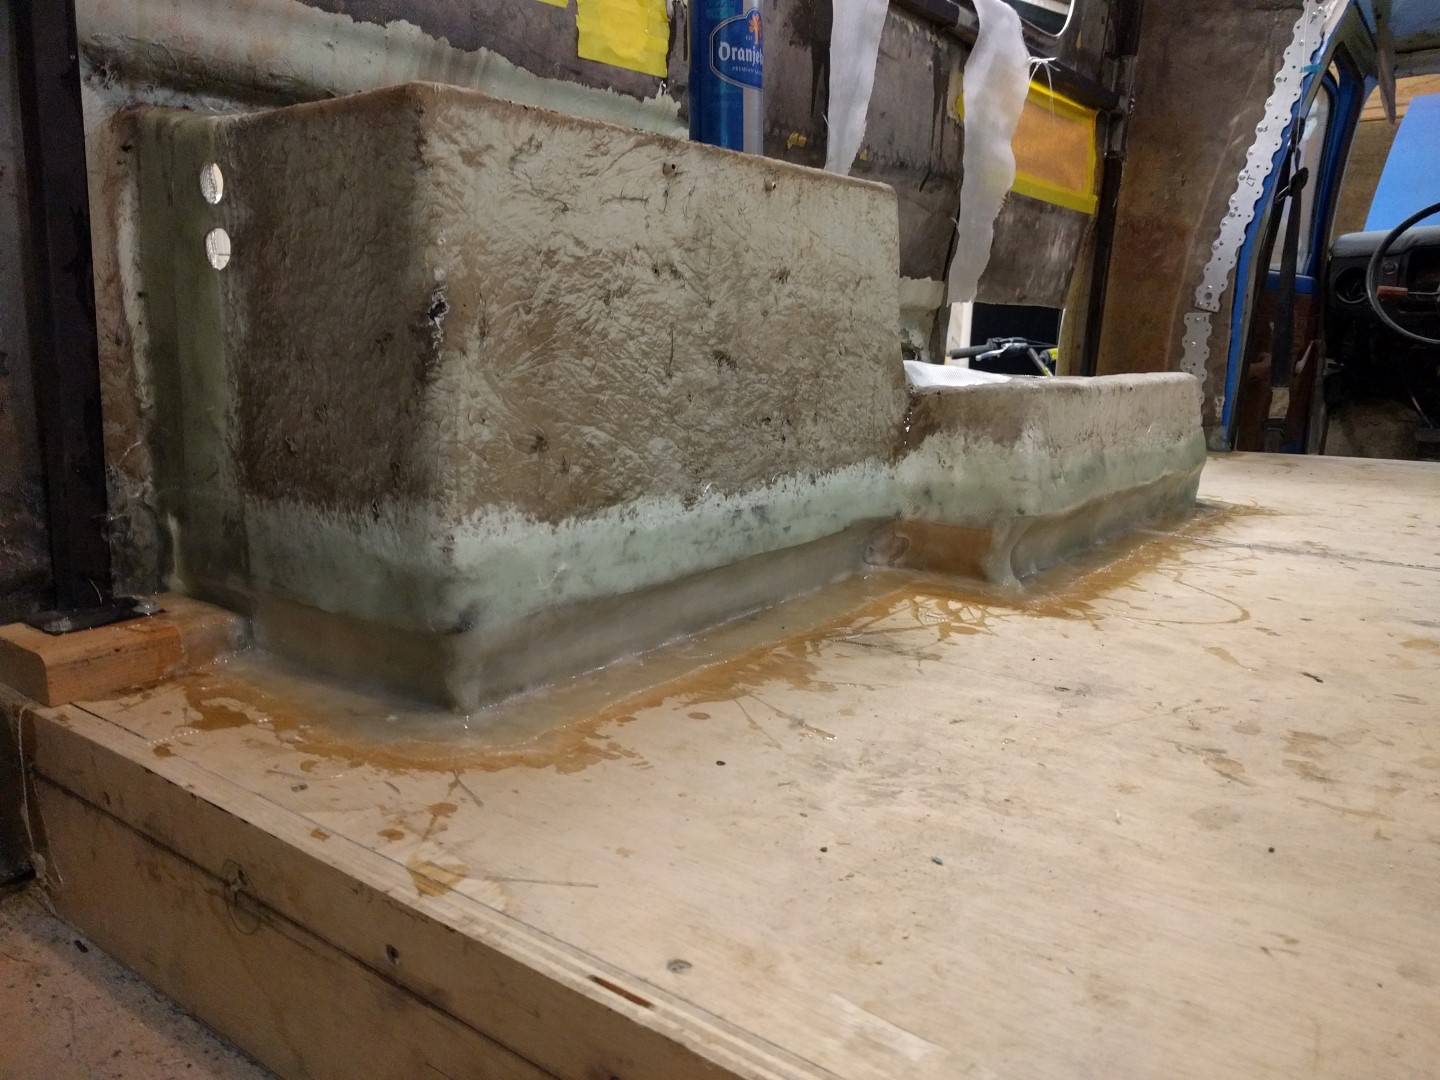
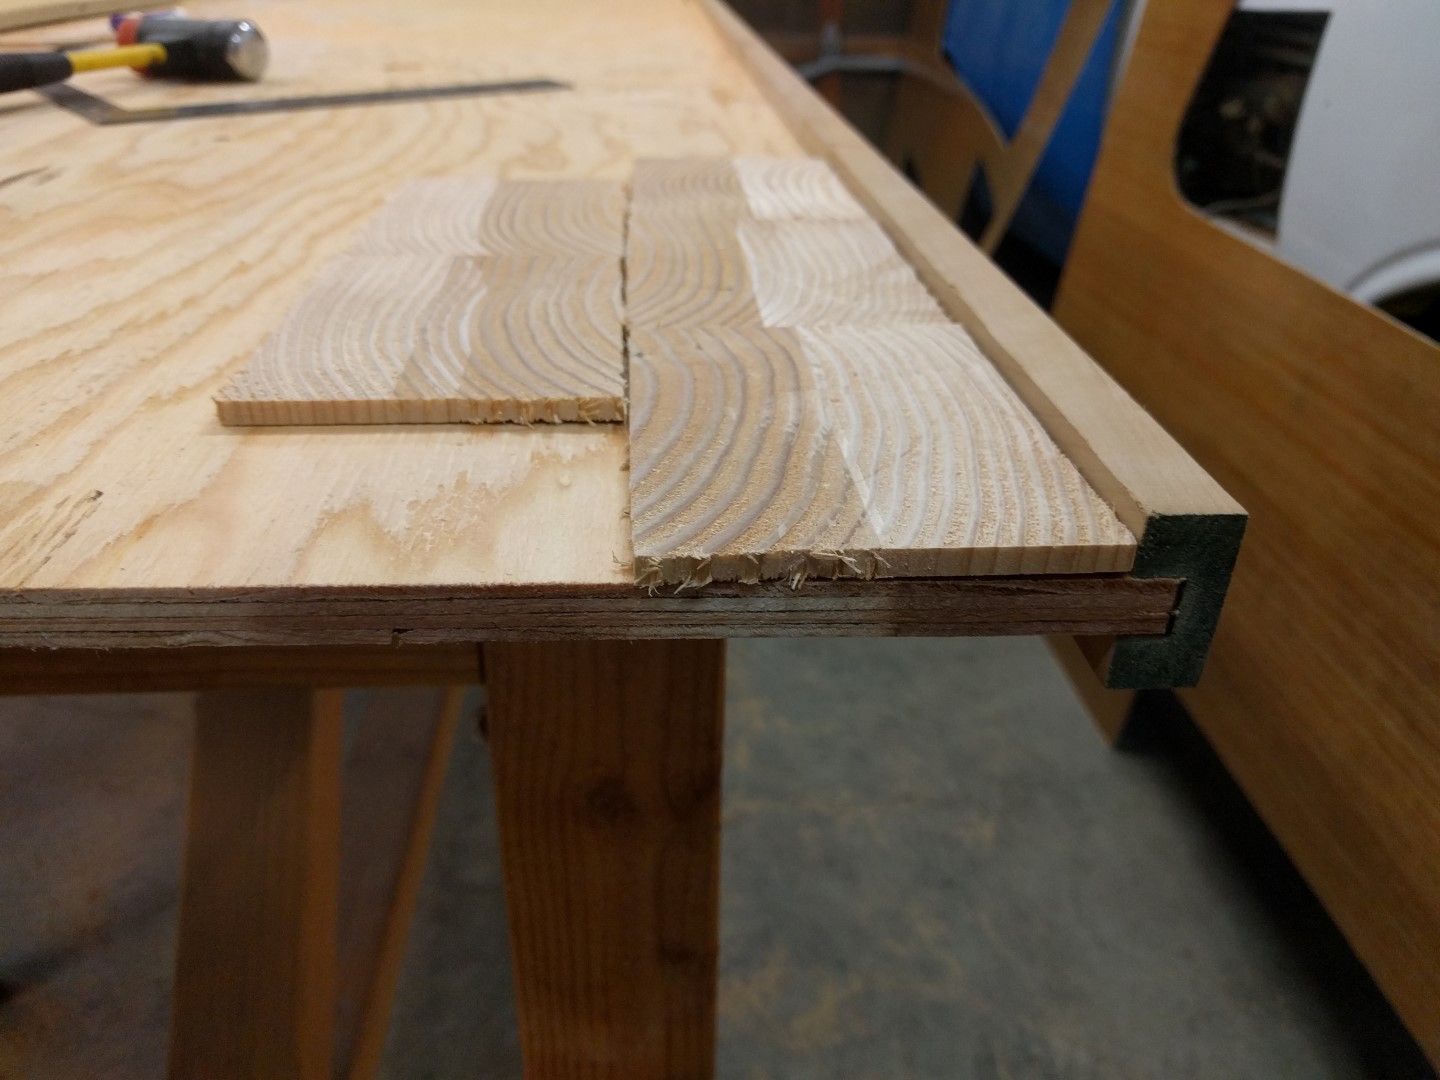
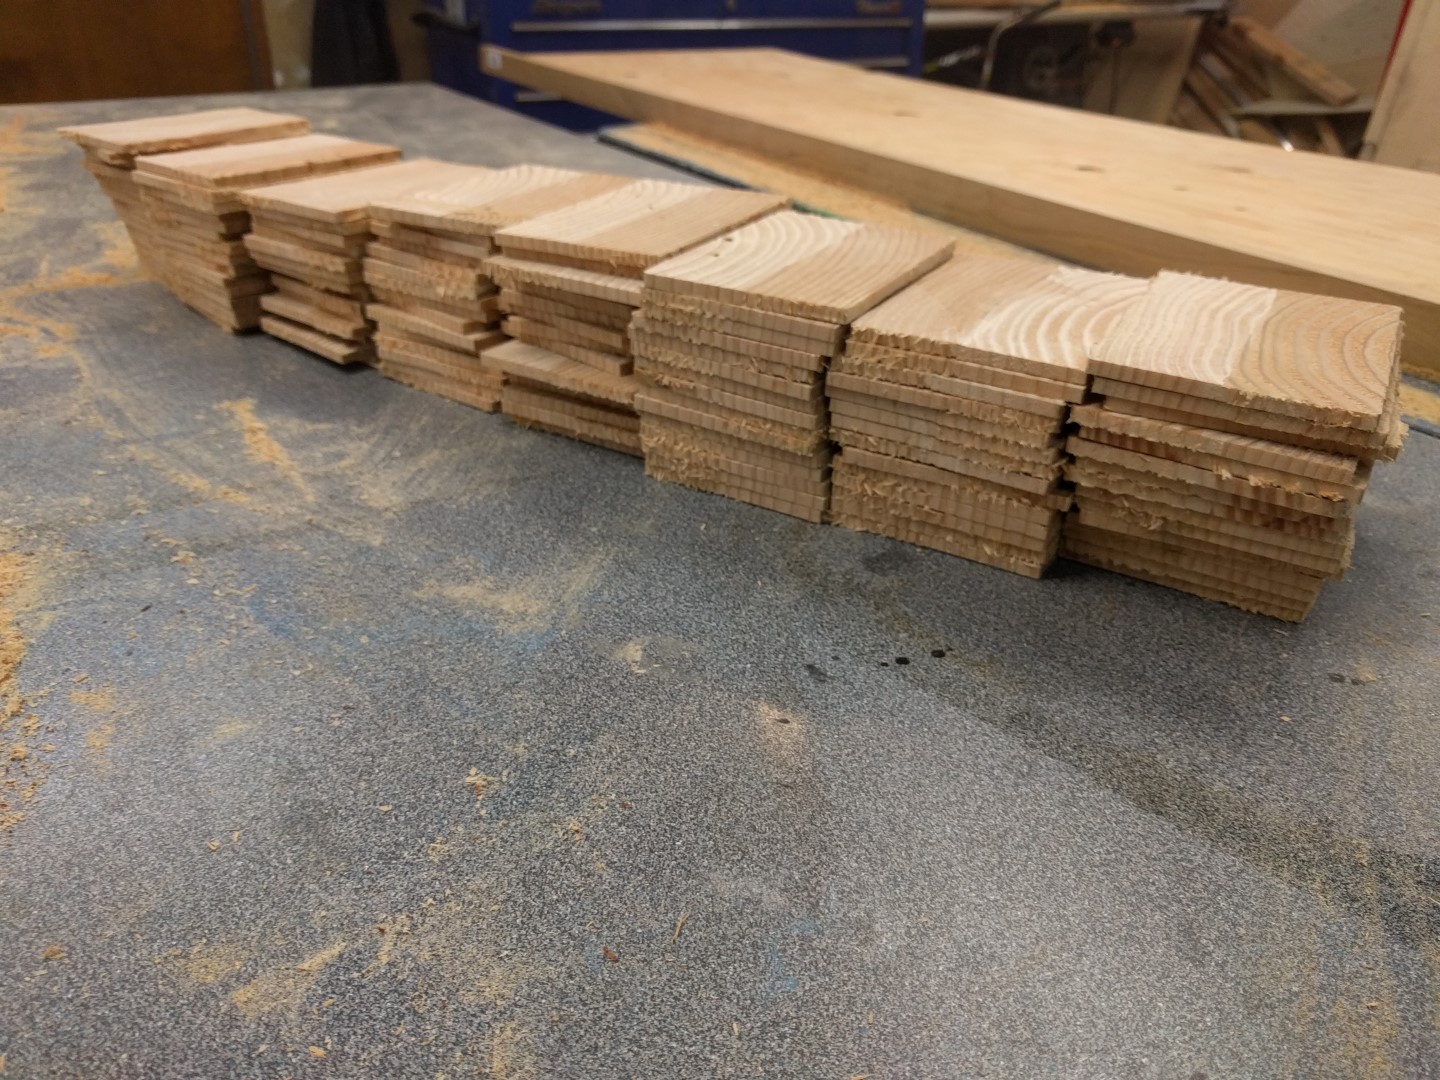
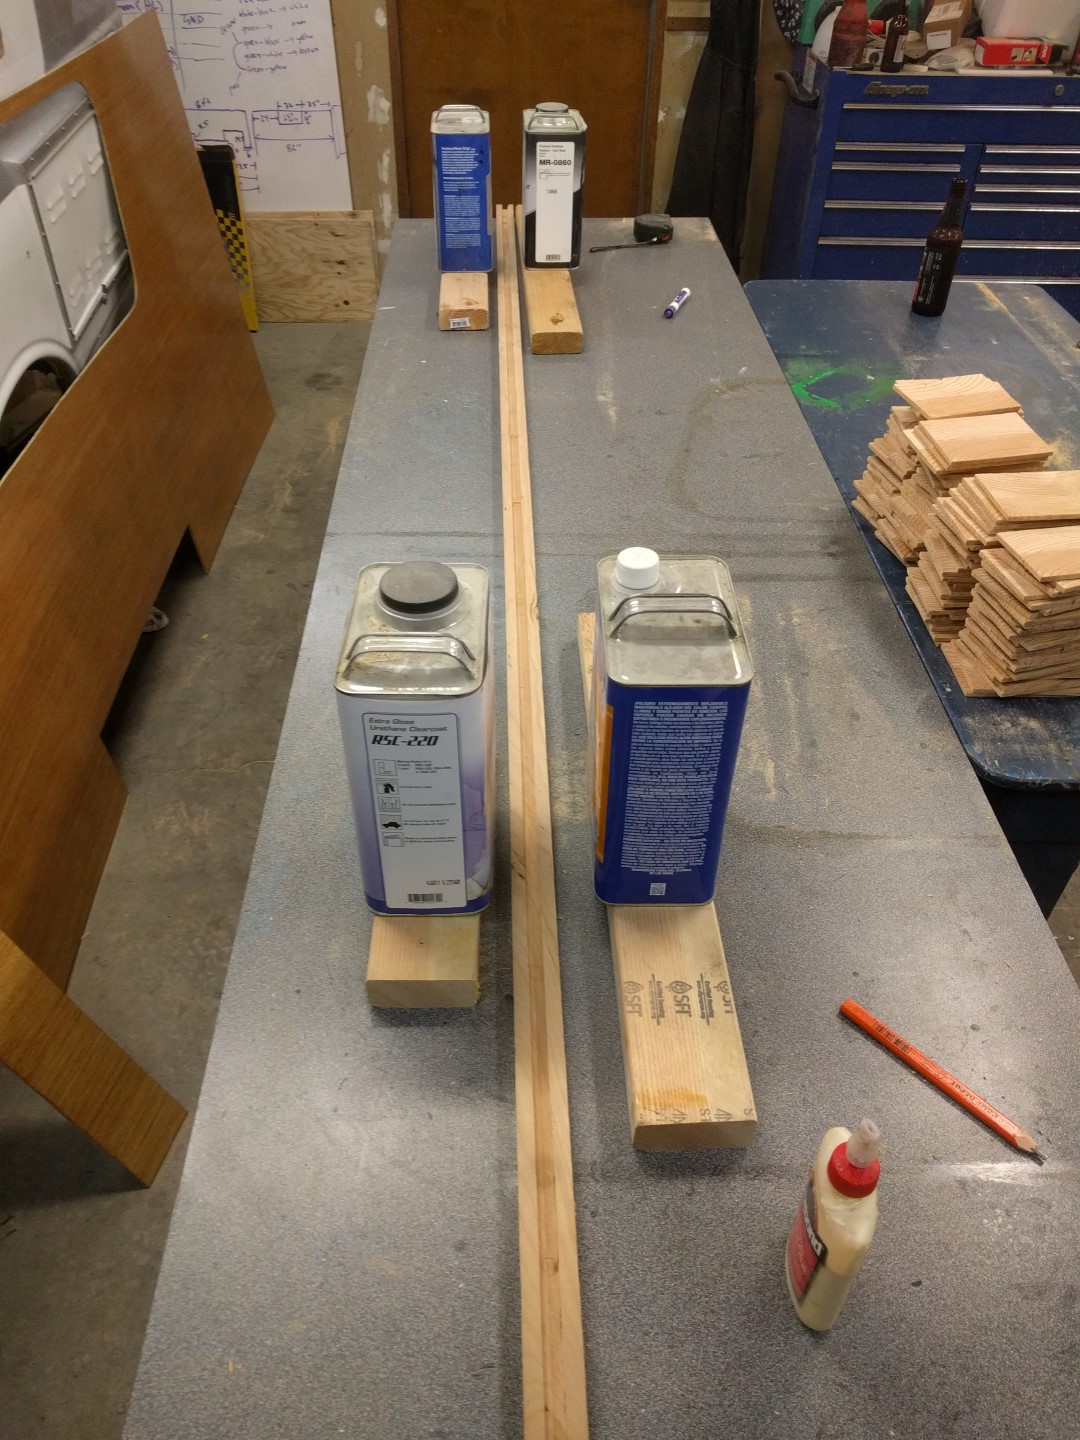
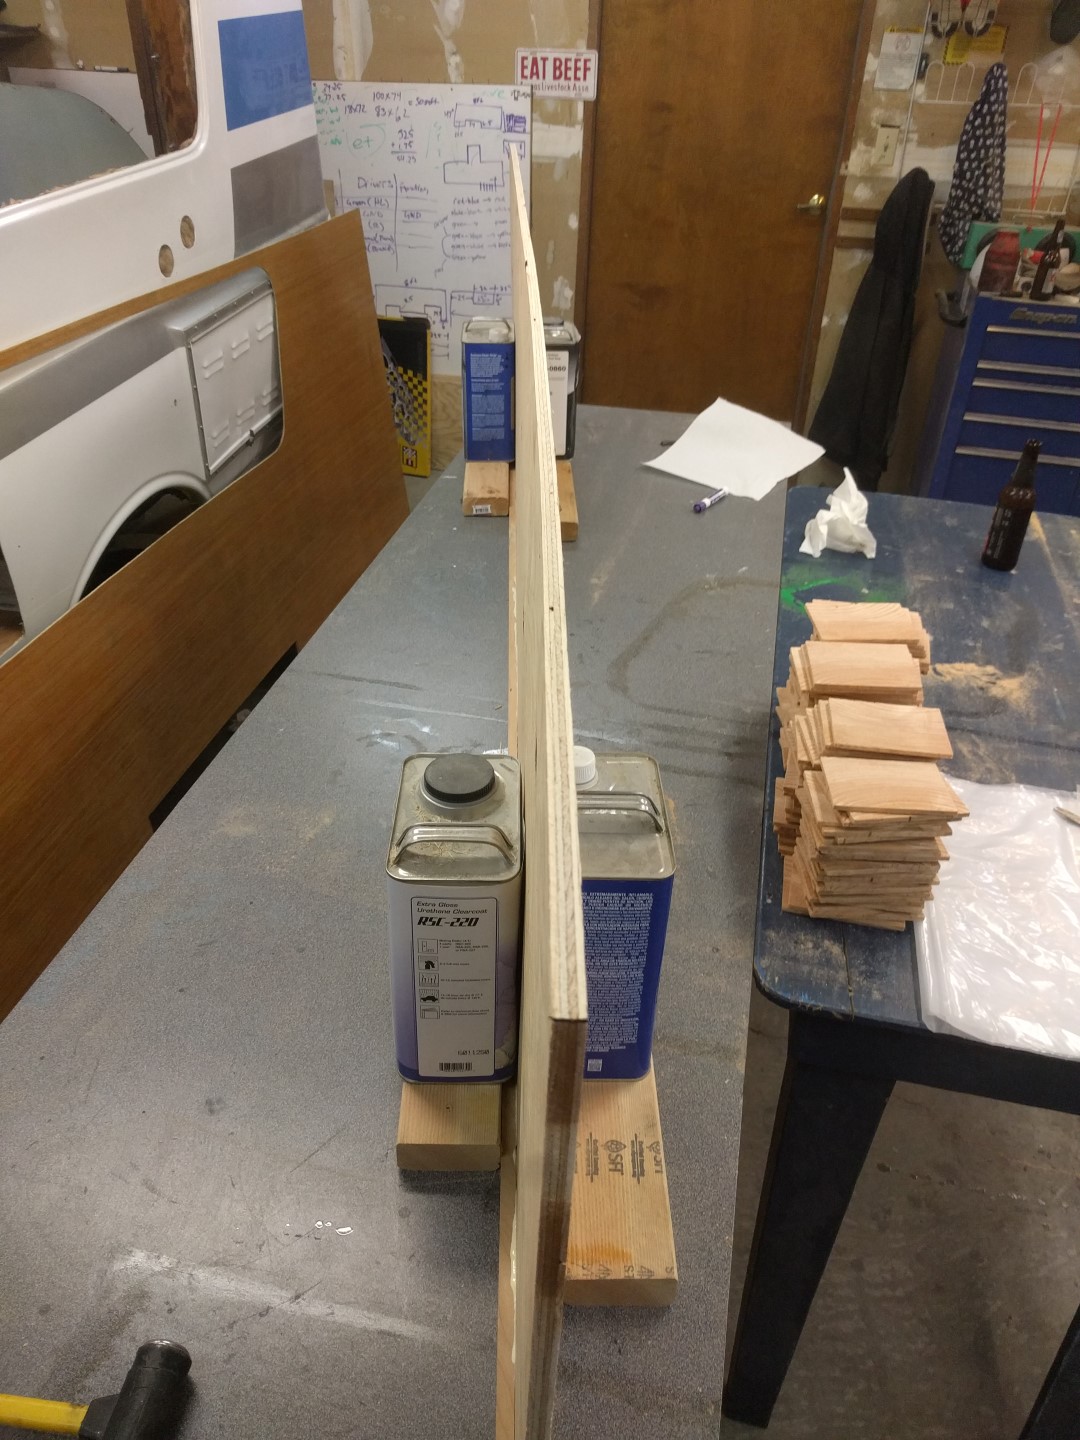
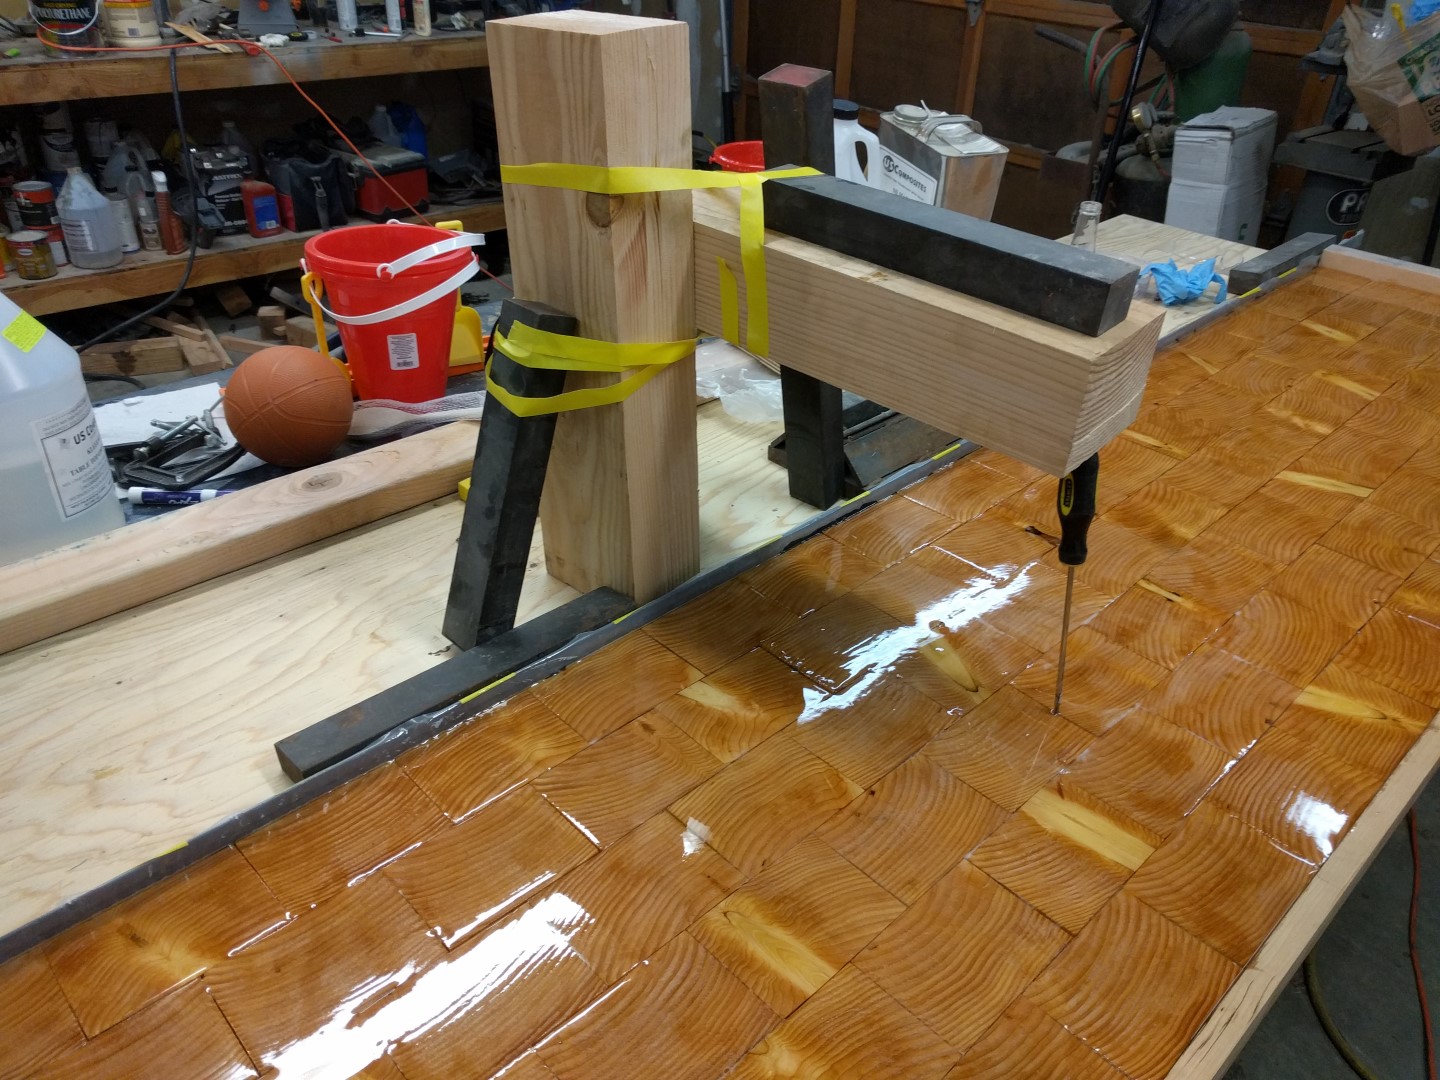
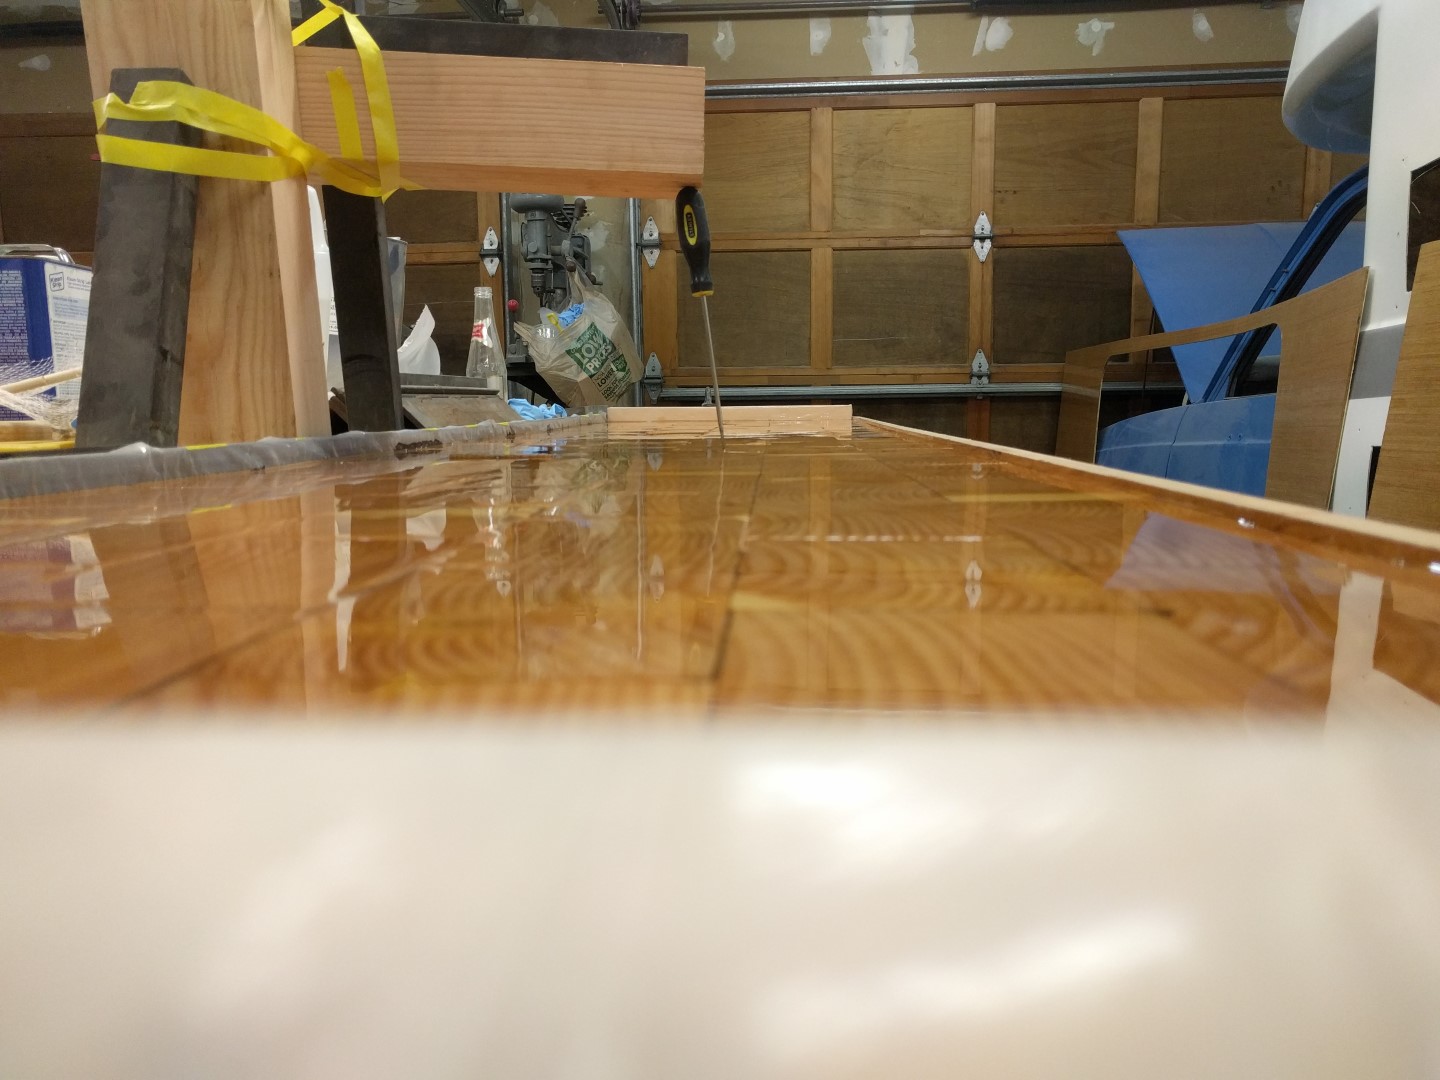
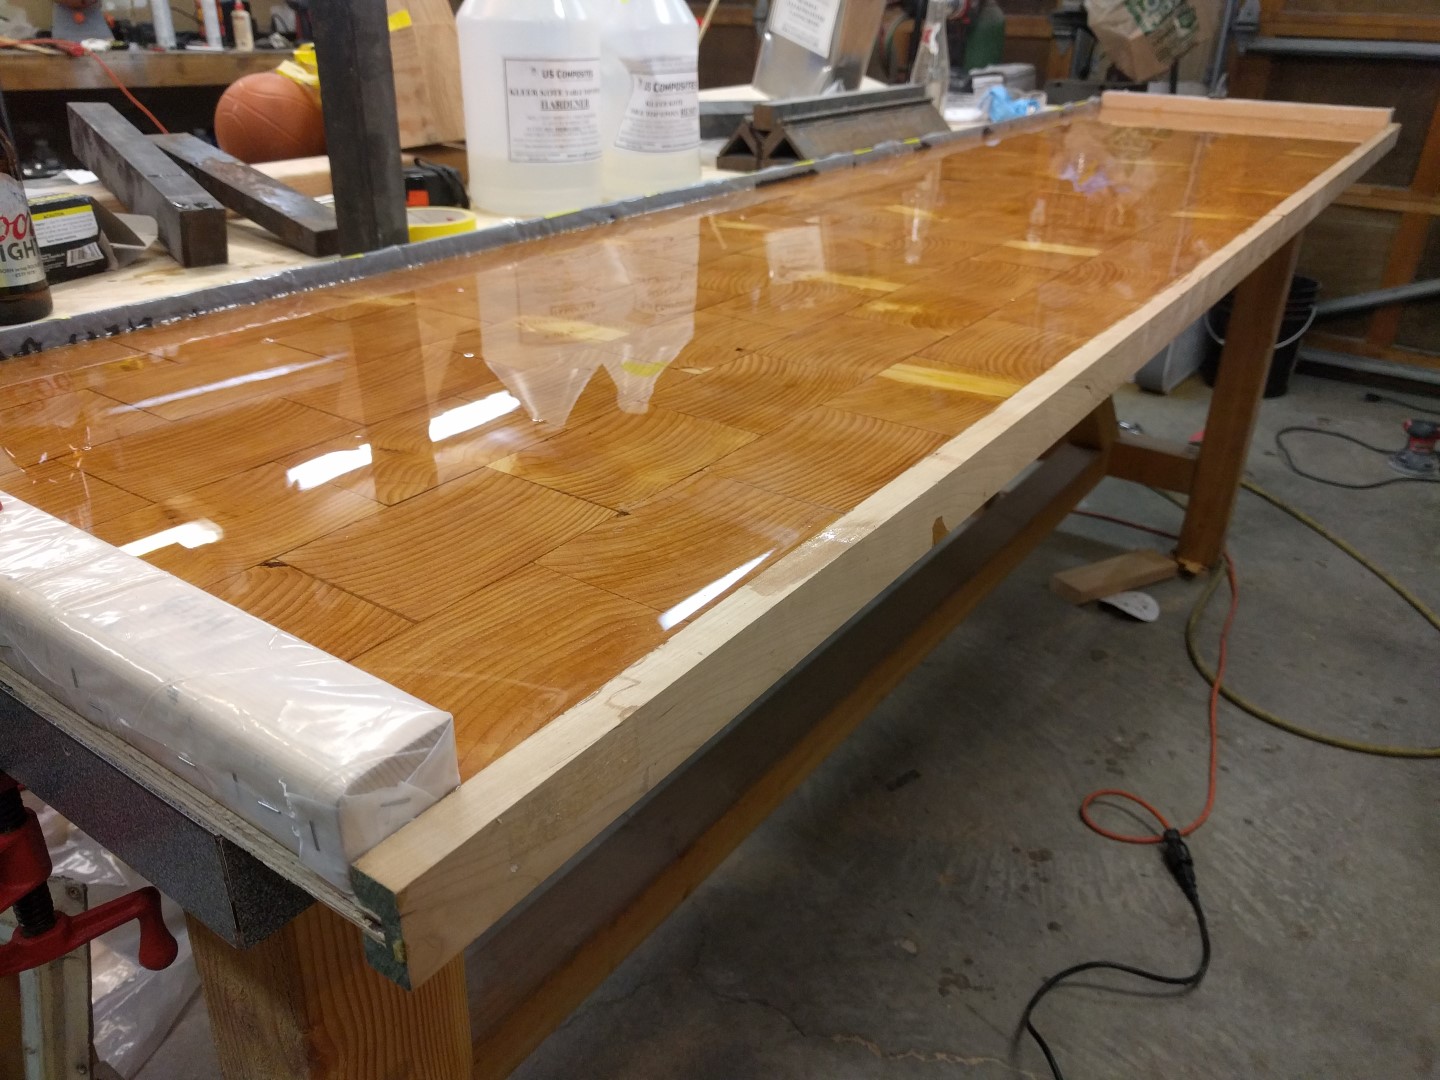
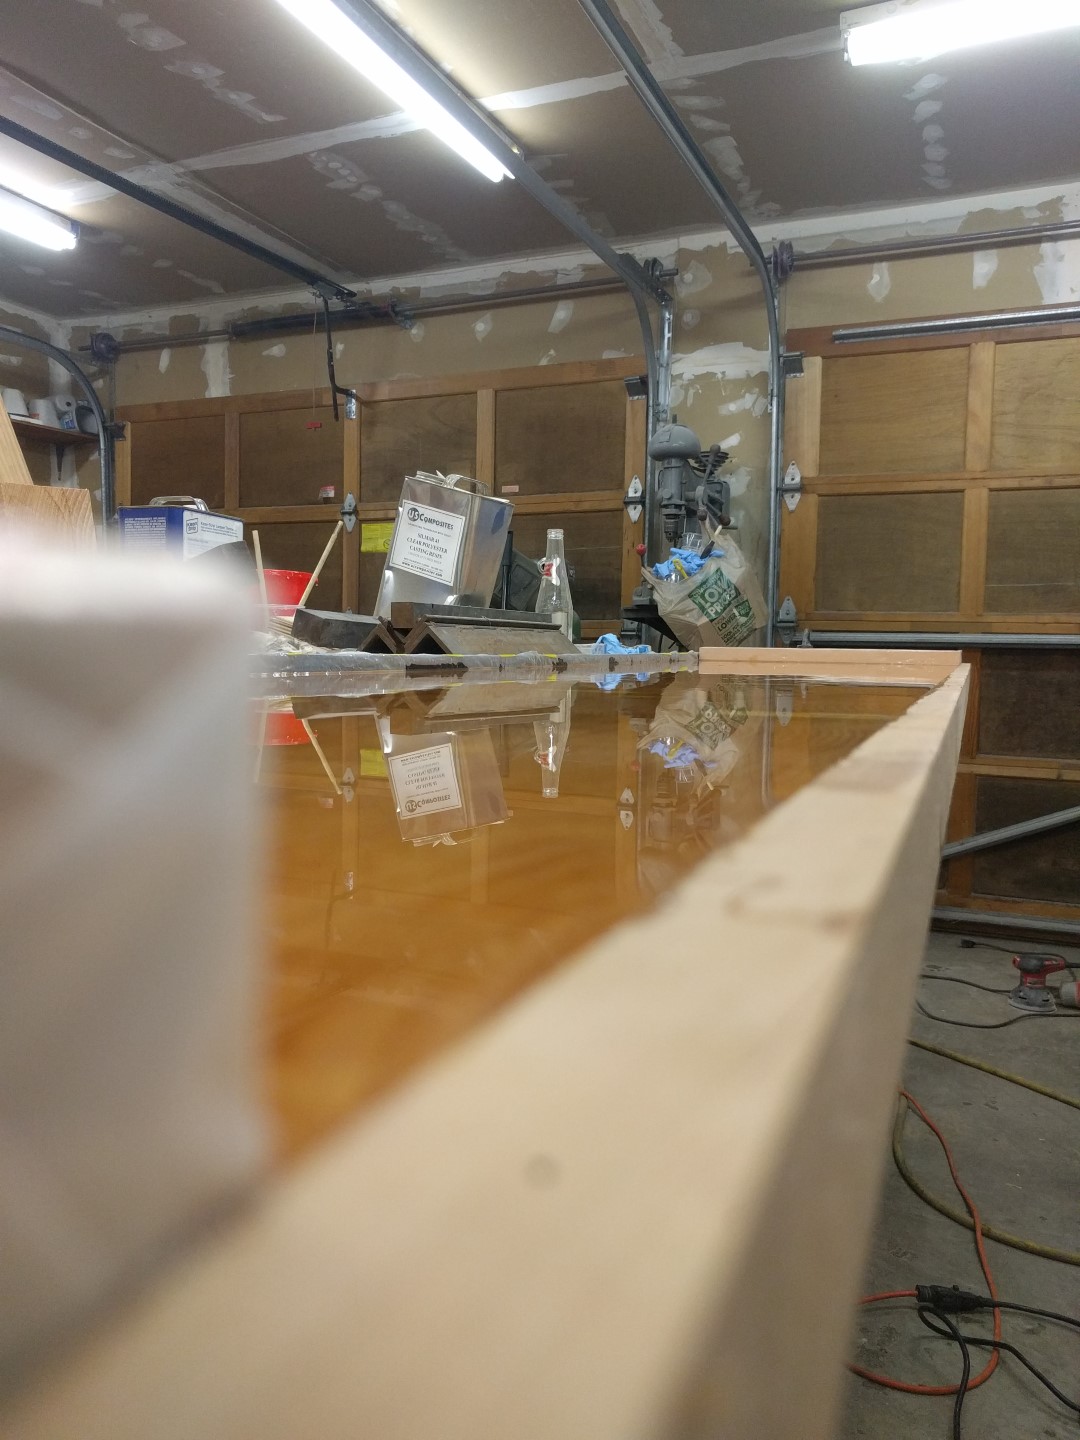
Table Failure
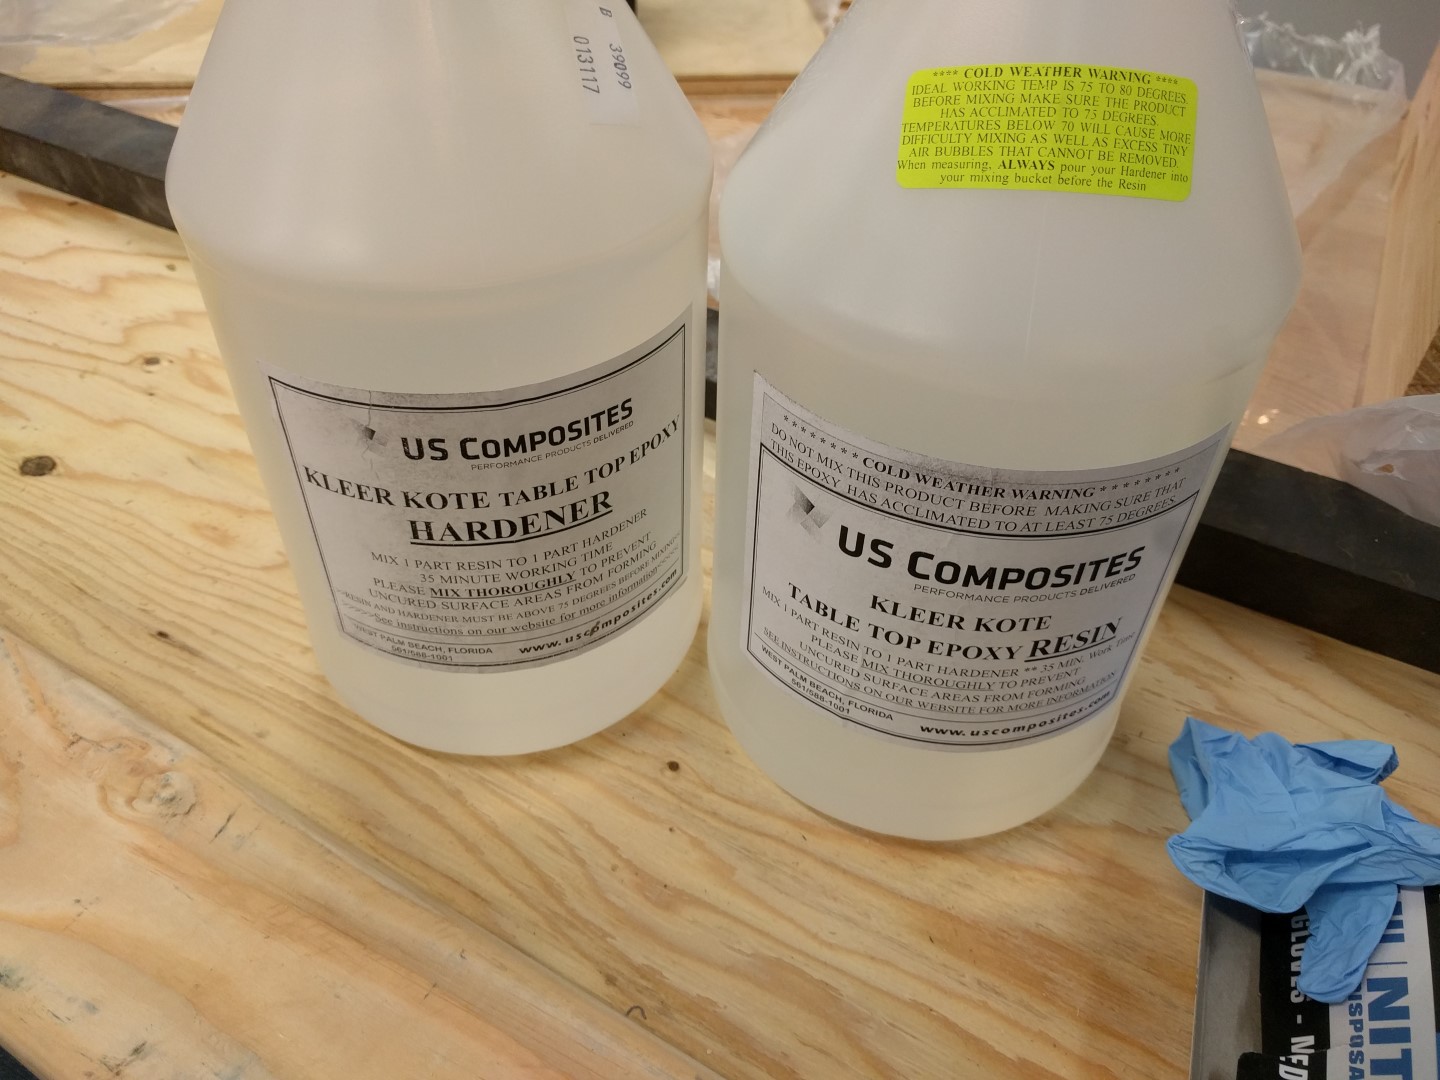
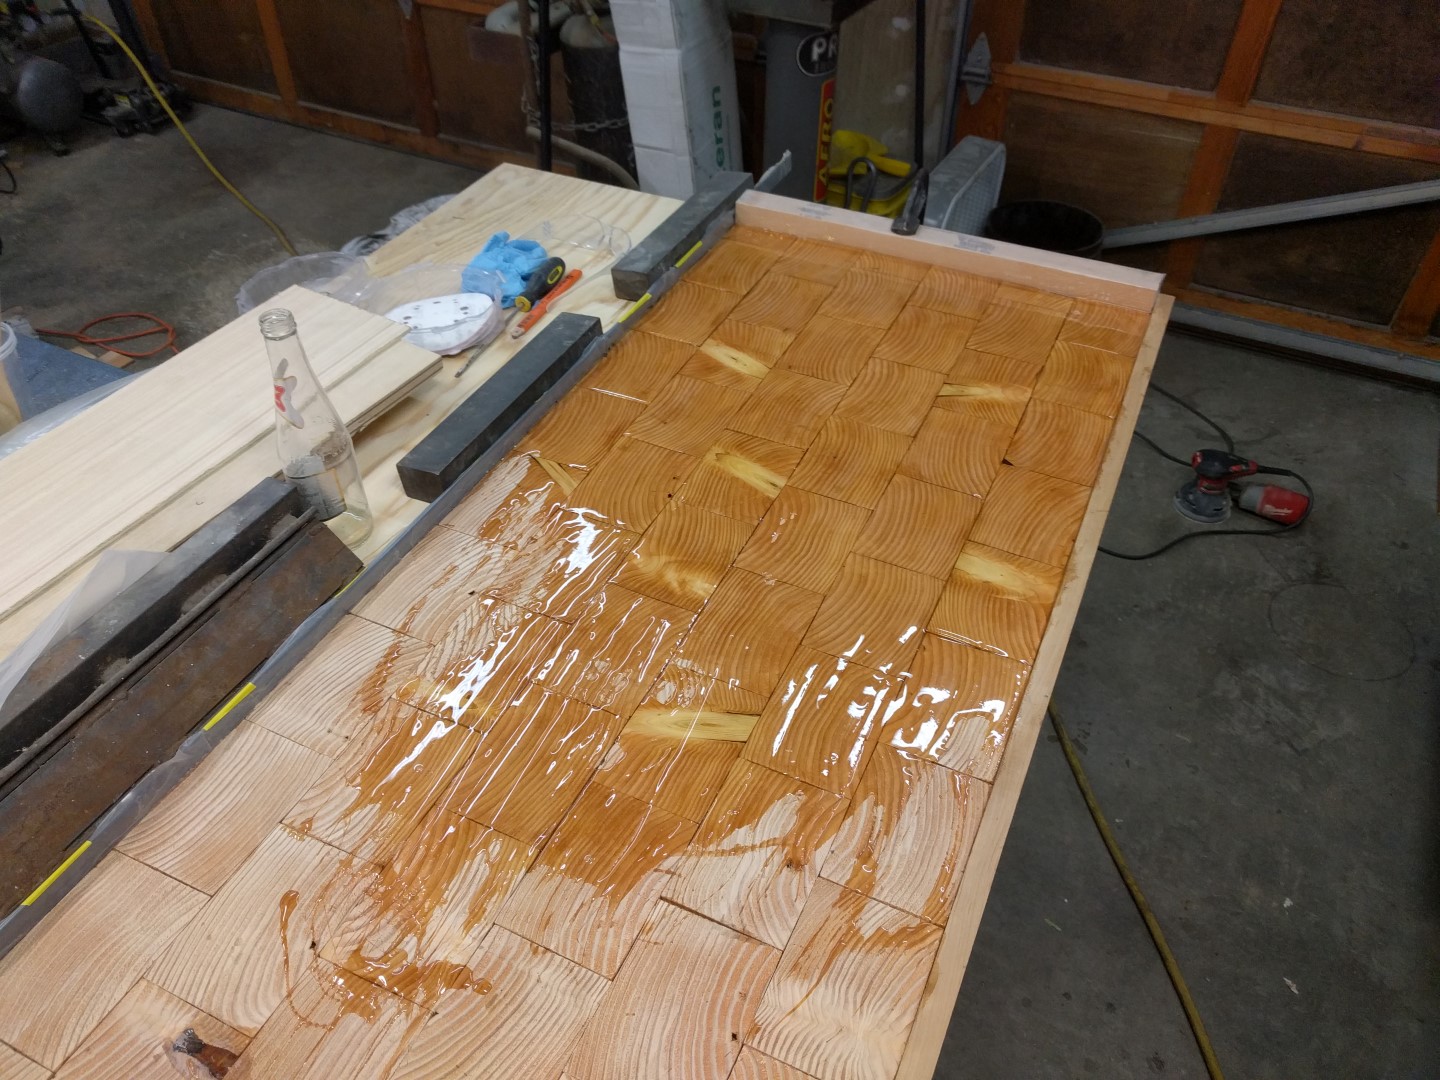
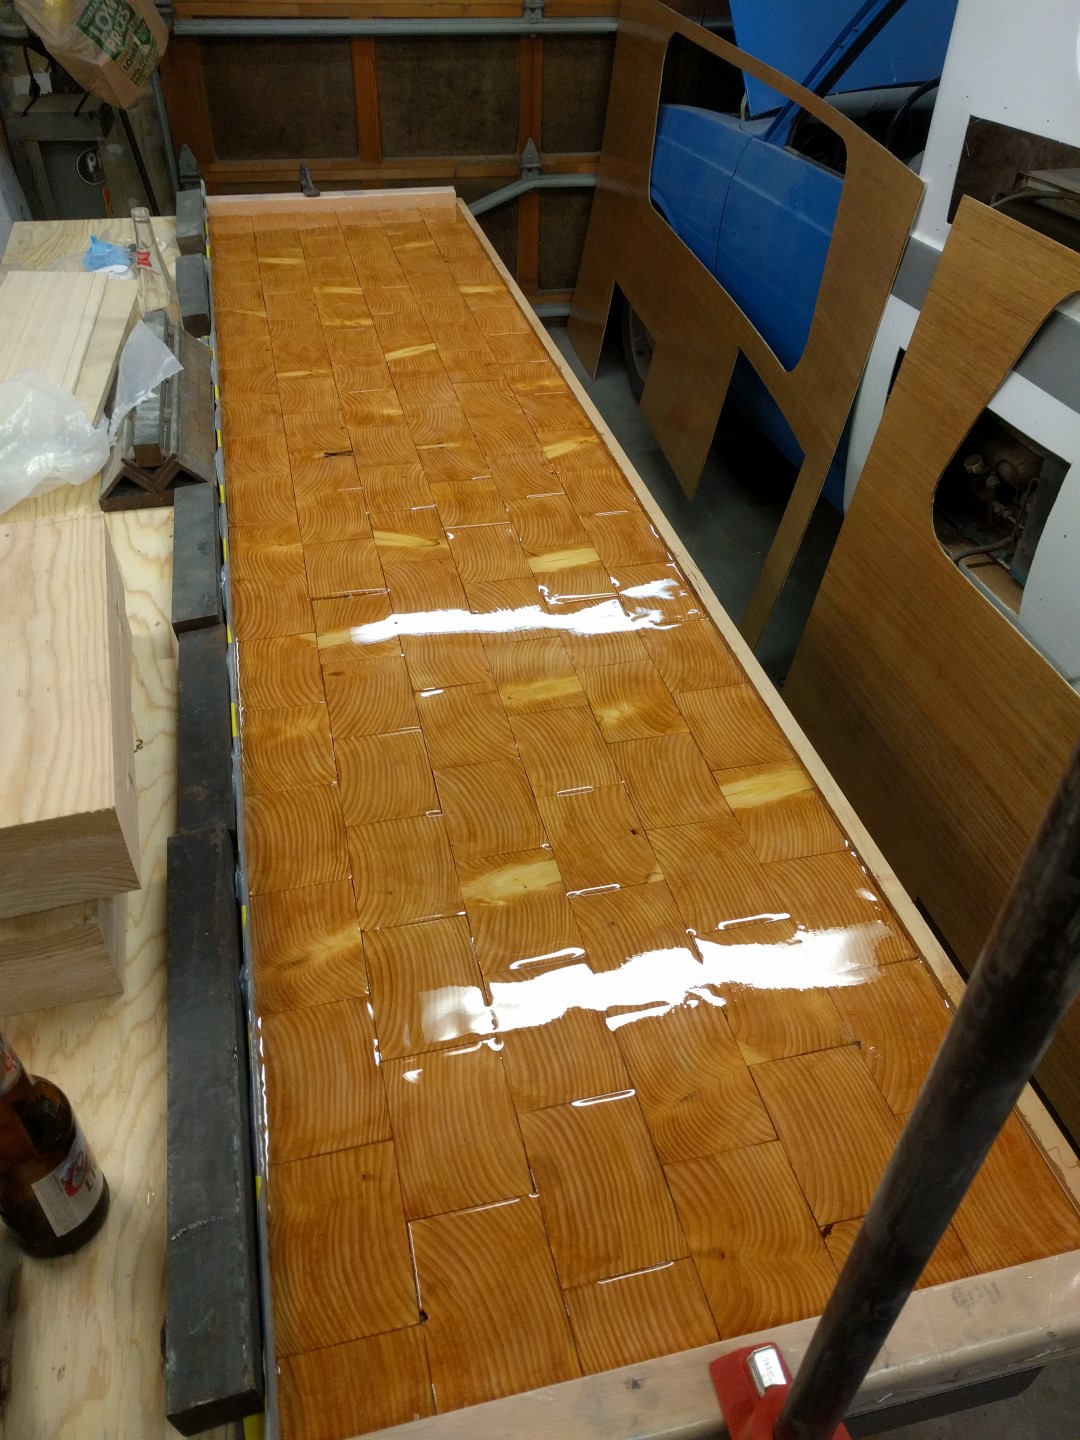
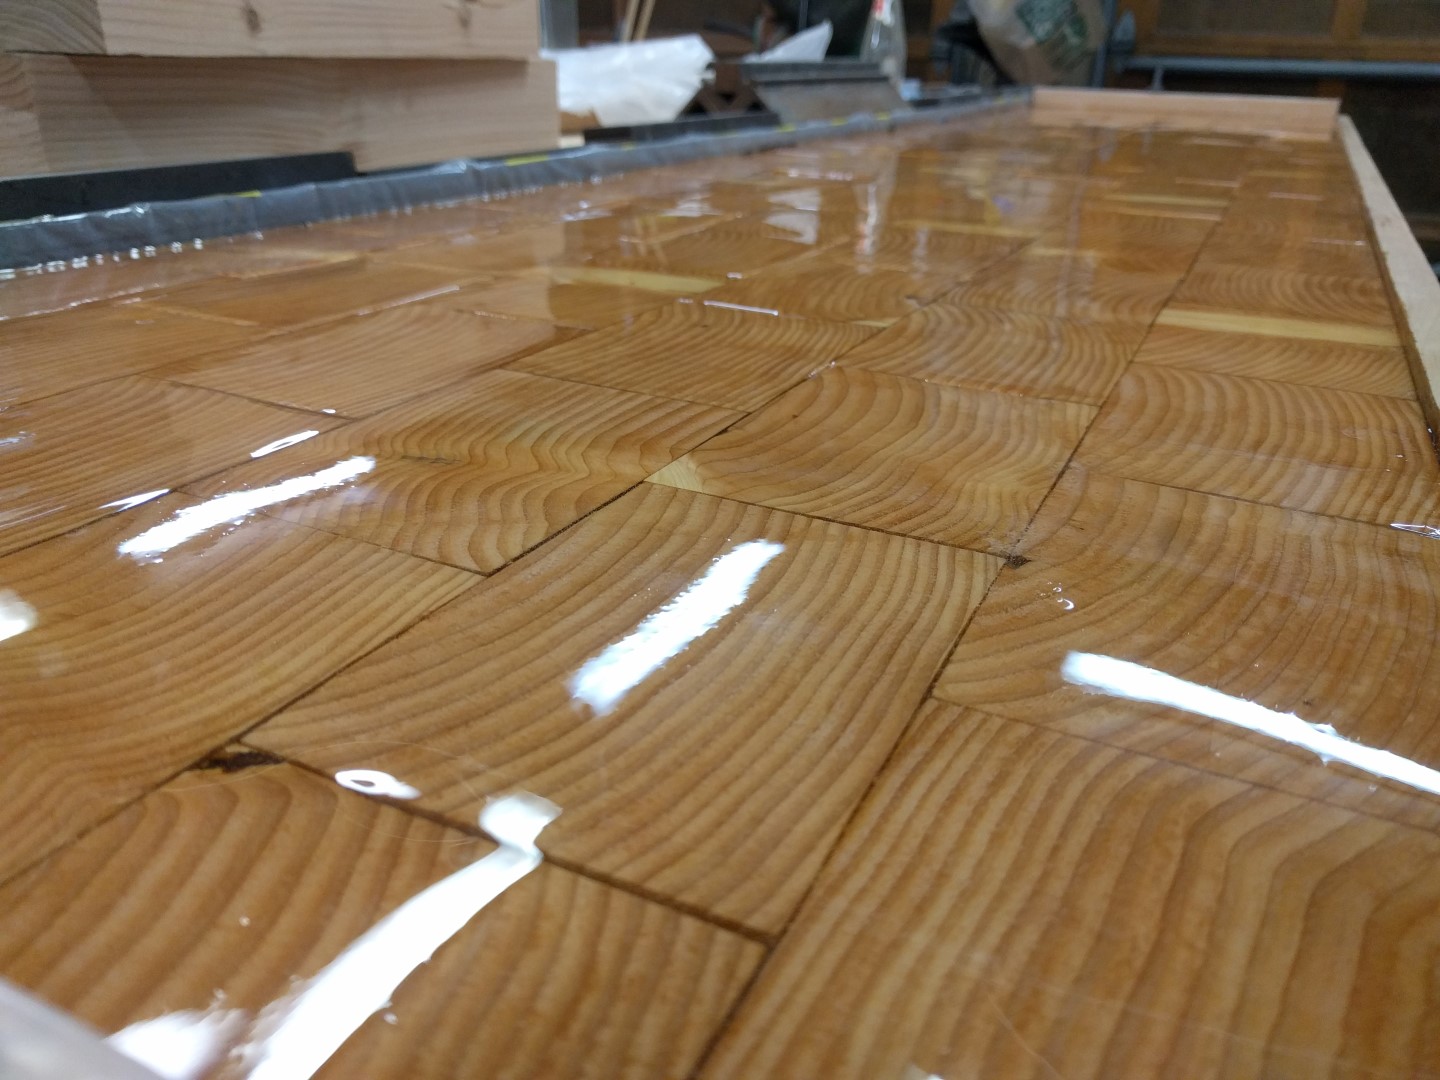
I had aspirations of building a custom table like the ones you see at bars that use clear epoxy and encapsulate various objects inside. Unfortunately, it did not turn out as I expected. The final product bowed and cracked making it unusable. The final table is covered in the Table section.
The clear epoxy used was US Composites Kleer Koat table and bartop epoxy.


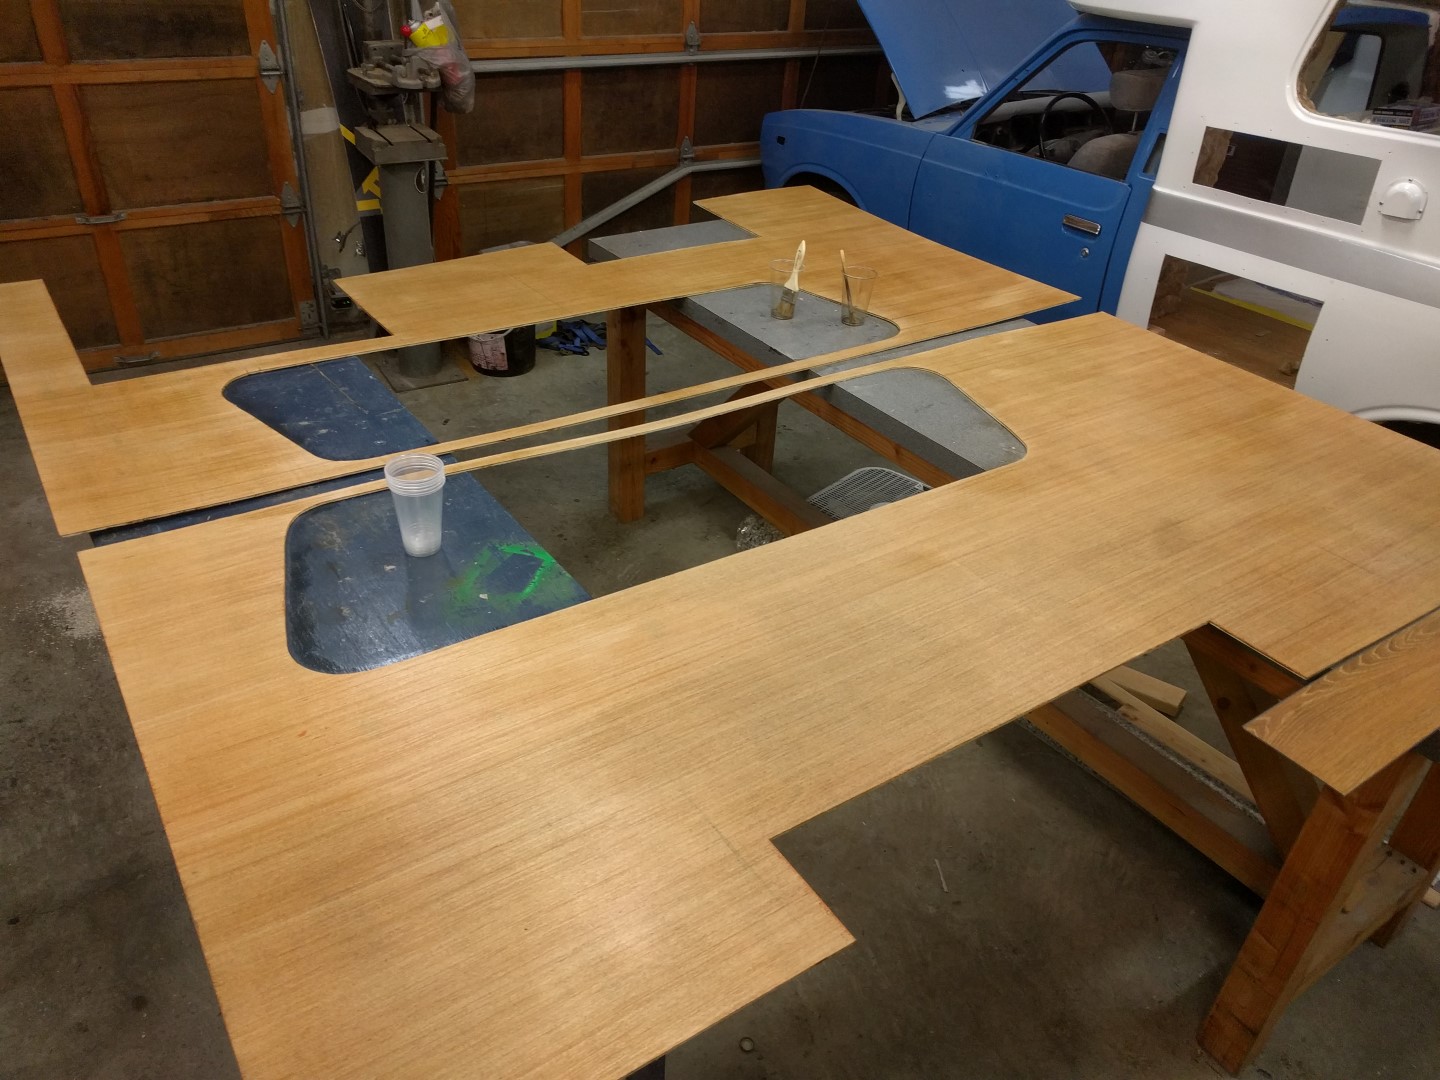
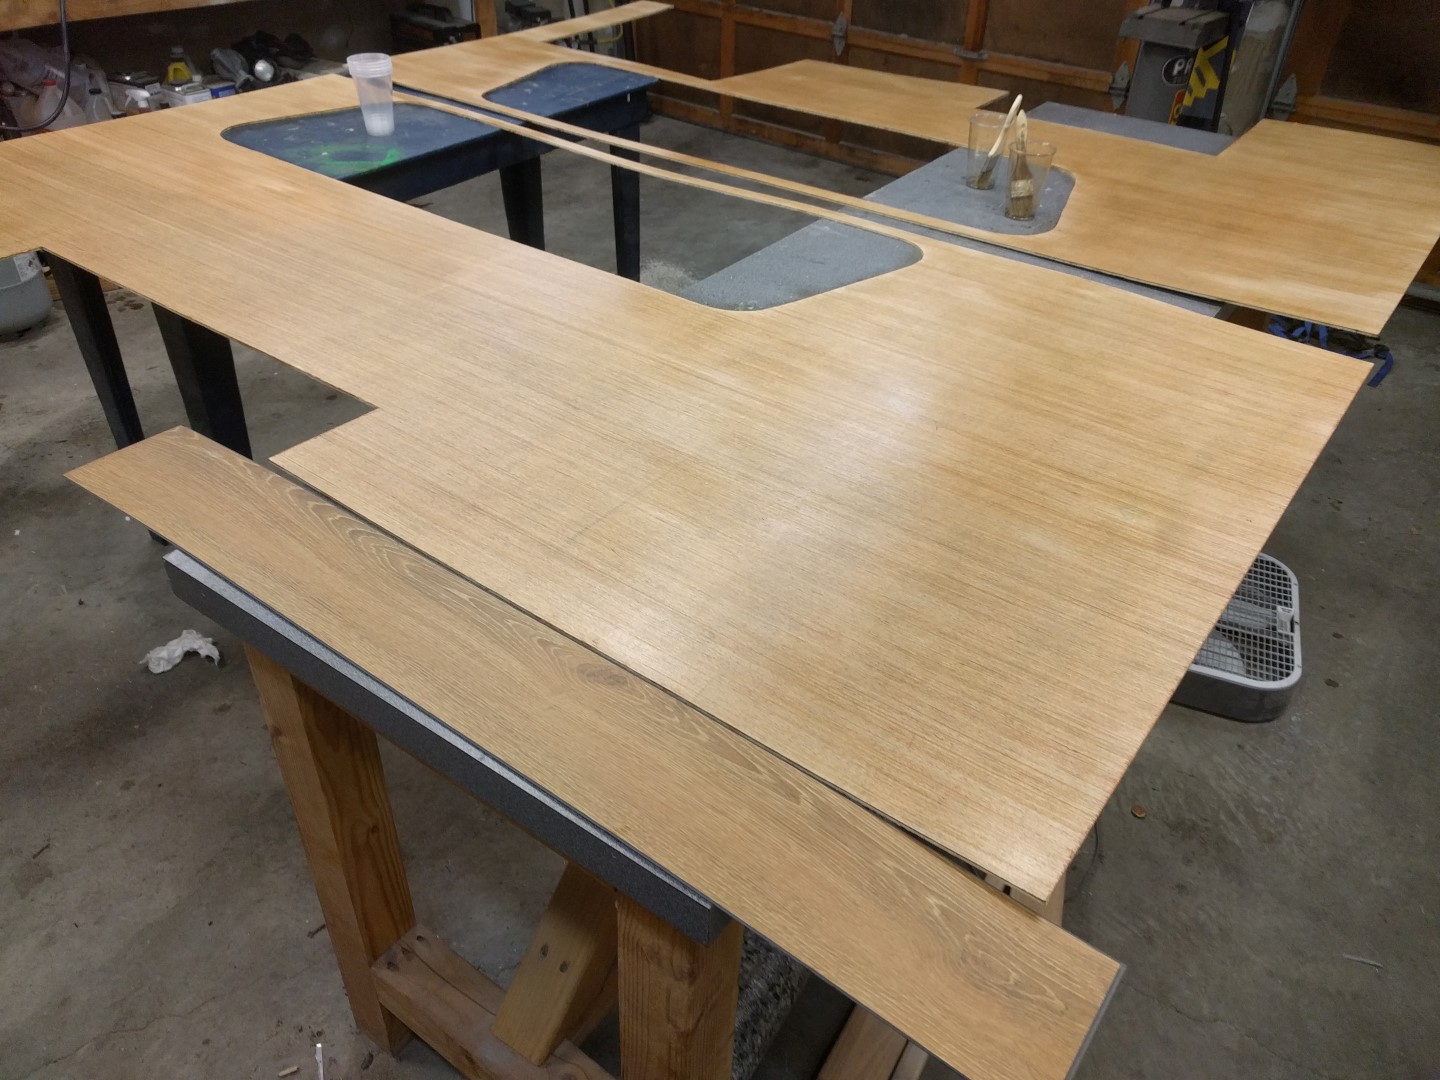
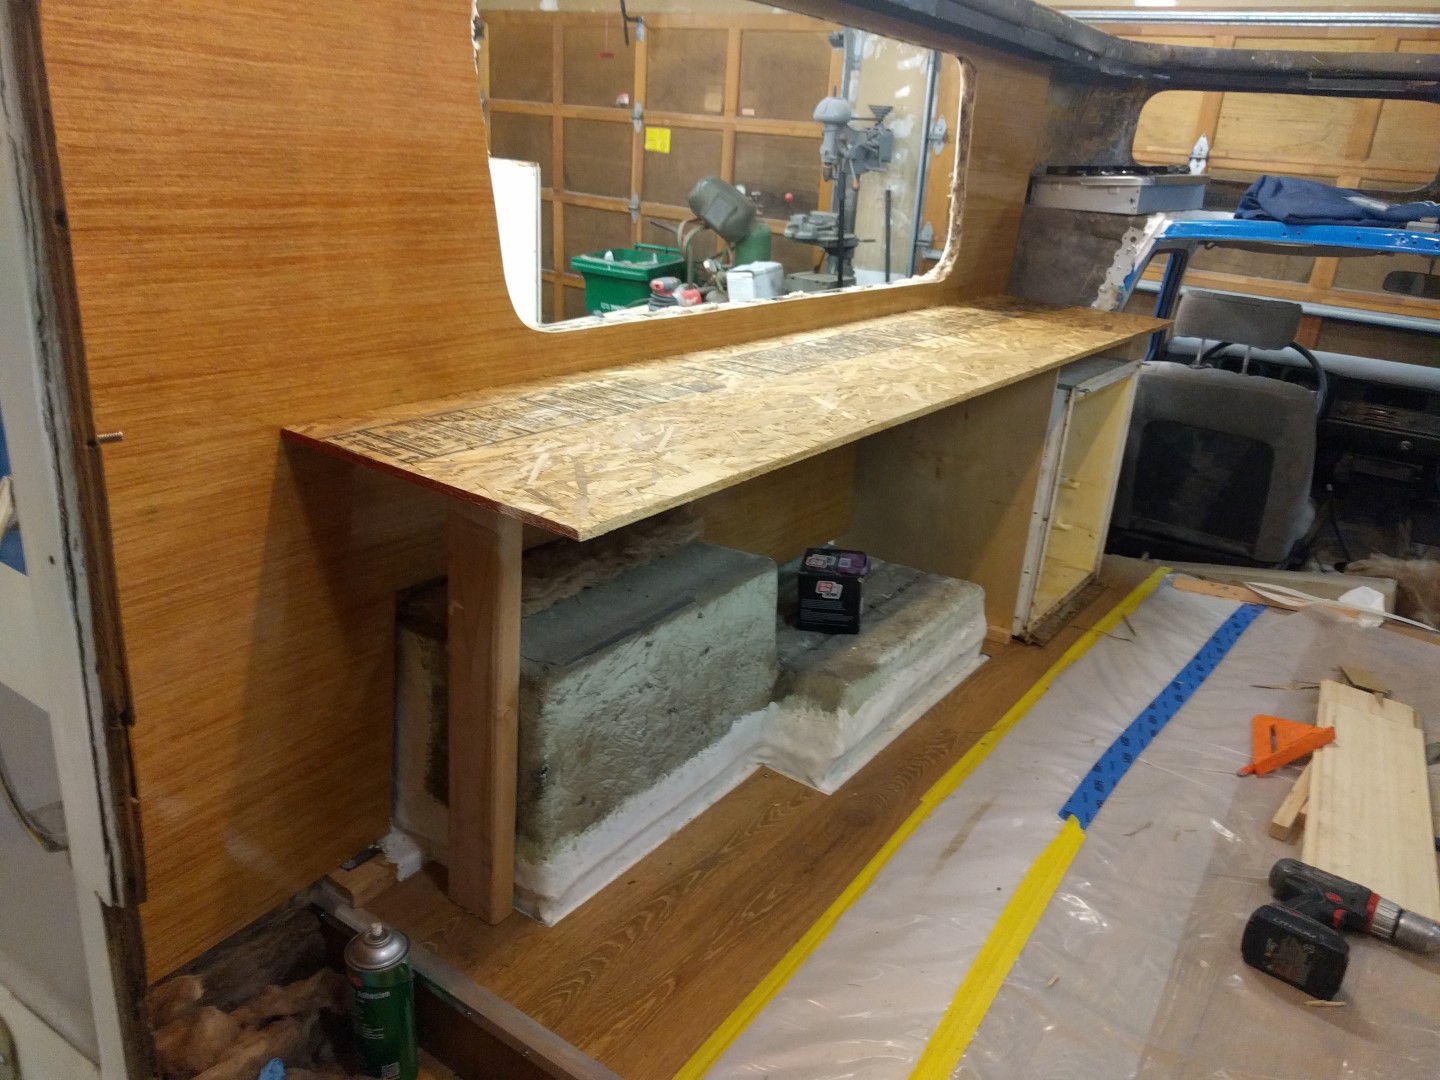
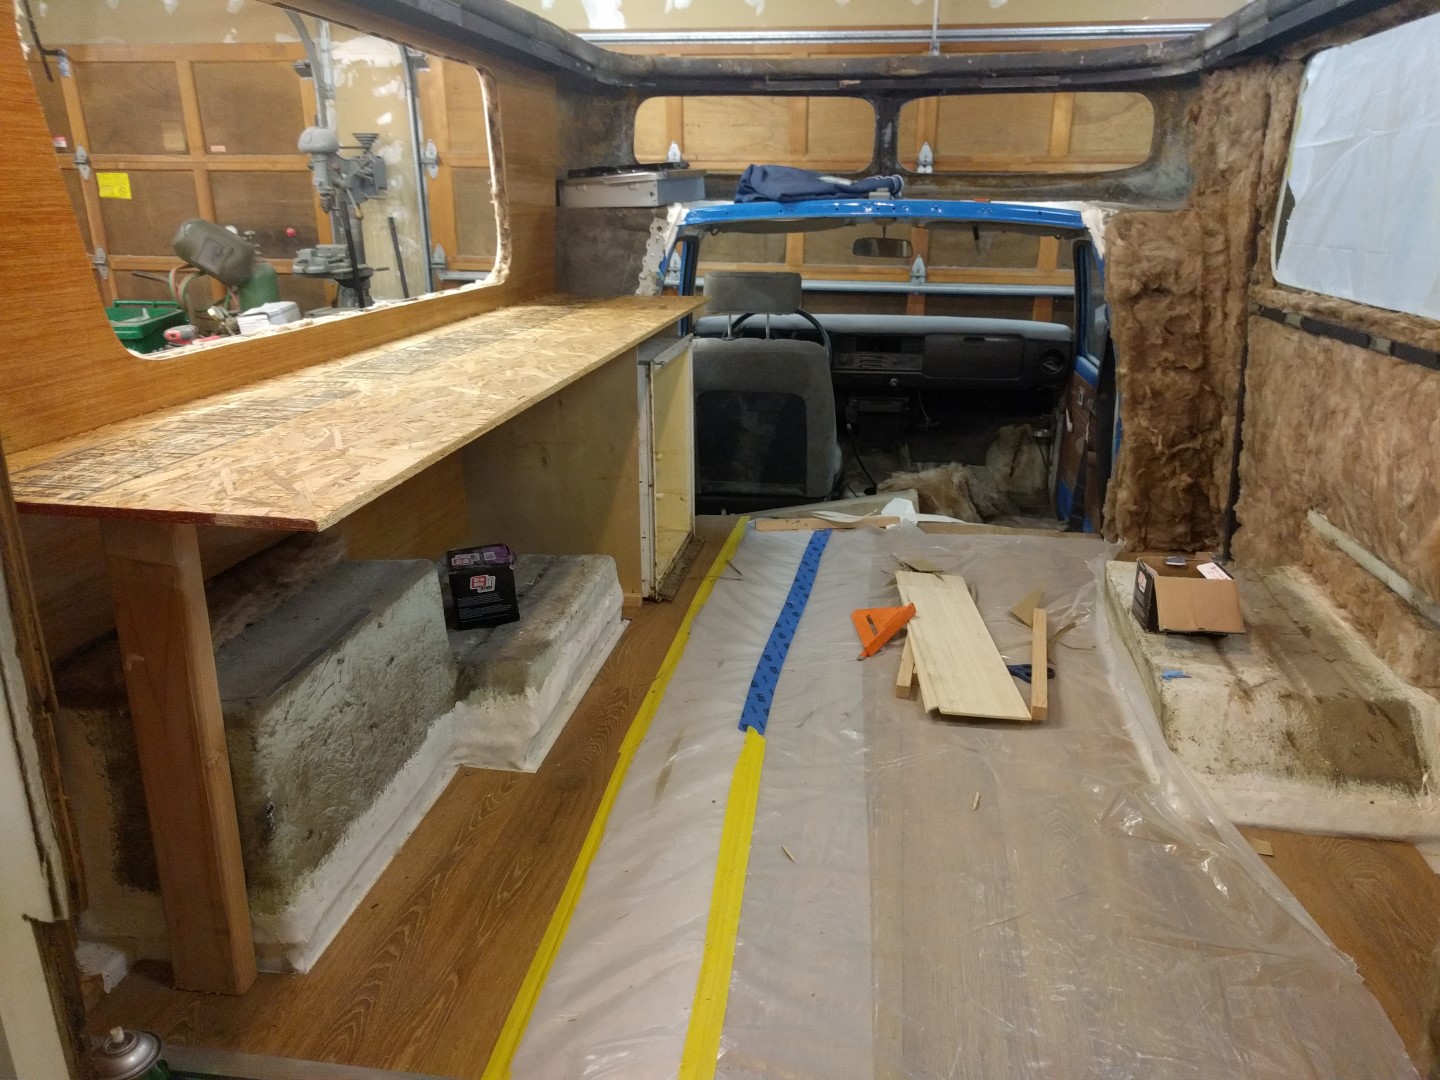
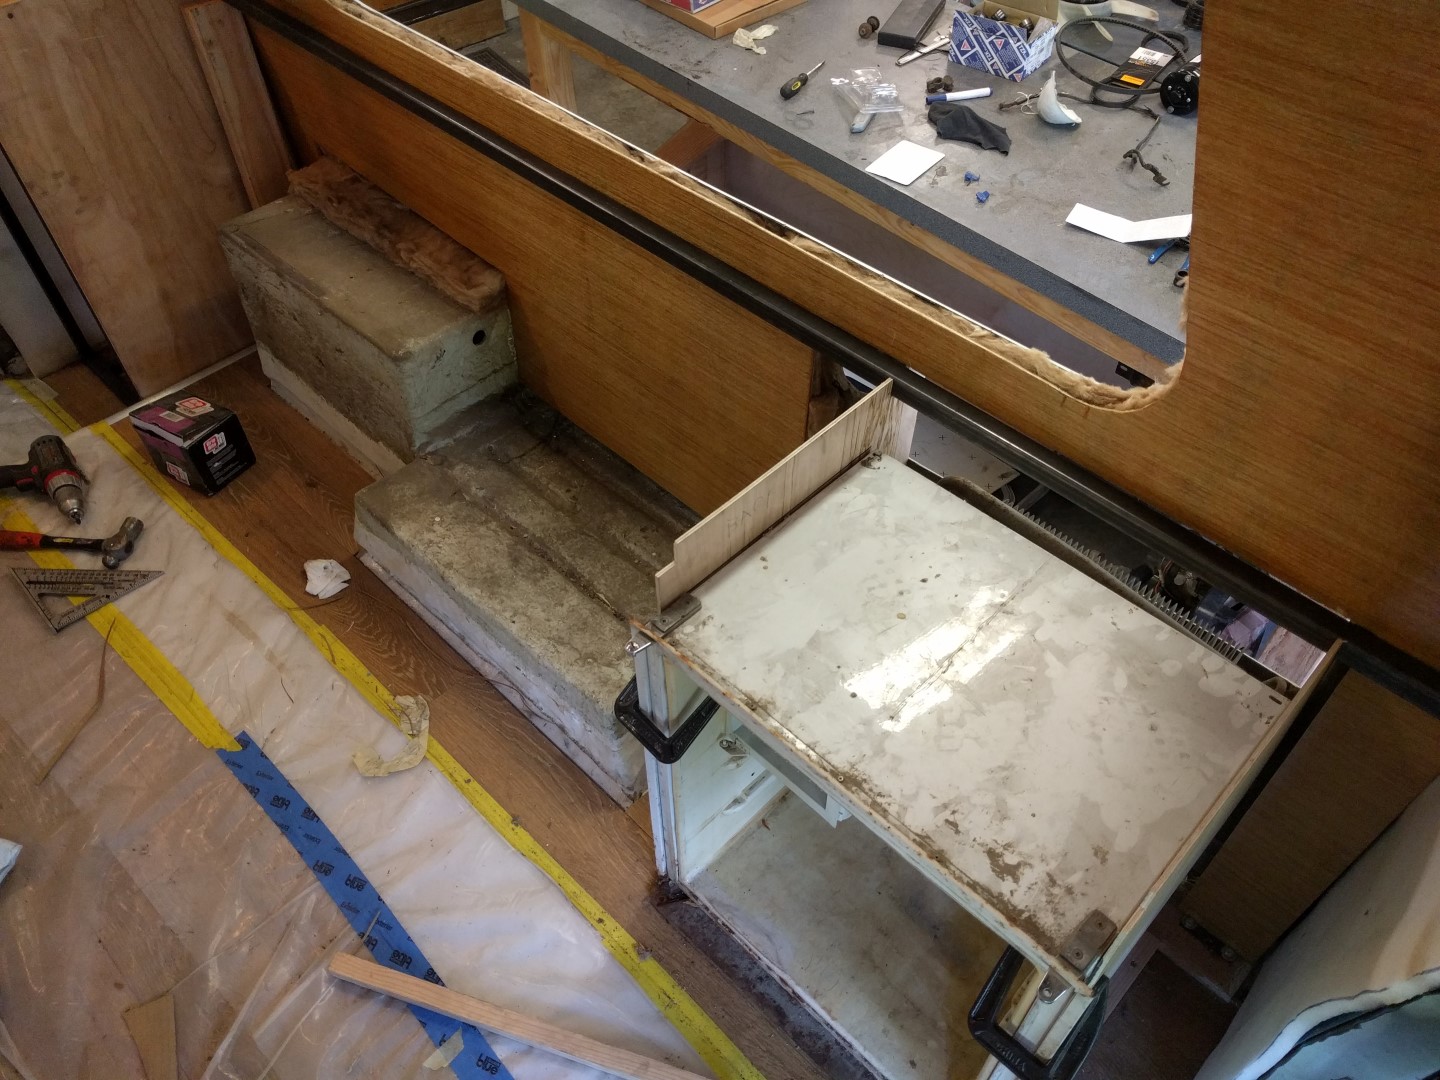
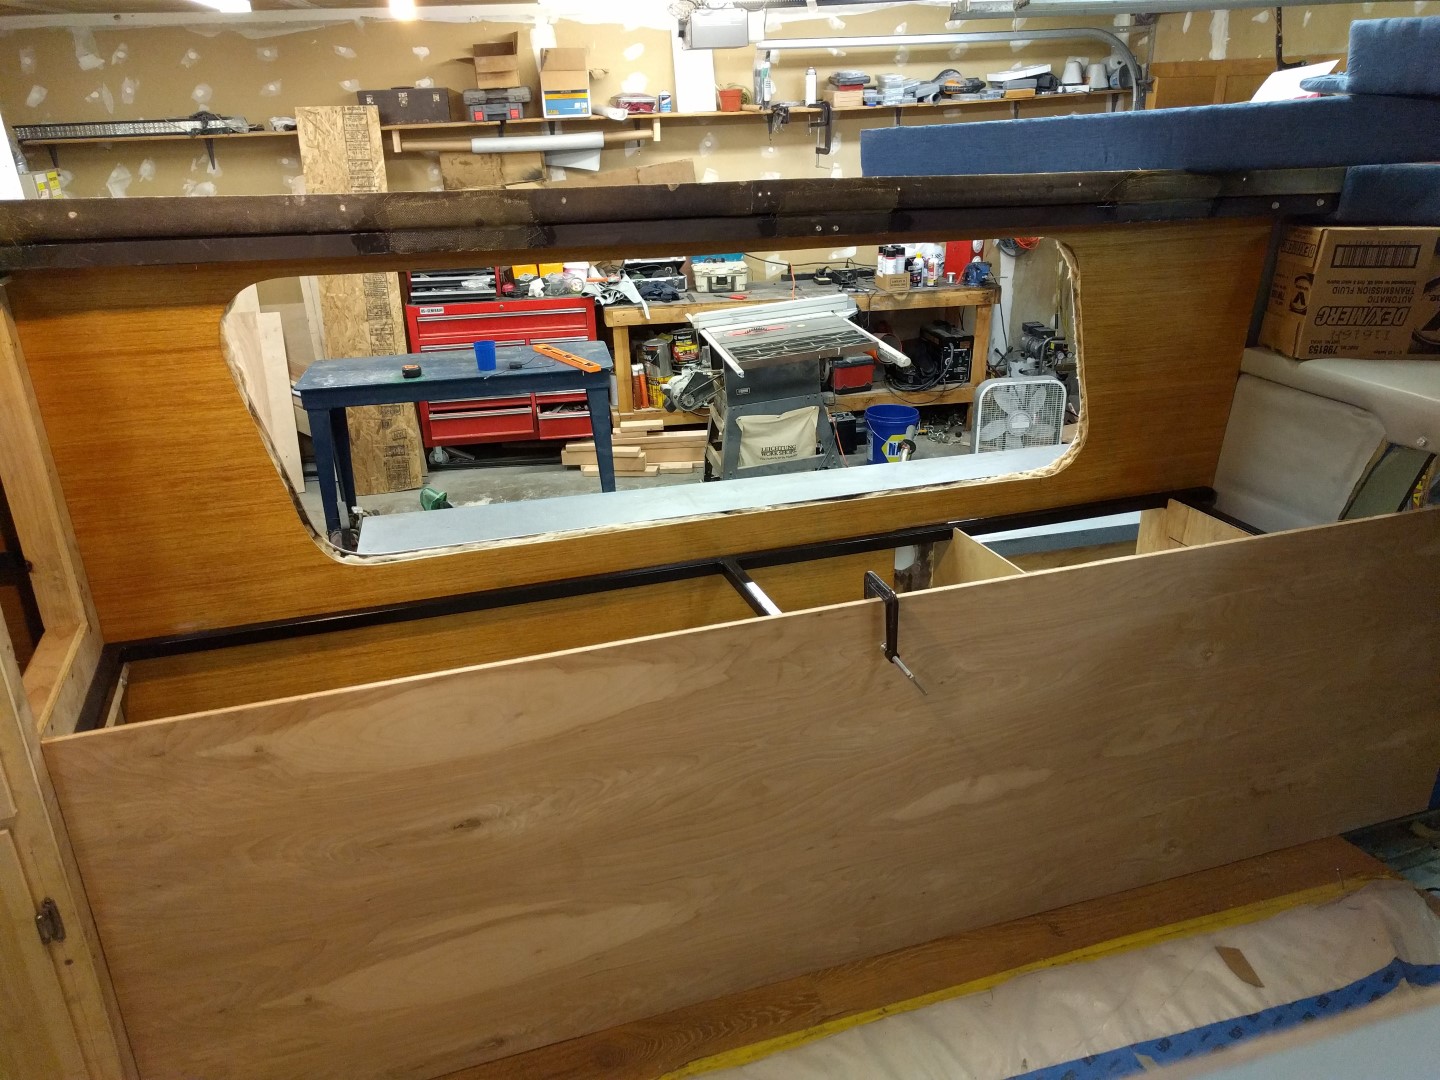
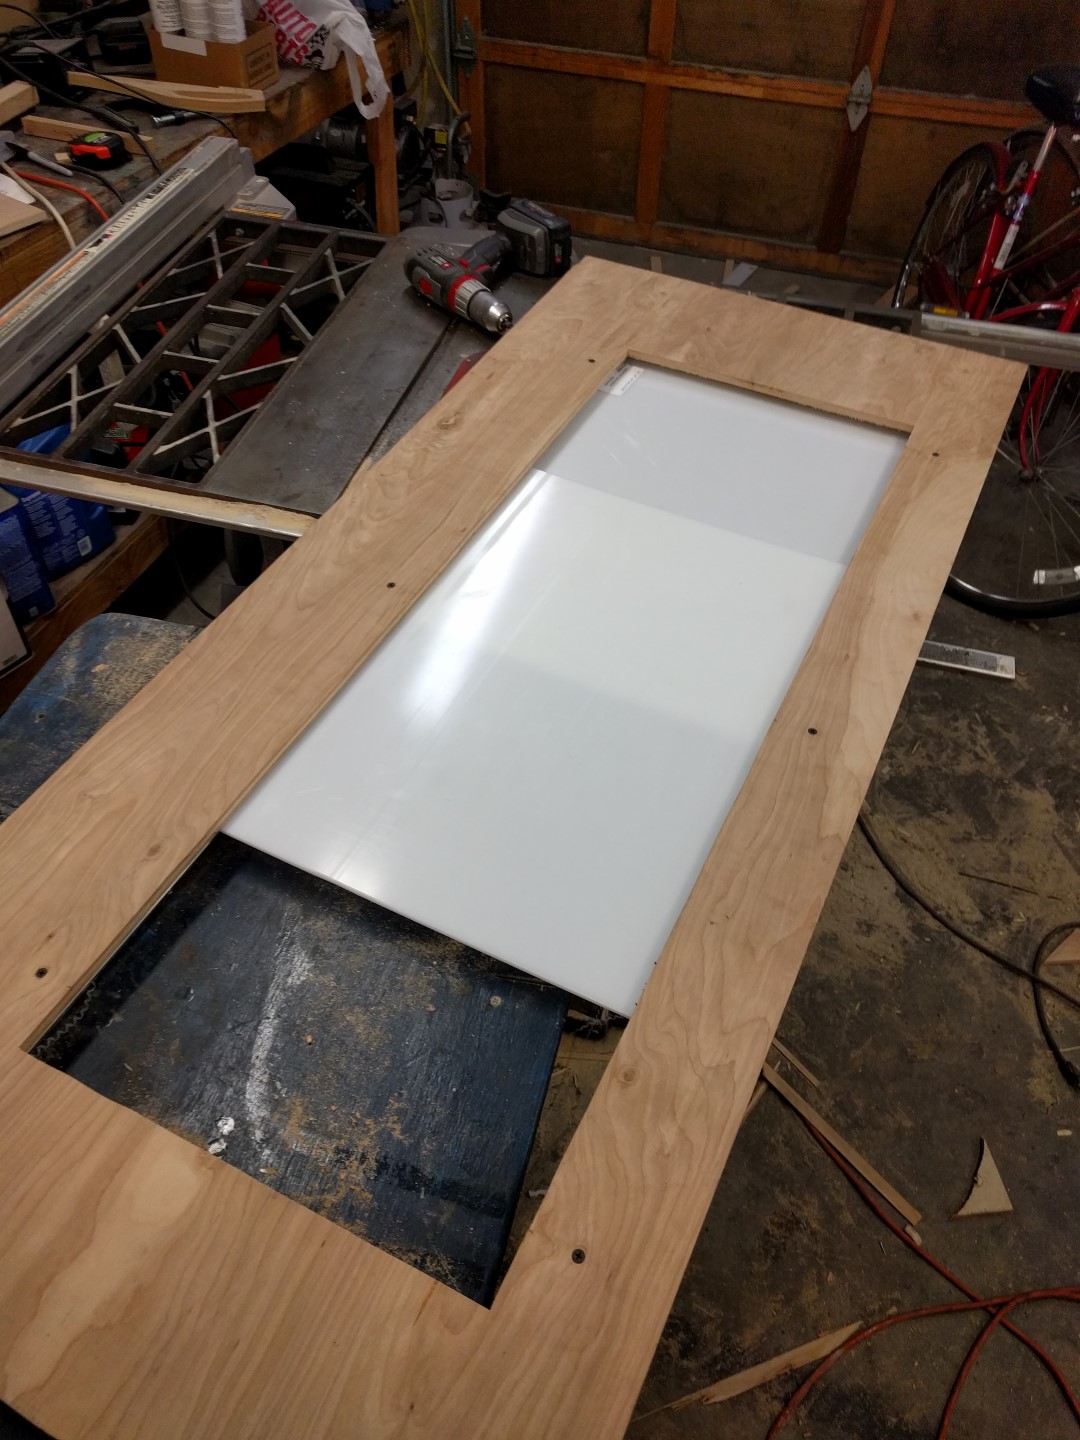
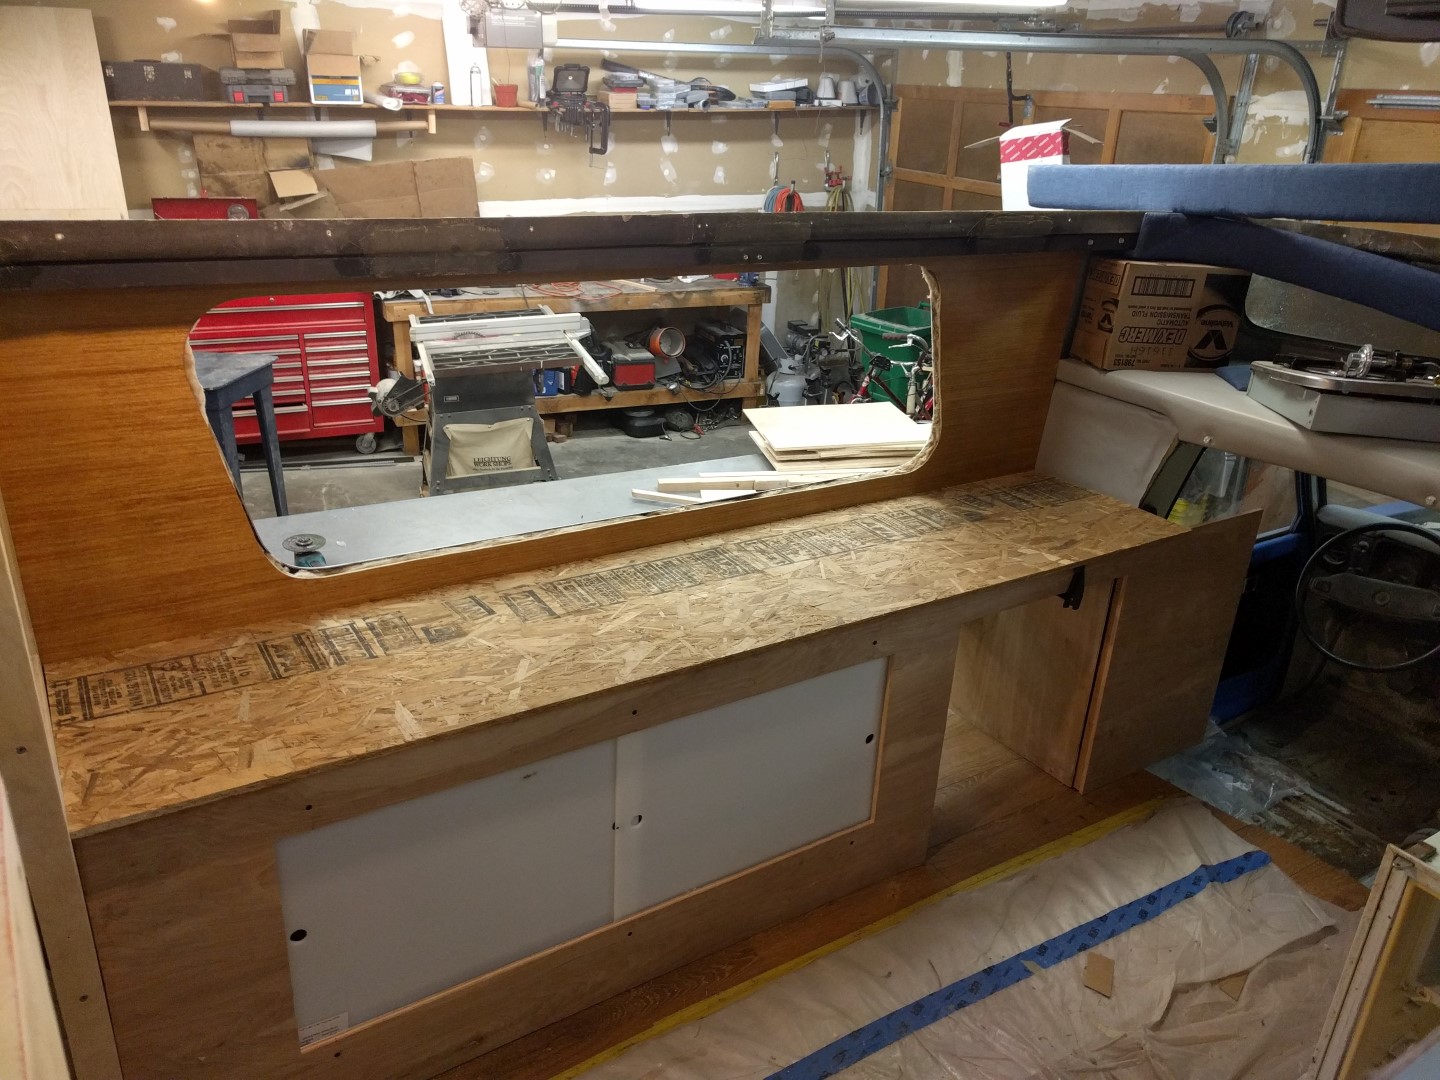
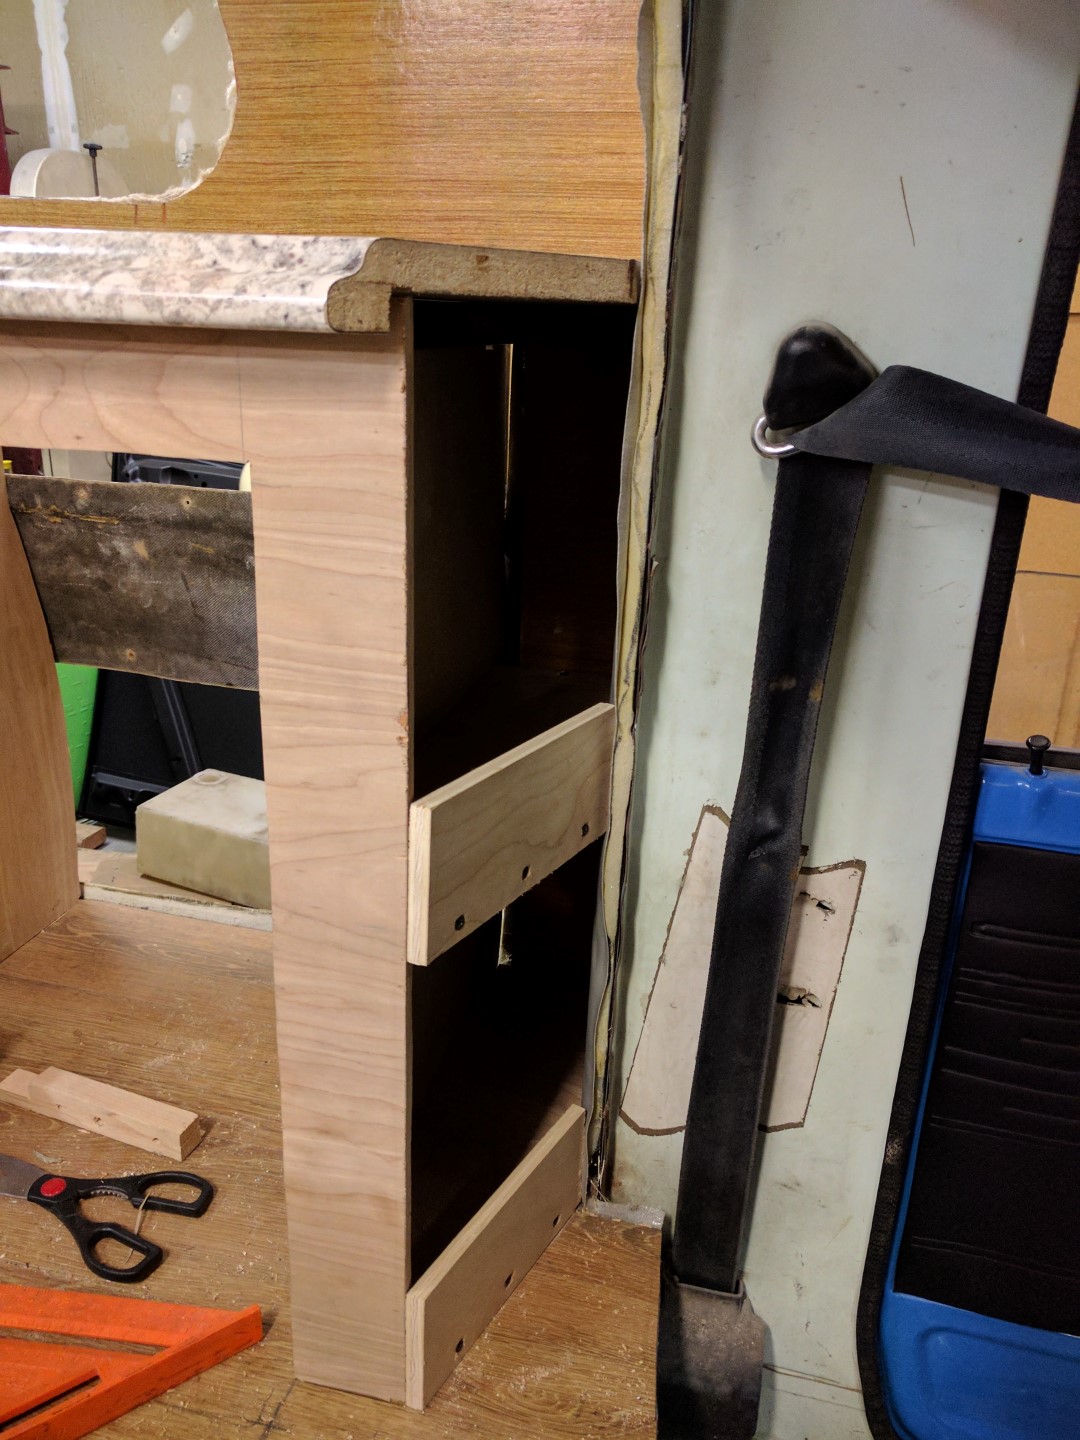
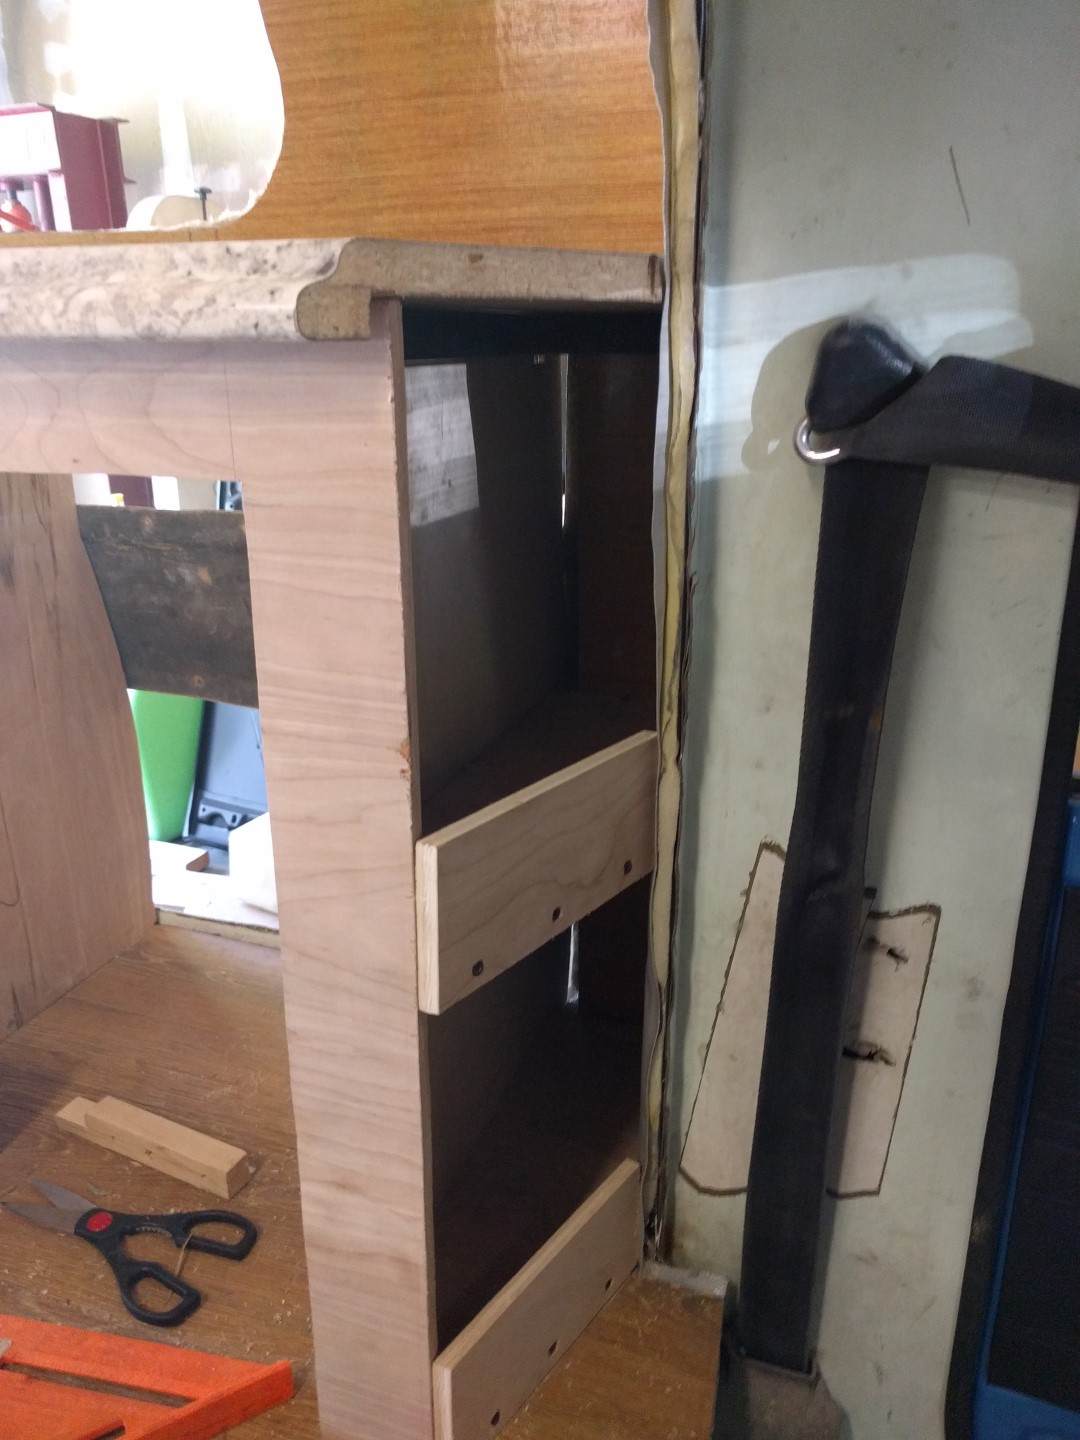
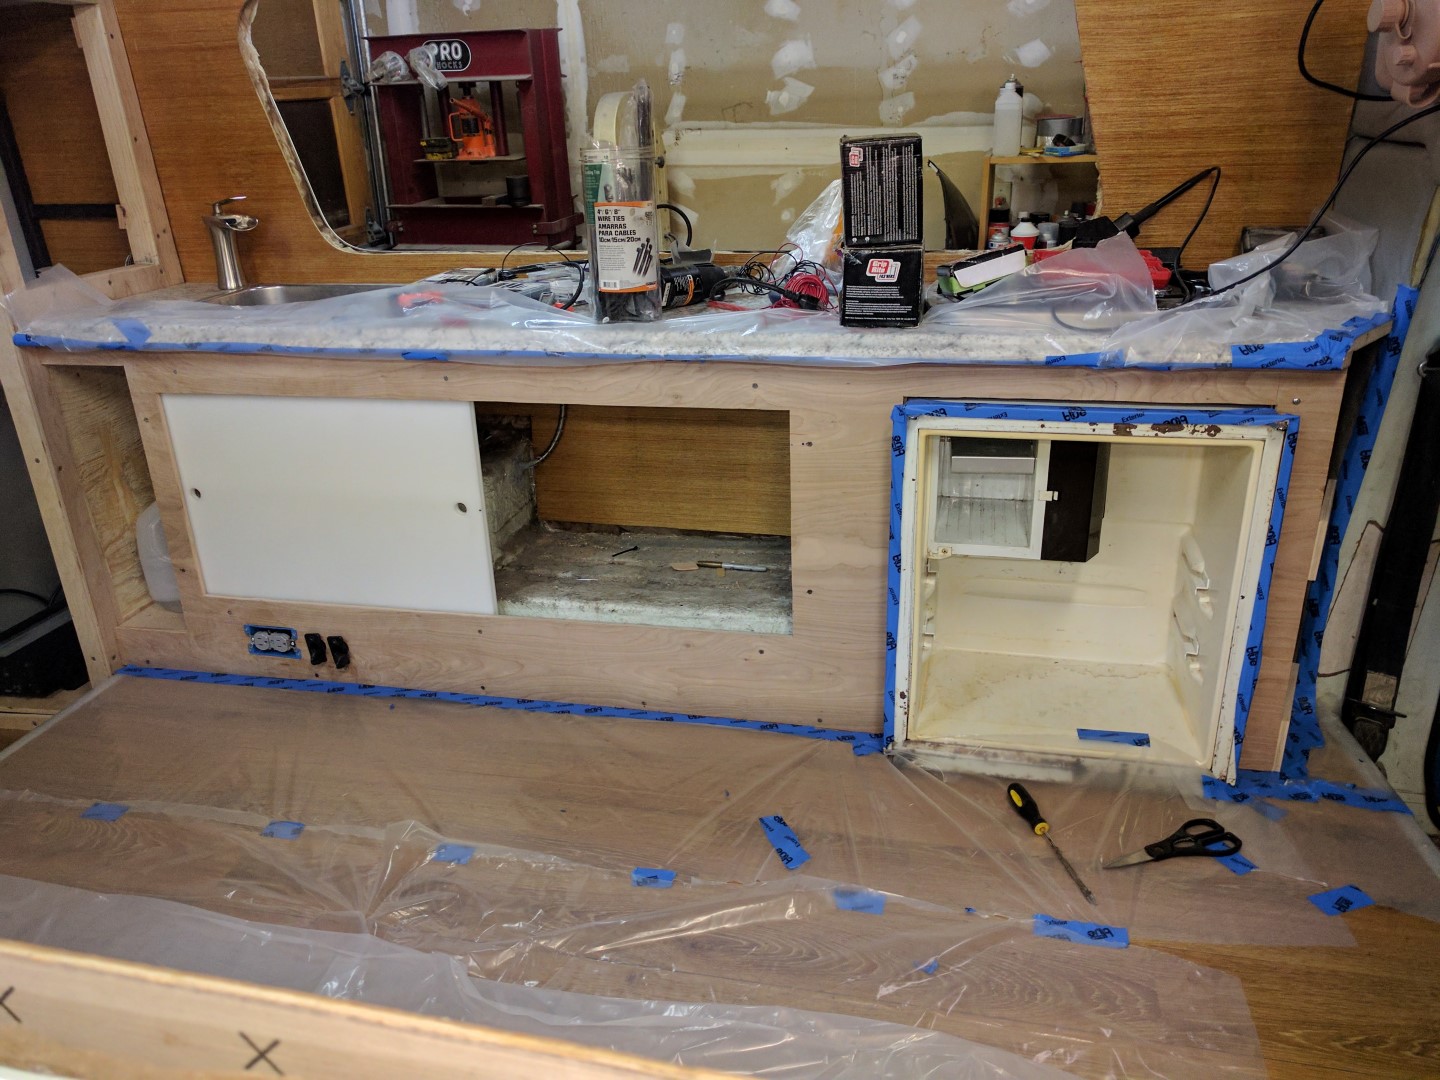
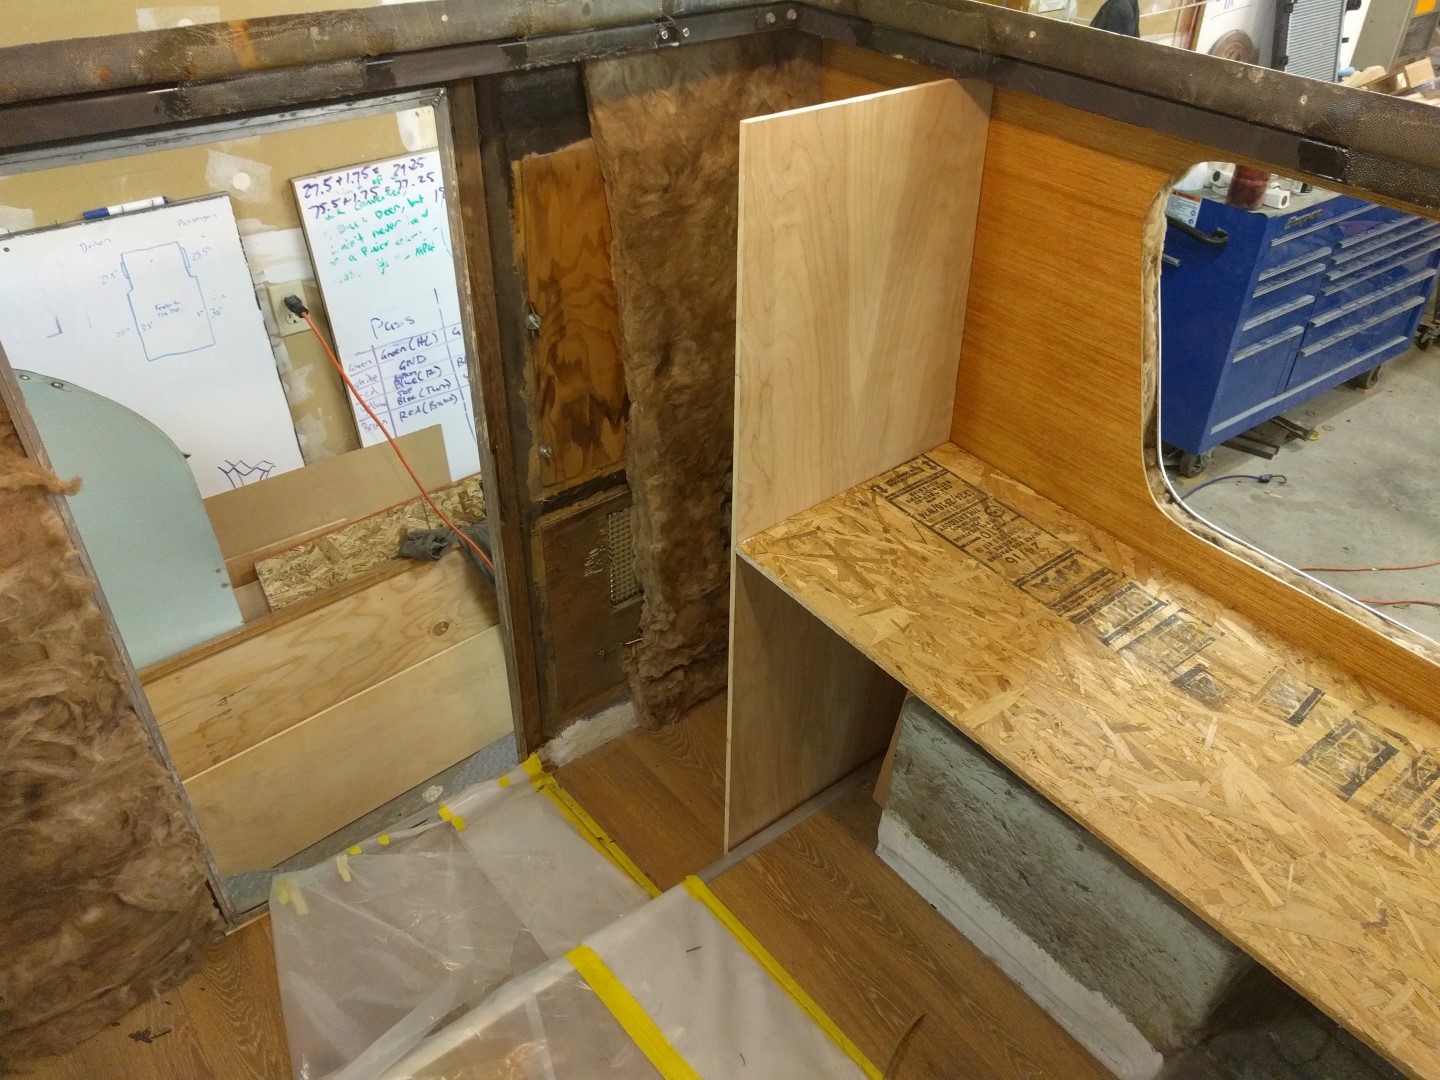
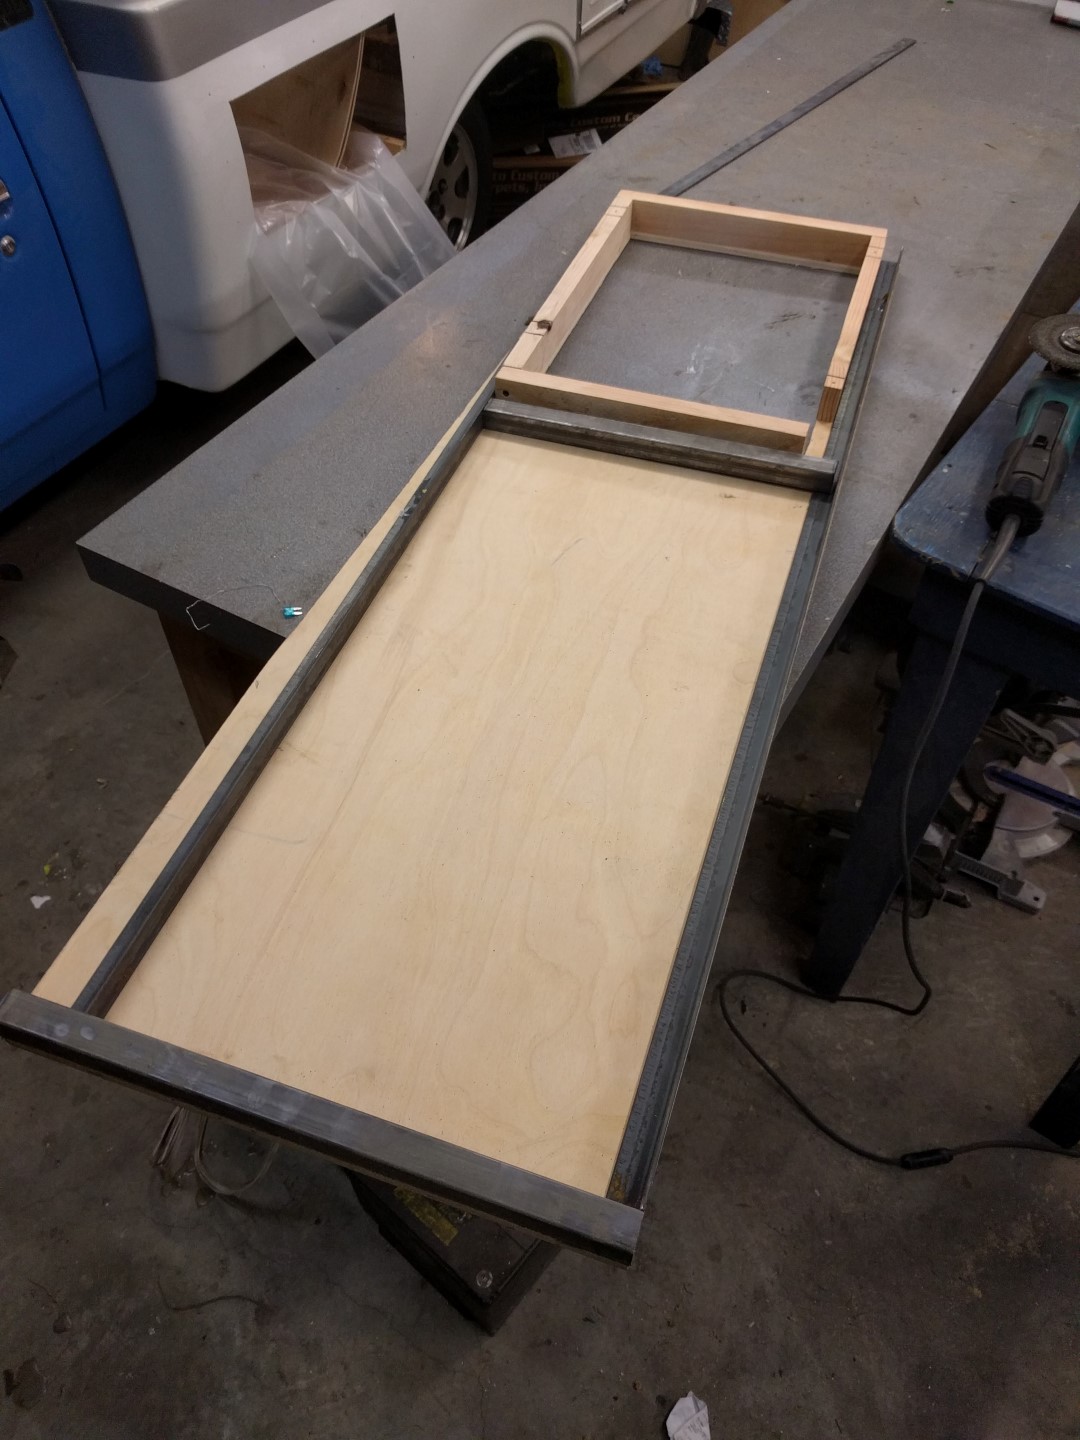
Table
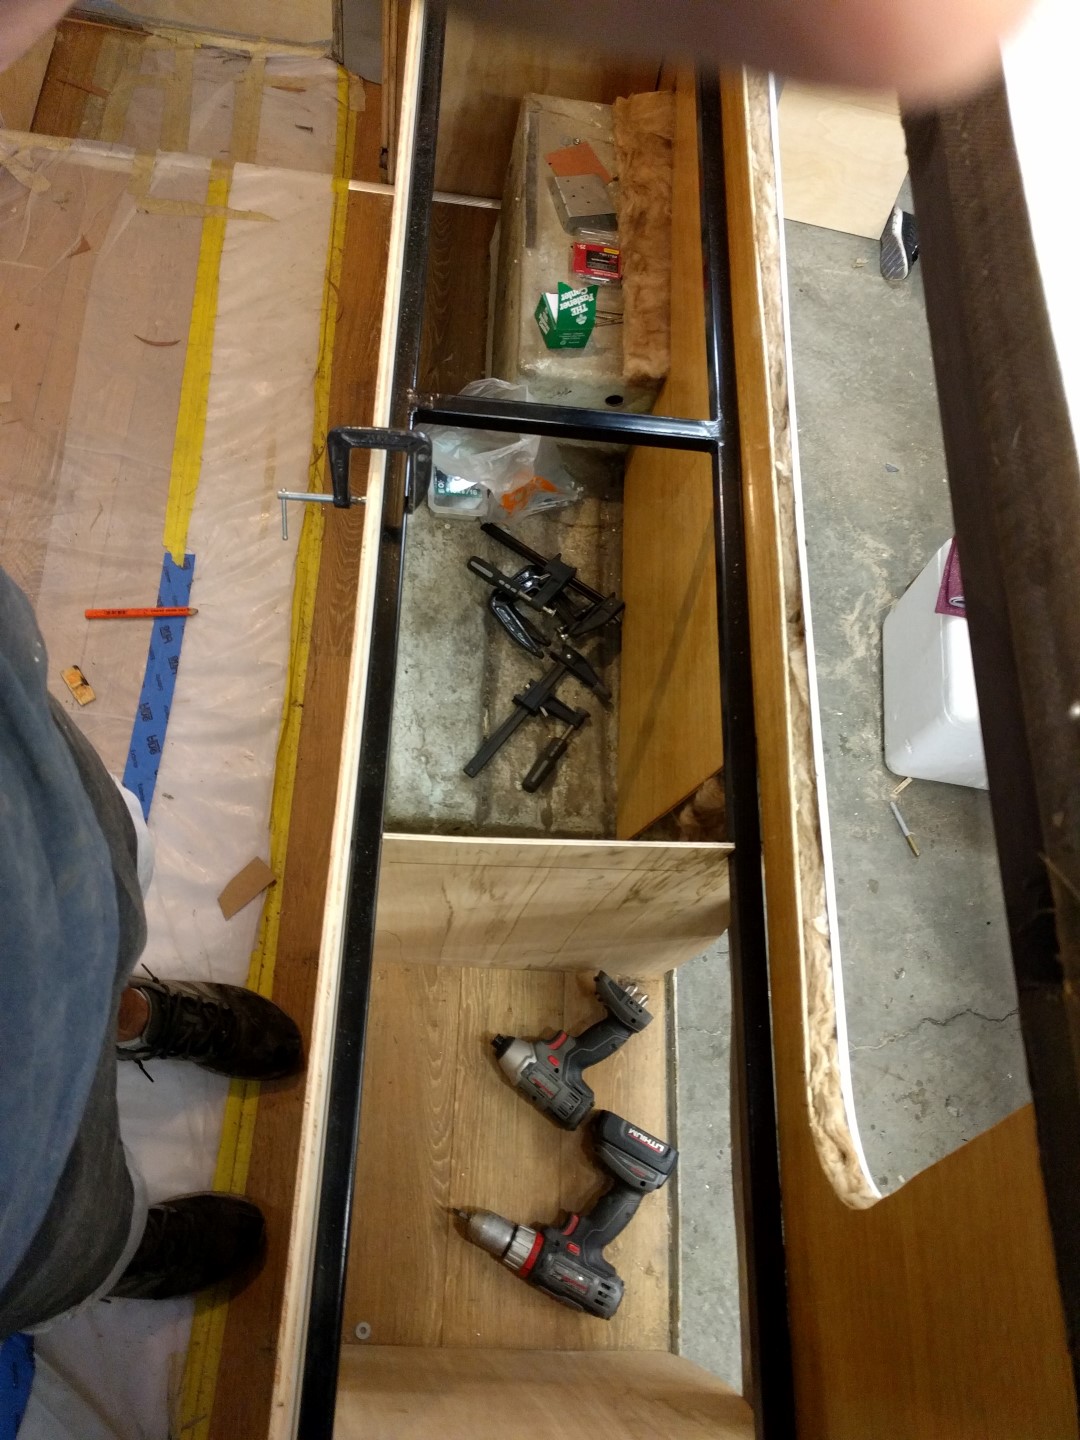
The main table counter top is installed on the driver’s side of the cabin. Underneath the counter is the fridge on the right, removable water tank on the left, and storage with a sliding door in the middle.
The first step was to frame the fridge in place and make sure there was enough height clearance to fit the stove over the frame. A mock plywood counter was used to make the exact shape of the counter before cutting the main table top.
A metal frame was built out of 1” square tubing, supported at the rear by the cabinets and the front partially by the fridge, a leg on the frame, and the H-shaped frame behind the walls. The frame was painted with black spray paint.
The front of the counter is 1/2” sanded plywood. The edge near the truck cabin was left longer to cut to size after all the other cutouts were made. The fridge cutout was first, followed by and opening for the sliding doors, and lastly the water tank of the far left.
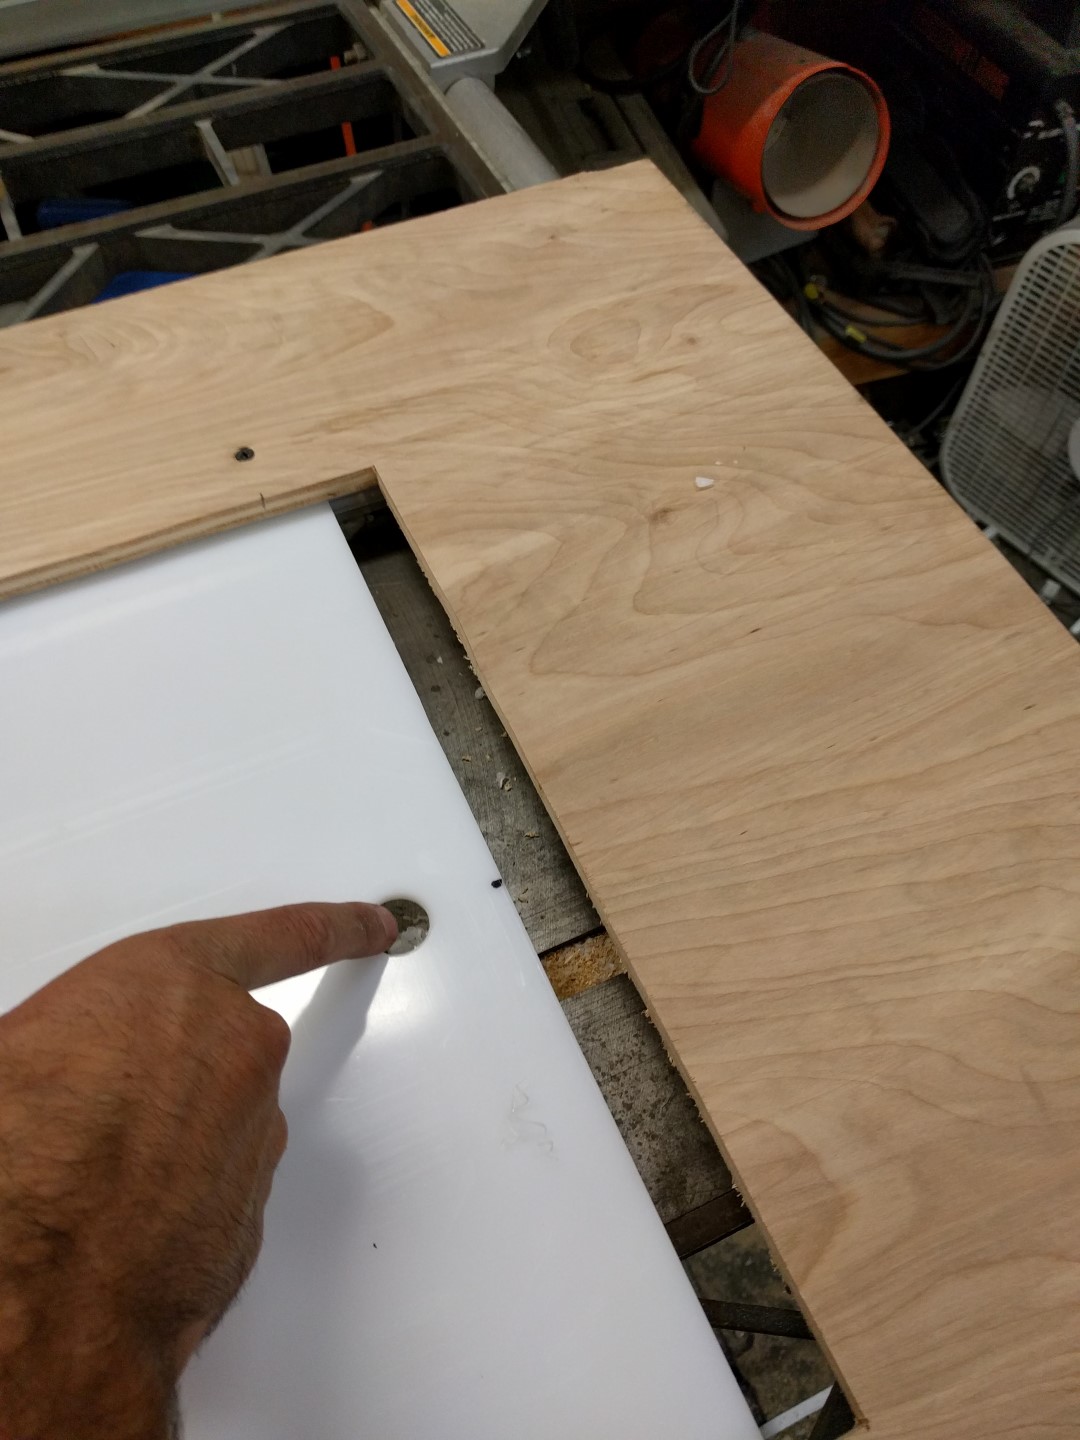
The sliding door was made from 1/4” plastic with a sliding door tray from McMaster Carr. Four finger sized holes were drilled in the doors to slide them back and forth.
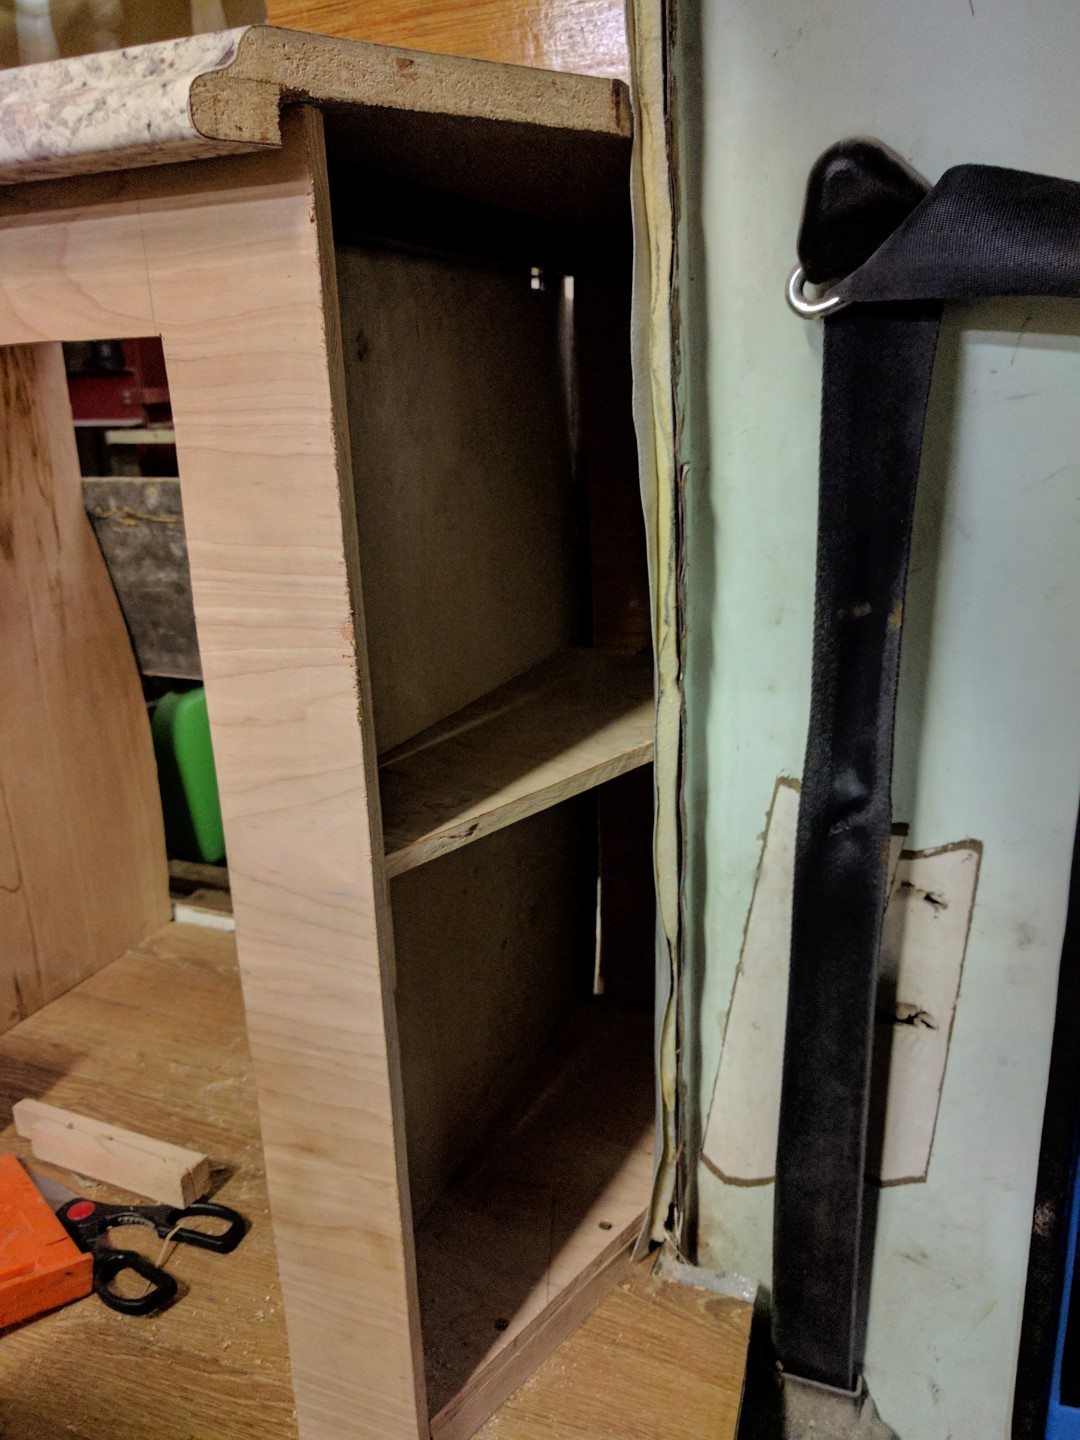
To the right of the fridge, directly behind the drivers seat, two shelfs were made.
The counter is white and speckled made from a particle board base with very hard veneer over the top.


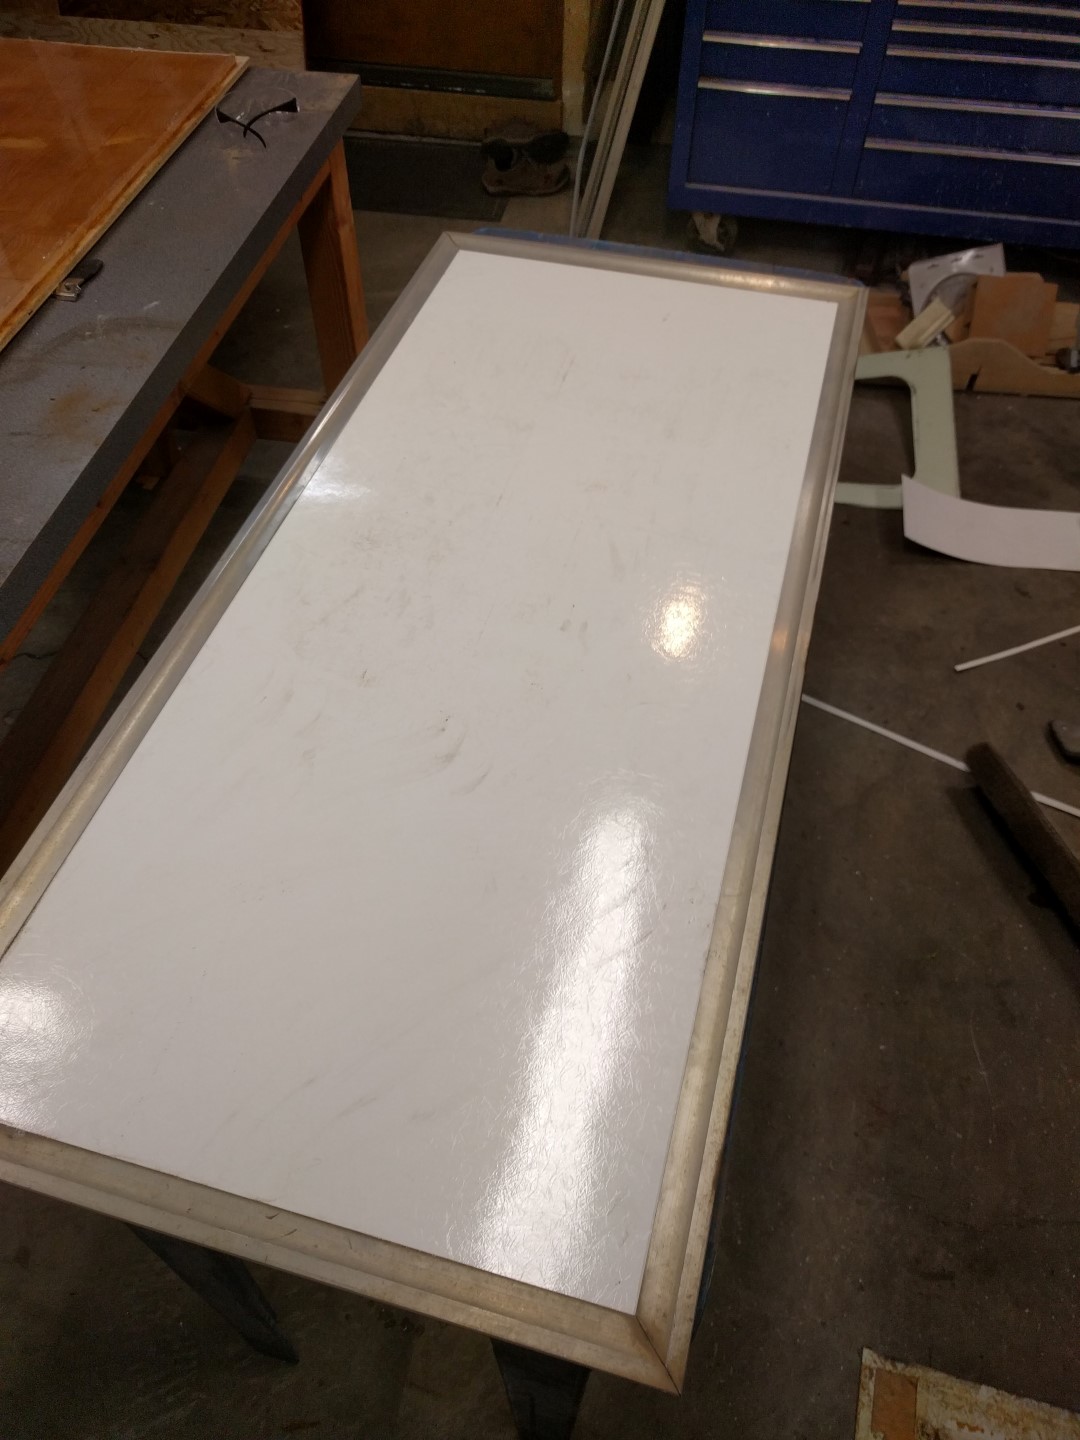
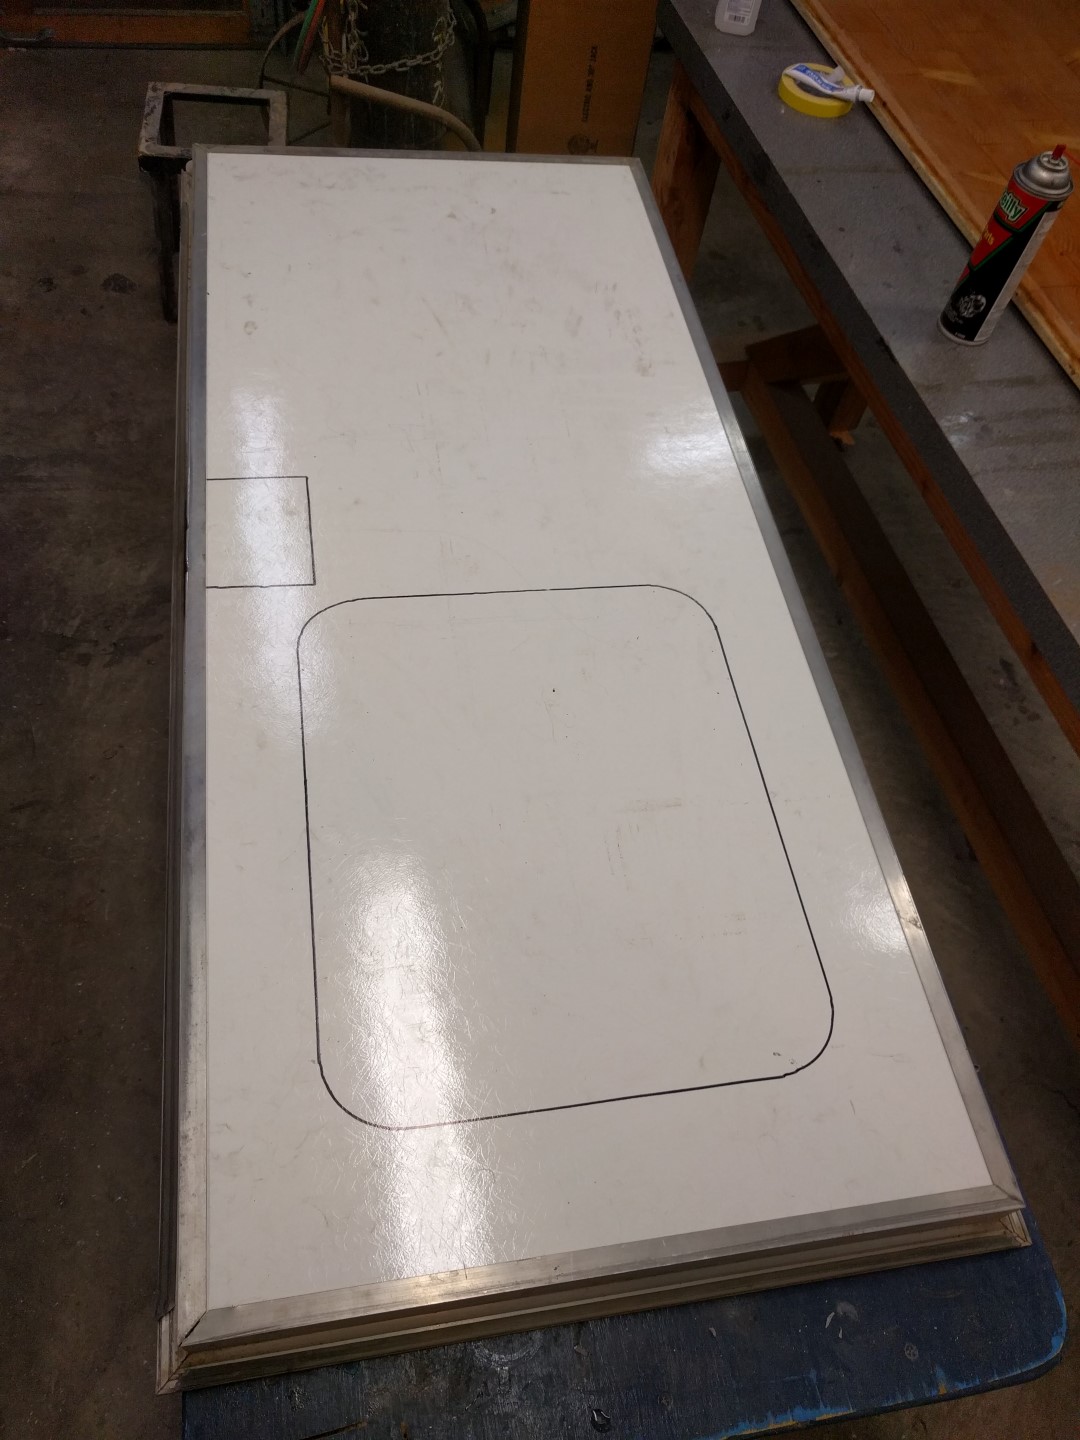
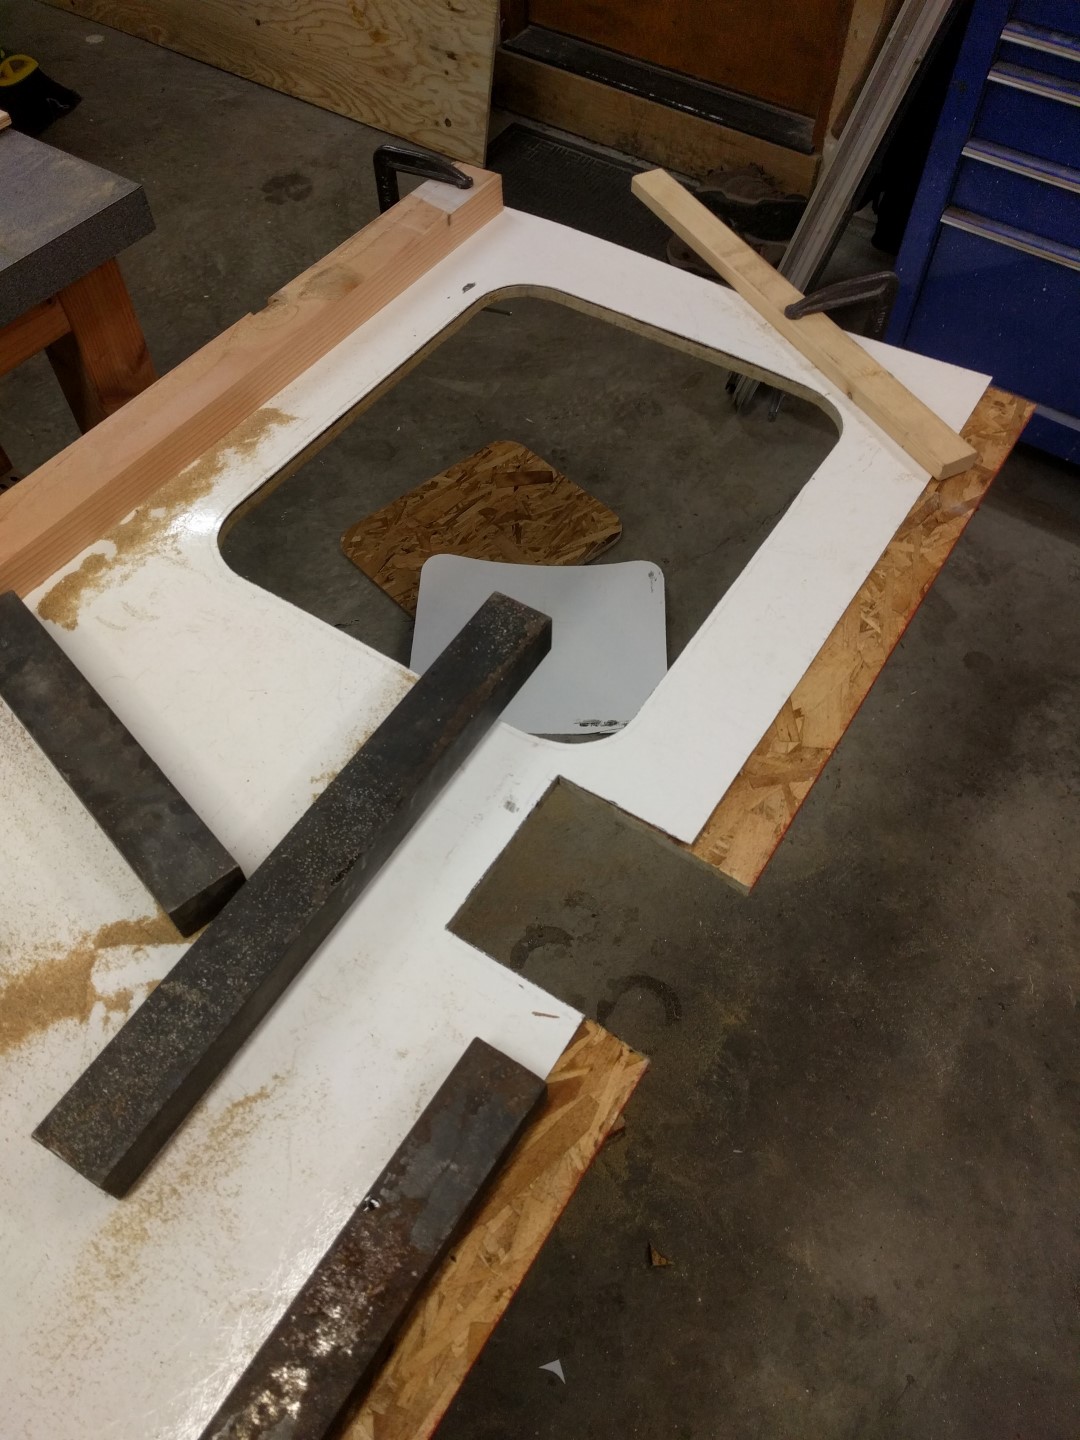
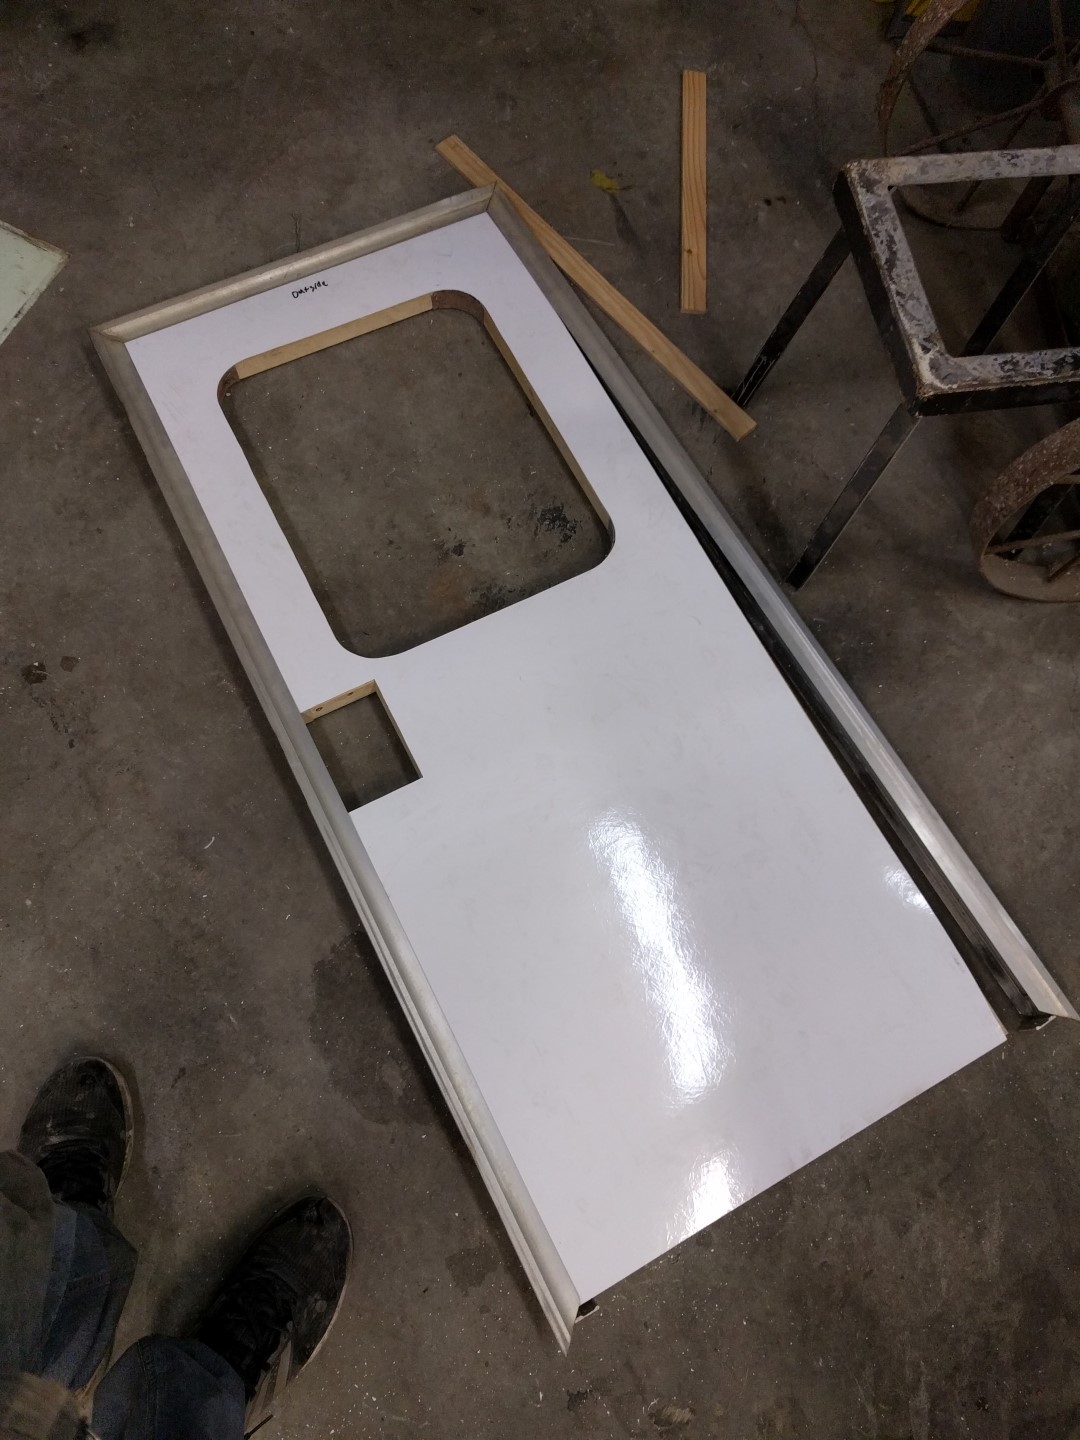
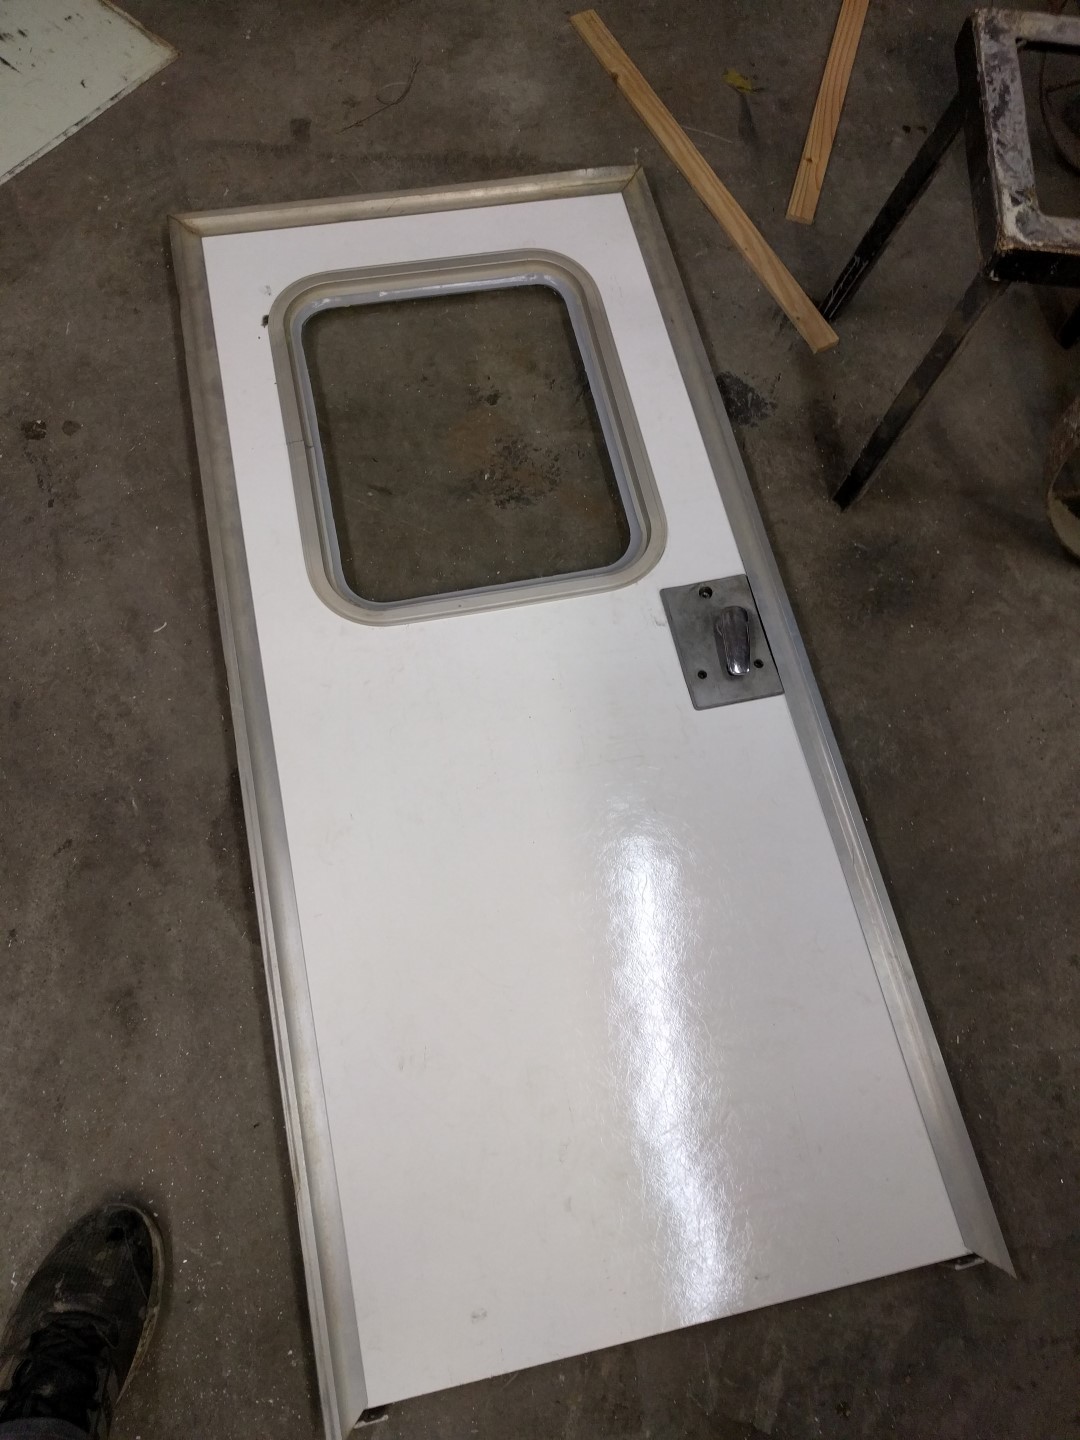
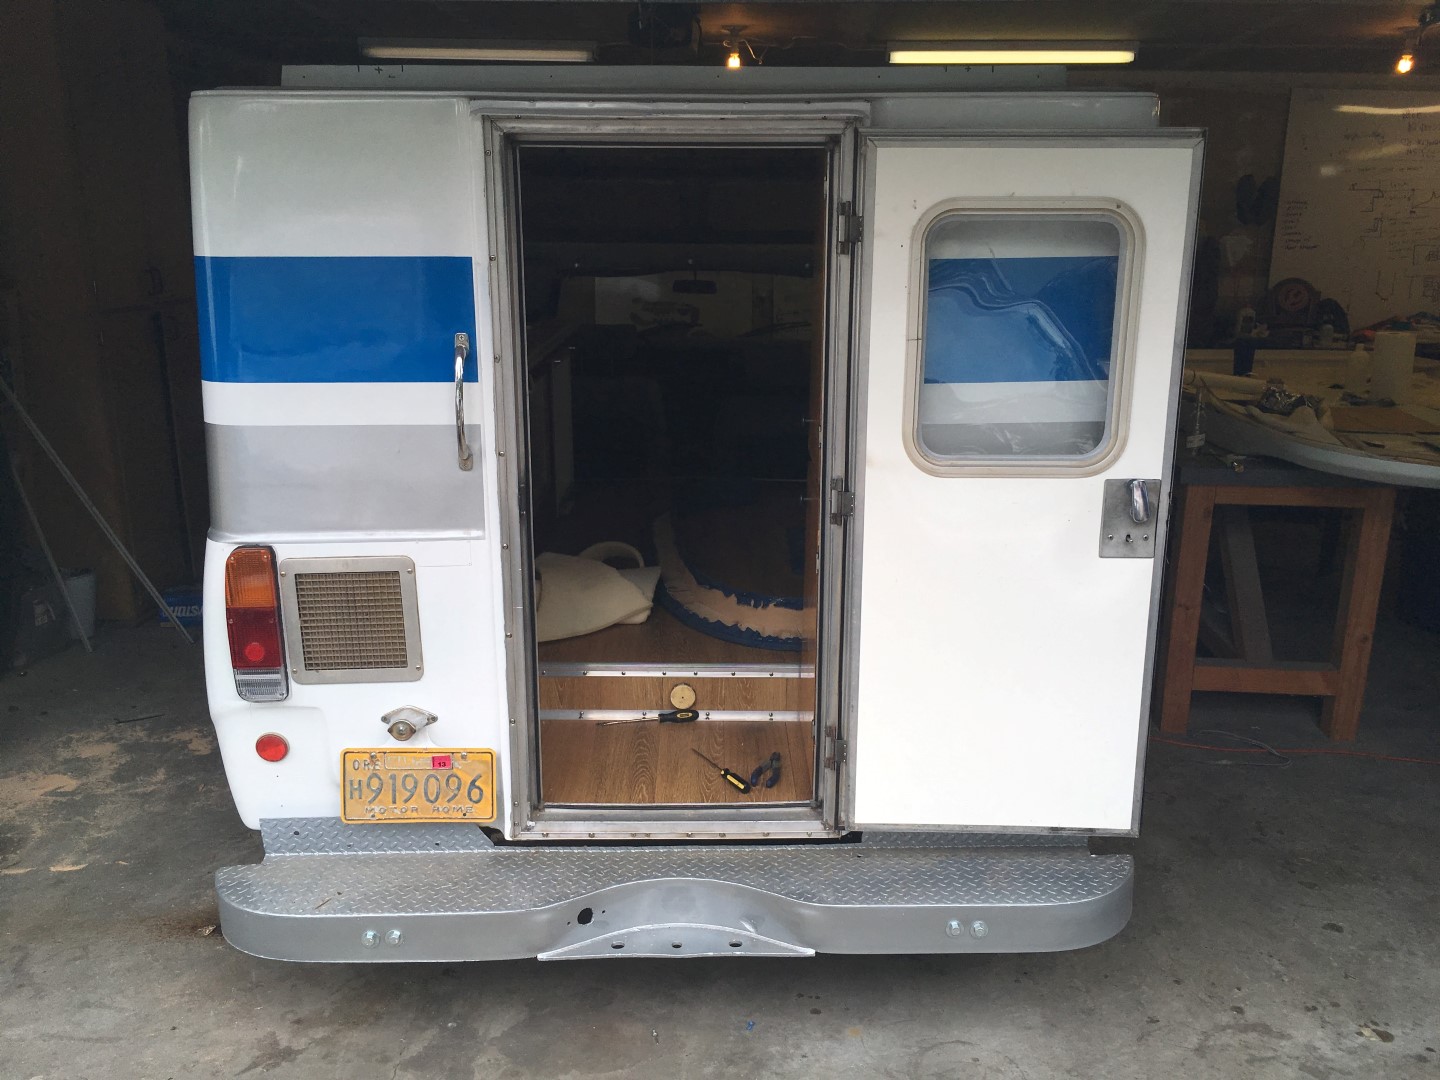
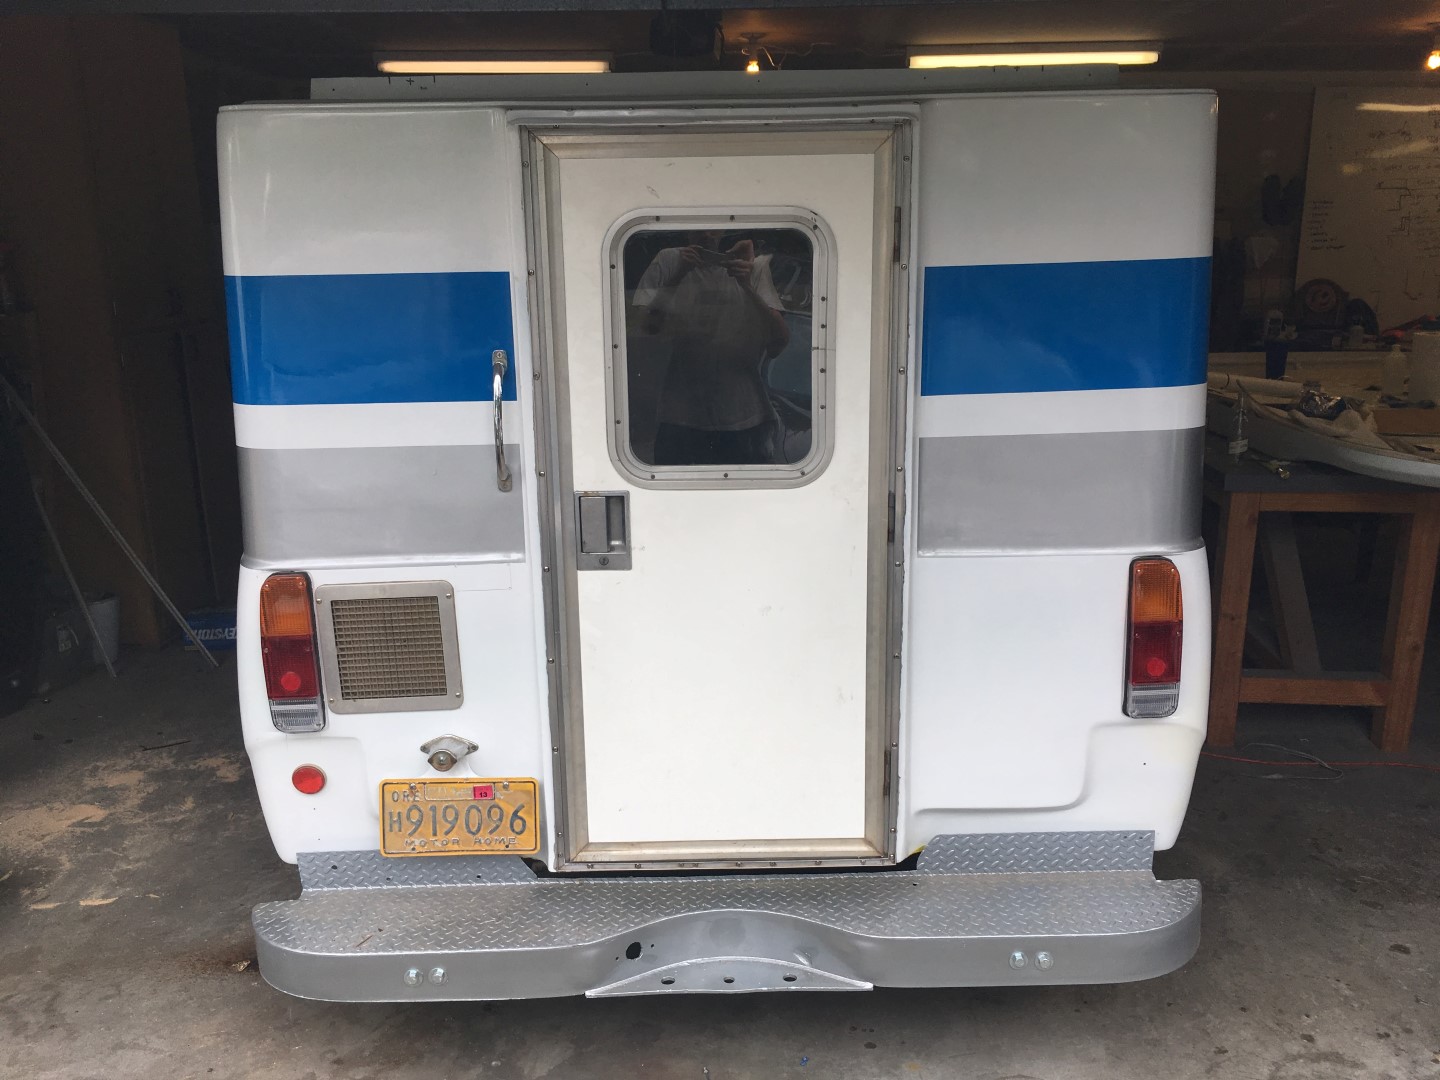
Coach Door Rebuild
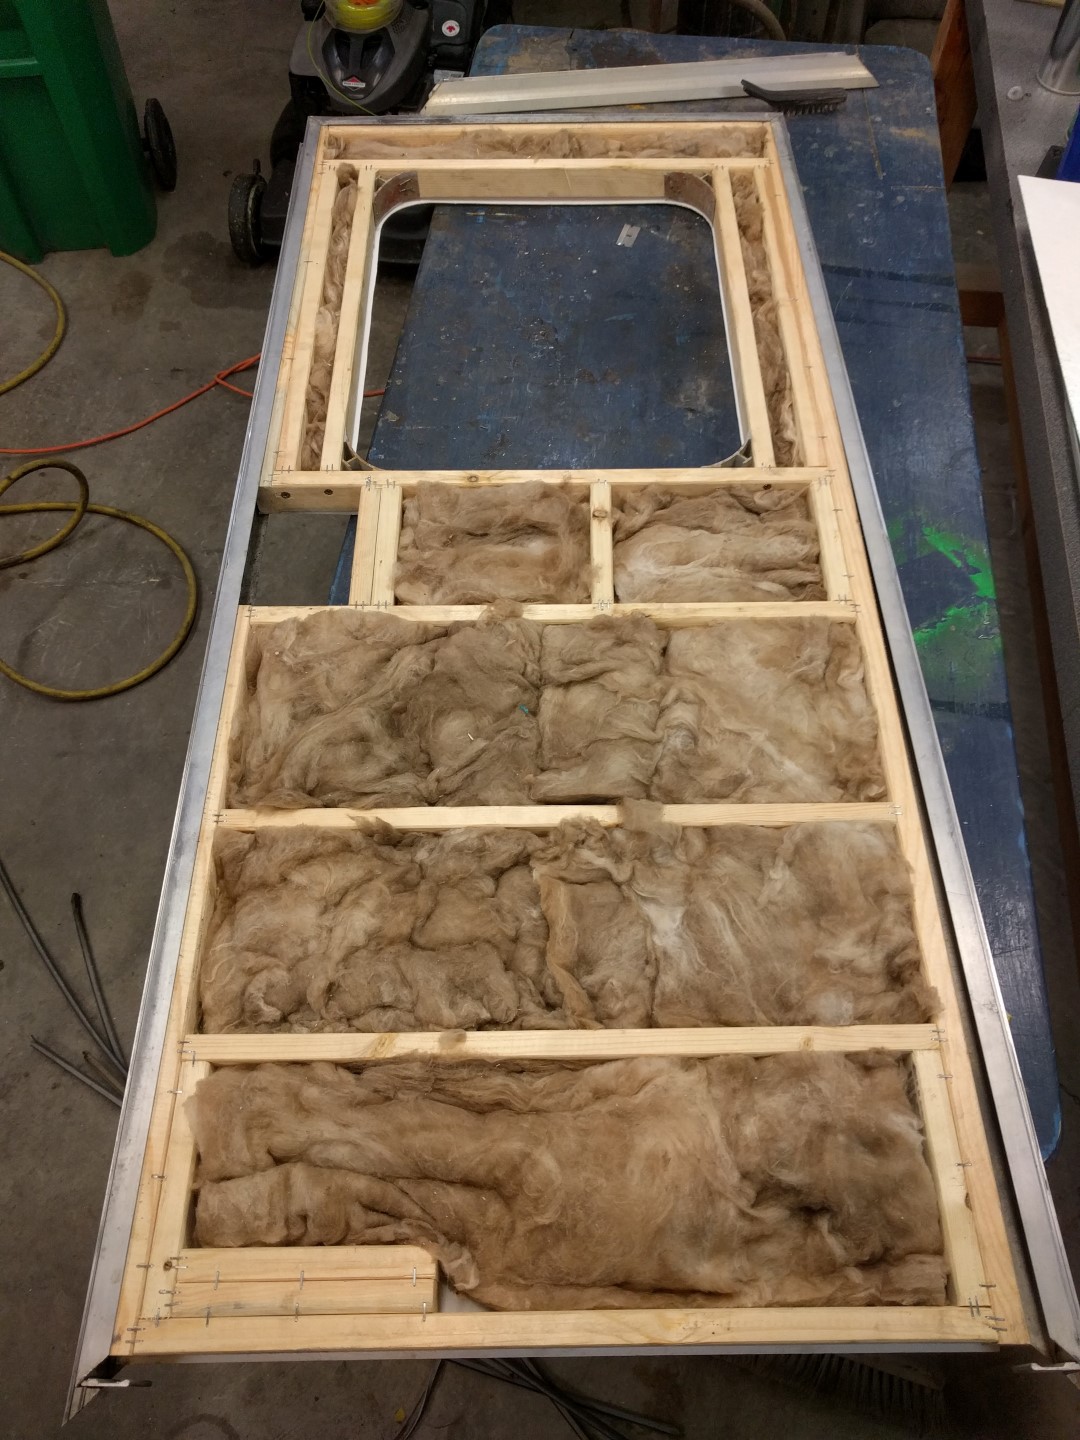
The door frame was rotted and in need of a rebuild. The basic structure of the door is 1x2” wood strips nailed together with insulation in the middle and Filon (fiberglass rv siding) sheets covering the insulation. The old Filon was cracked and in poor condition so the old was used as a template for the new sheets. The wood frame structure was improved by adding more reinforcements where the old frame was rotted or stressed. Holes were cut for the window and door handle/lock by tracing the old sheets.
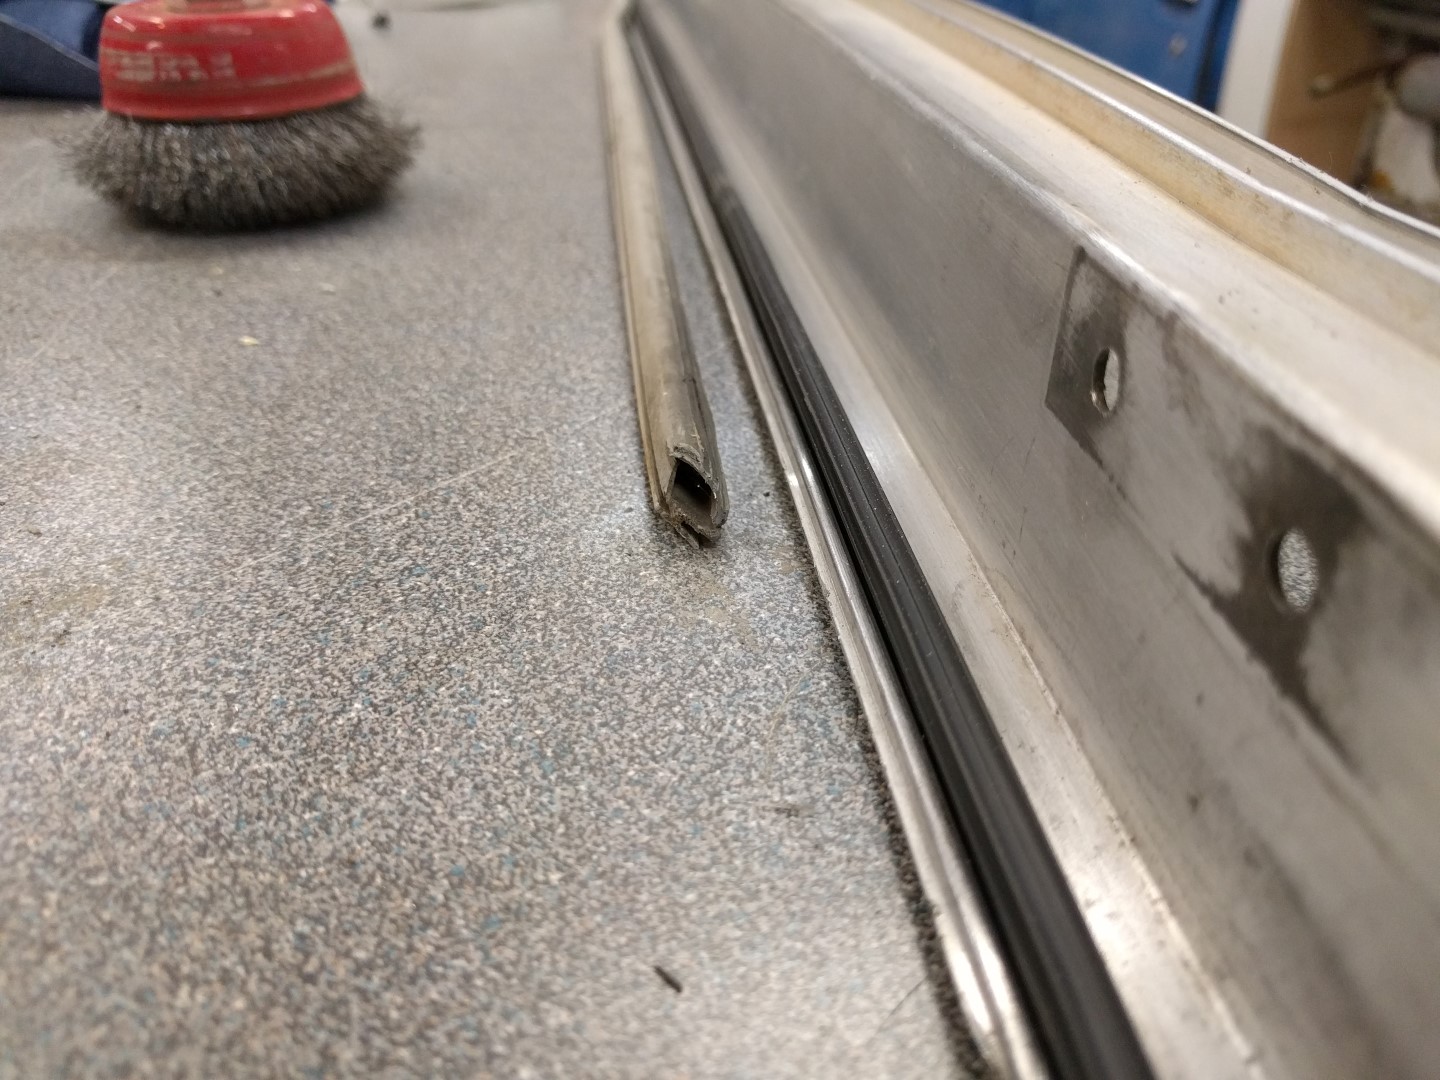
The aluminum frame attached to the fiberglass shell needed some love so it was tig welded in spots were it was cracked. Then it was attached to the shell with stainless screws with butyl tape between the seal ans shell. The aluminum door frame is quite easy to disassemble. Remove a few screws and the aluminum pieces pop apart.
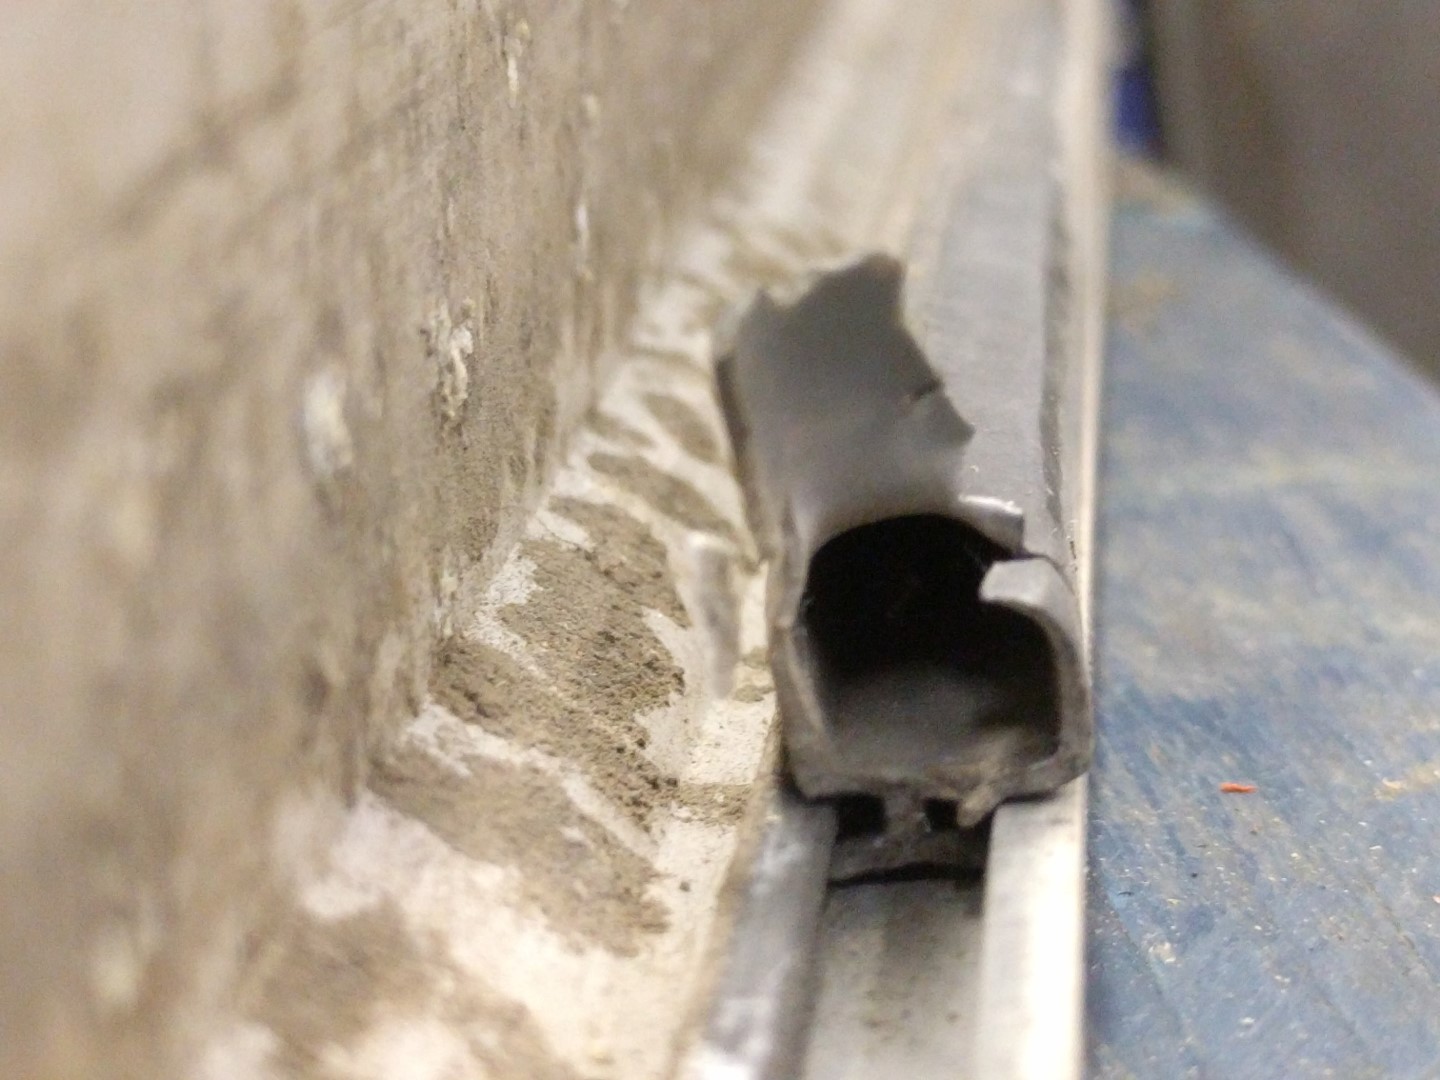
The gray door bubble seal was in poor condition and finding a replacement for that wasn’t easy. The Swisco 58-134 Commercial Bubble Weatherstrip is a closest fit I could find. In the corners the seal had to be cut so black RTV silicon was used to seal that area.
The door handle/lock was in decent condition but missing the key. A local locksmith was able to re-key the lock cylinder.
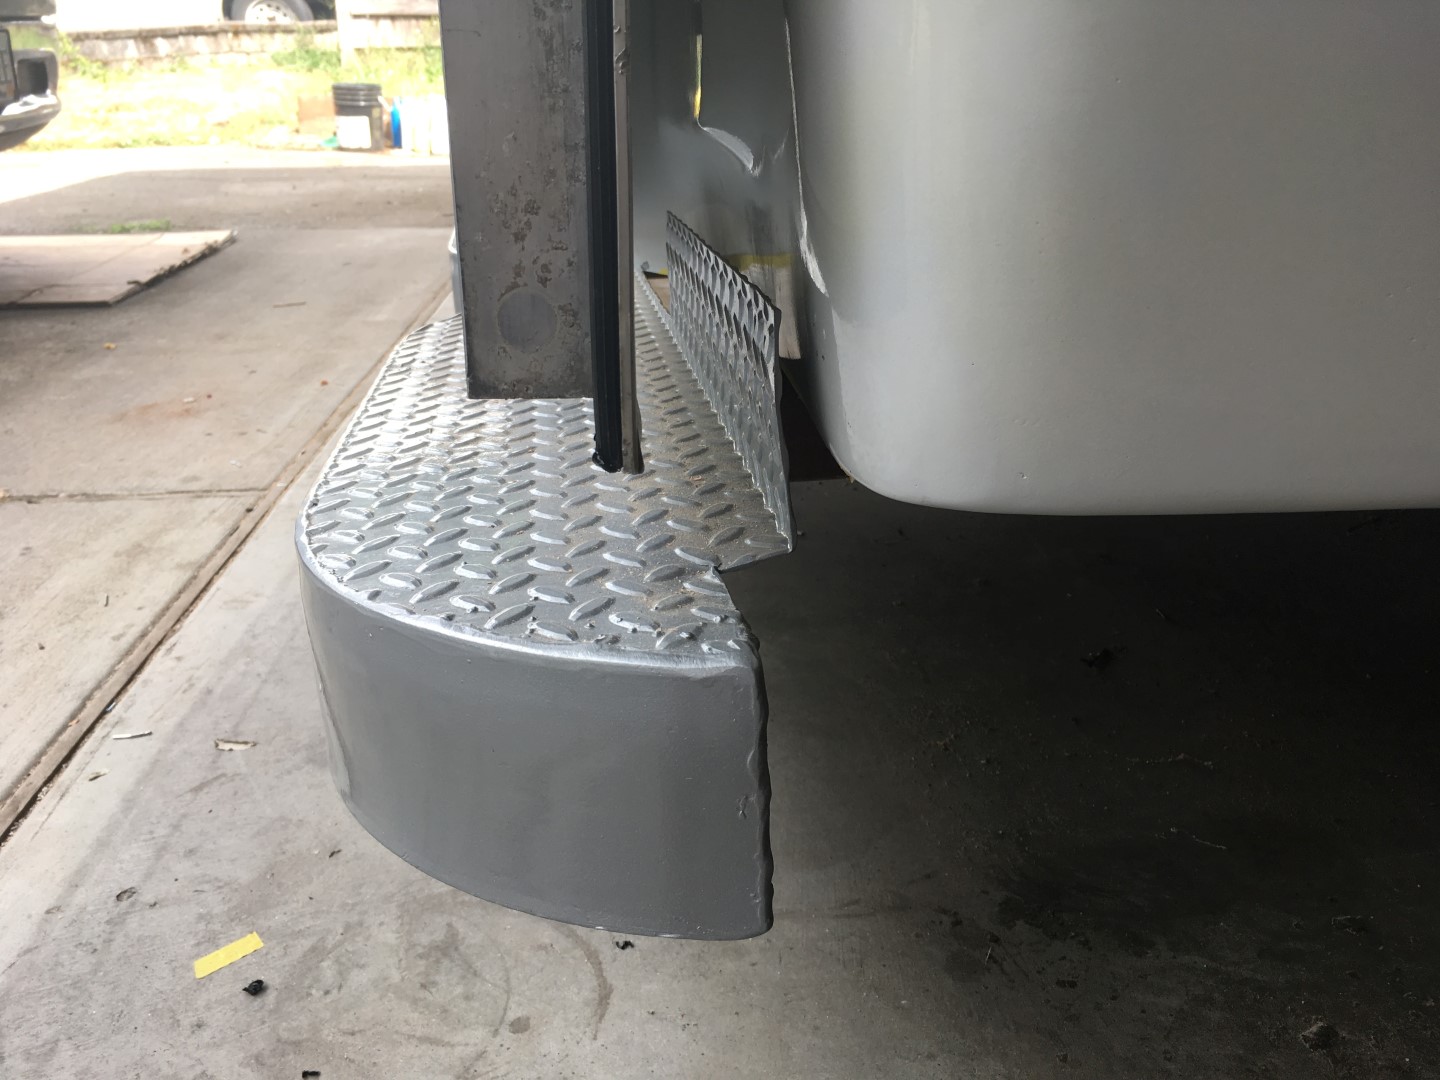
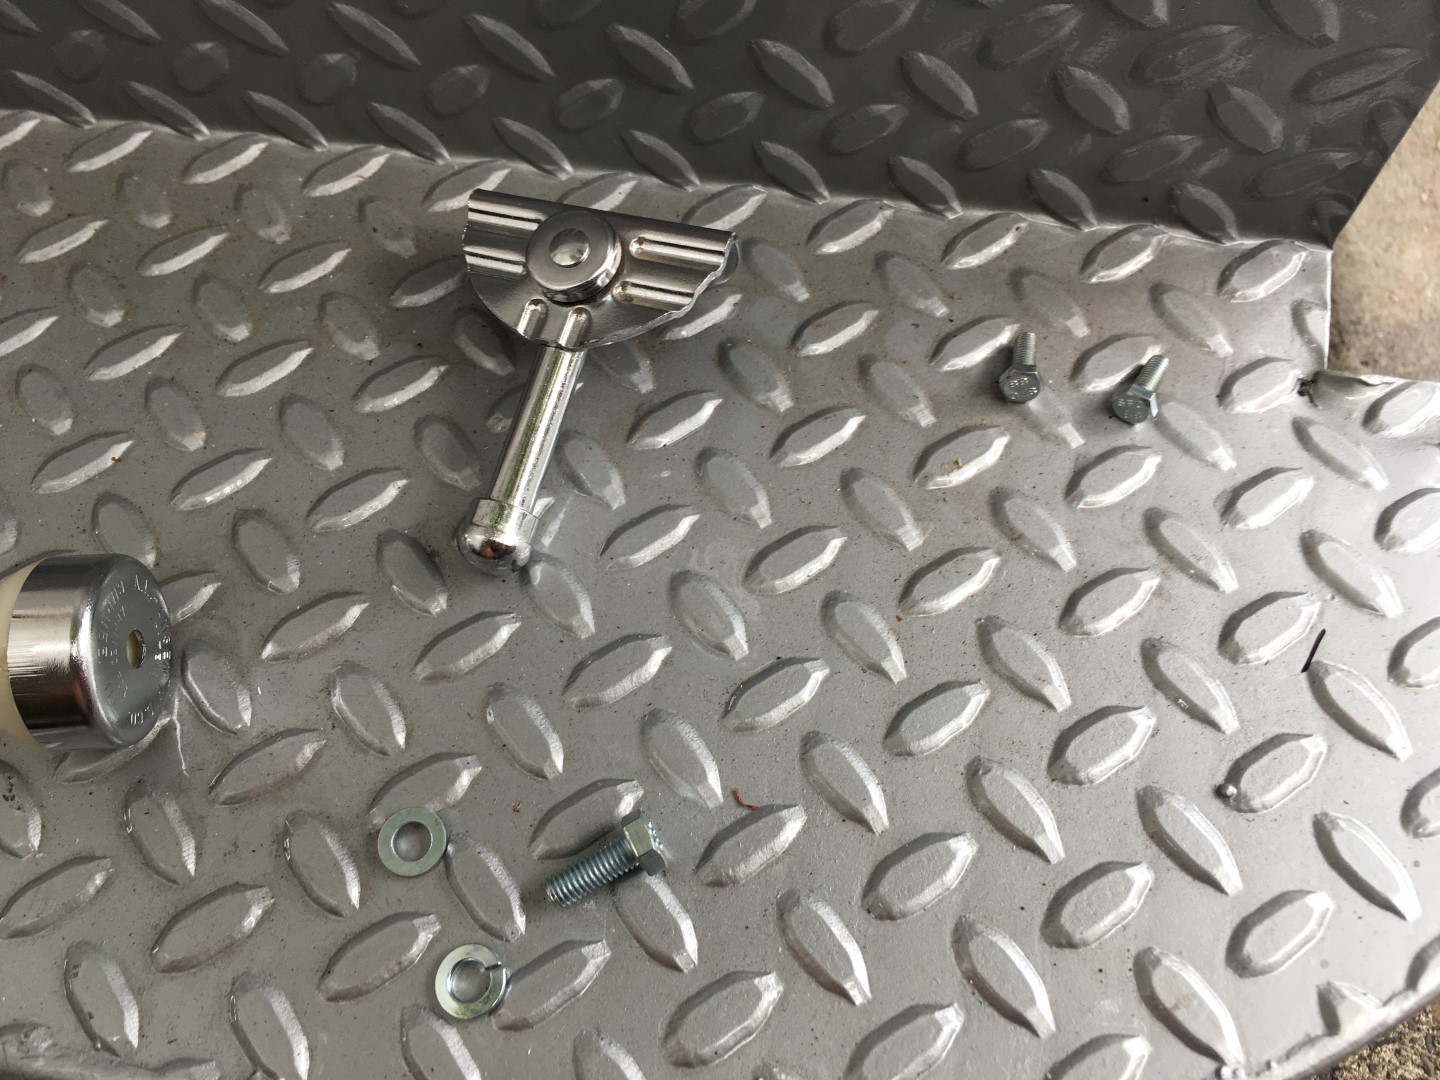
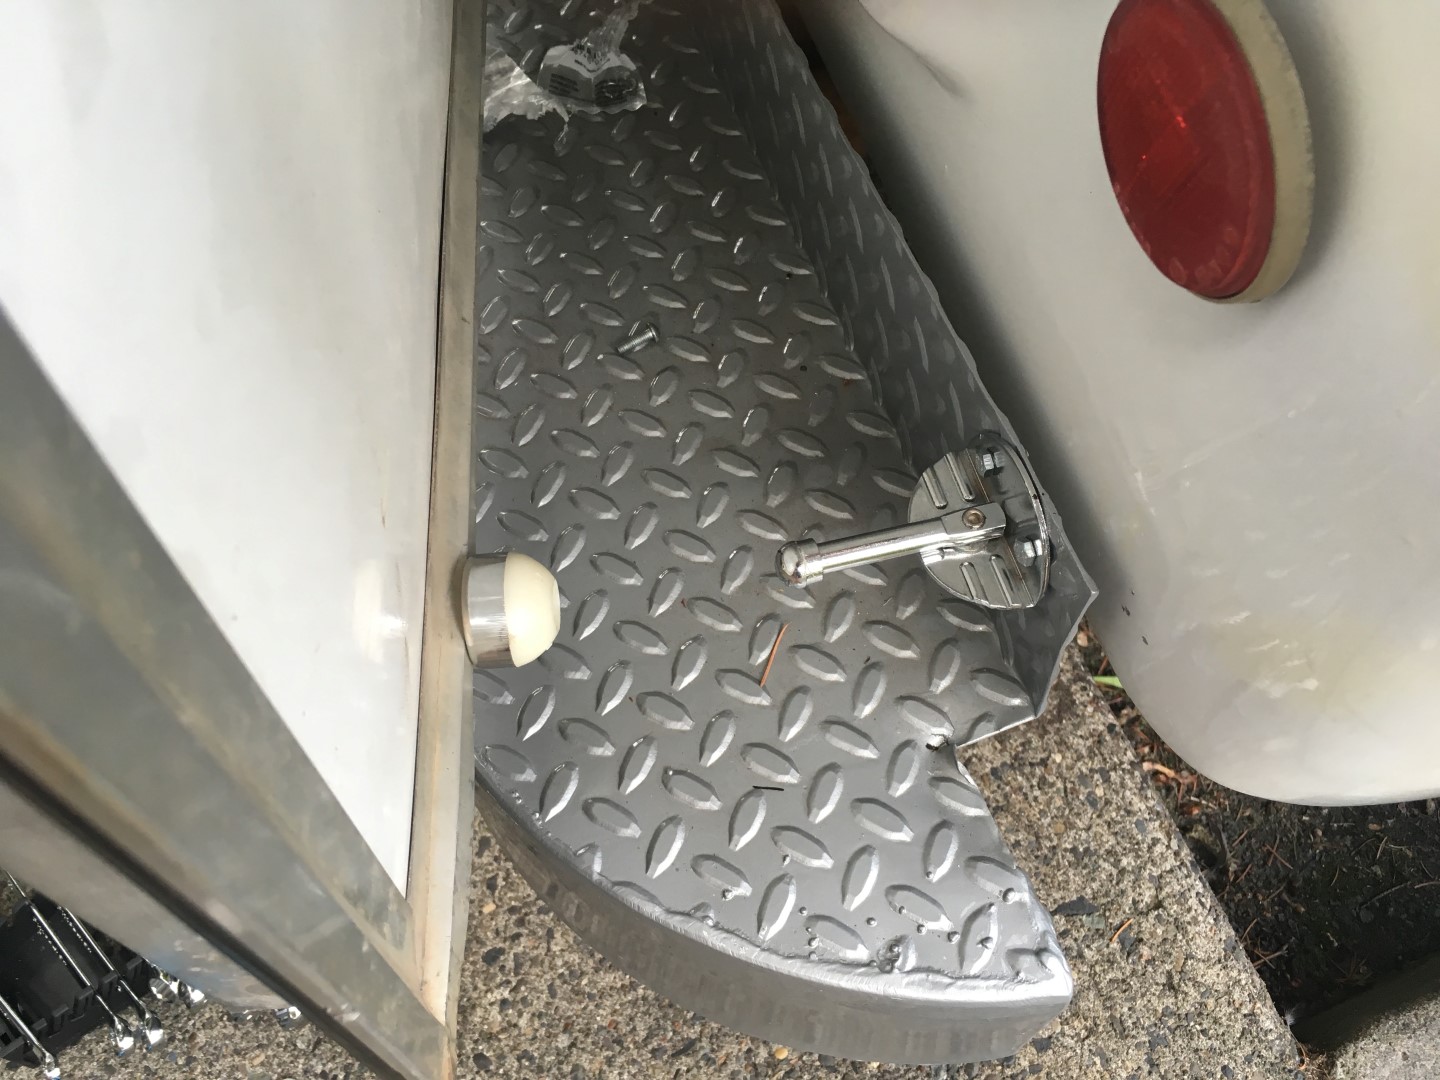
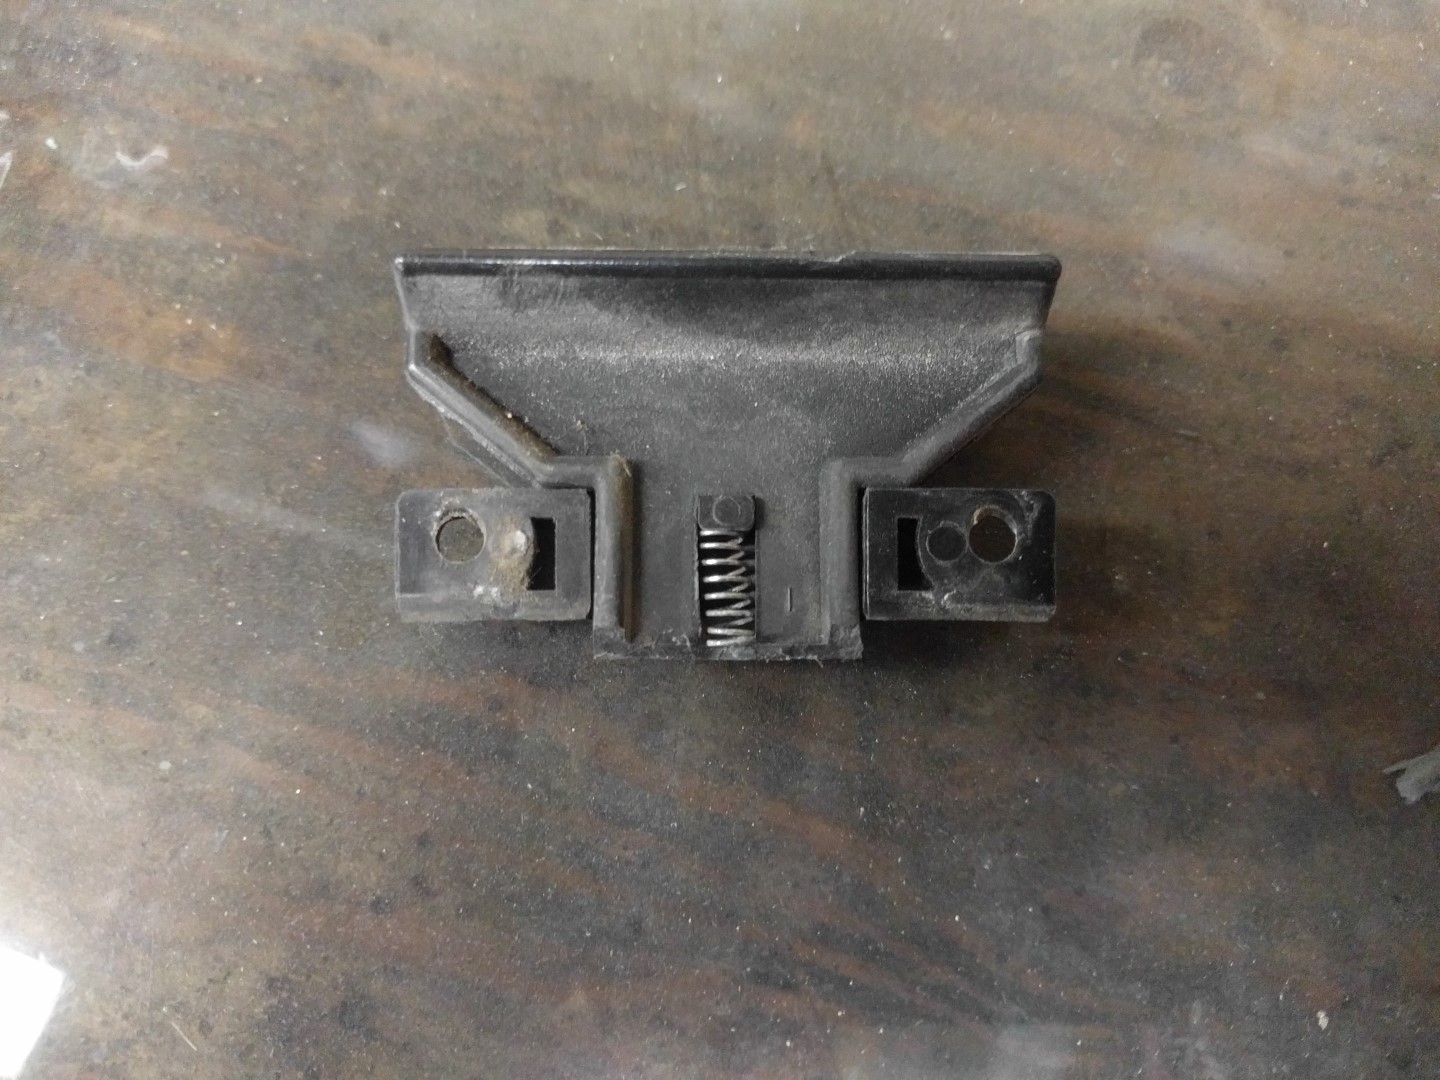
A door stop was installed on the bumper to prevent the door from smashing the tail light.


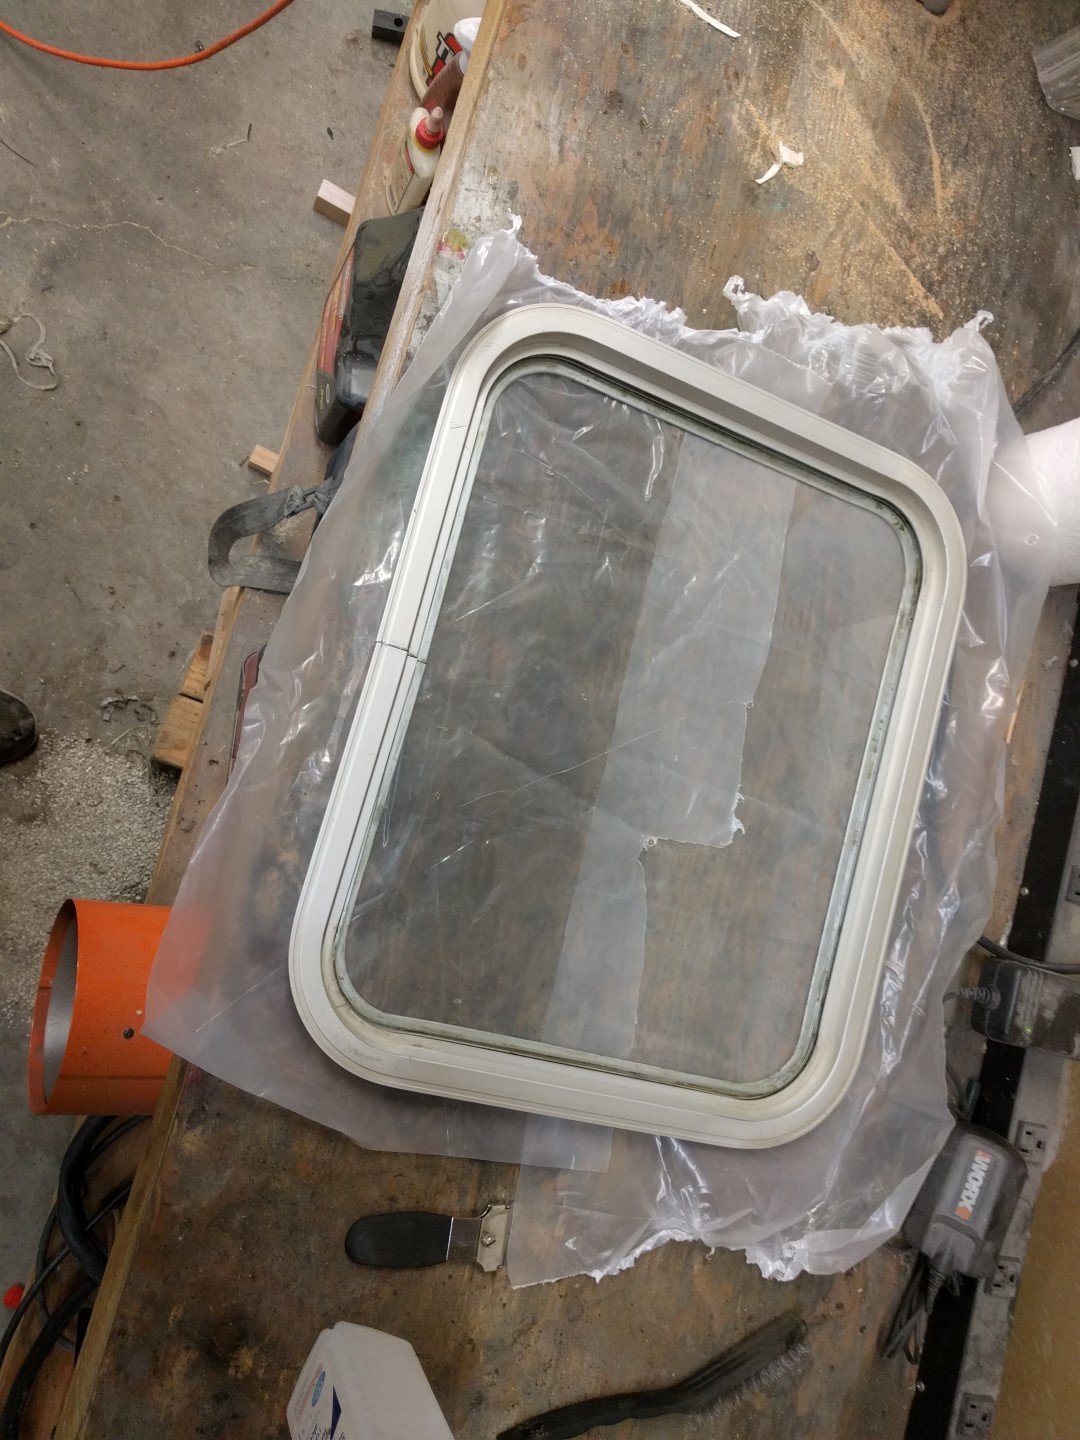
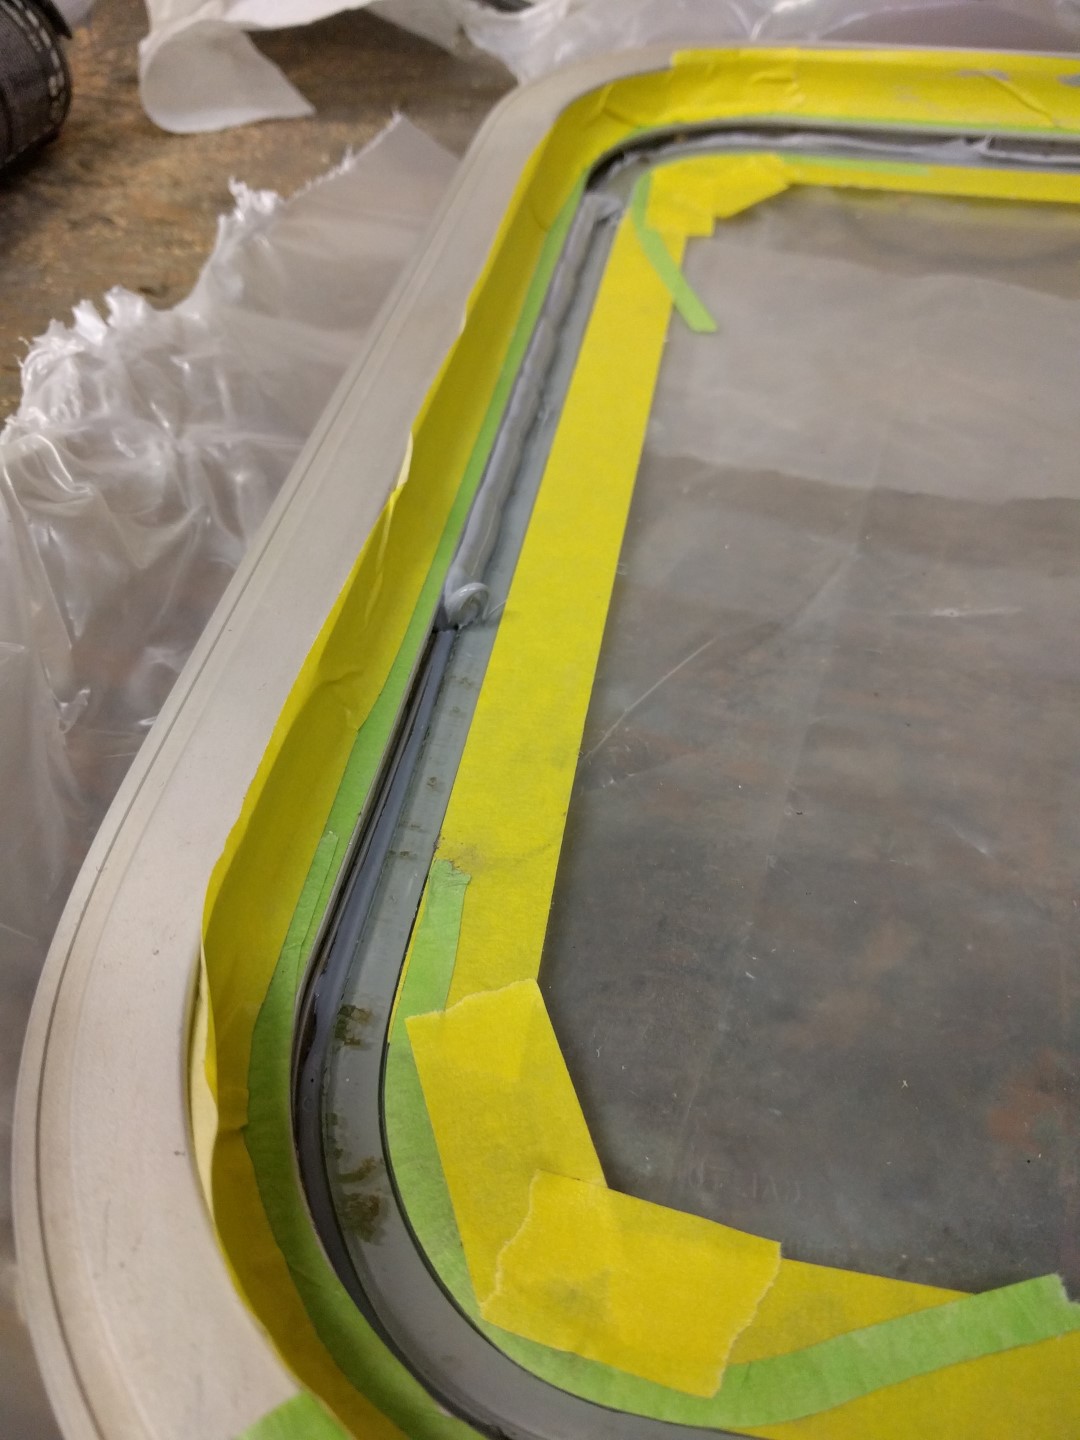
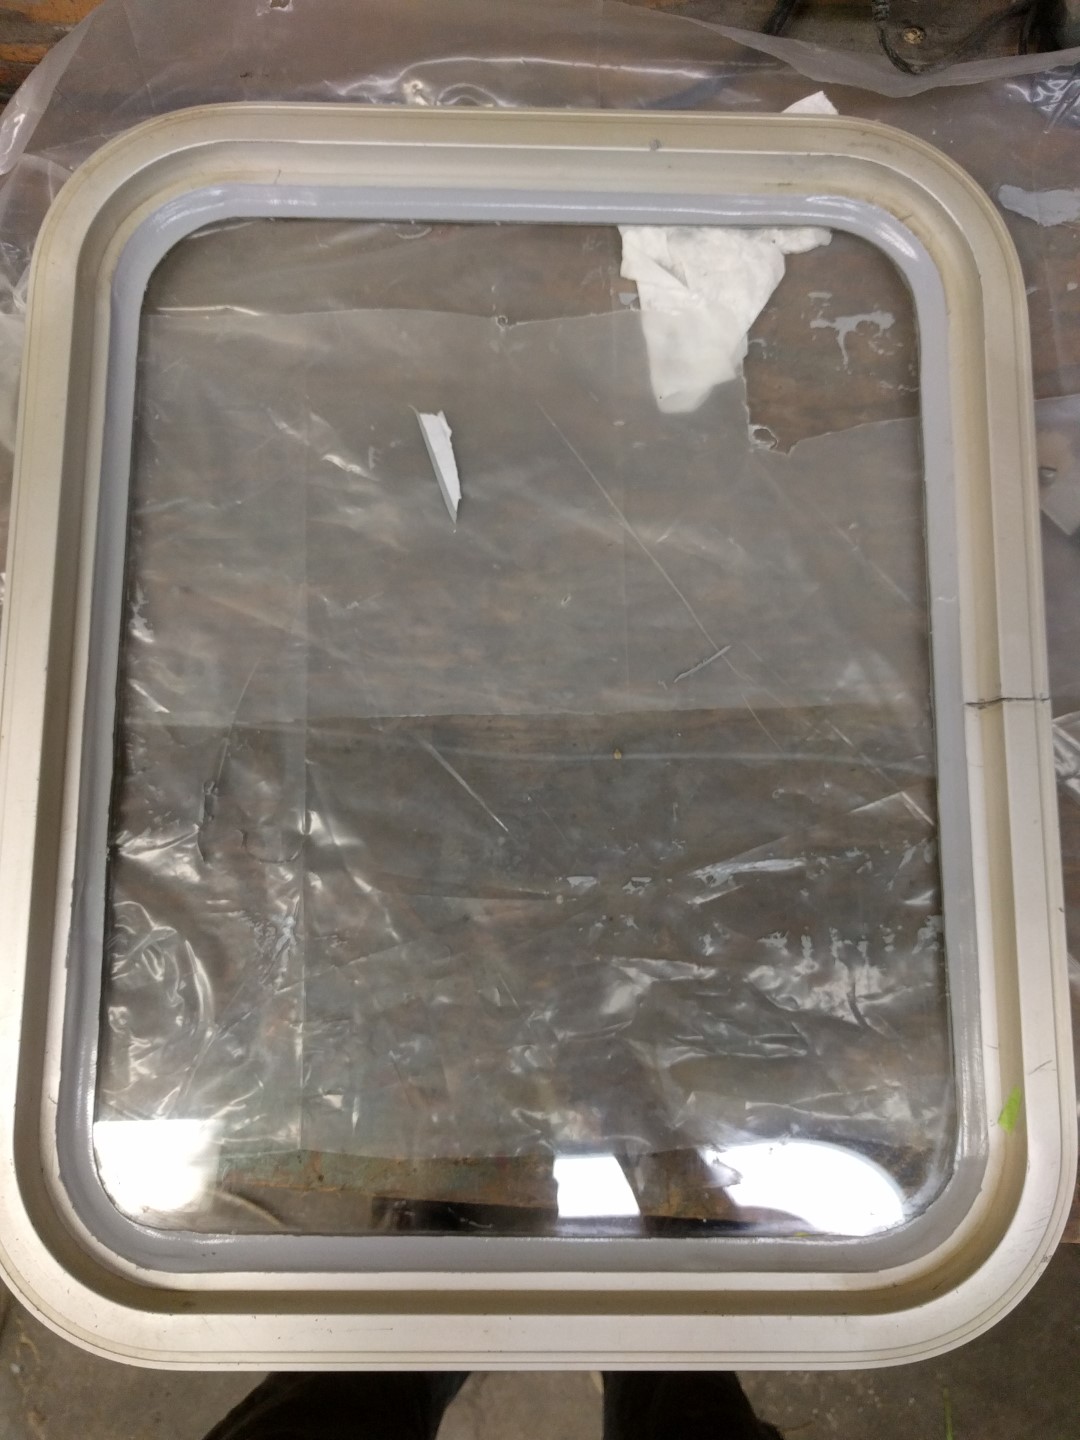
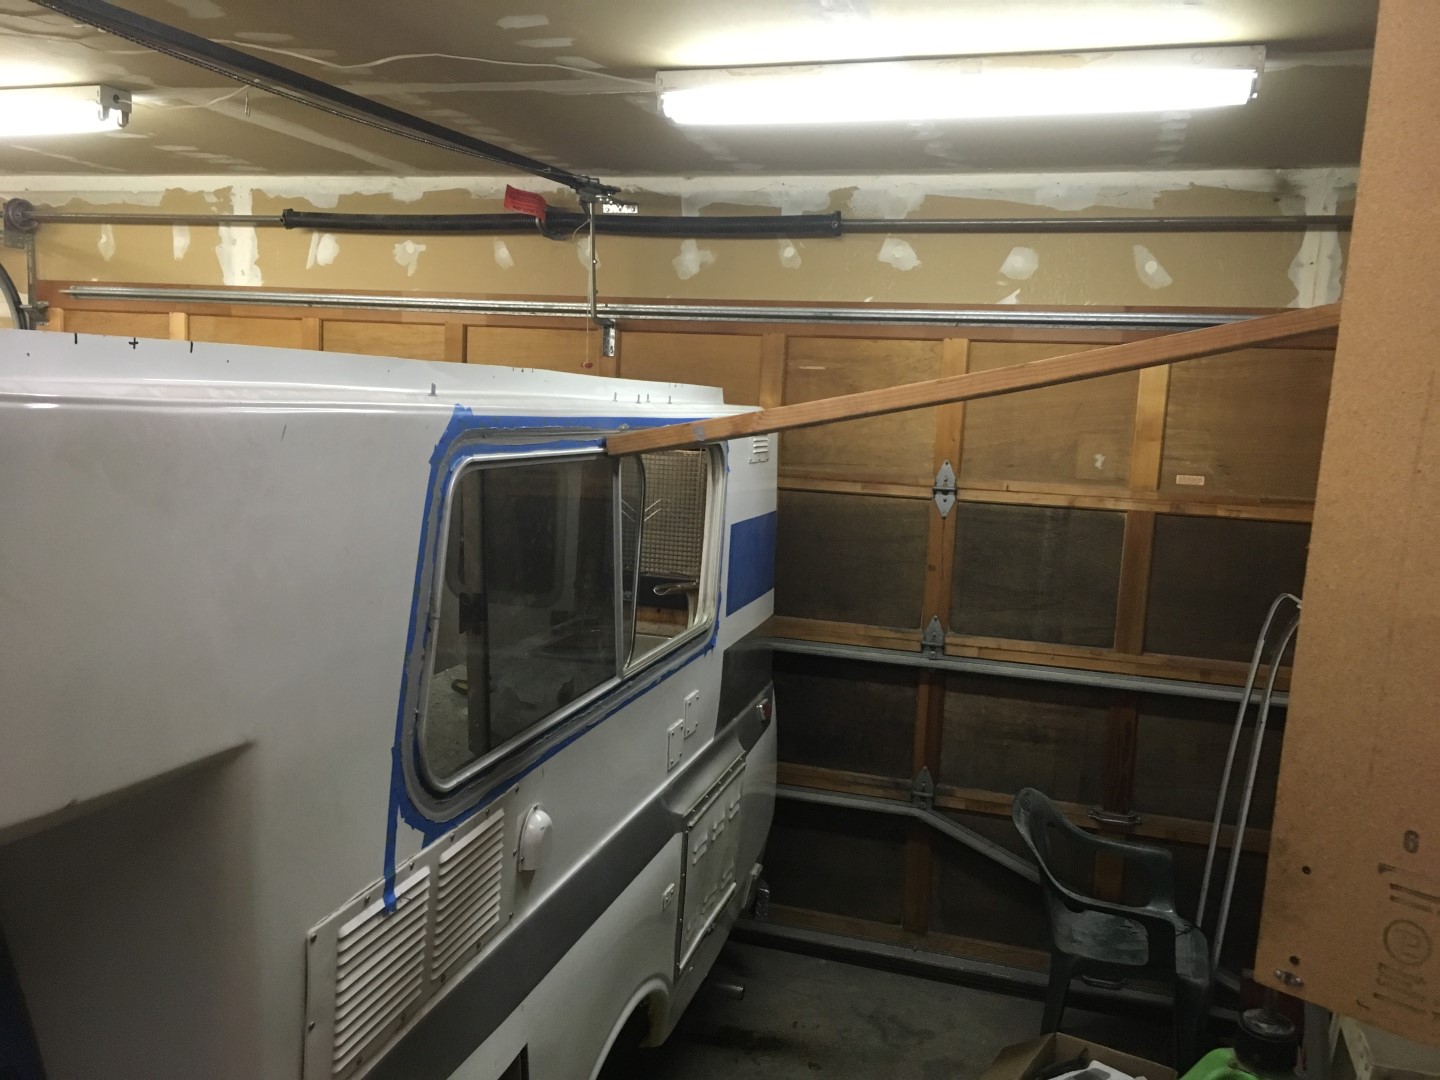
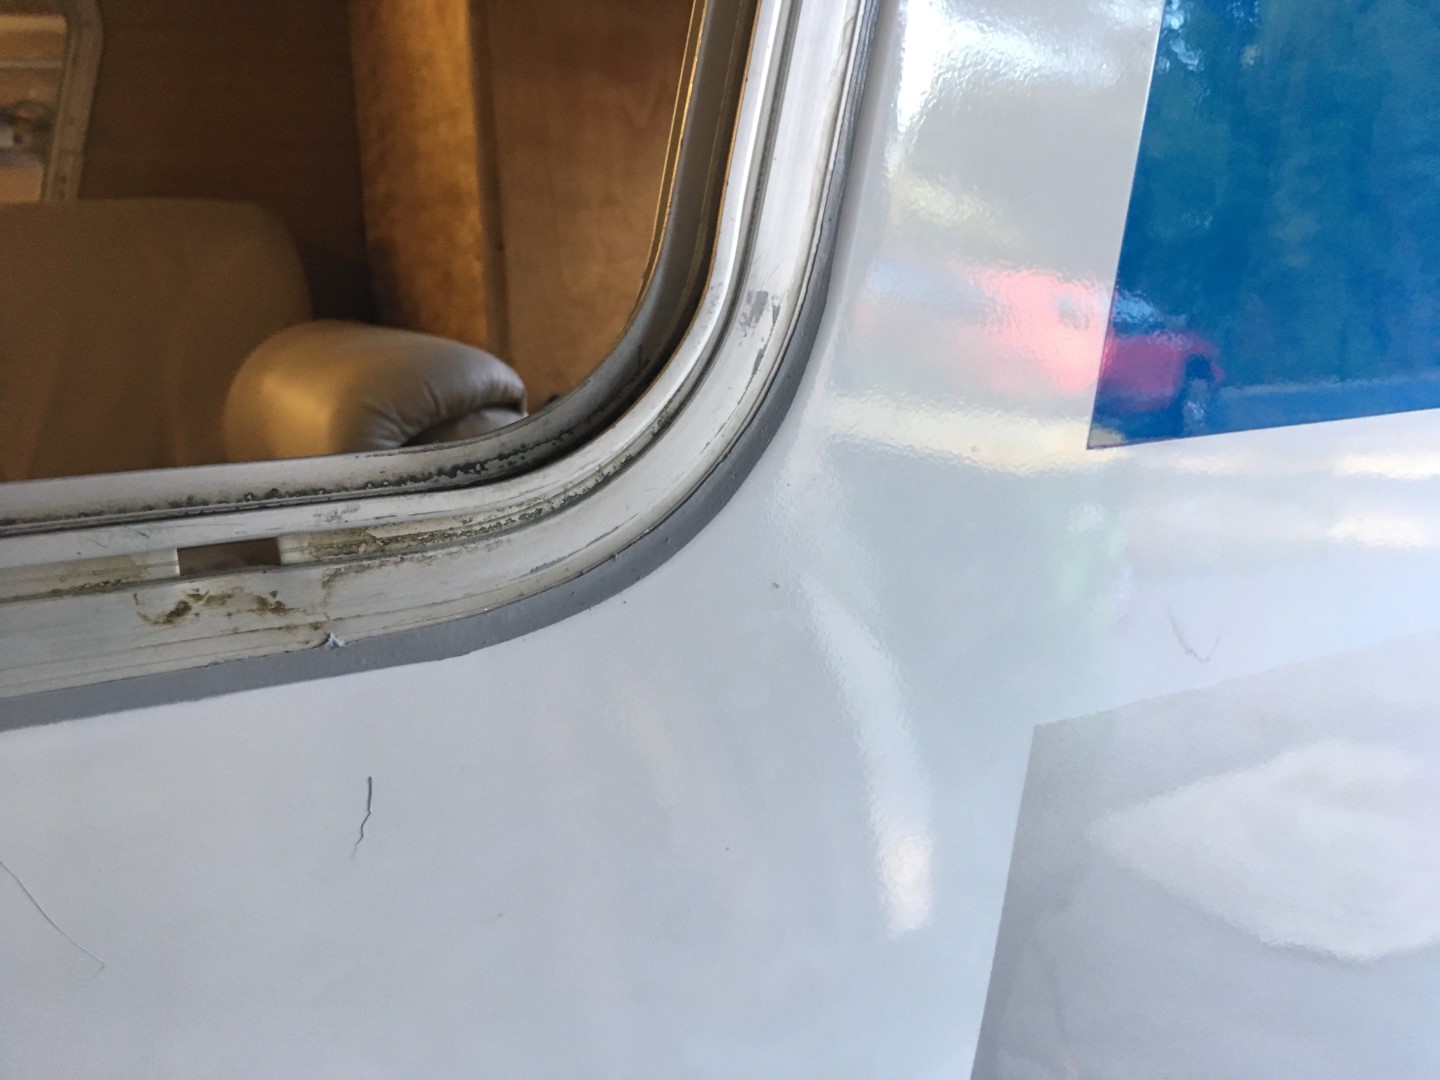
Camper Windows
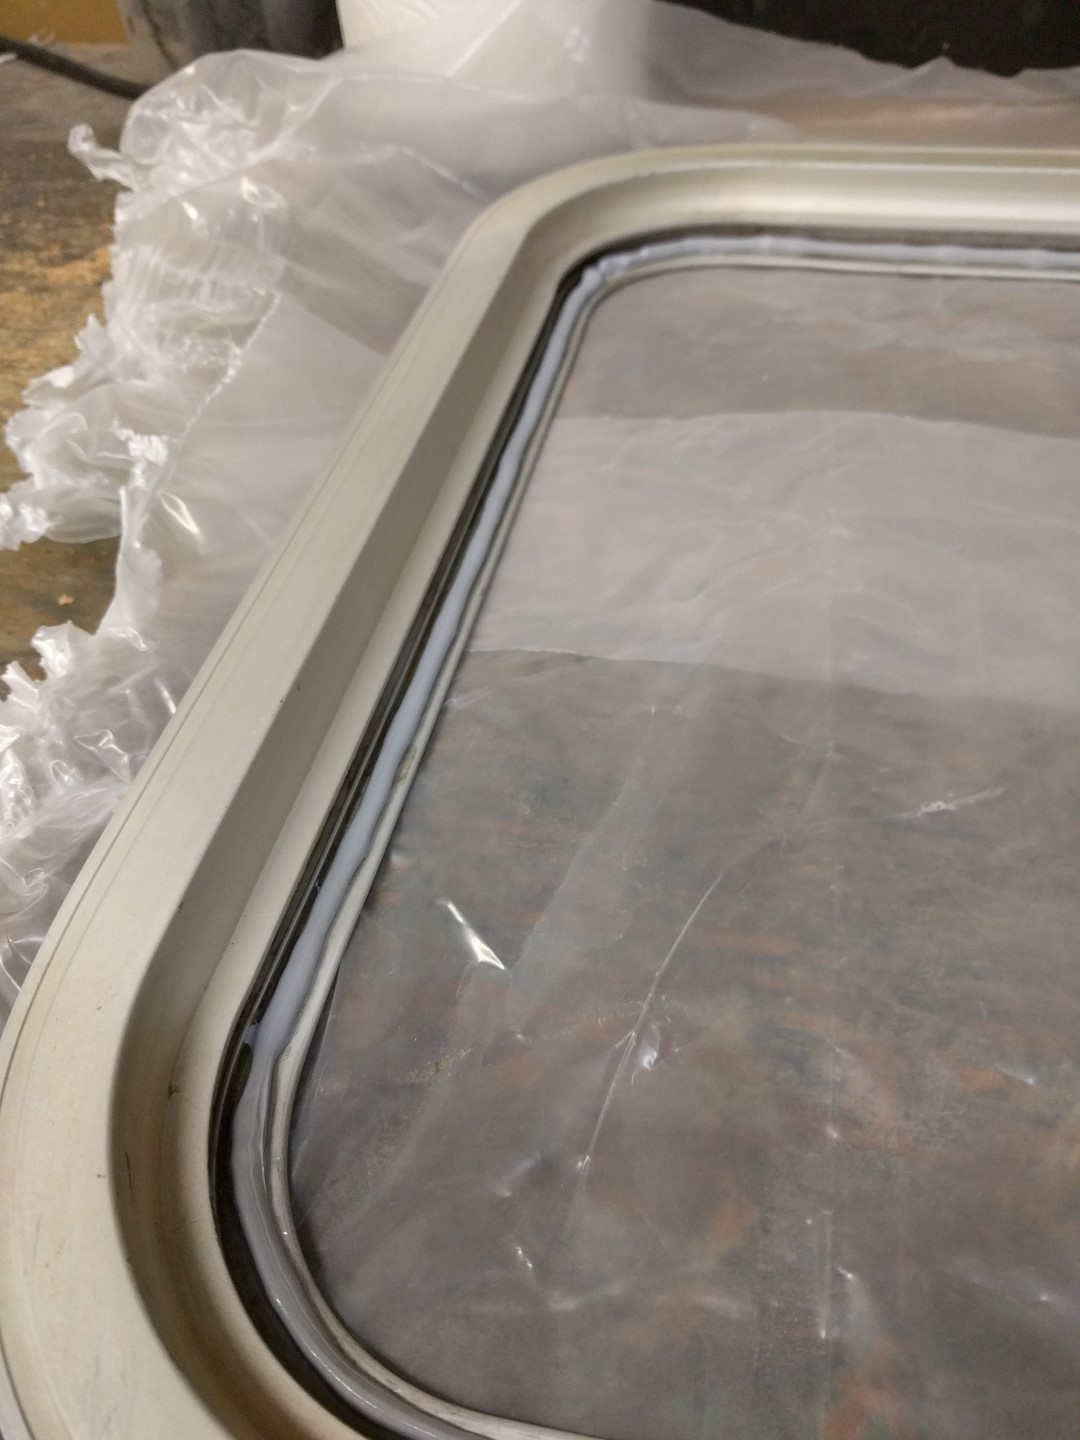
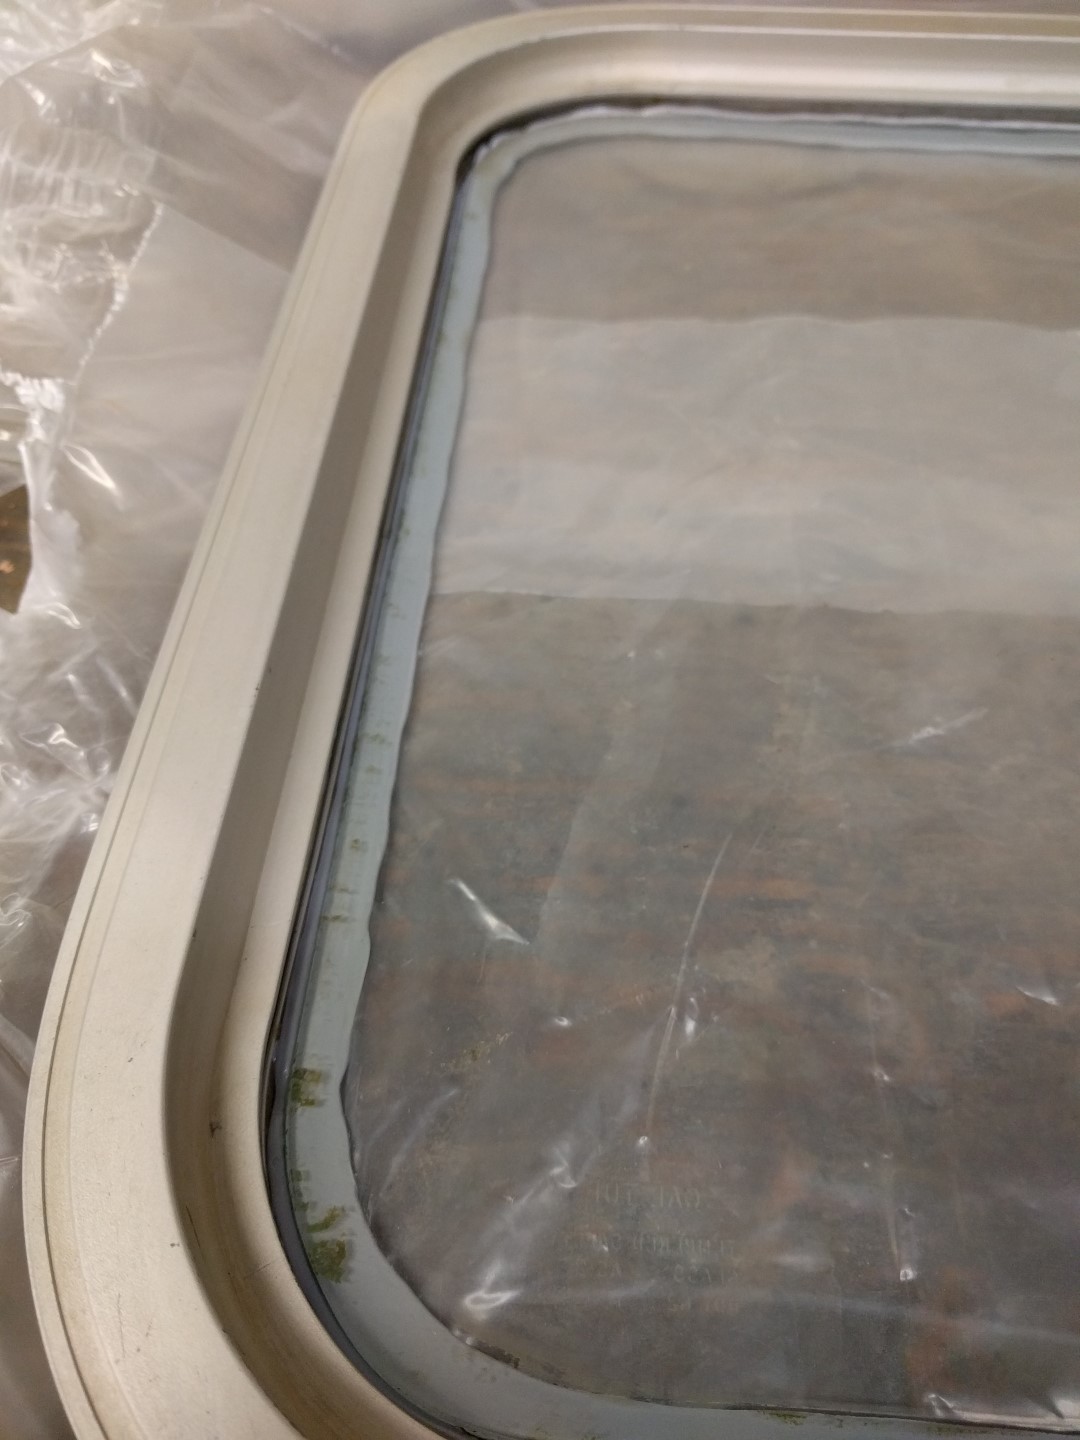
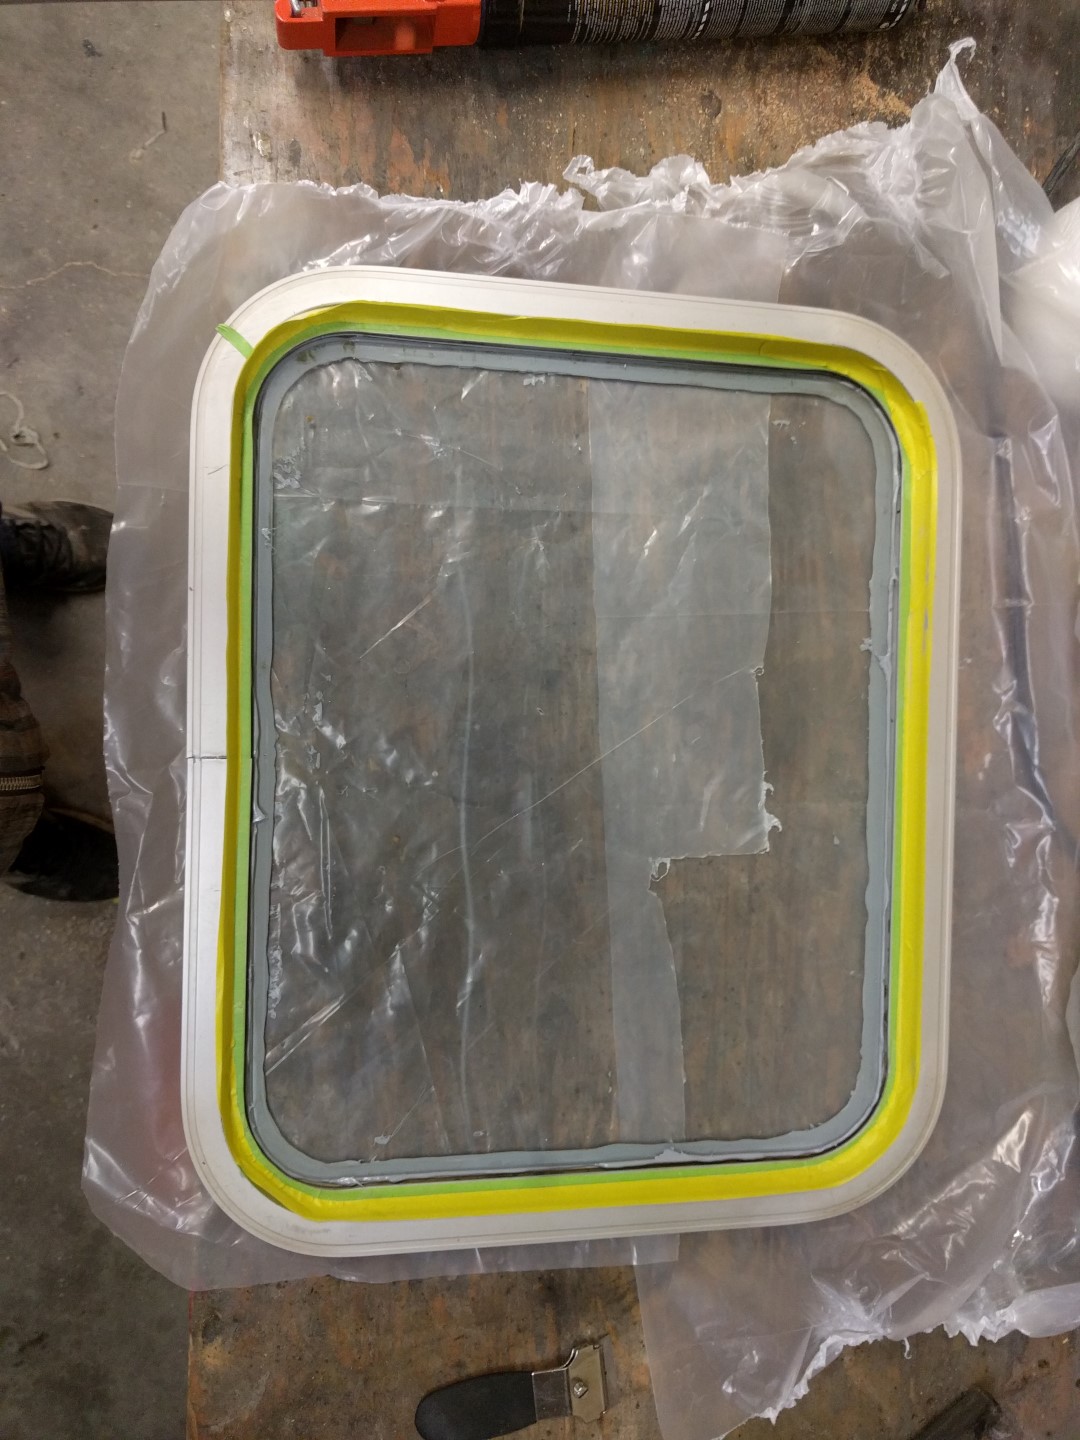
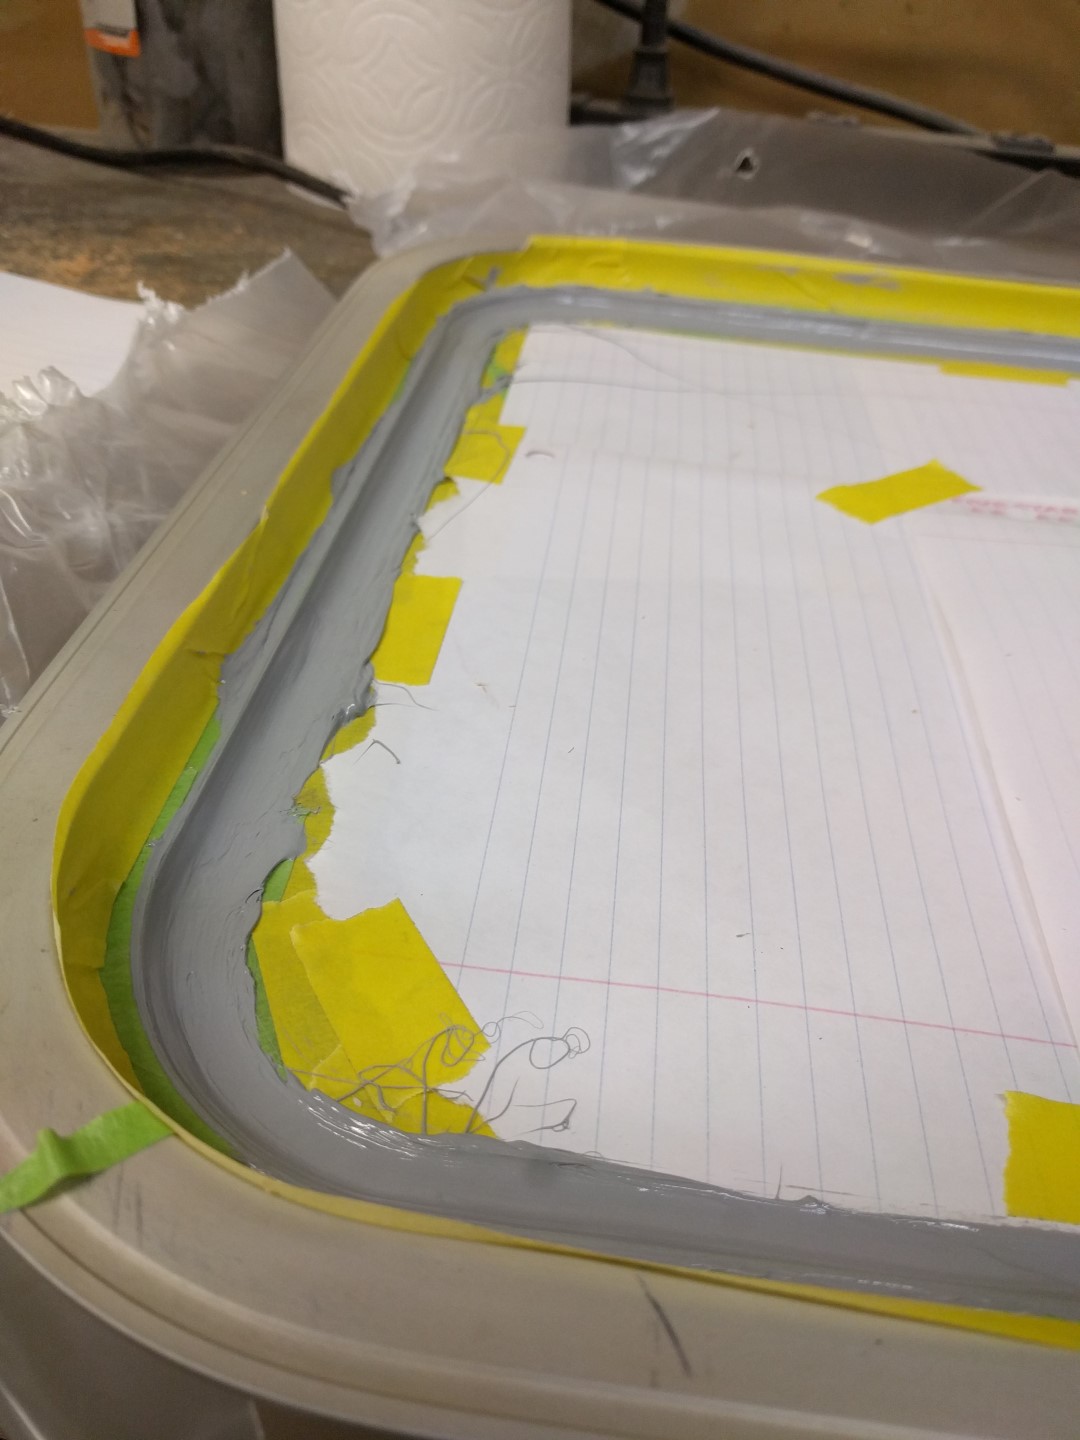
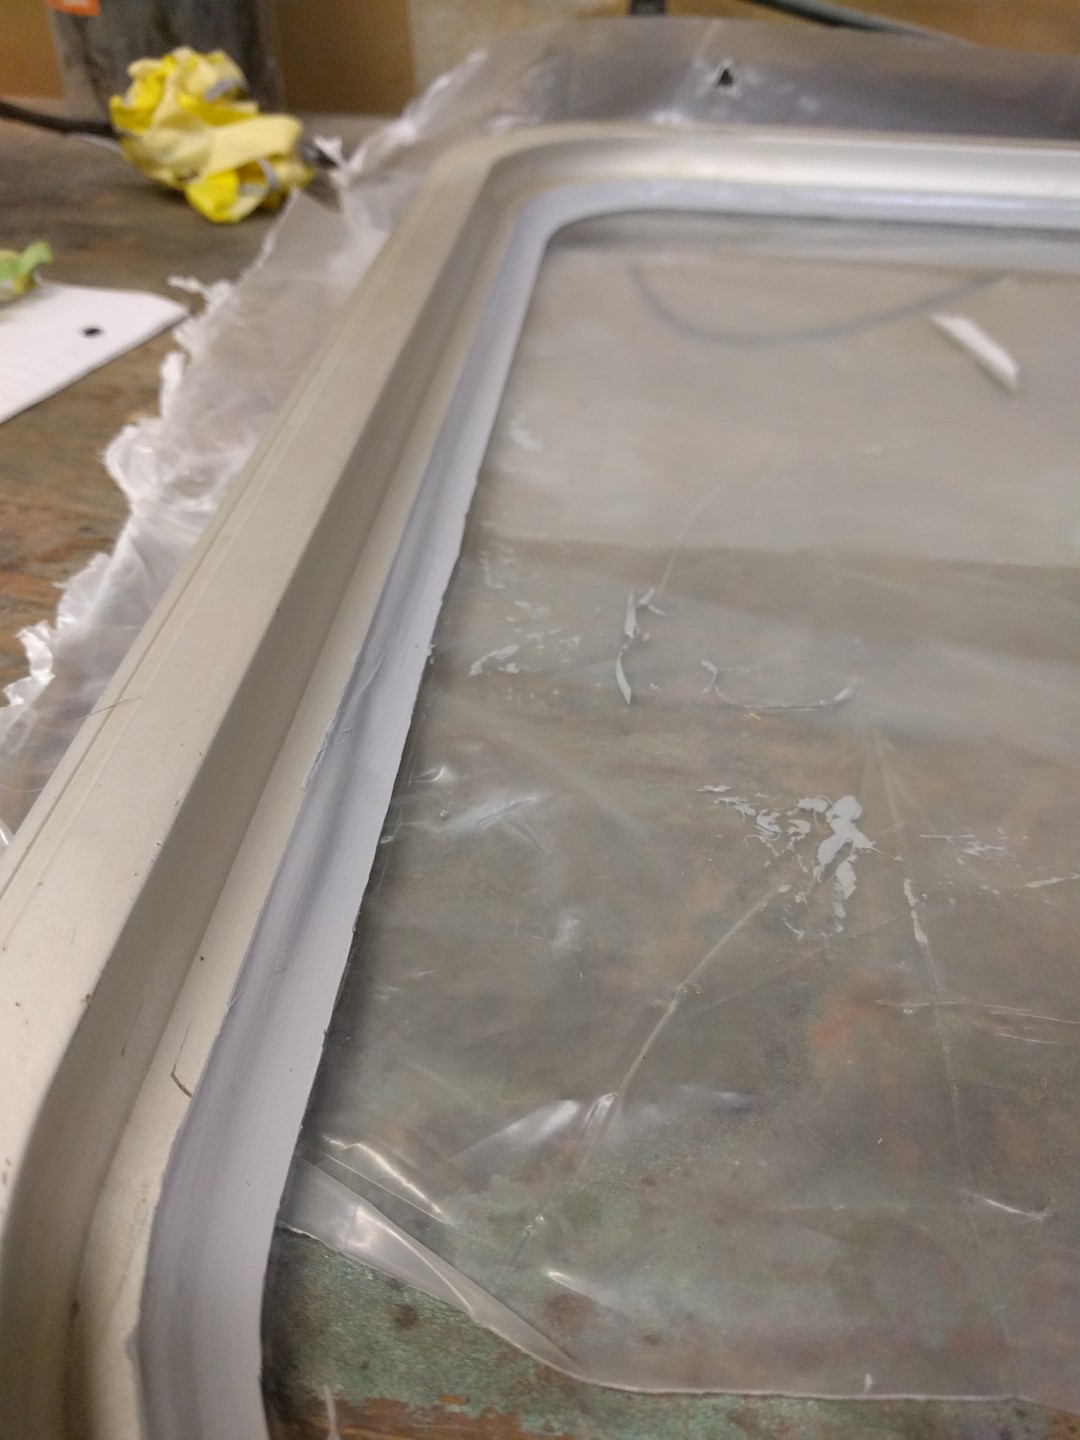
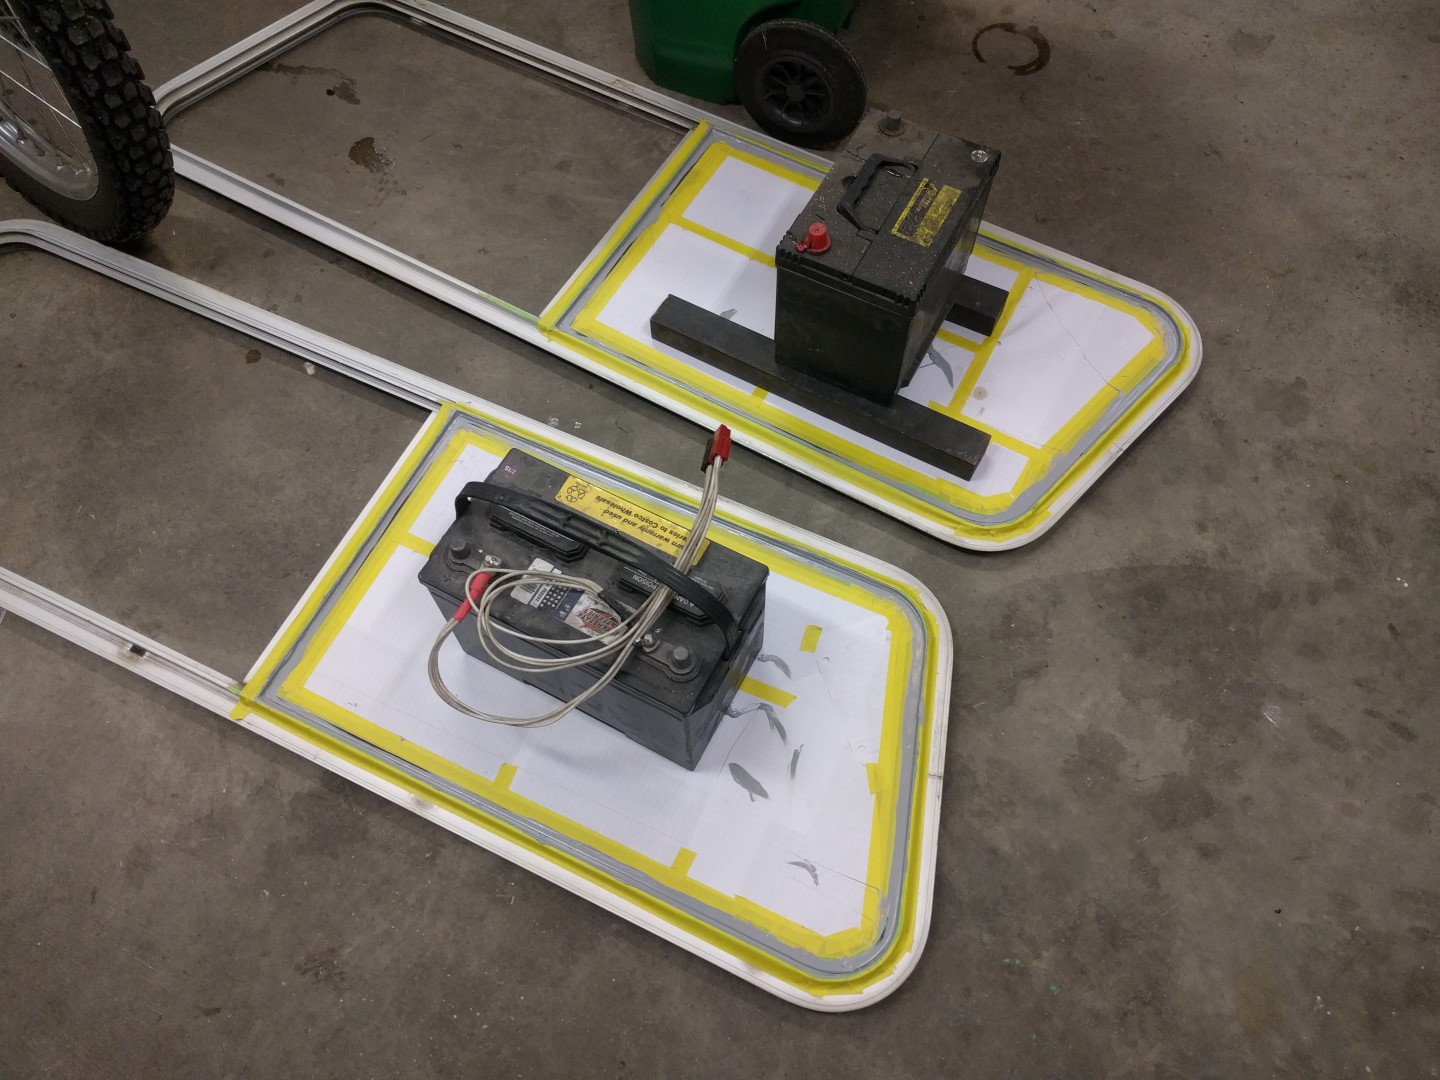
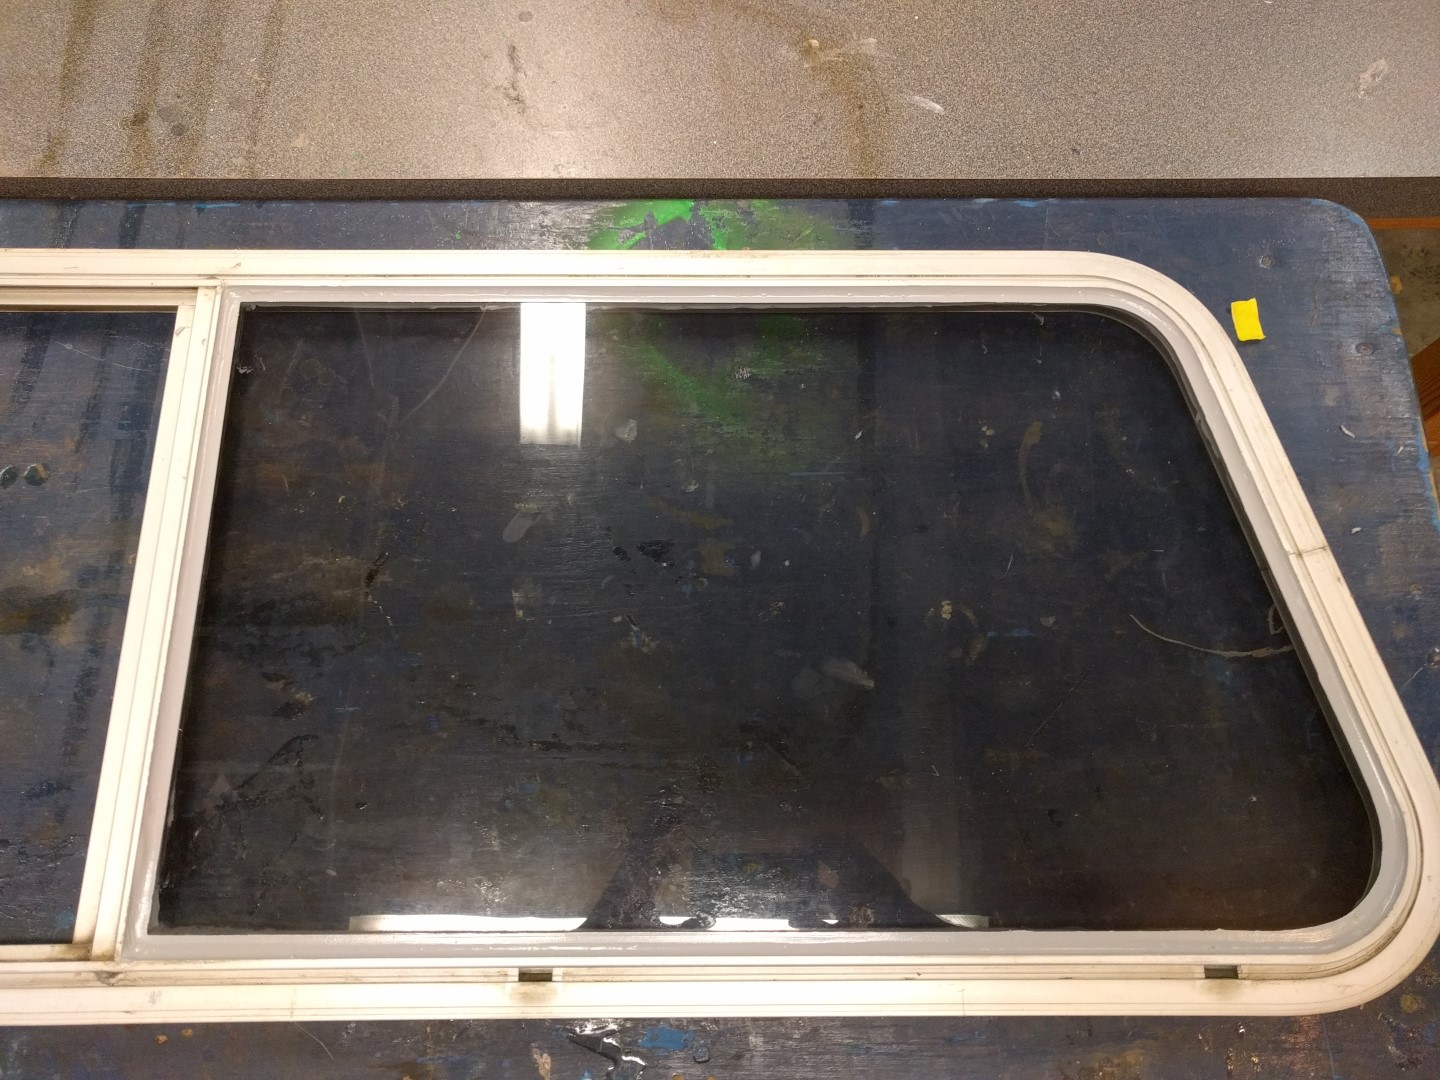
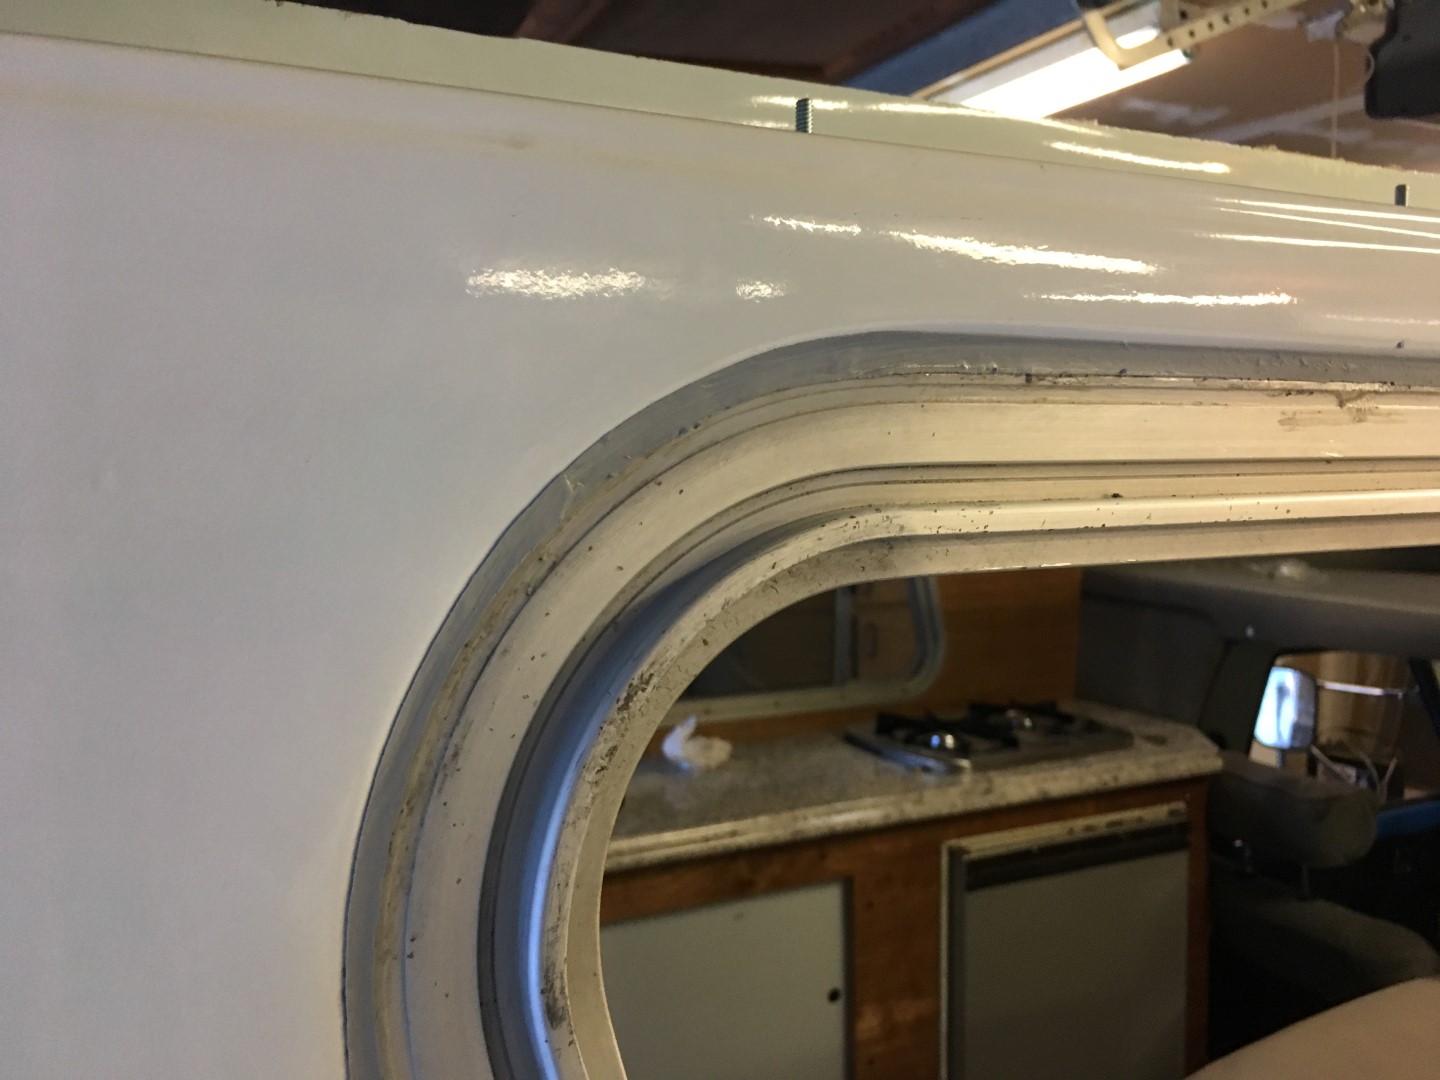
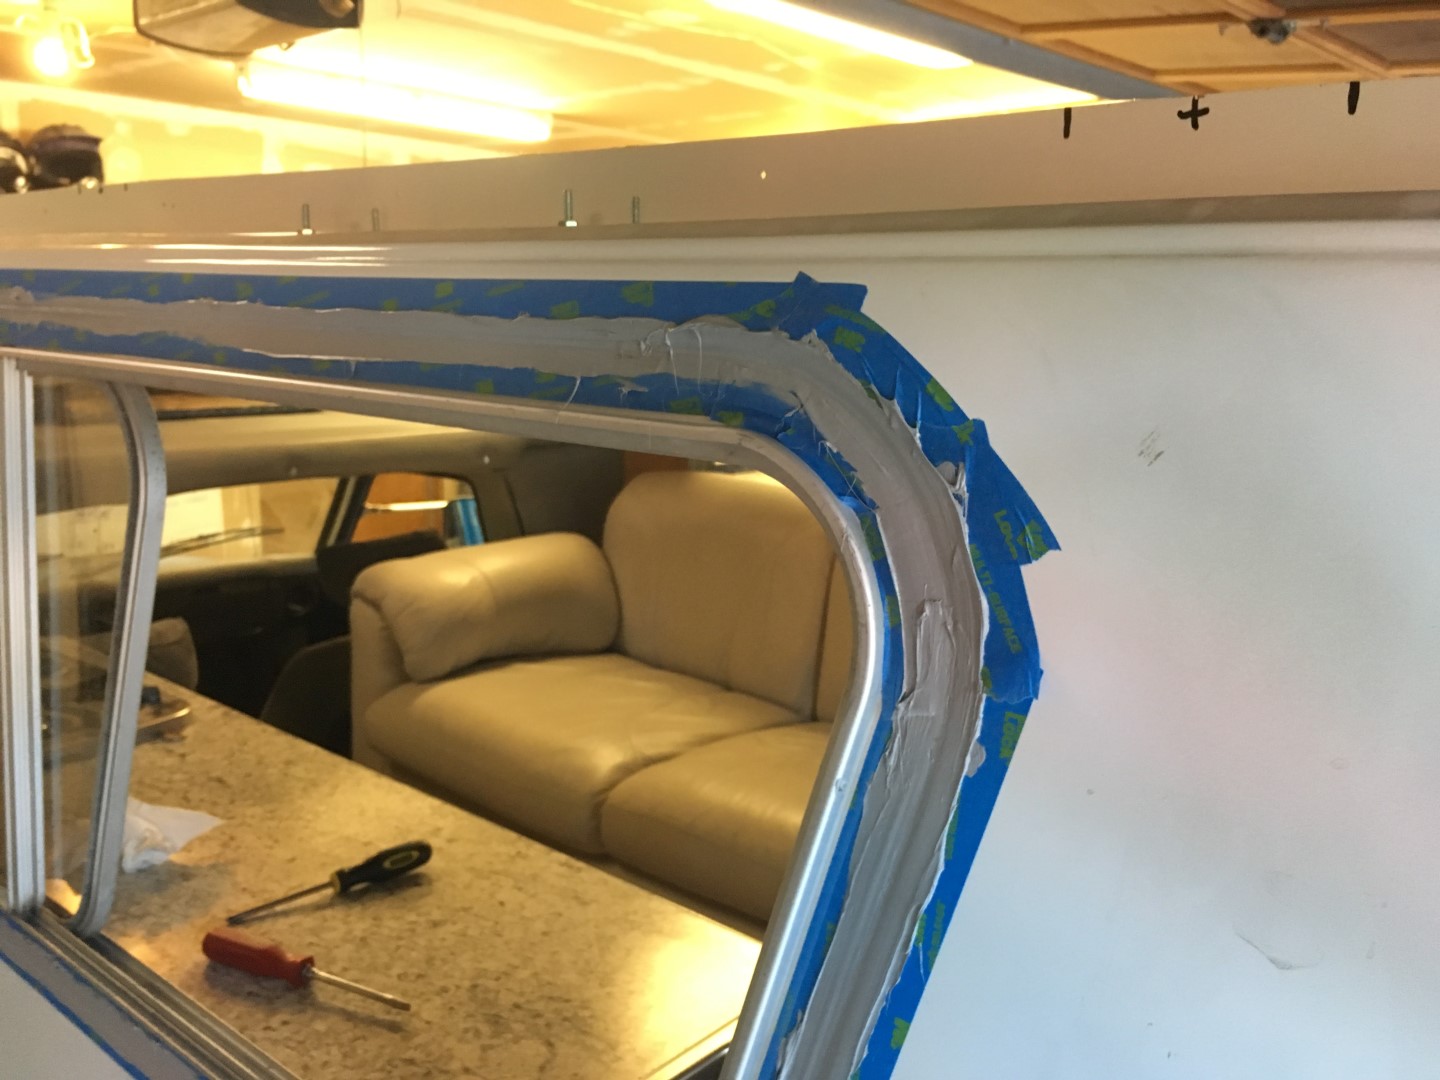
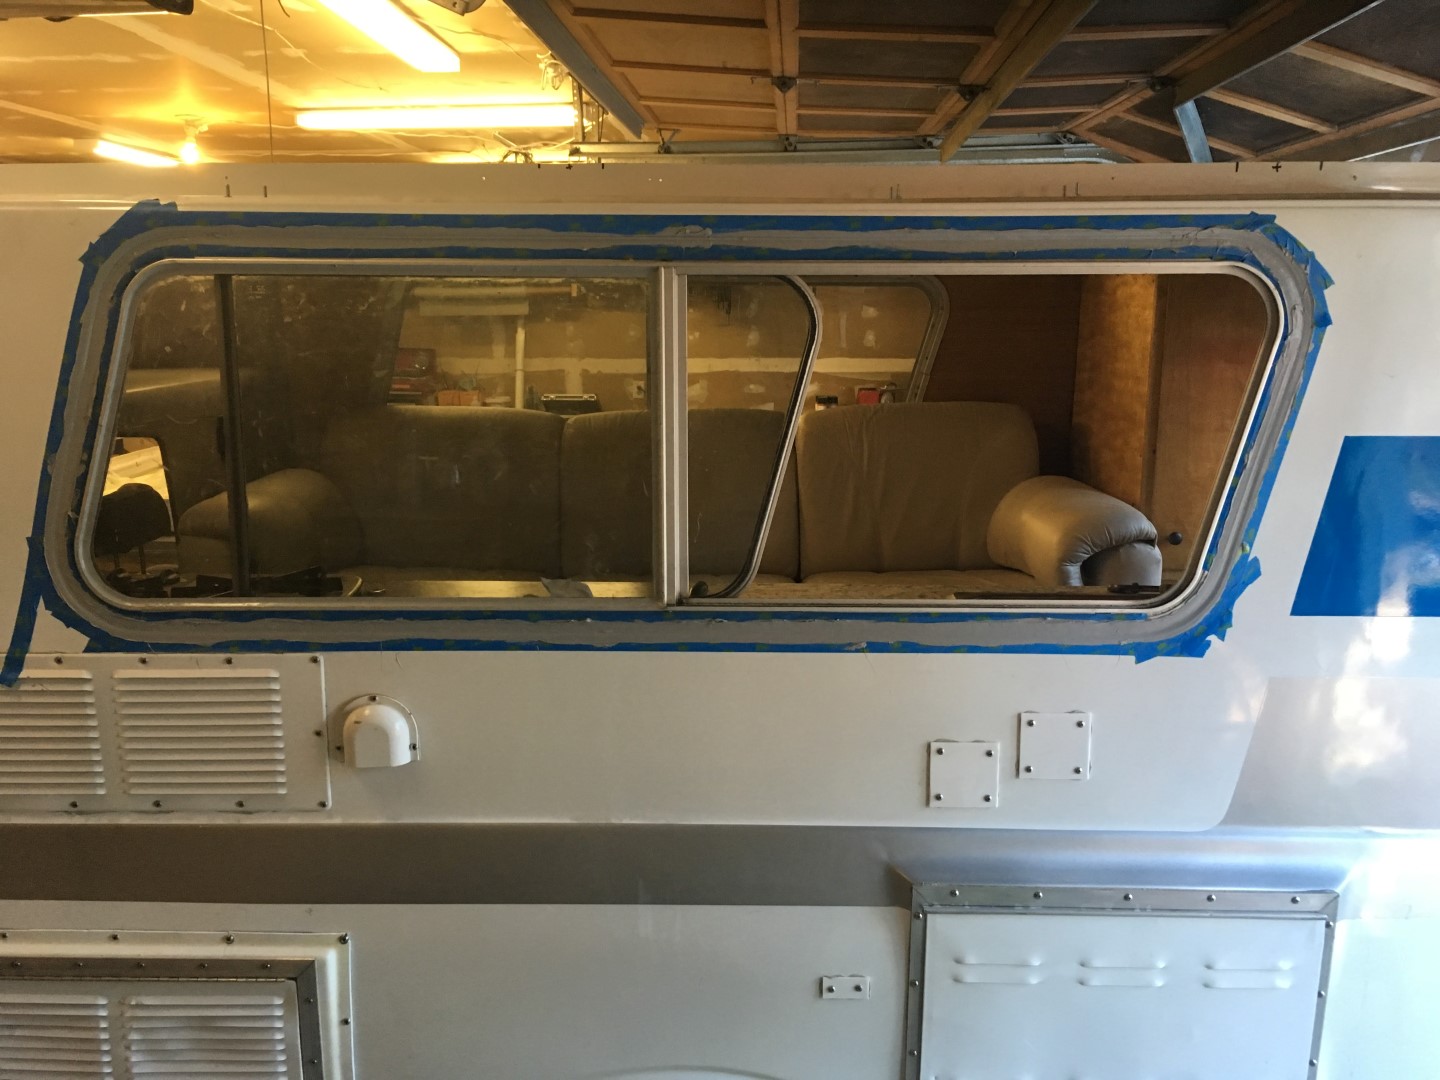
All the windows were completely removed and resealed with Sikaflex 221 polyurethane sealer. The polyurethane is the best sealer to use on RV windows. Don’t use caulk or regular silicone. The windows sit inside the frames loosely until there is a seal (in this case polyurethane sealer instead of the stock seal). The window was taped off meticulously for a nice smooth bead and sealer was applied around the perimeter of both sides of the windows.
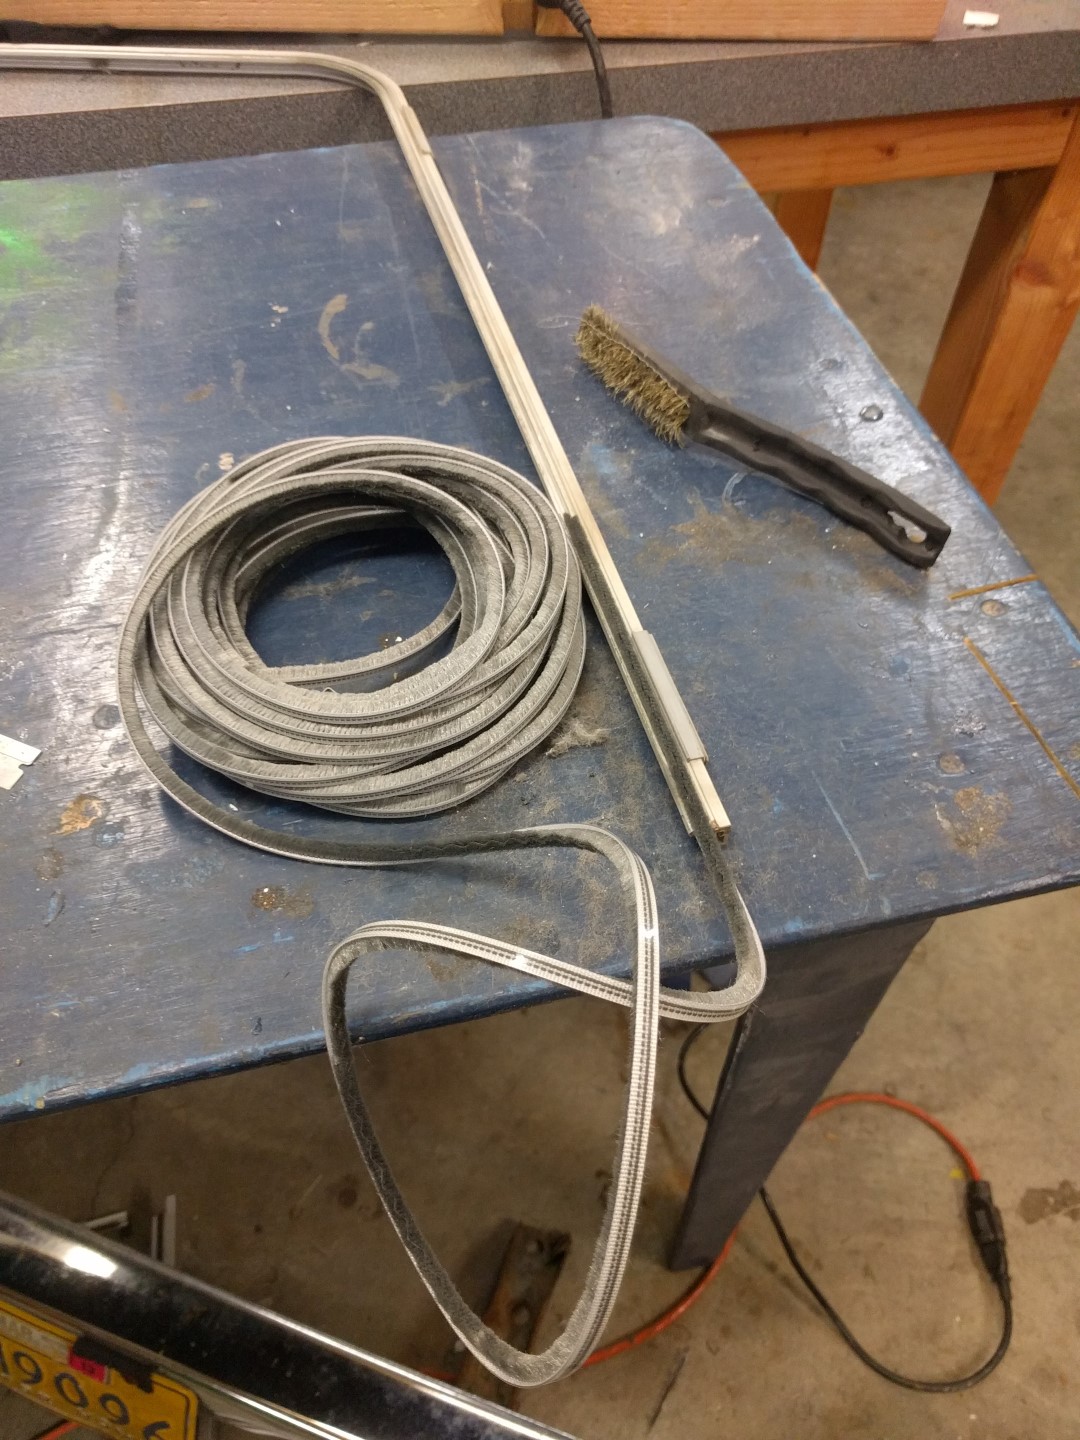
The sliding side windows have a “wood pile” seal that protect the windows from scratching each other. The dimensions were measured and an inexpensive replacement was found on eBay. The seal slides into the frame with ease, then just needs to be cut to size!
The windows all install by pinching the fiberglass shell and interior trim. My hope was that when reinstalling the windows they would pinch enough to use a seal that wouldn’t inhibit the windows from being removed in the future for cleaning and resealing purposes; however, this is not the case. Instead more Sikaflex 221 polyurethane sealer was used and during dry time a 2x4 was propped up to force the window to be recessed into the shell.


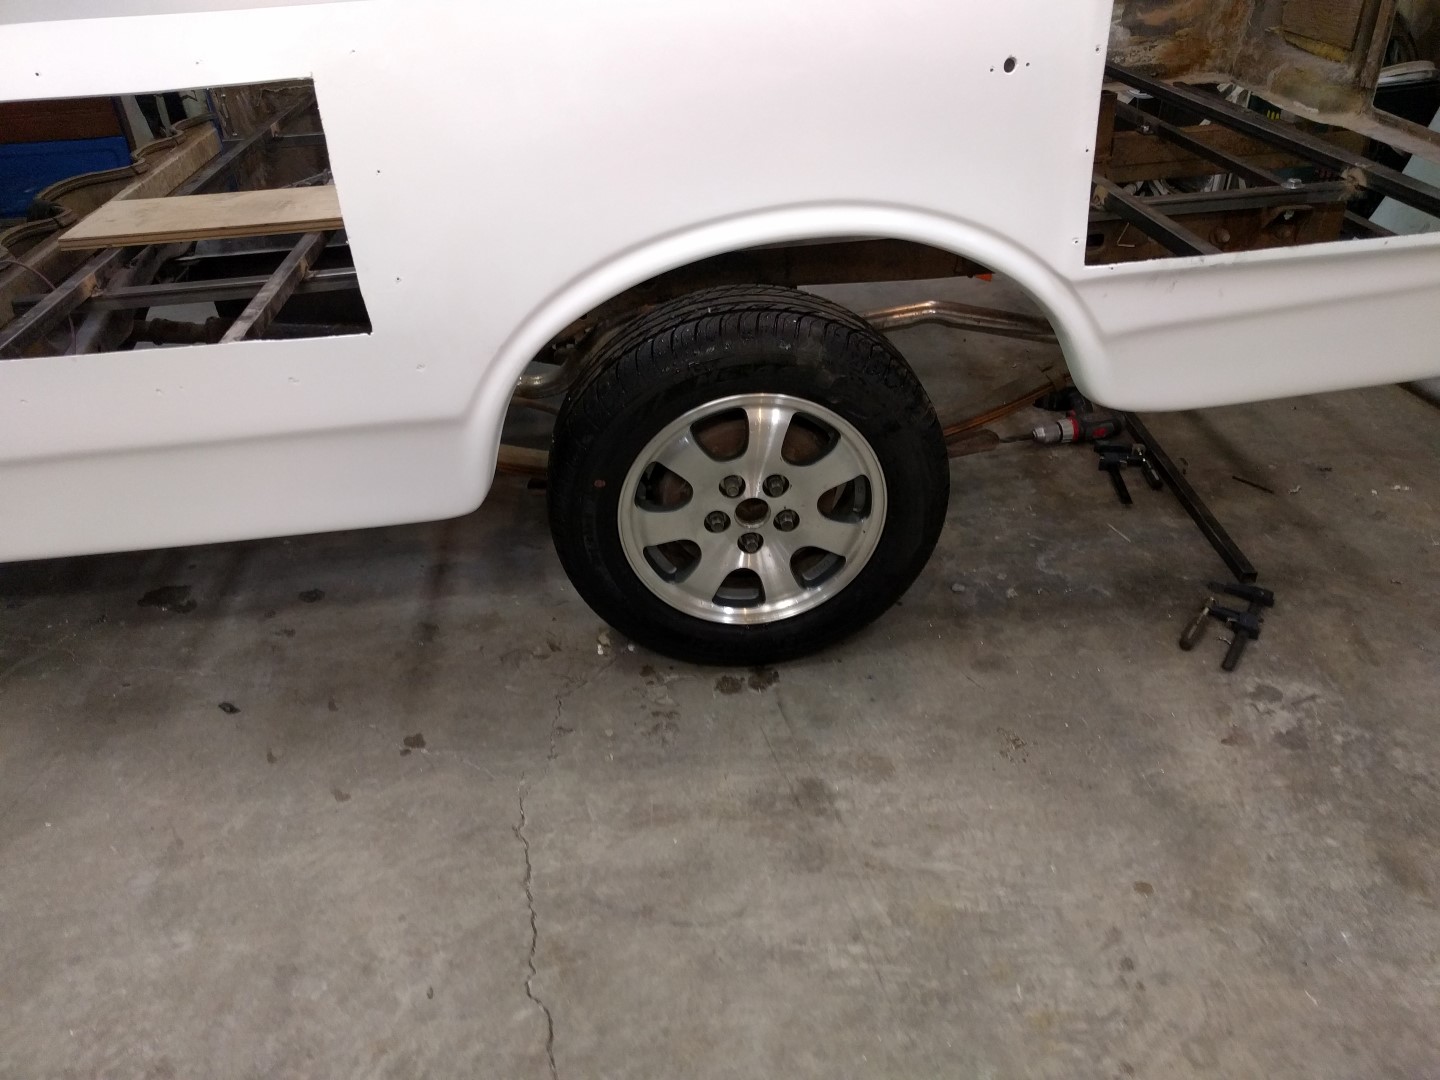
Wheels
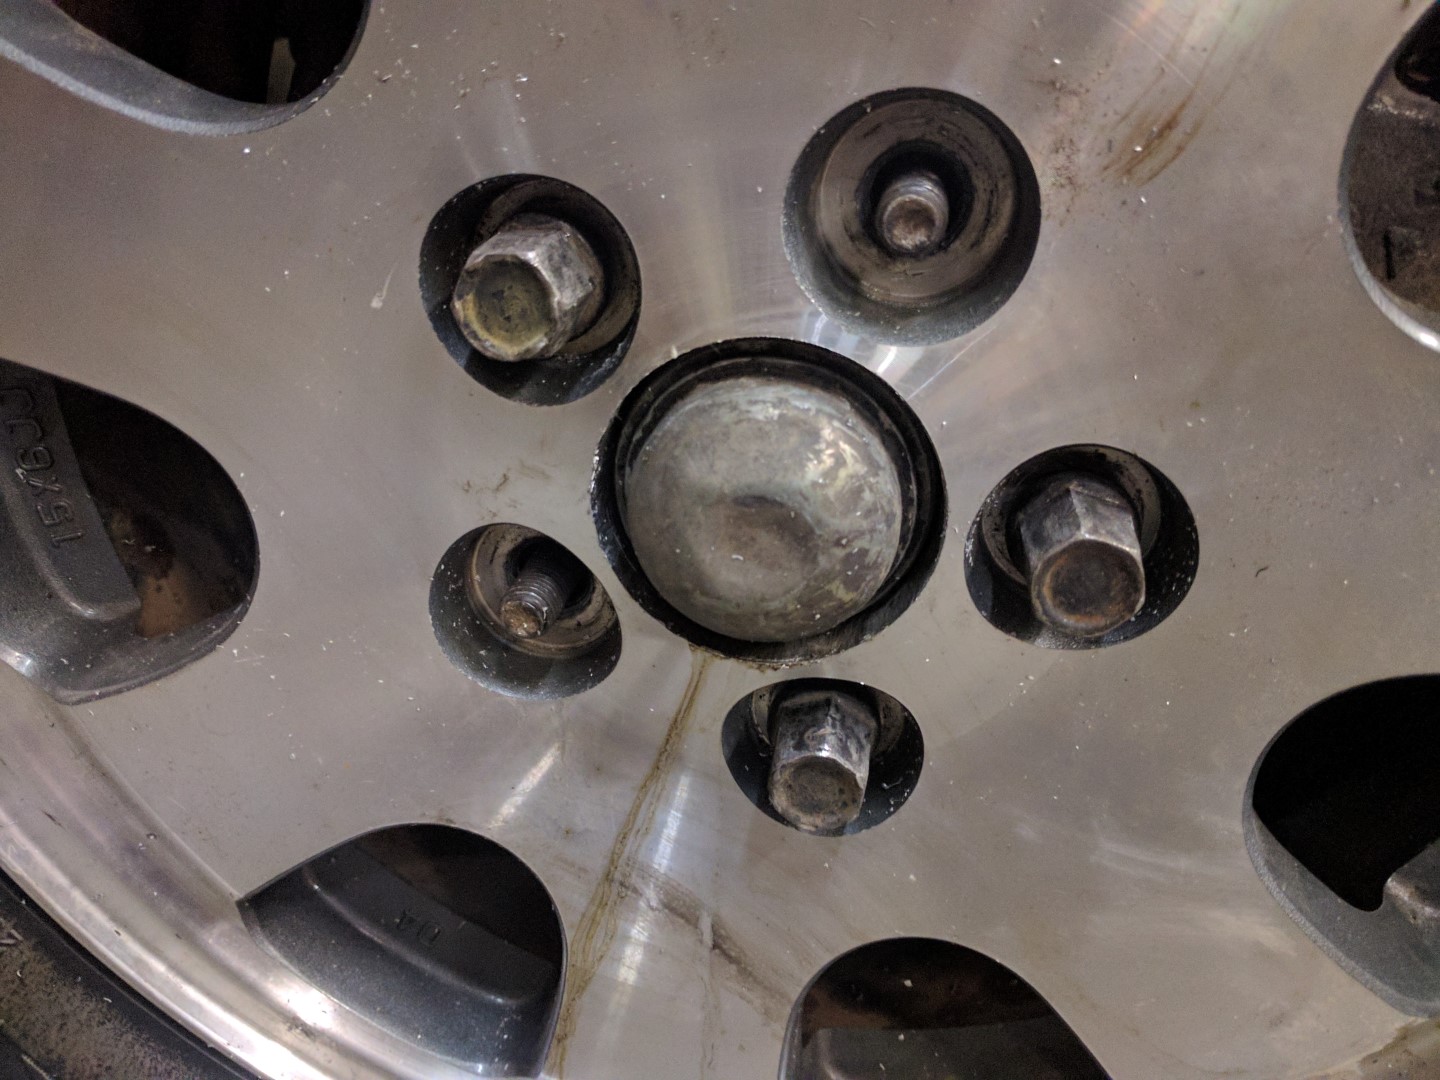
None of the stock wheels from either rebuild or parts rig matched so I bought a good set for $100 with 90% tread left on the tires. Good deal! They are from a Mazda car and have the 5x114.3 bolt pattern.
The offset and wheel/tire dimensions are definitely different from stock. There is some rubbing on the frame in the rear but will solve in the future with 1.5” wheel spacers. The studs in the rear are 1” long. The only rubs when you turn all the way in either direction; not very concerned there.
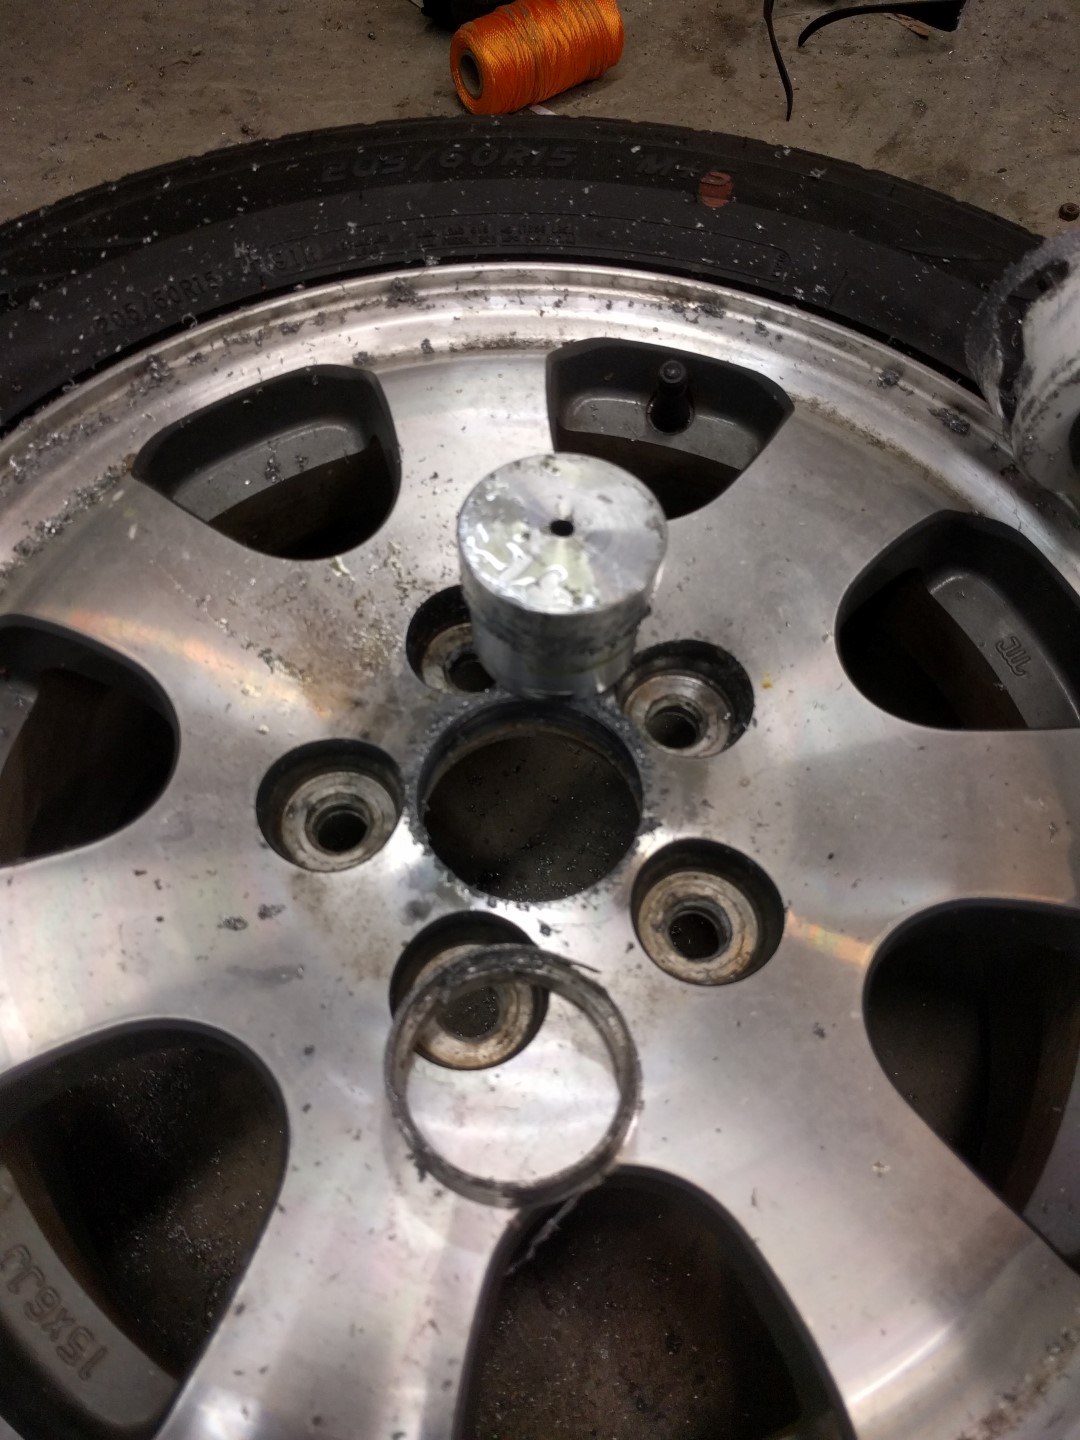
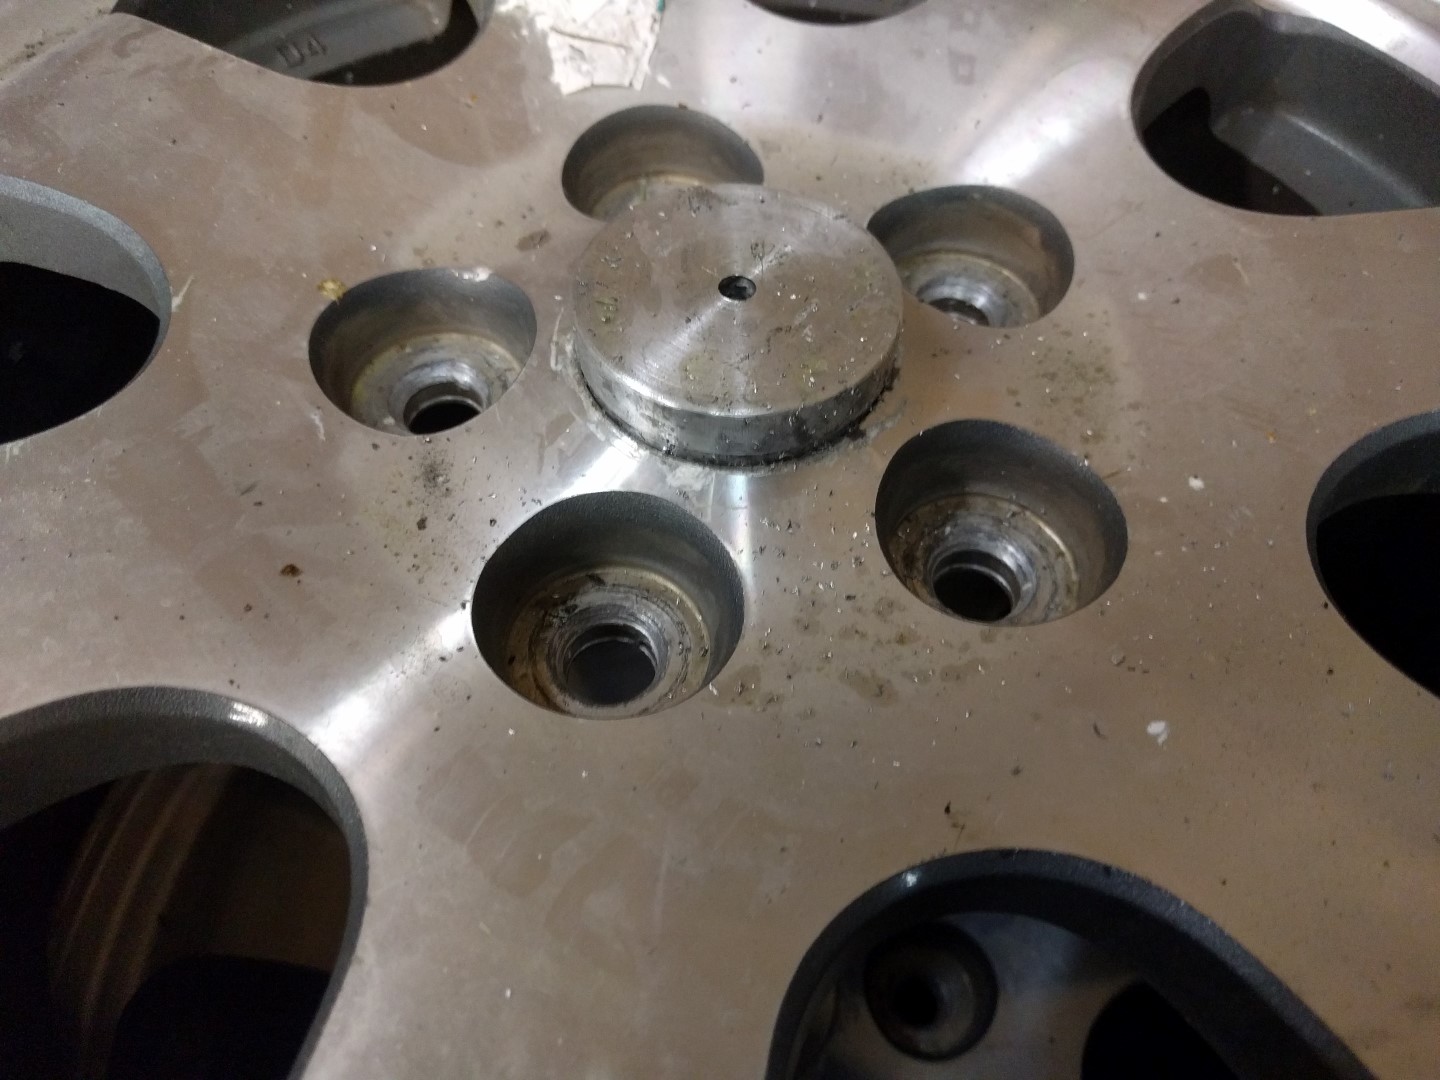
The Mazda wheels shown are hubcentric wheels and the Toyota Pickup is lugcentric (or boltcentric). Unfortunately, the diameter of the hub on the Mazda was smaller than the hub on the front of the pickup so they needed to be bored out a bit. An aluminum piece was cut on the lathe to fit into the wheel and house a metal hole saw to bore out the hole a bit.

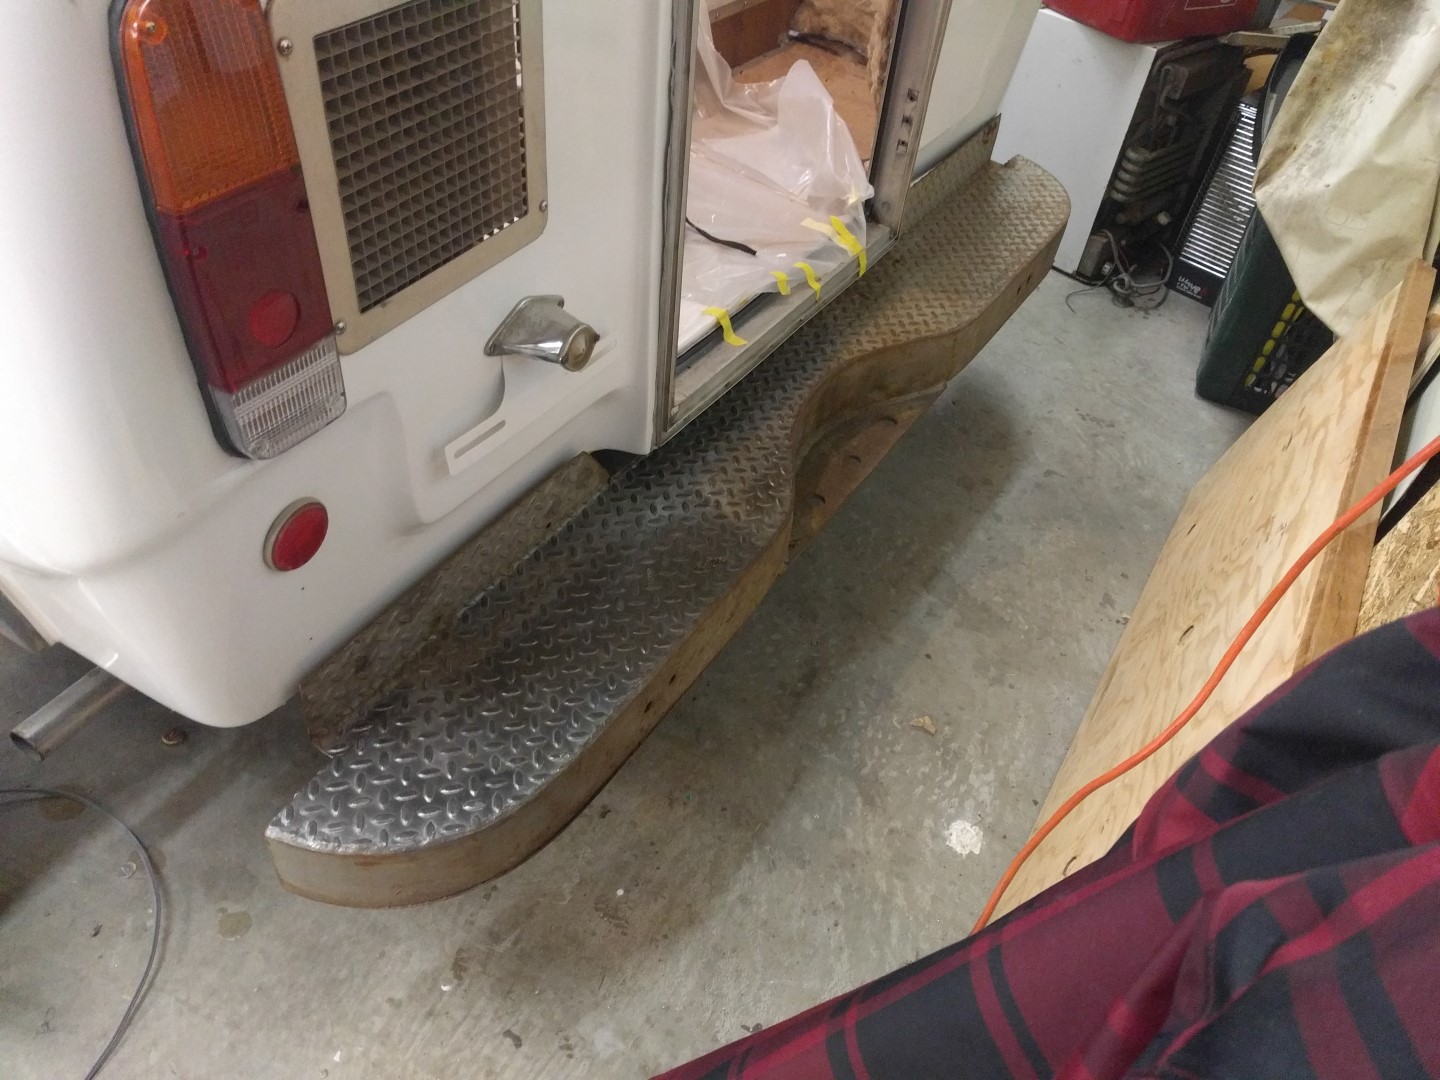
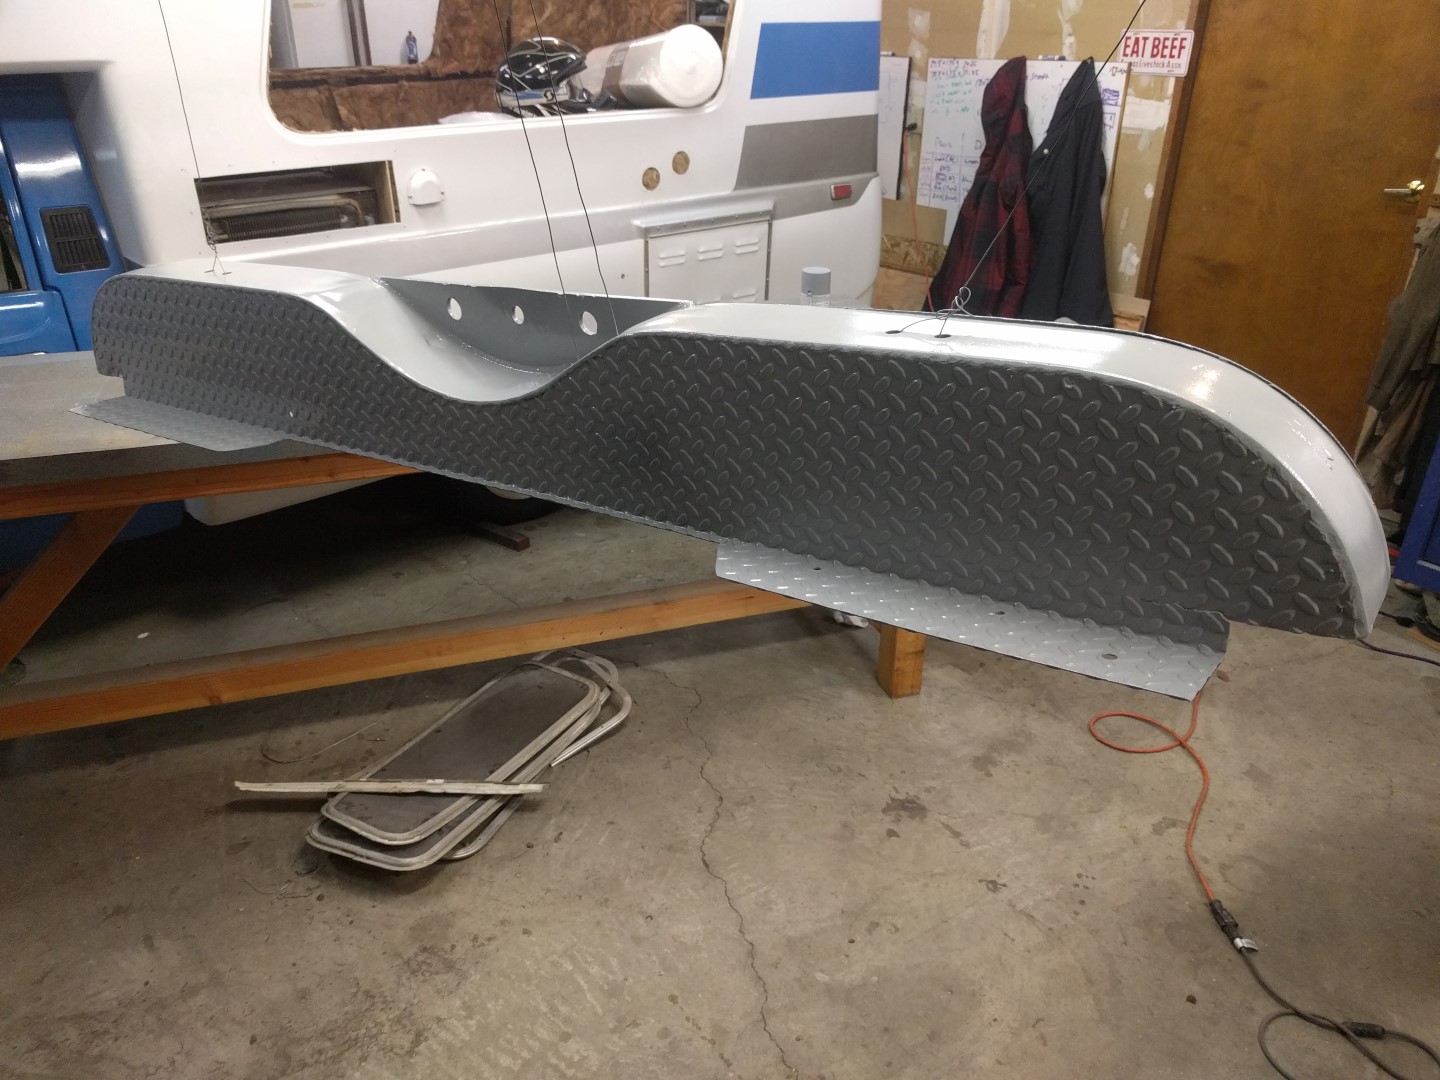
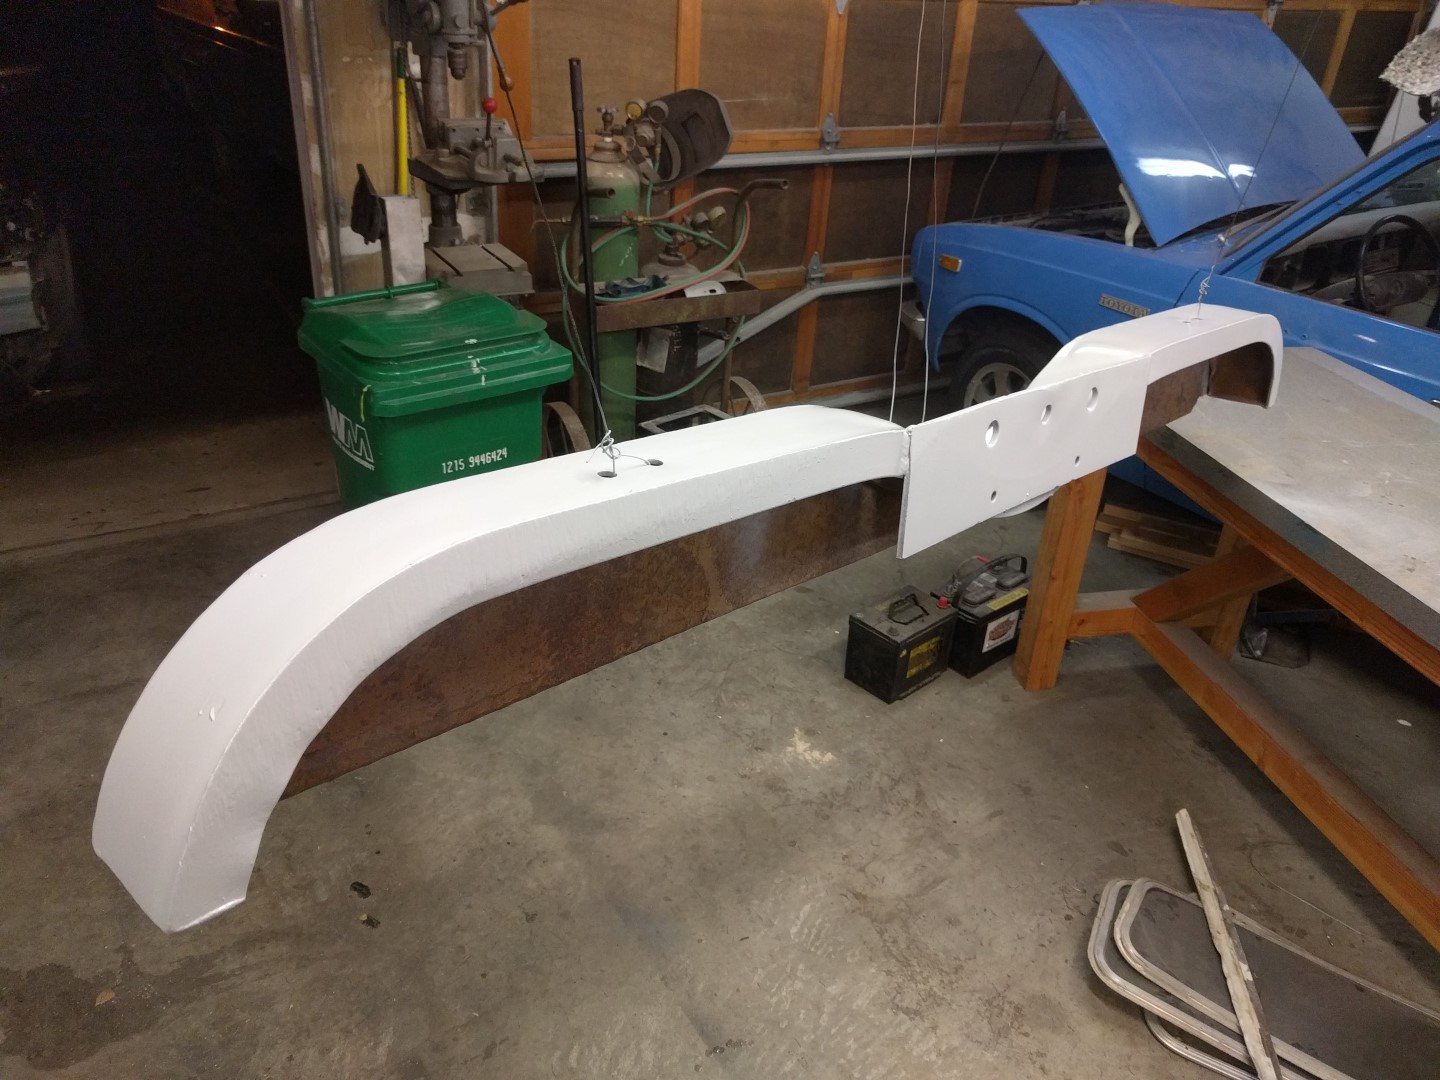
Rear Bumper
The rear bumper isn’t the stock bumper. It is steel and much more heavy duty. It was wire wheeled to remove all the dirt/rust and then primed, painted, and clearcoated with the same silver paint from the shell stripe.
This bumper is attached with 4 hefty bolts into the right angle of the frame.


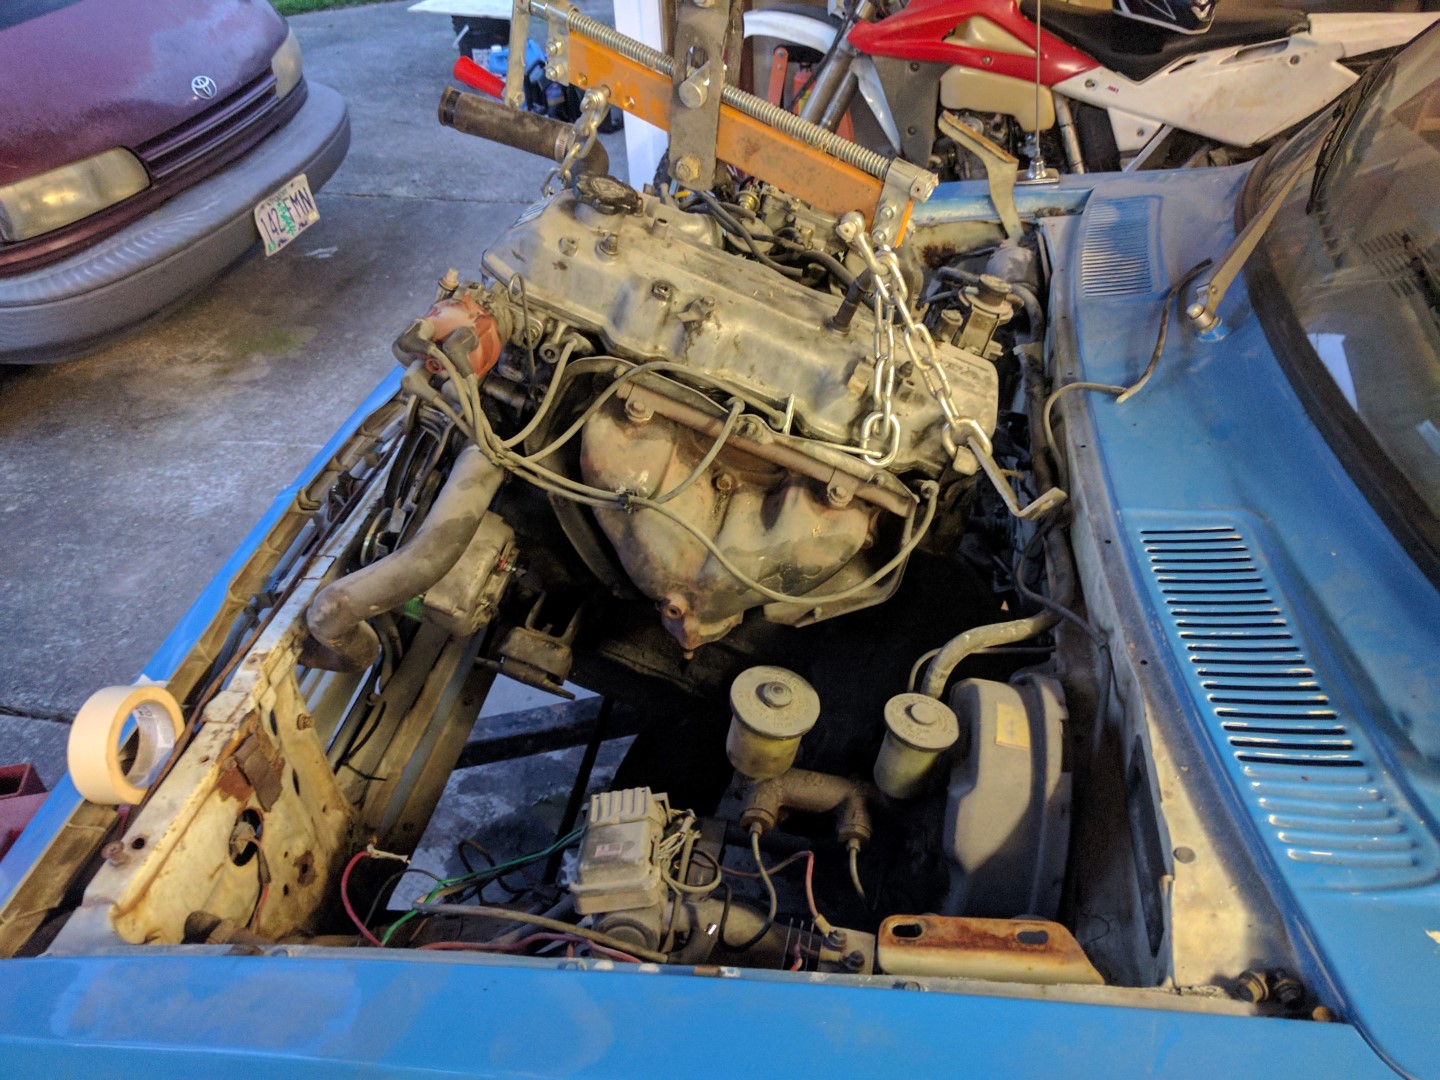
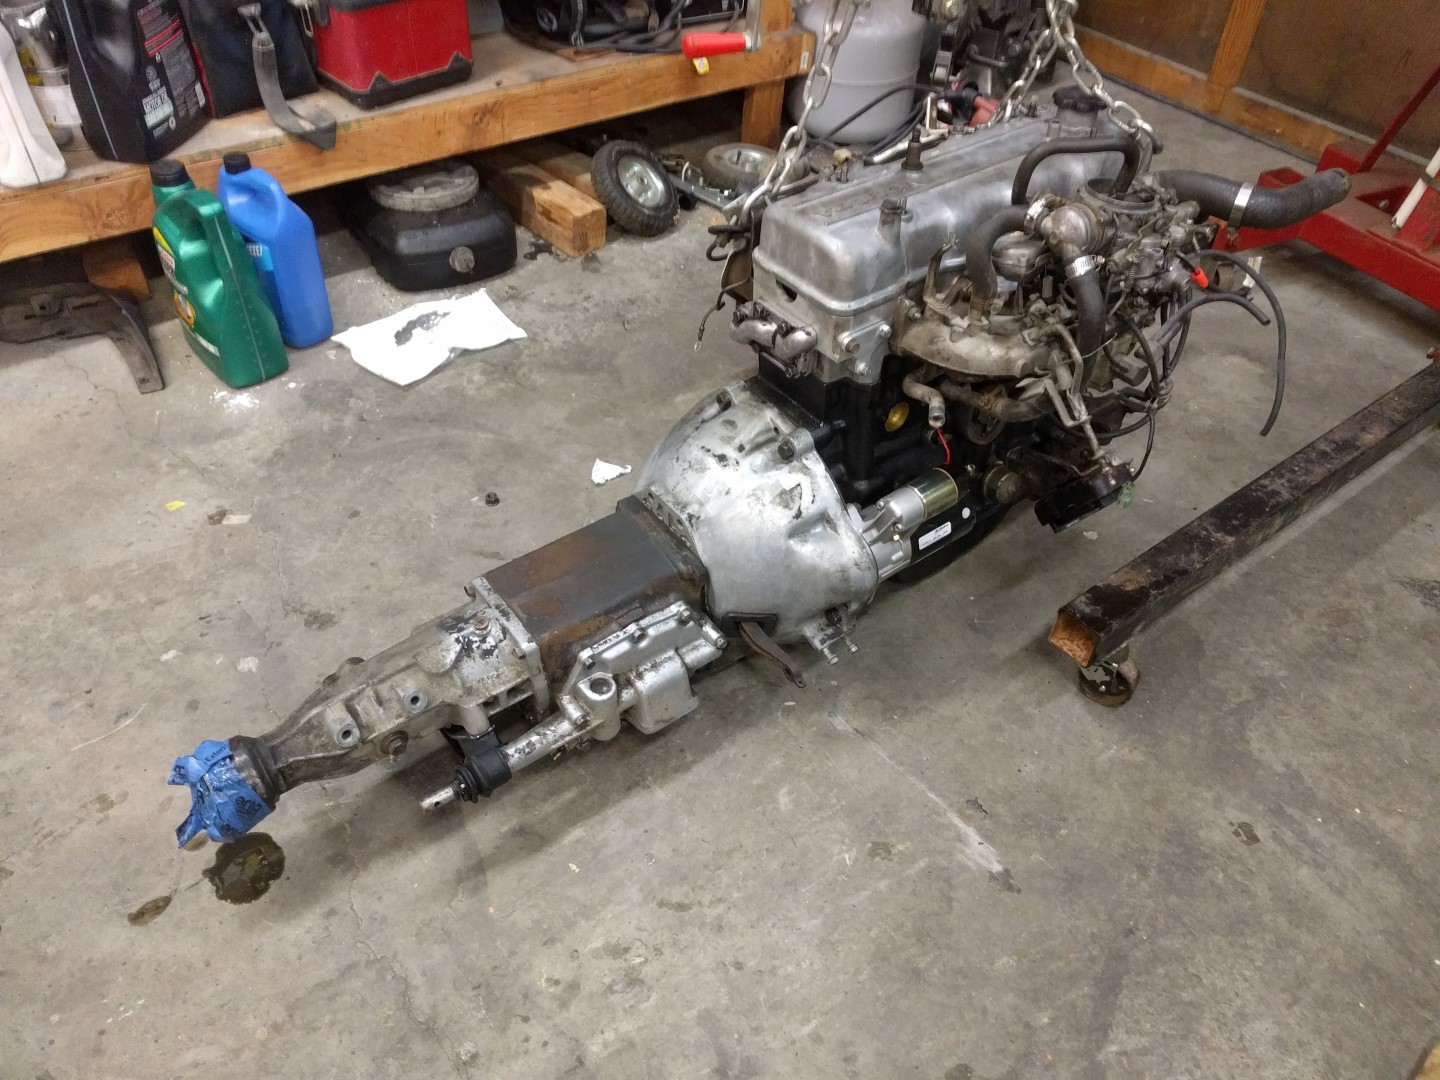
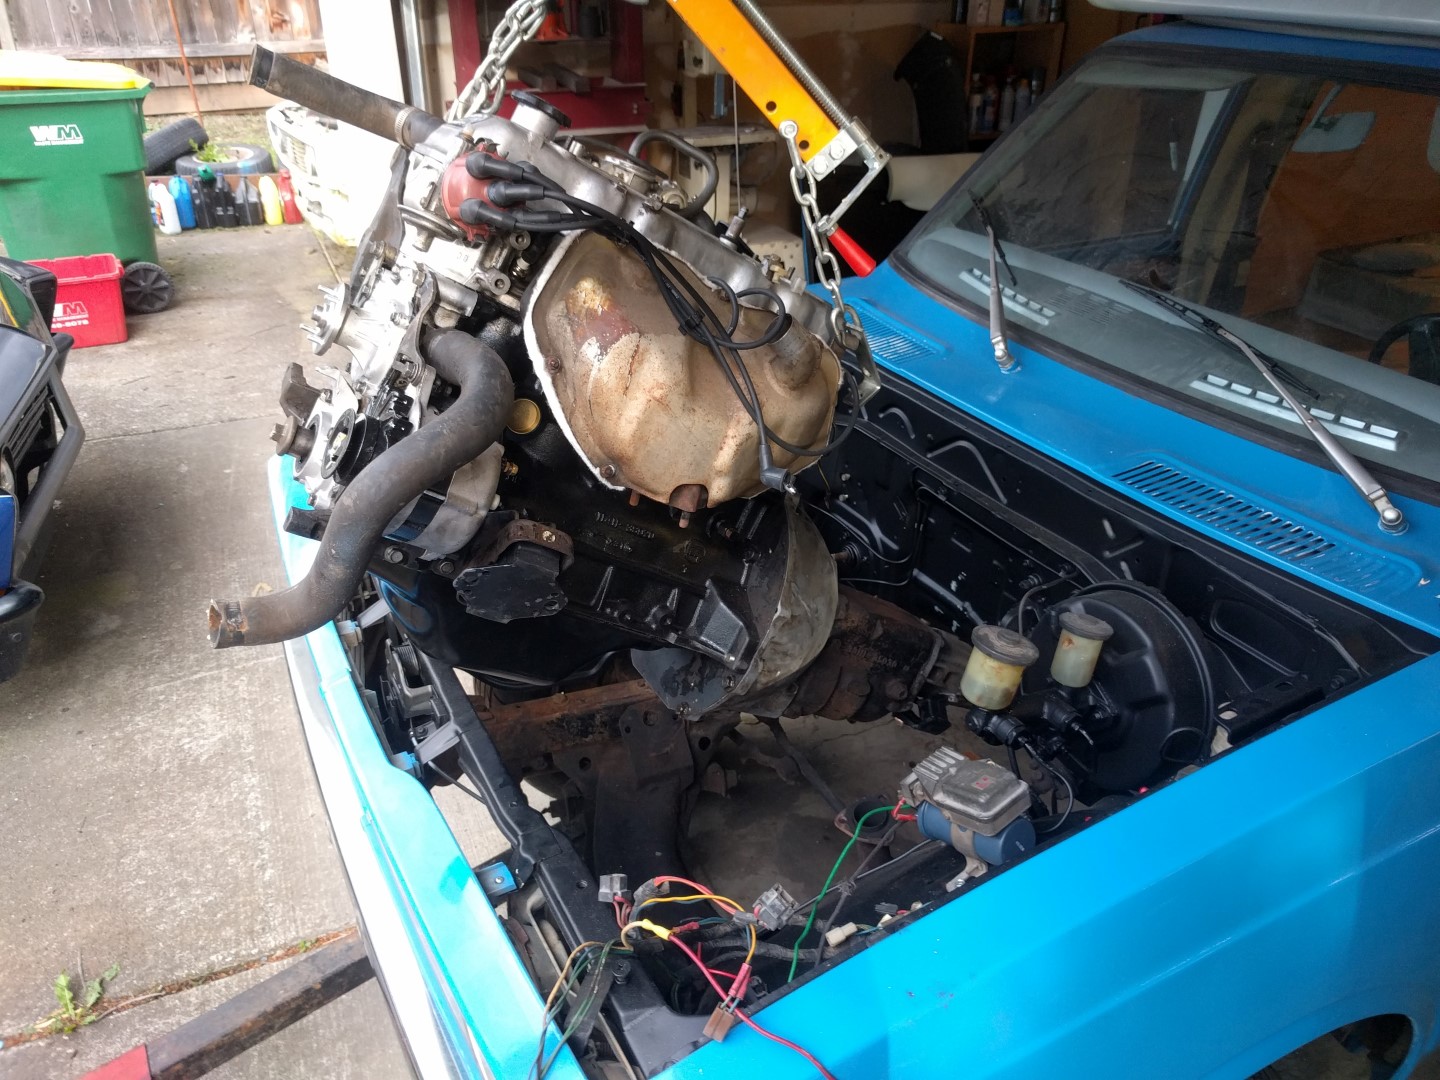
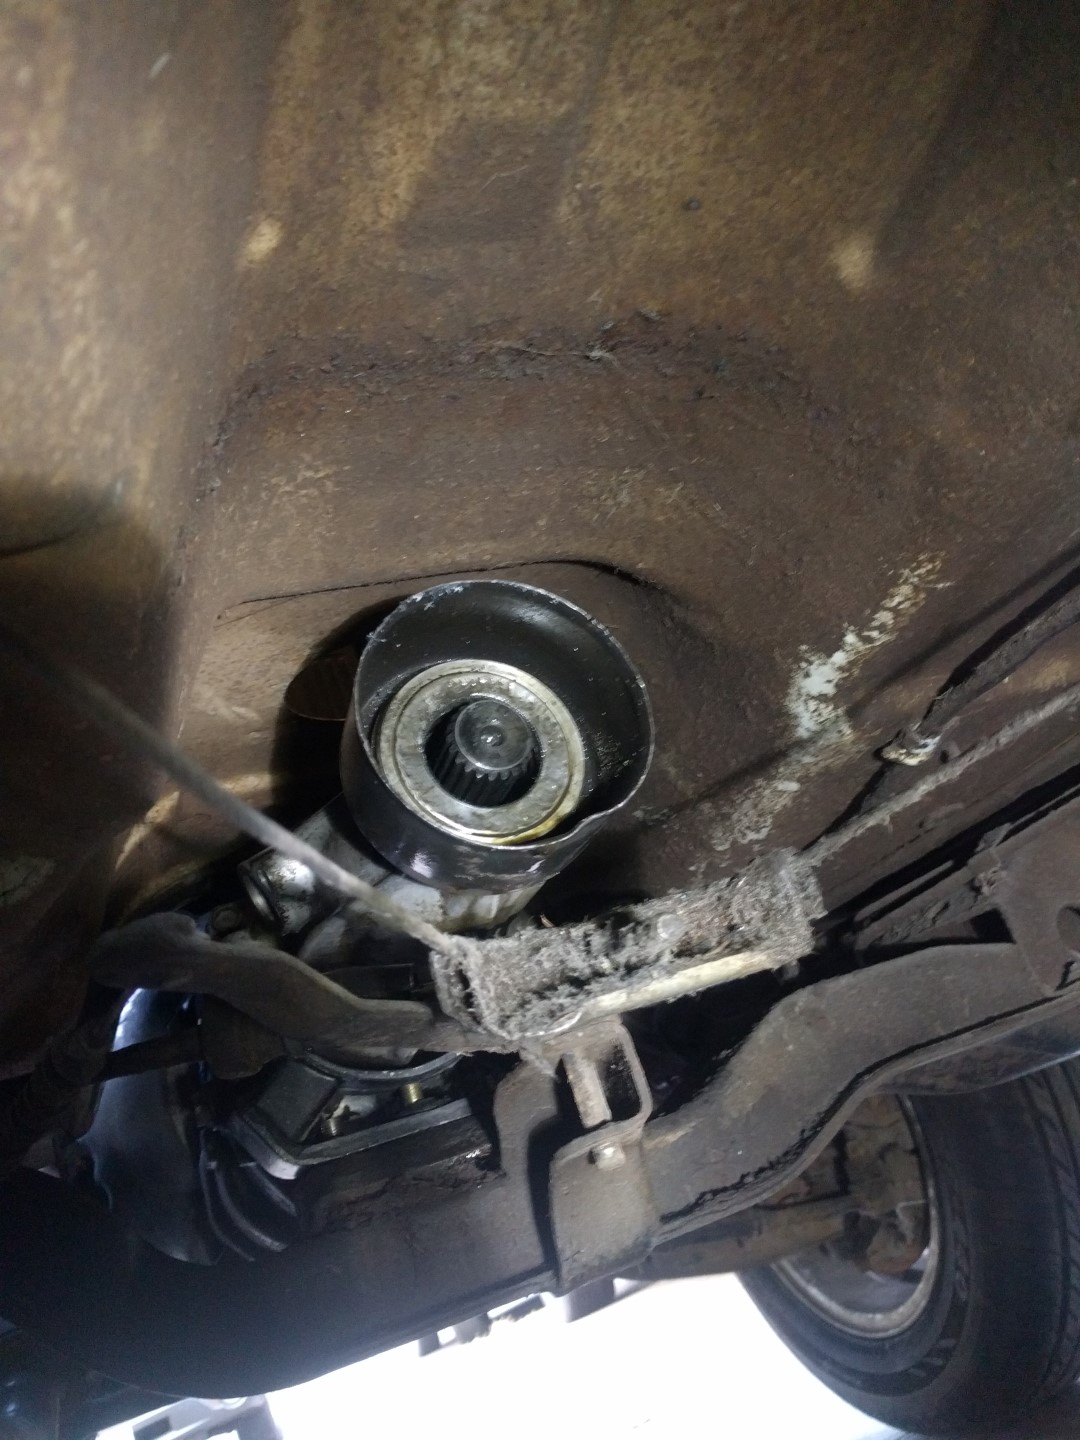
Engine Removal
The engine is actually quite simple to remove. The engine was completely rebuilt in following sections.
To remove the engine
- Disconnect all wires and water/air hoses from the engine
- Remove radiator (unless the transmission has been removed), you need the extra space
- Unbolt the two engine mounts on either side of the block
- Disconnect the drive shaft, carrier bearing has to be removed
- Remove the two bolts holding transmission in place
- Attach your cherry picker and jack her up!
The transmission mount threw me for a loop because it has this centering pin that required the transmission to be pushed up and “unlocked” from the frame. Note, the transmission cross member does not have to be removed.


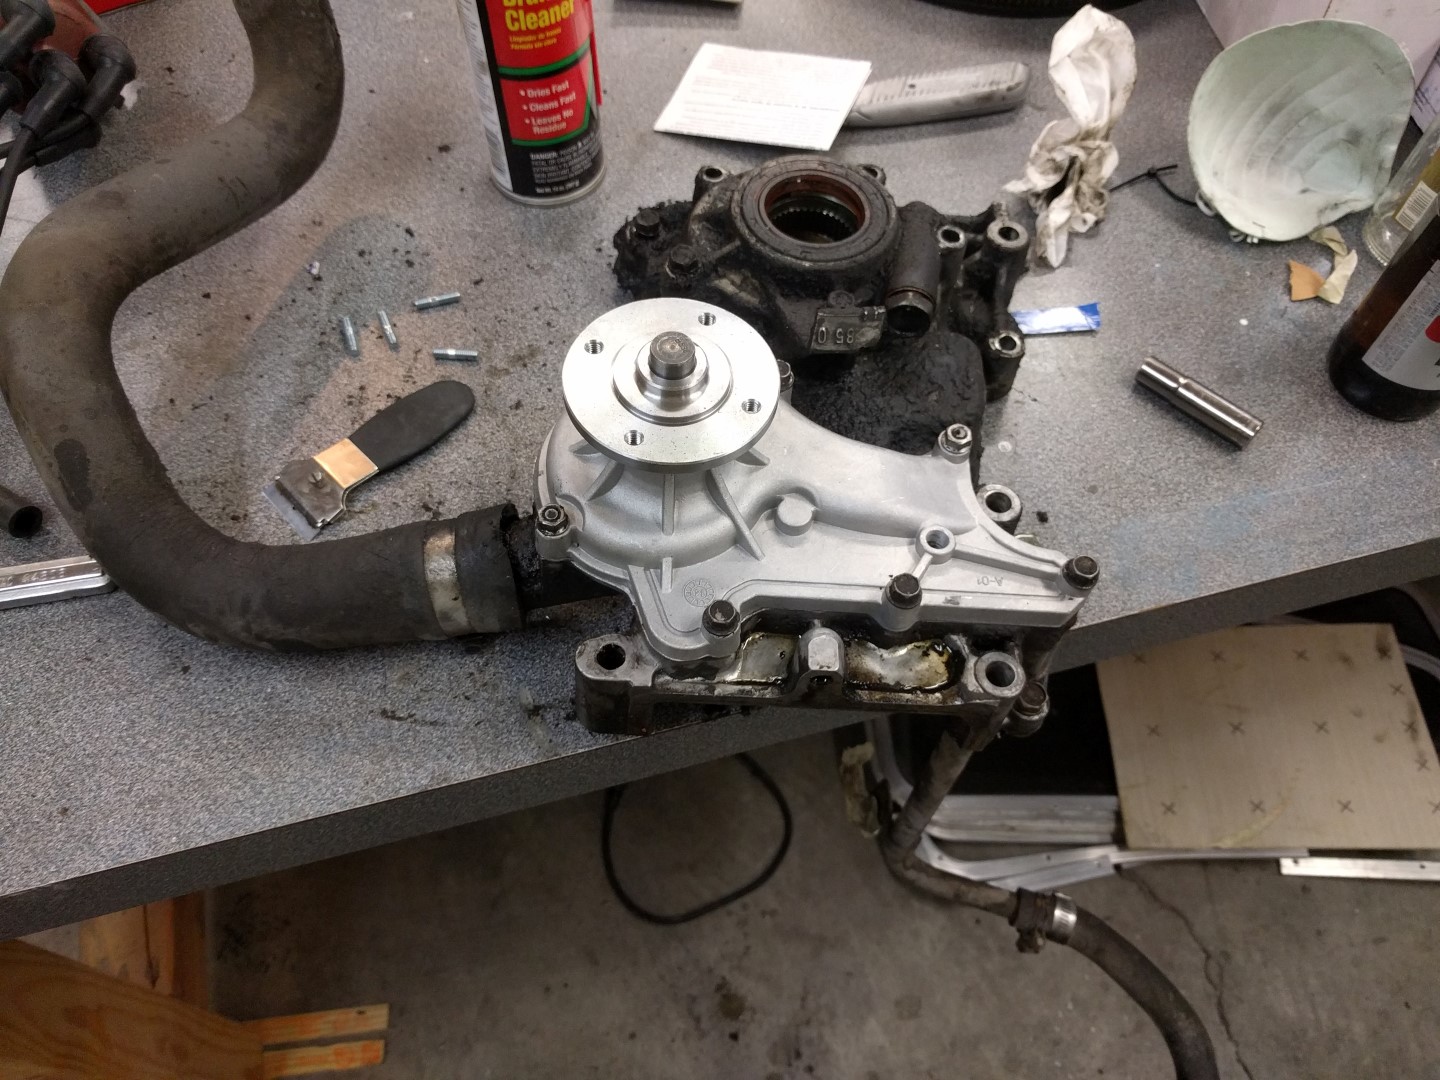
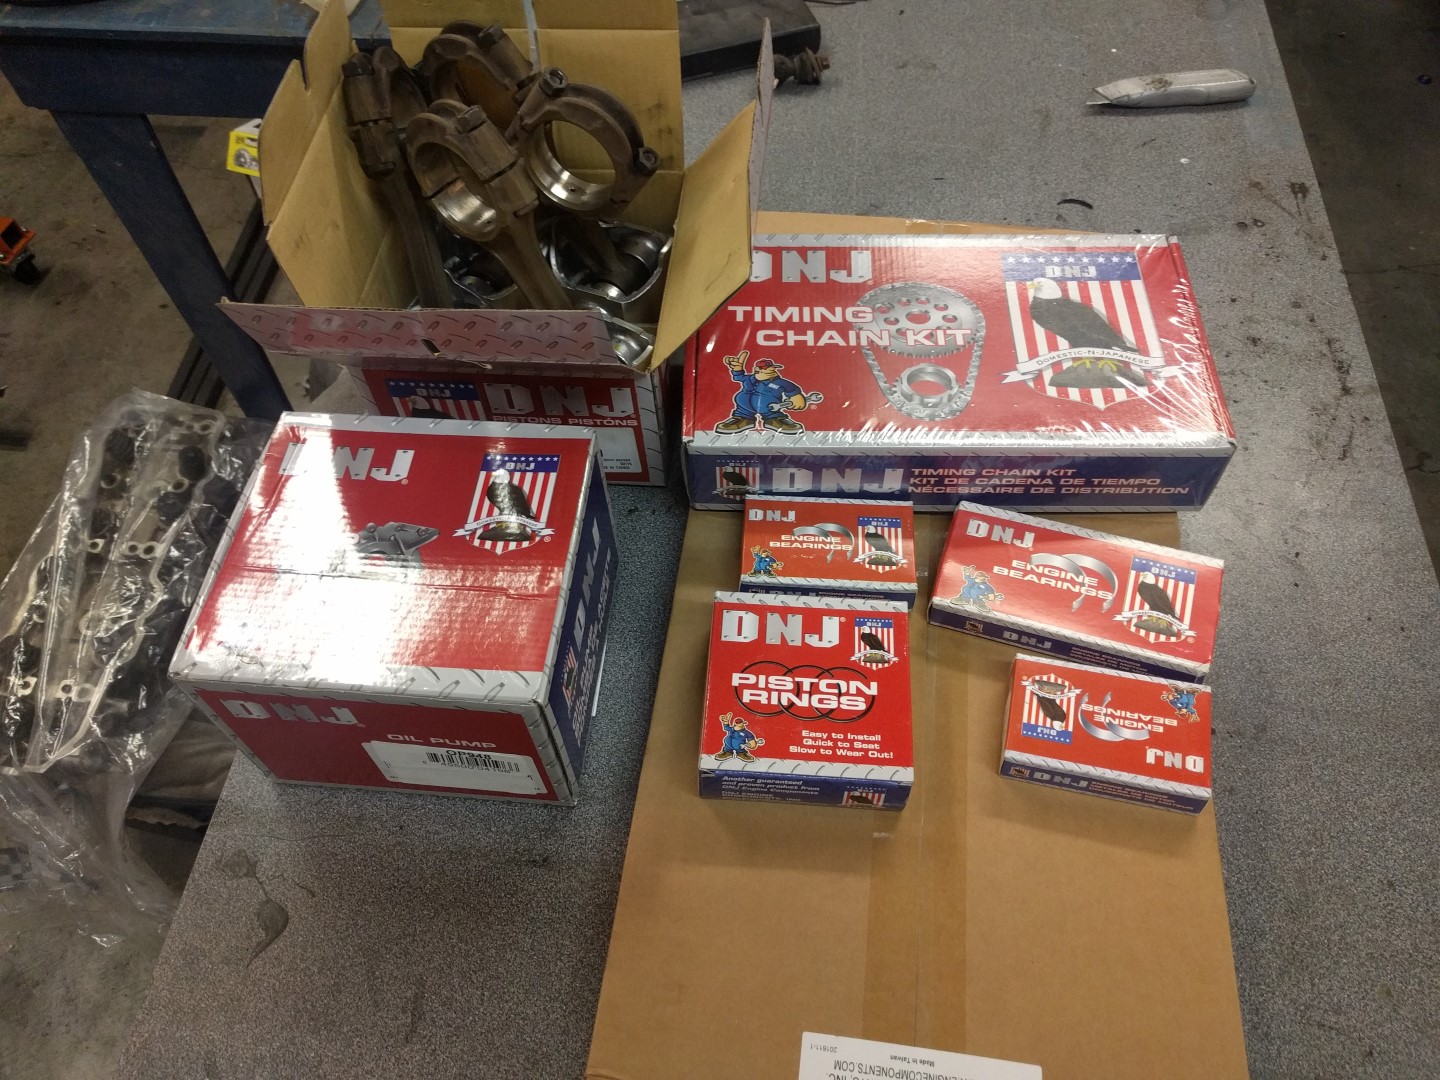
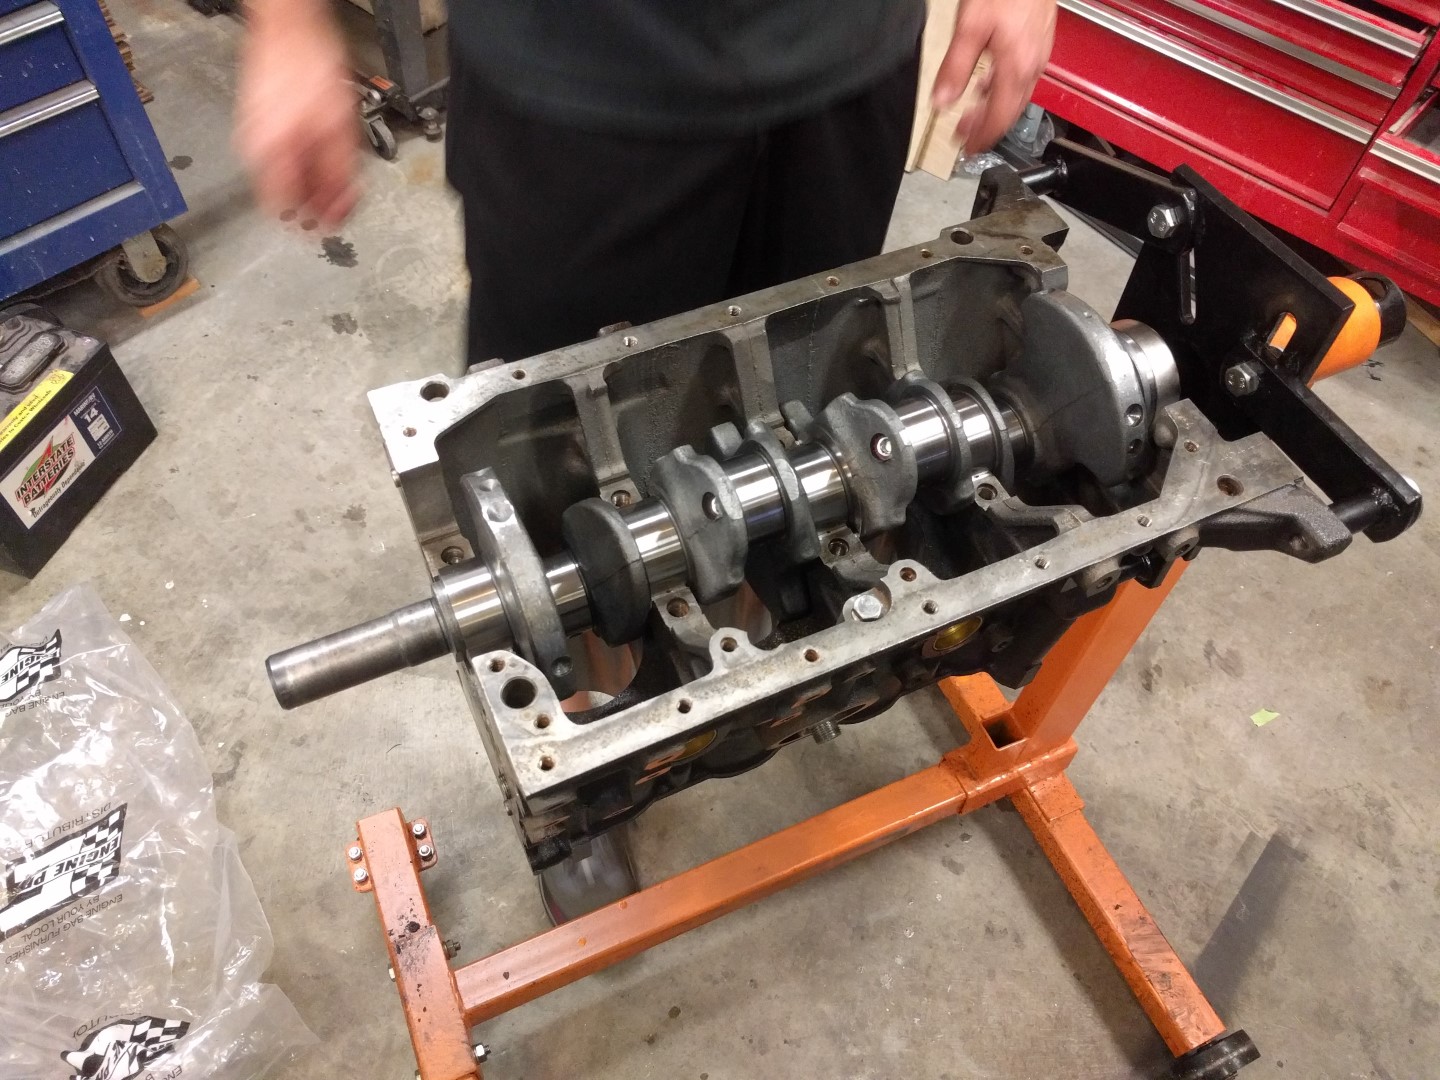
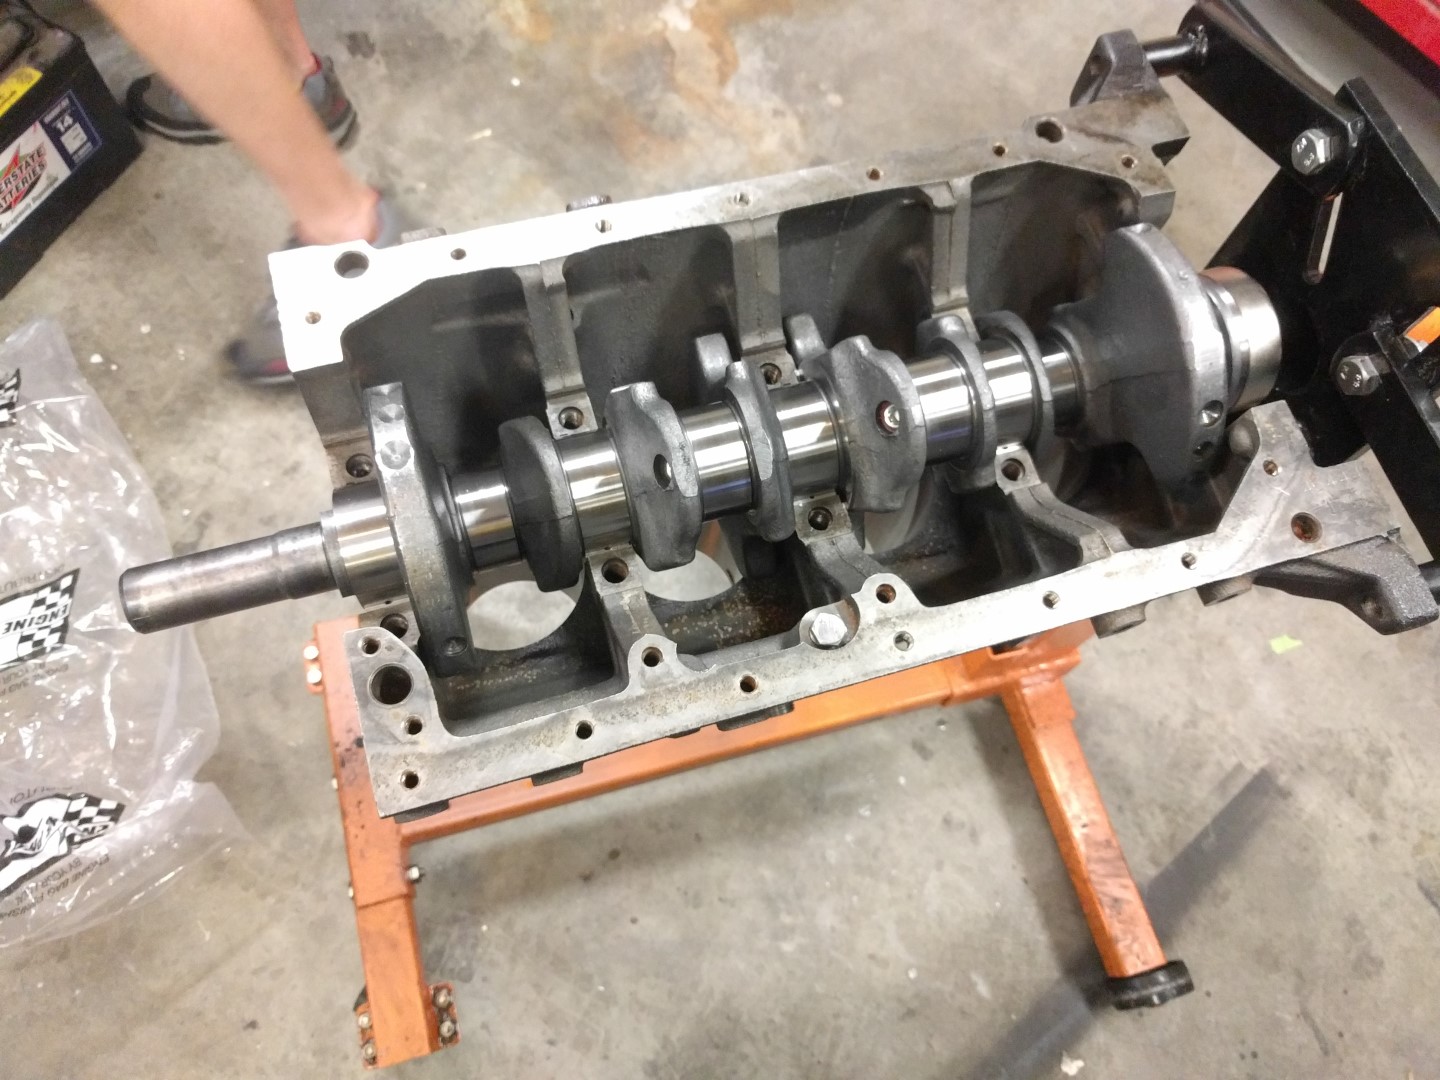
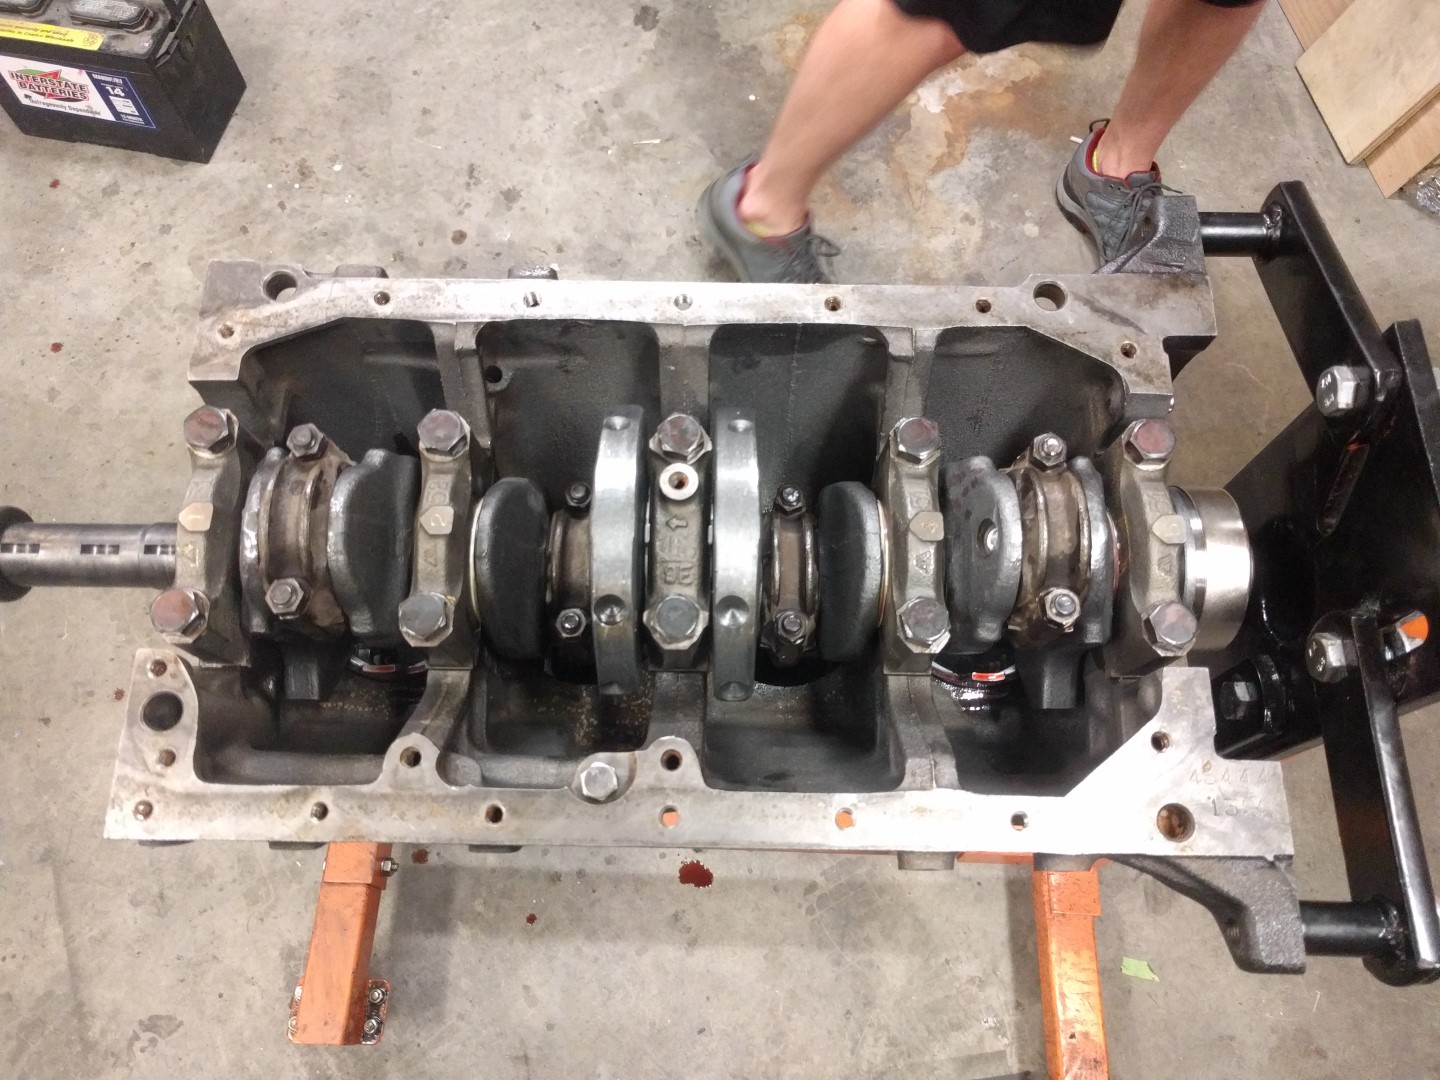
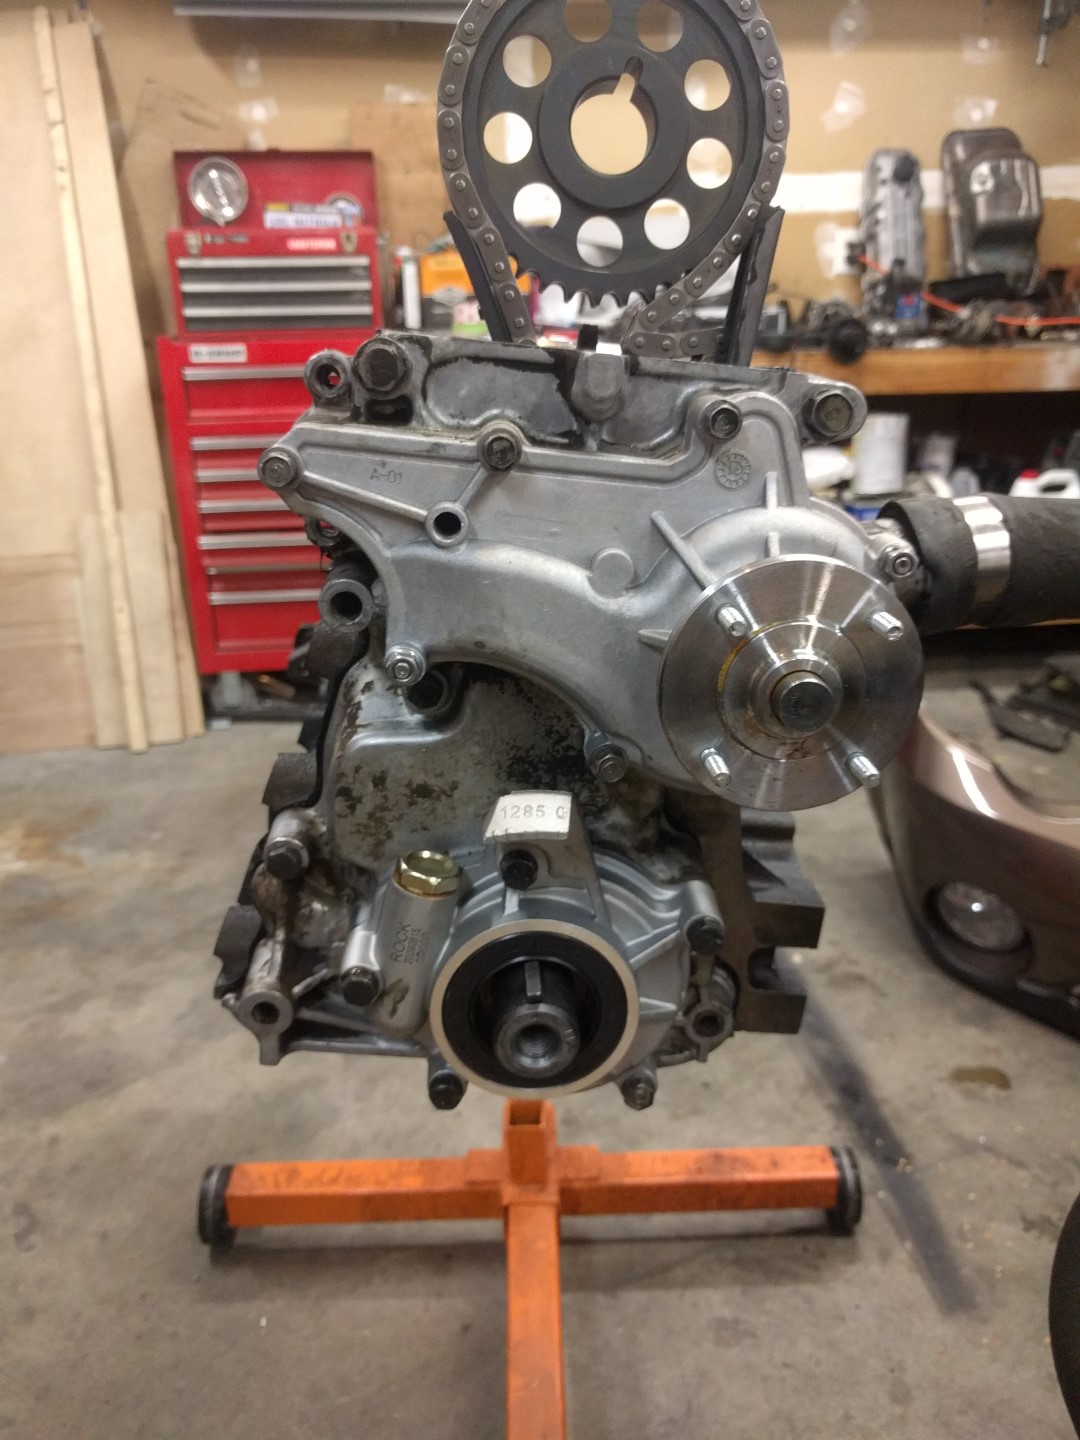
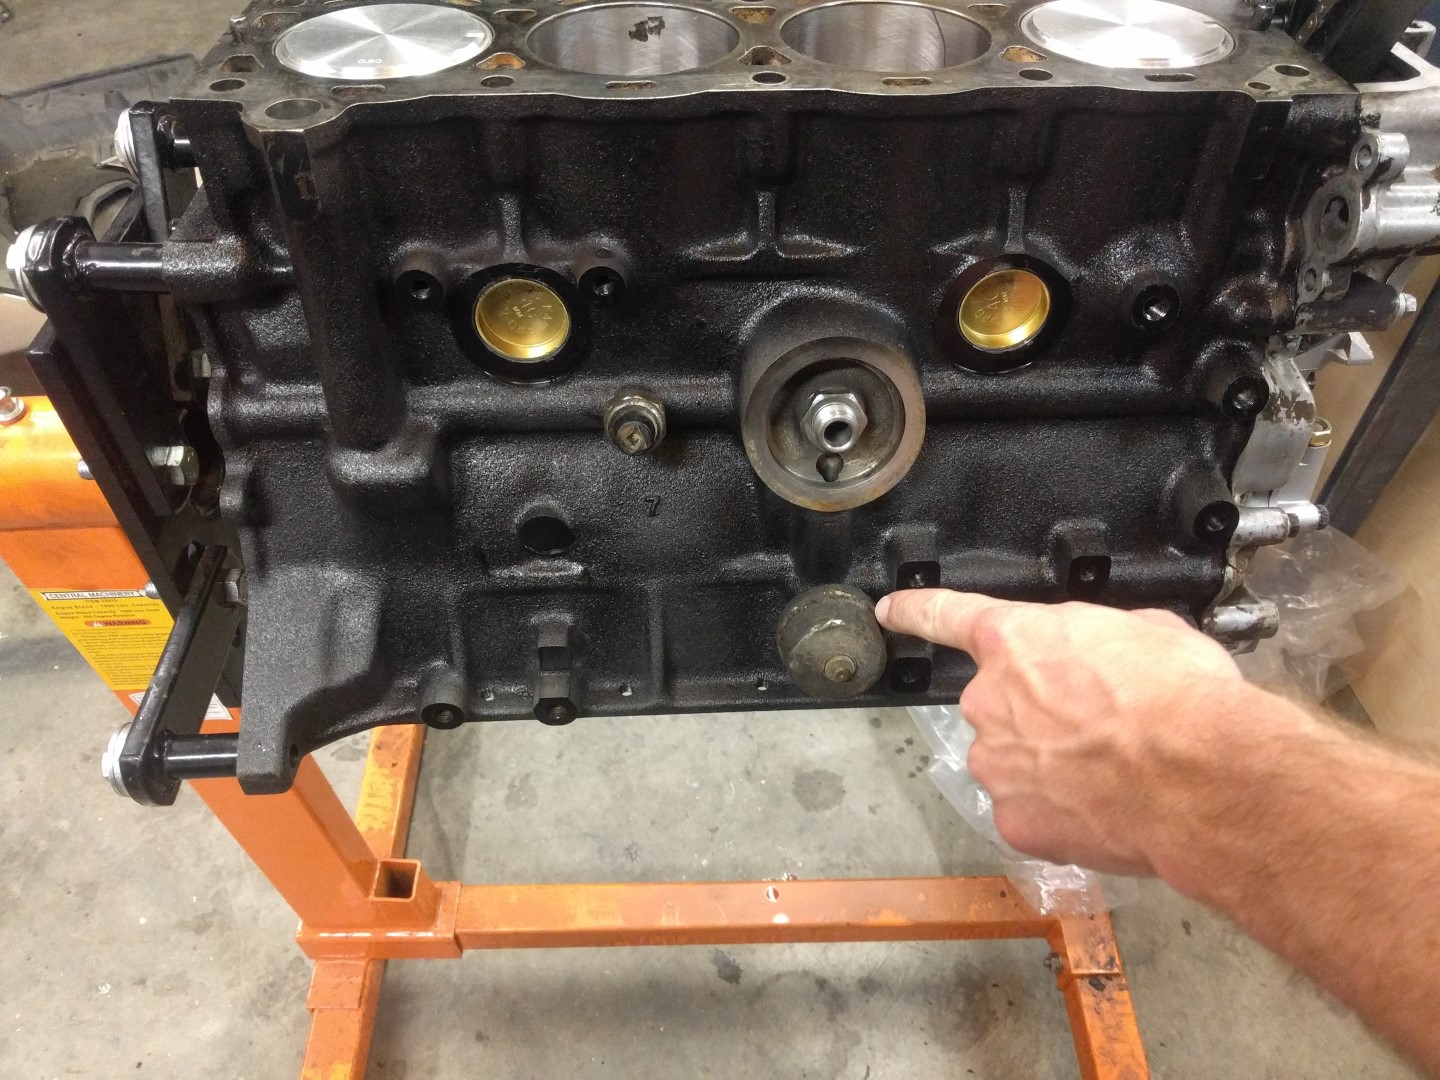
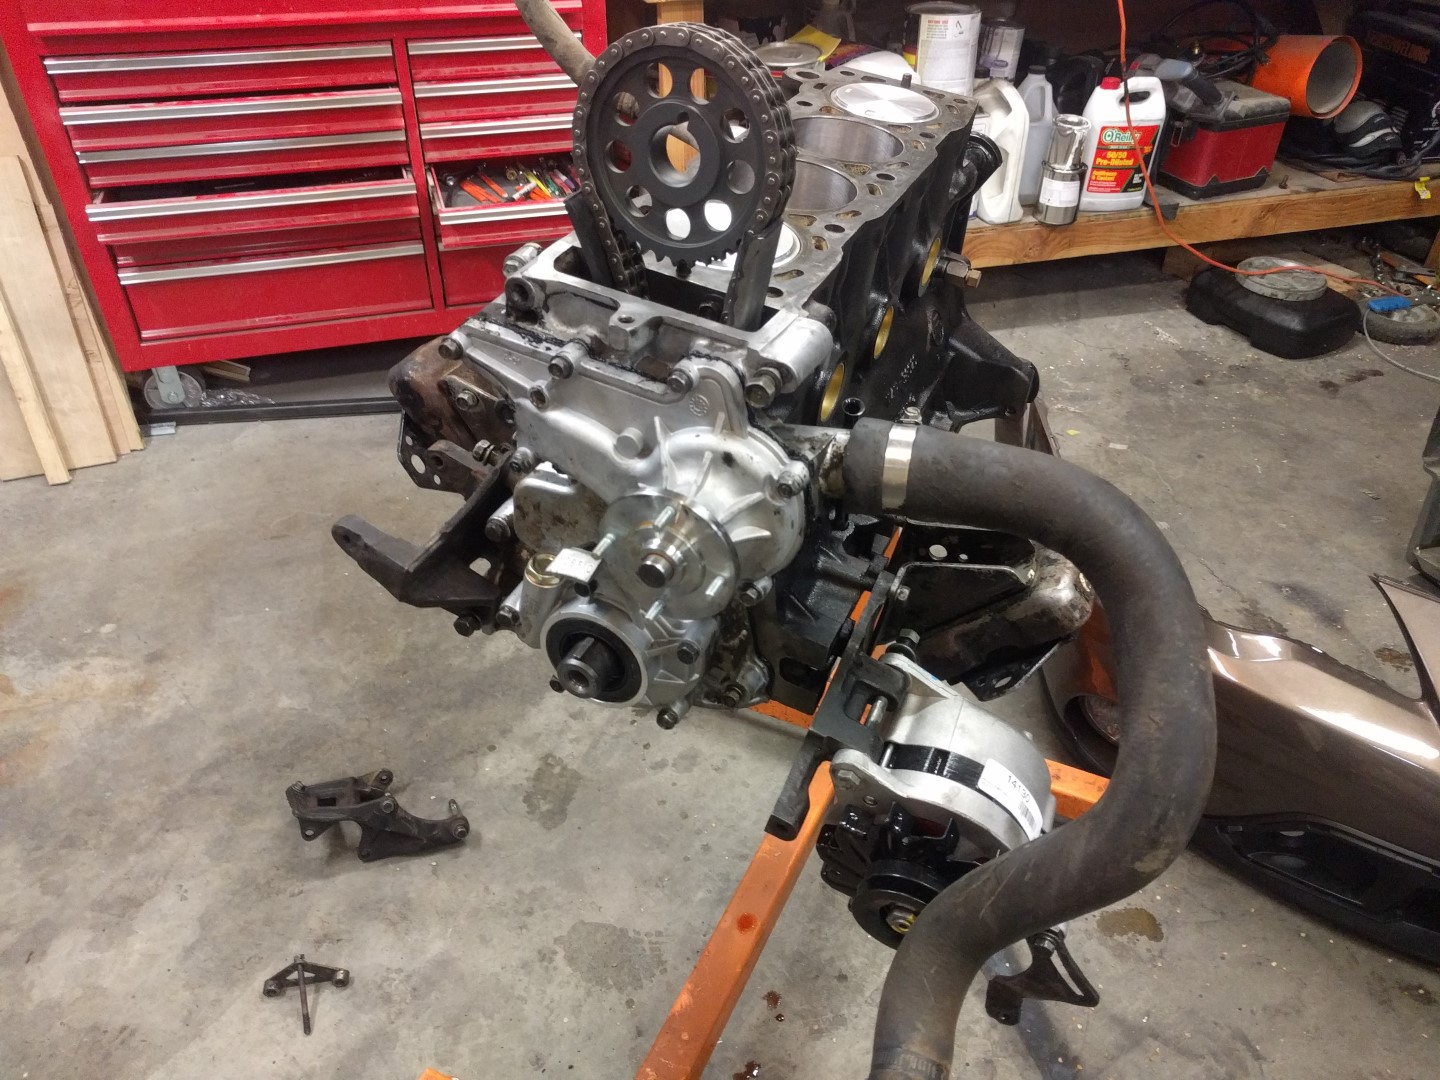
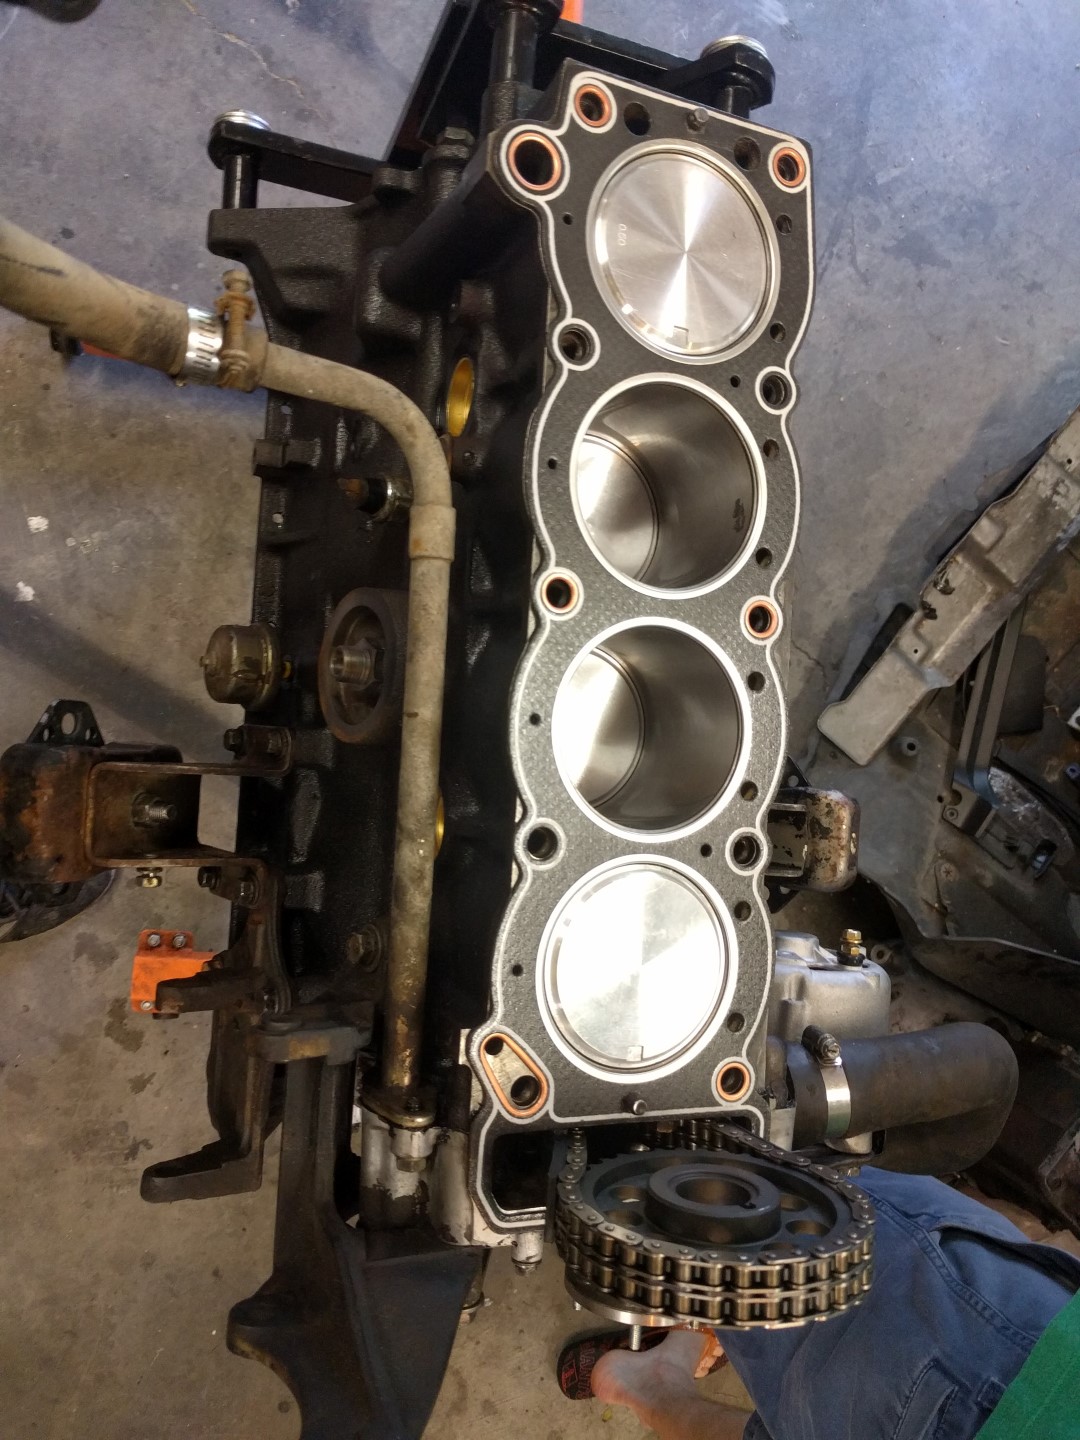
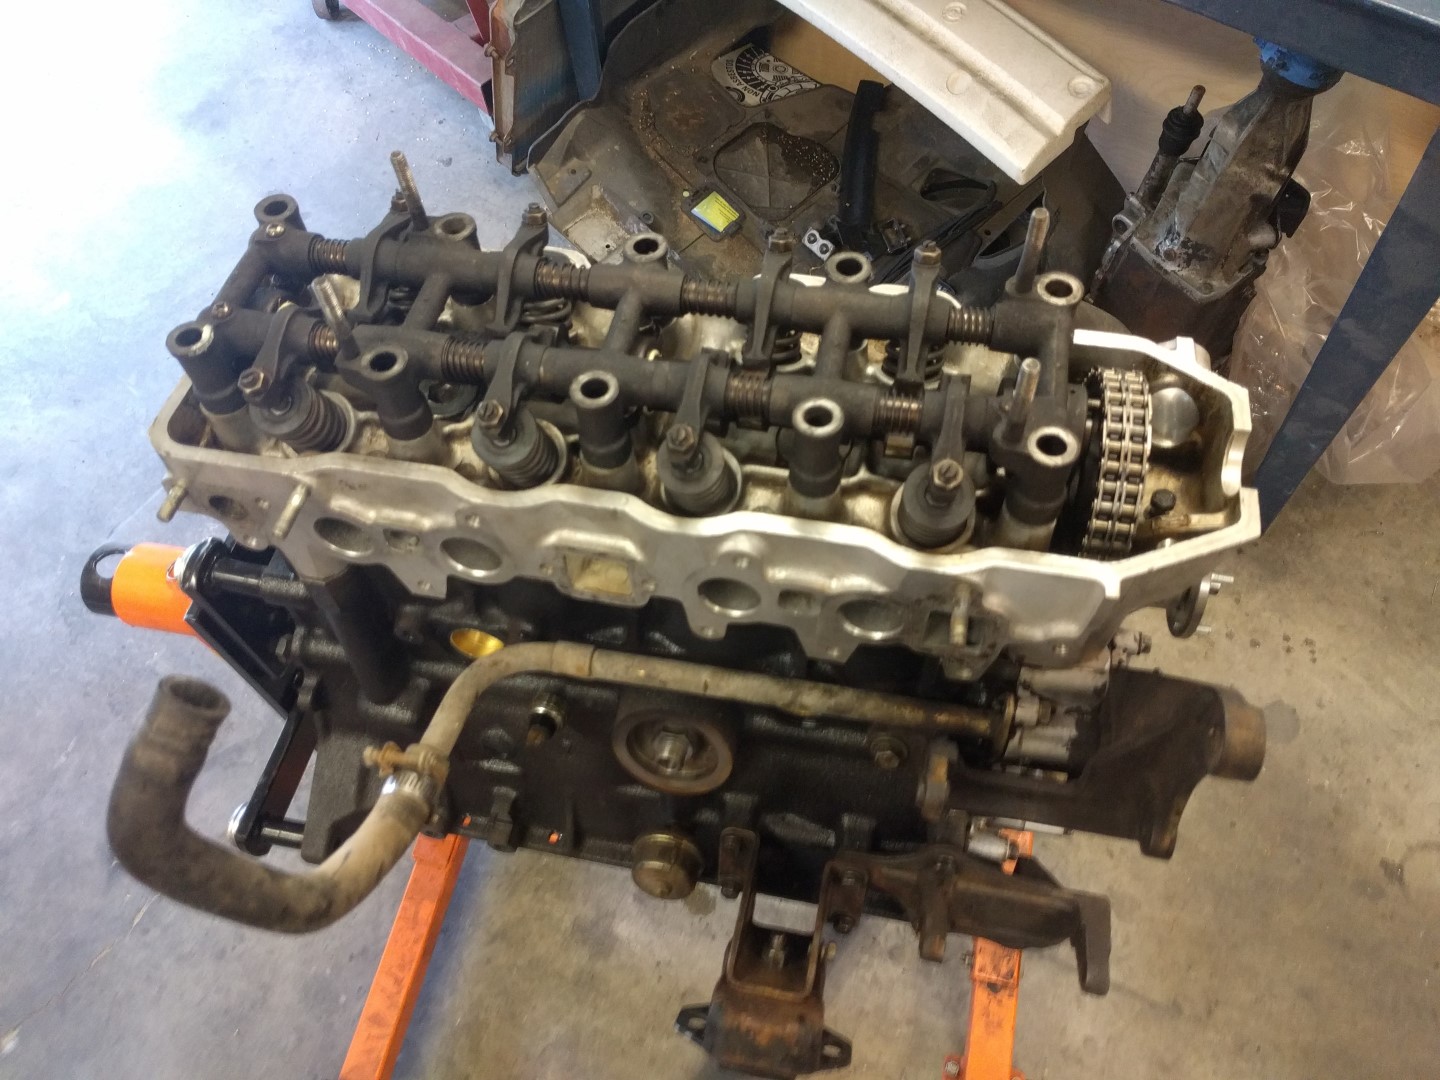
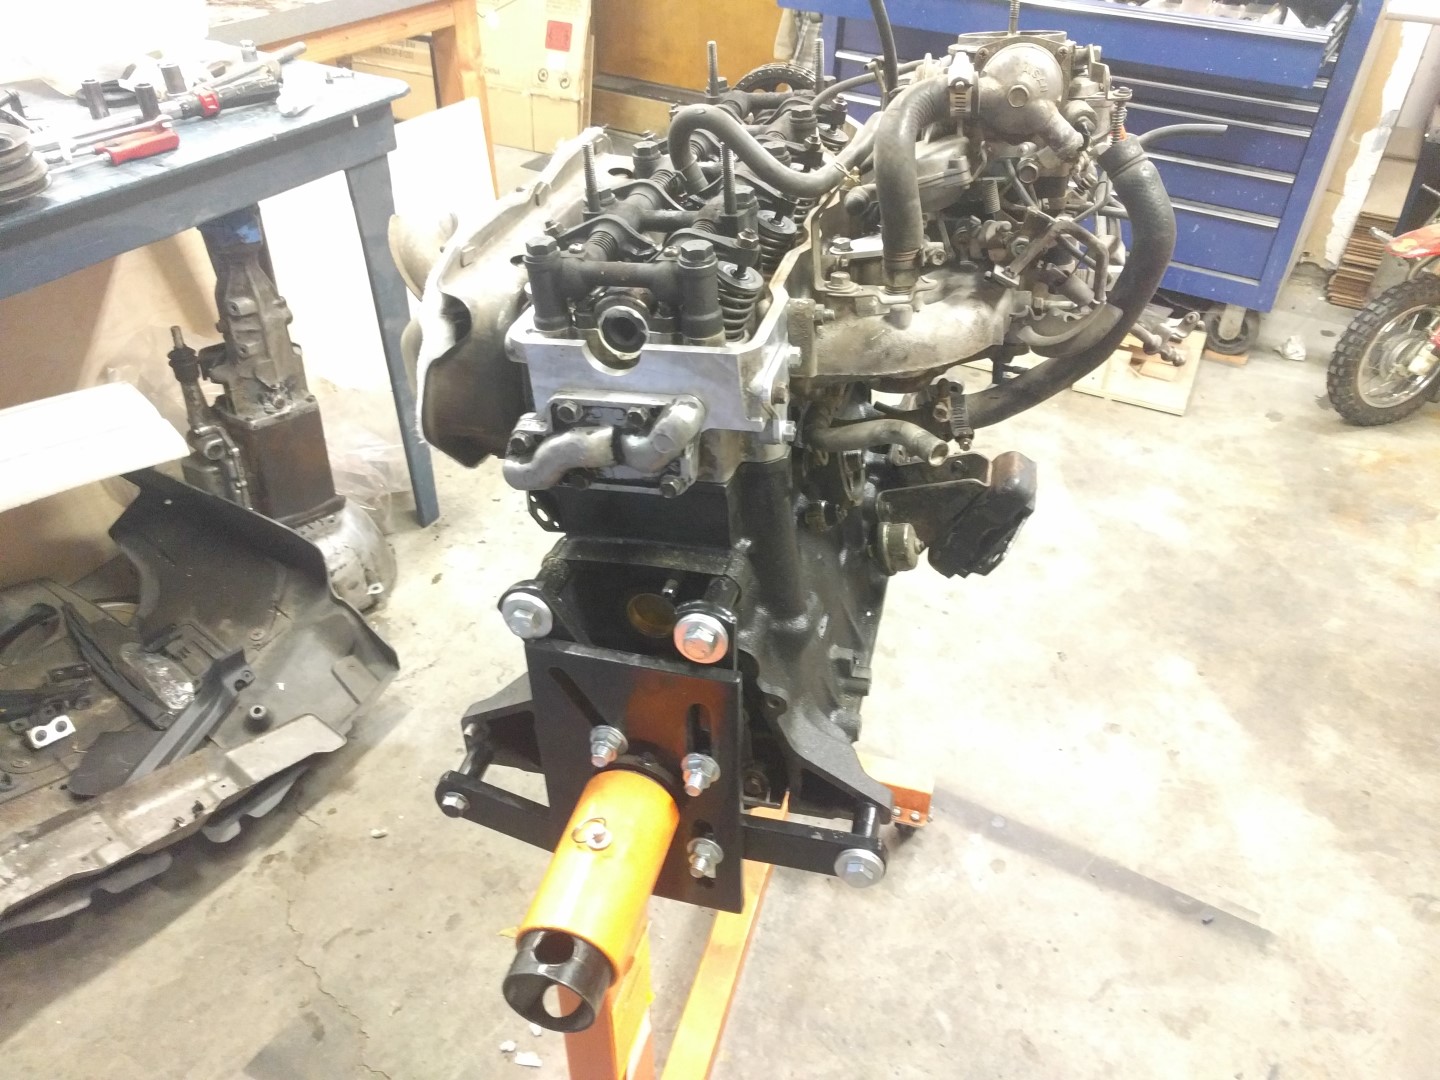
Engine Rebuild
Once the engine was removed it was time to start rebuilding it. This was my first engine rebuild but luckily my good friend who has done many engines was helping me.
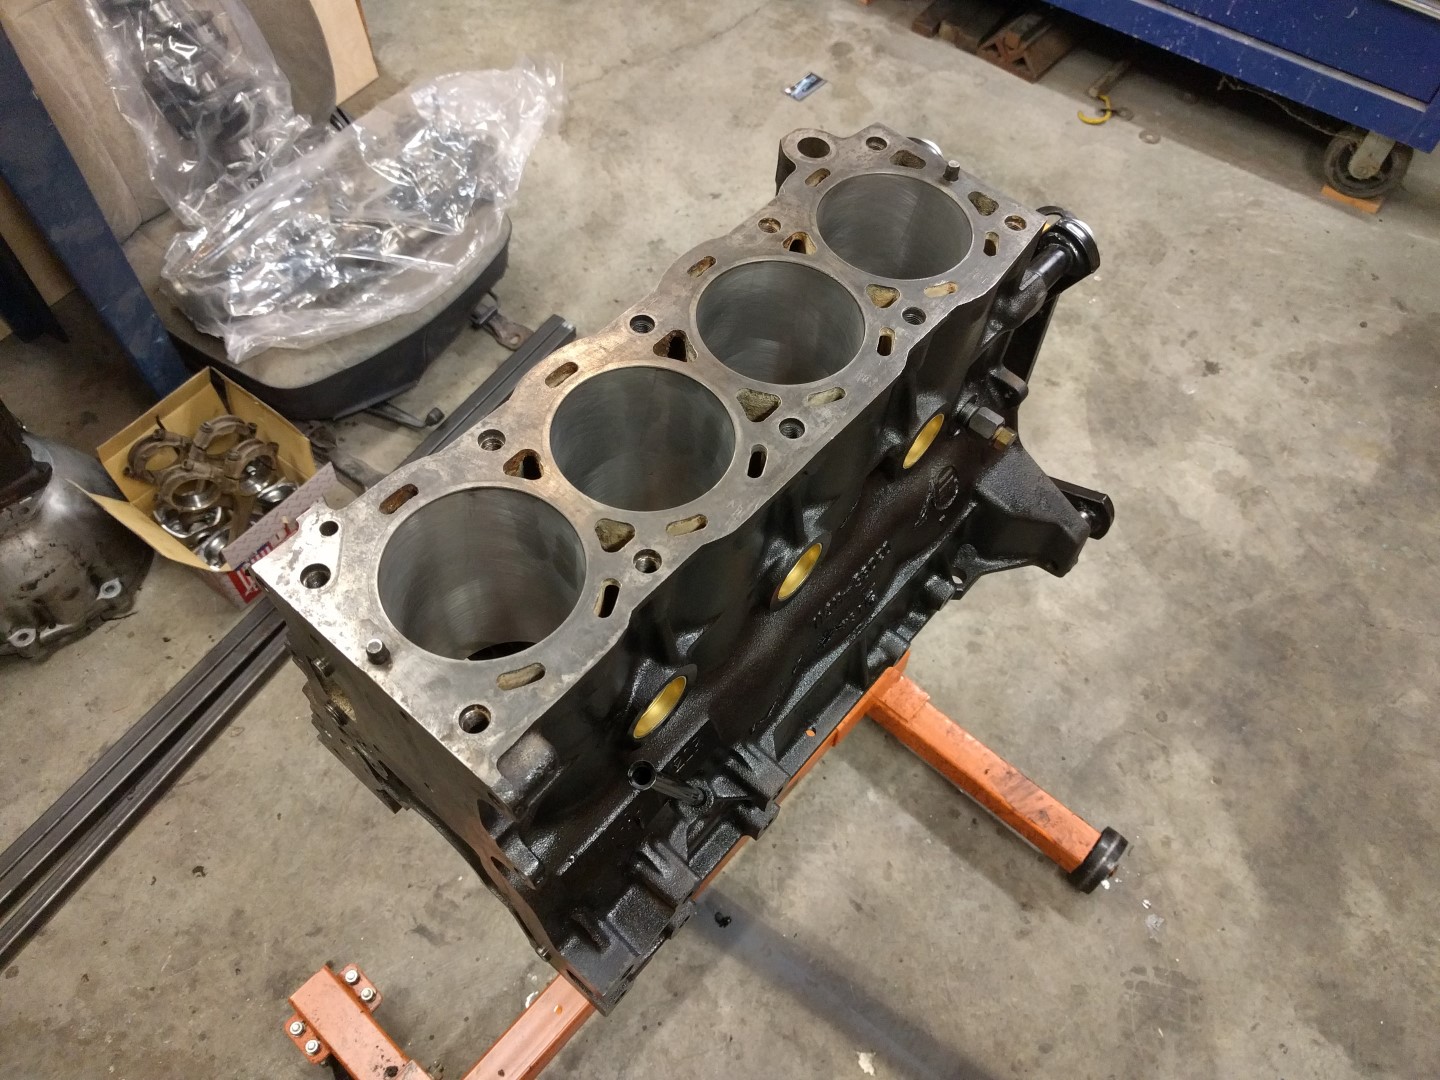
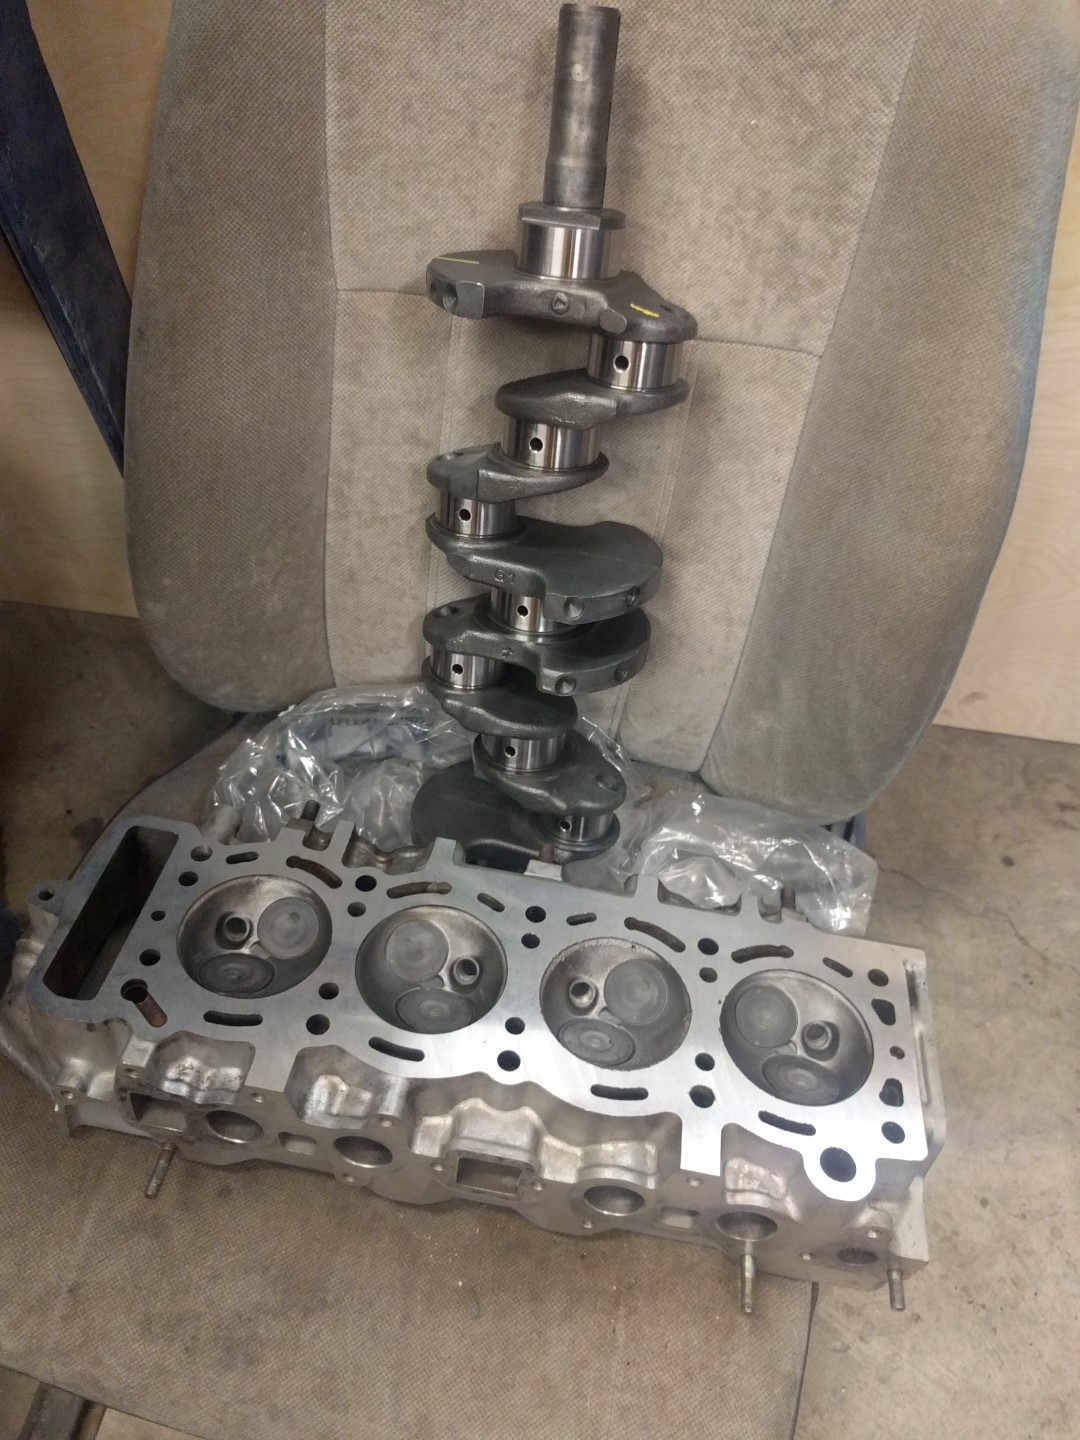
The first step is to completely disassemble the engine down to the point where the block, head, and crankshaft are all separate pieces (my machinist was okay with leaving the crankshaft attached to the block). Now take these to your local machinist and they should know what to do from there. They will order an engine rebuild kit that will have the parts for an entire rebuild: pistons, rings, bearings, seals, and gaskets. Total machinist cost including the rebuild kit was $750.
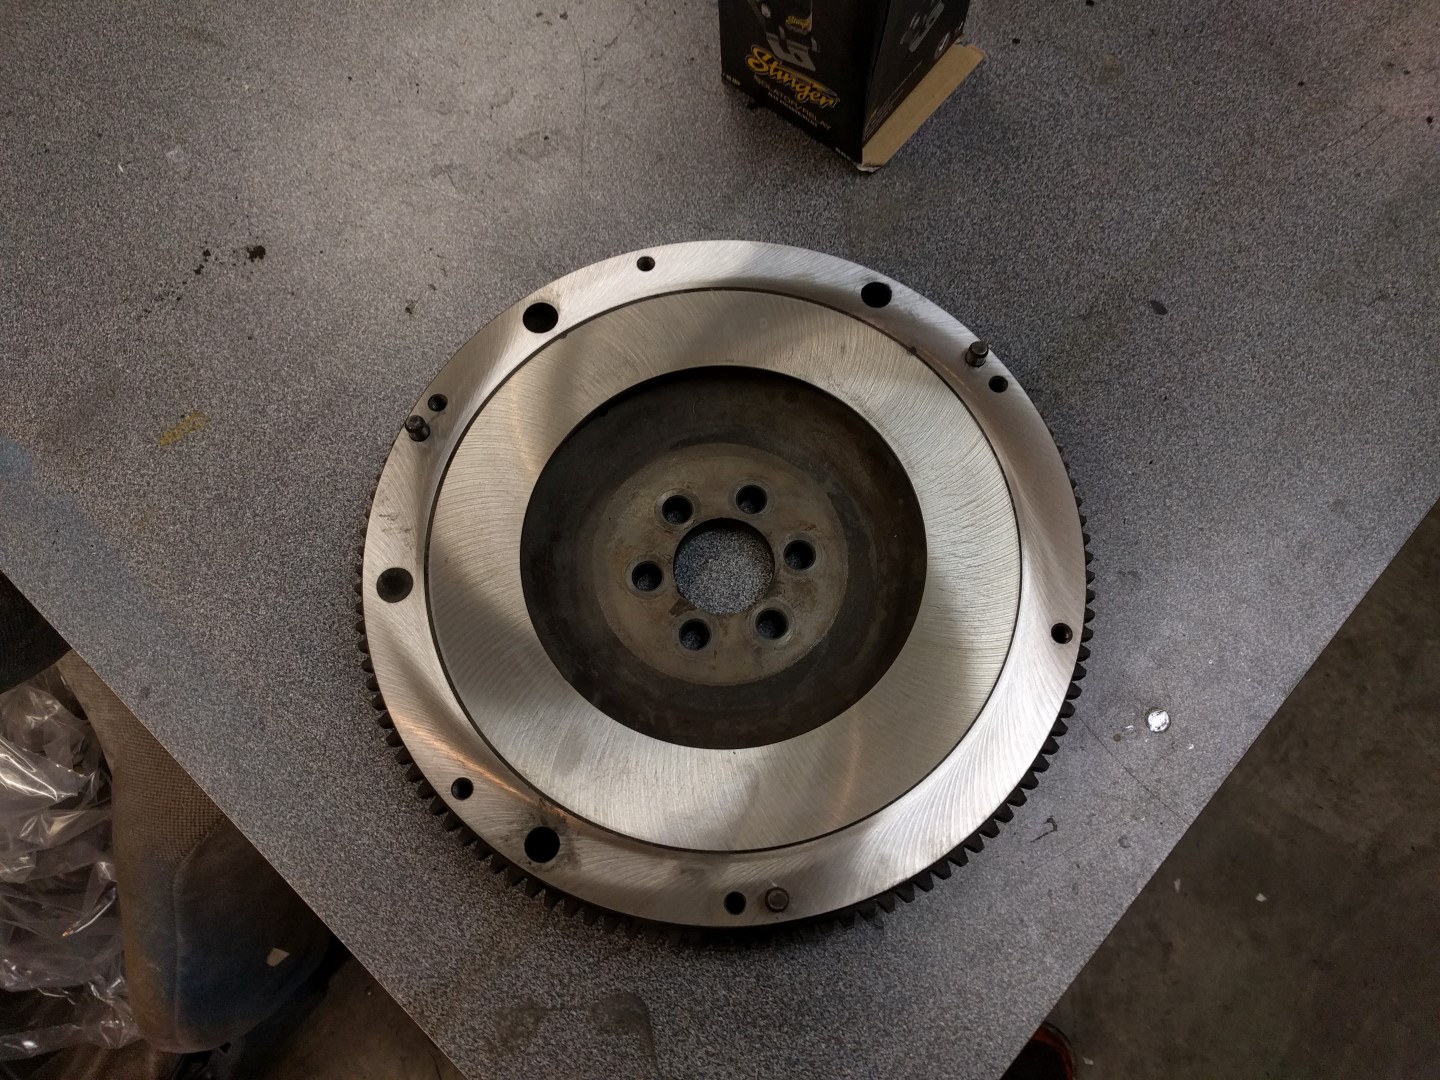
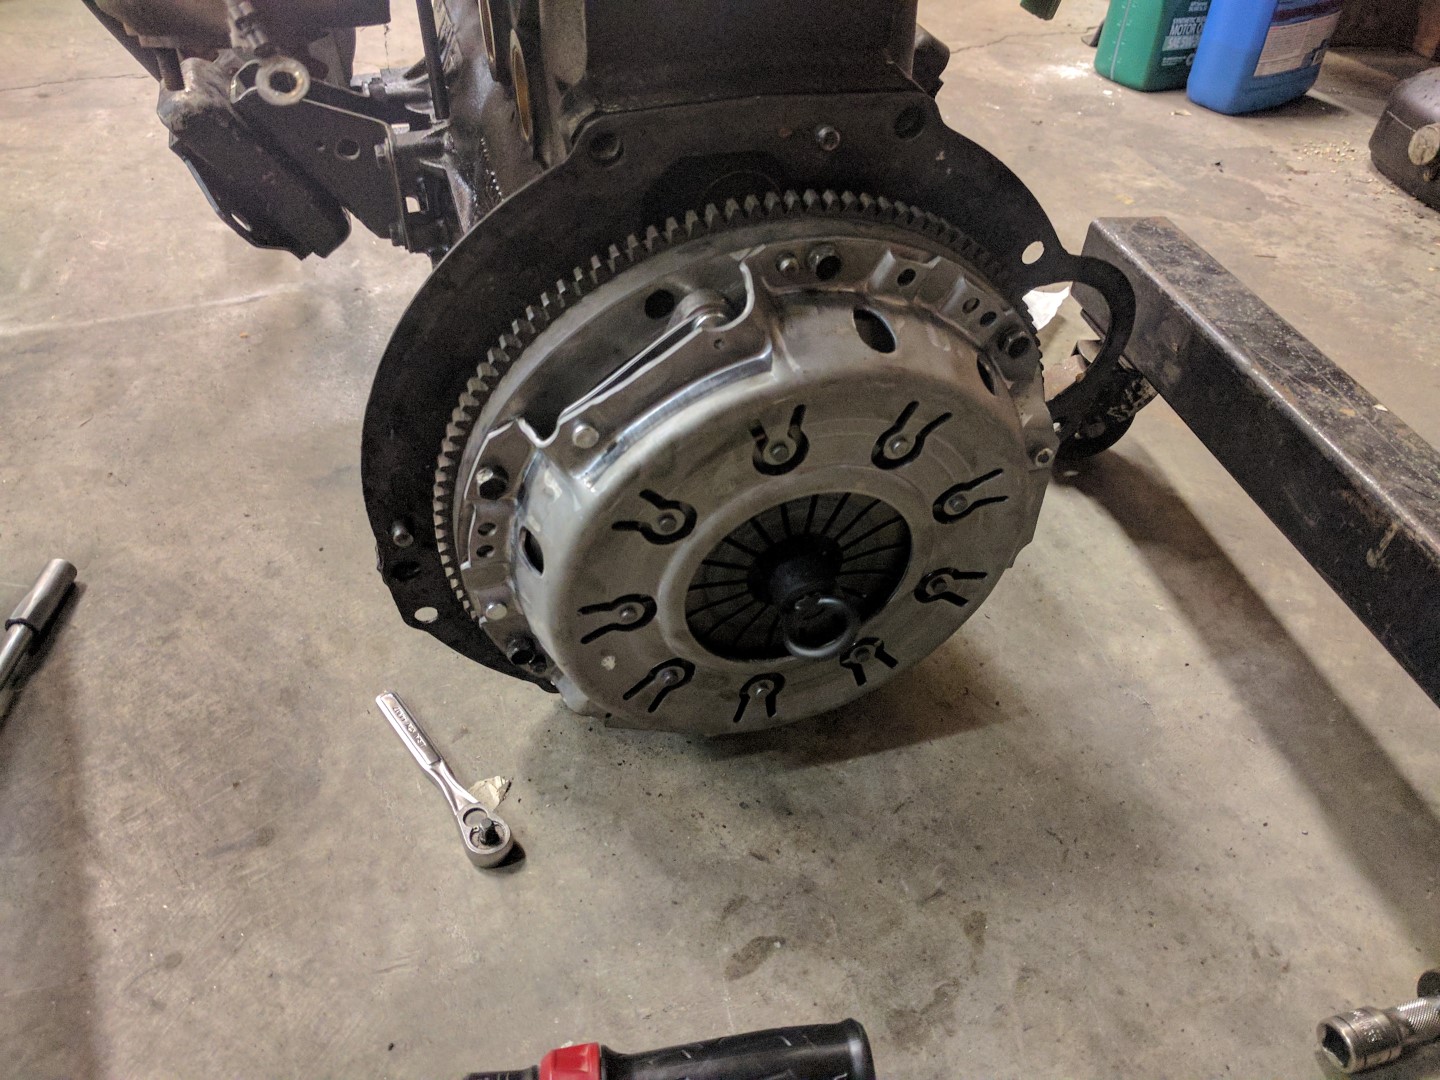
The flywheel desperately needed to be resurfaced. The same machinist did that for $80. The clutch was entirely rebuilt as well.
Nothing was done to the transmission.
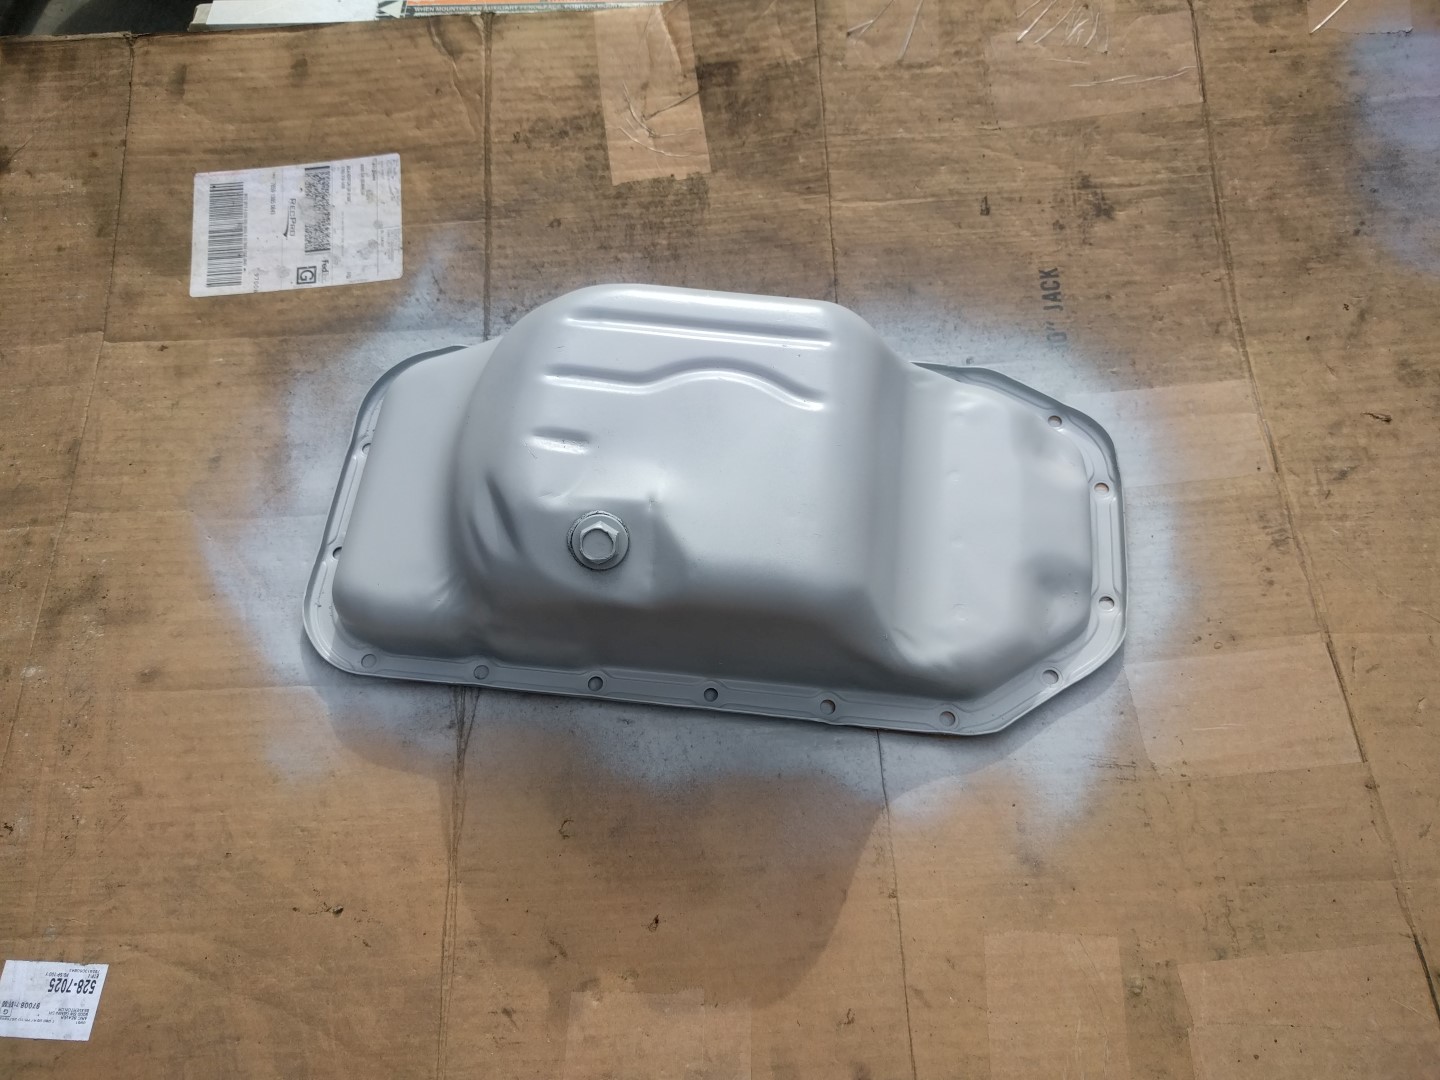
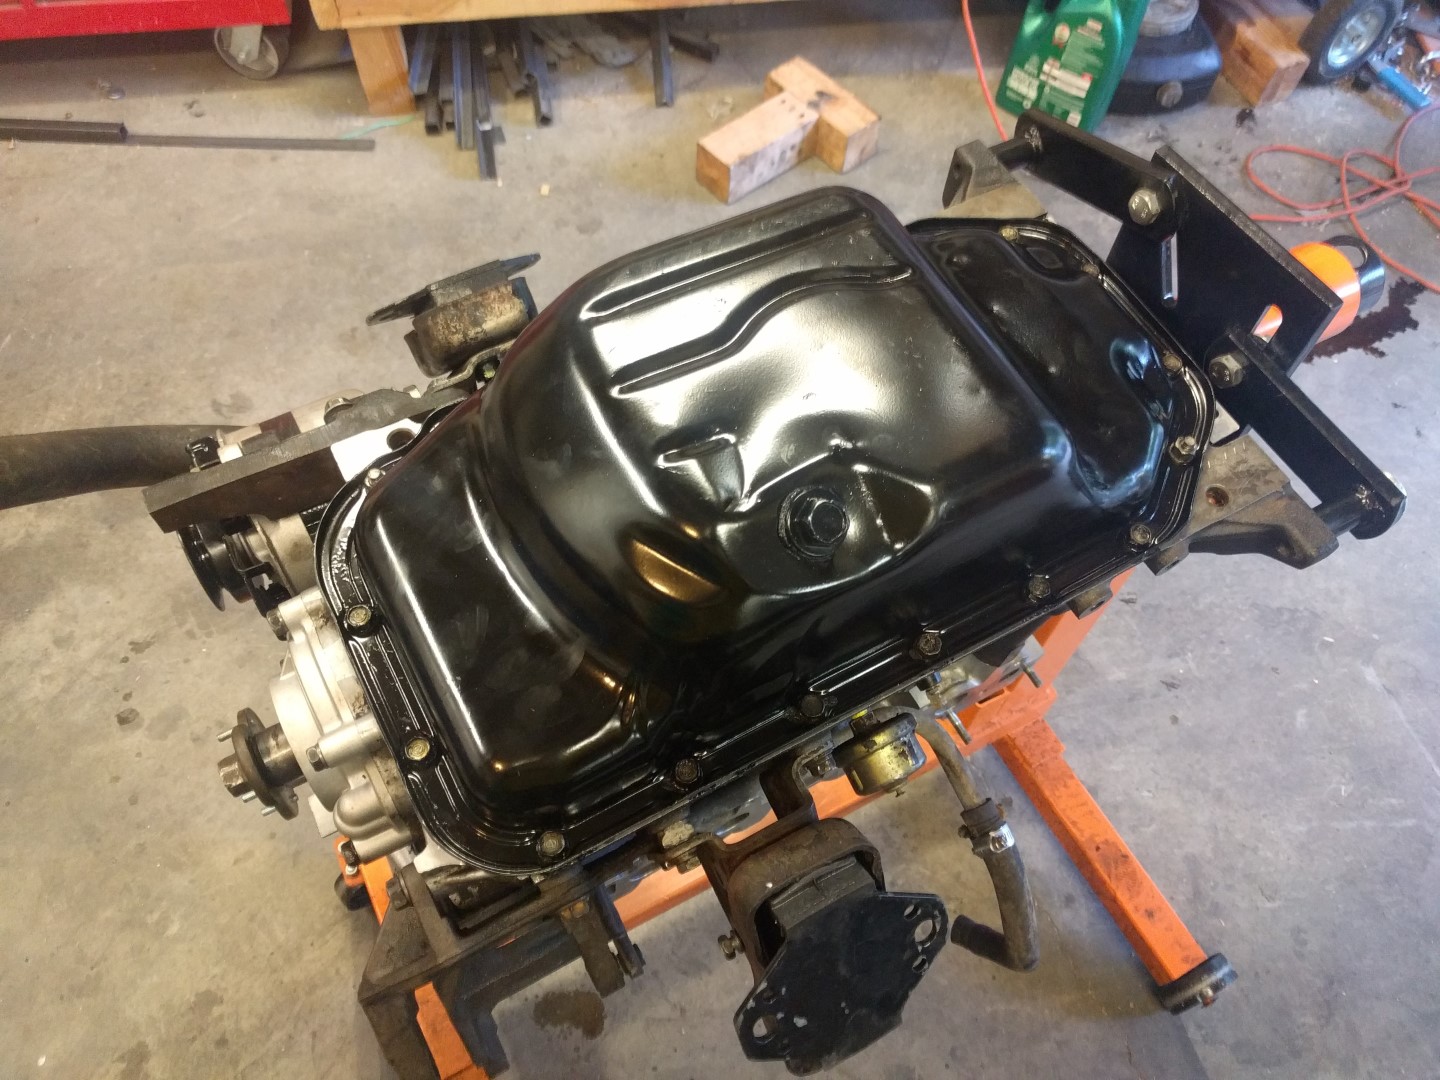
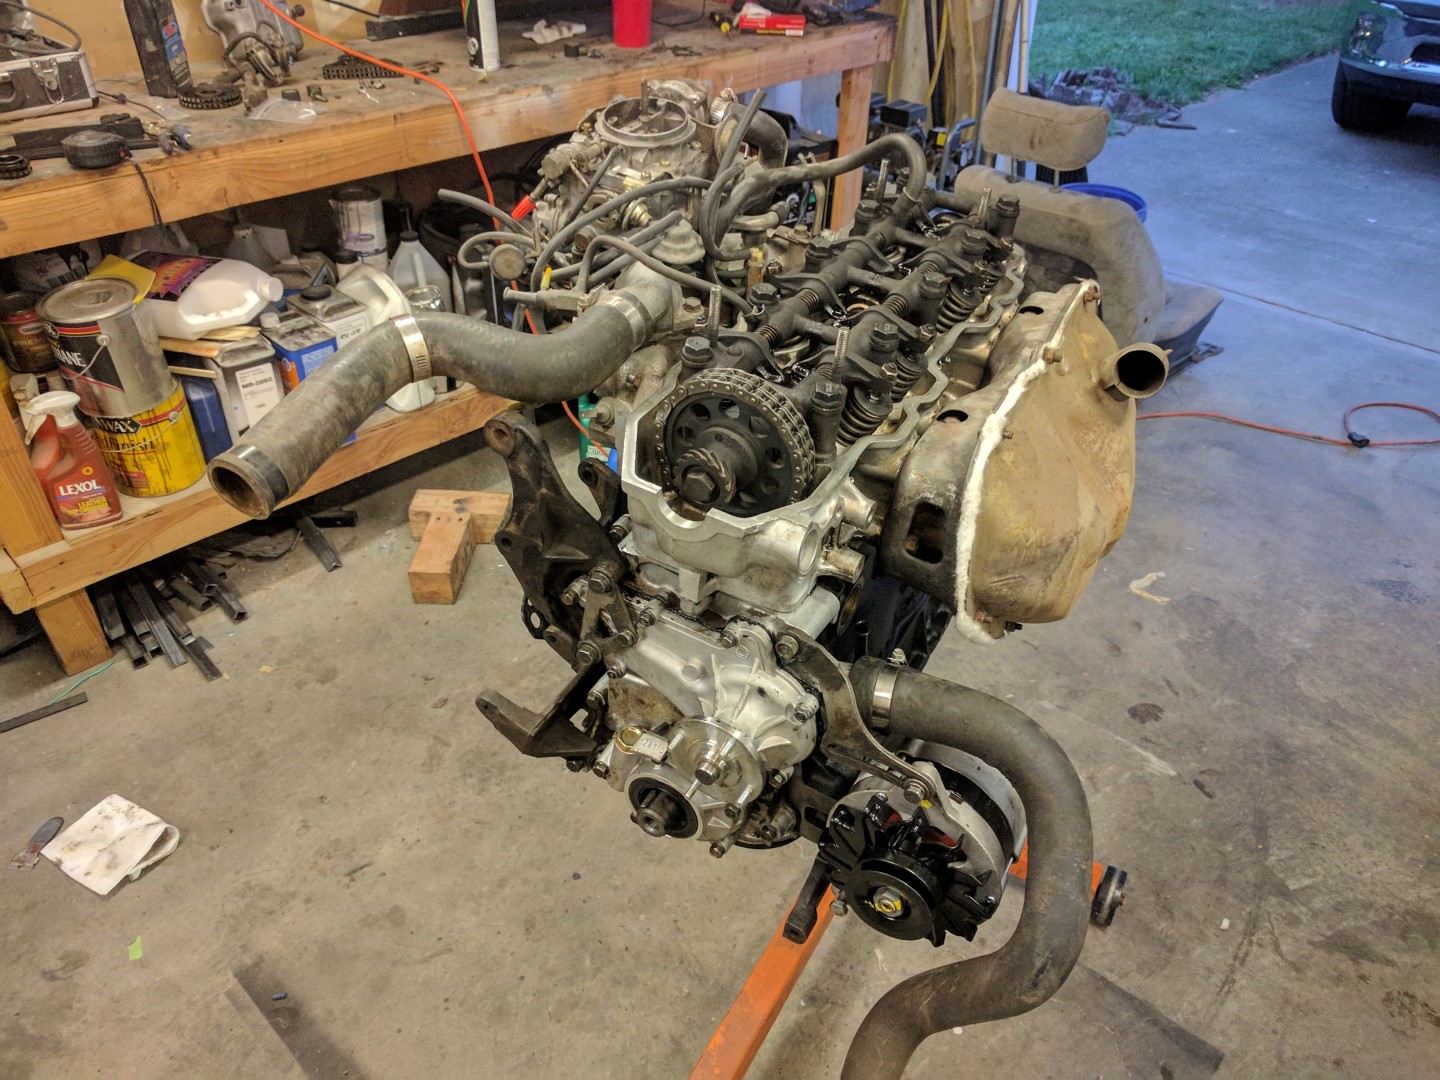
Only use Toyota FIPG gasket maker for oil pan and water pump. This stuff is awesome and never leaks!
Grab an Haynes manual for the rebuild. It will walk you through every step.
A VERY STRONG WORD OF WARNING! The oil pumps on these engines need to be primed!! Make sure you have oil pressure before running the engine after rebuild. Simply cranking the engine may not be enough: remove the oil filter and squirt oil into the filter holes in the block and fill the filter with oil. Some people even suggest to fill the oil filter with wheel bearing grease to promote the pump to start pumping.
Check out all the pictures below of the engine rebuild. A picture is worth a thousand words!


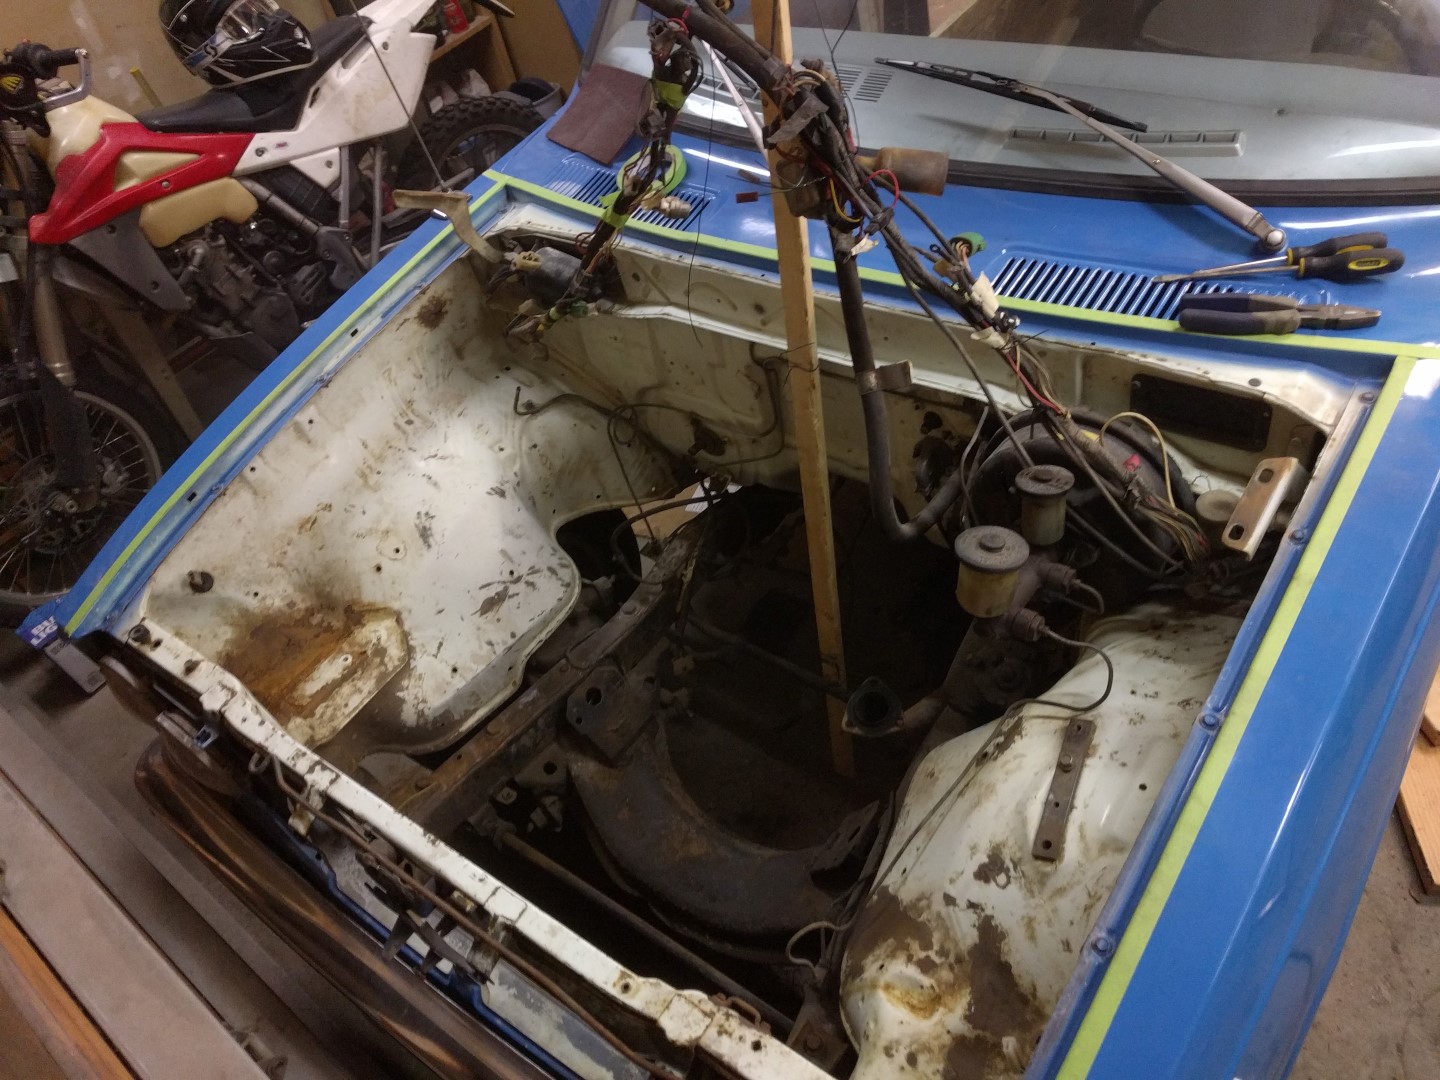
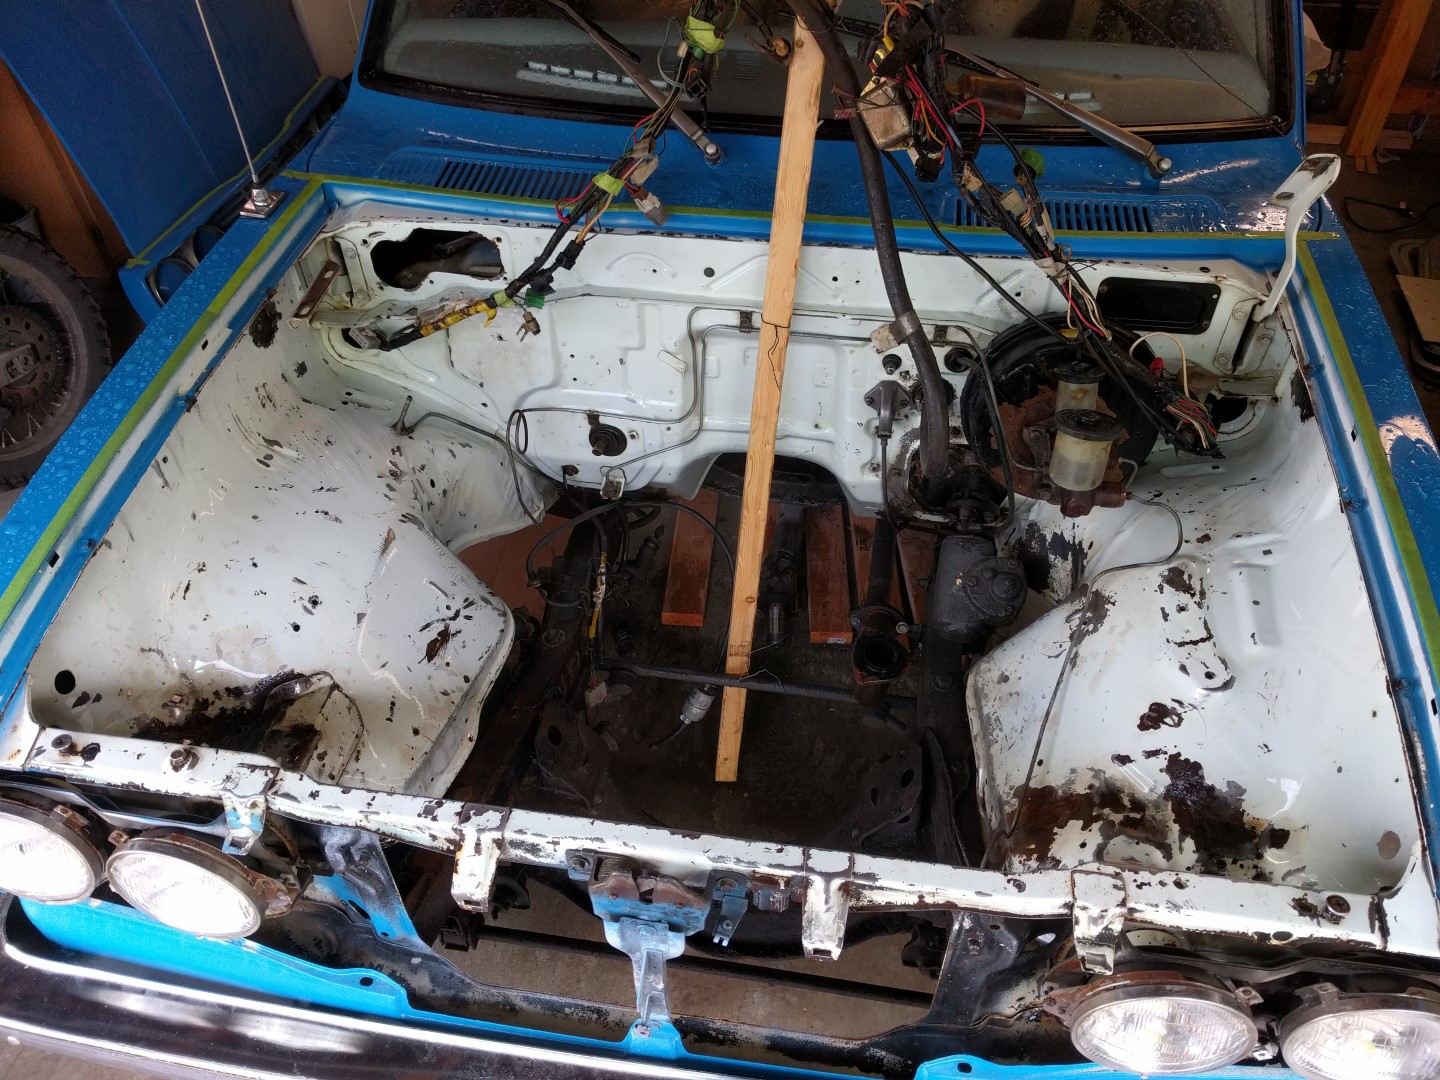
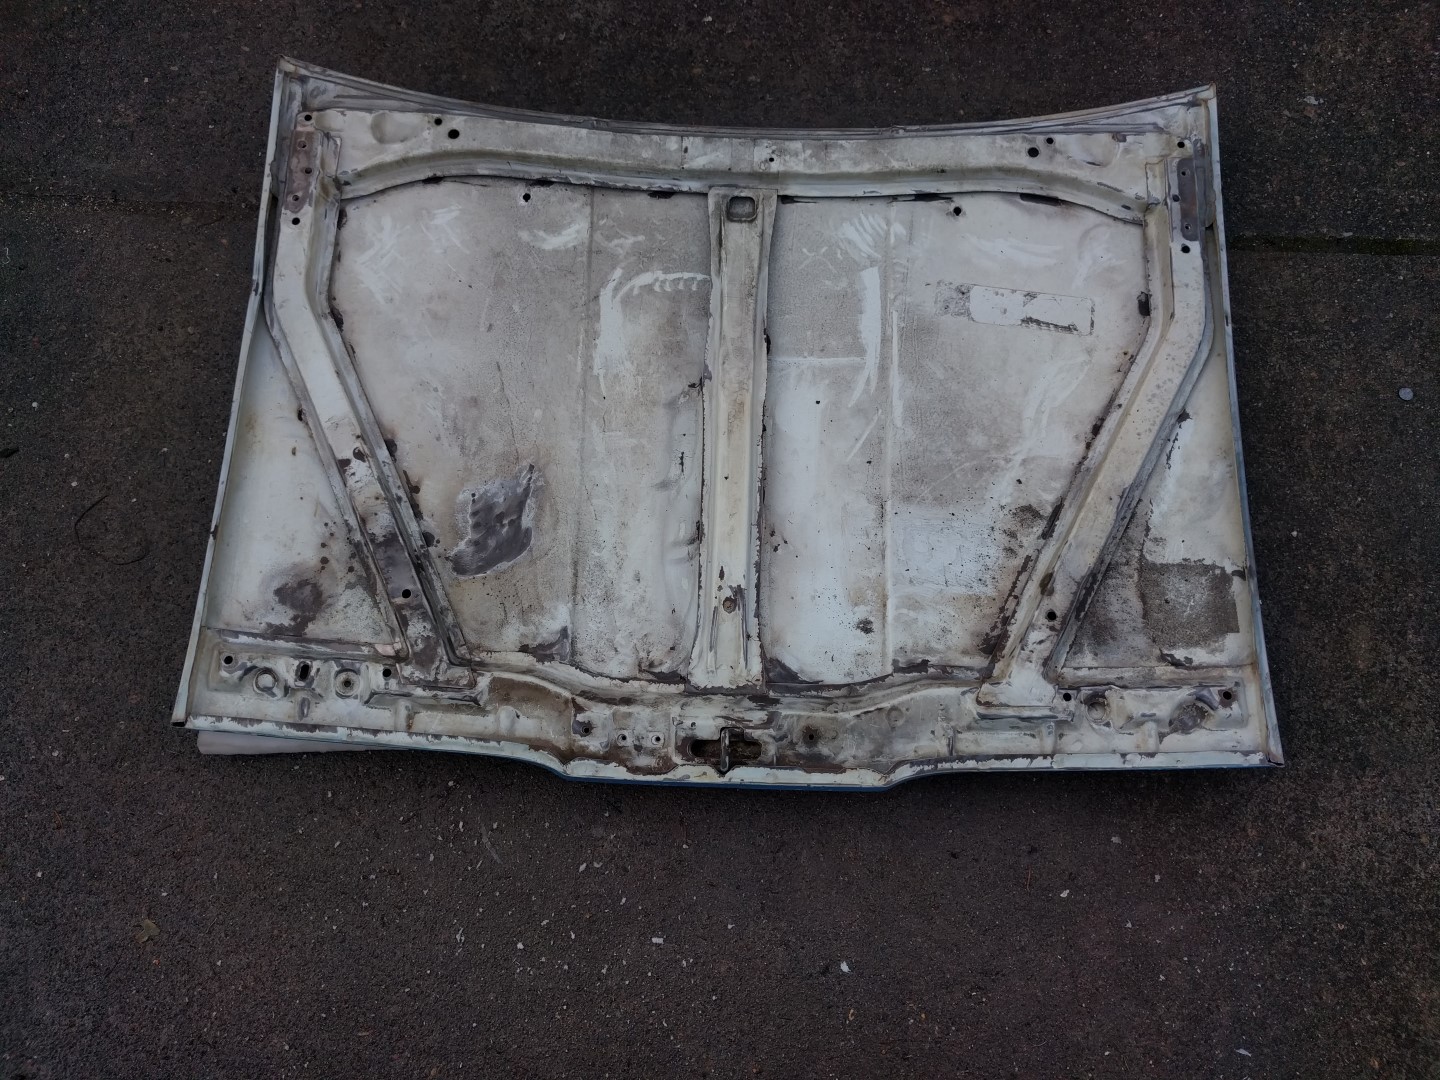
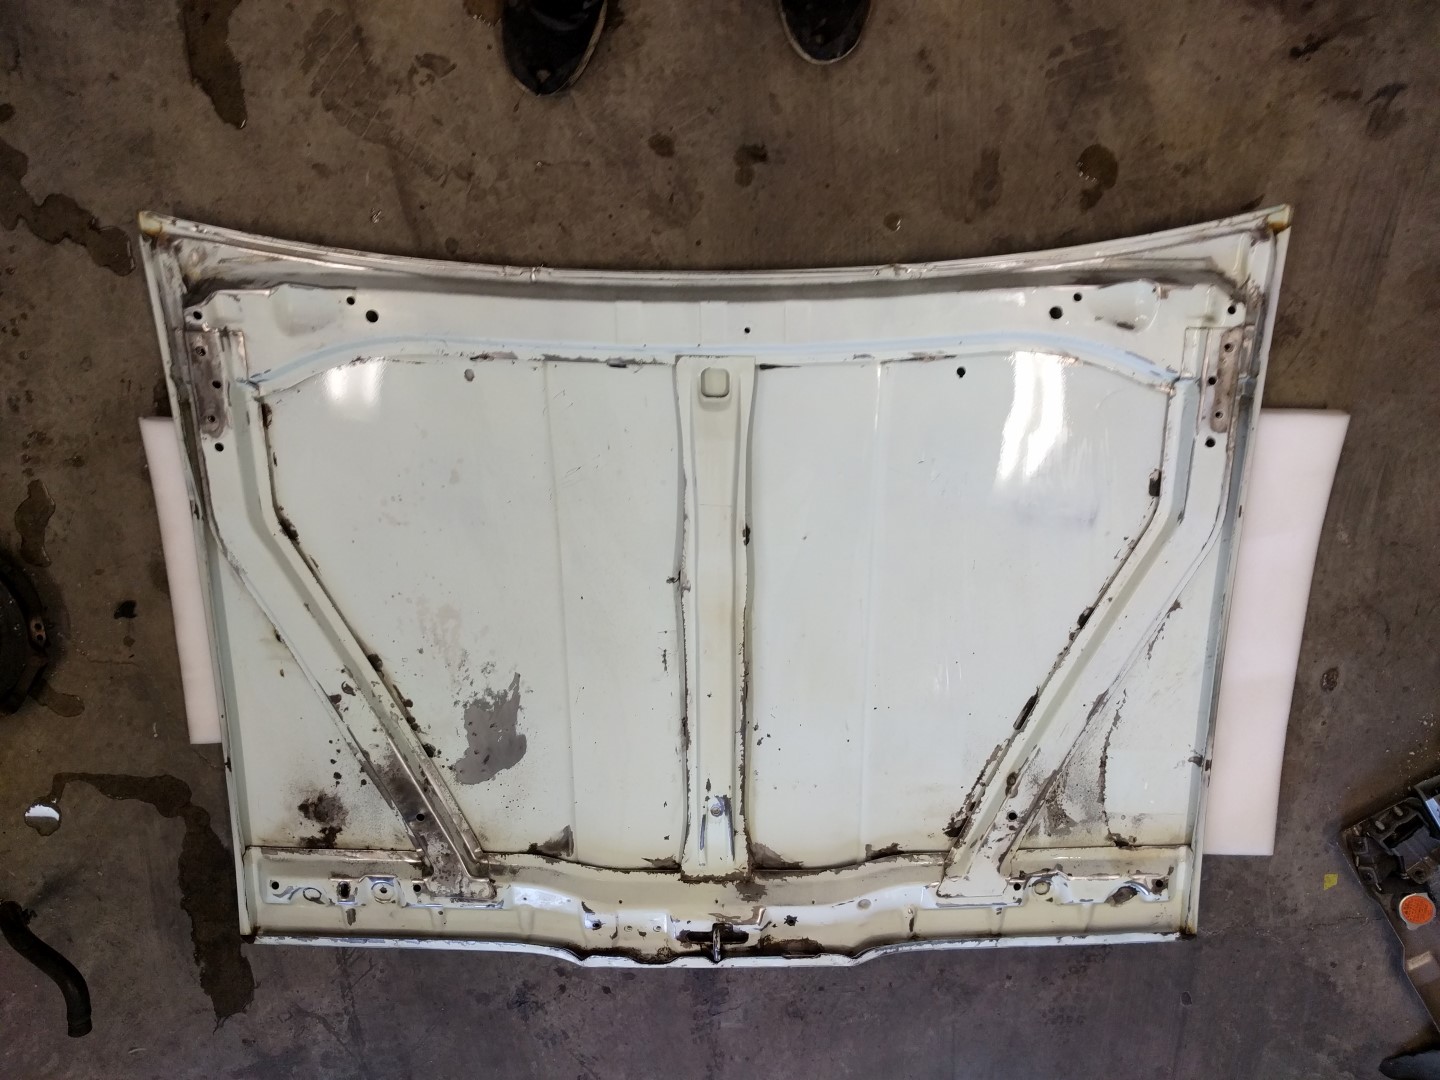
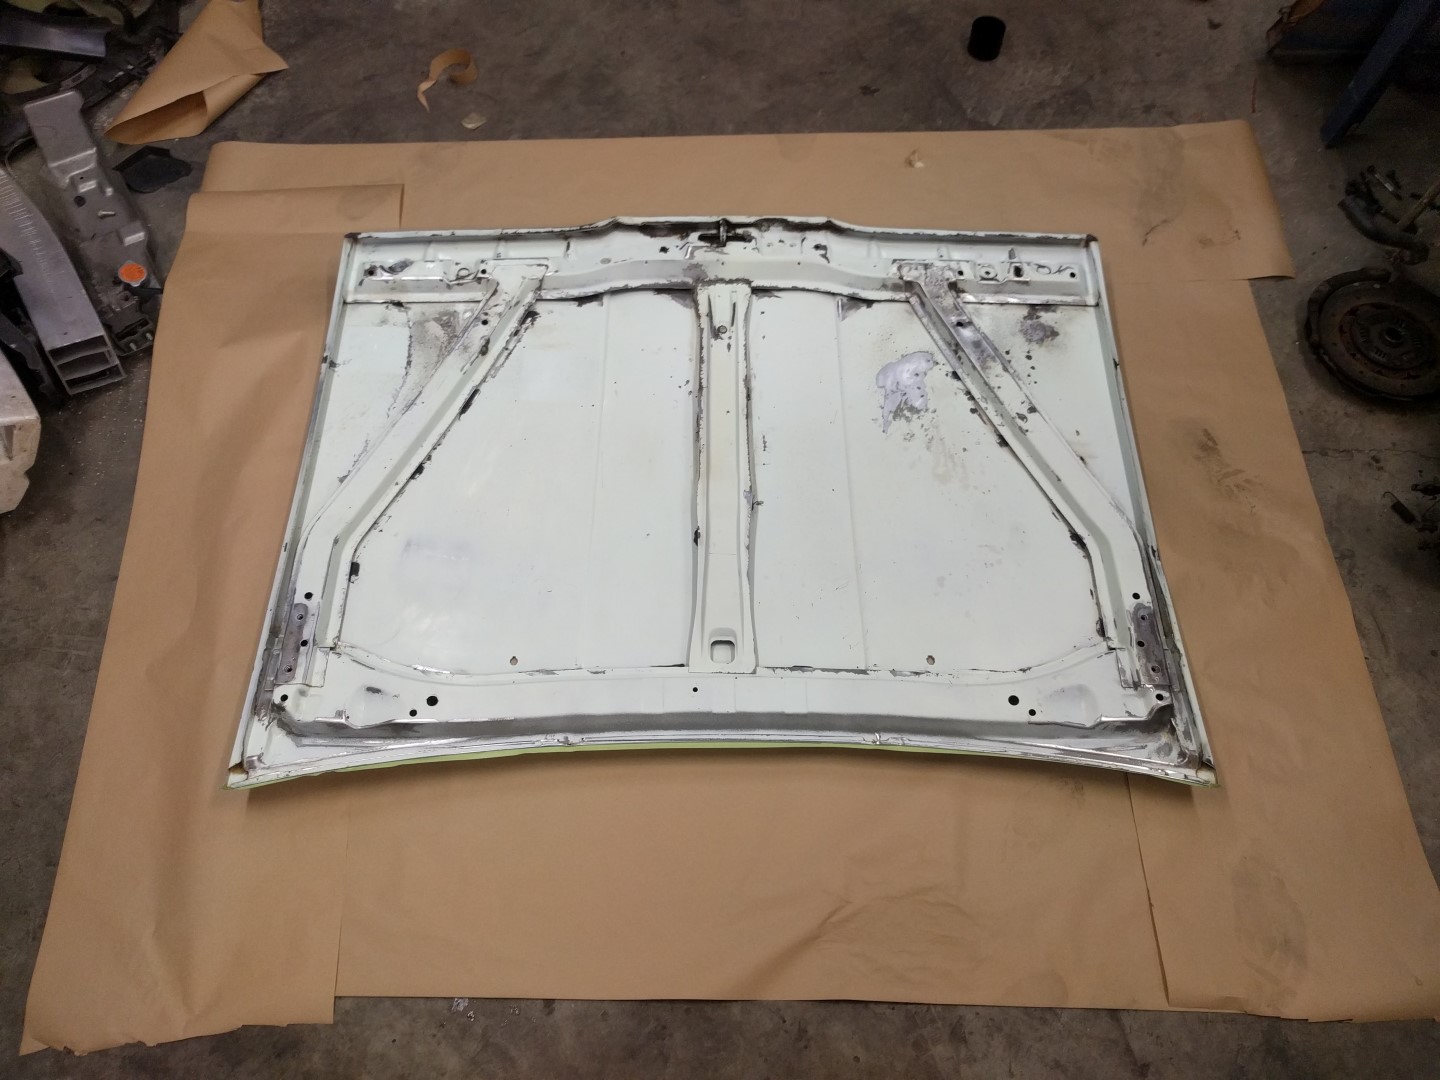
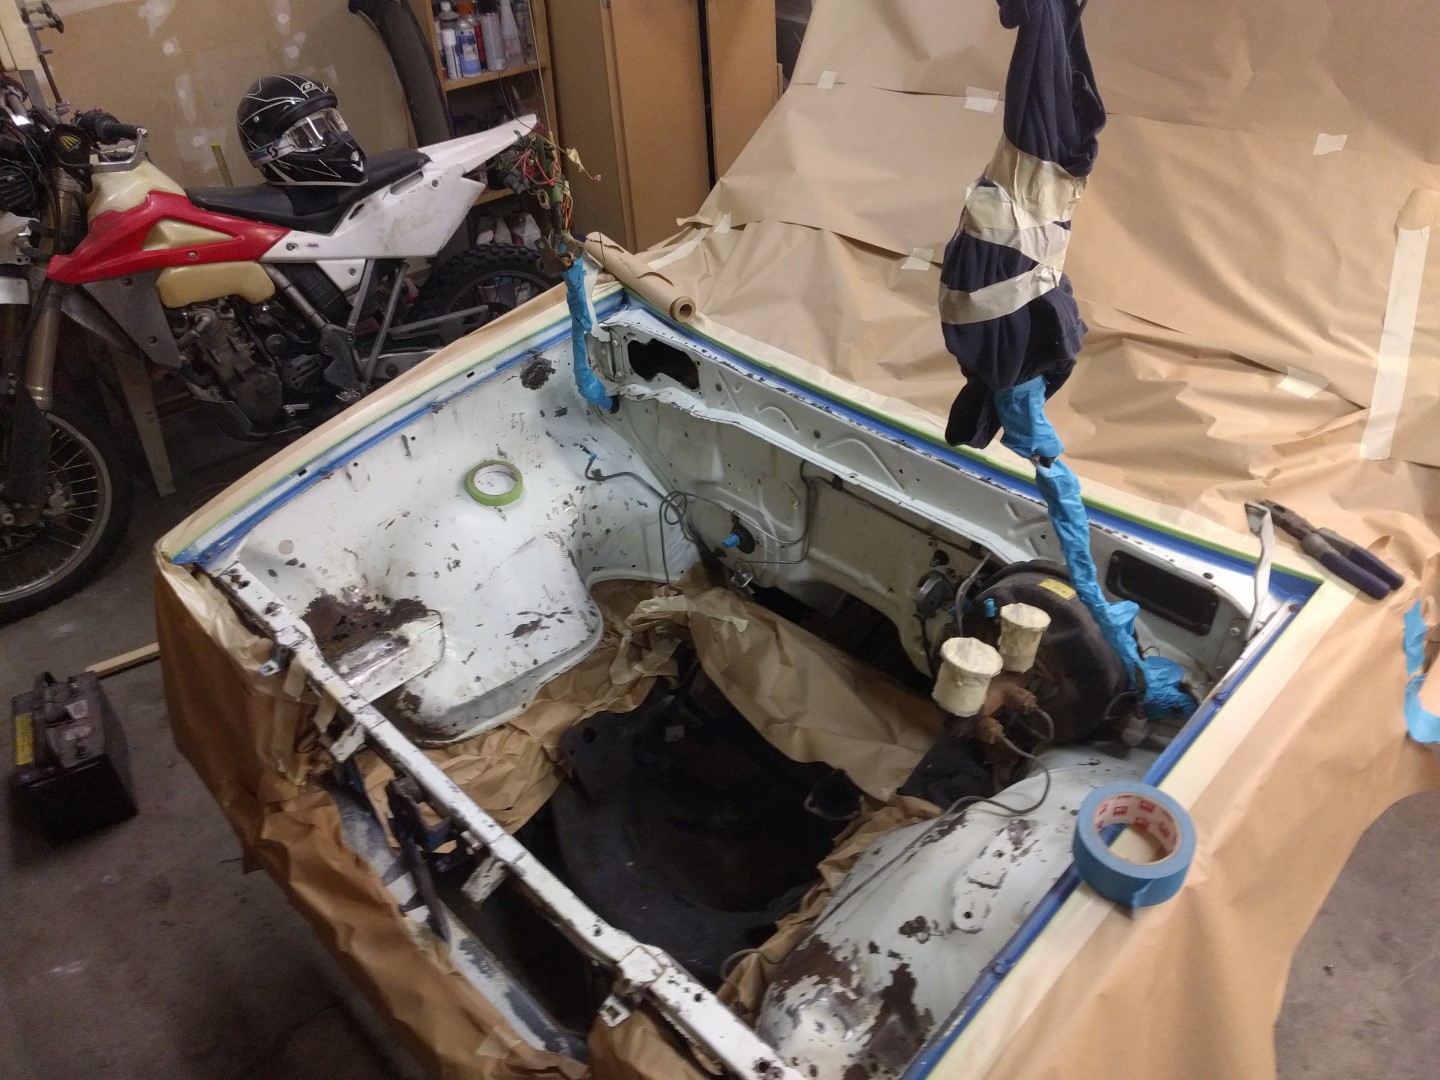
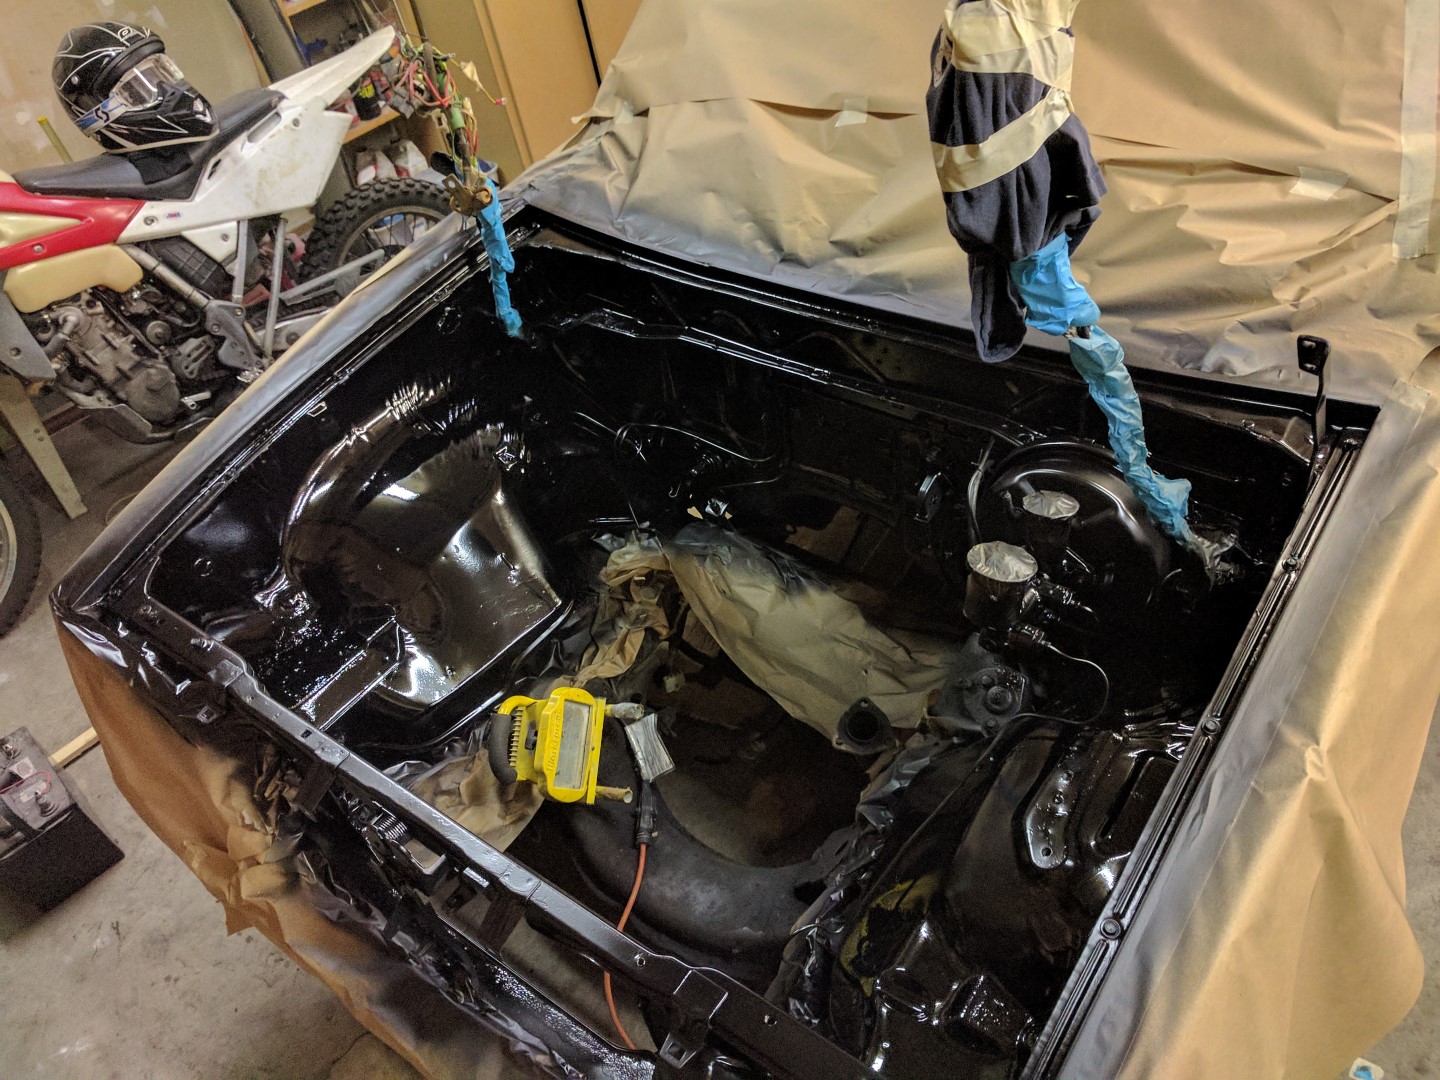
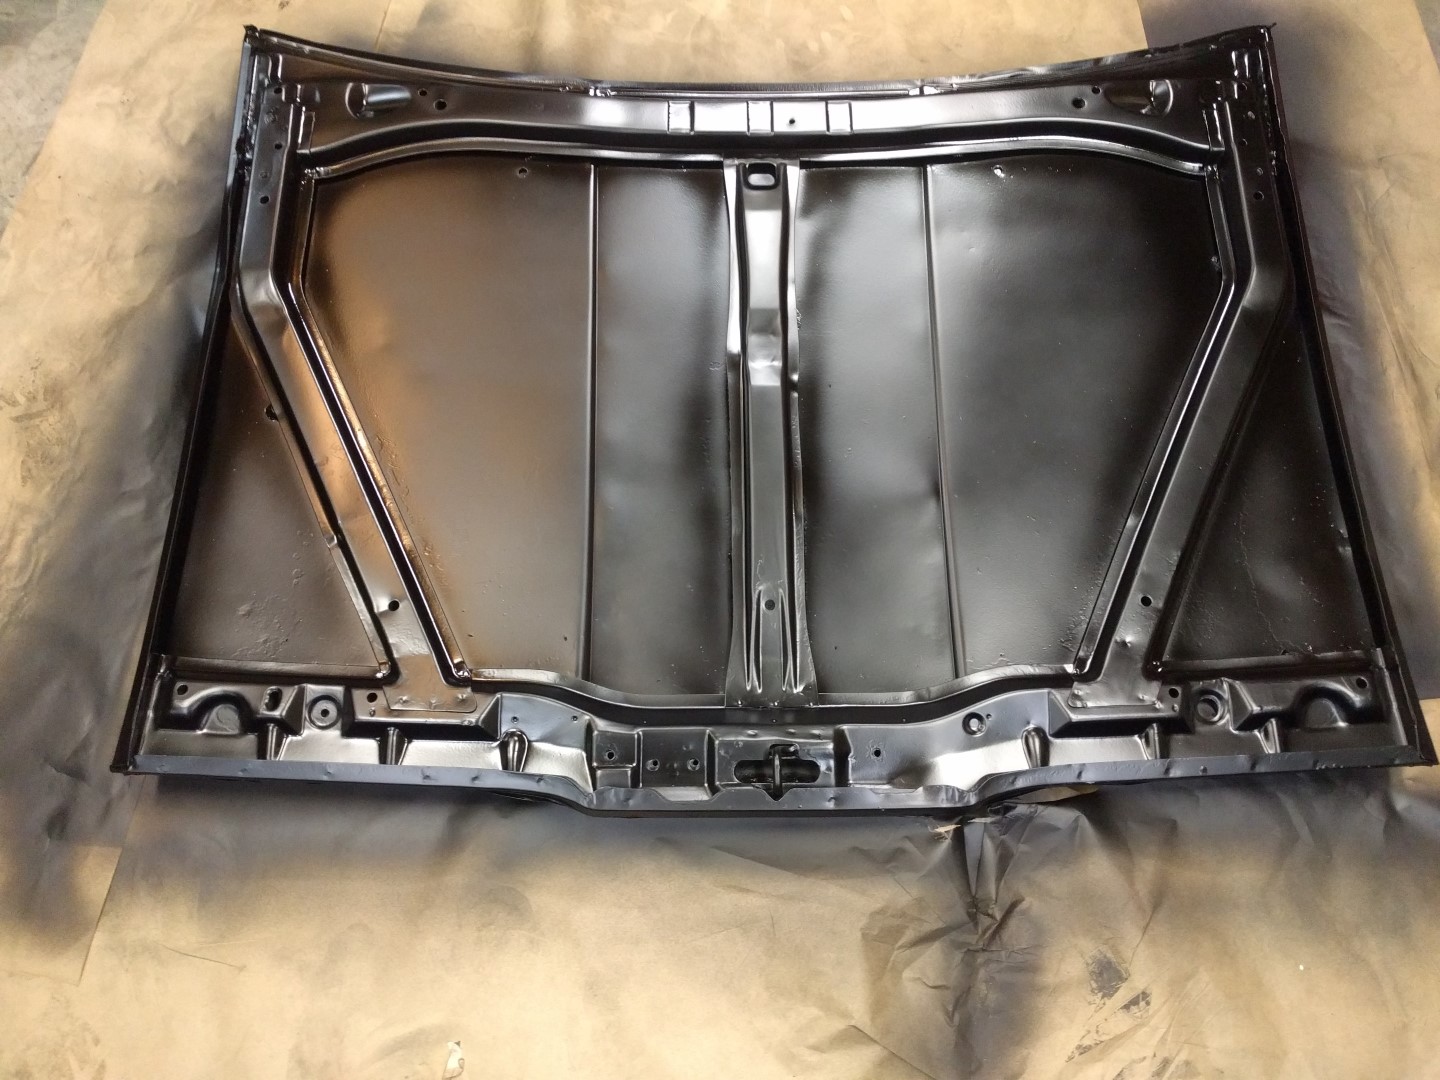
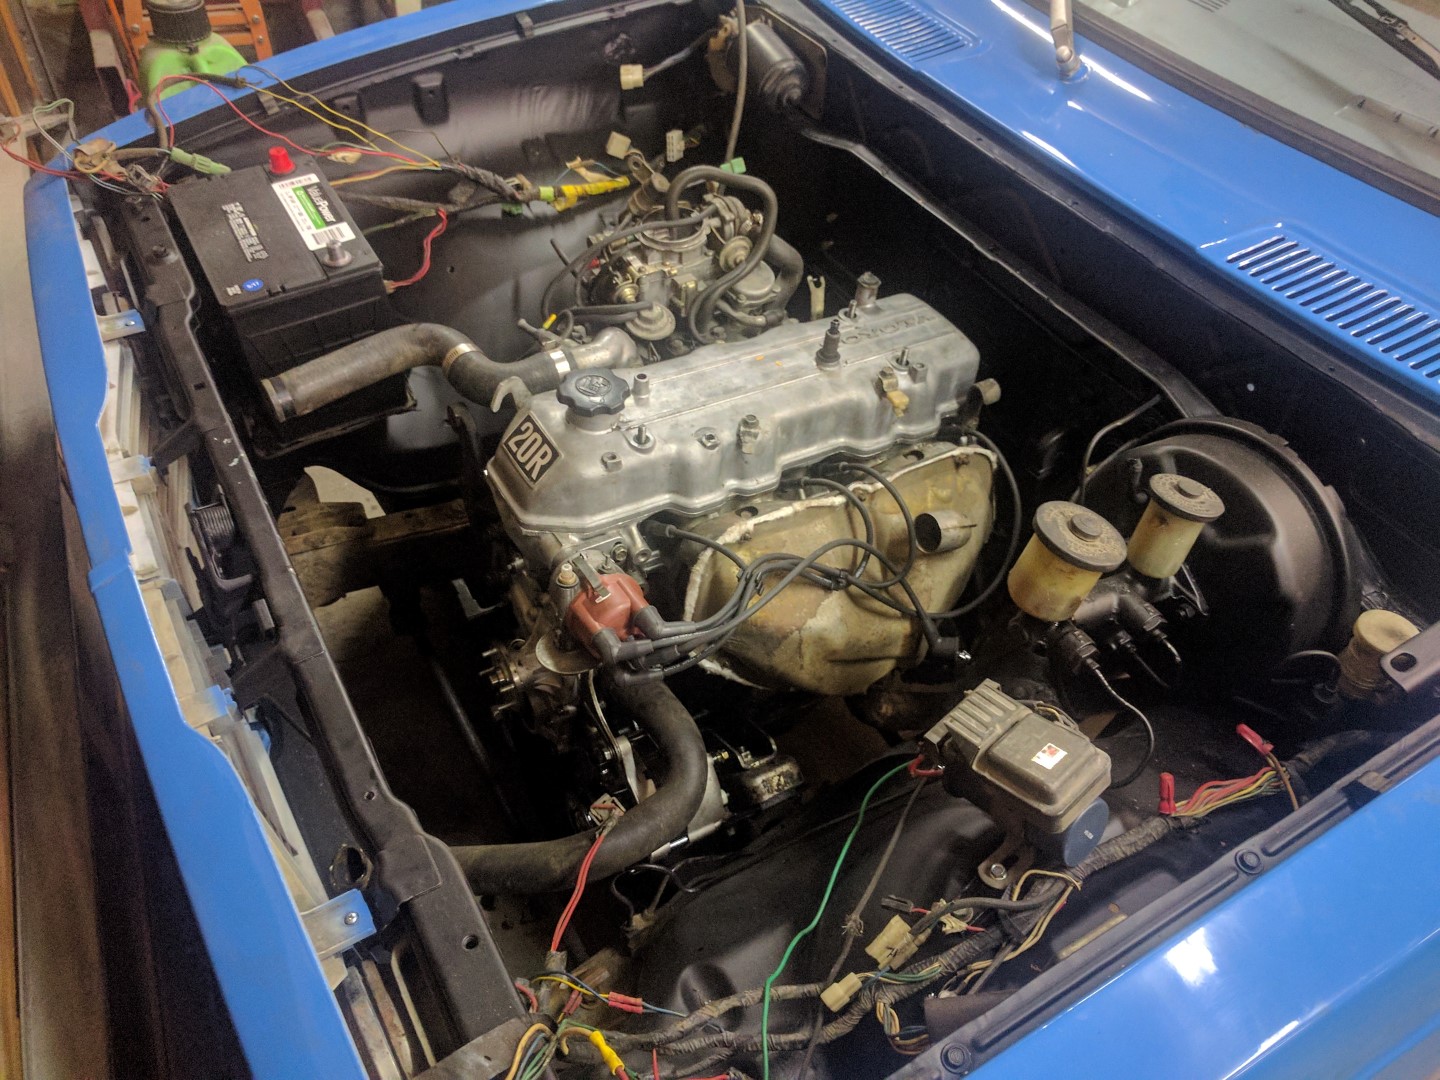
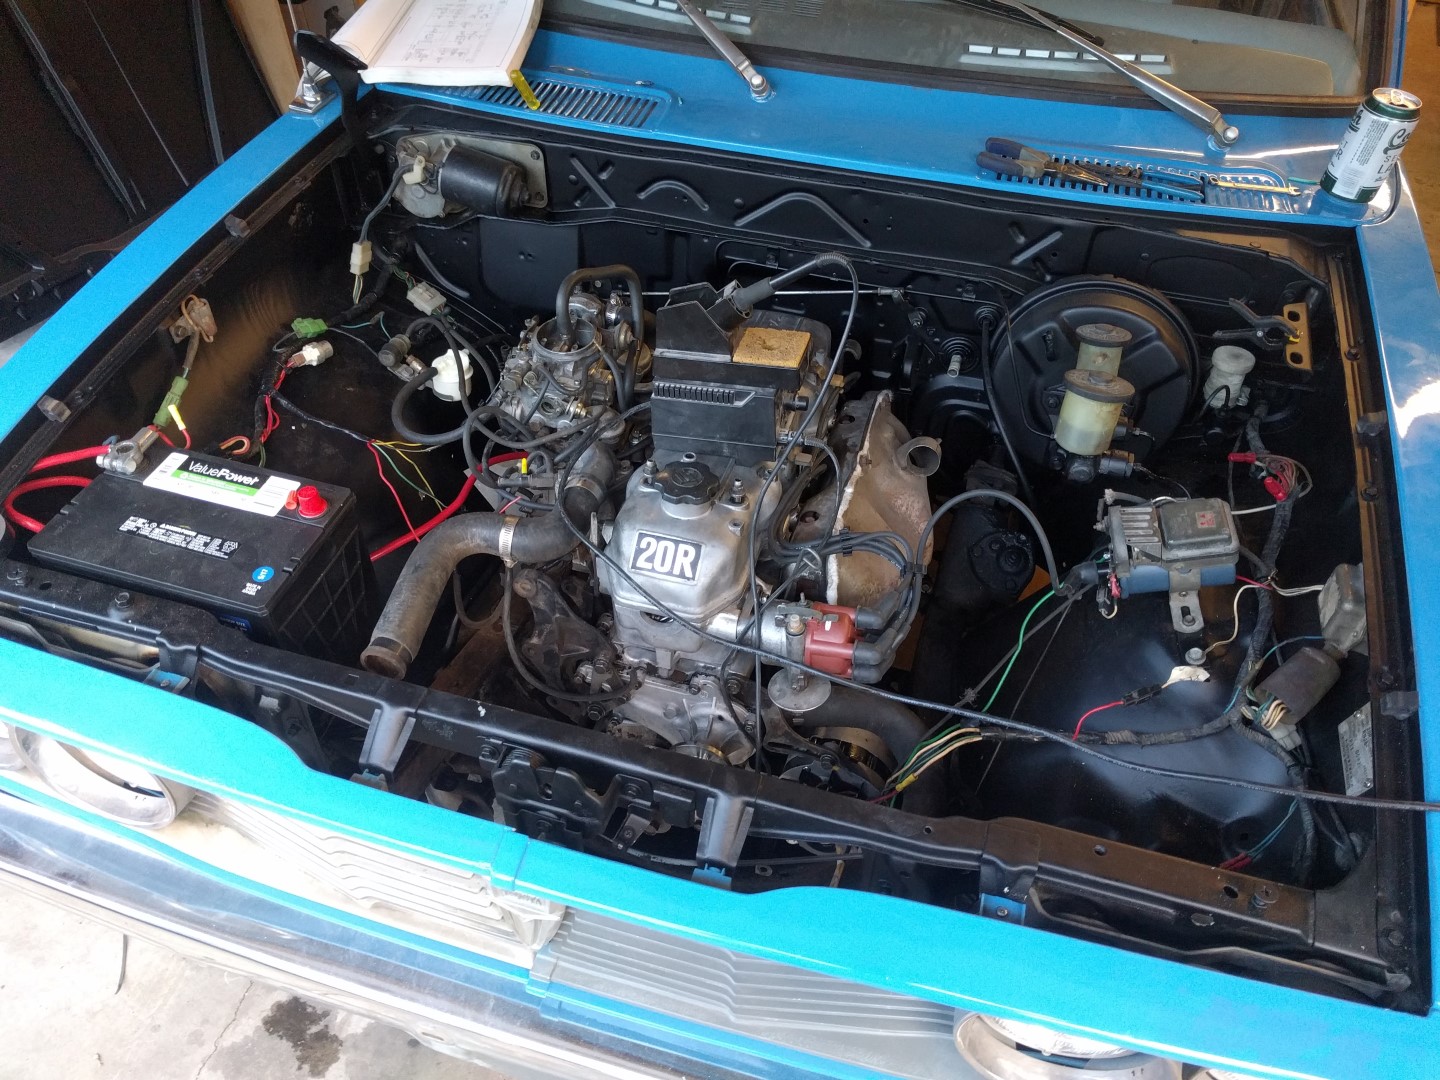
Engine Bay Paint
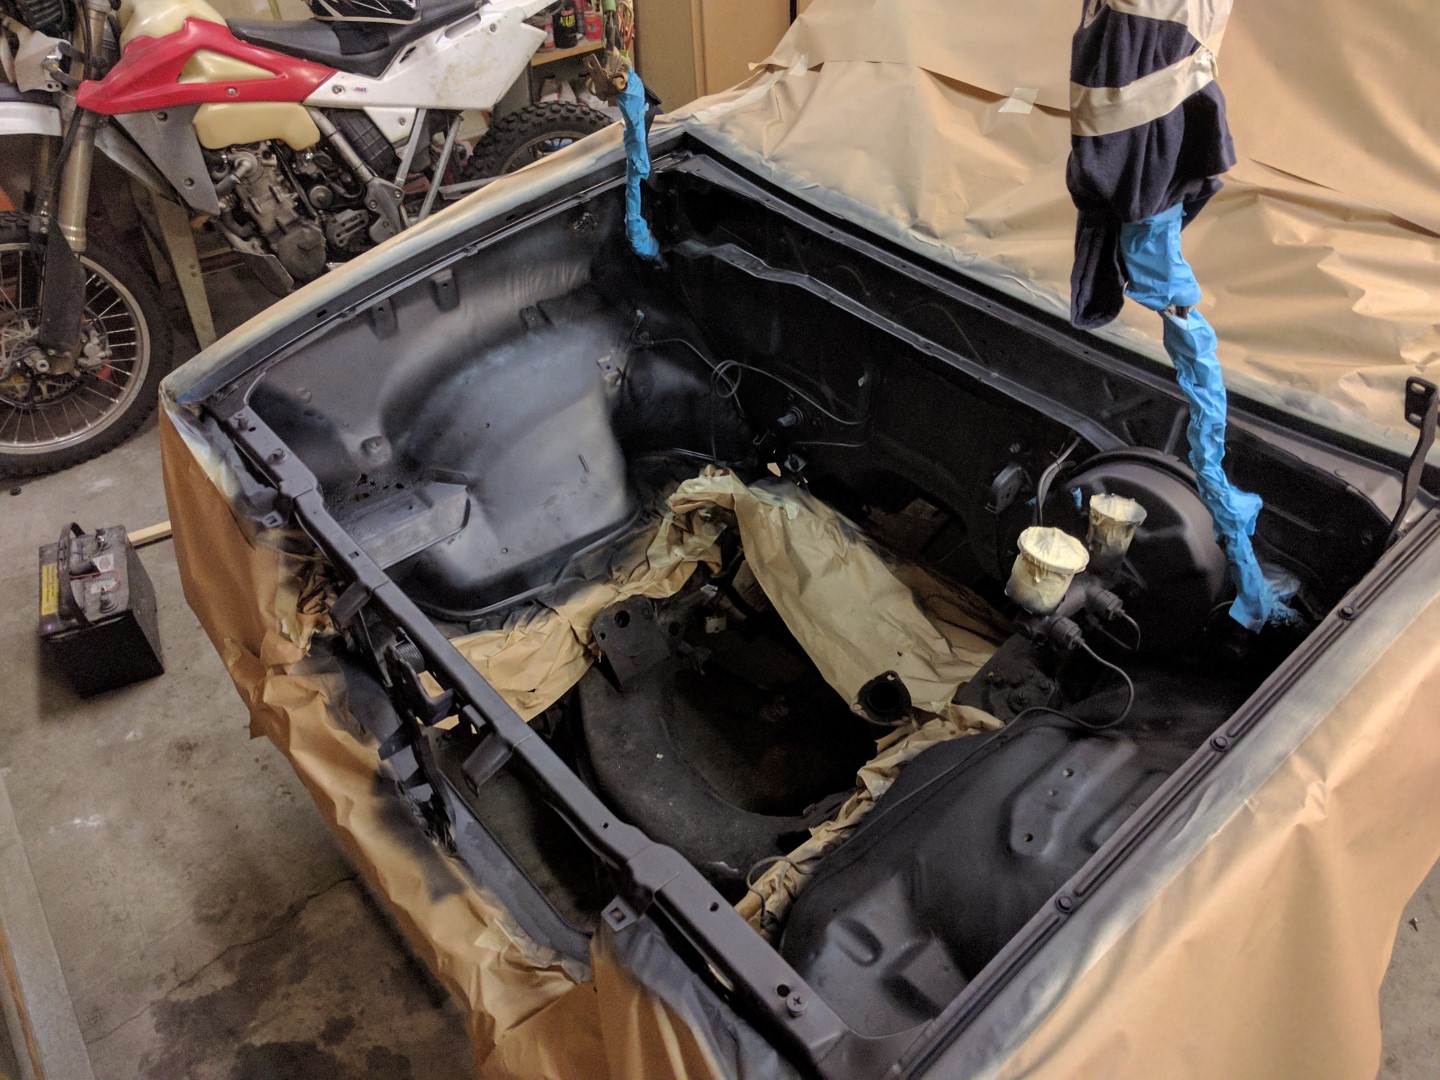
The engine bay was quite dirty from the 40 years of hard work. All the things bolted to the bay were removed and everything cleaned throughly. The amount of time spent cleaning things was not something I expect for this project! Using red scuff pads helps remove the dirt/grease/grime. The underside of the hood was also cleaned.
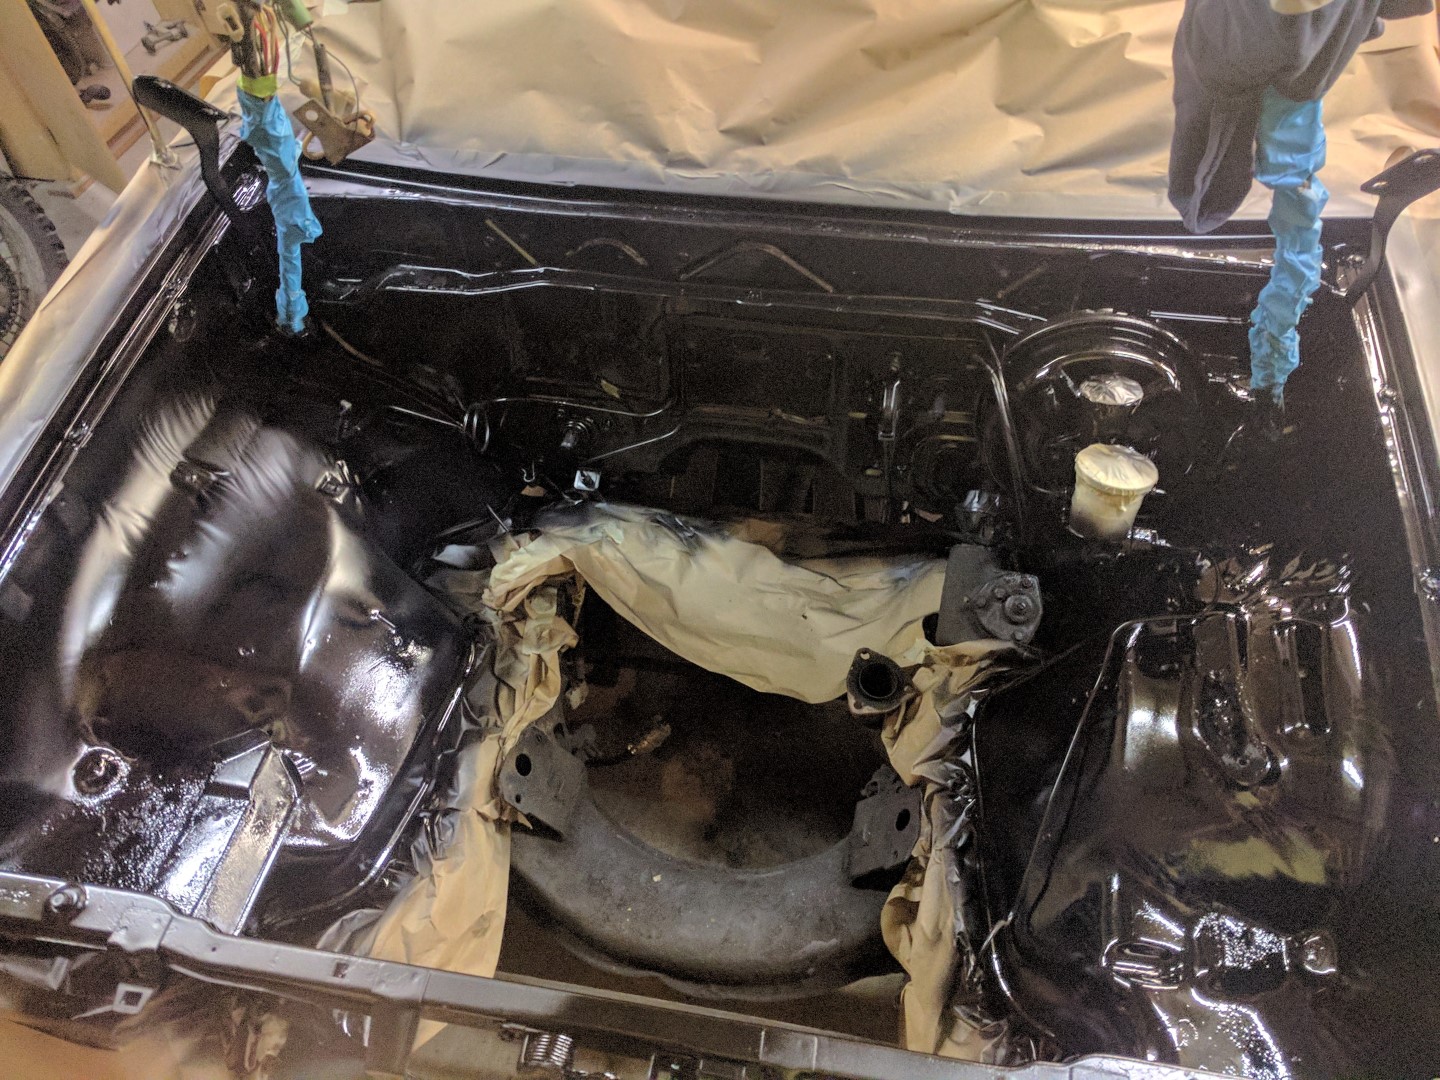
Everything was taped off to prevent overspray and rattle can black primer was applied to the hood and bay. Some cheap-ish flat black single stage paint from the special NAPAs that mix paint (decently priced, decent paint!) was sprayed on with an HVLP gun.
The results are great! Looks much better than the stock white.


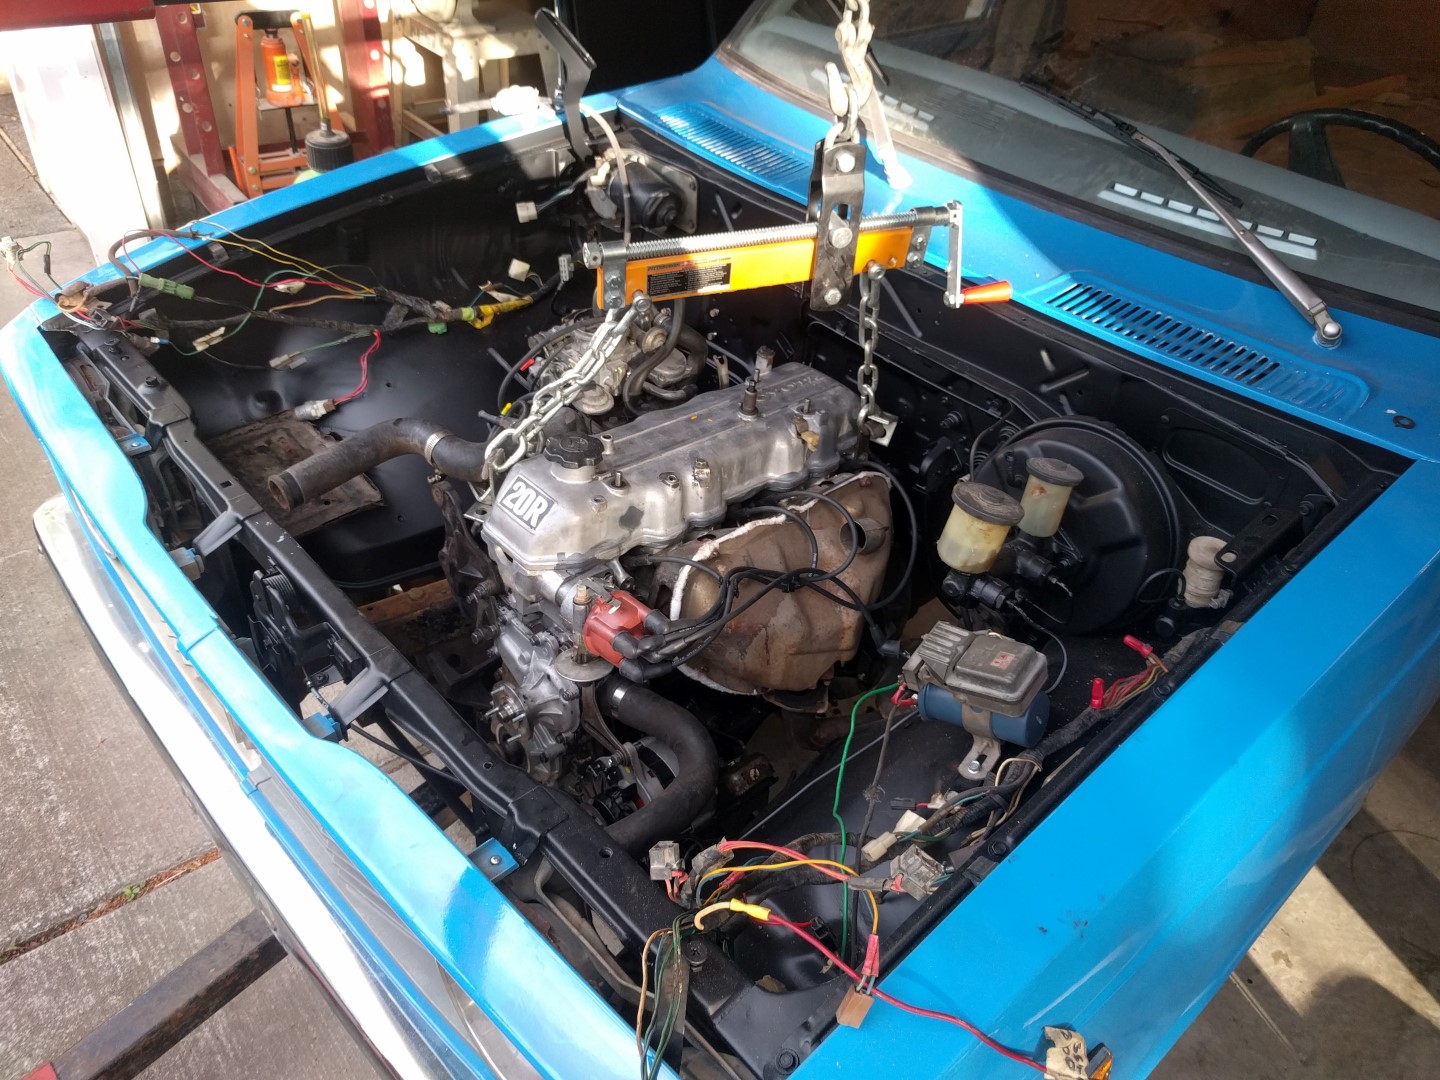
Engine Install
Putting the engine back in is the exact opposite of the removal. Using a cherry picker with a engine load leveler make the job very easy. Both the transmission and engine mounts were replaced which are super cheap from RockAuto.
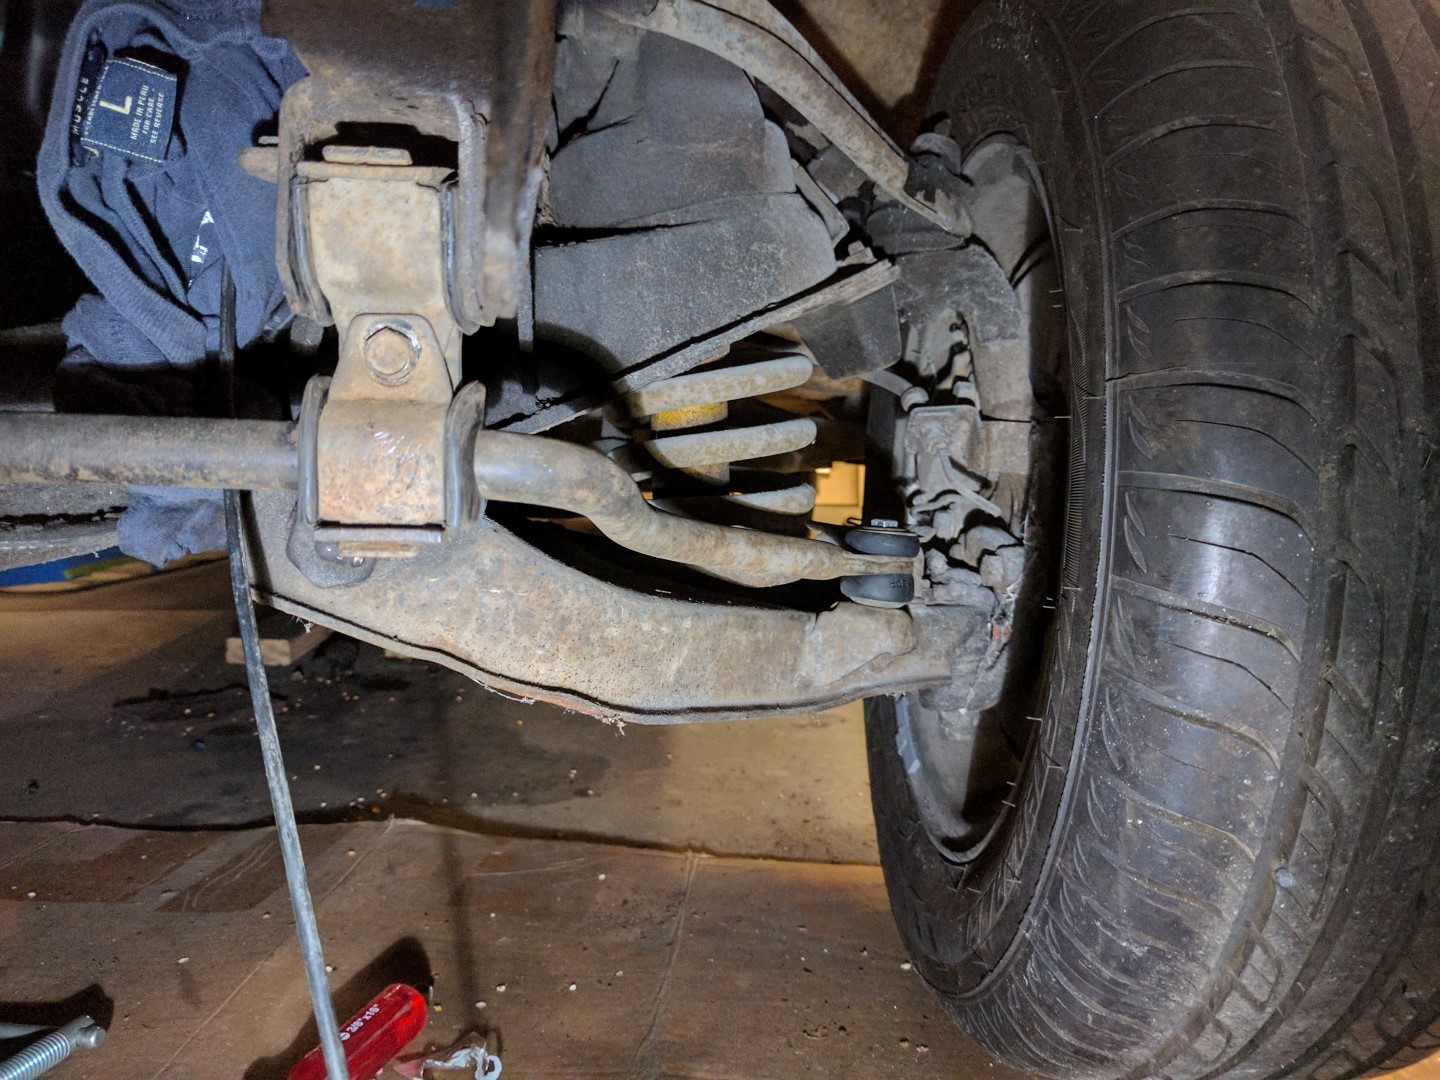
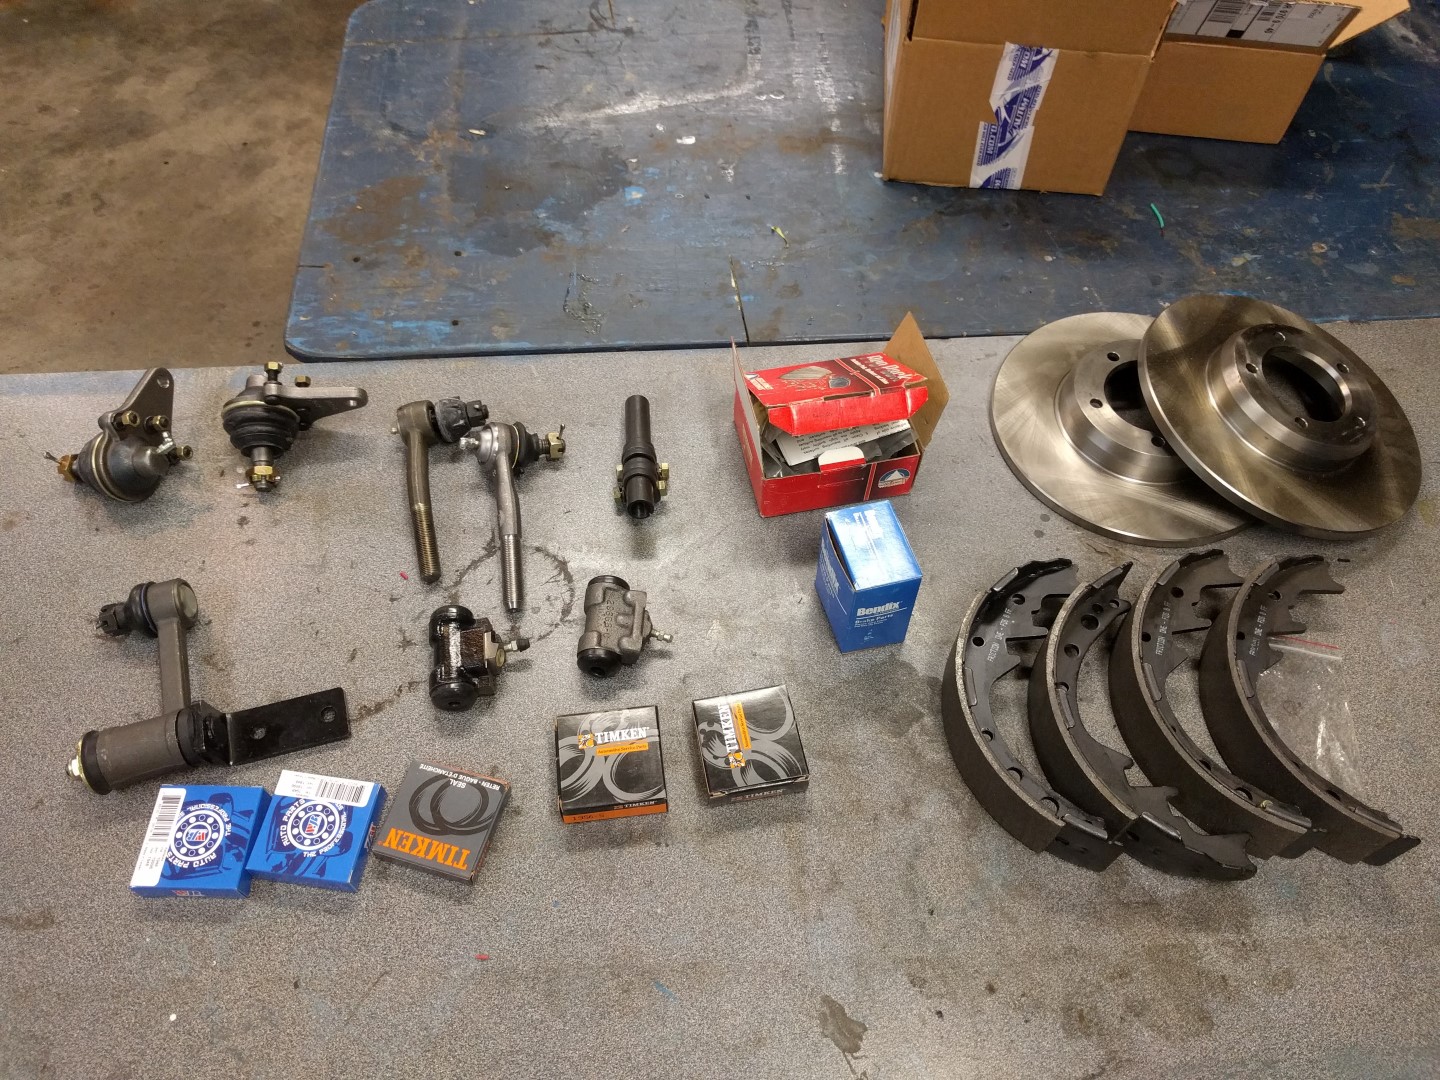
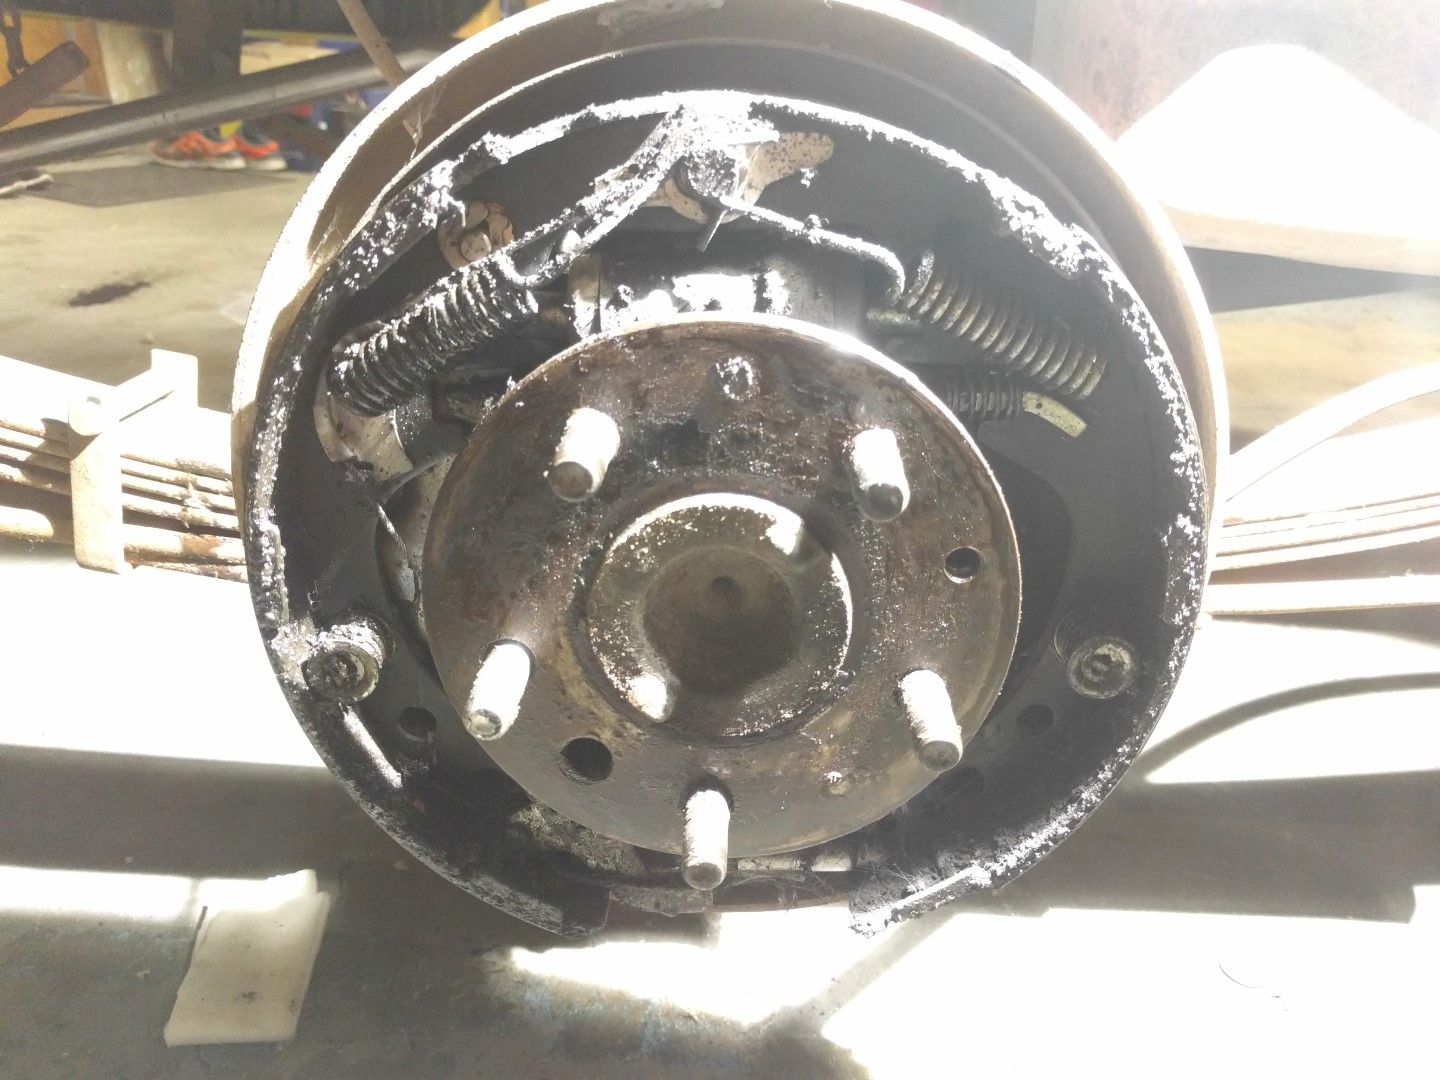
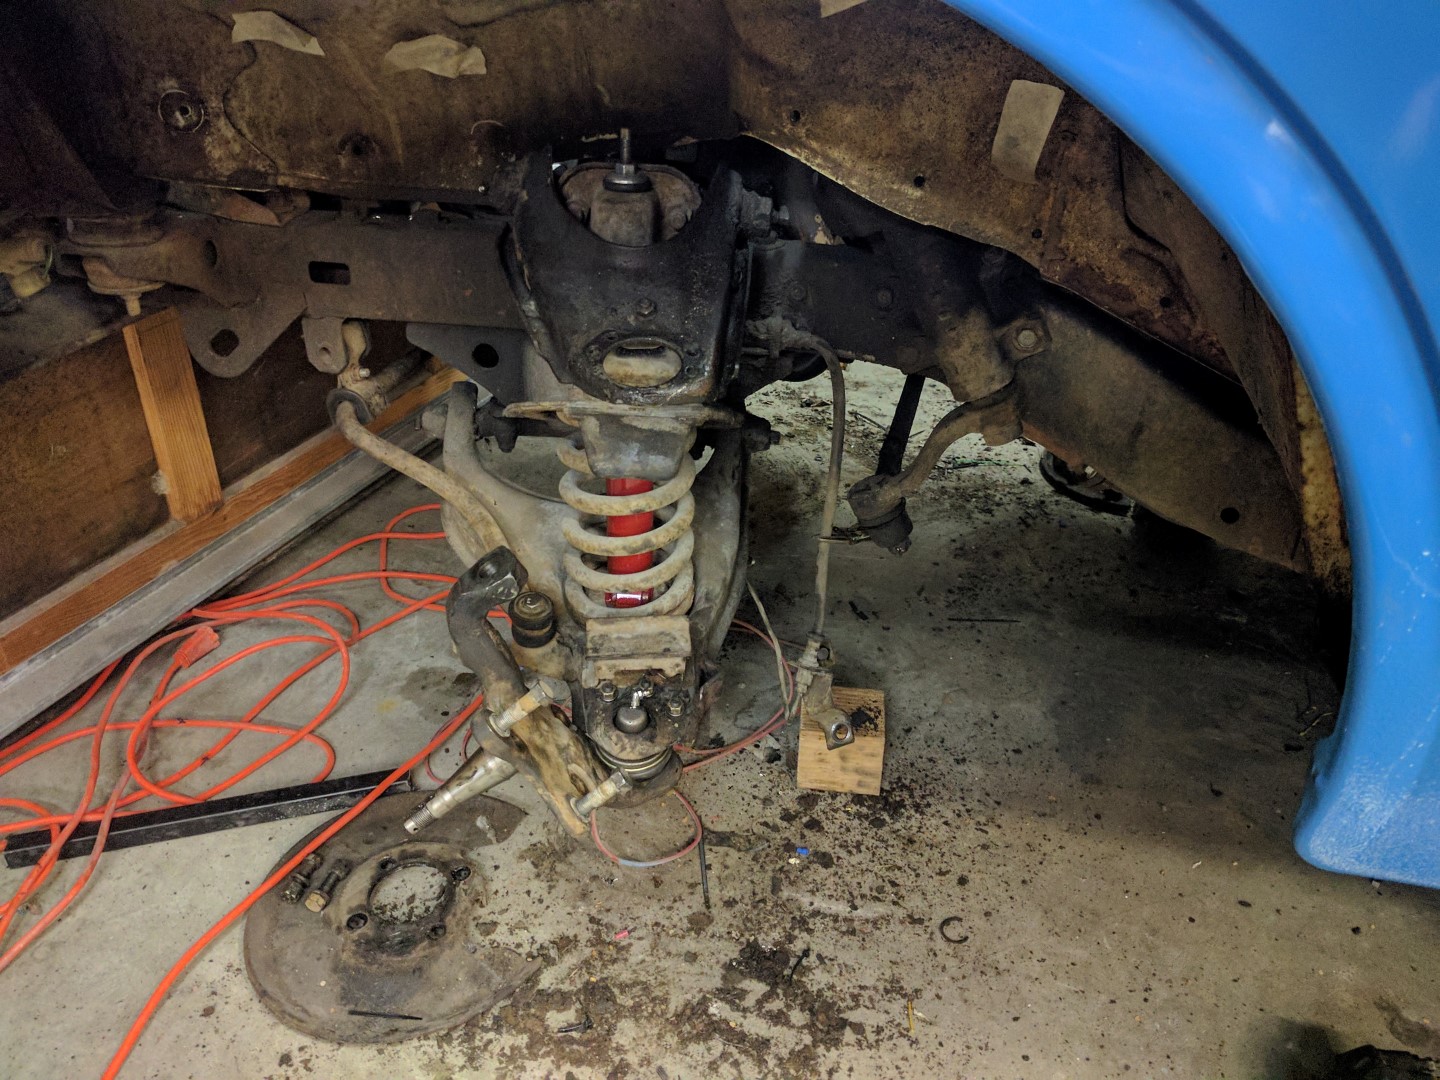
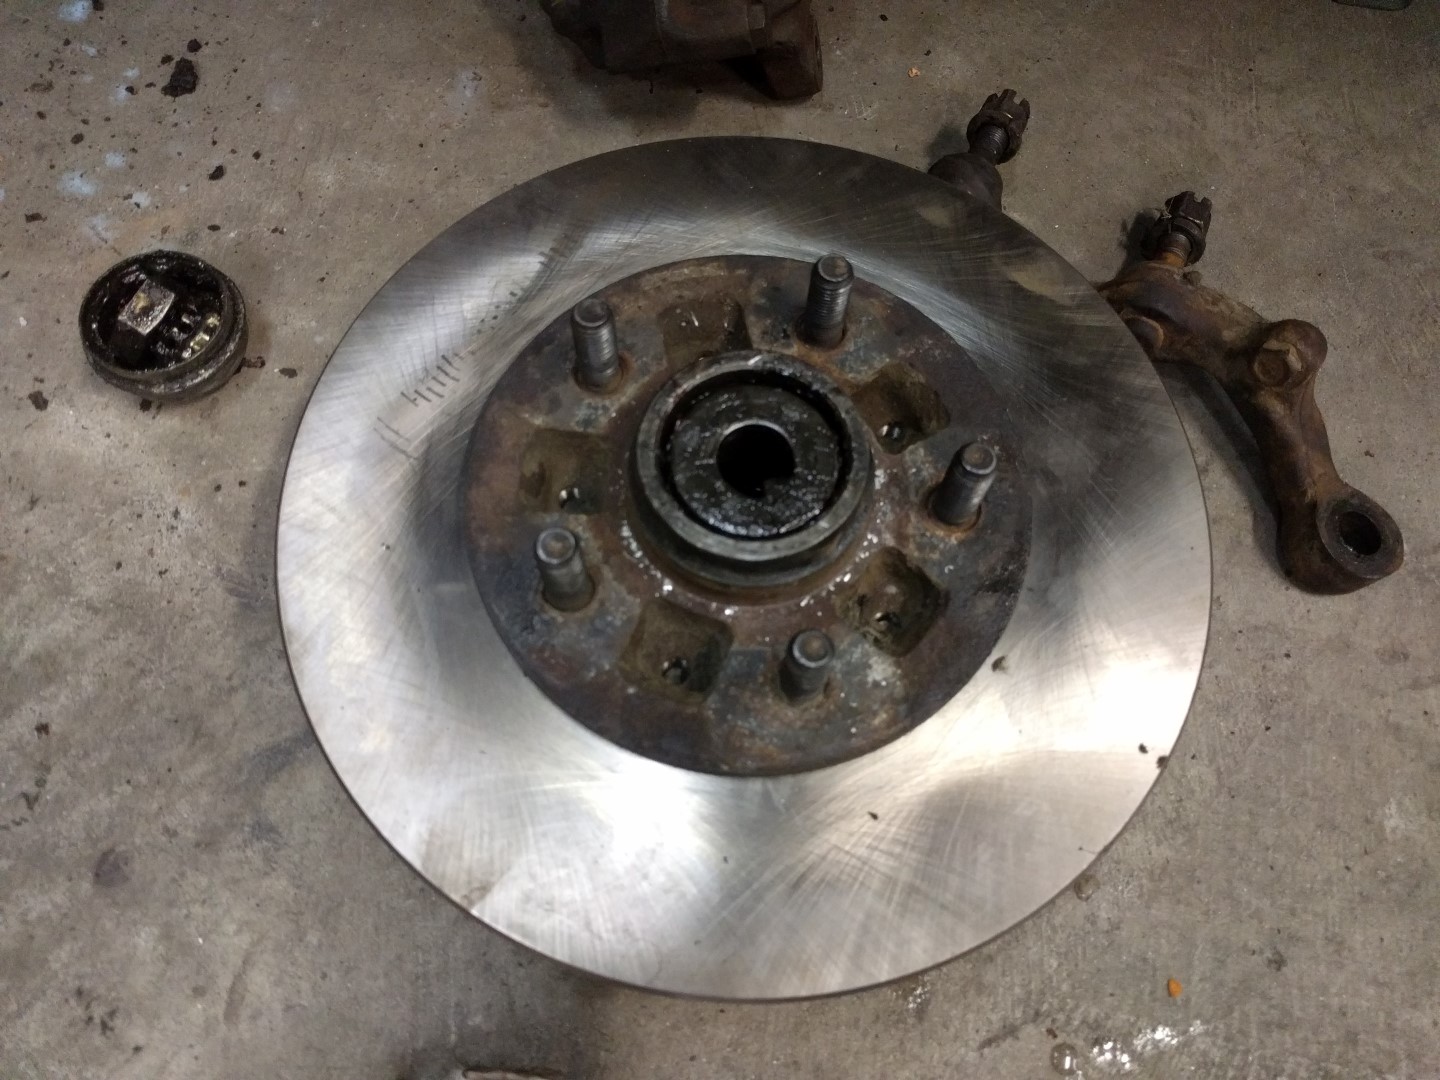
Suspension and Steering and Brakes
All of the suspension, steering, and brake components that are subjected to wear and tear were replaced which includes:
- Sway arm bushings
- Brake pads
- Rear brake cylinders
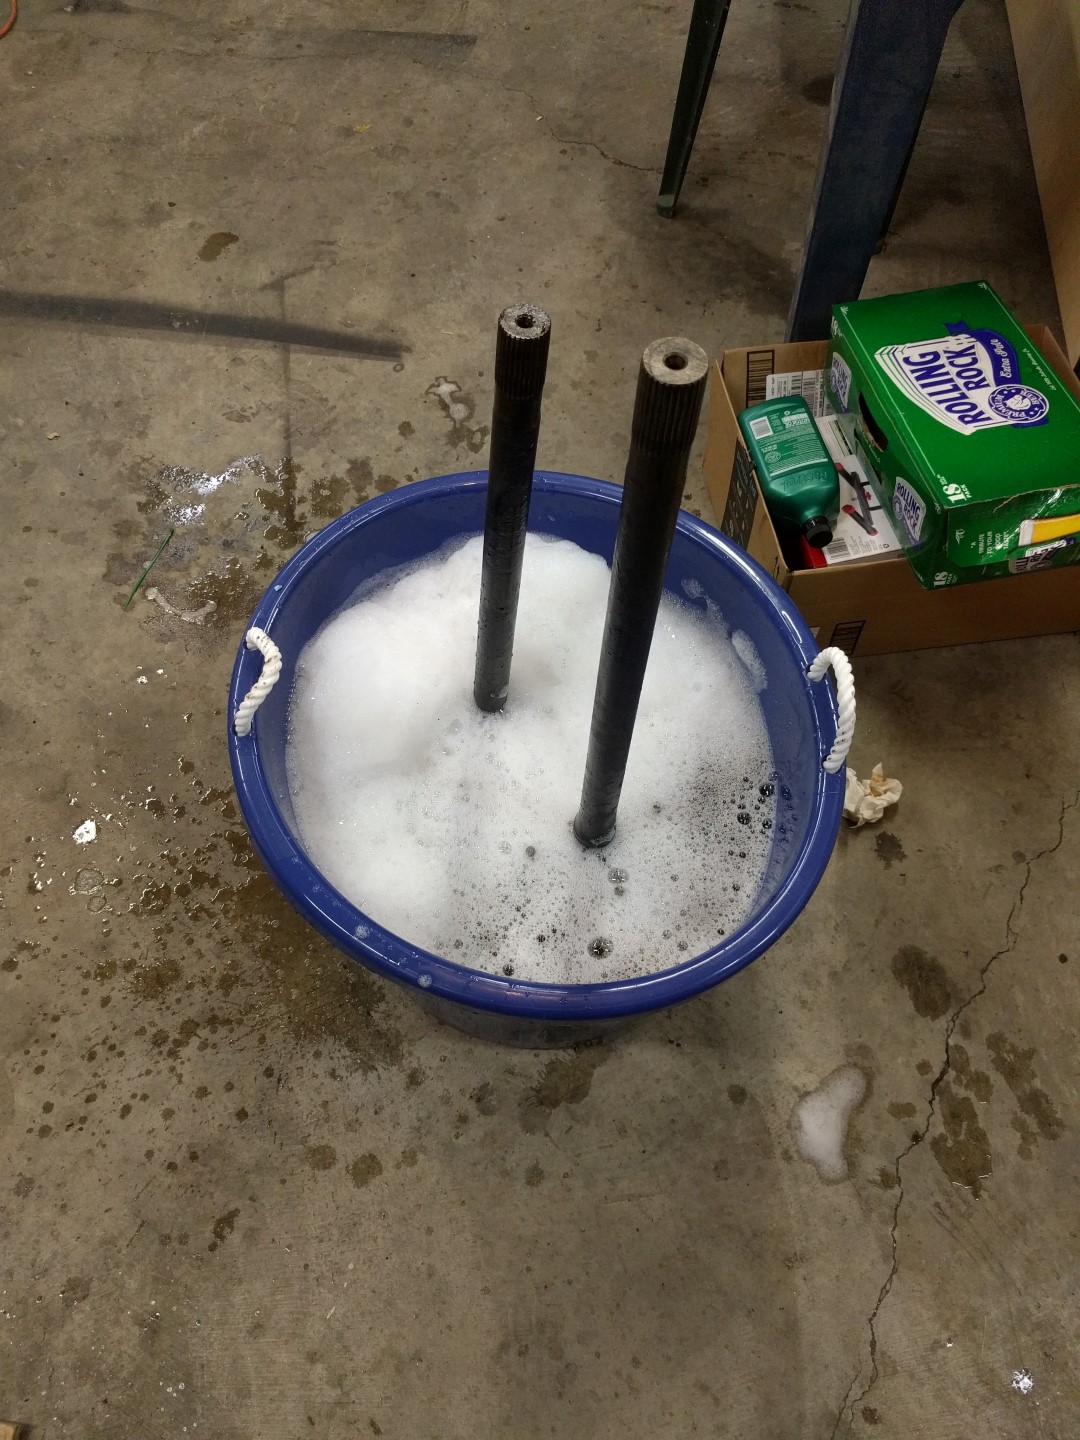
- Axle seals
- Shocks
- Front brake discs
- Repacked wheel bearings with grease
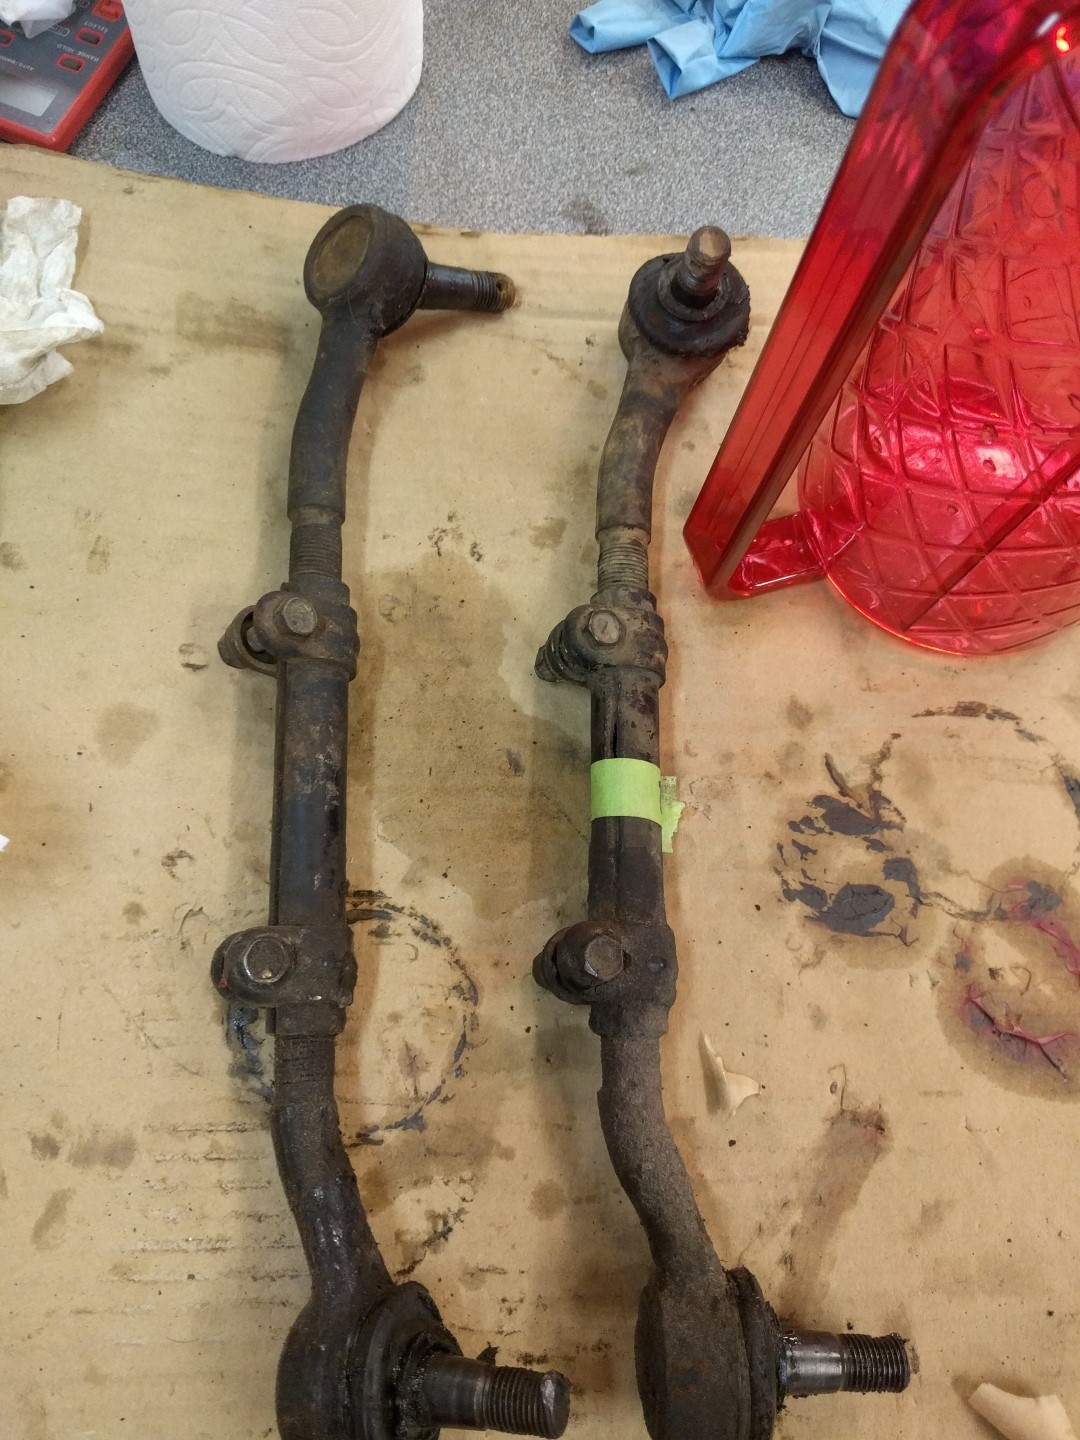
- Tie rod ends and sleeves
- Pitman arm
- Upper/lower ball joints


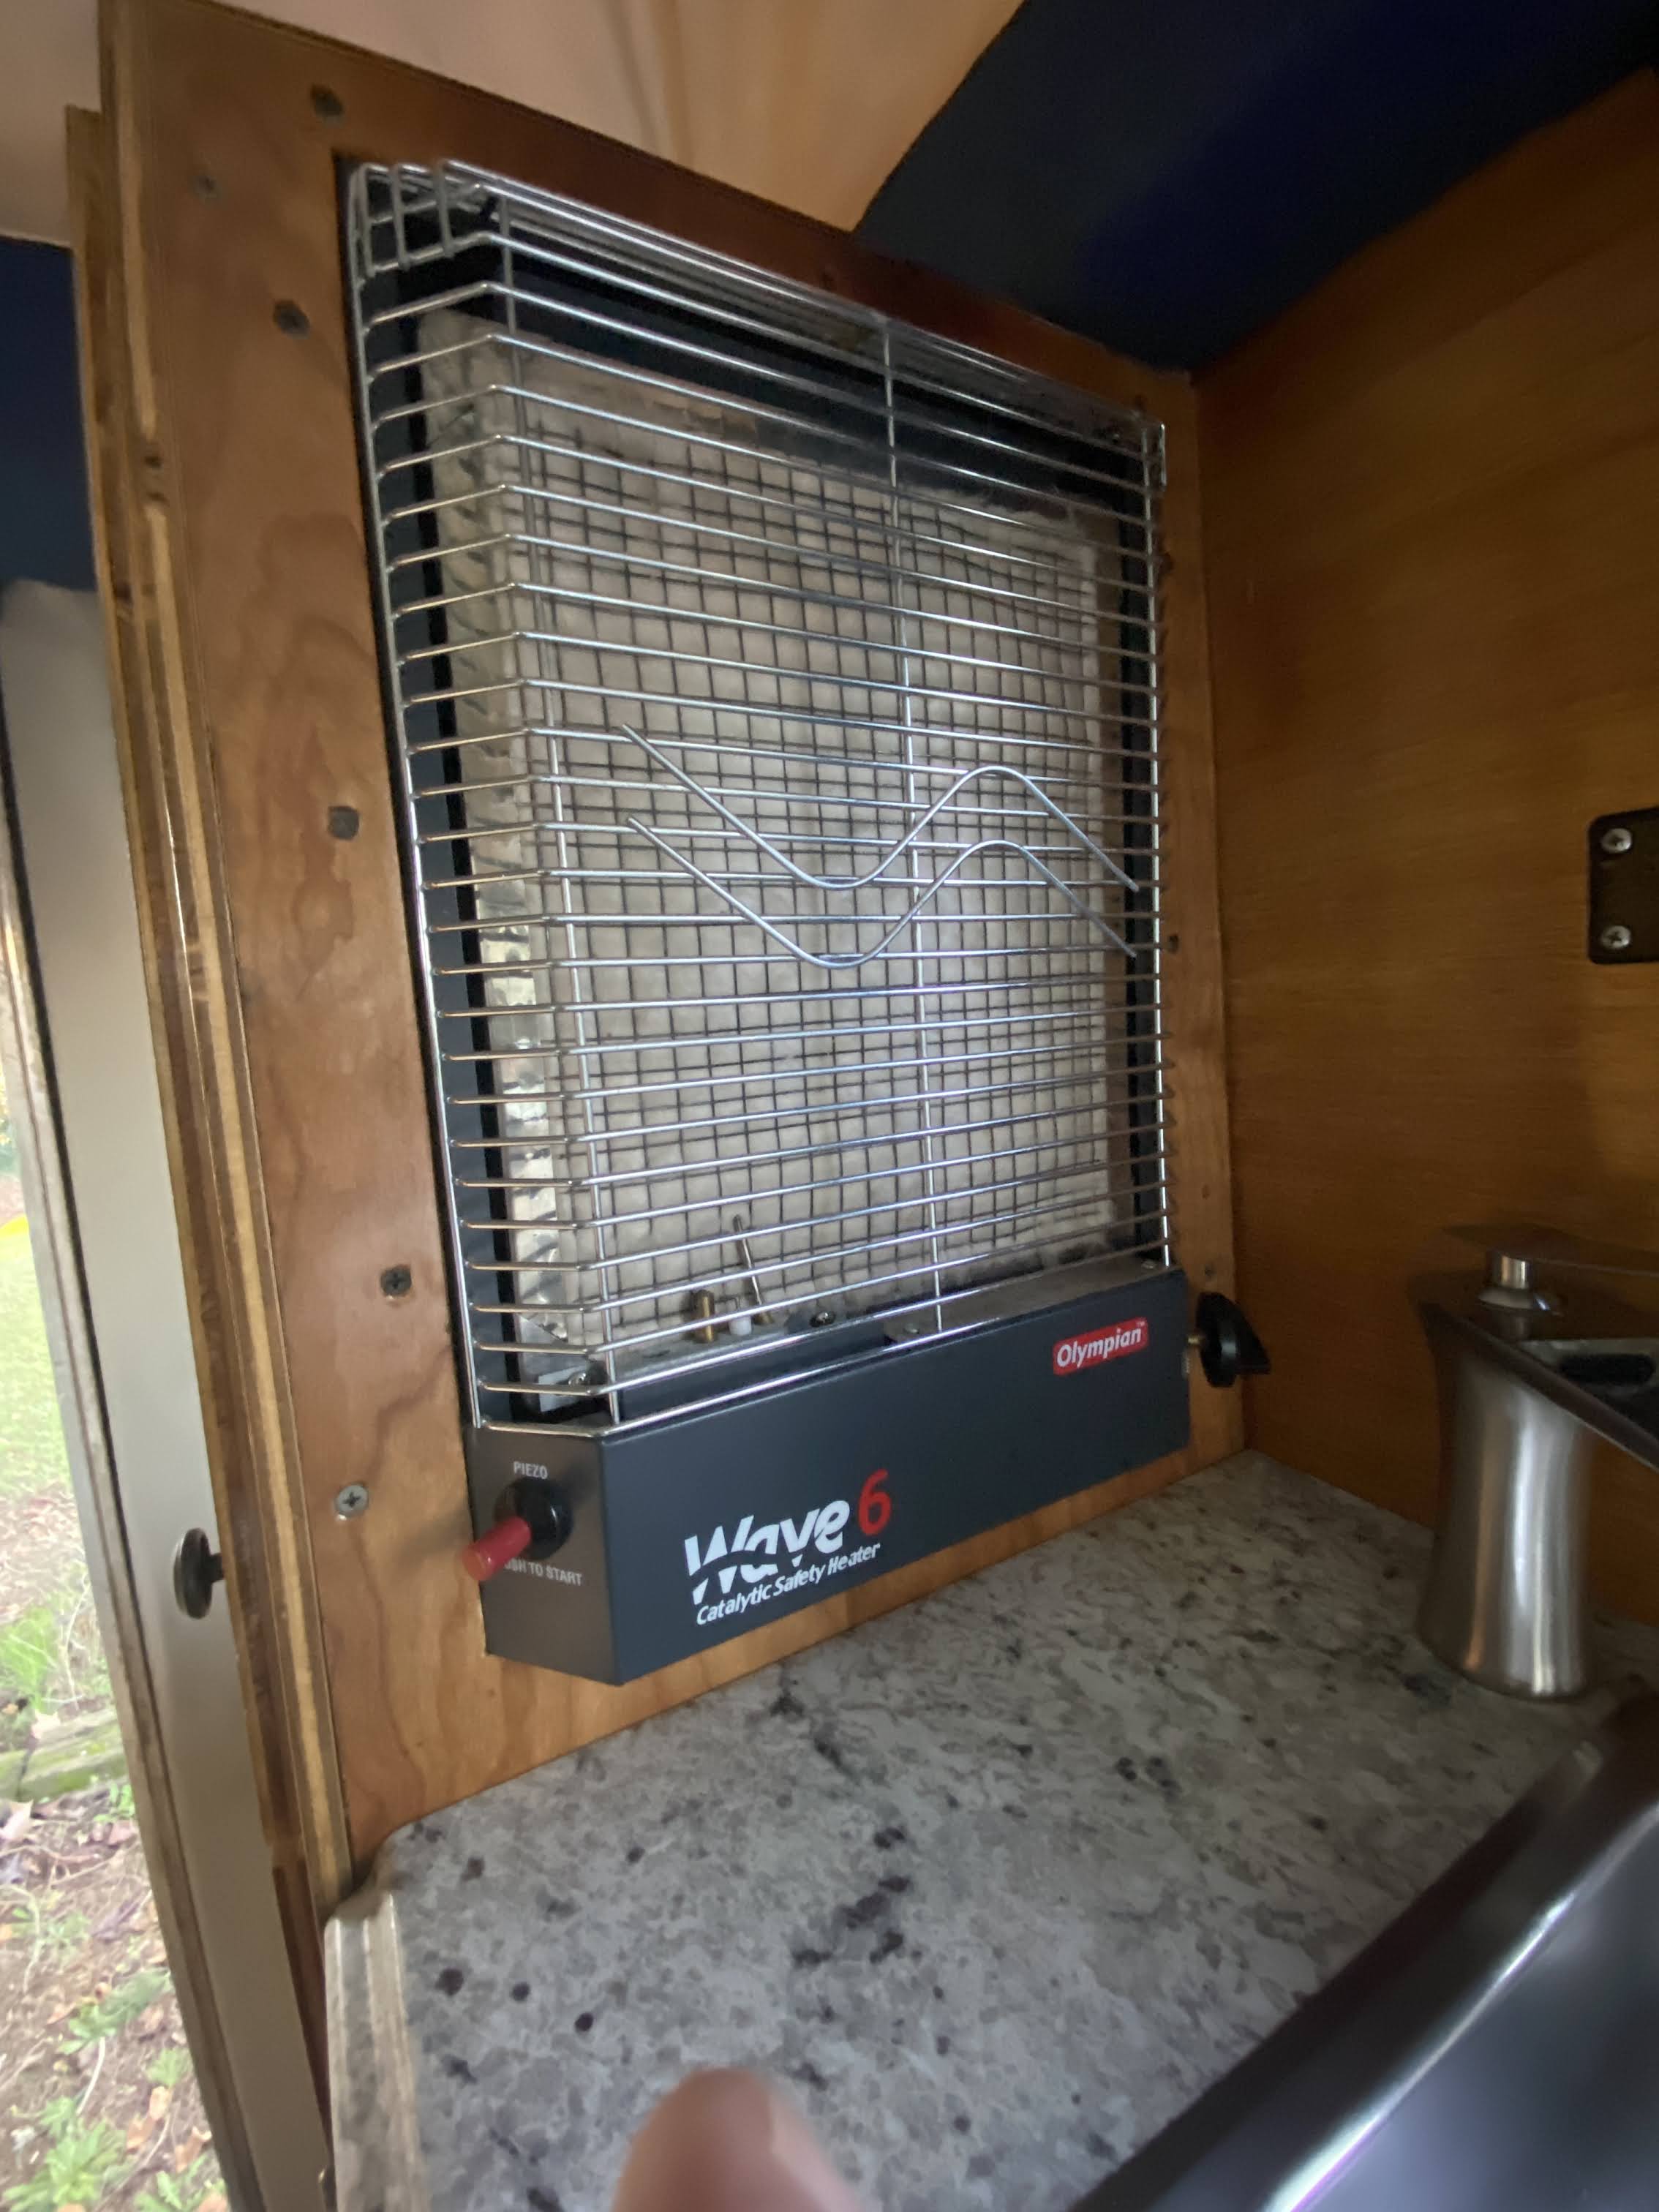
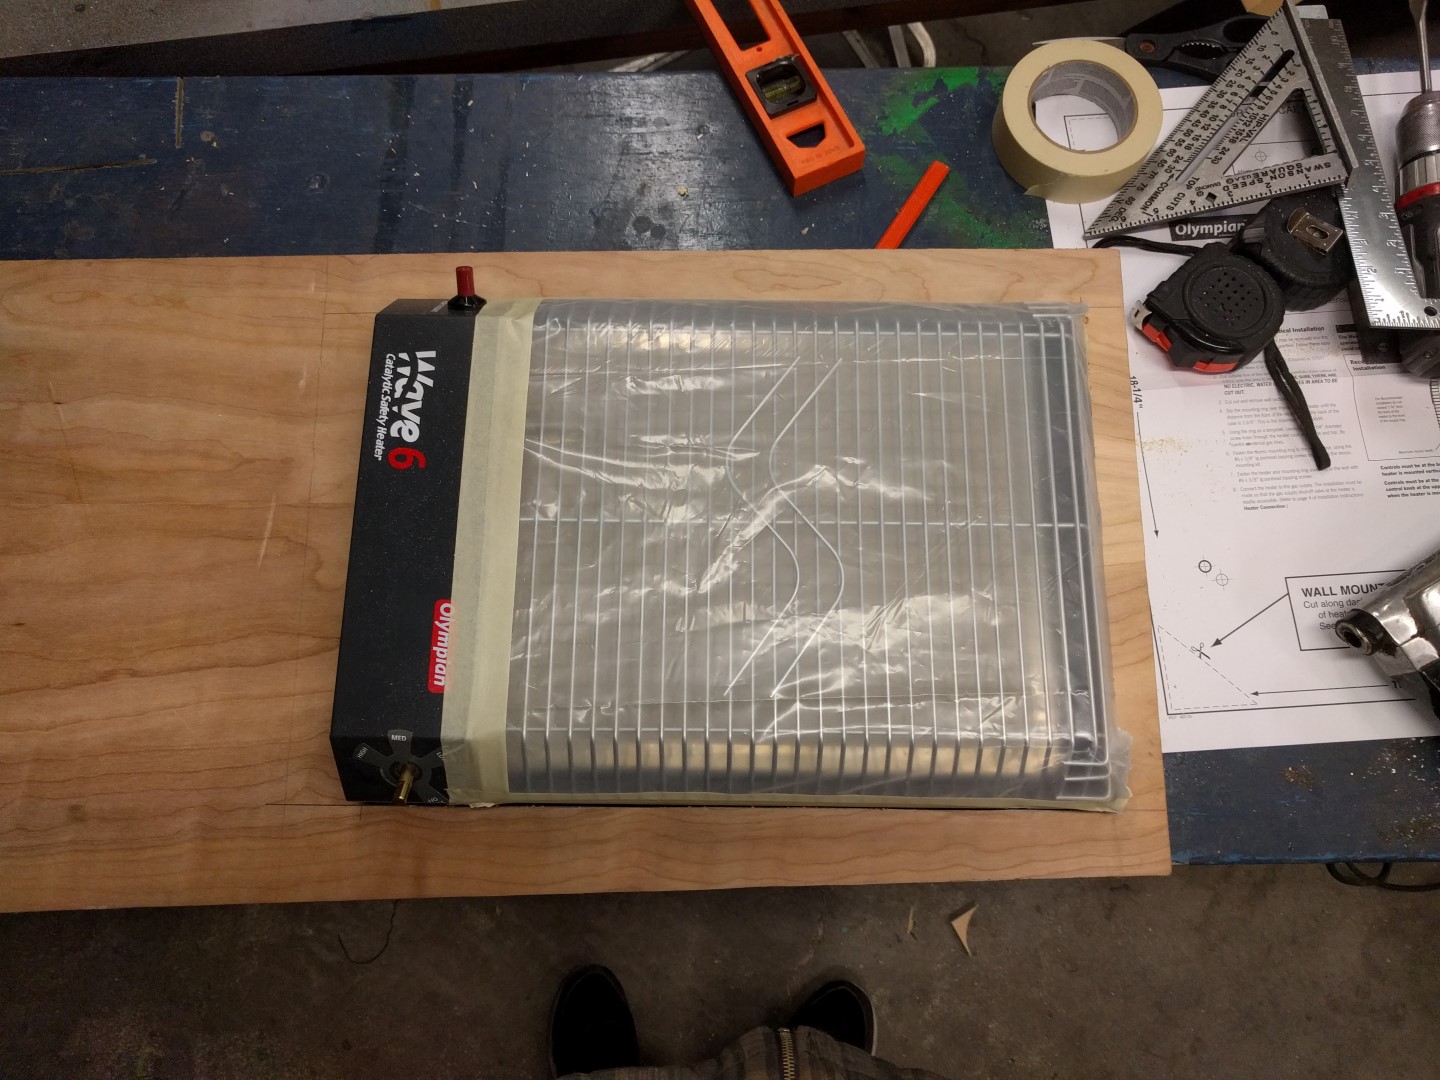
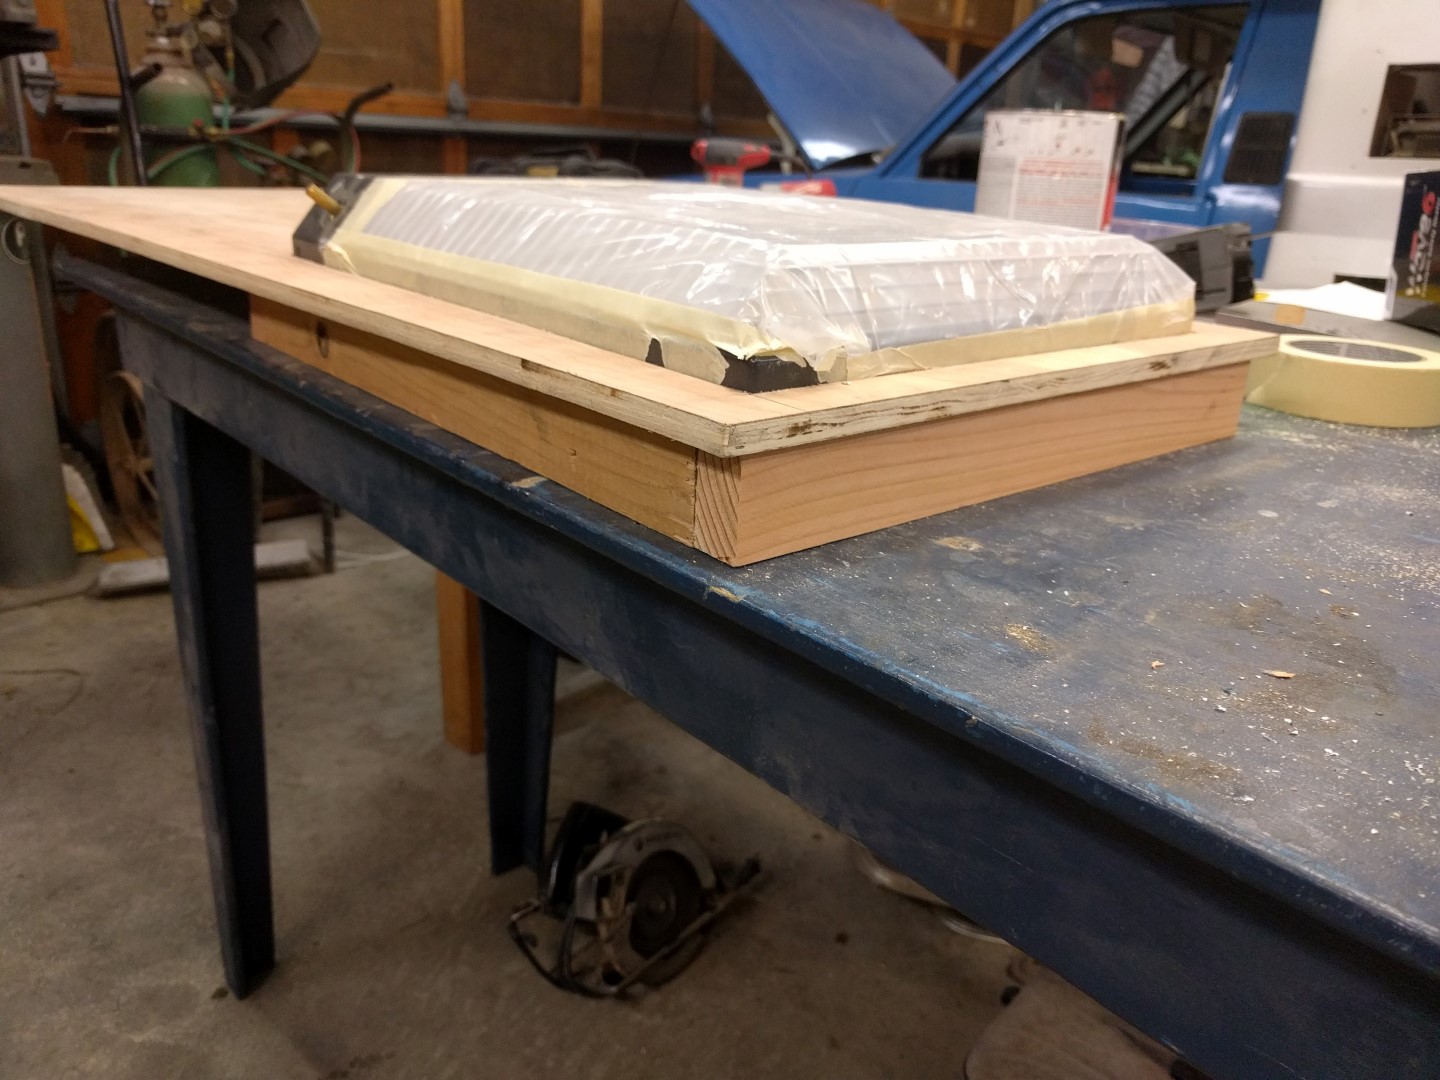
Heater
The heater is installed on the front side of the rear drivers side closet; recessed into the wall a bit. It is the ventless Camco 57341 Olympian Wave-6 6000 BTU LP Gas Catalytic Heater. It keeps the cabin nice and warm.

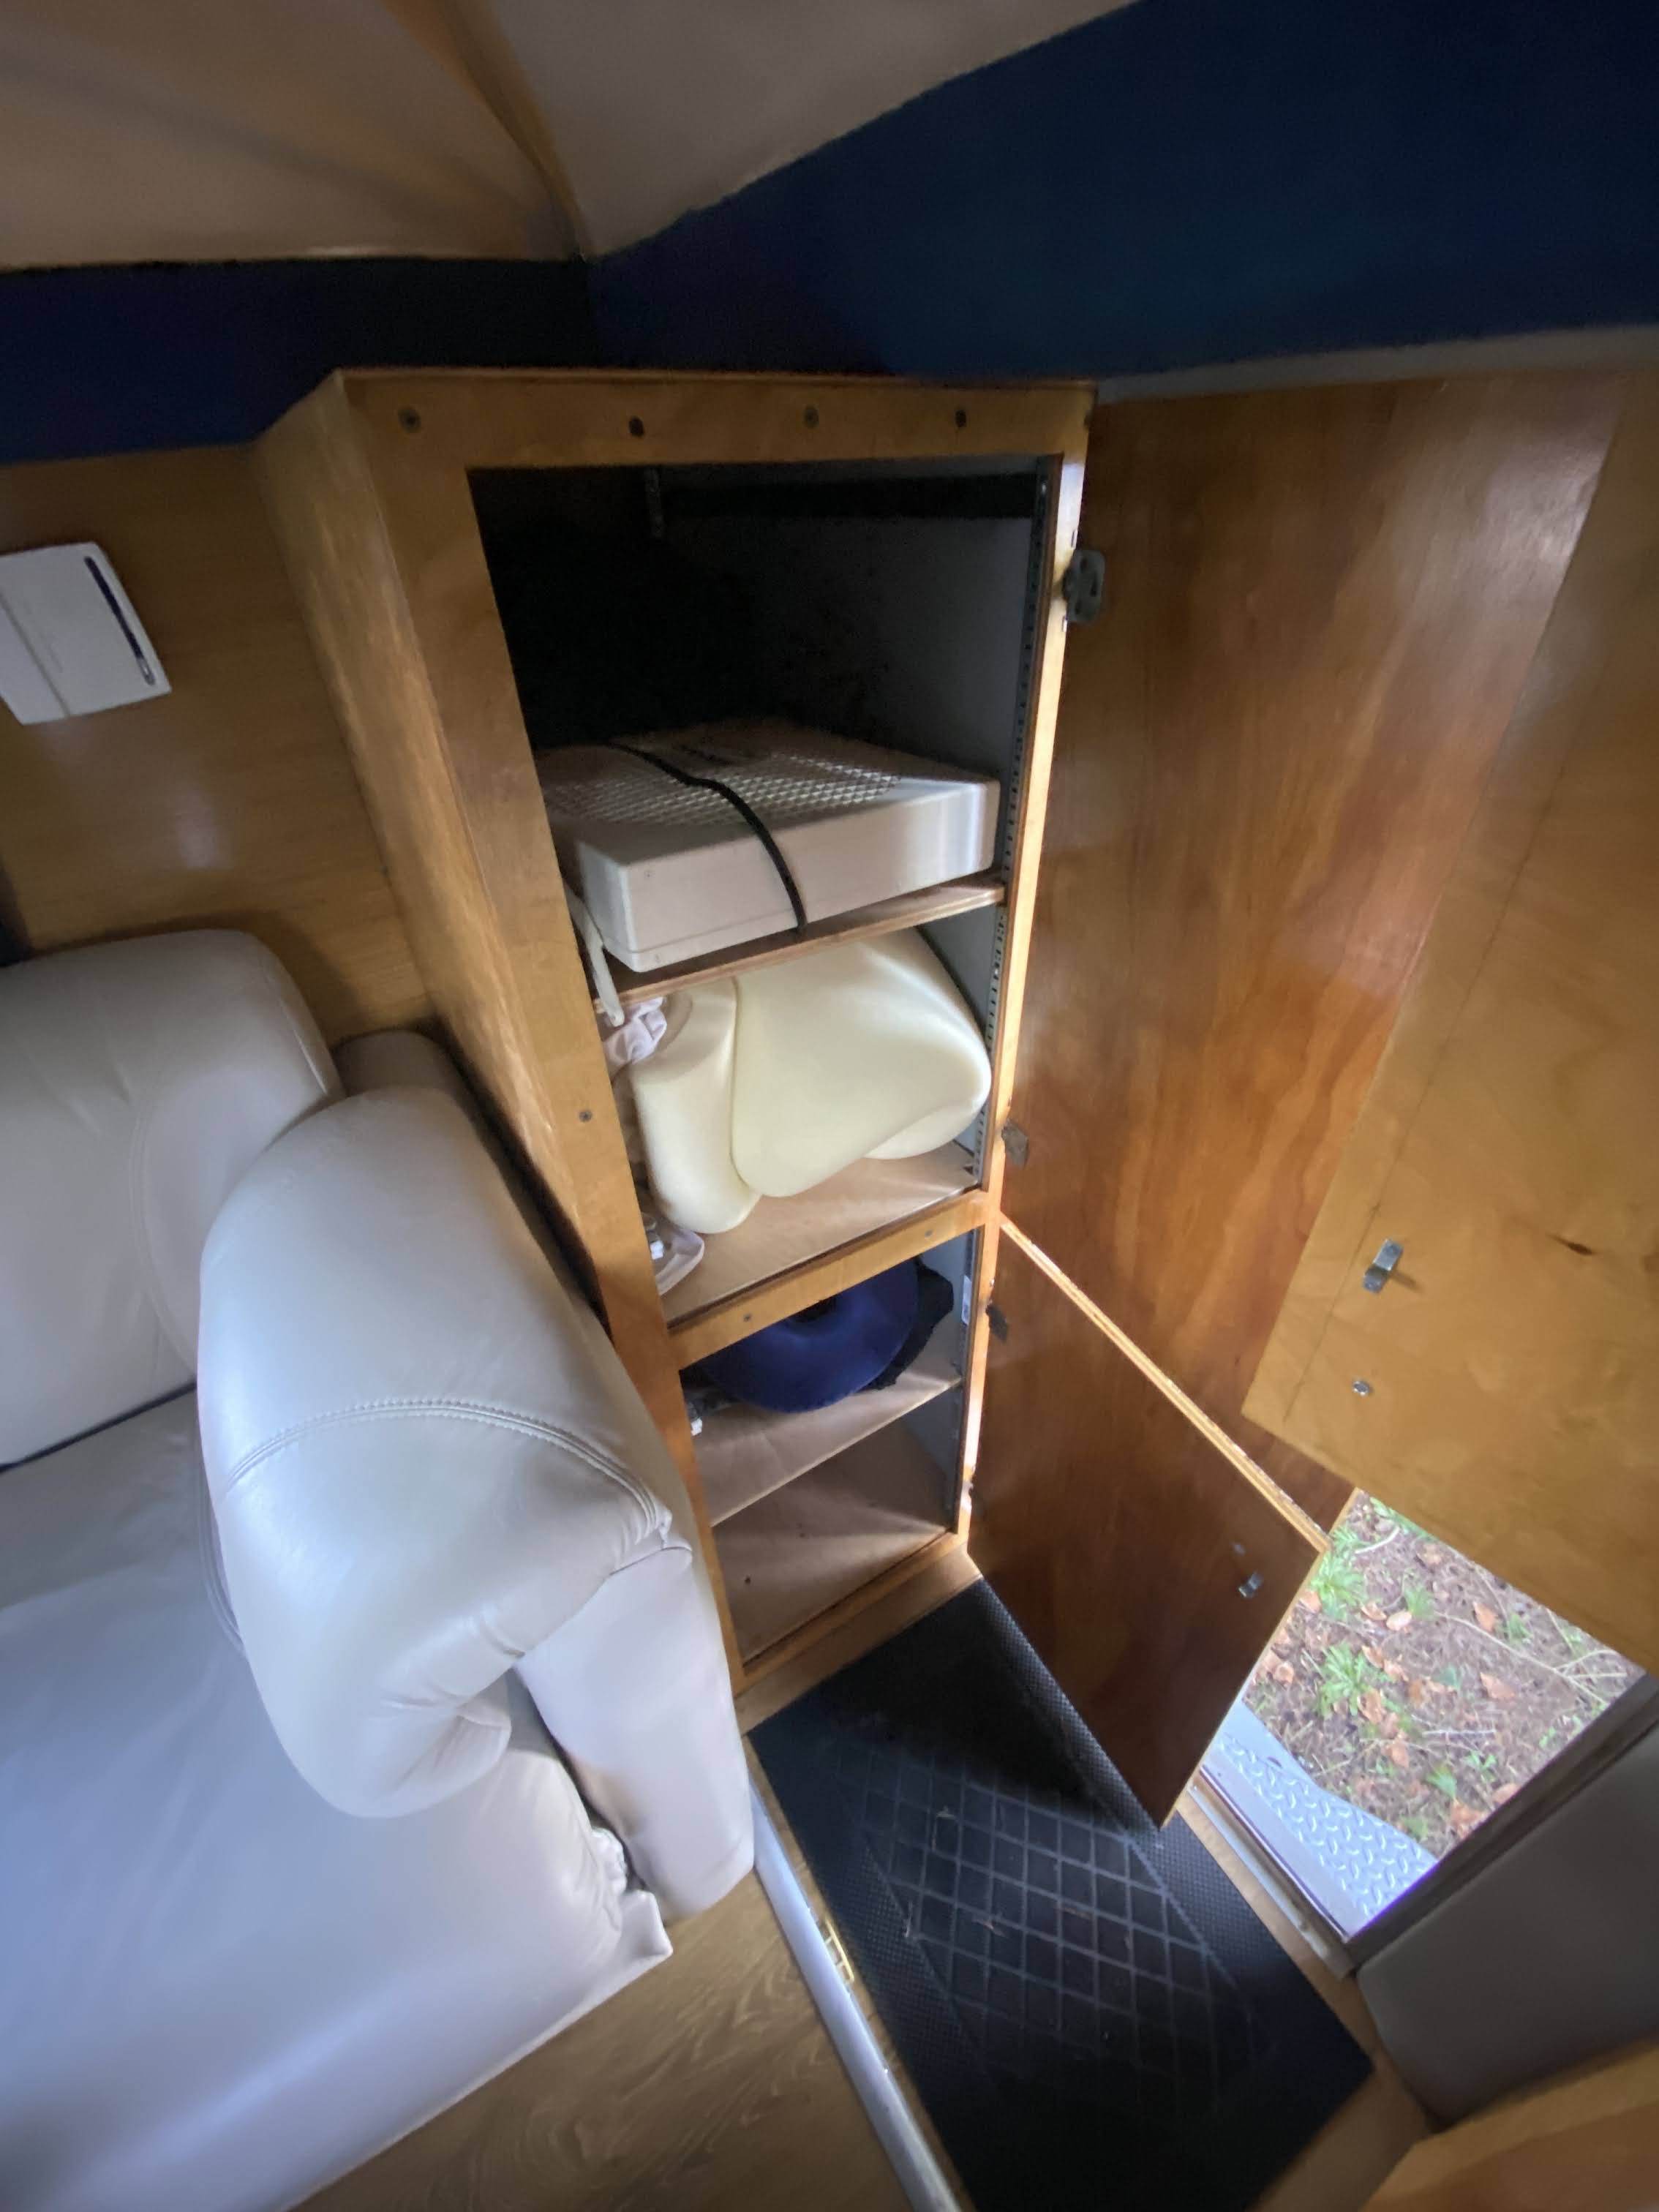
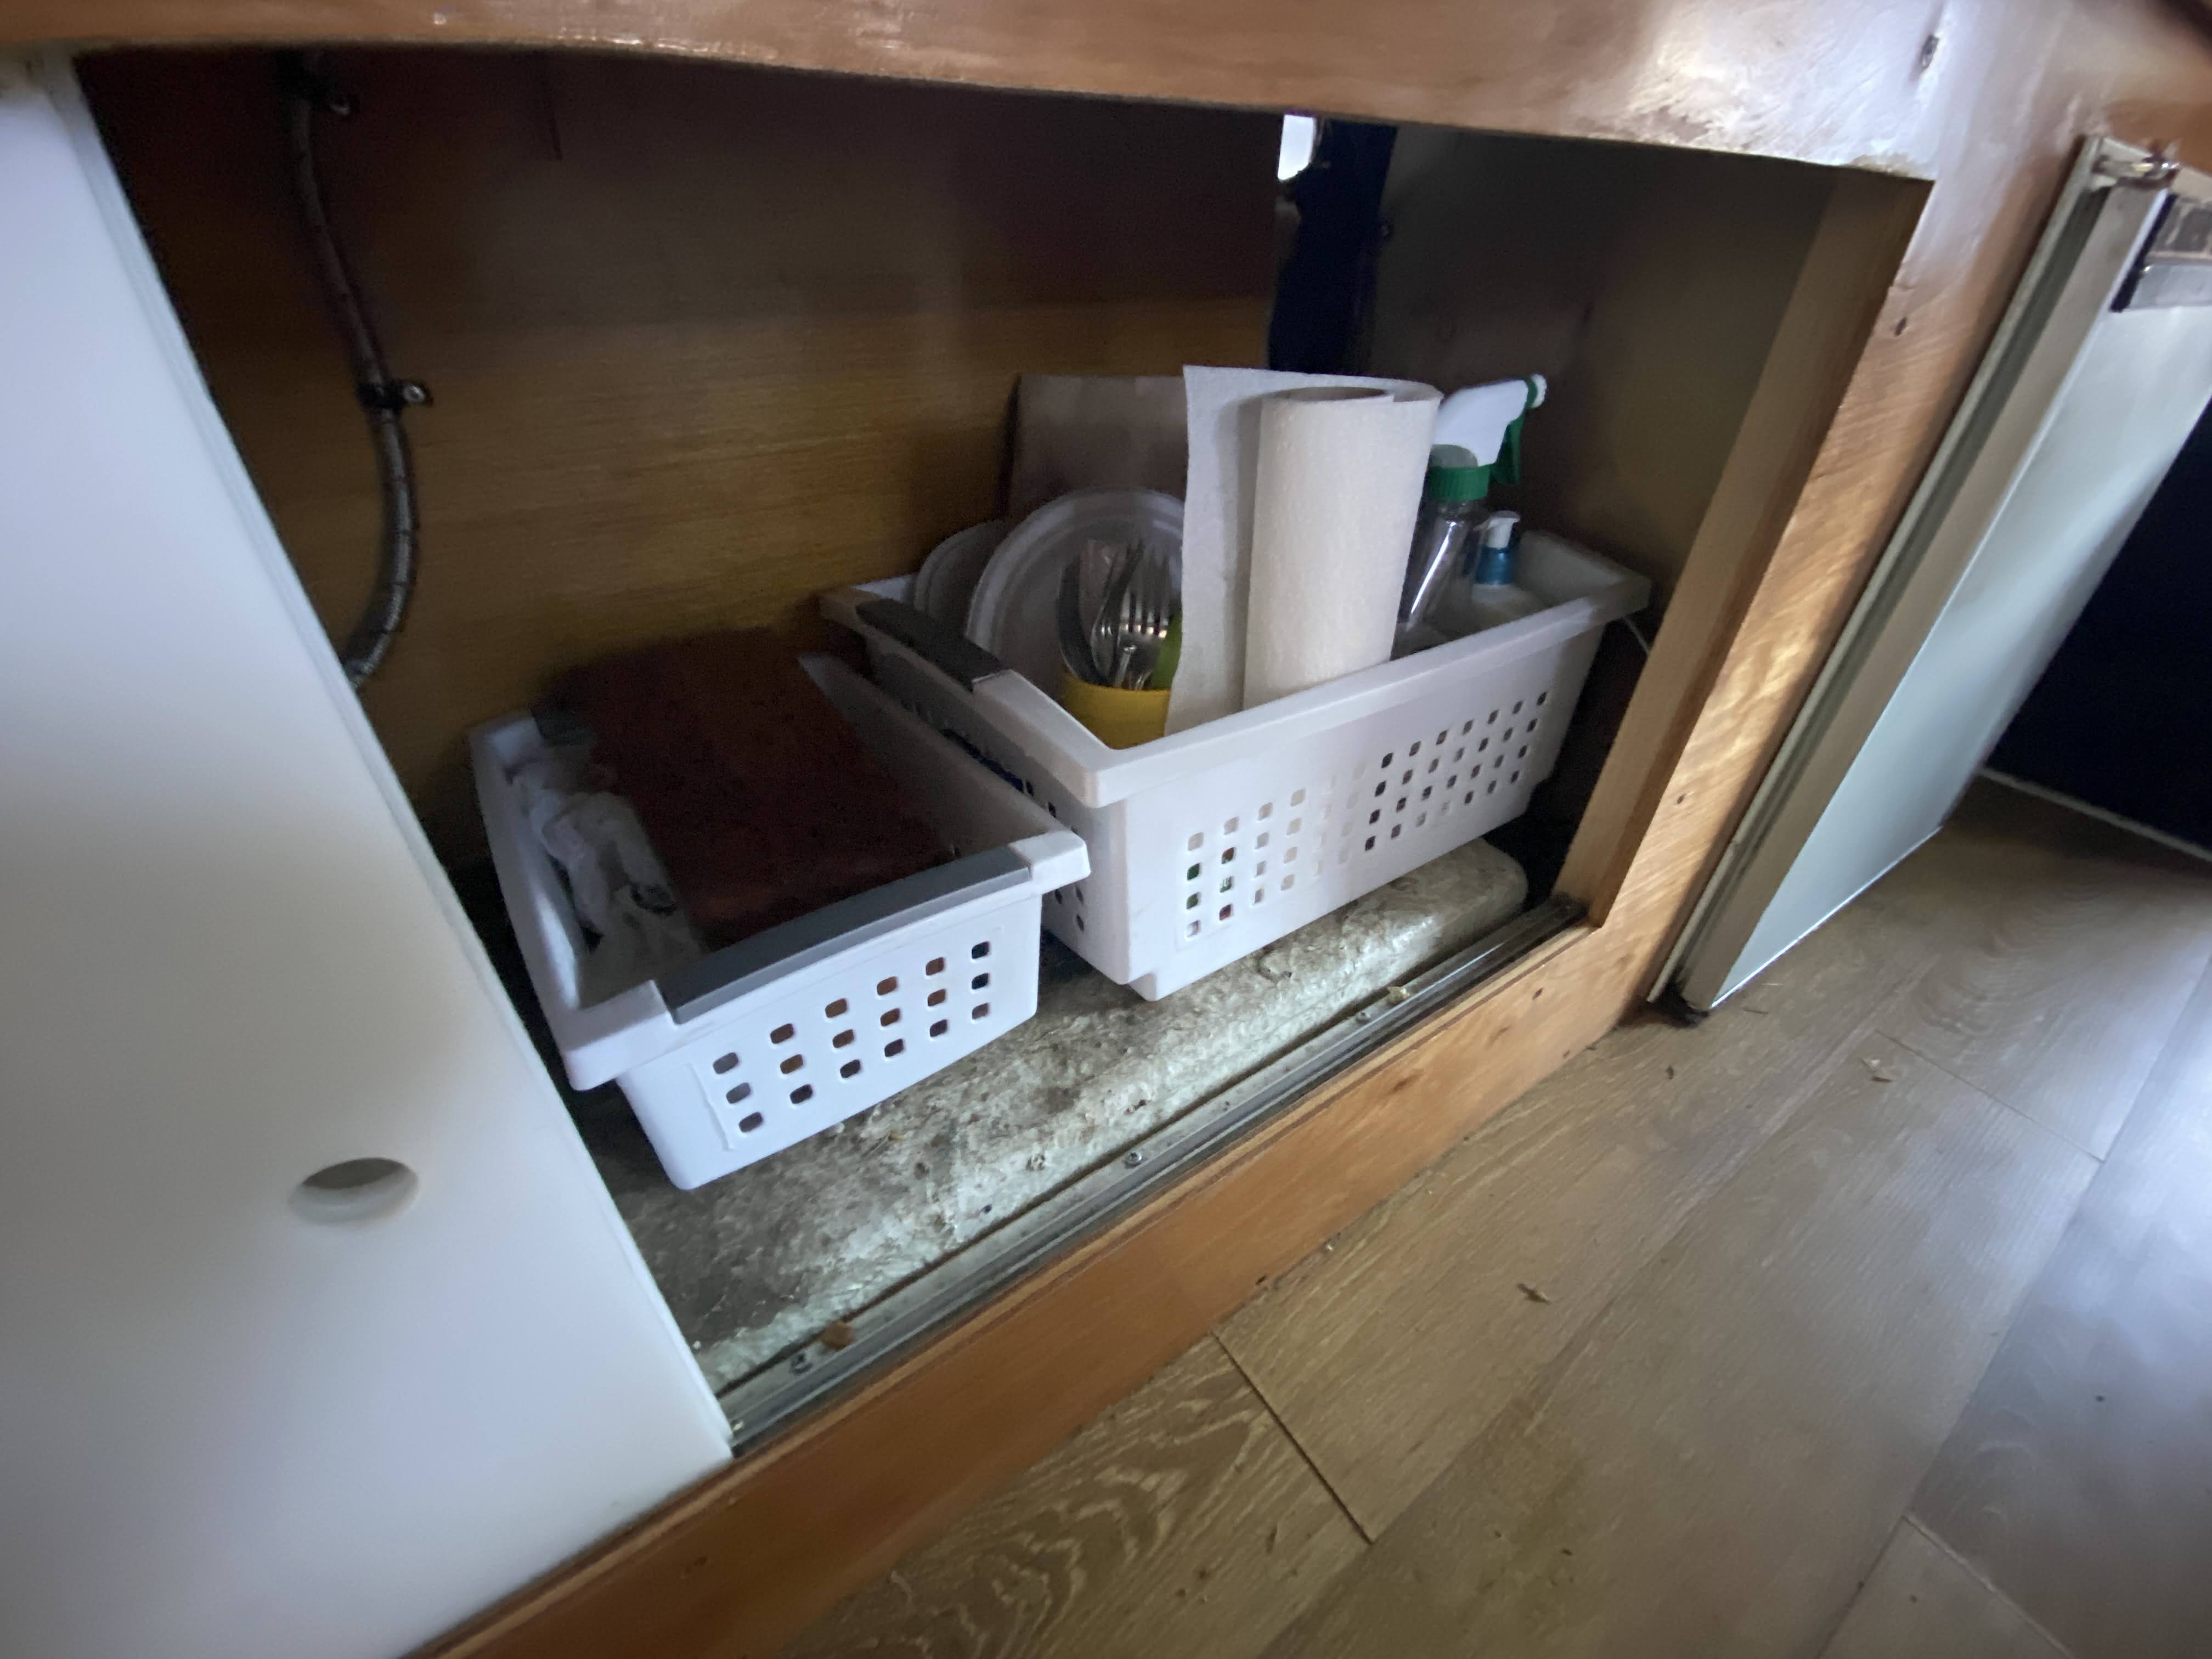
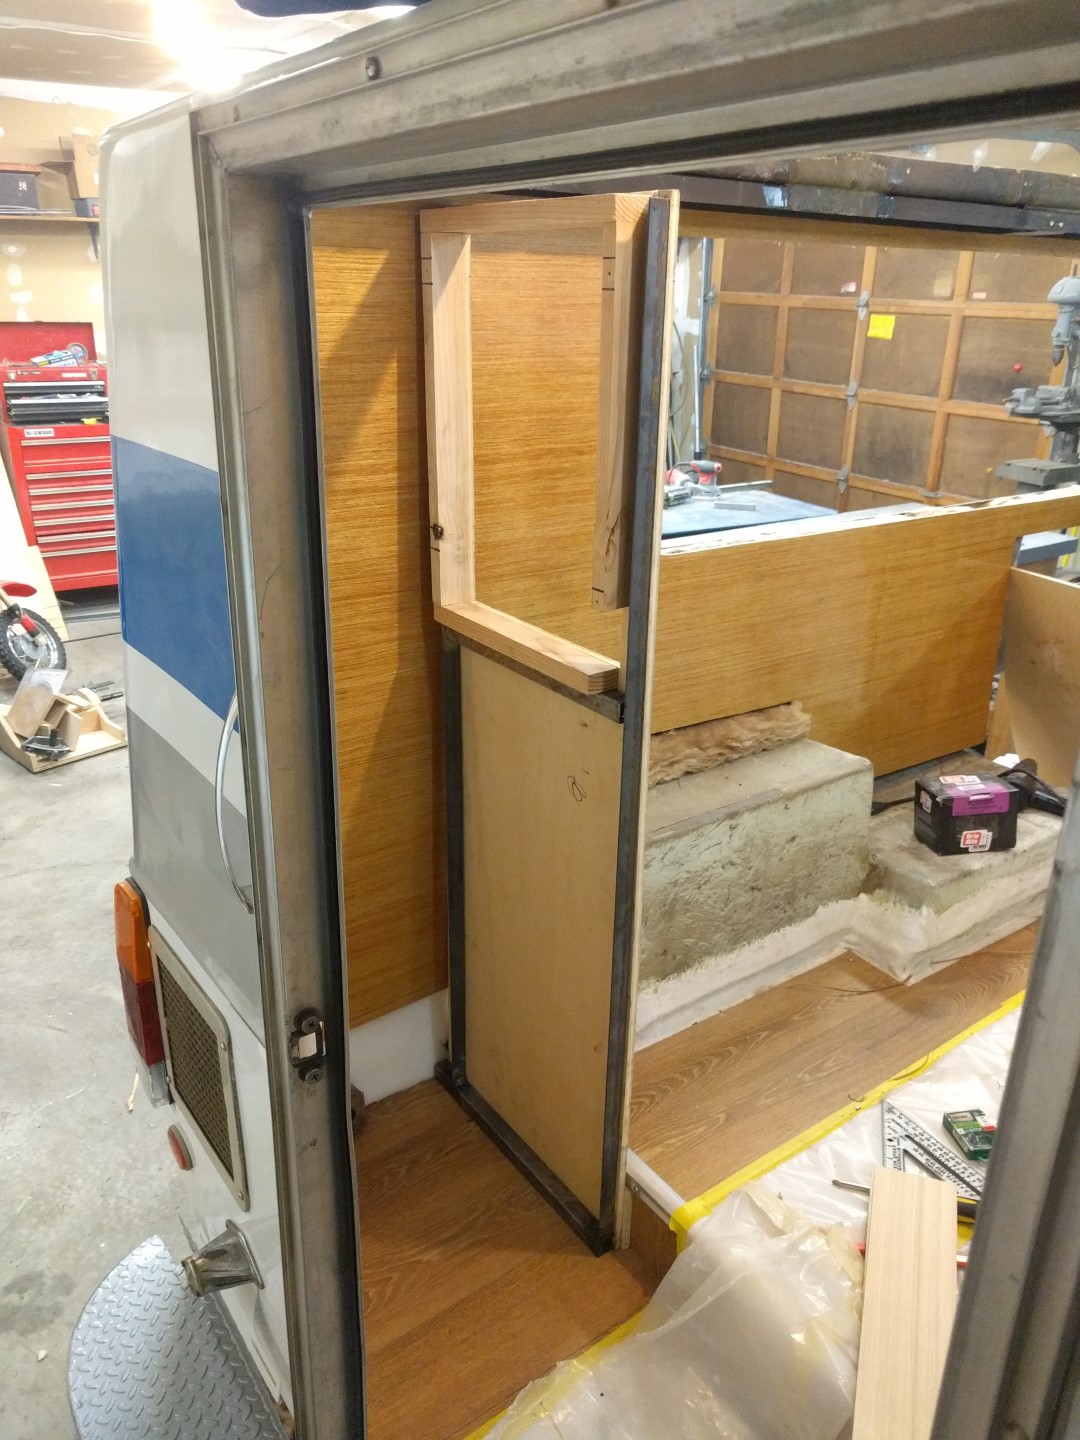
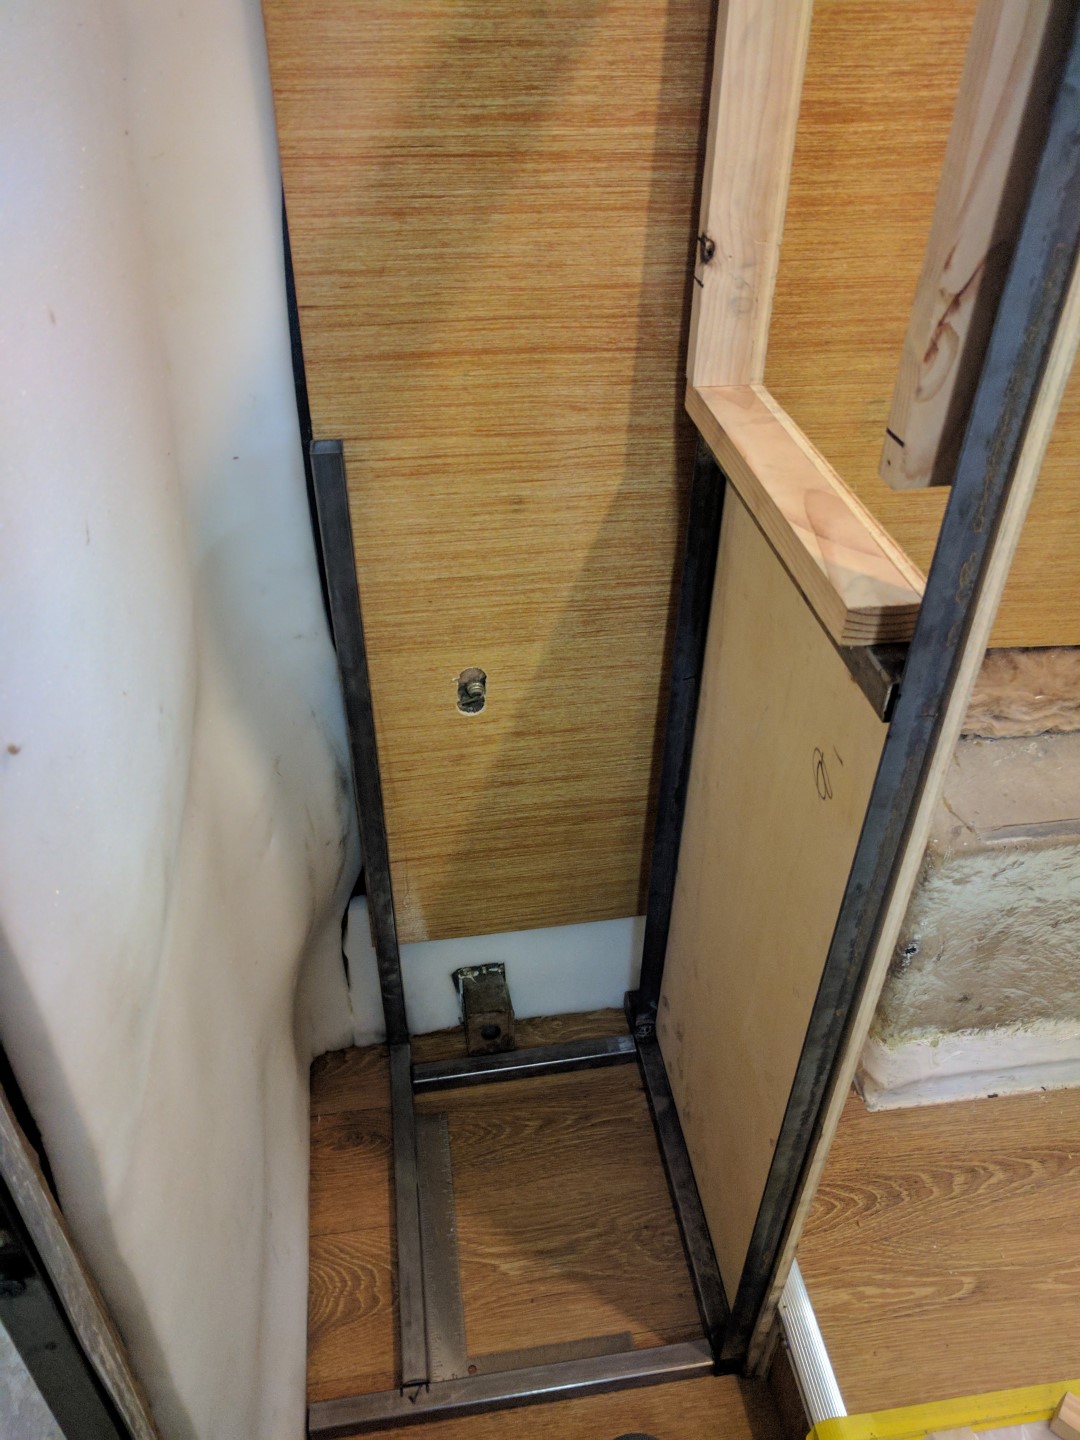
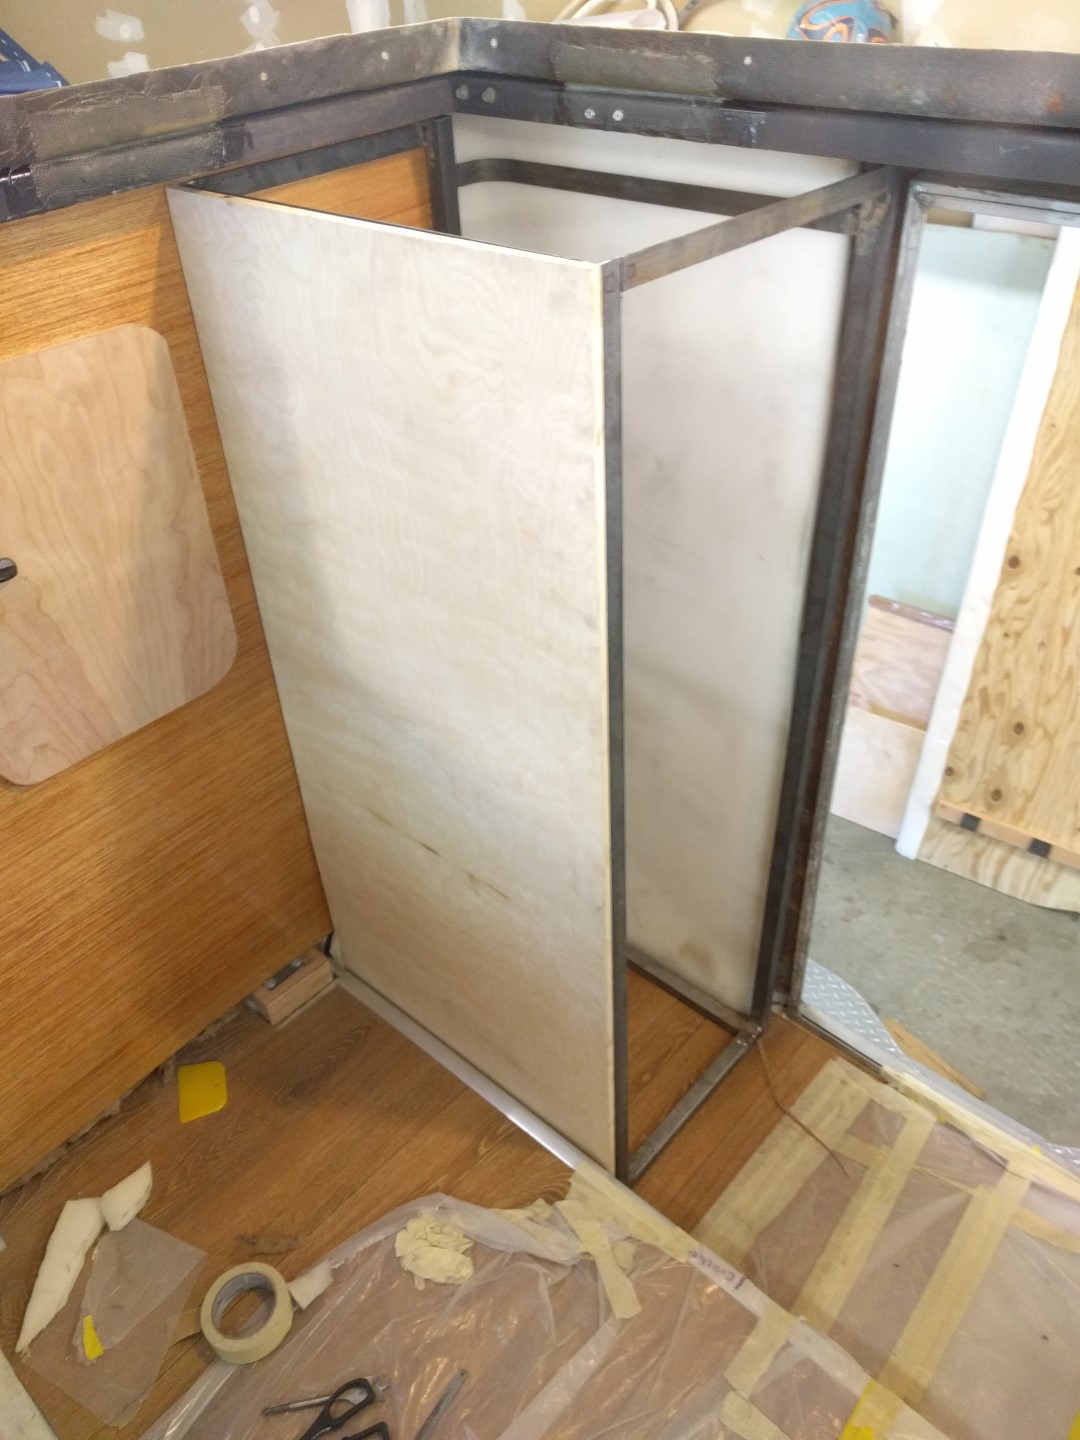
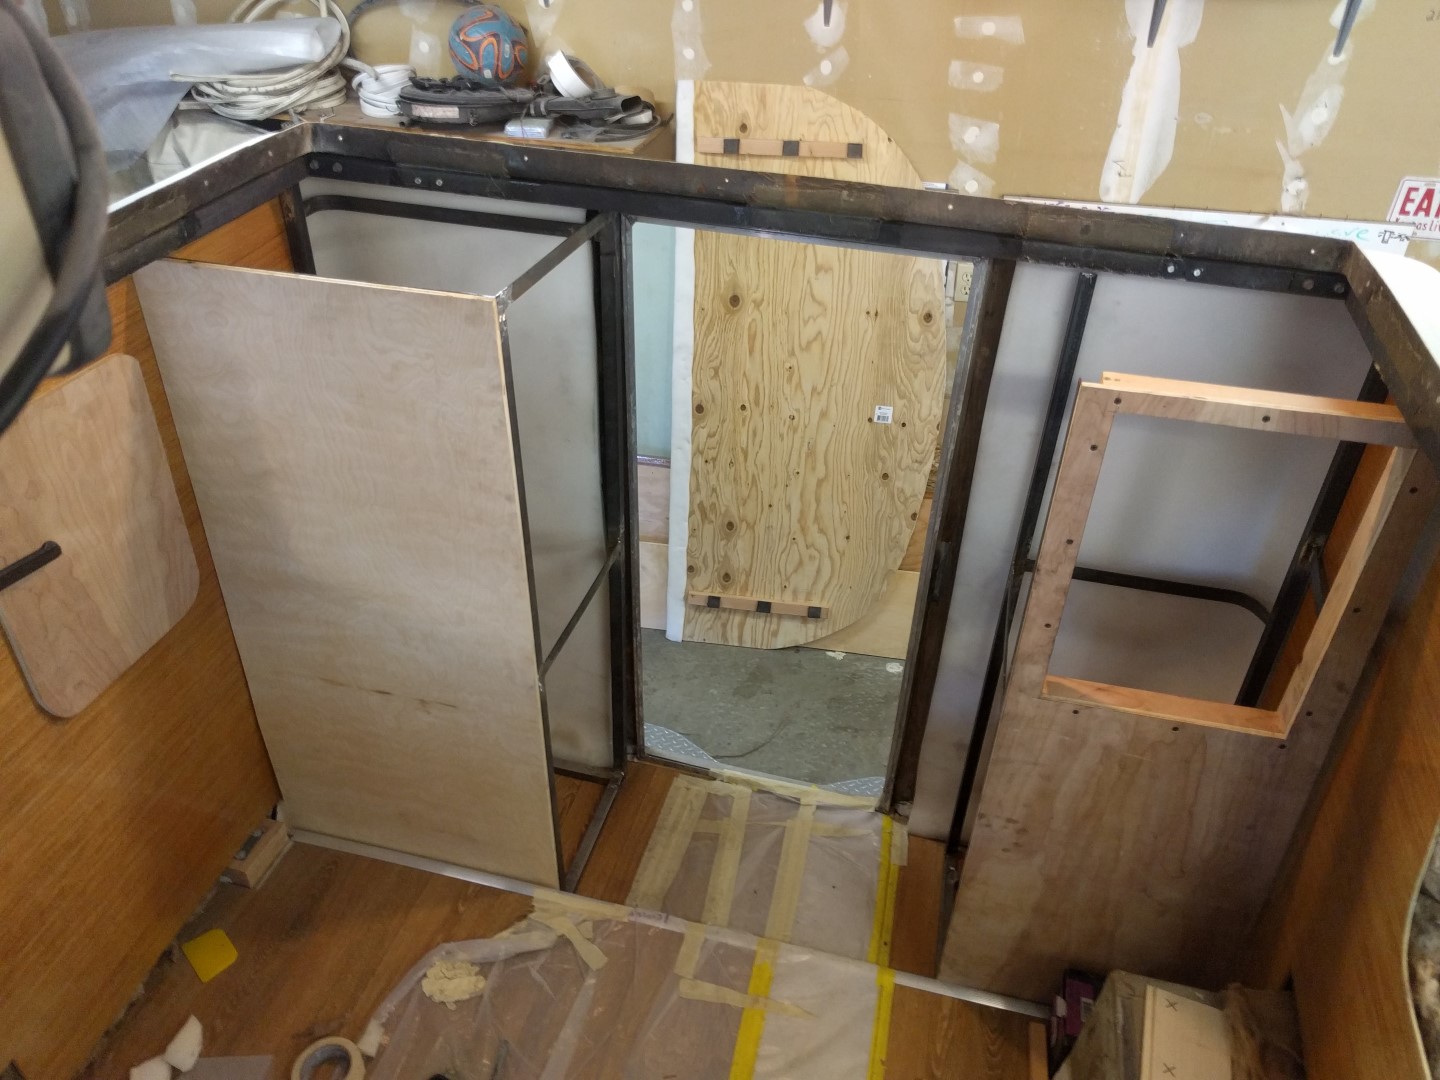
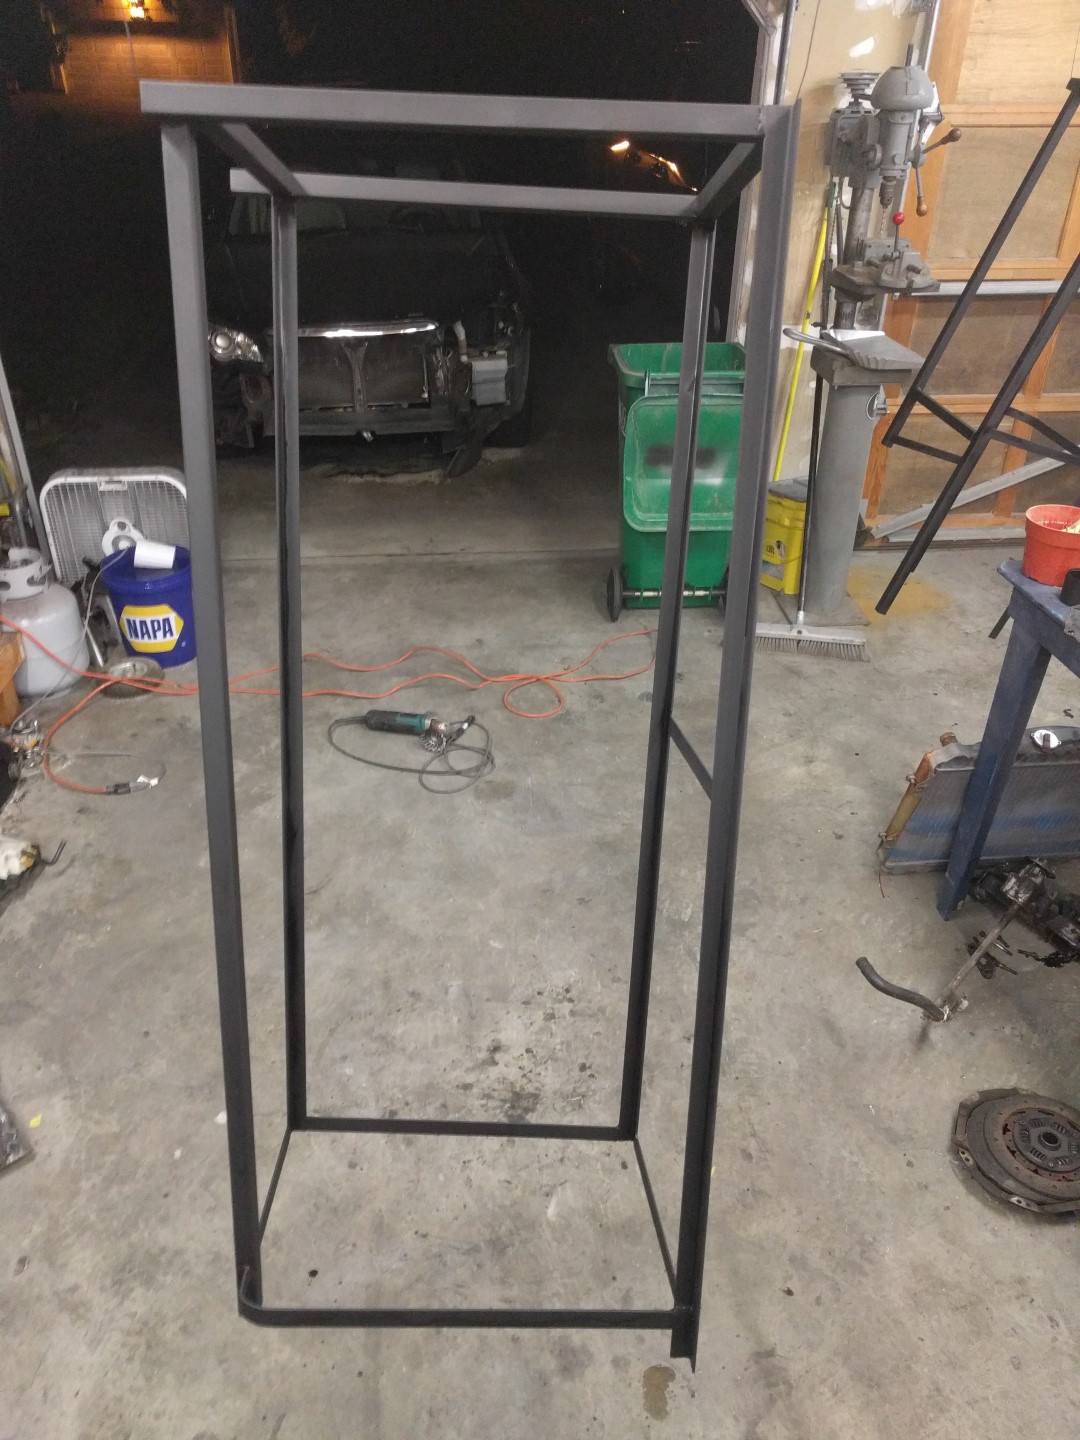
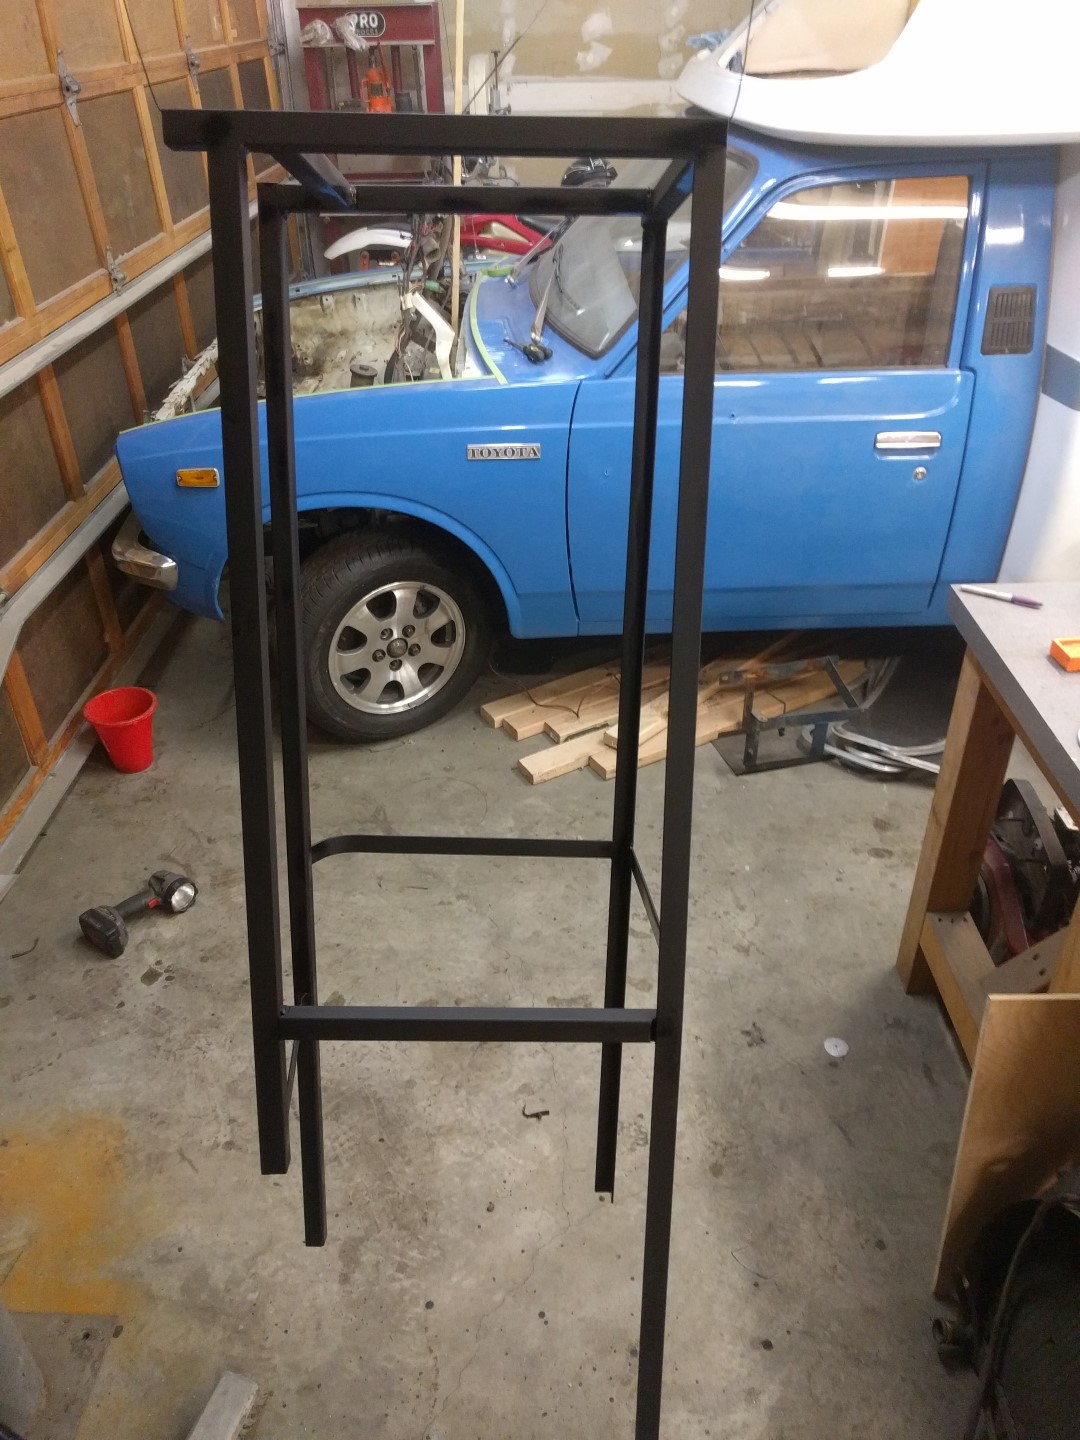
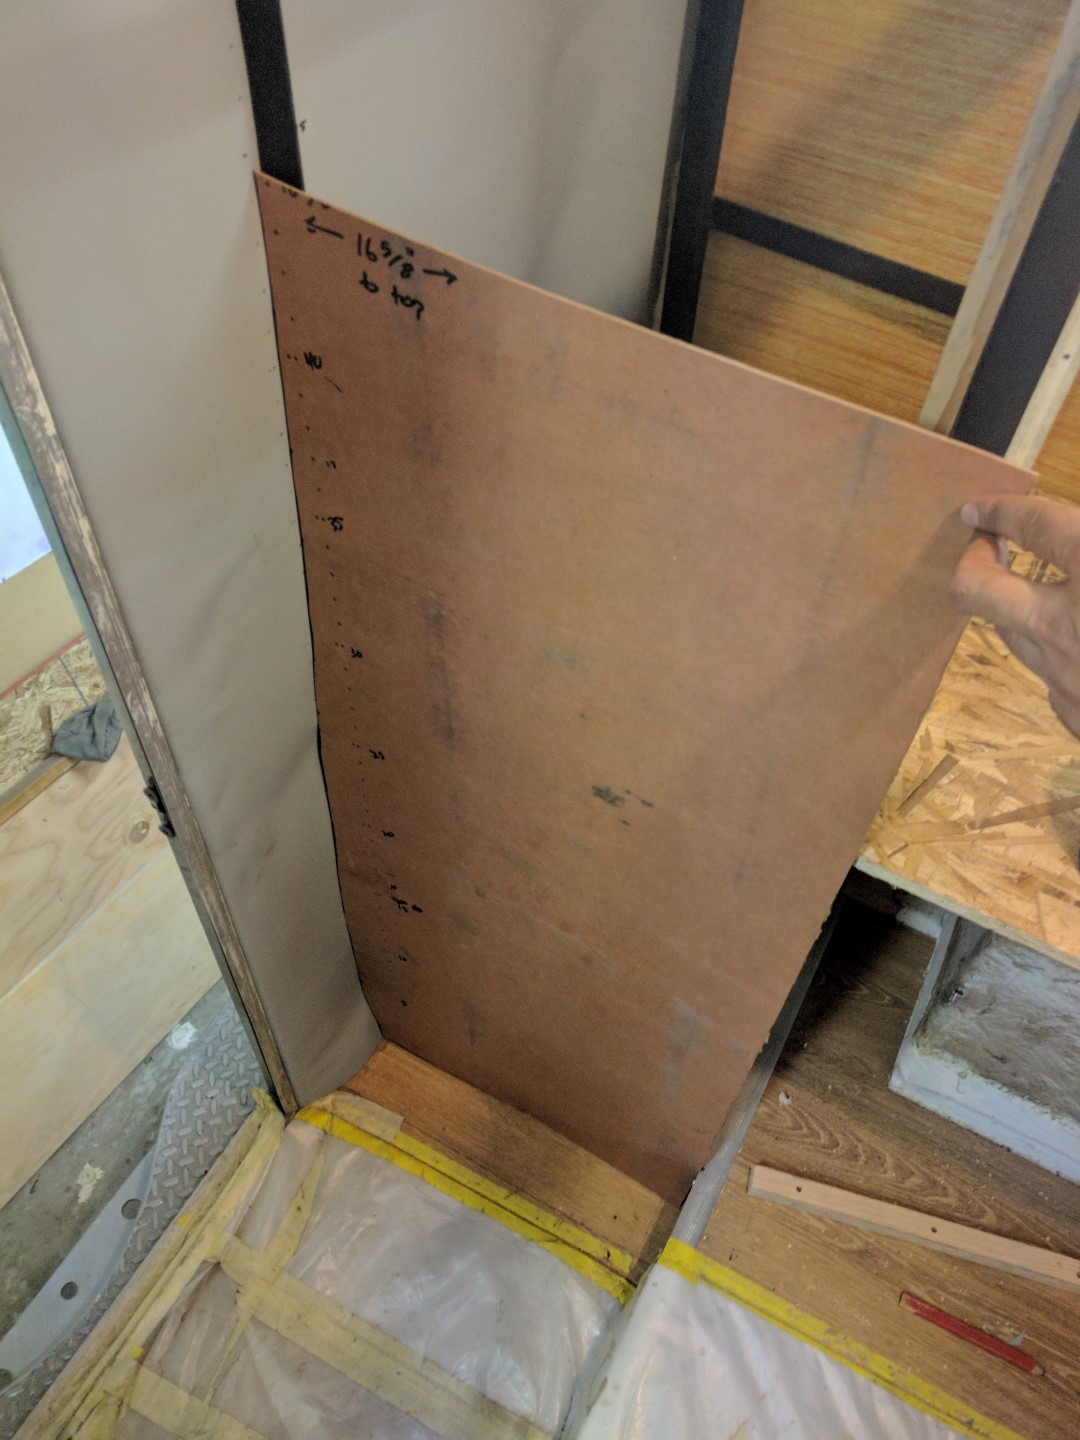
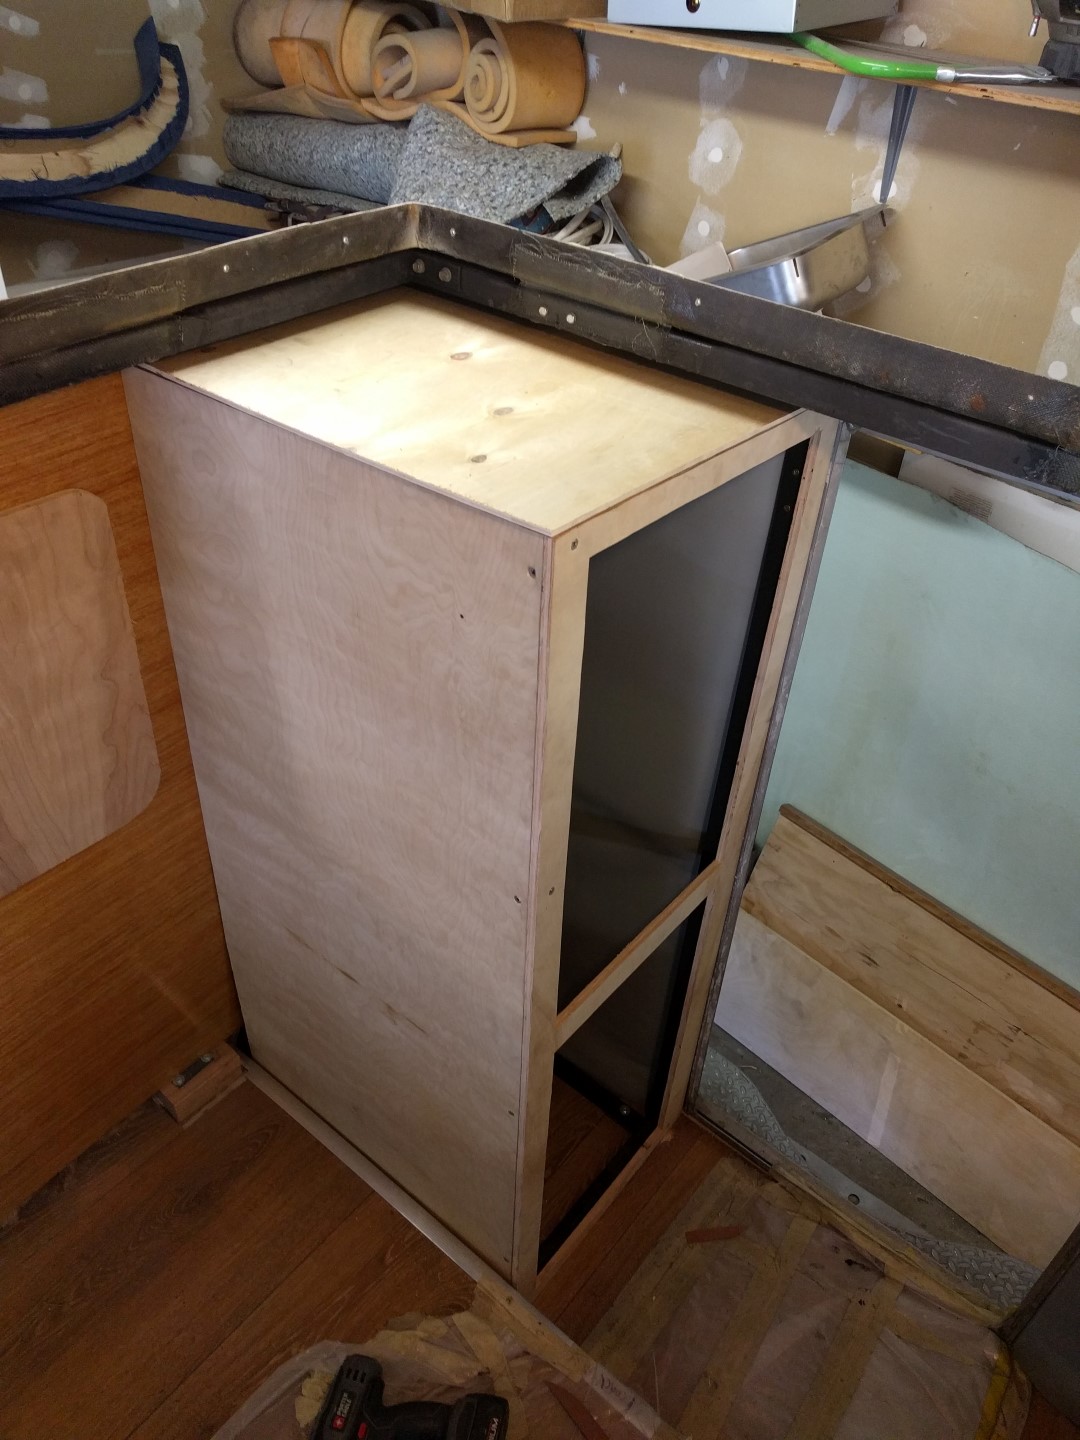
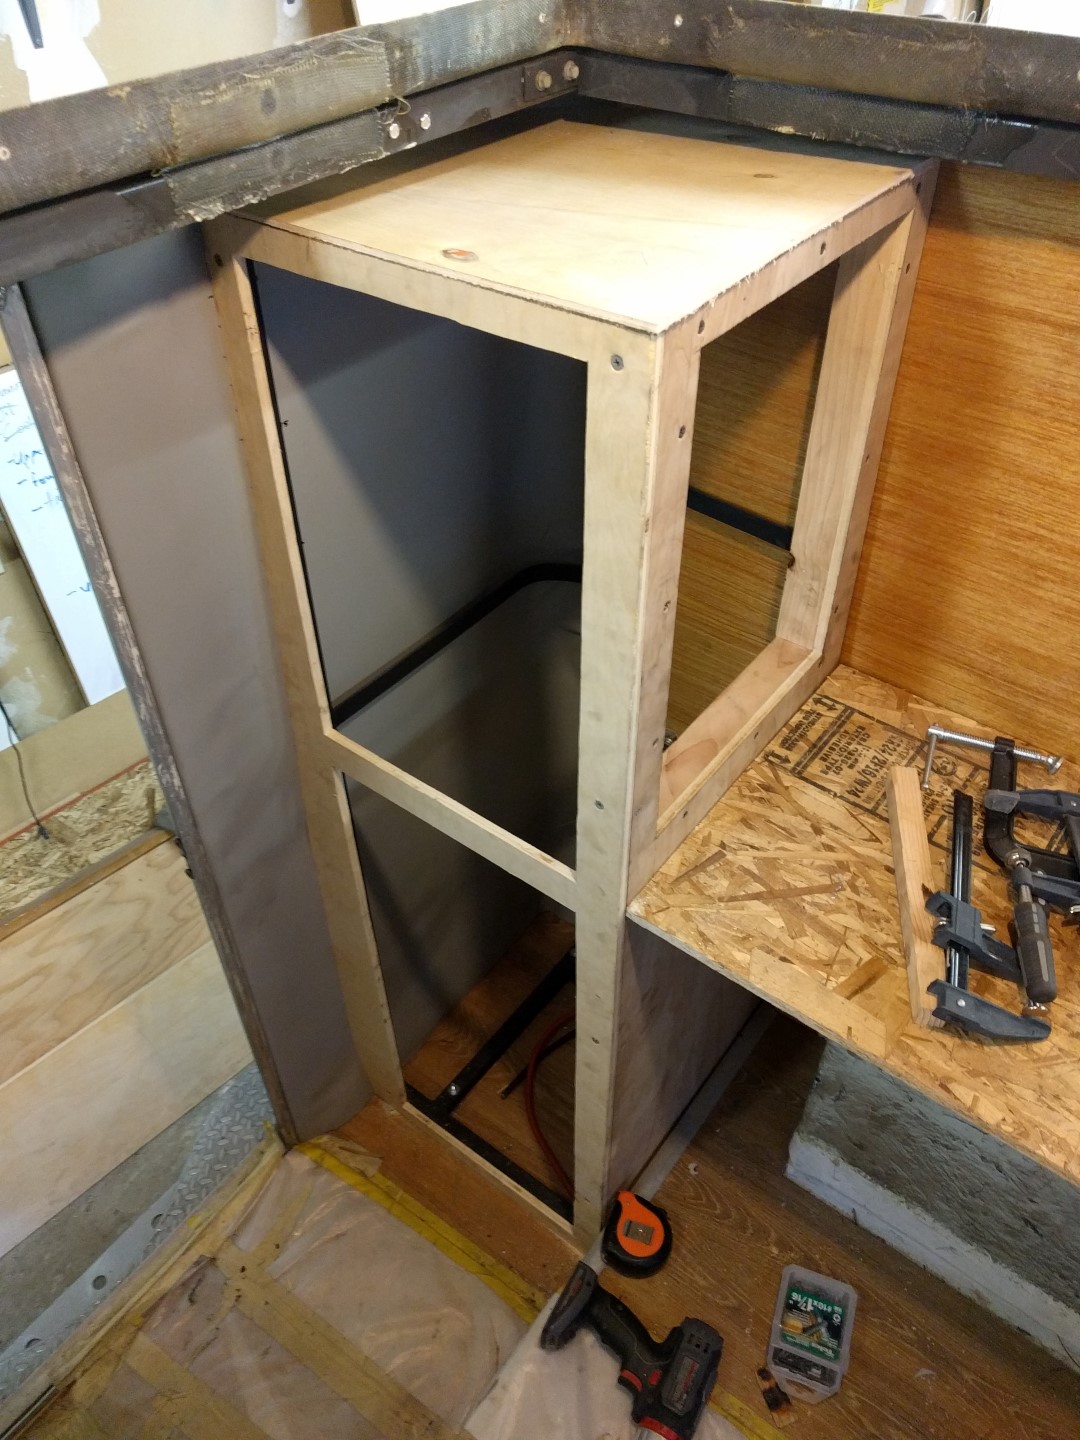
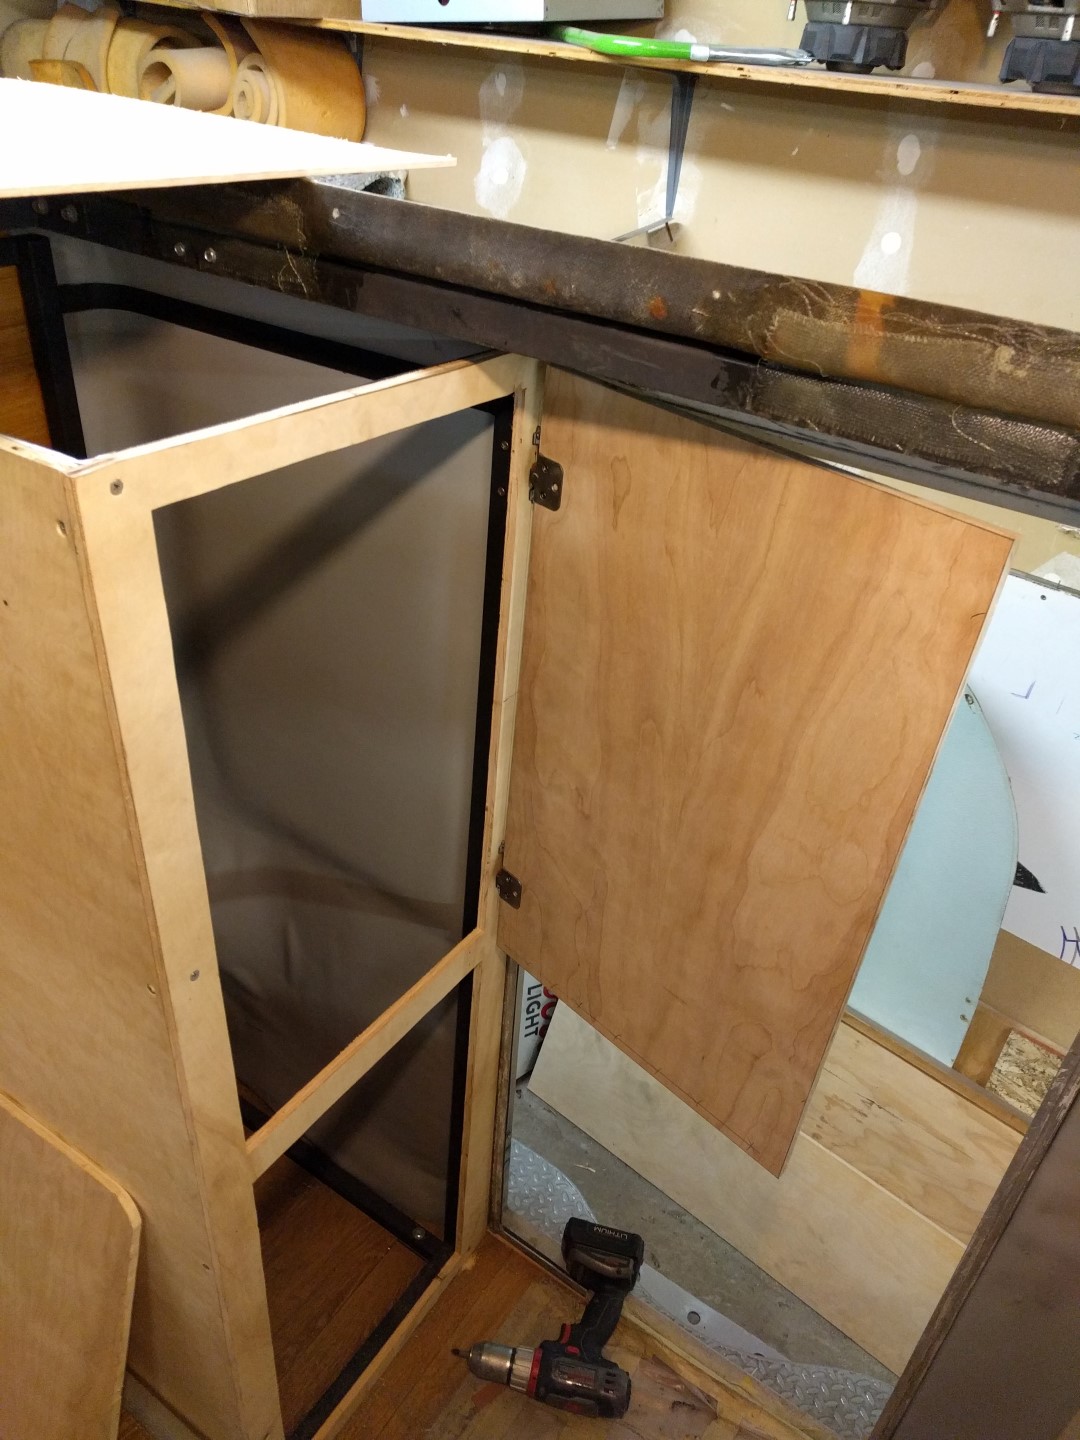
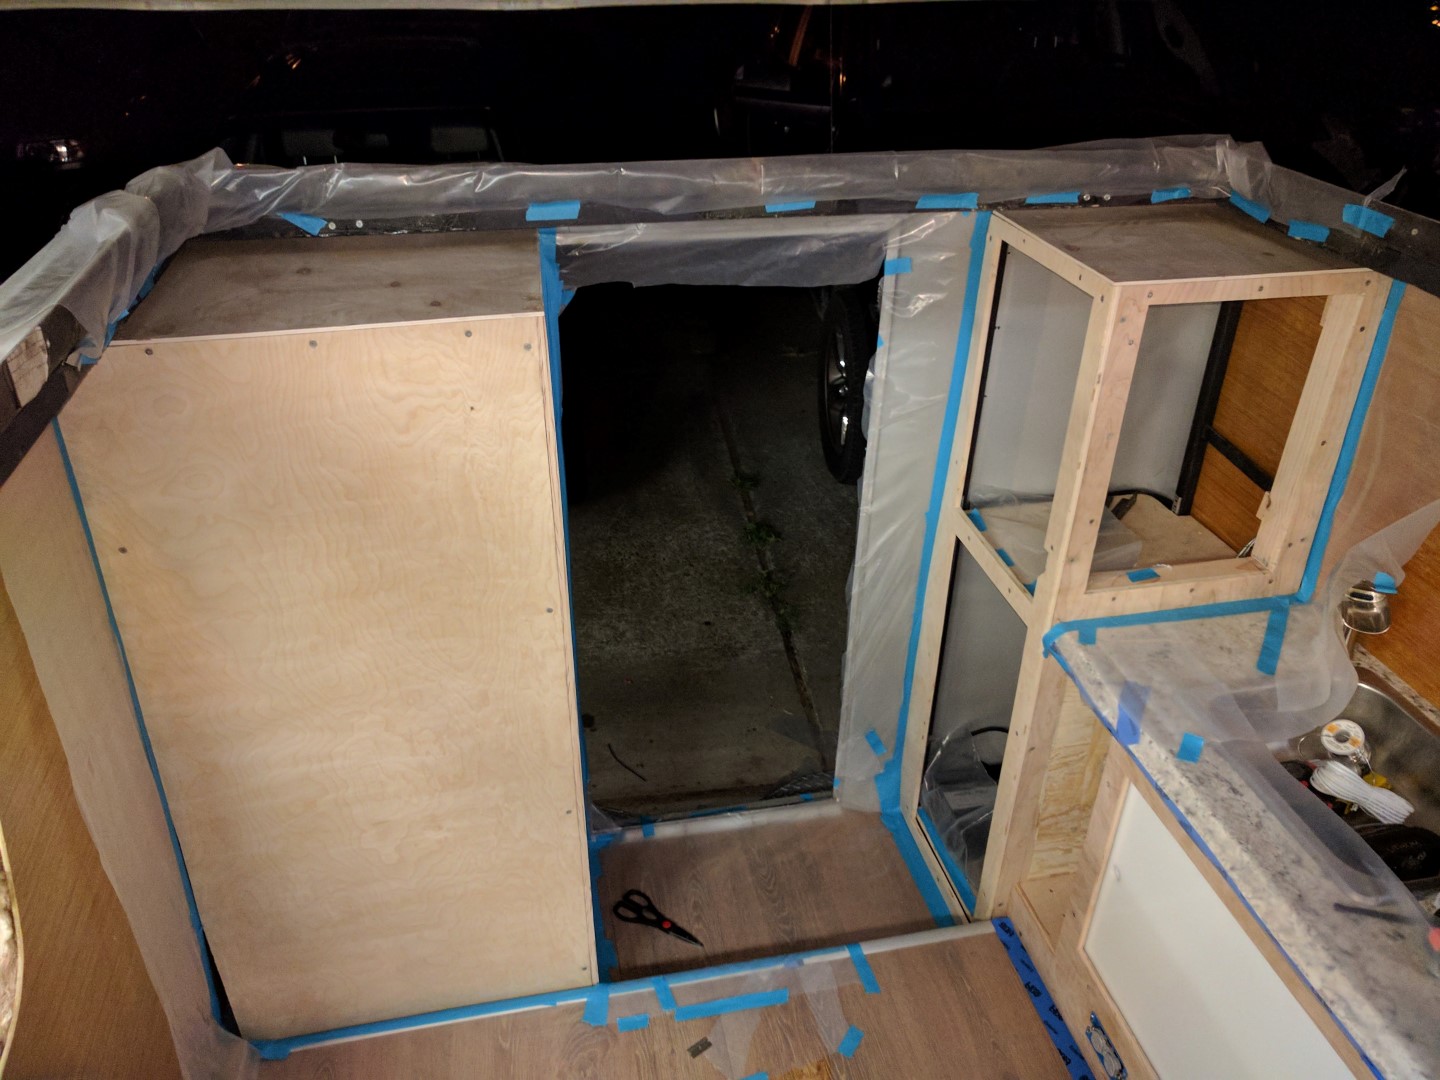
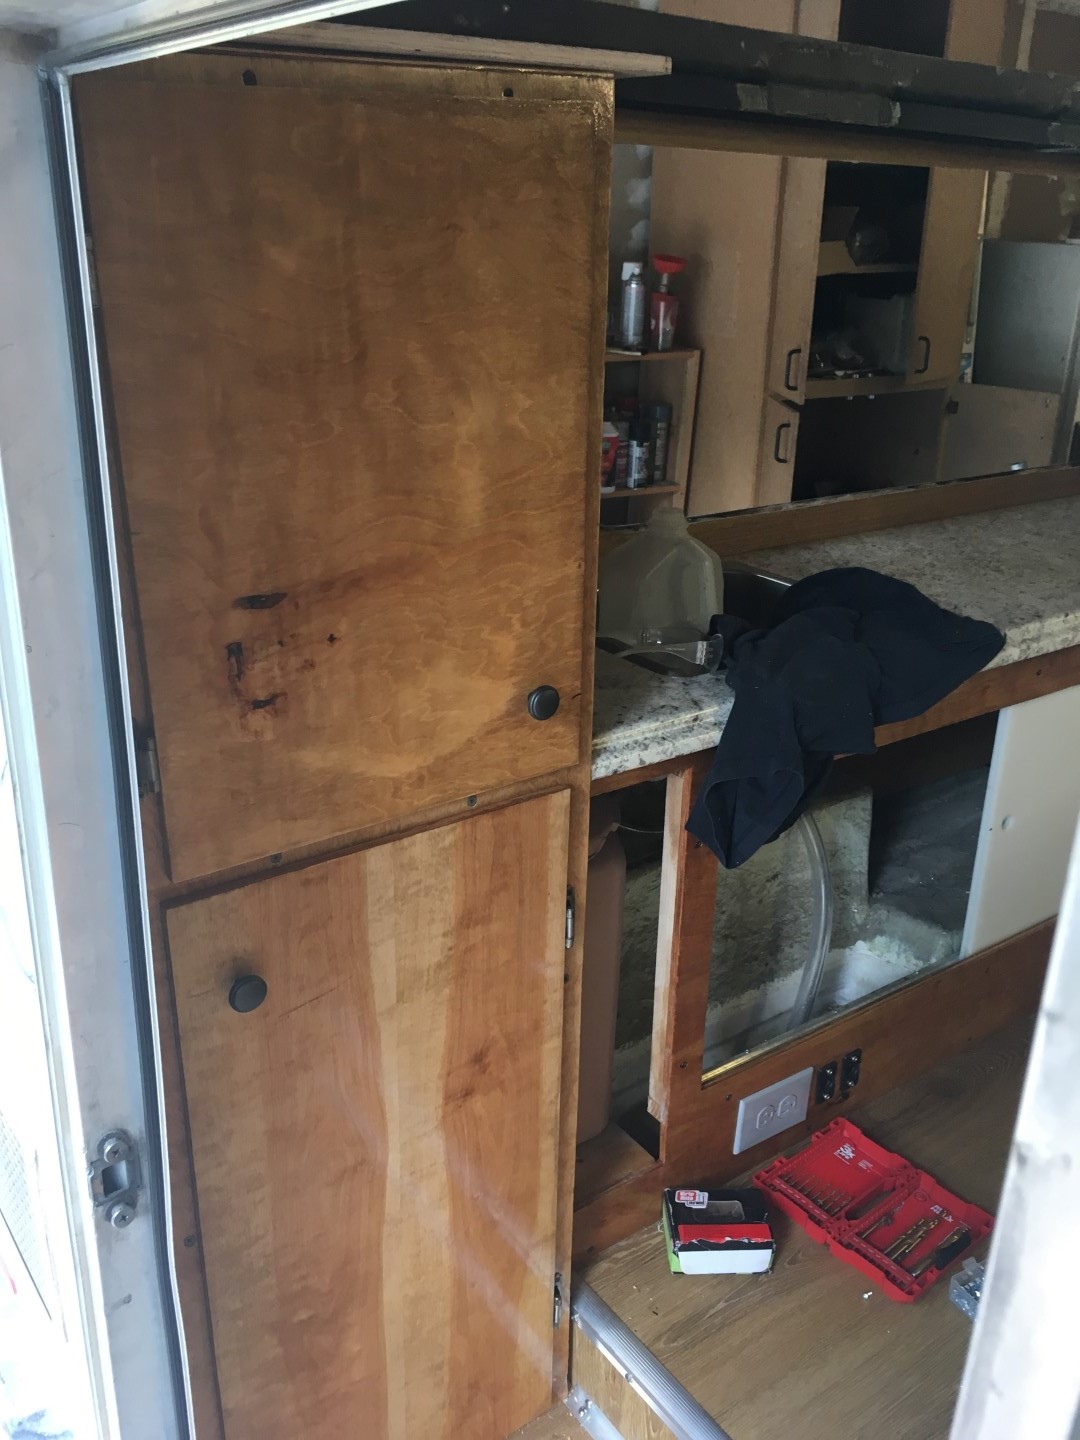
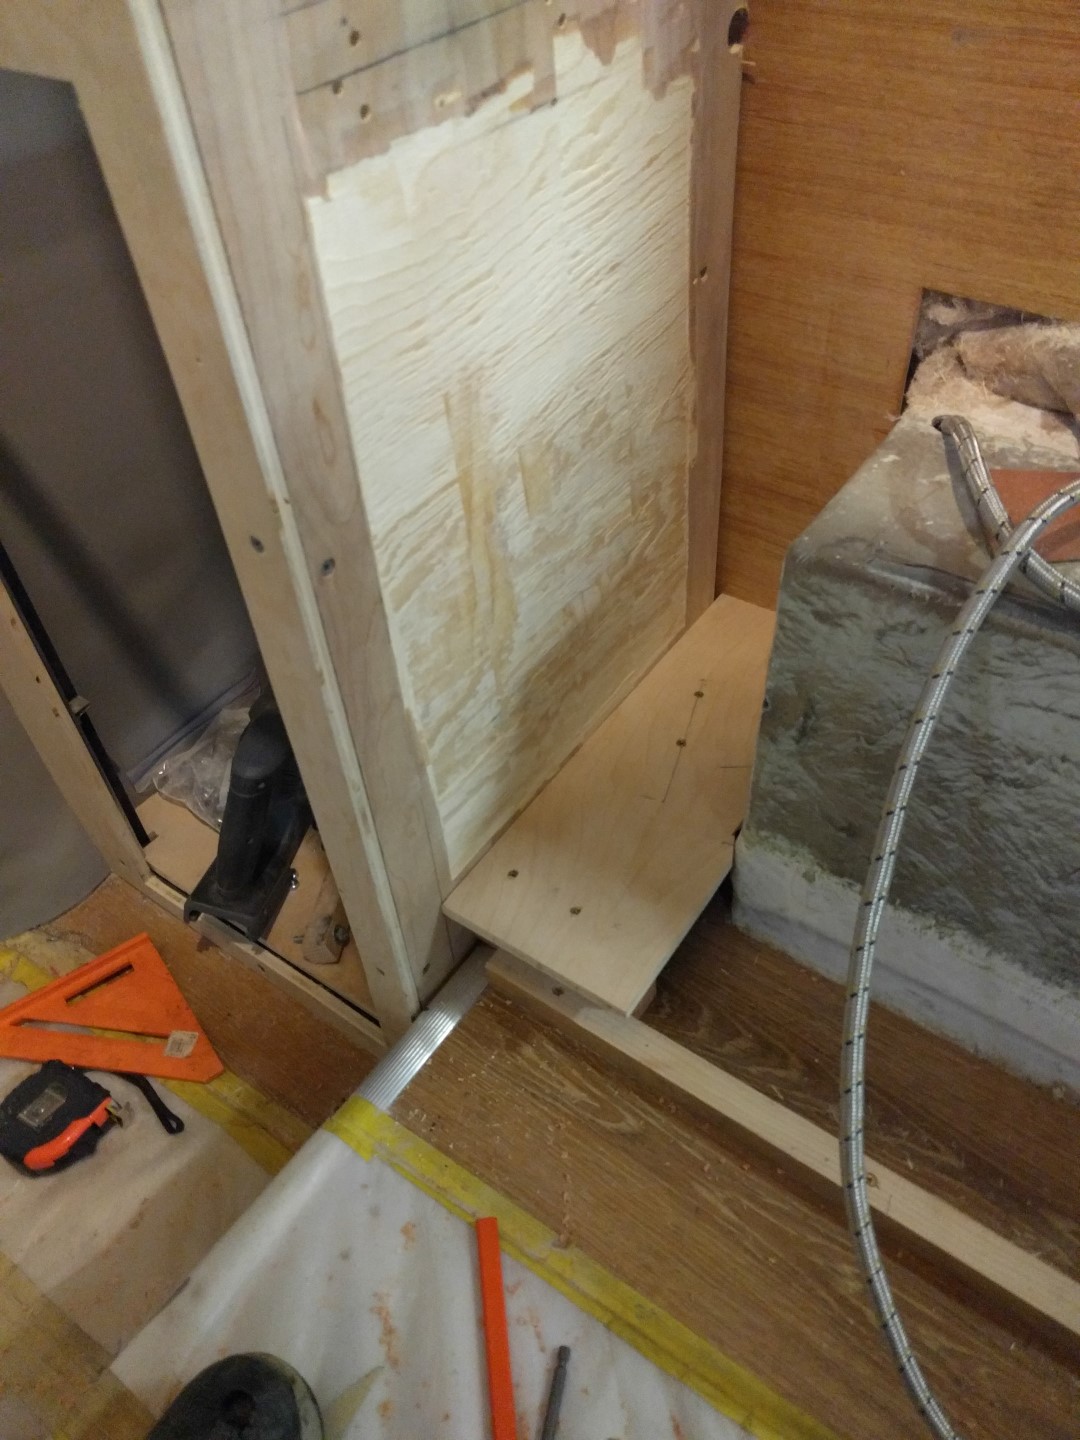
Cabinets
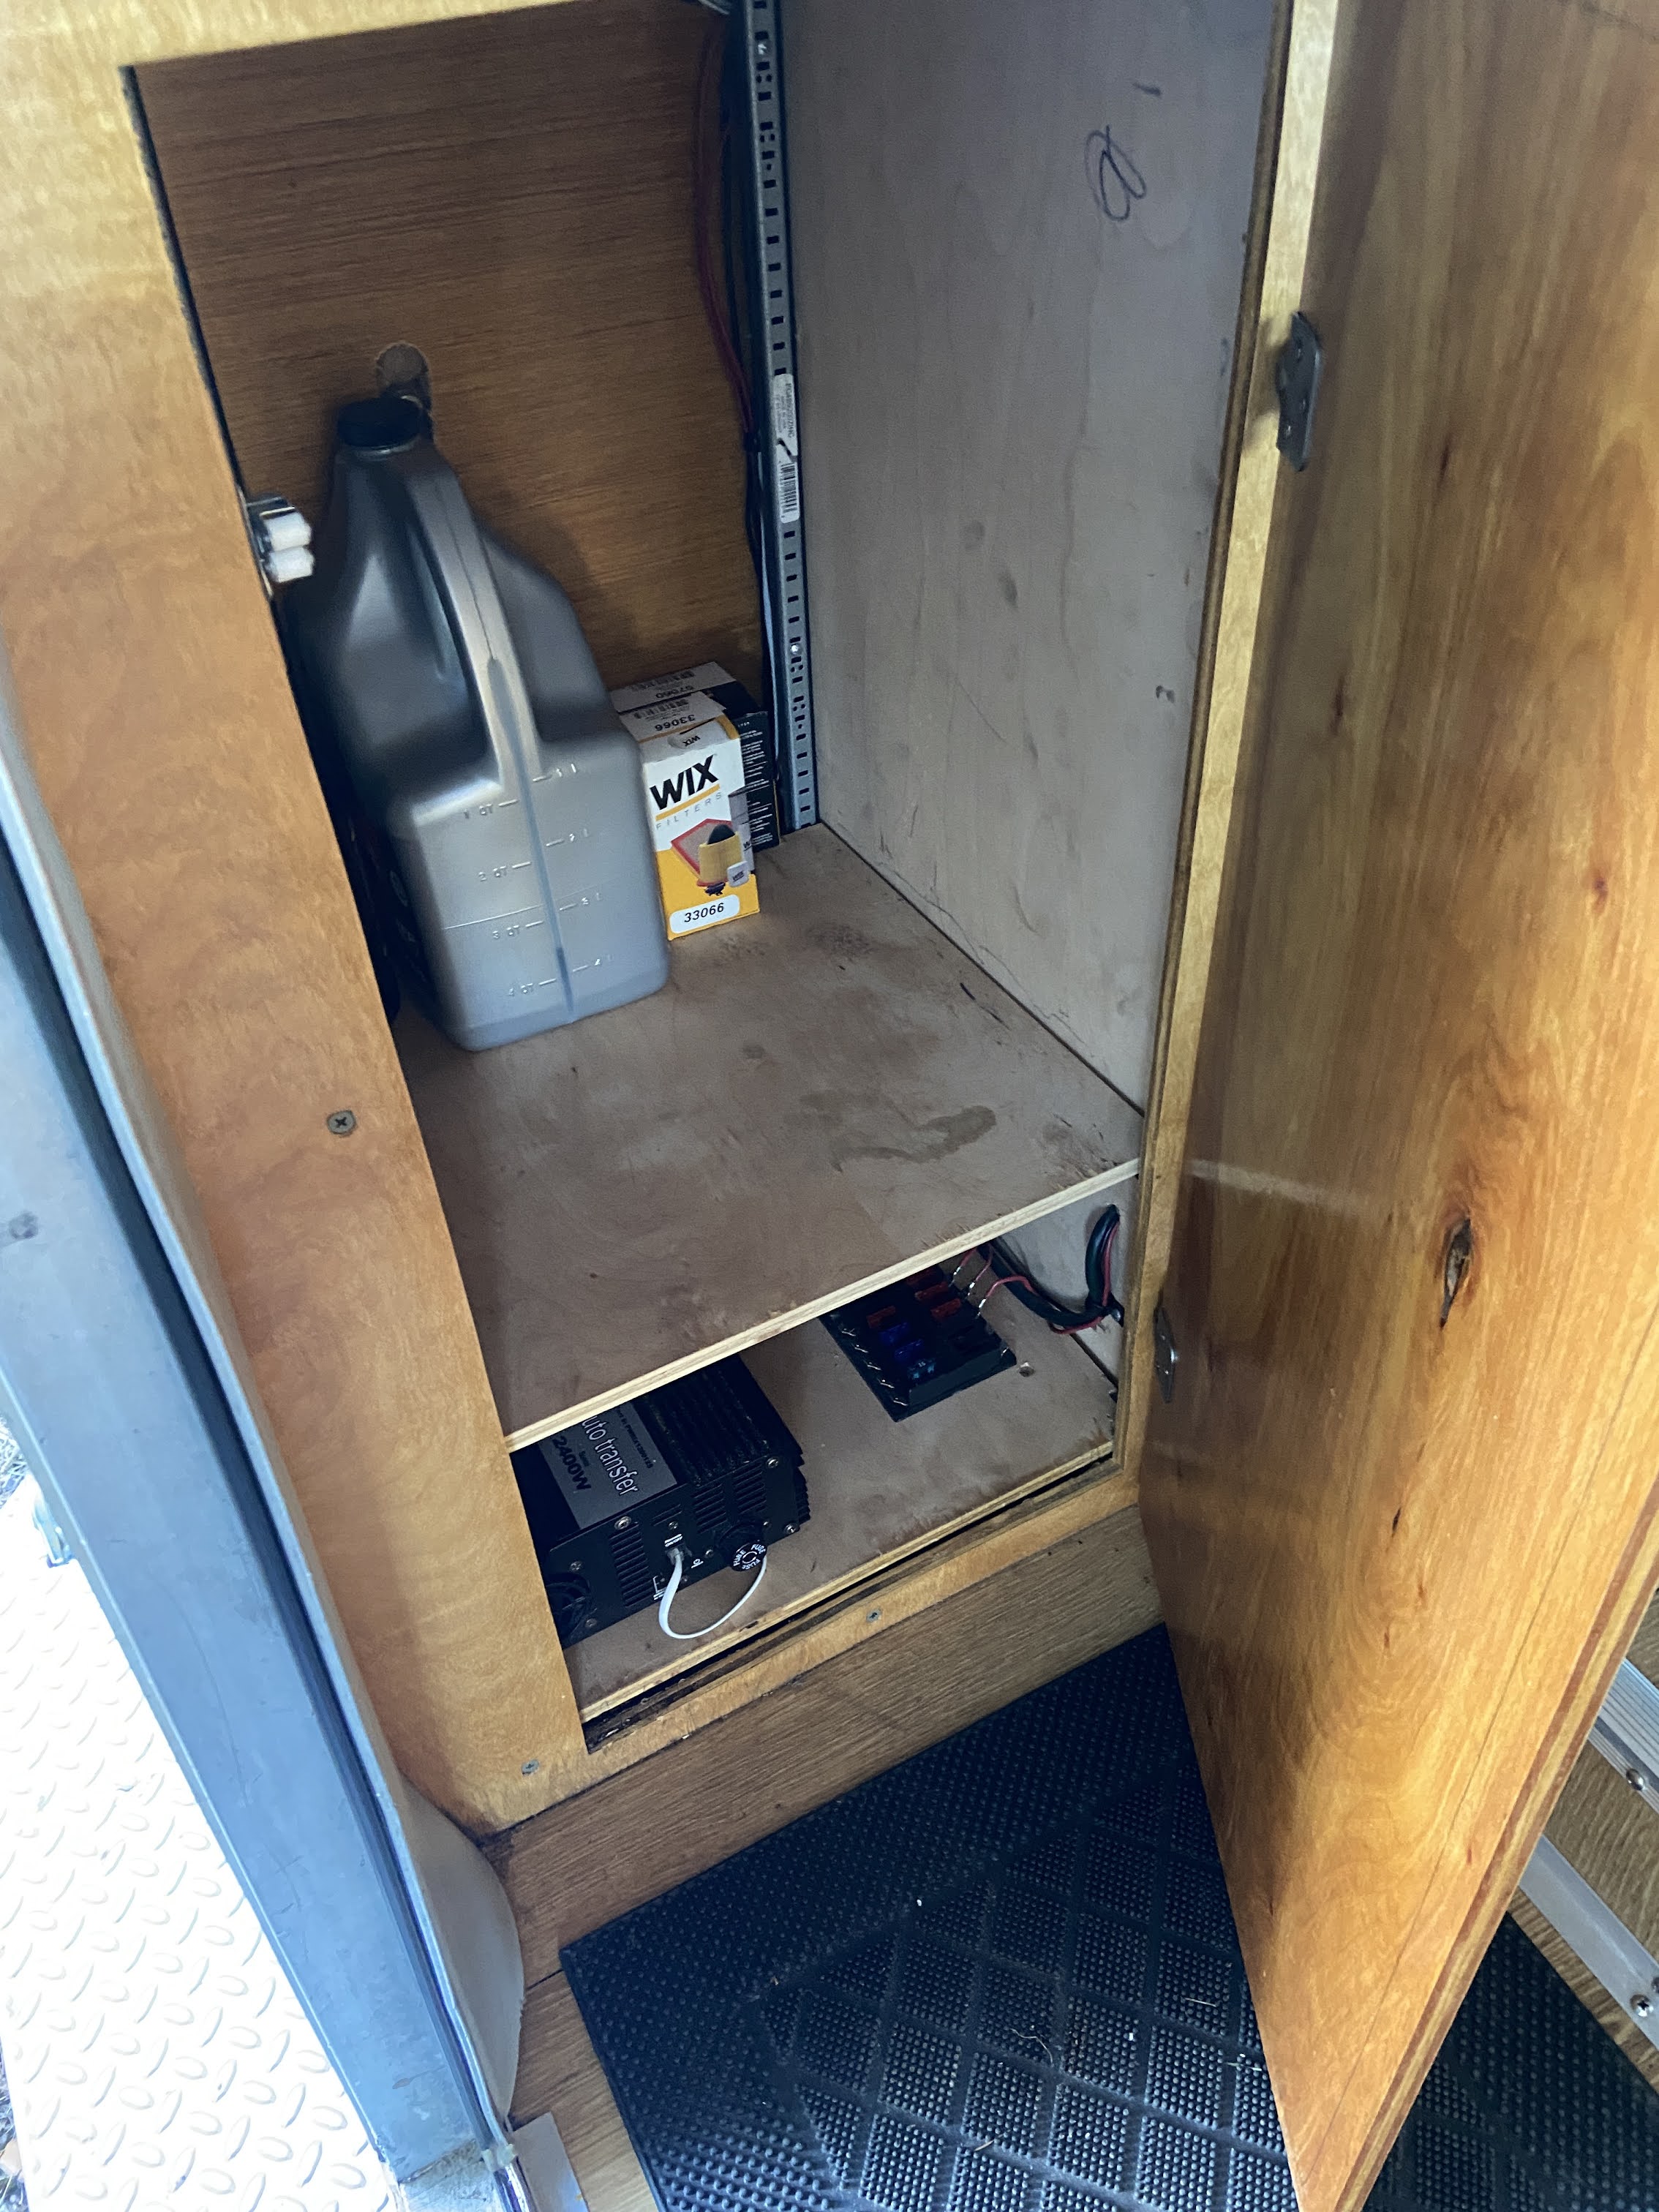
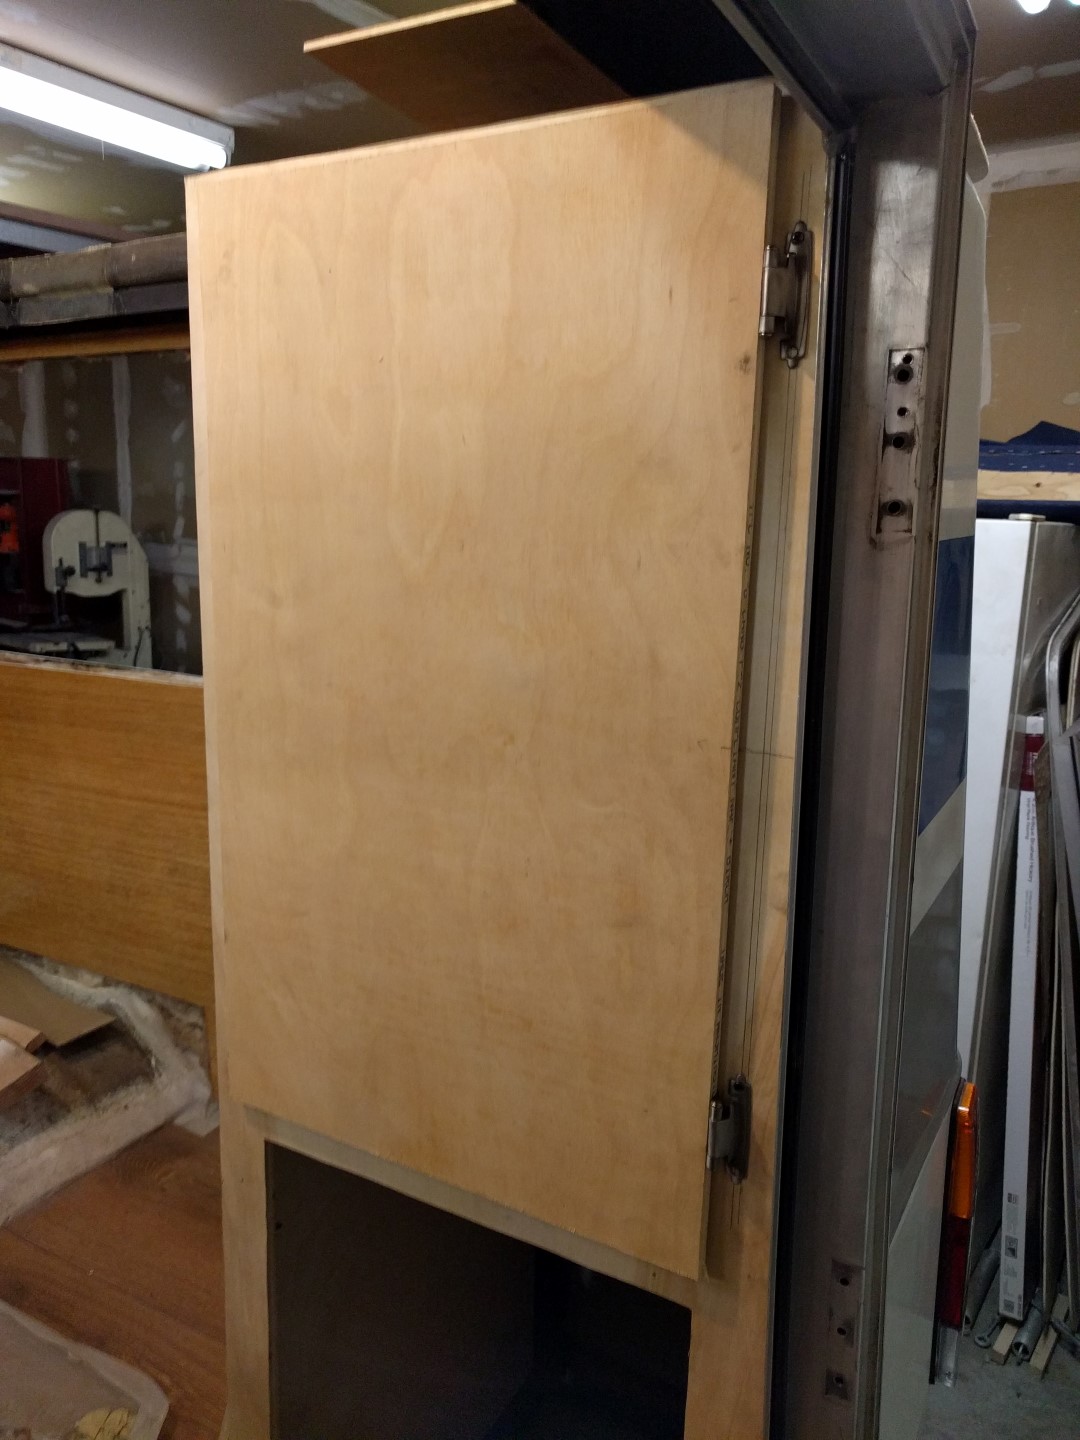
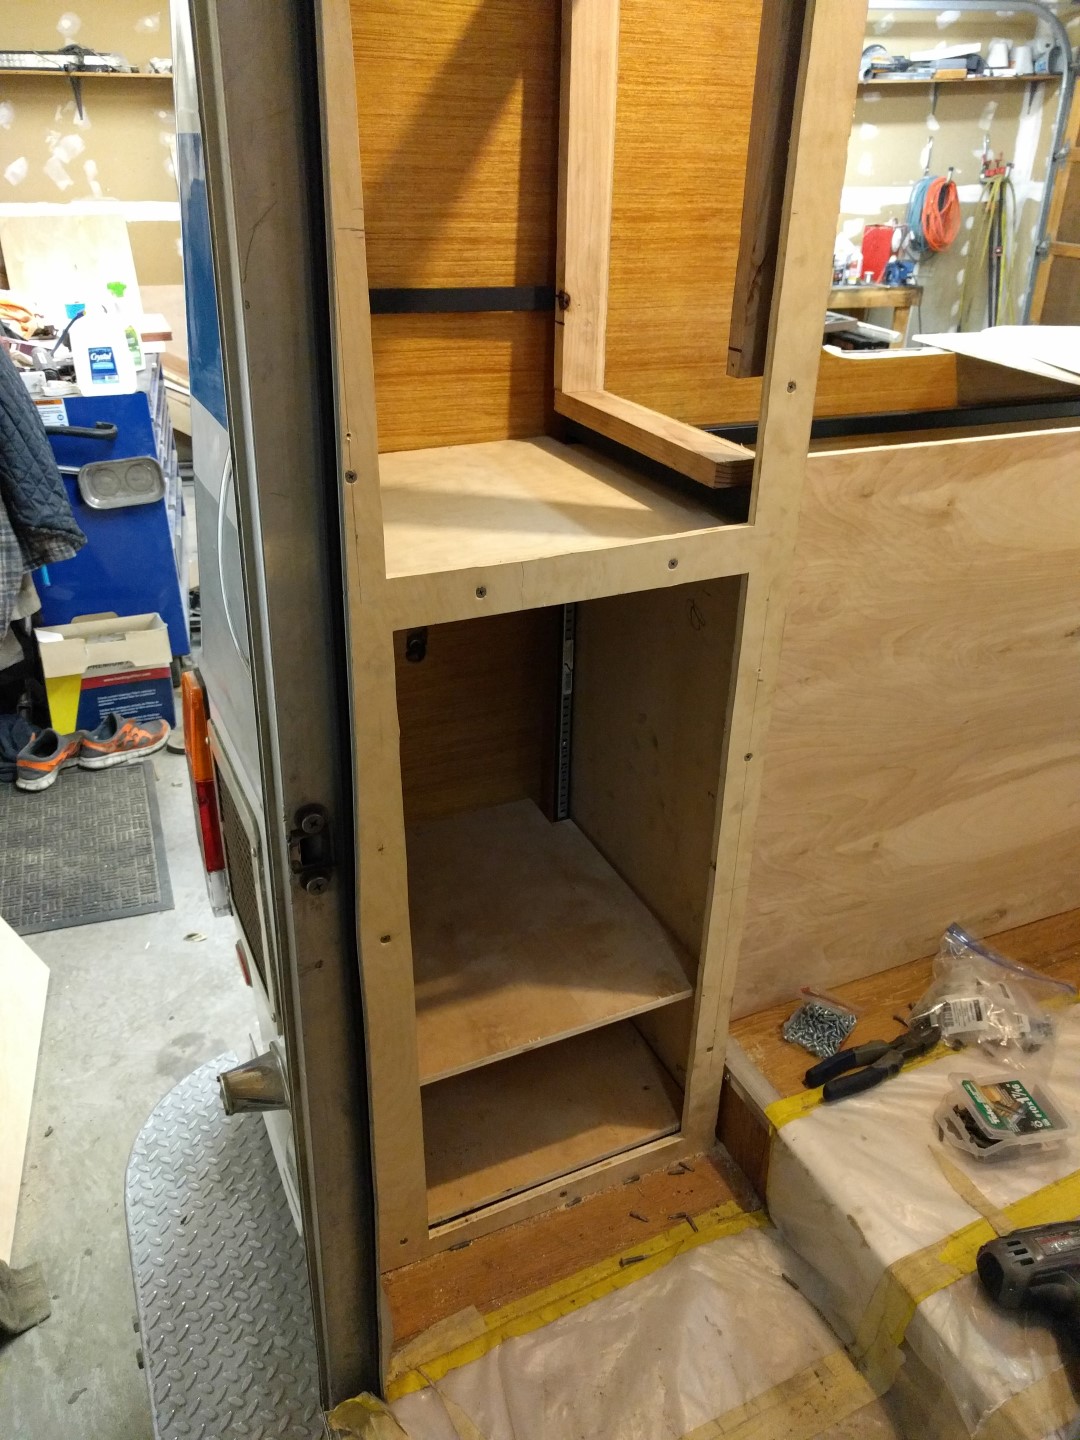
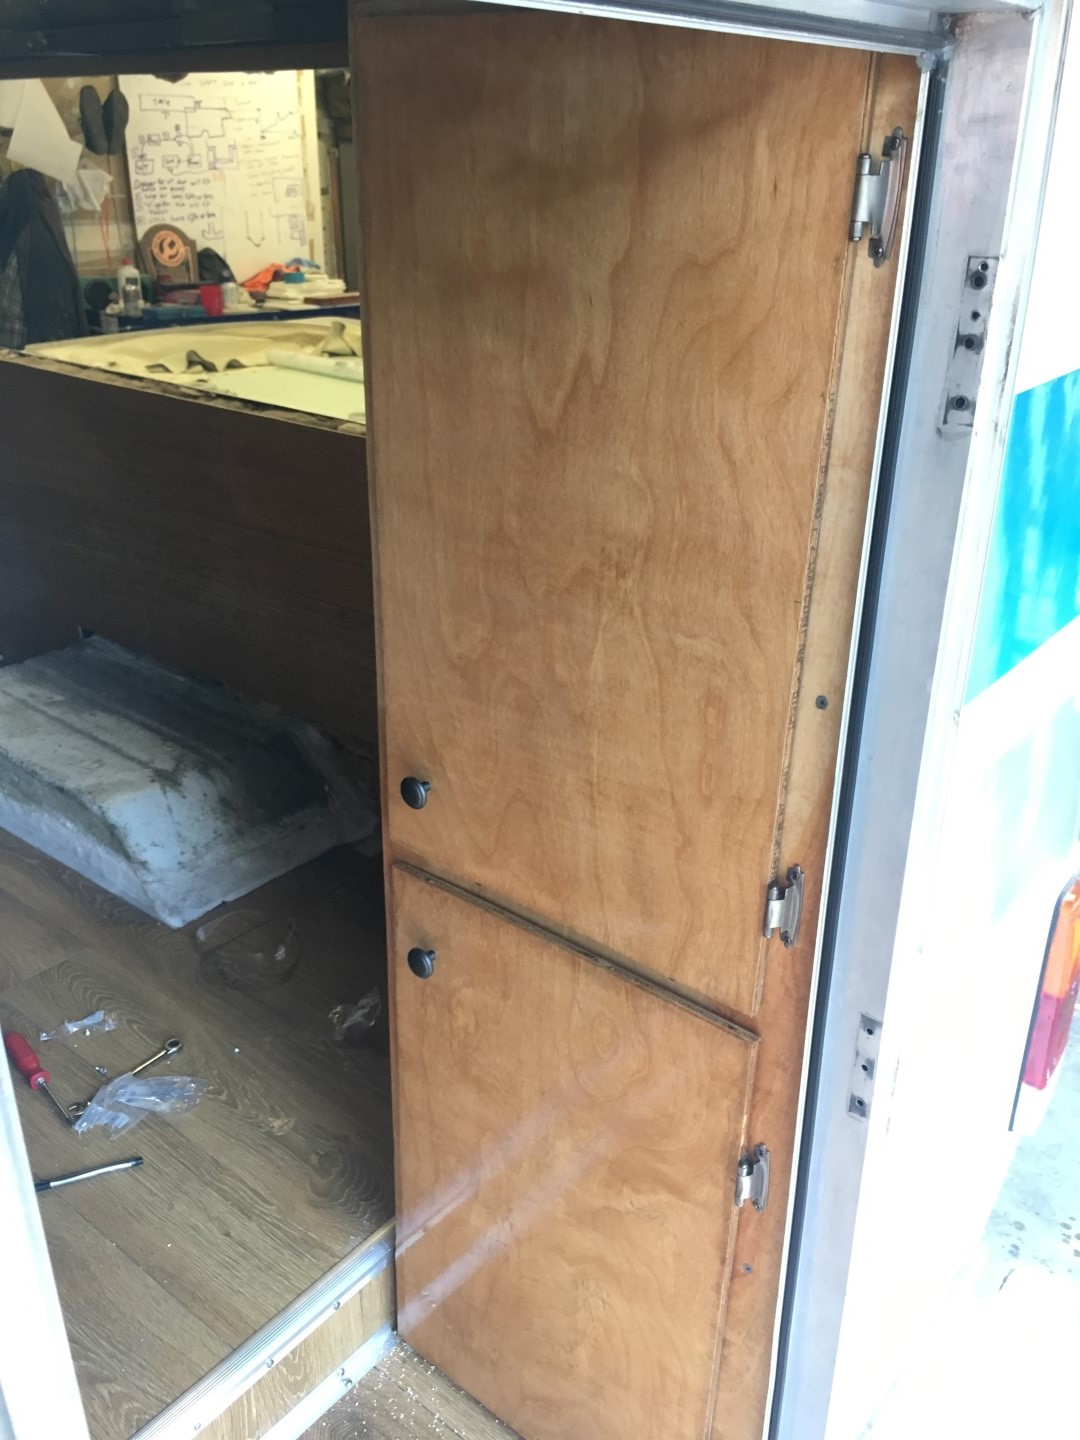
The two rear closets were framed using a combination of metal: 1” square tubing and 1” angle iron. The metal frame was spray painted black and secured to the floor with bolts and 1/2” sanded plywood covers the metal frame. The plywood has very specific shapes and requires a template to be made before cutting the plywood to ensure a proper fit. Two large rectangular holes were made in the front of the closet for hinged cabinet door access into the closet. Three of the doors open into the cabin and the other one opens out for easy access to things when standing outside of the camper.
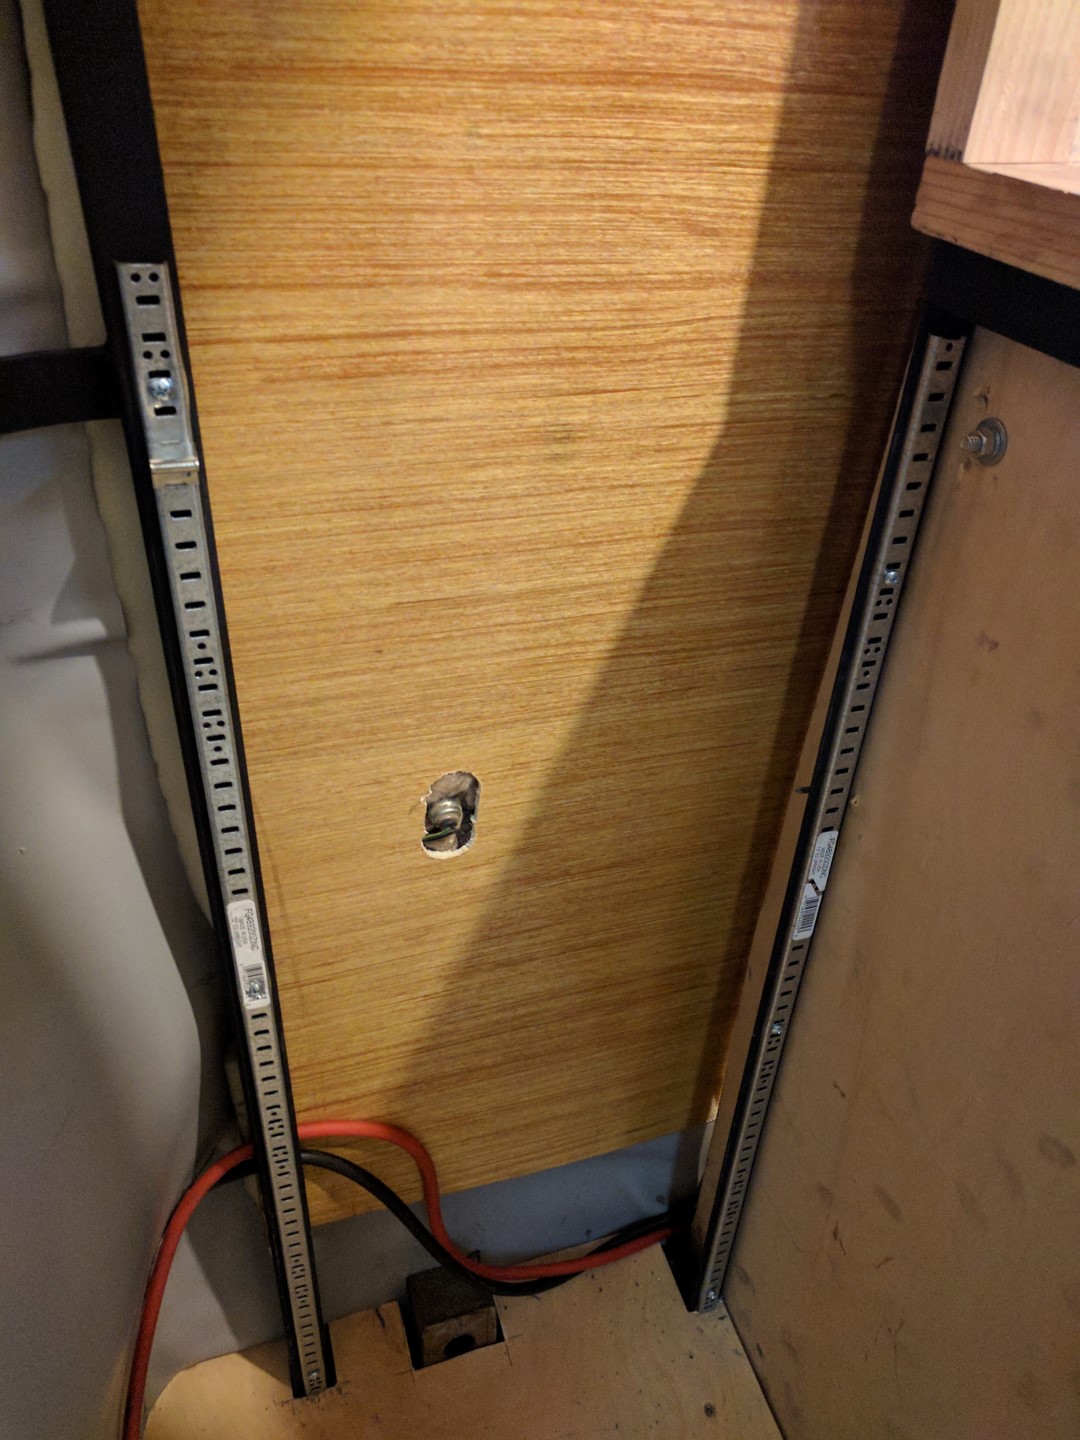
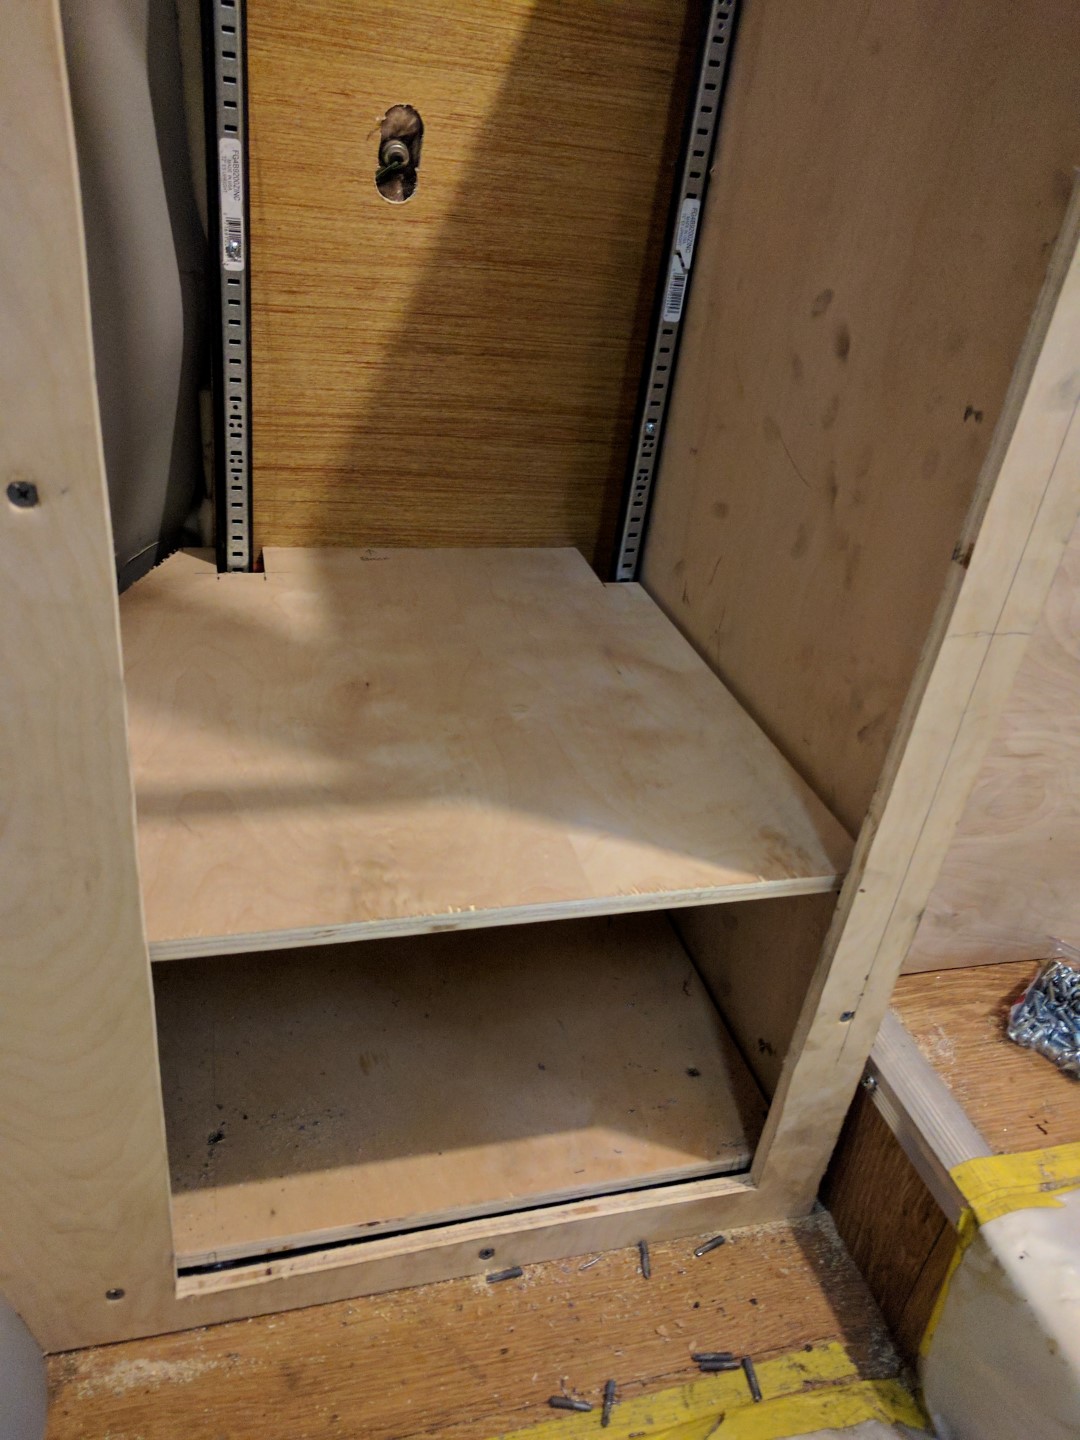
Adjustable shelf brackets were screwed to the metal frame and custom shelf sizes were cut to fit on those brackets. The driver’s side has 3 shelfs and the passenger’s side has 4 shelfs. The lower shelf on the driver’s side houses all the electronics: inverter, wiring, fuse block, etc.
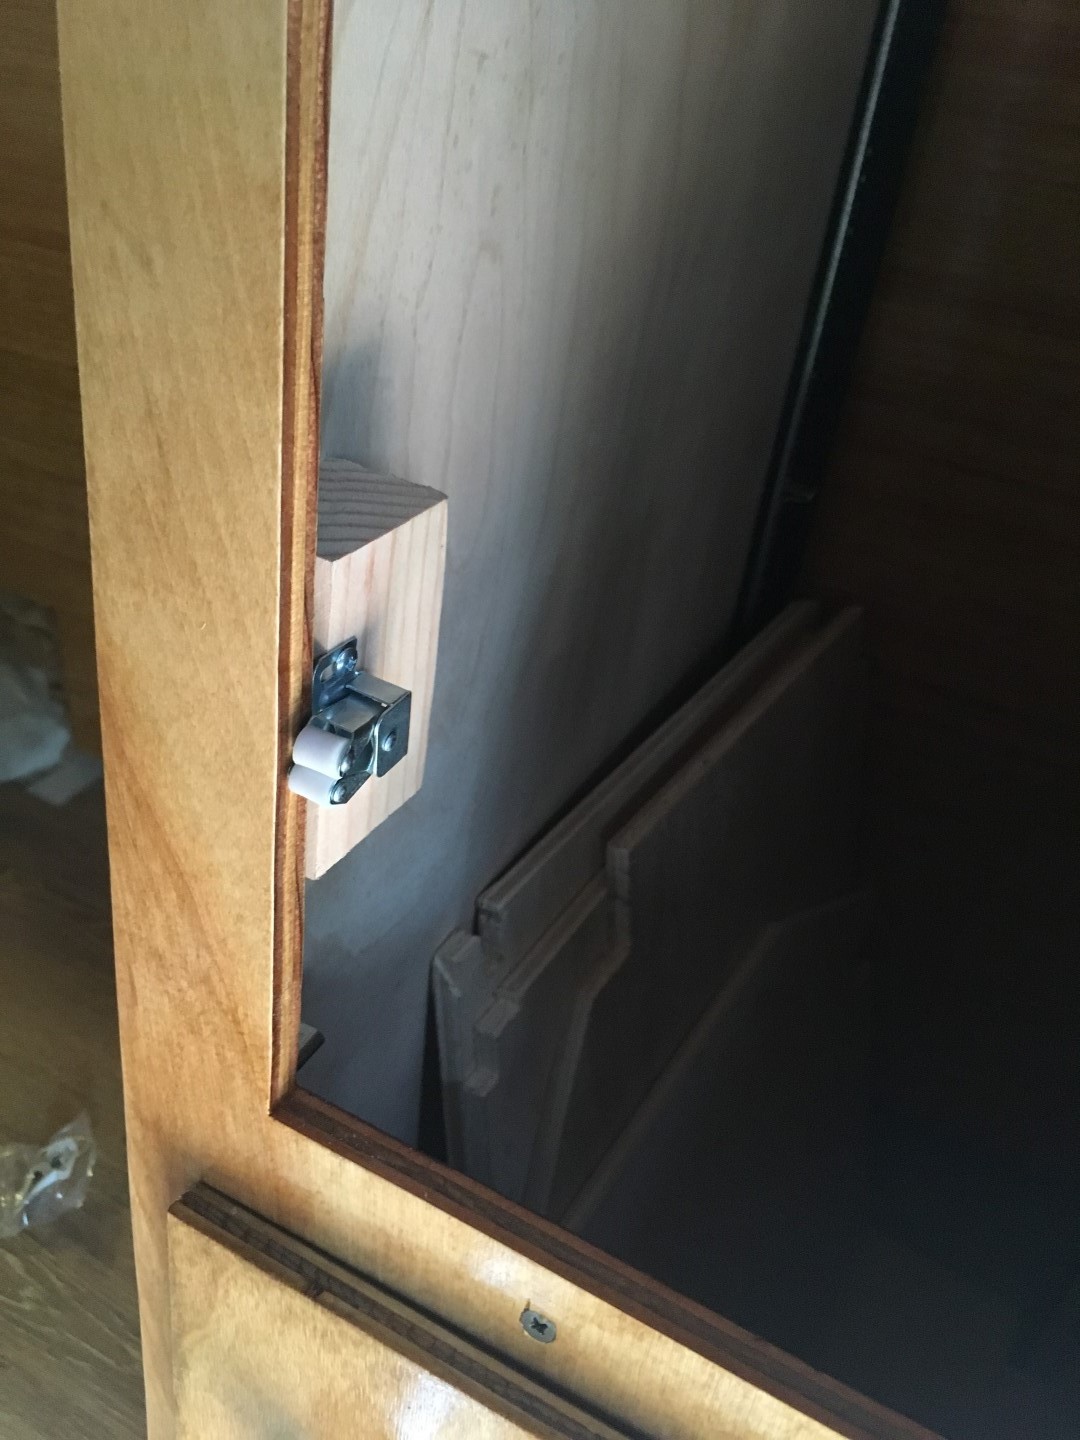
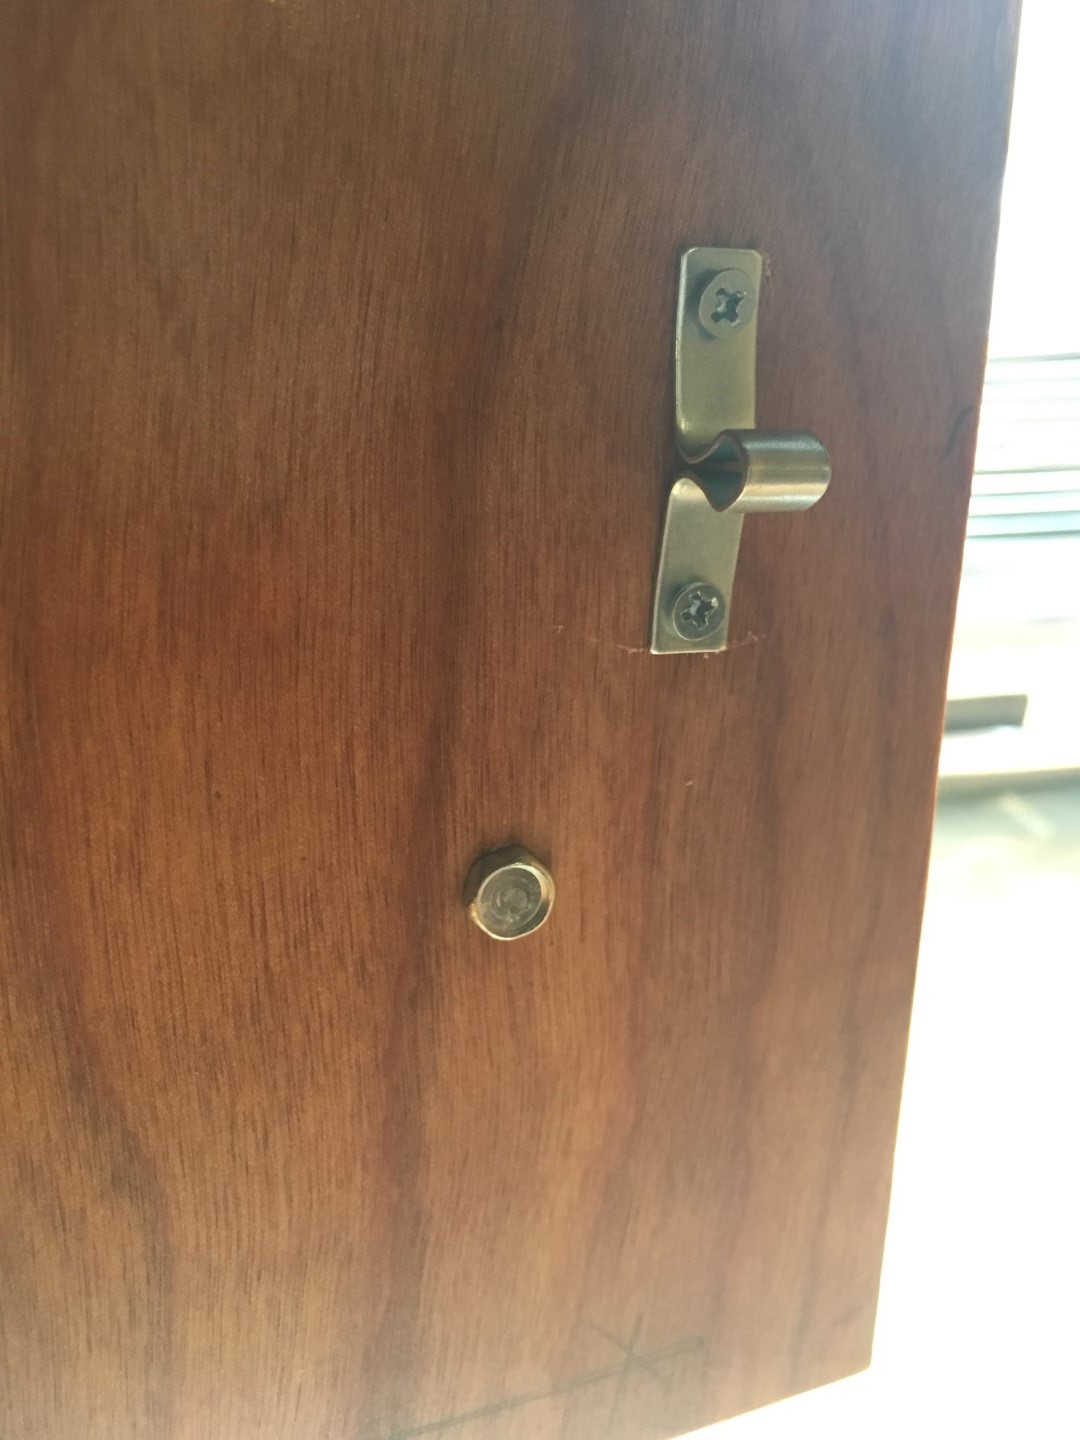
The interior was finished and then all the cabinet door hardware was installed: hinges, door knob, and latches.


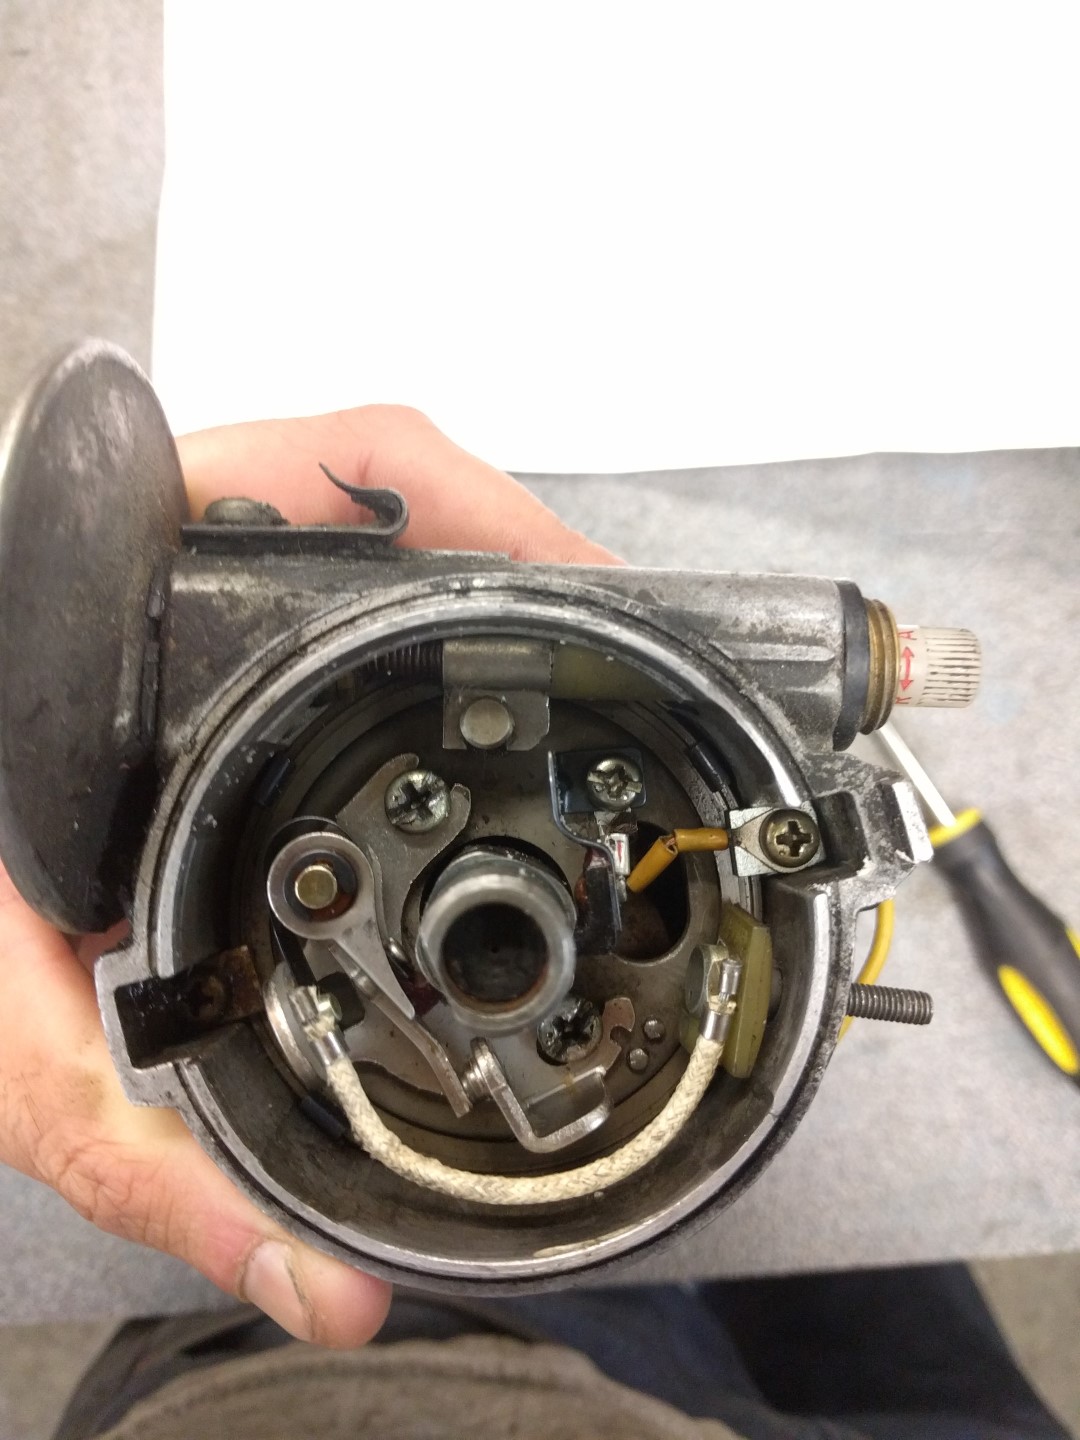
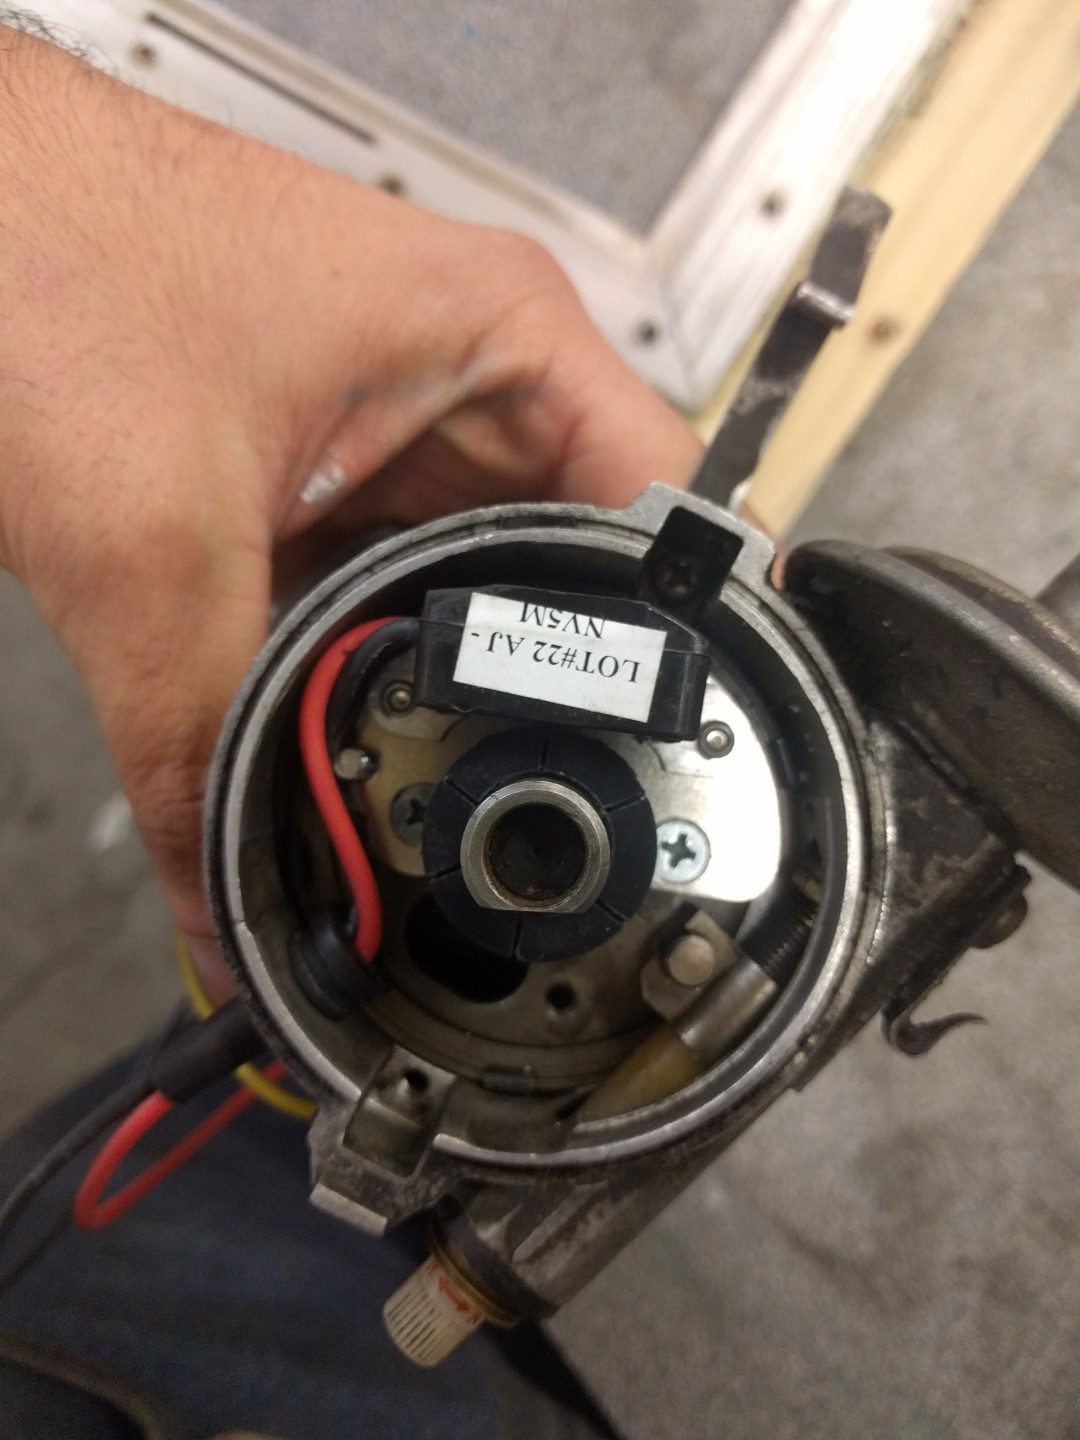
Ignition
The ignition from some of the 1977’s (I think) has points - and that is lame-o. Fortunately, a company called Pertronix makes a electronic ignition replacement: Pertronix 1641 that is compatible with these Toyota Pickups. This module mounts inside of the ignition distributor and replaces the stock points and igniter; only external component required is the ignition coil.
The Pertronix system works without a physical electrical connection. Instead, a permanent magnet is installed on the distributor rotor and a hall effect sensor inside of the ignition module picks up when that magnet passes the surface of the module. The signal then grounds the ignition coil creating a very large electrical spike (thousands of volts) which is then sent to a particular spark plug through the distributor.
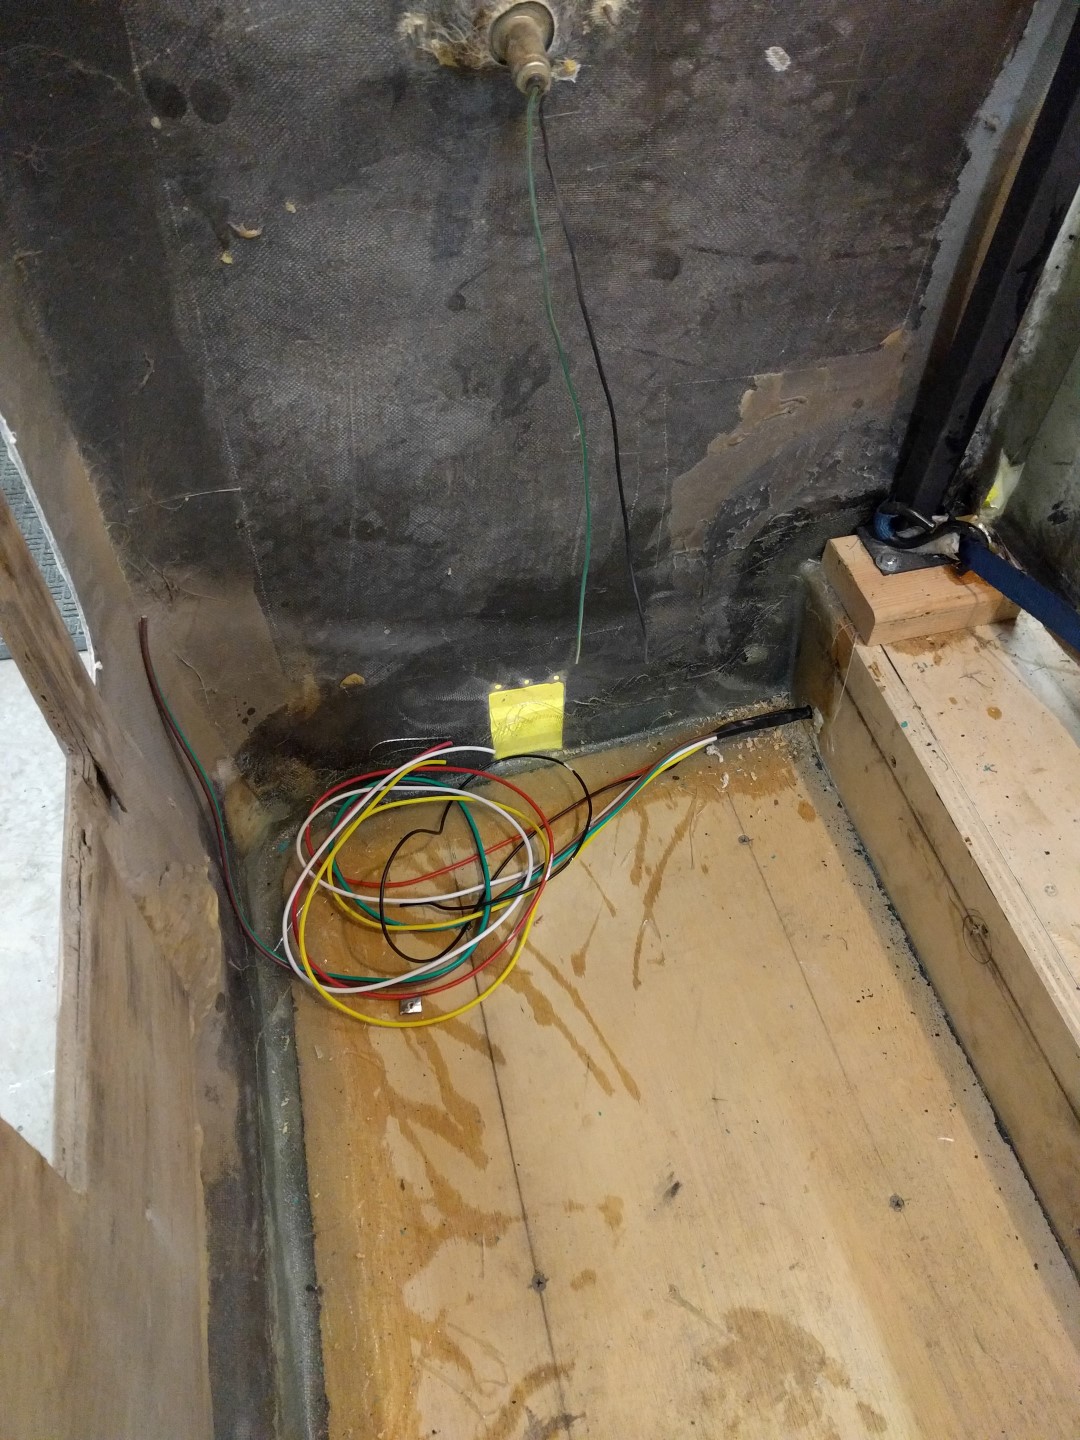
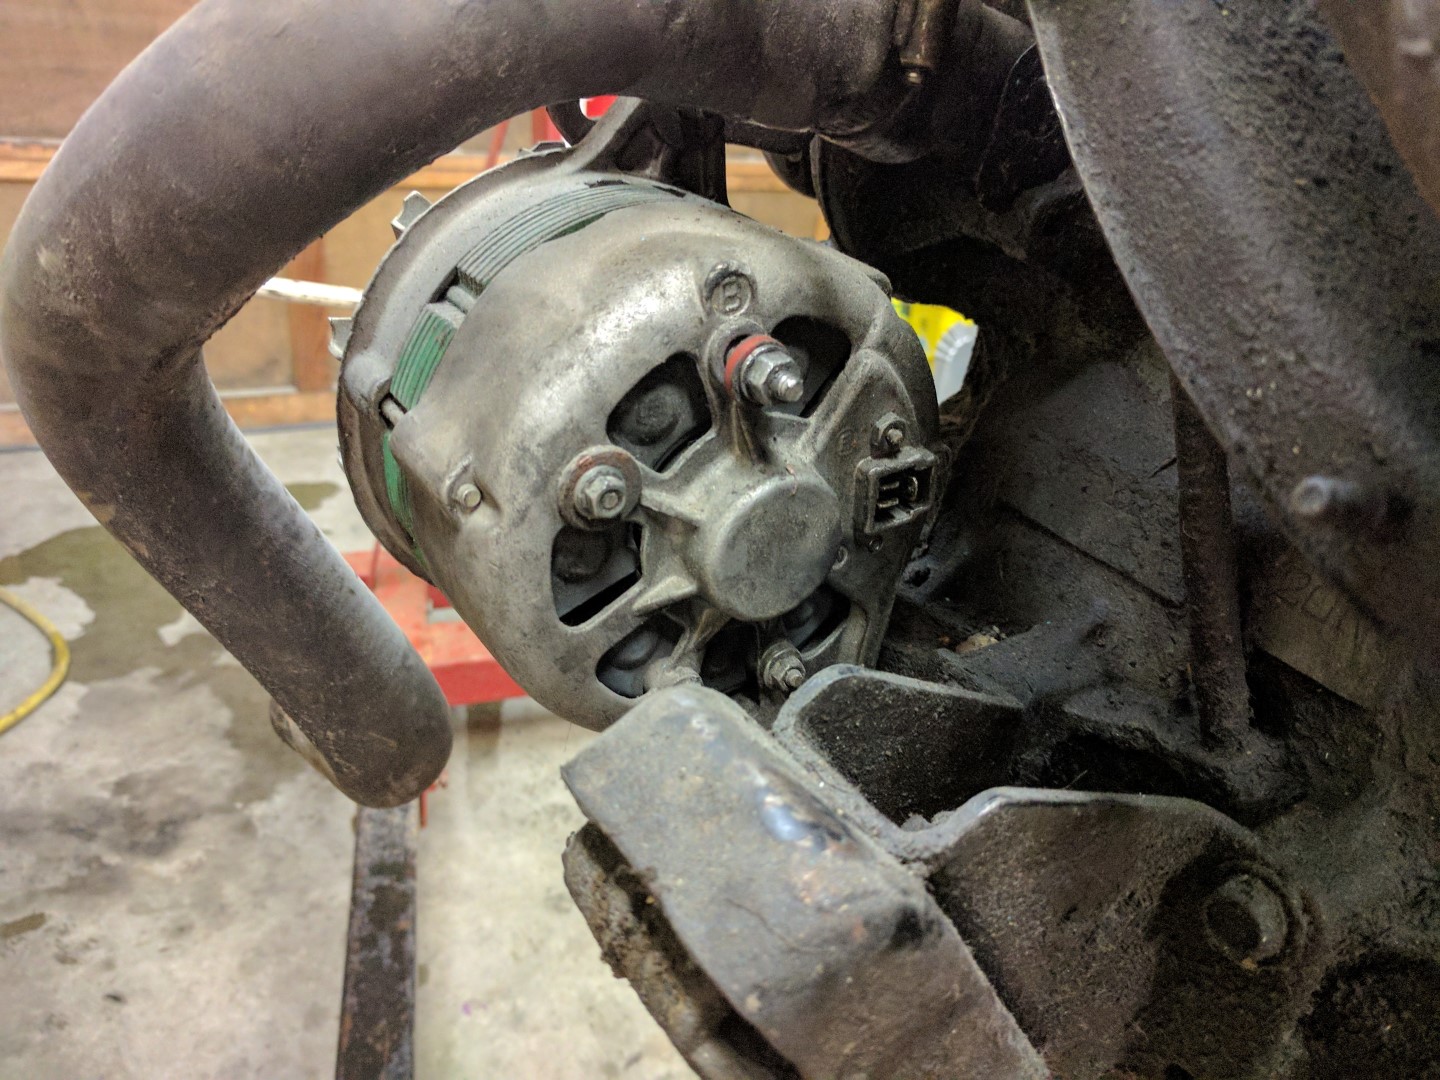
Alternator
The alternator was replaced with a brand new one from RockAuto. The way Chinook hacked into the alternator cable for the auxiliary battery was very interesting. The wiring harness up near the brake booster was just torn apart and hacked into; not very professional. Instead, I hacked a wire into the wire harness going down to the alternator that then goes to both the regular battery and the auxiliary battery when the vehicle is running (to prevent discharging the regular battery when the vehicle is not running).

Electrical
Auxiliary Battery
Covered in the next section.
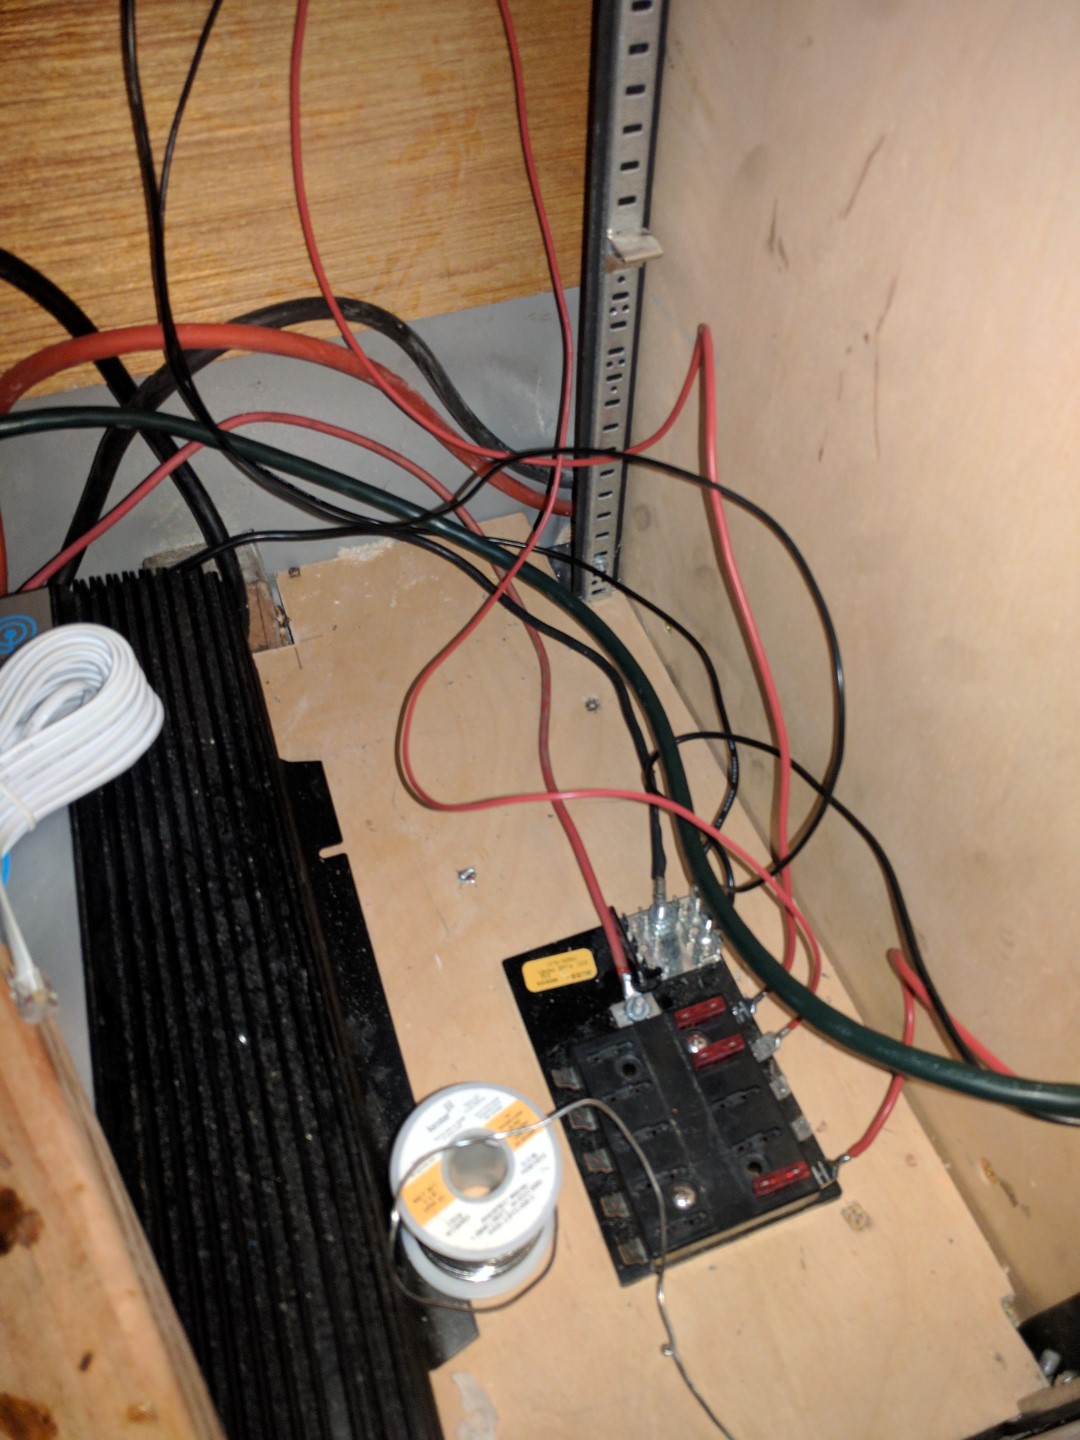
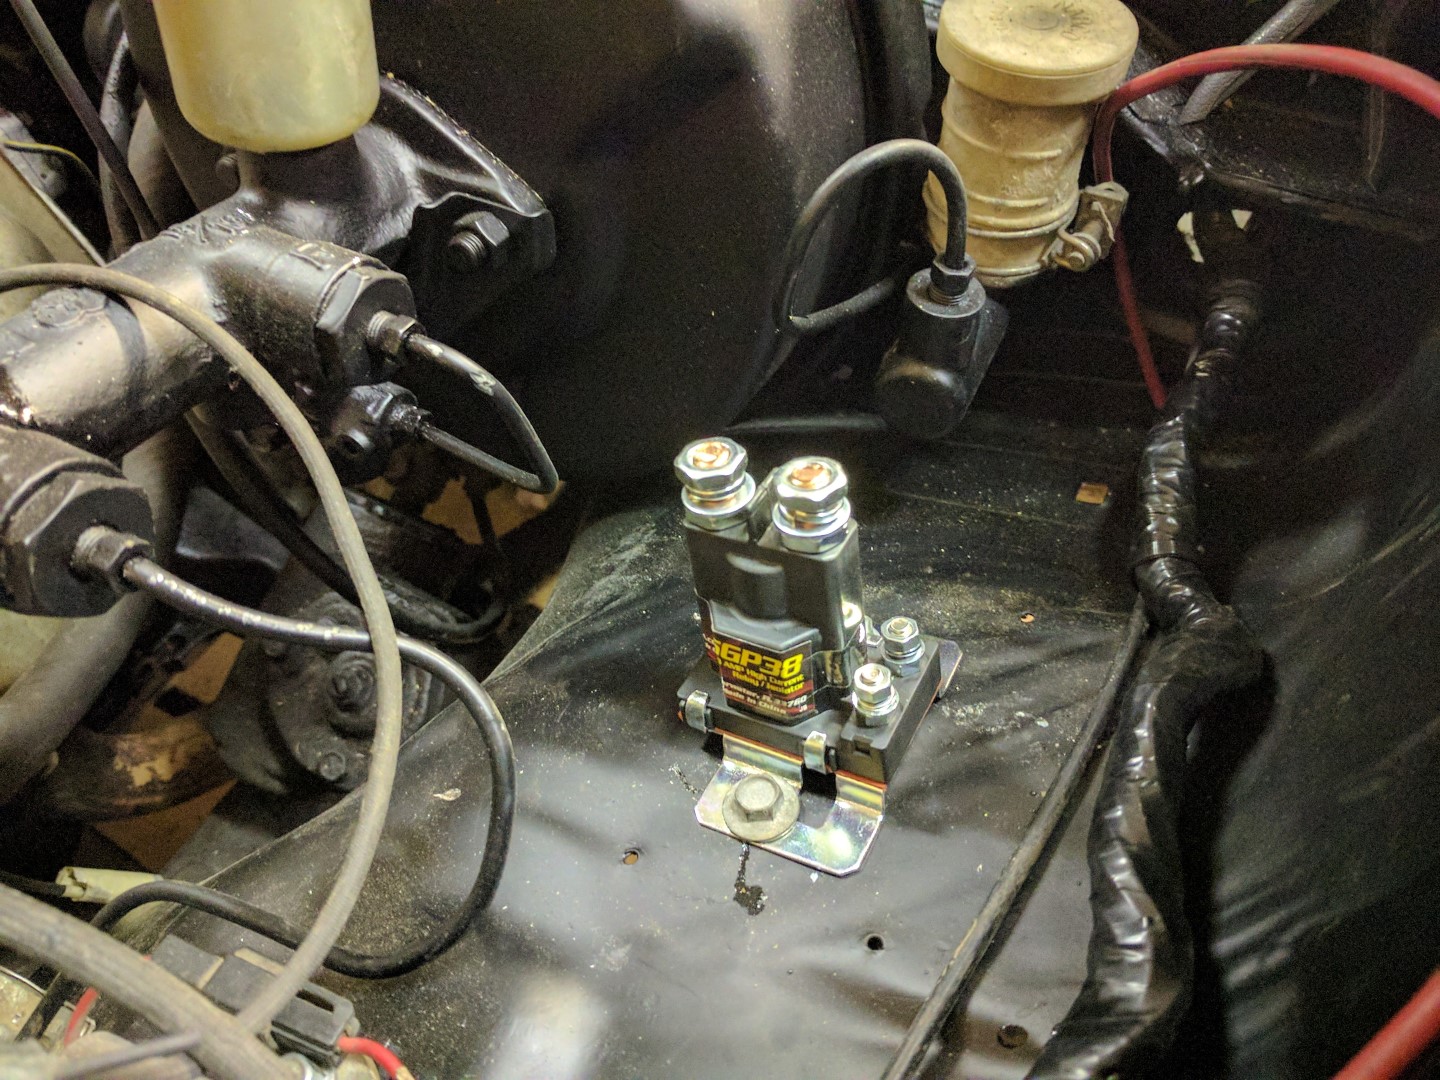
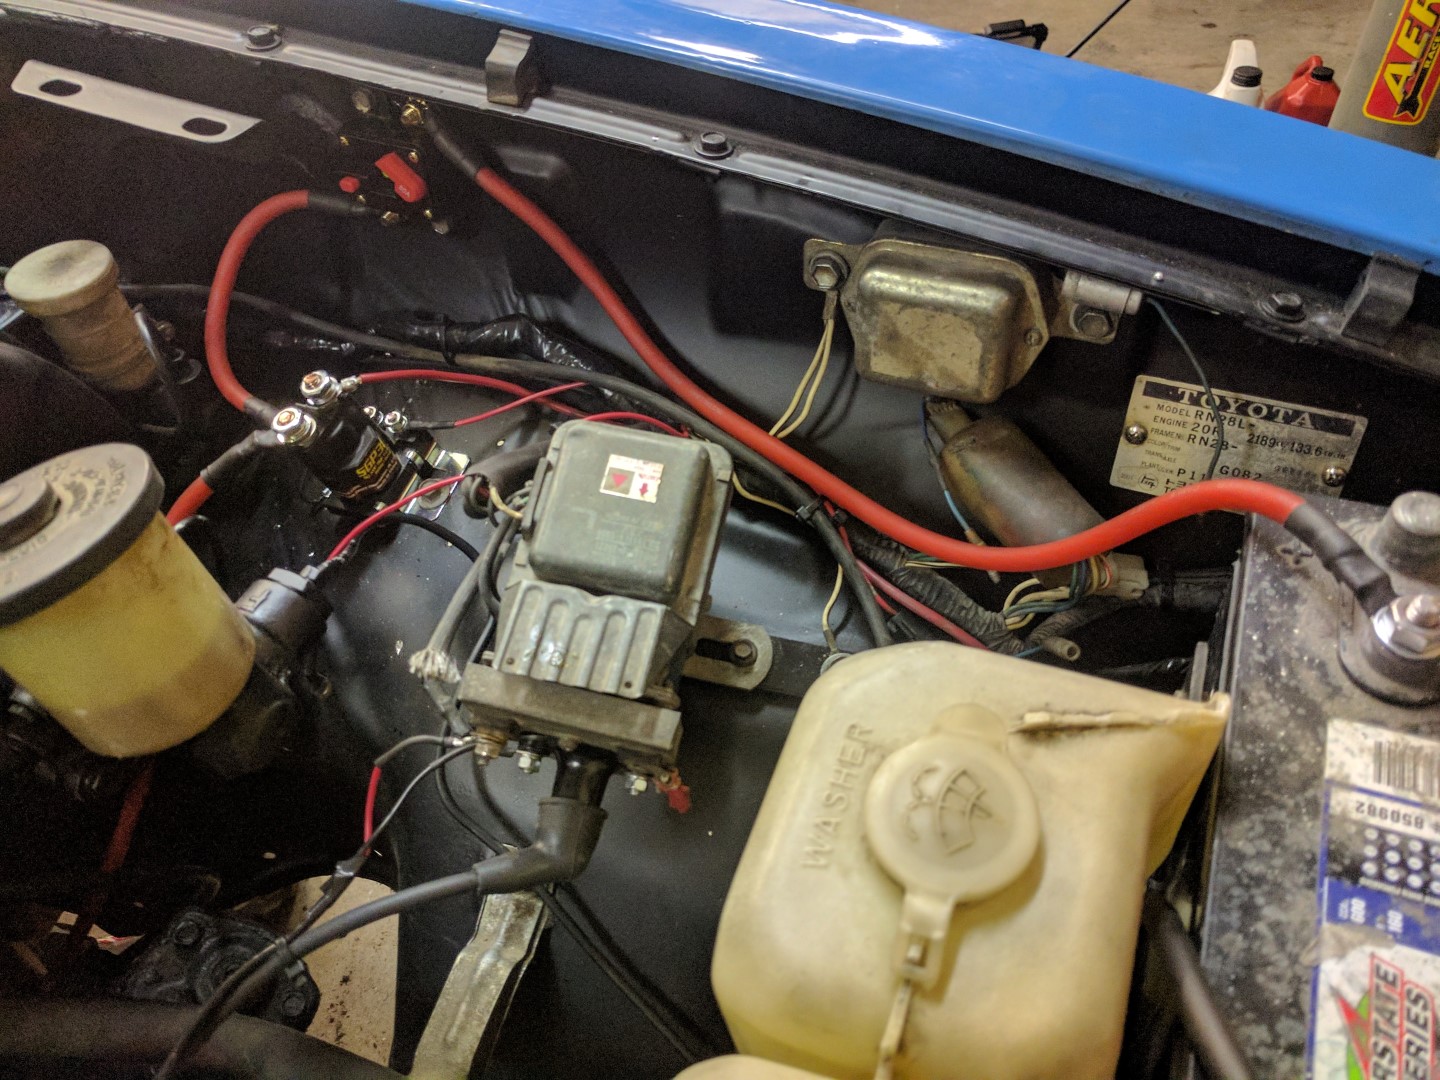
Fuse Block and Ignition Relay
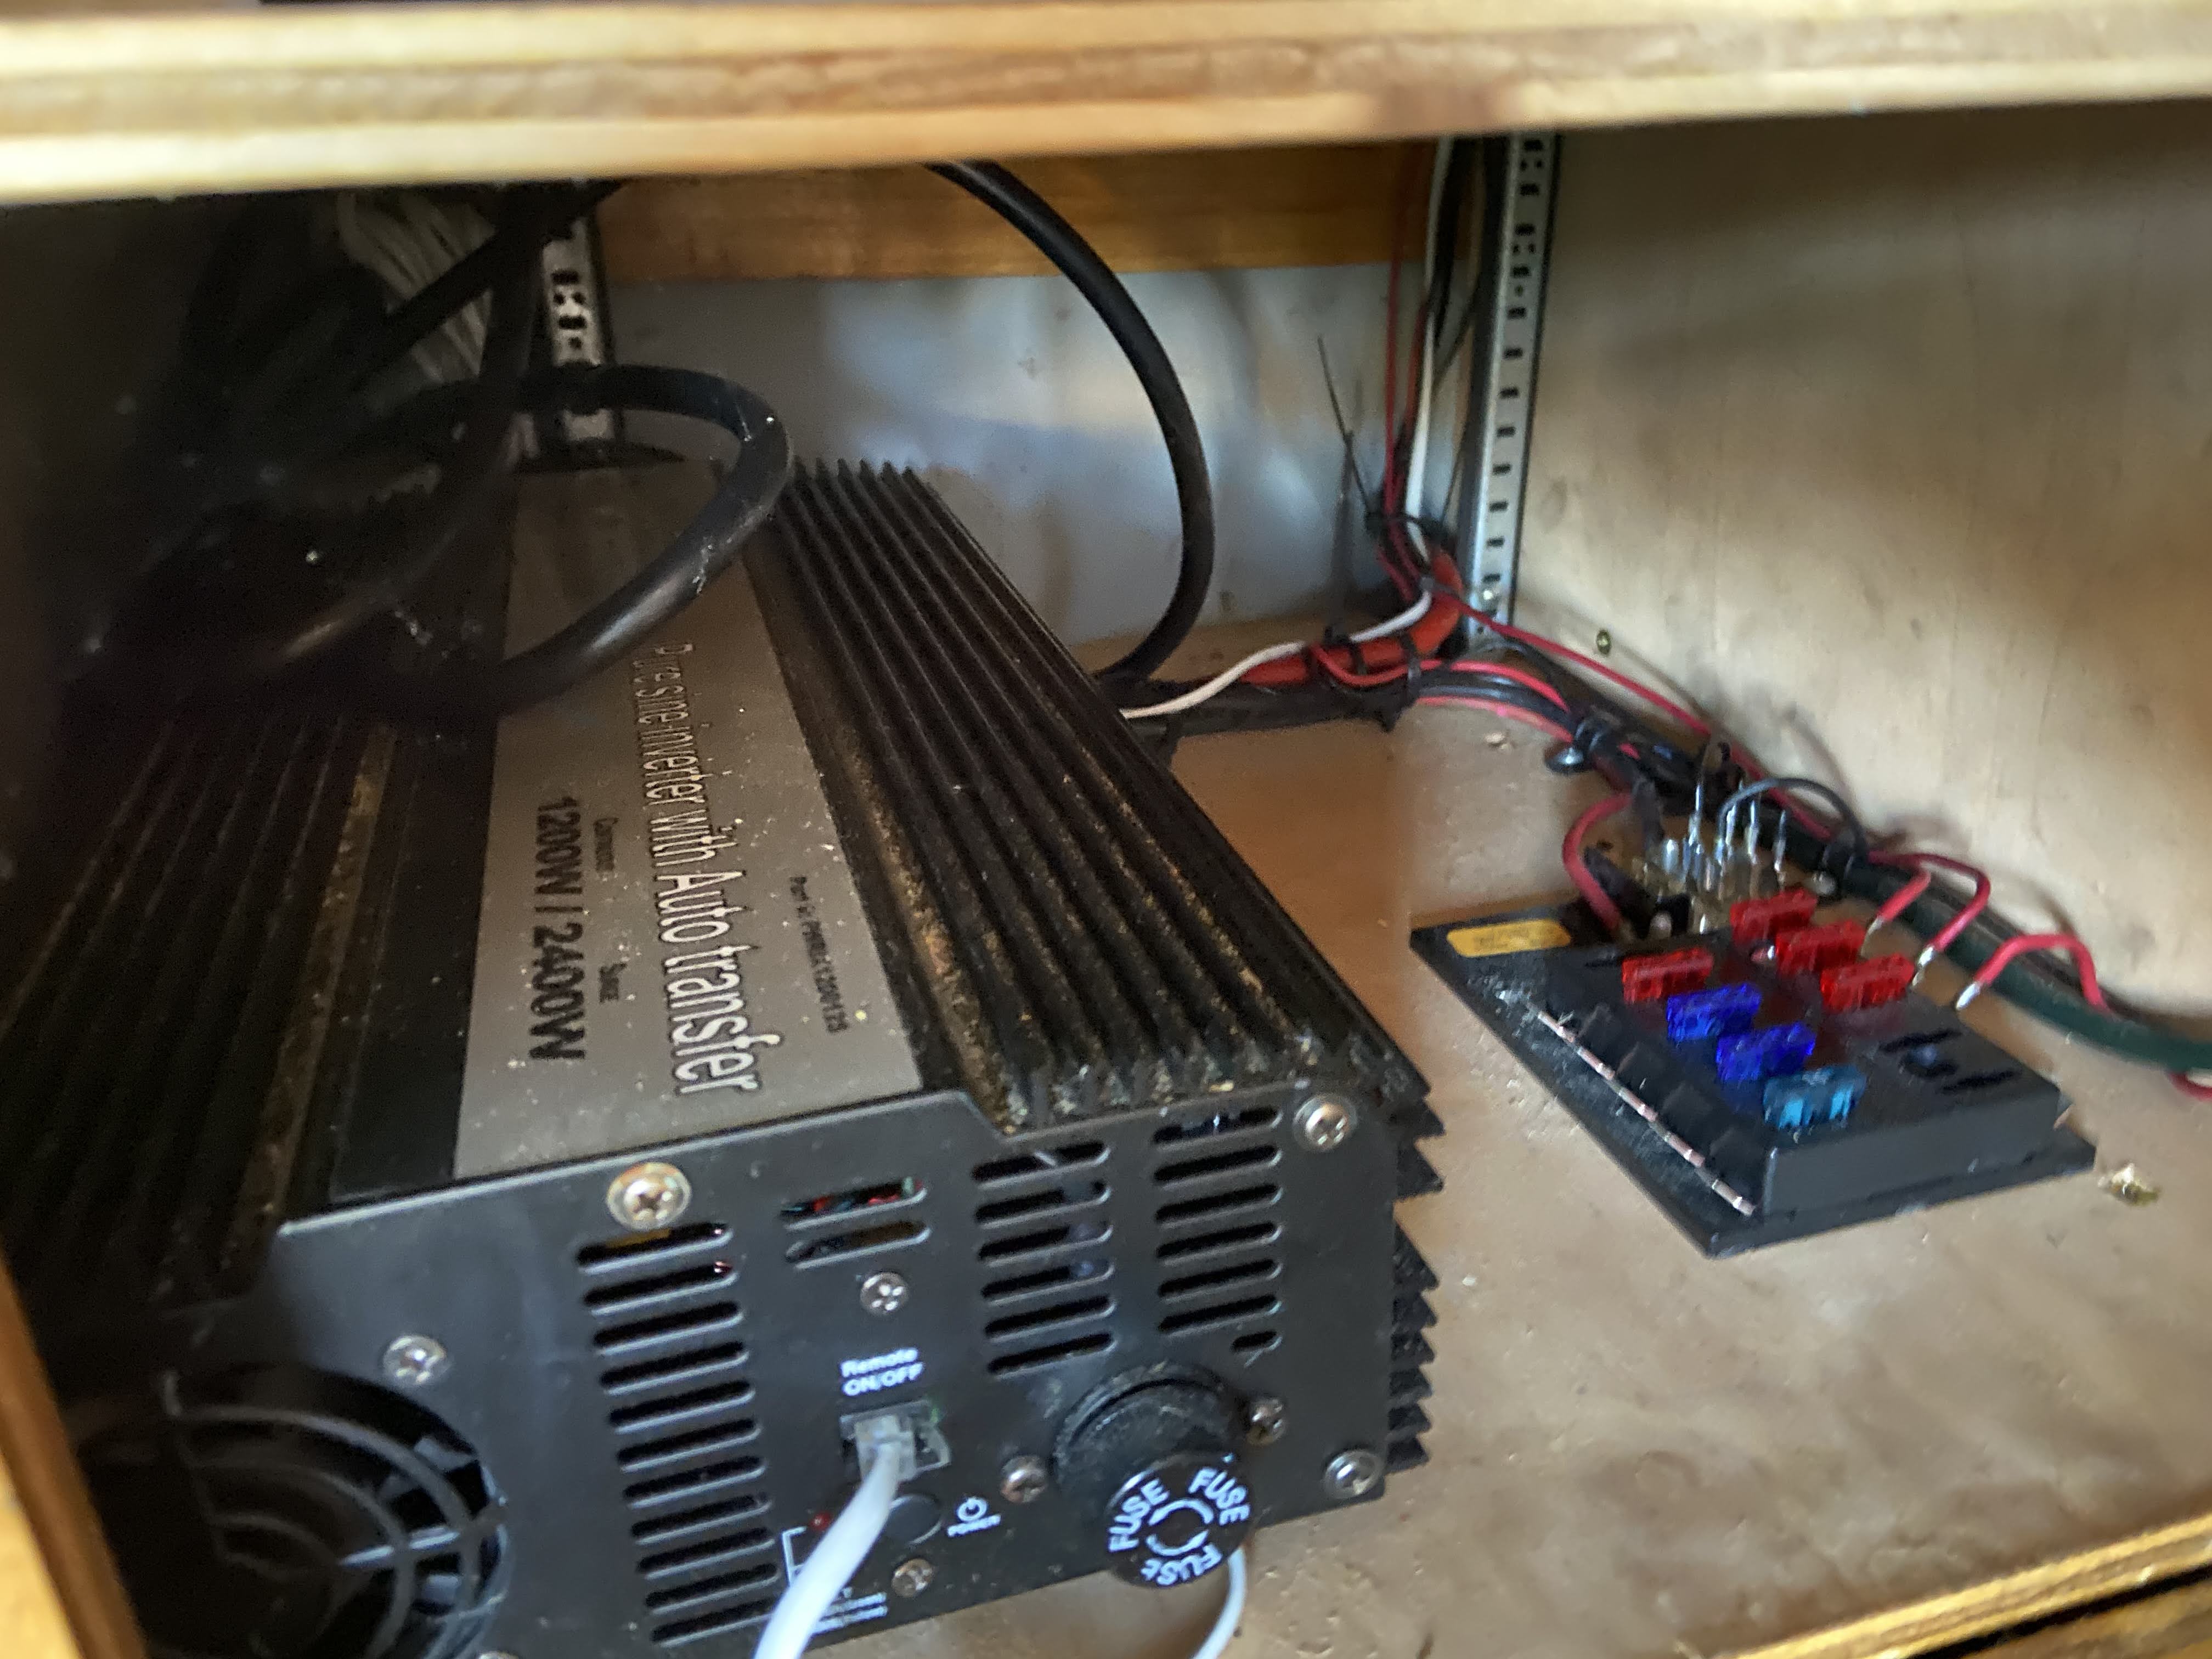
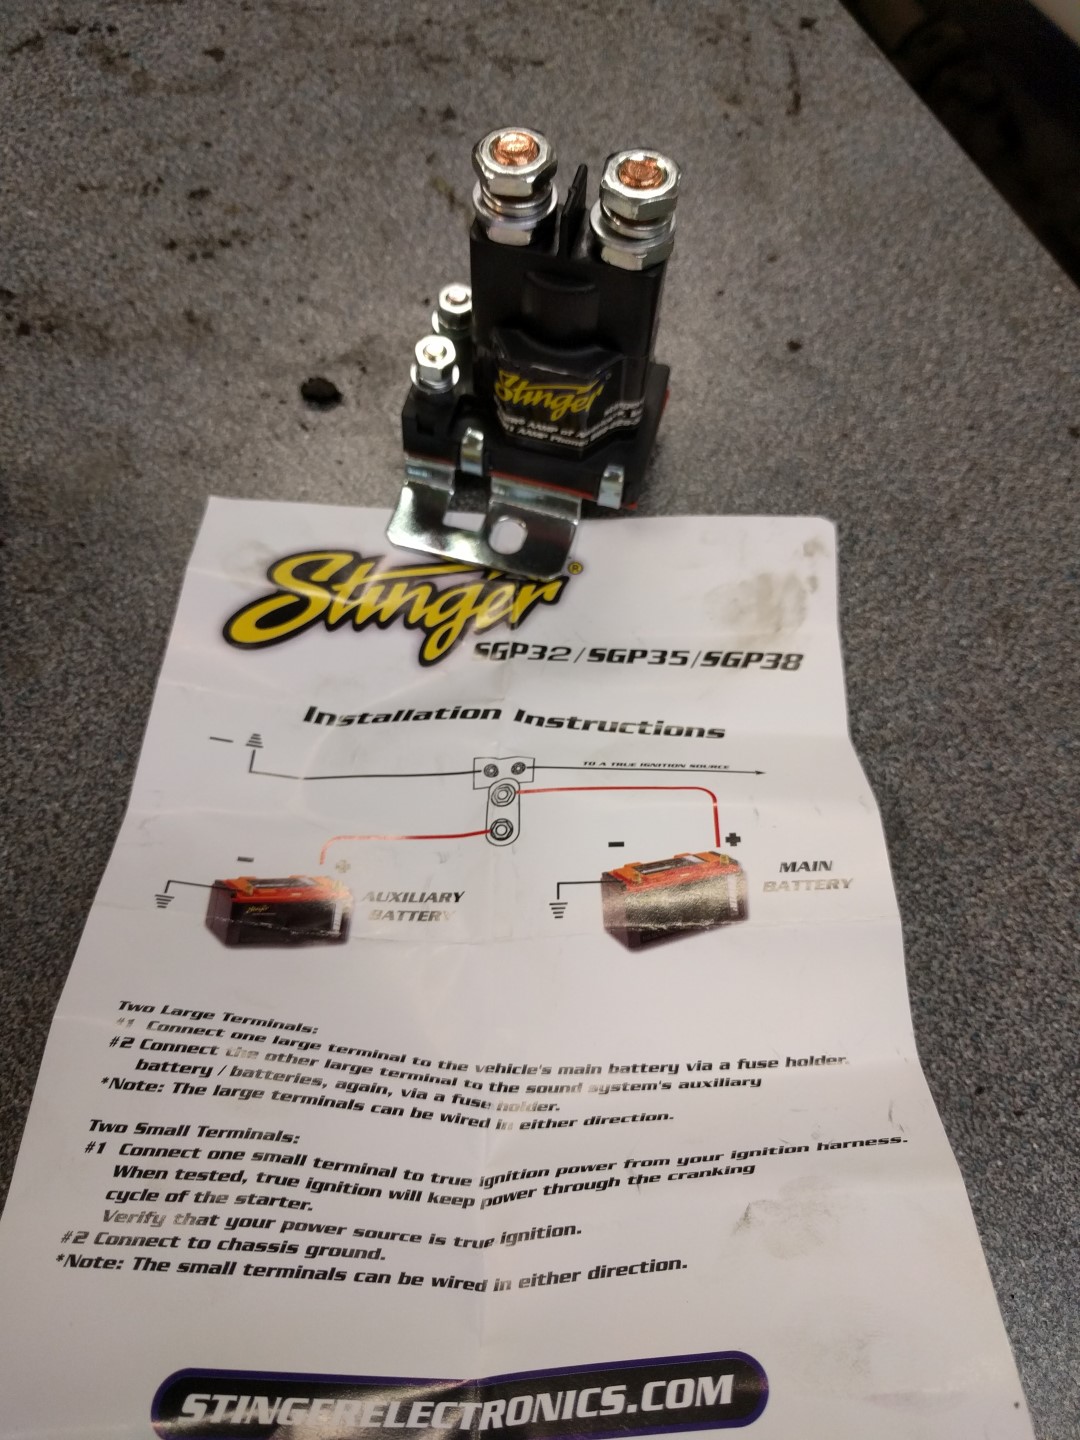
The Seachoice ATO / ATC Fuse Block 10 Gang fuse block was used with the Stinger SGP38 80-AMP Battery Isolator and Relay and W6 80A AMP Circuit Breaker.
The ignition only turns on the ignition relay on when the vehicle is running to avoid discharging the battery that starts the vehicle. When the vehicle is off the power to the cabin is fed exclusively from the auxiliary battery.
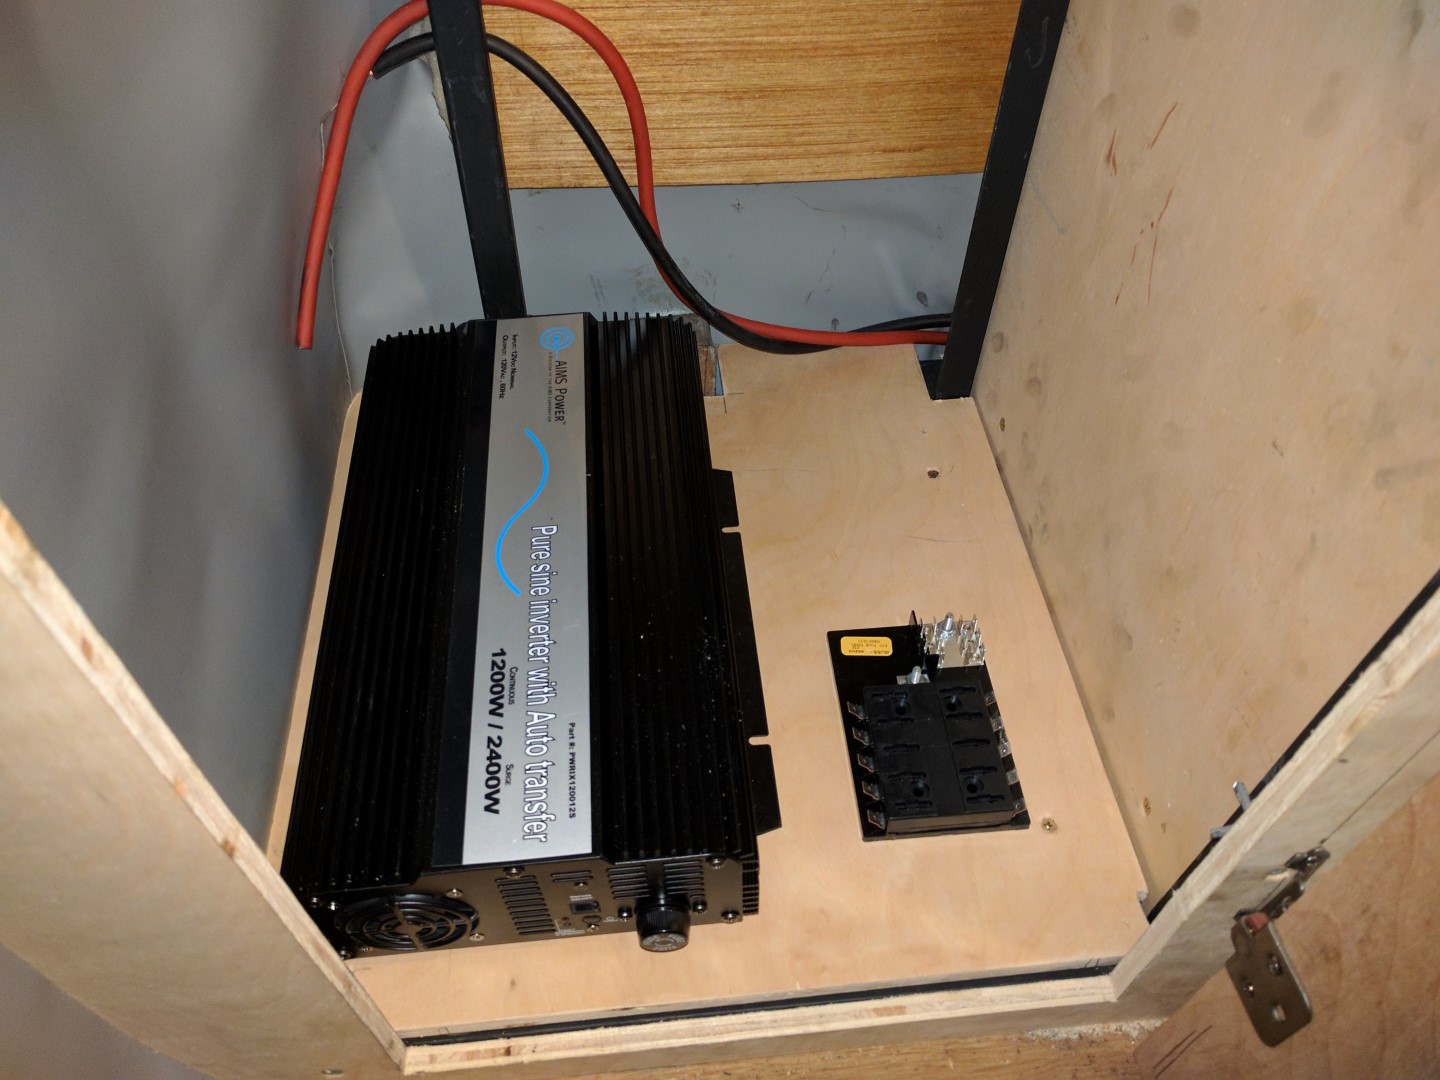
A 6 gauge power wire is ran through the frame to the fuse block and inverter (through a 80A breaker box) in the lower driver’s side closet. There it is distributed to all the DC electronic devices in the cabin.
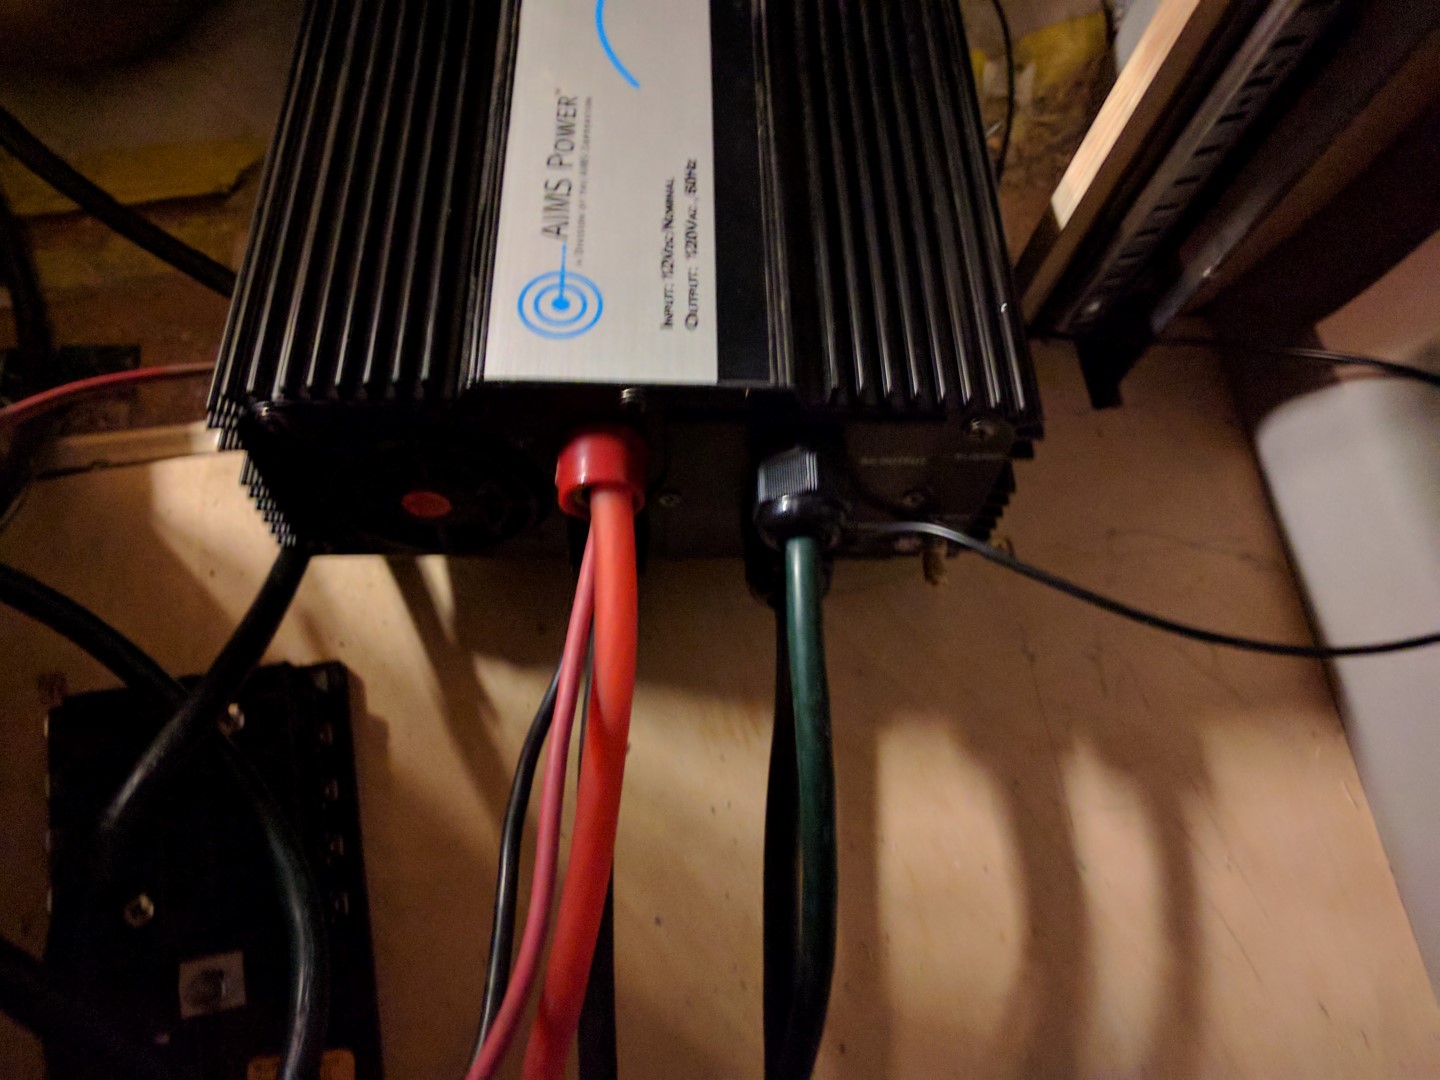
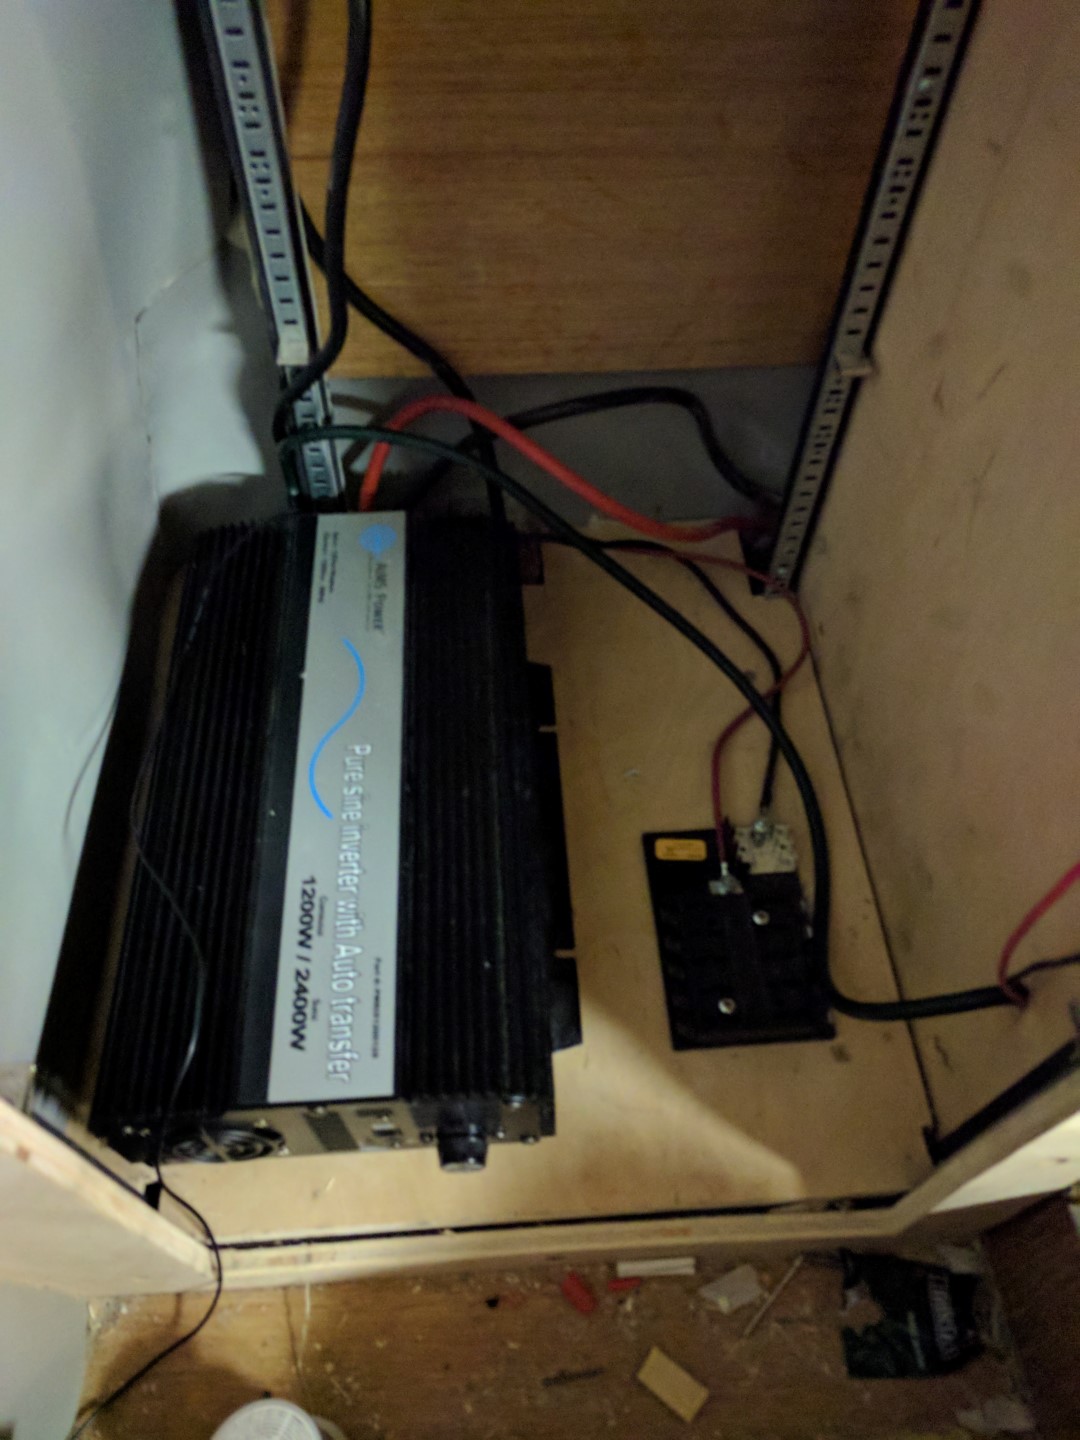
DC to AC Inverter and AC Wiring
The AIMS Power PWRIX120012S inverter was chosen because it has a built in transfer switch that allows shore power to be prioritized over DC to AC inverting. More simply put, if you don’t plug in your camper to an AC outlet it will invert but if the camper is plugged it it will exclusively use power from where it is plugged into.
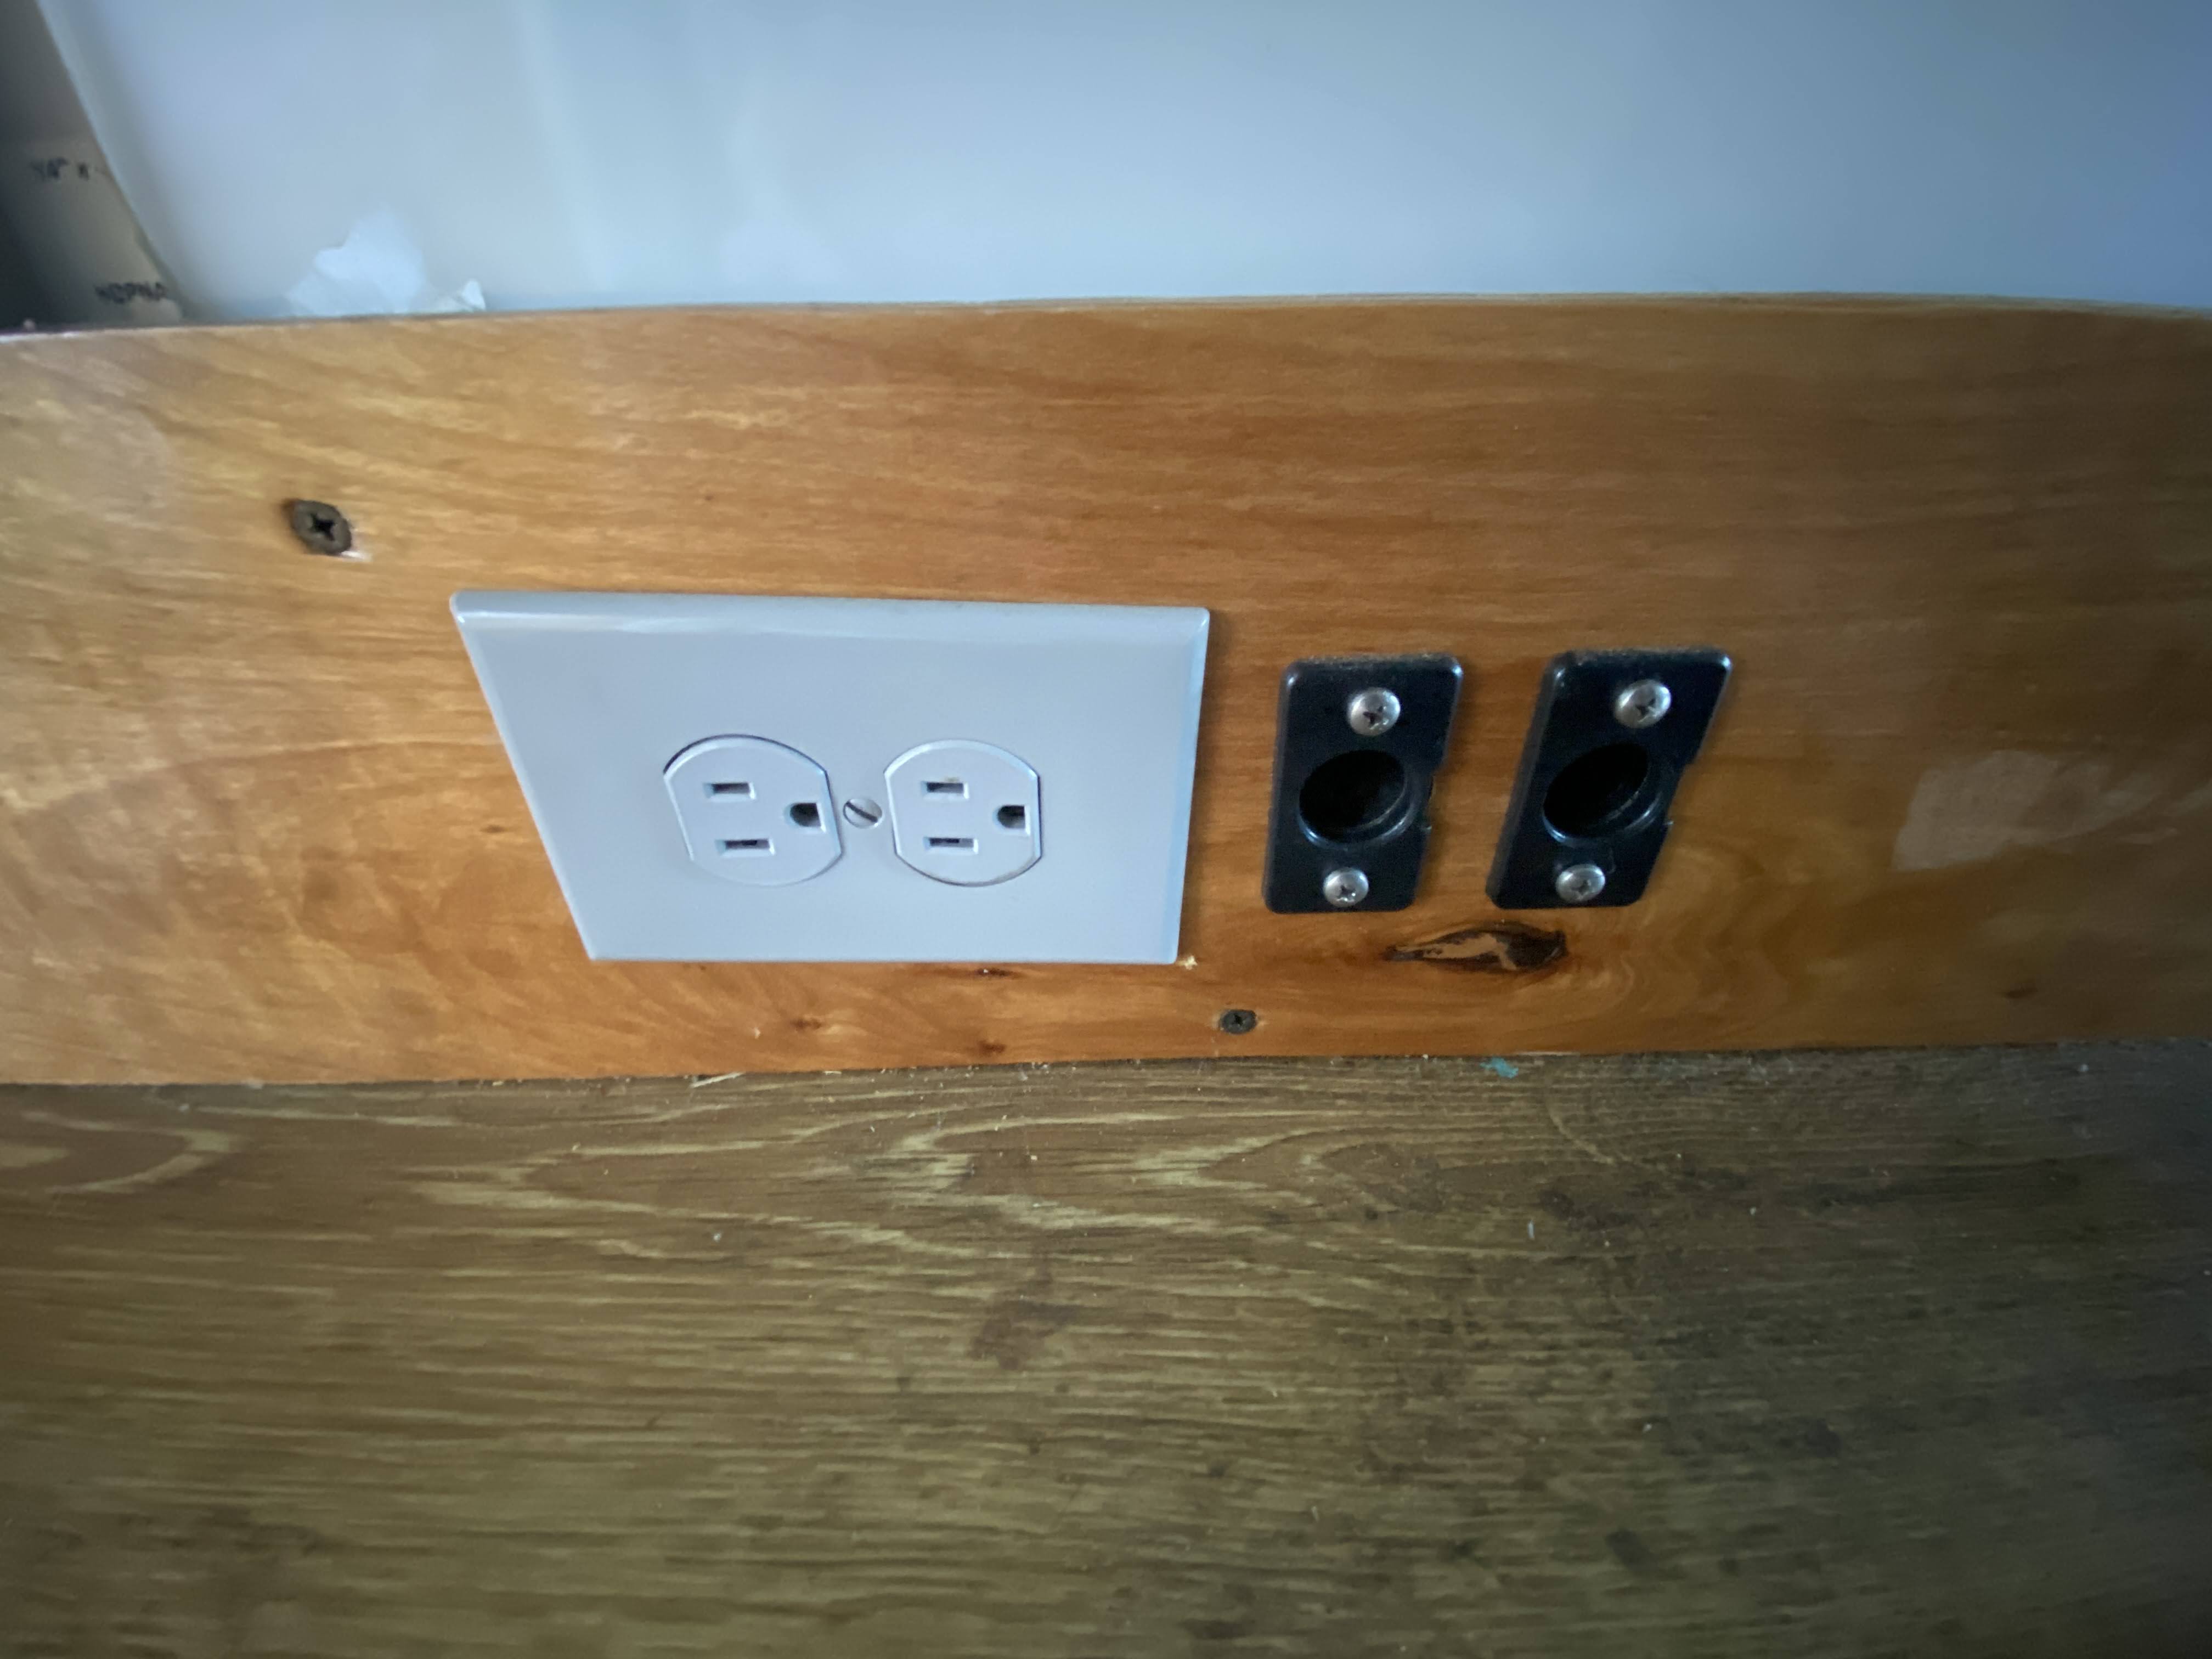
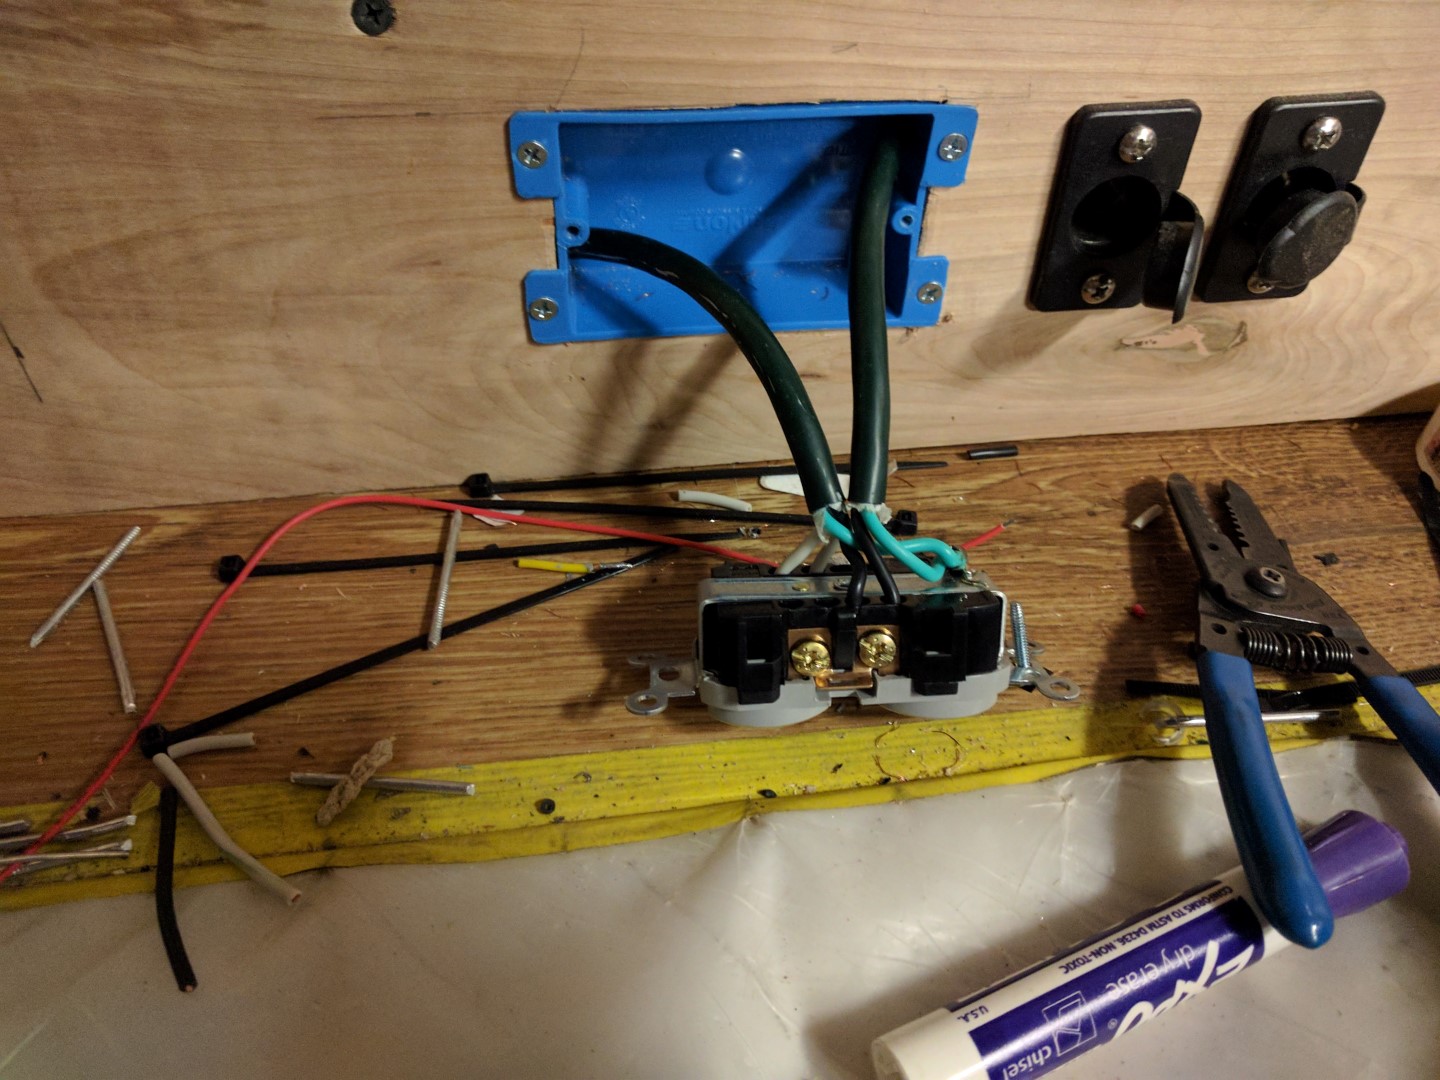
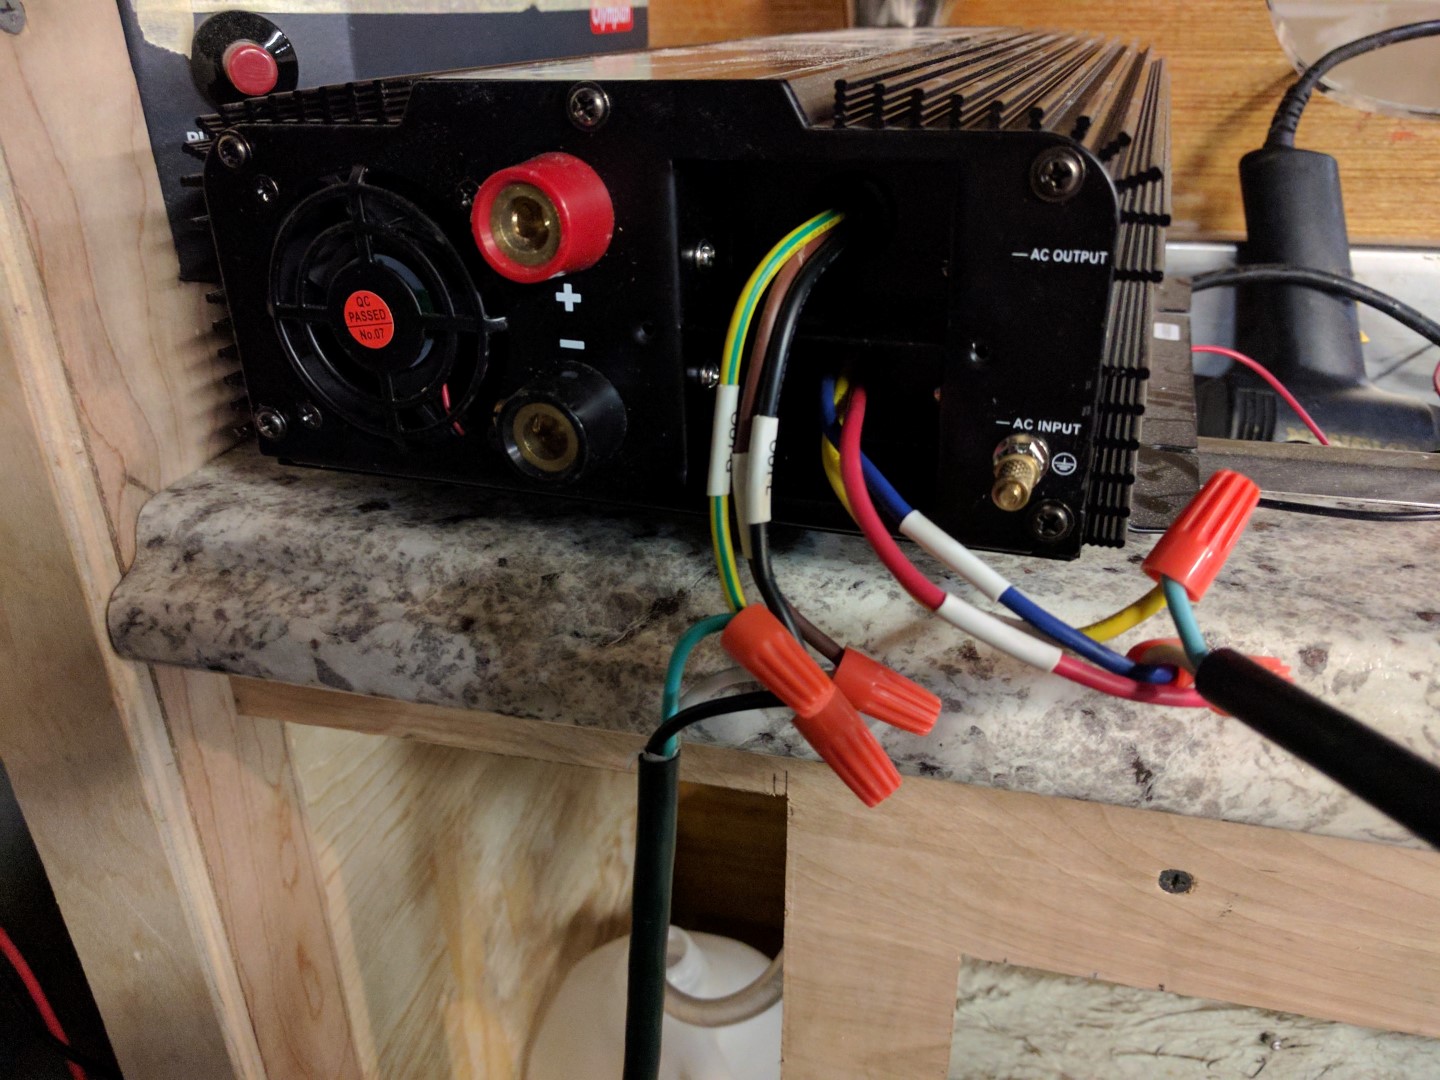
The inverter has 2 inputs and 1 output: inputs are either AC or DC and the output is AC. The AC output is only wired to a two plug standard AC outlet. The AC ground wire is grounded to the truck frame as per the instructions.
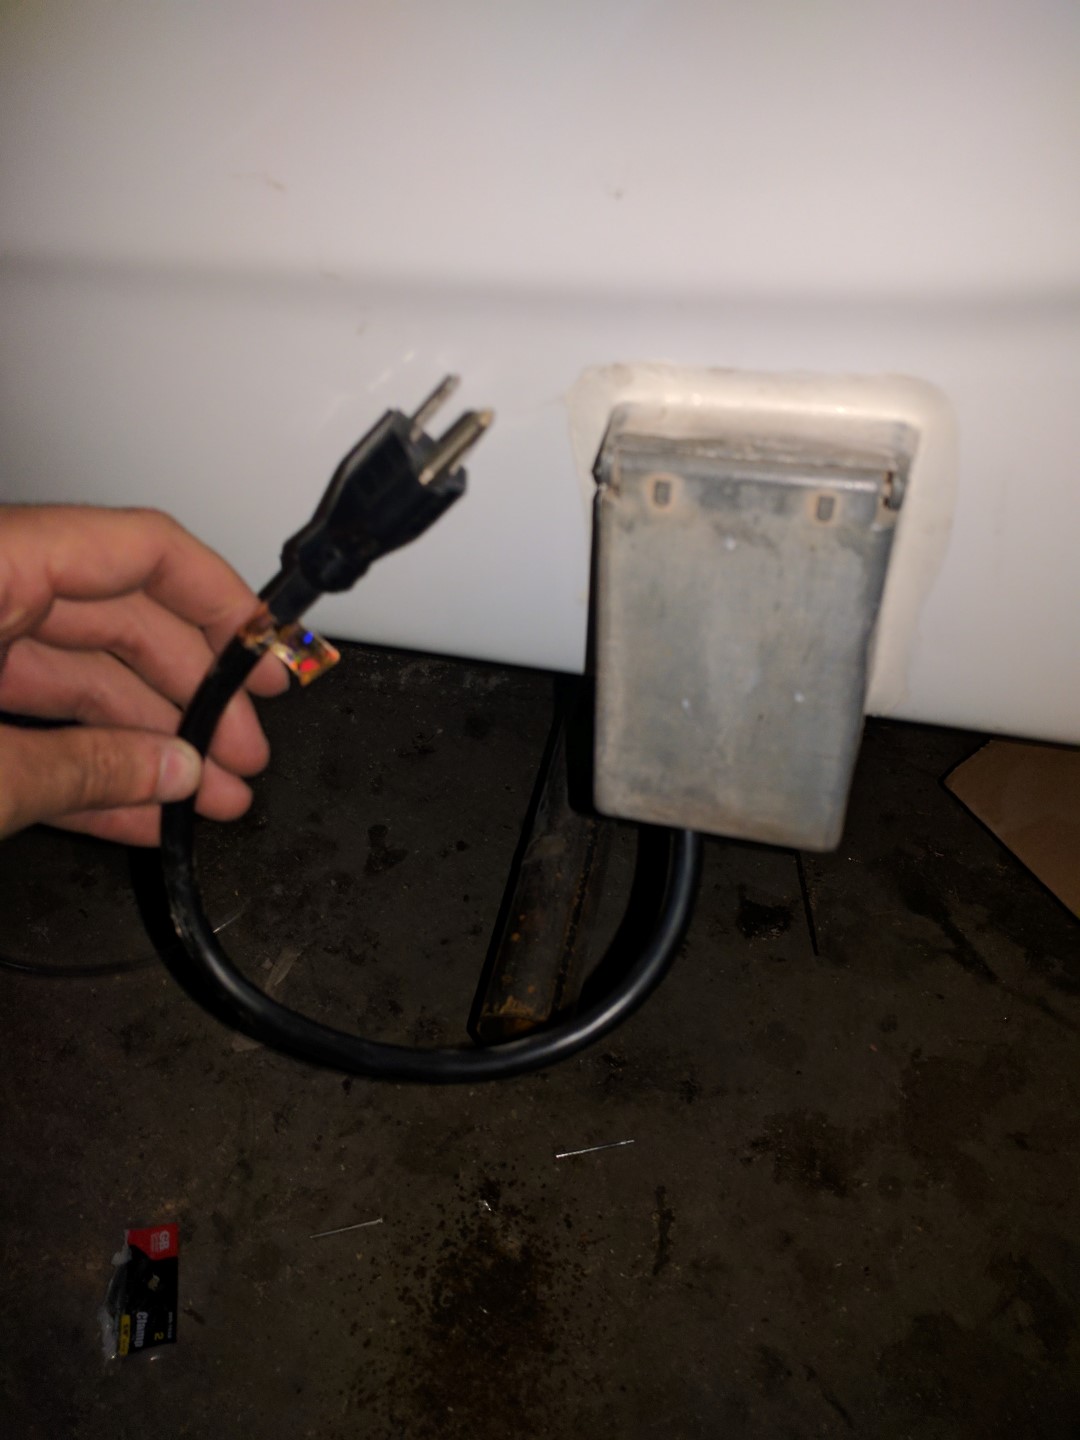
An 8 foot heavy duty AC electrical cable can be pulled out from the small electrical box to plug into shore power.
The inverter has a remote power switch located on the driver’s side wall that is controlled via a single button, either on or off.
Fridge
The fridge is wired into the DC fuse block and AC power for its 3-way operation. The inverter will power the fridge from AC unless shore power is connected.
DC Wiring
Currently, the sink pump, DC outlets, and fridge are the only devices powered by the DC circuitry. The automatic sink pump is the Favson Diaphragm Pump that powers itself when pressure is lost in the water system. The two DC outlets are plain Jane cigarette style plugs. The fridge is simply connected to the fuse block for DC operation.


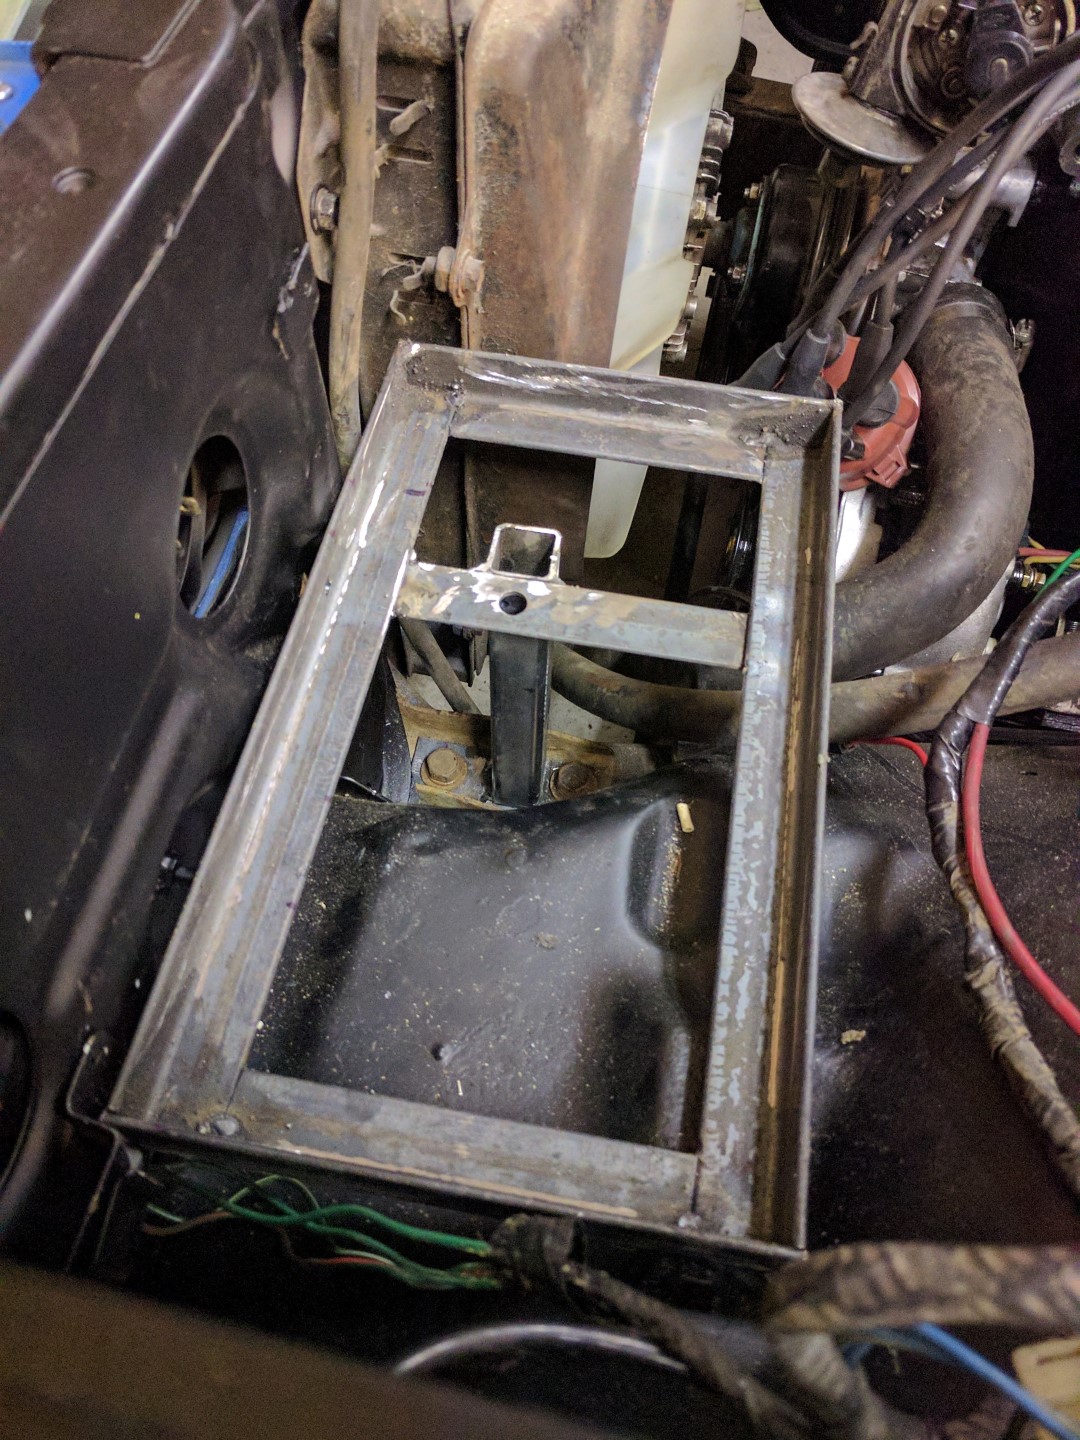
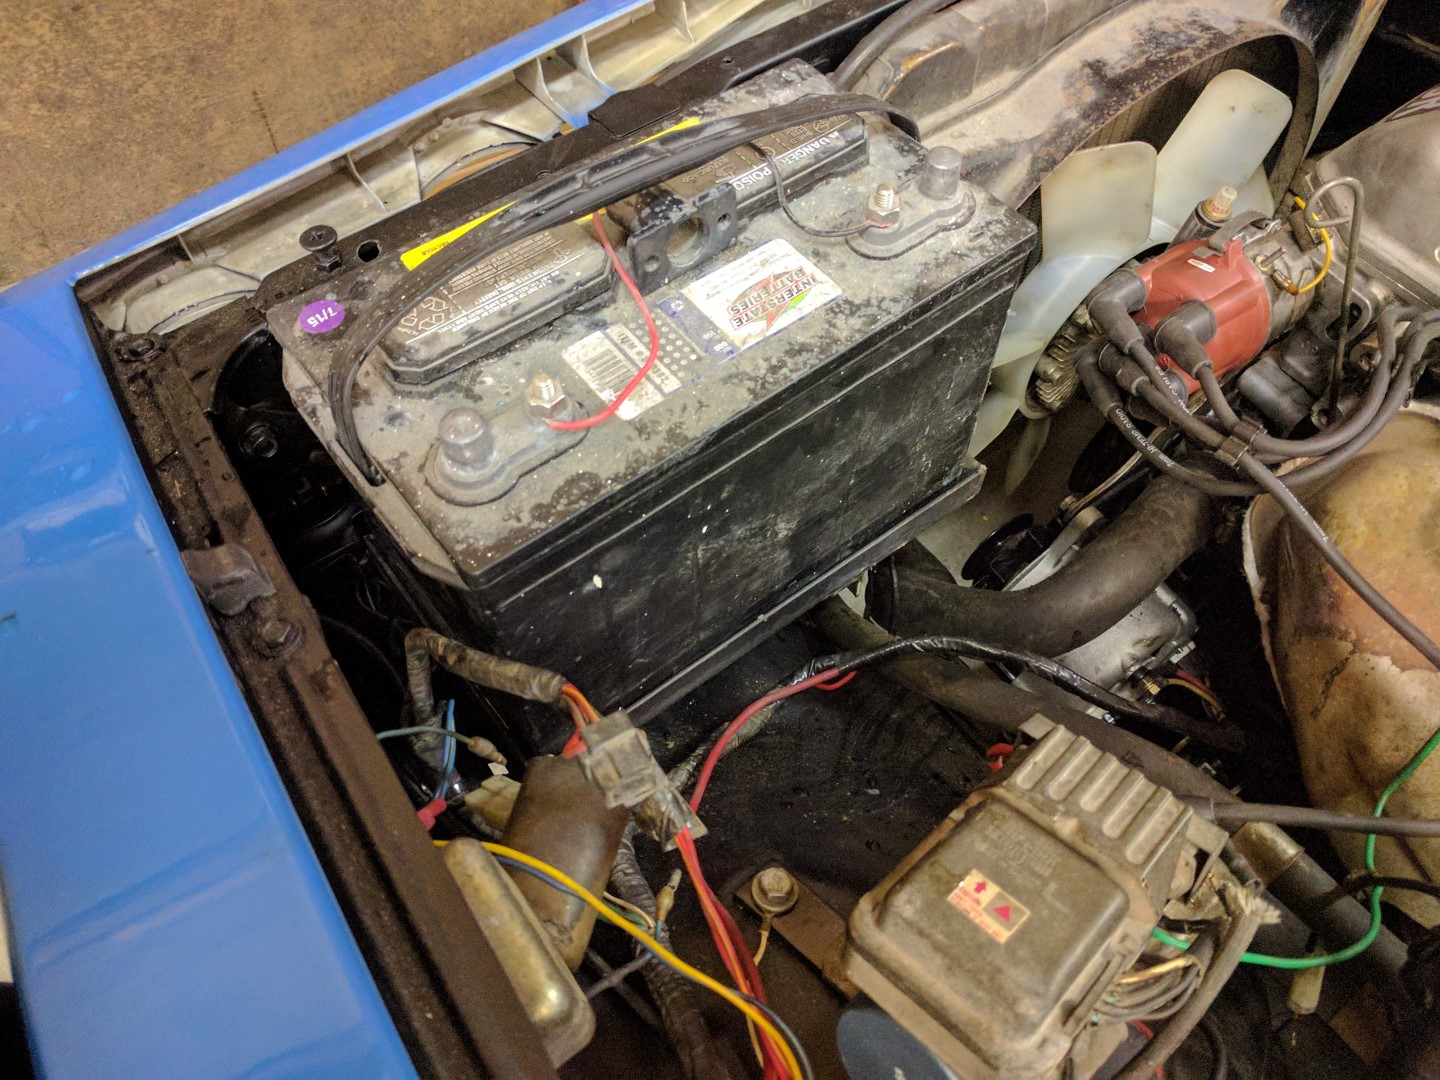
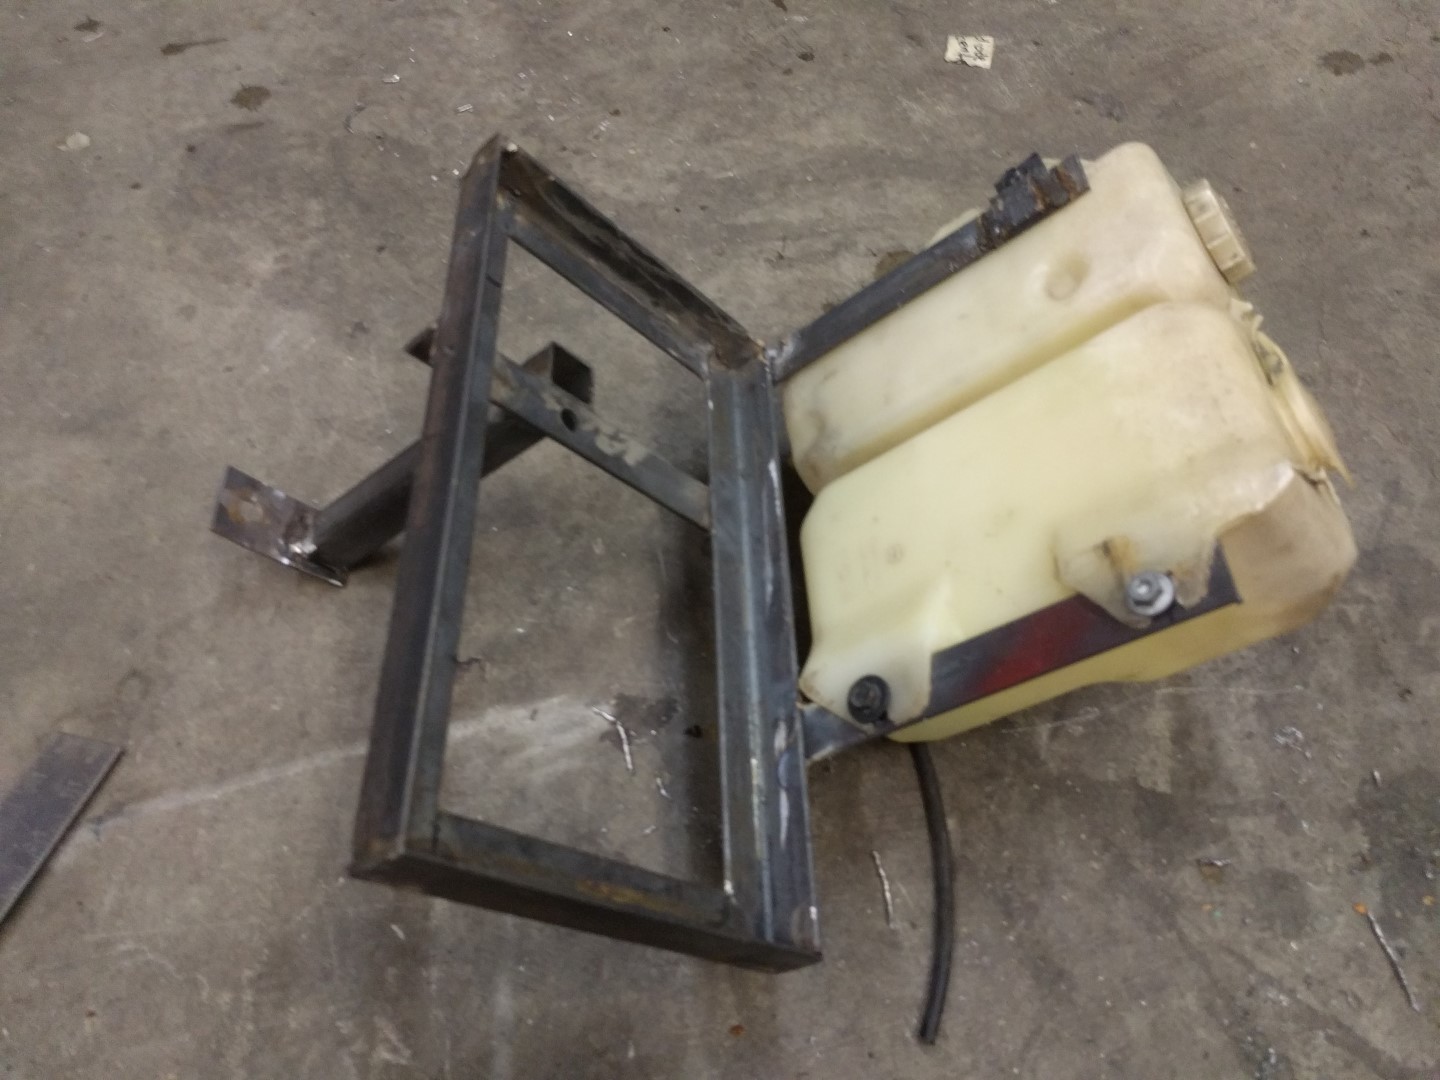
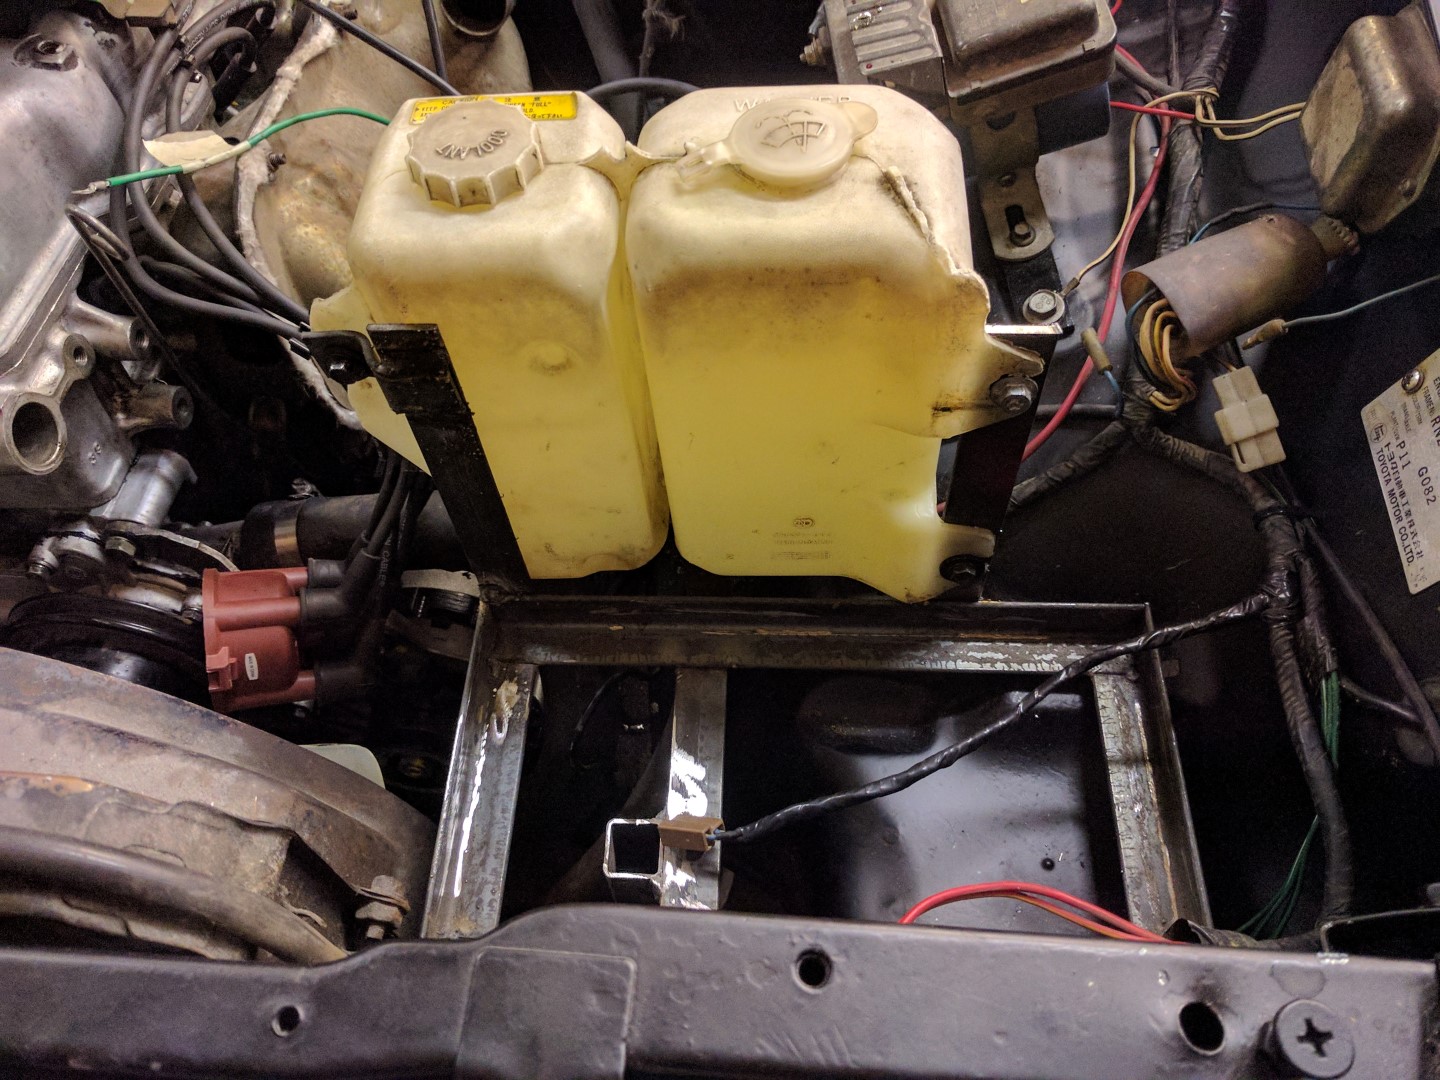
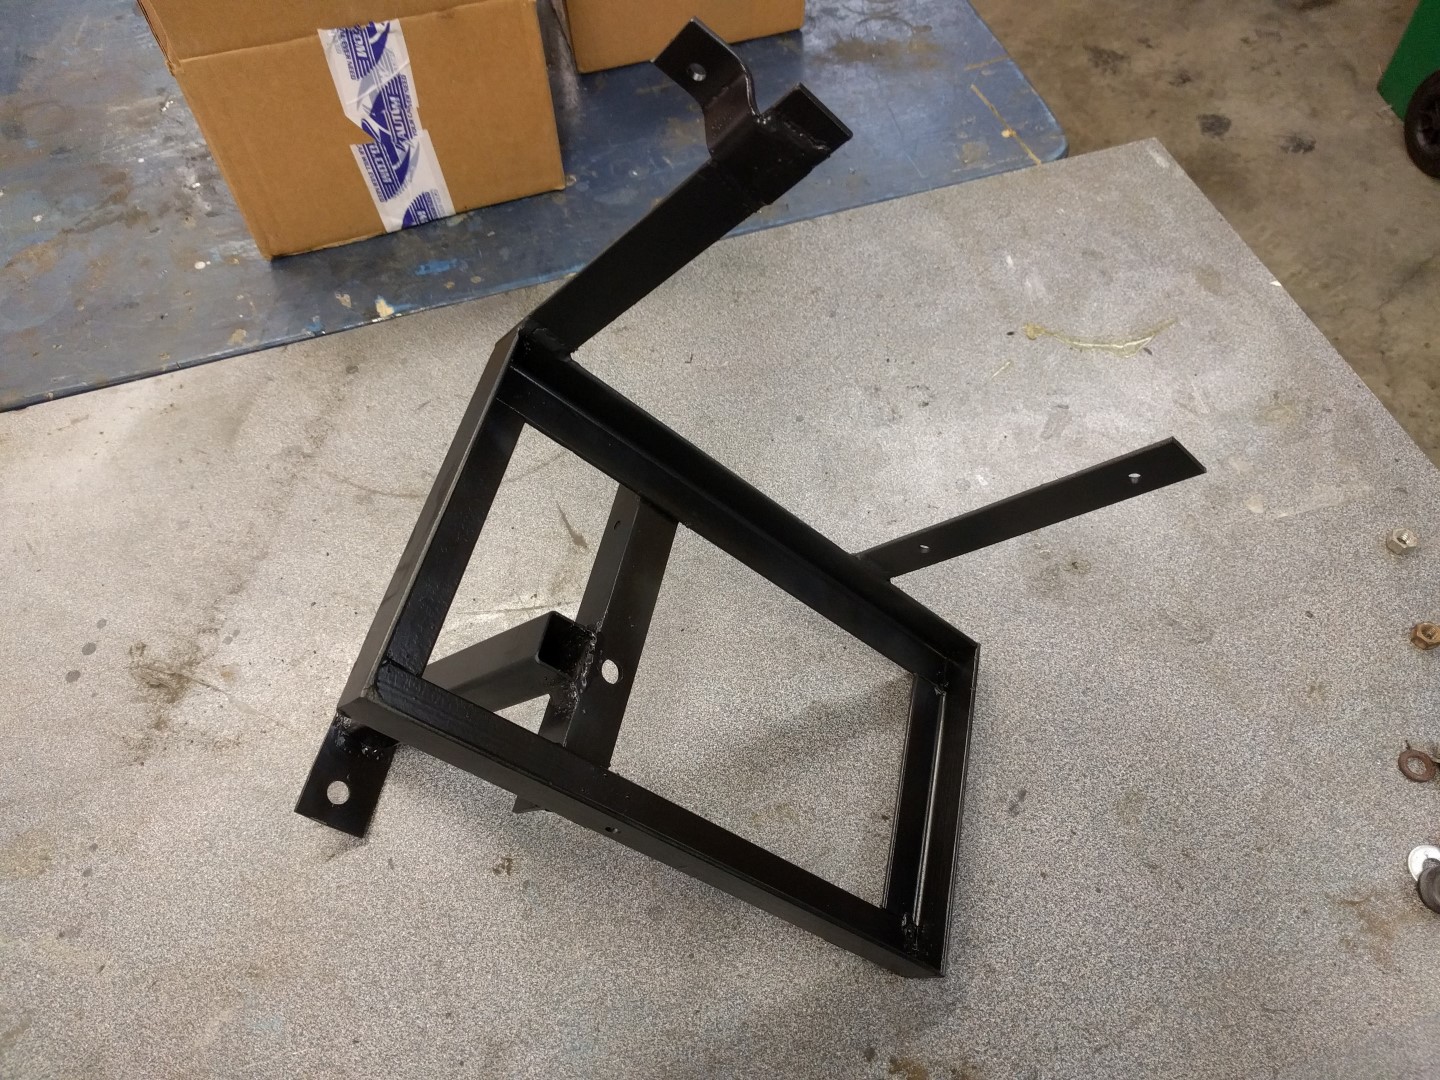
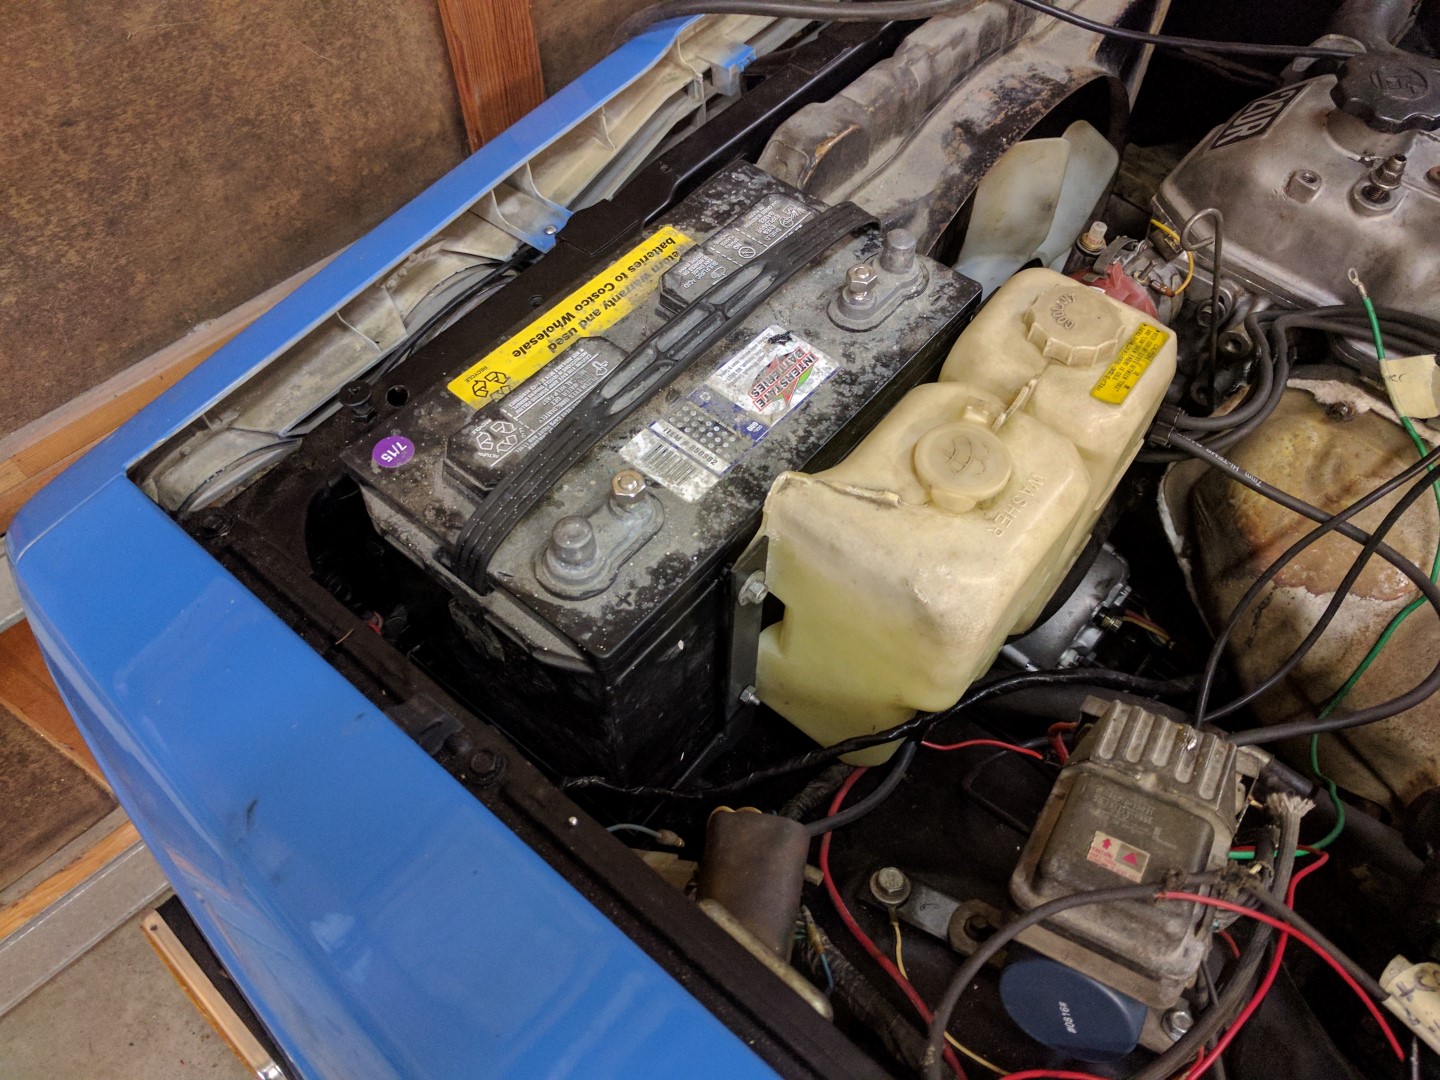
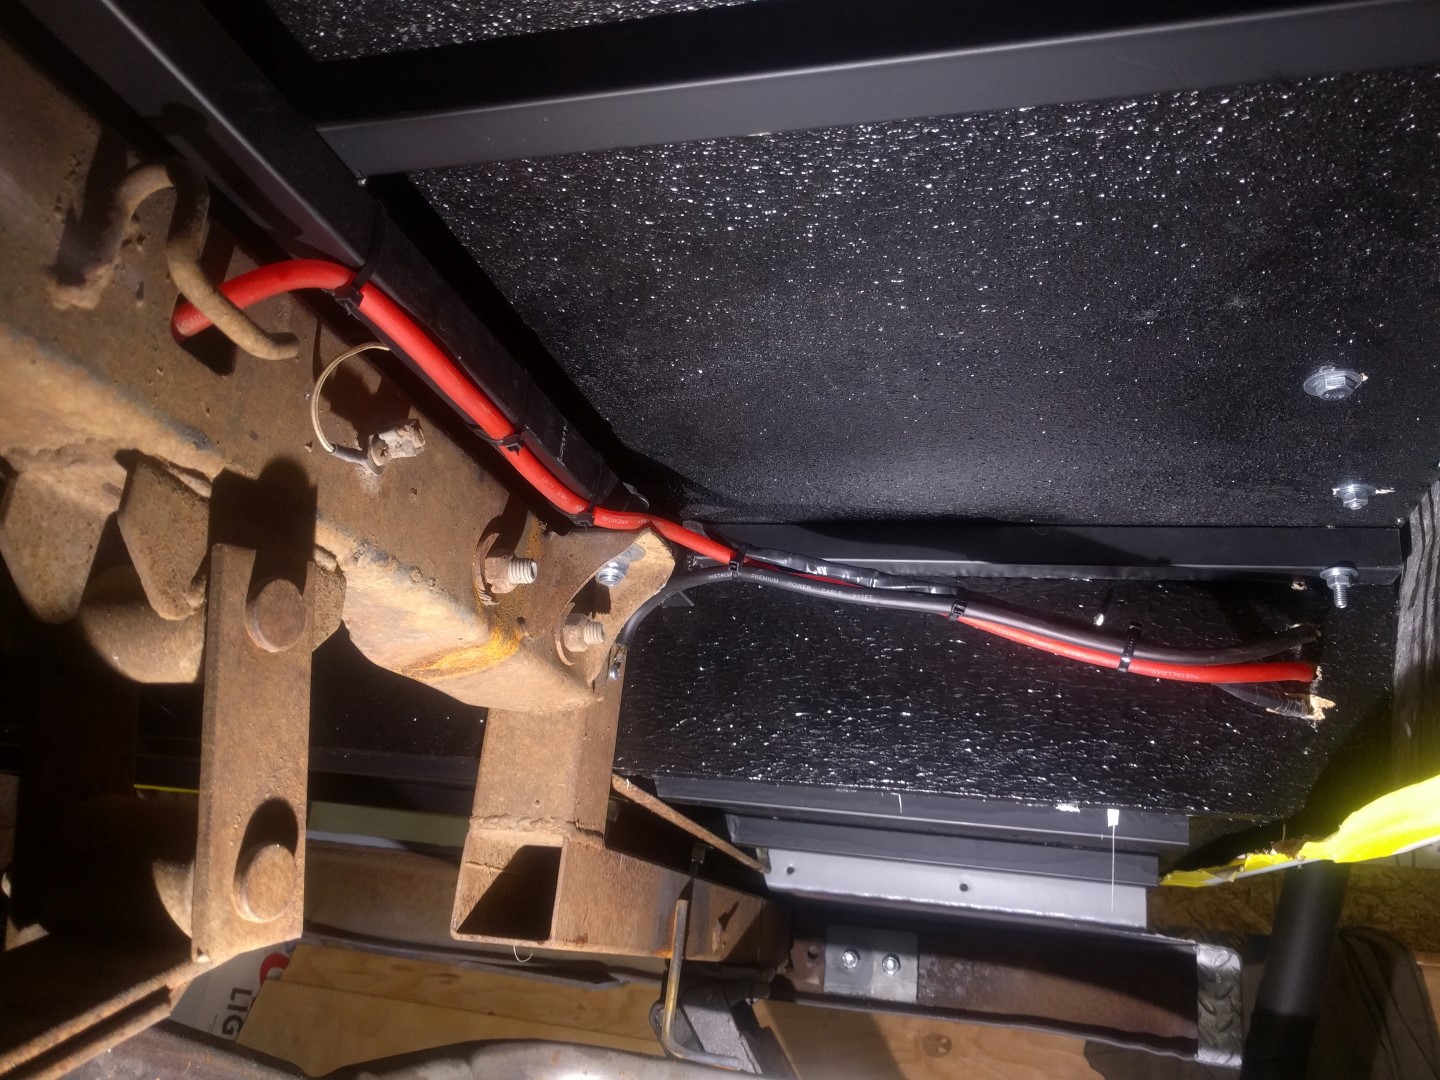
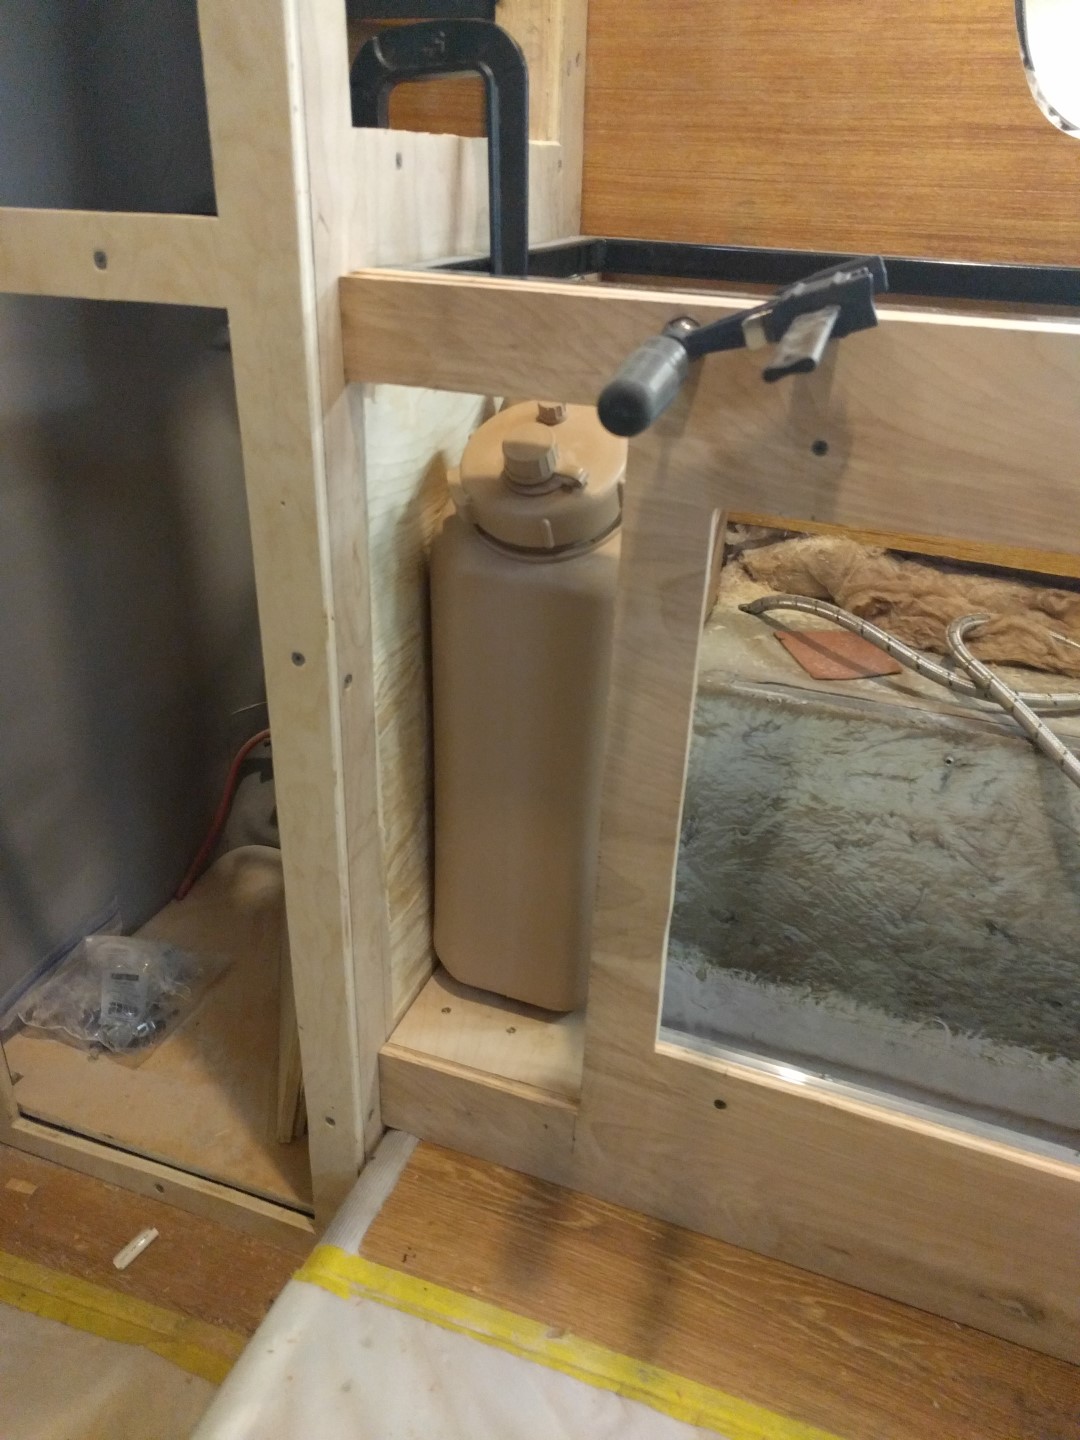
Auxiliary Coach Battery
A custom battery holder was constructed to house the battery and attach the wiper fluid and coolant overflow tanks. A basic 12V deep cycle battery was used as the template for the battery holder.
The ignition only turns on the ignition relay on when the vehicle is running to avoid discharging the battery that starts the vehicle. When the vehicle is off the power to the cabin is fed exclusively from the auxiliary battery.
A 6 gauge power wire is ran through the frame to the fuse block and inverter (through a 80A breaker box) in the lower driver’s side closet. There it is distributed to all the DC electronic devices in the cabin.


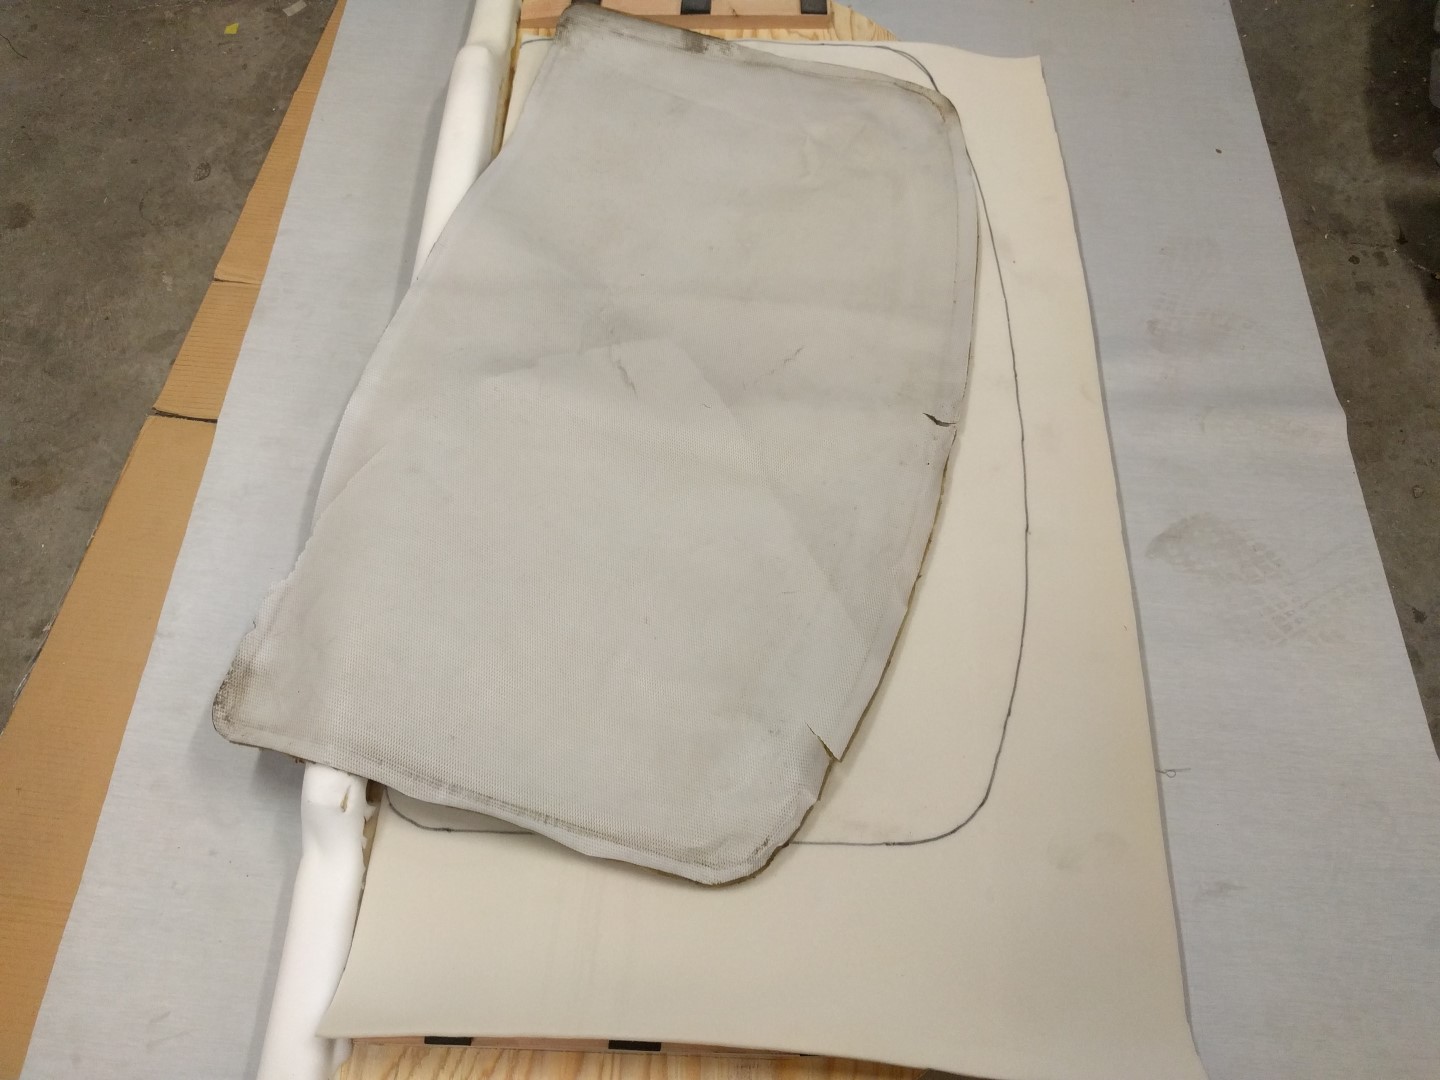
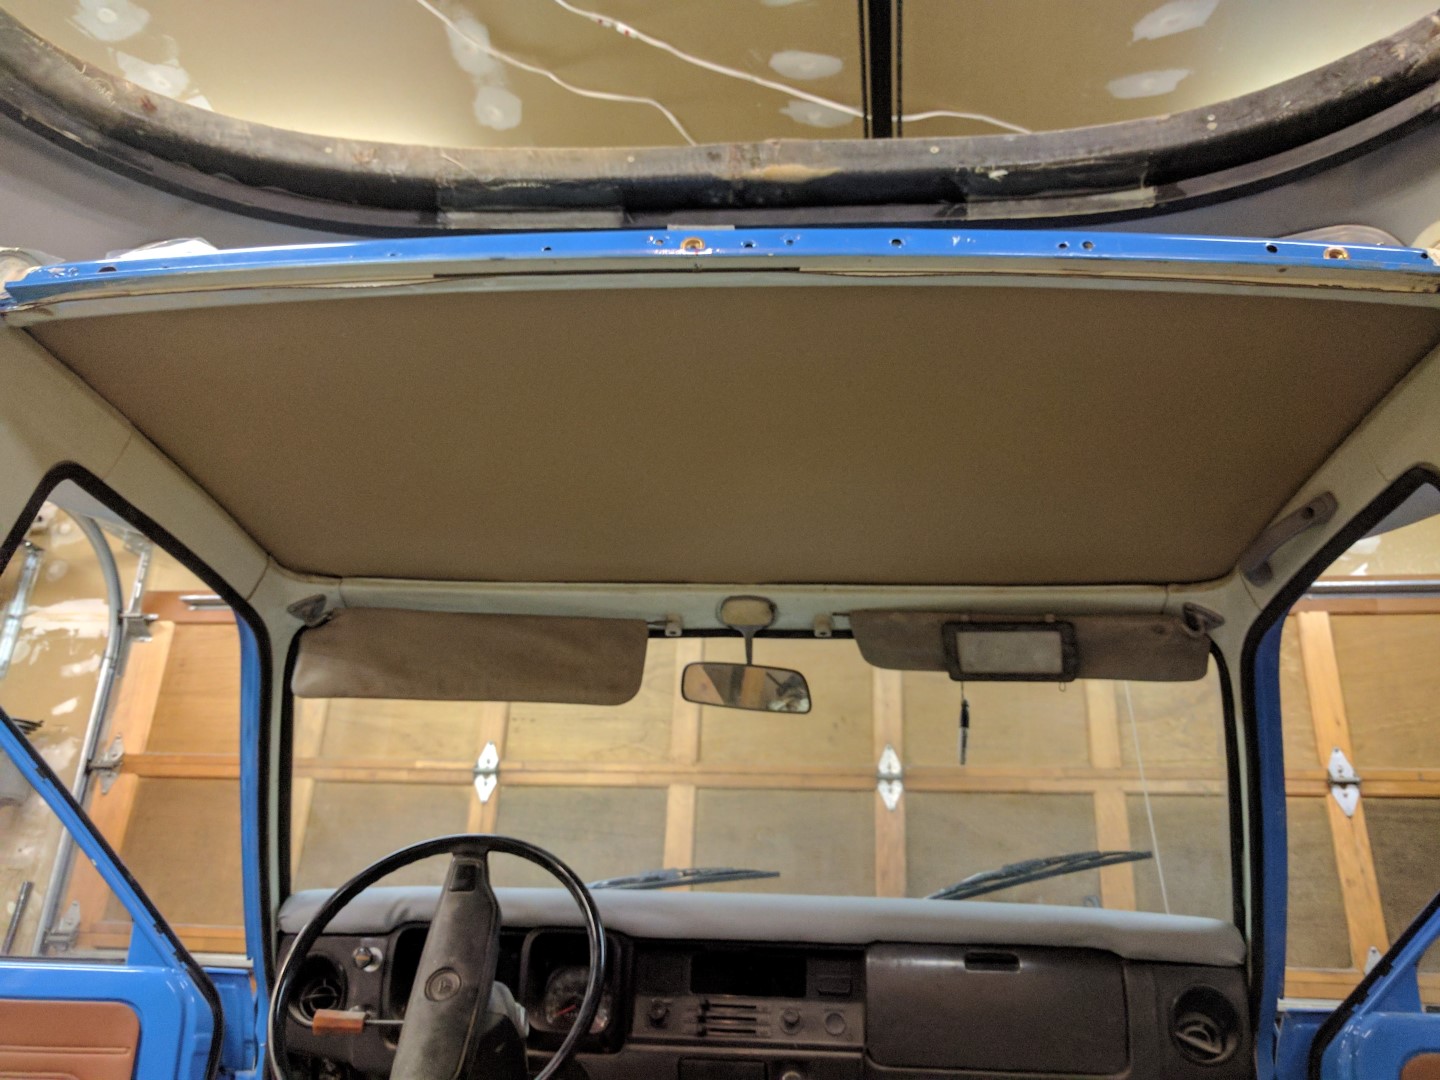
Headliner
The headliner is basic headliner material you can find at any fabric store. The old headliner was torn but intact enough to trace a new one from. It was attached using Weldwood liquid adhesive.

Water and Tank
The water inlets and outlets on the outside of the camper were removed and replaced with removable 5 gallon water tank which fits perfectly between the closet and the wheel well after some slight planing of the closet wall. The Favson Diaphragm Pump is used to pump water to the sink and only powers itself when pressure is lost in the water system. Both hot and cold portions of the faucet are plumbed to spit out cold water. Water is sucked from the tank using a removable plastic hose.


Interior Finishing
The interior wood was finished to have the same stain color as the walls and flooring, i.e. a light oak color. The cabinet door were removed and everything taped off, stained, and polyurethaned over twice.
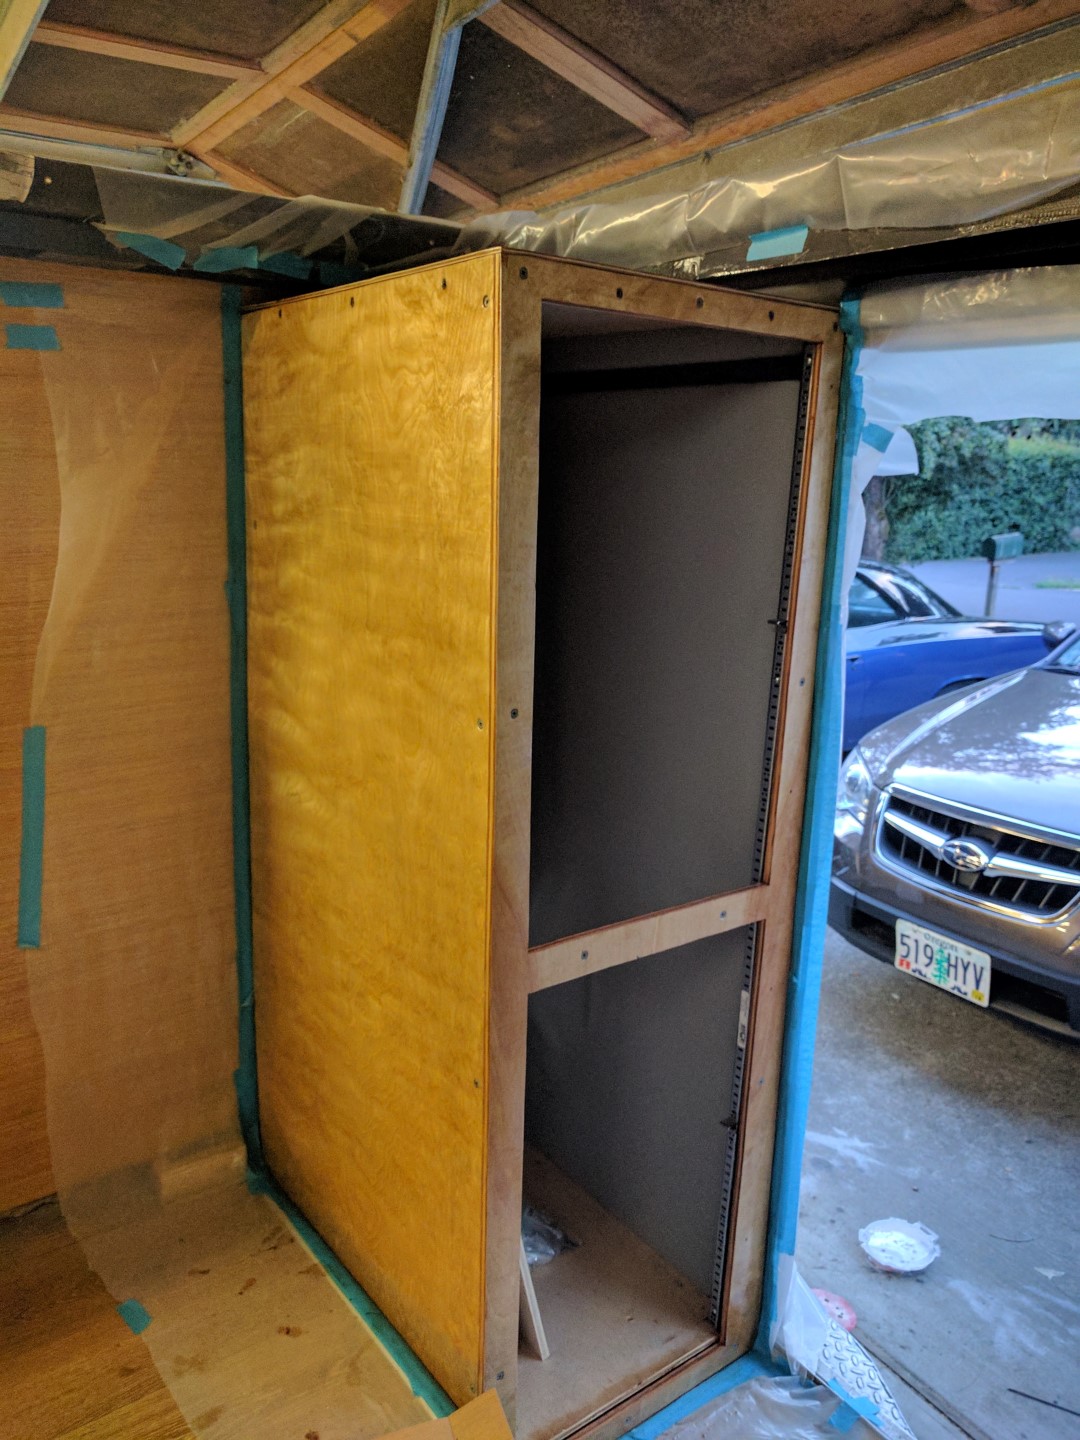
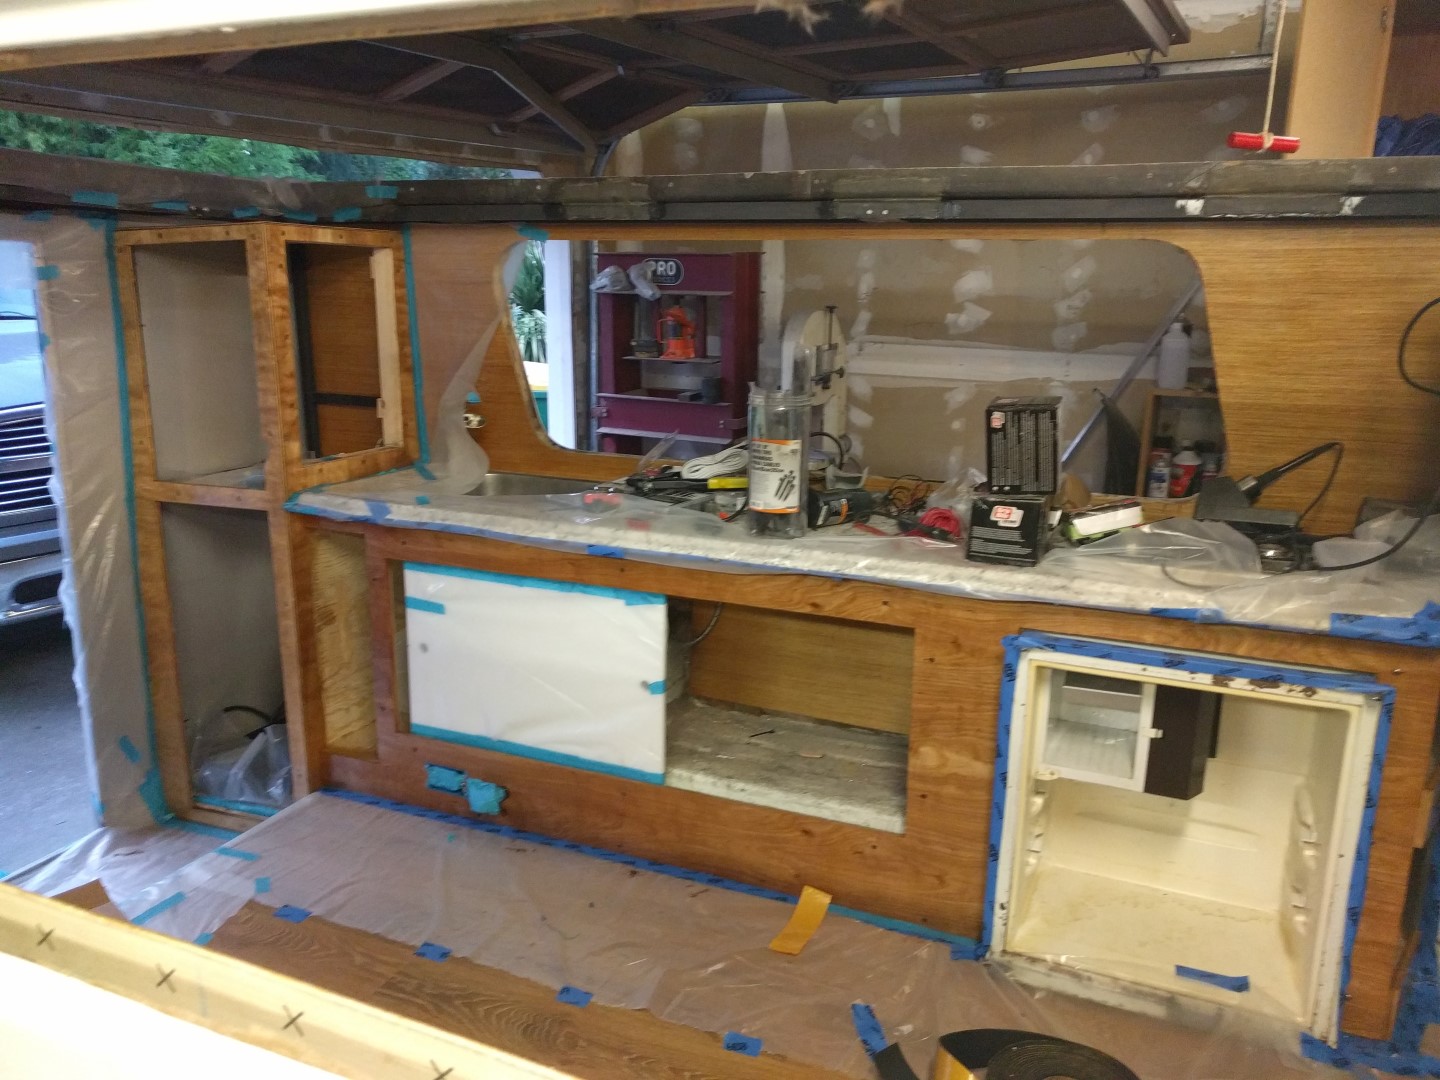
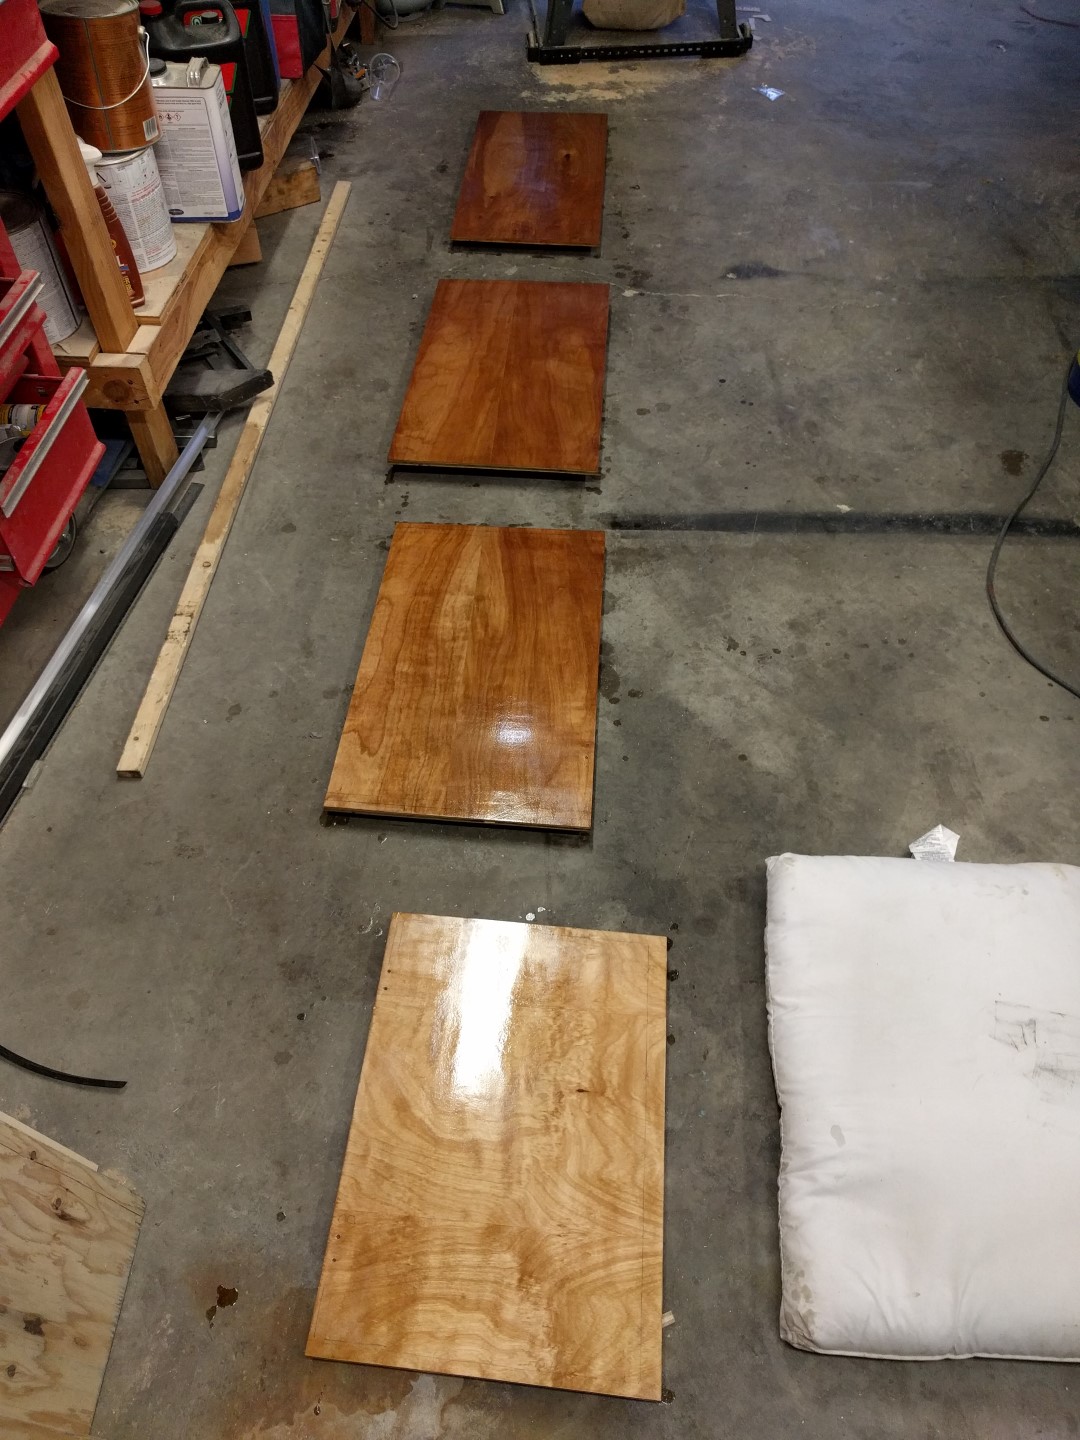
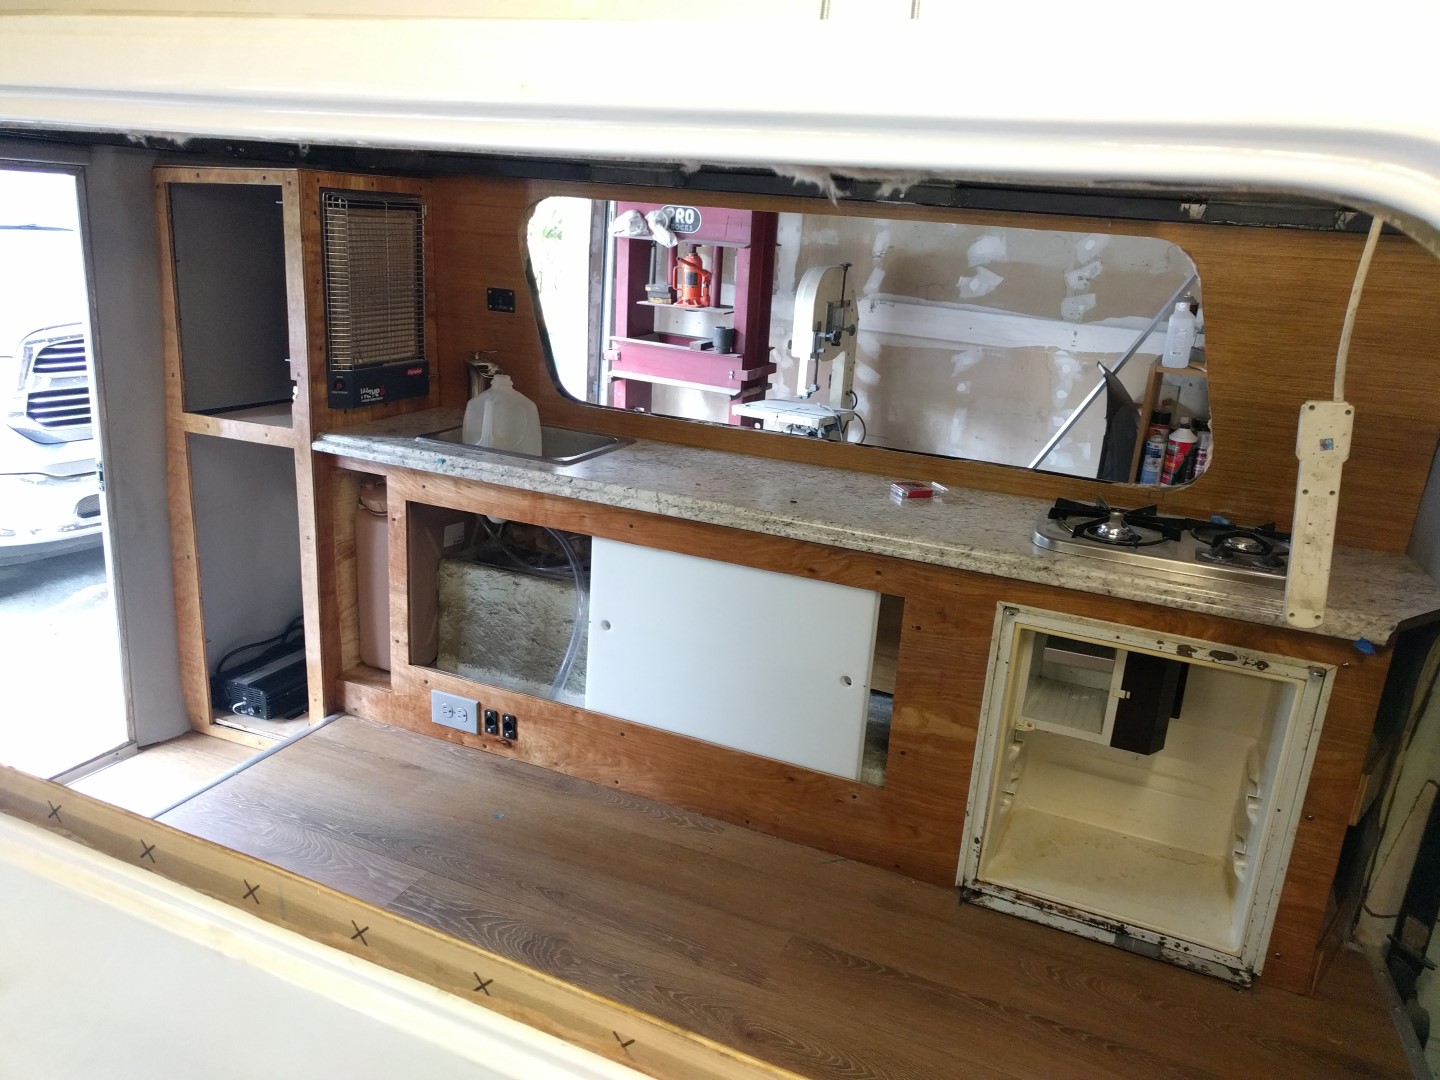
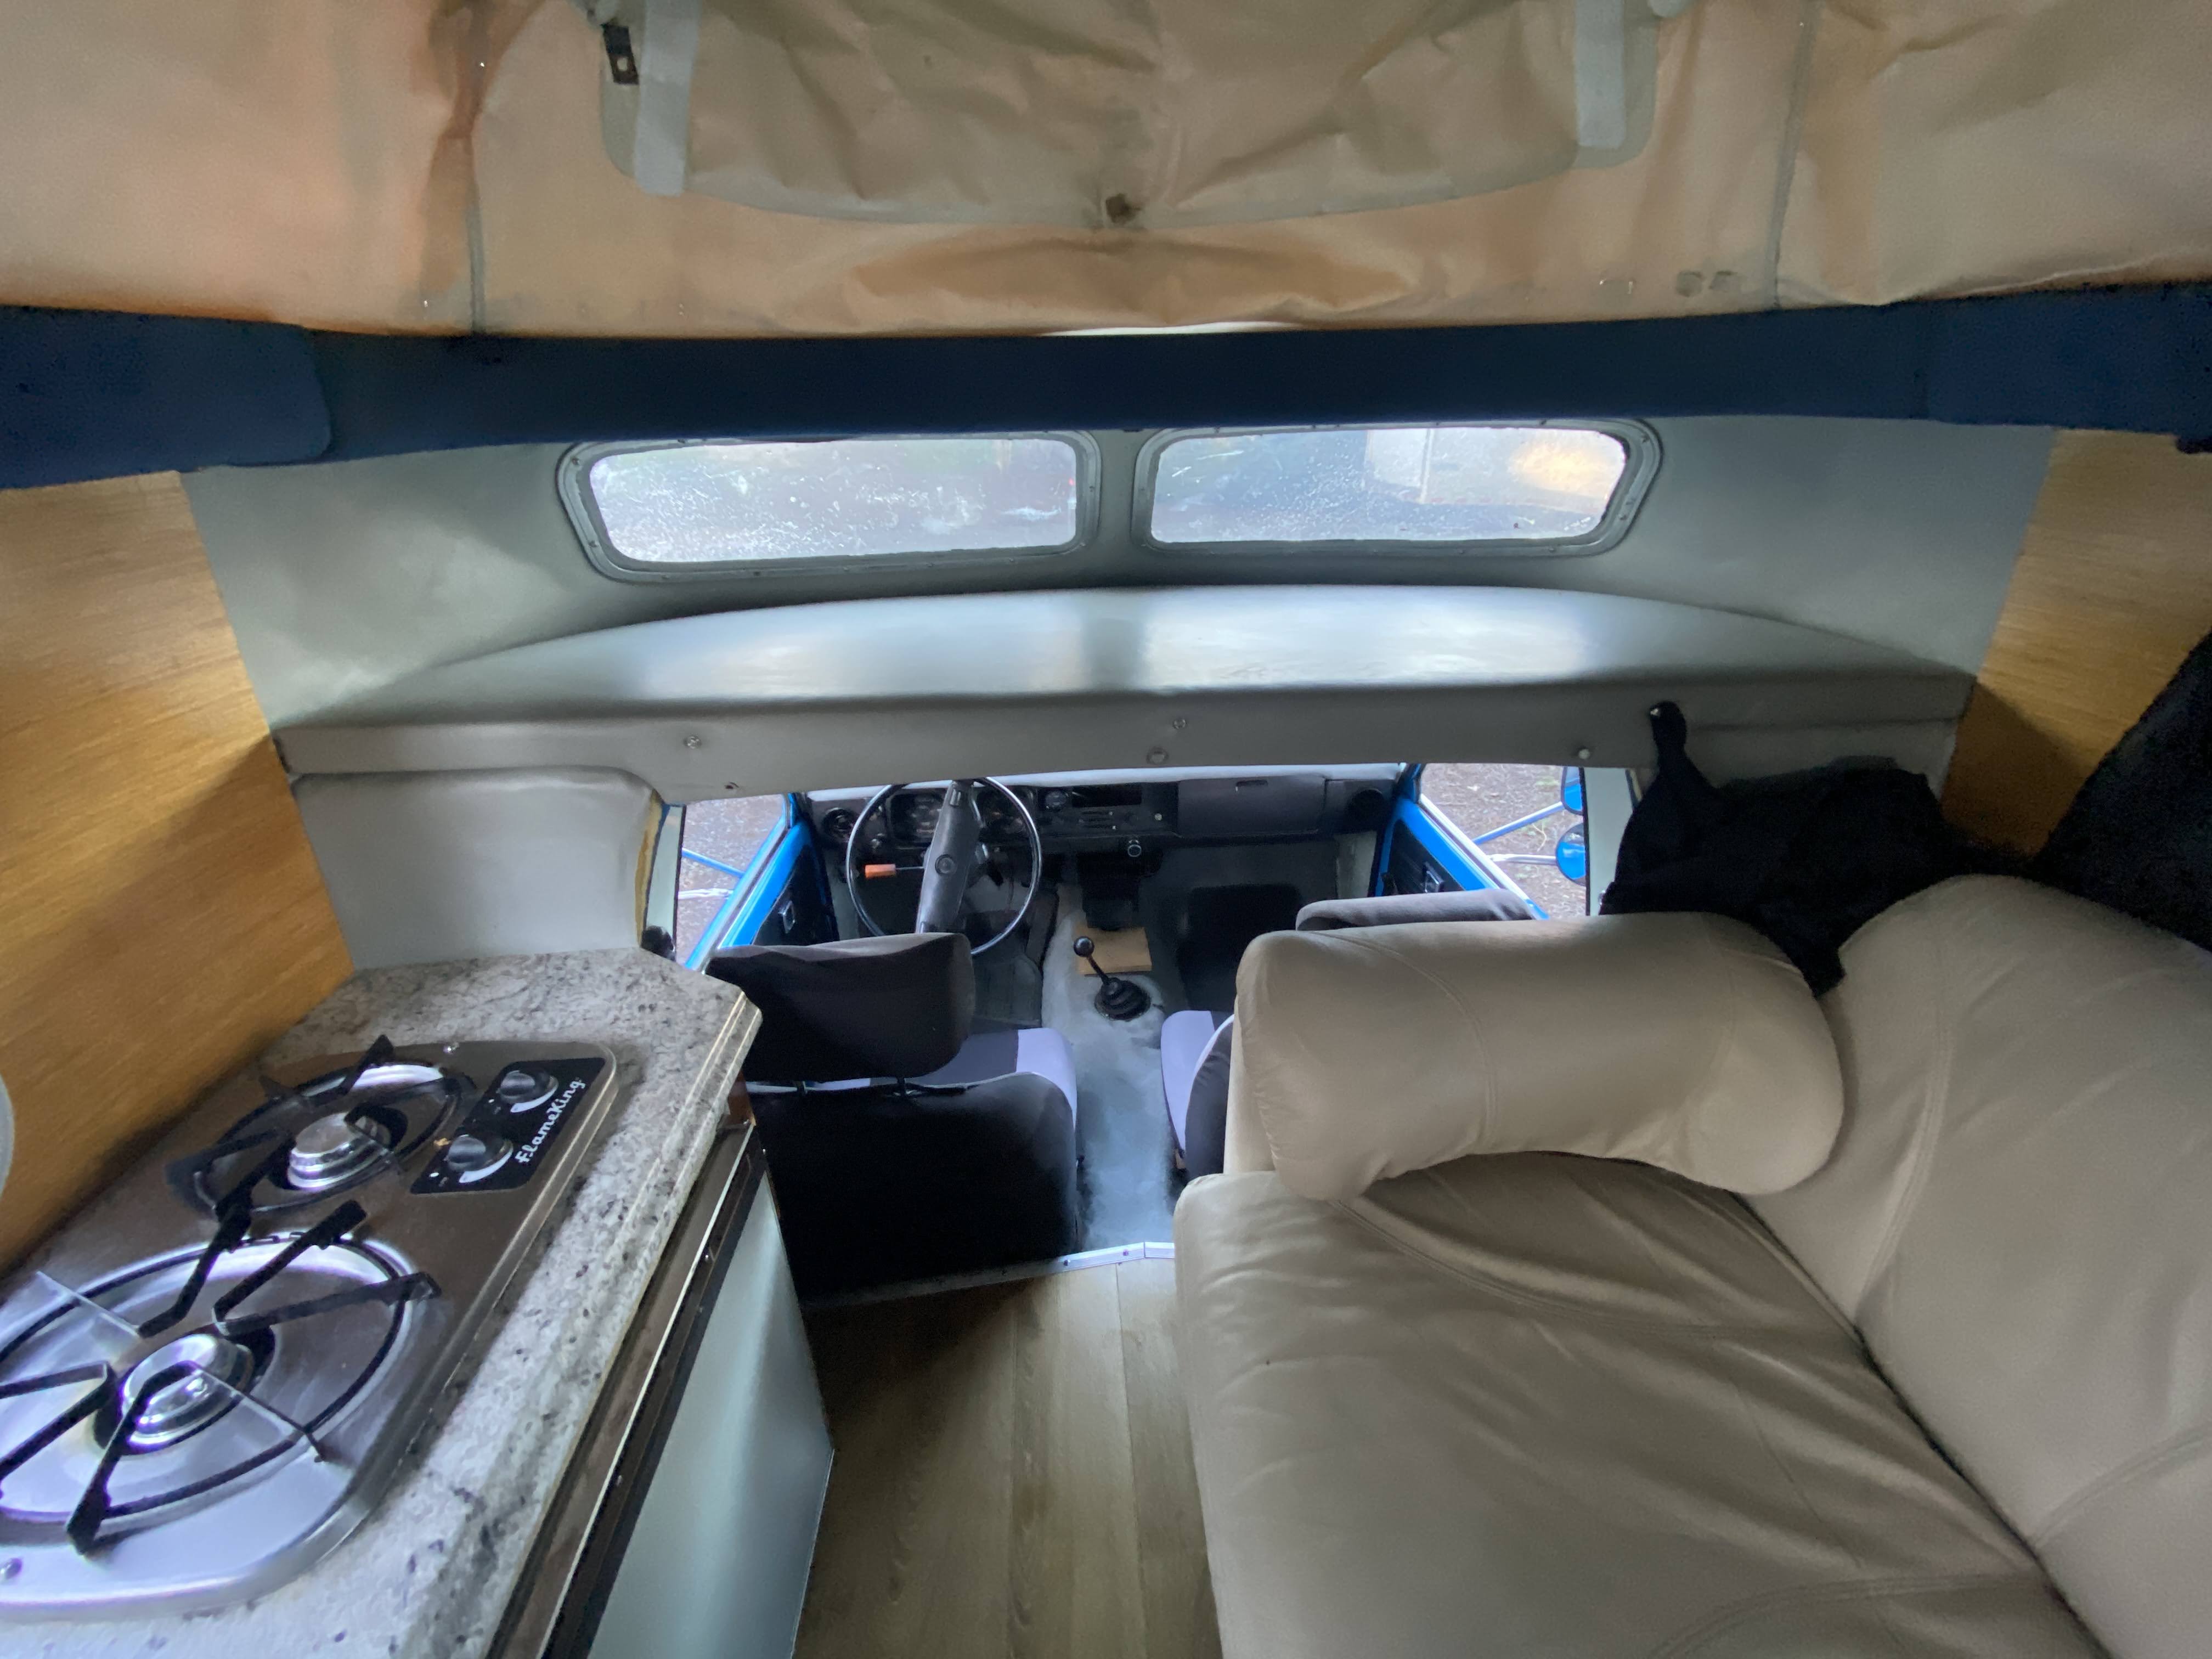
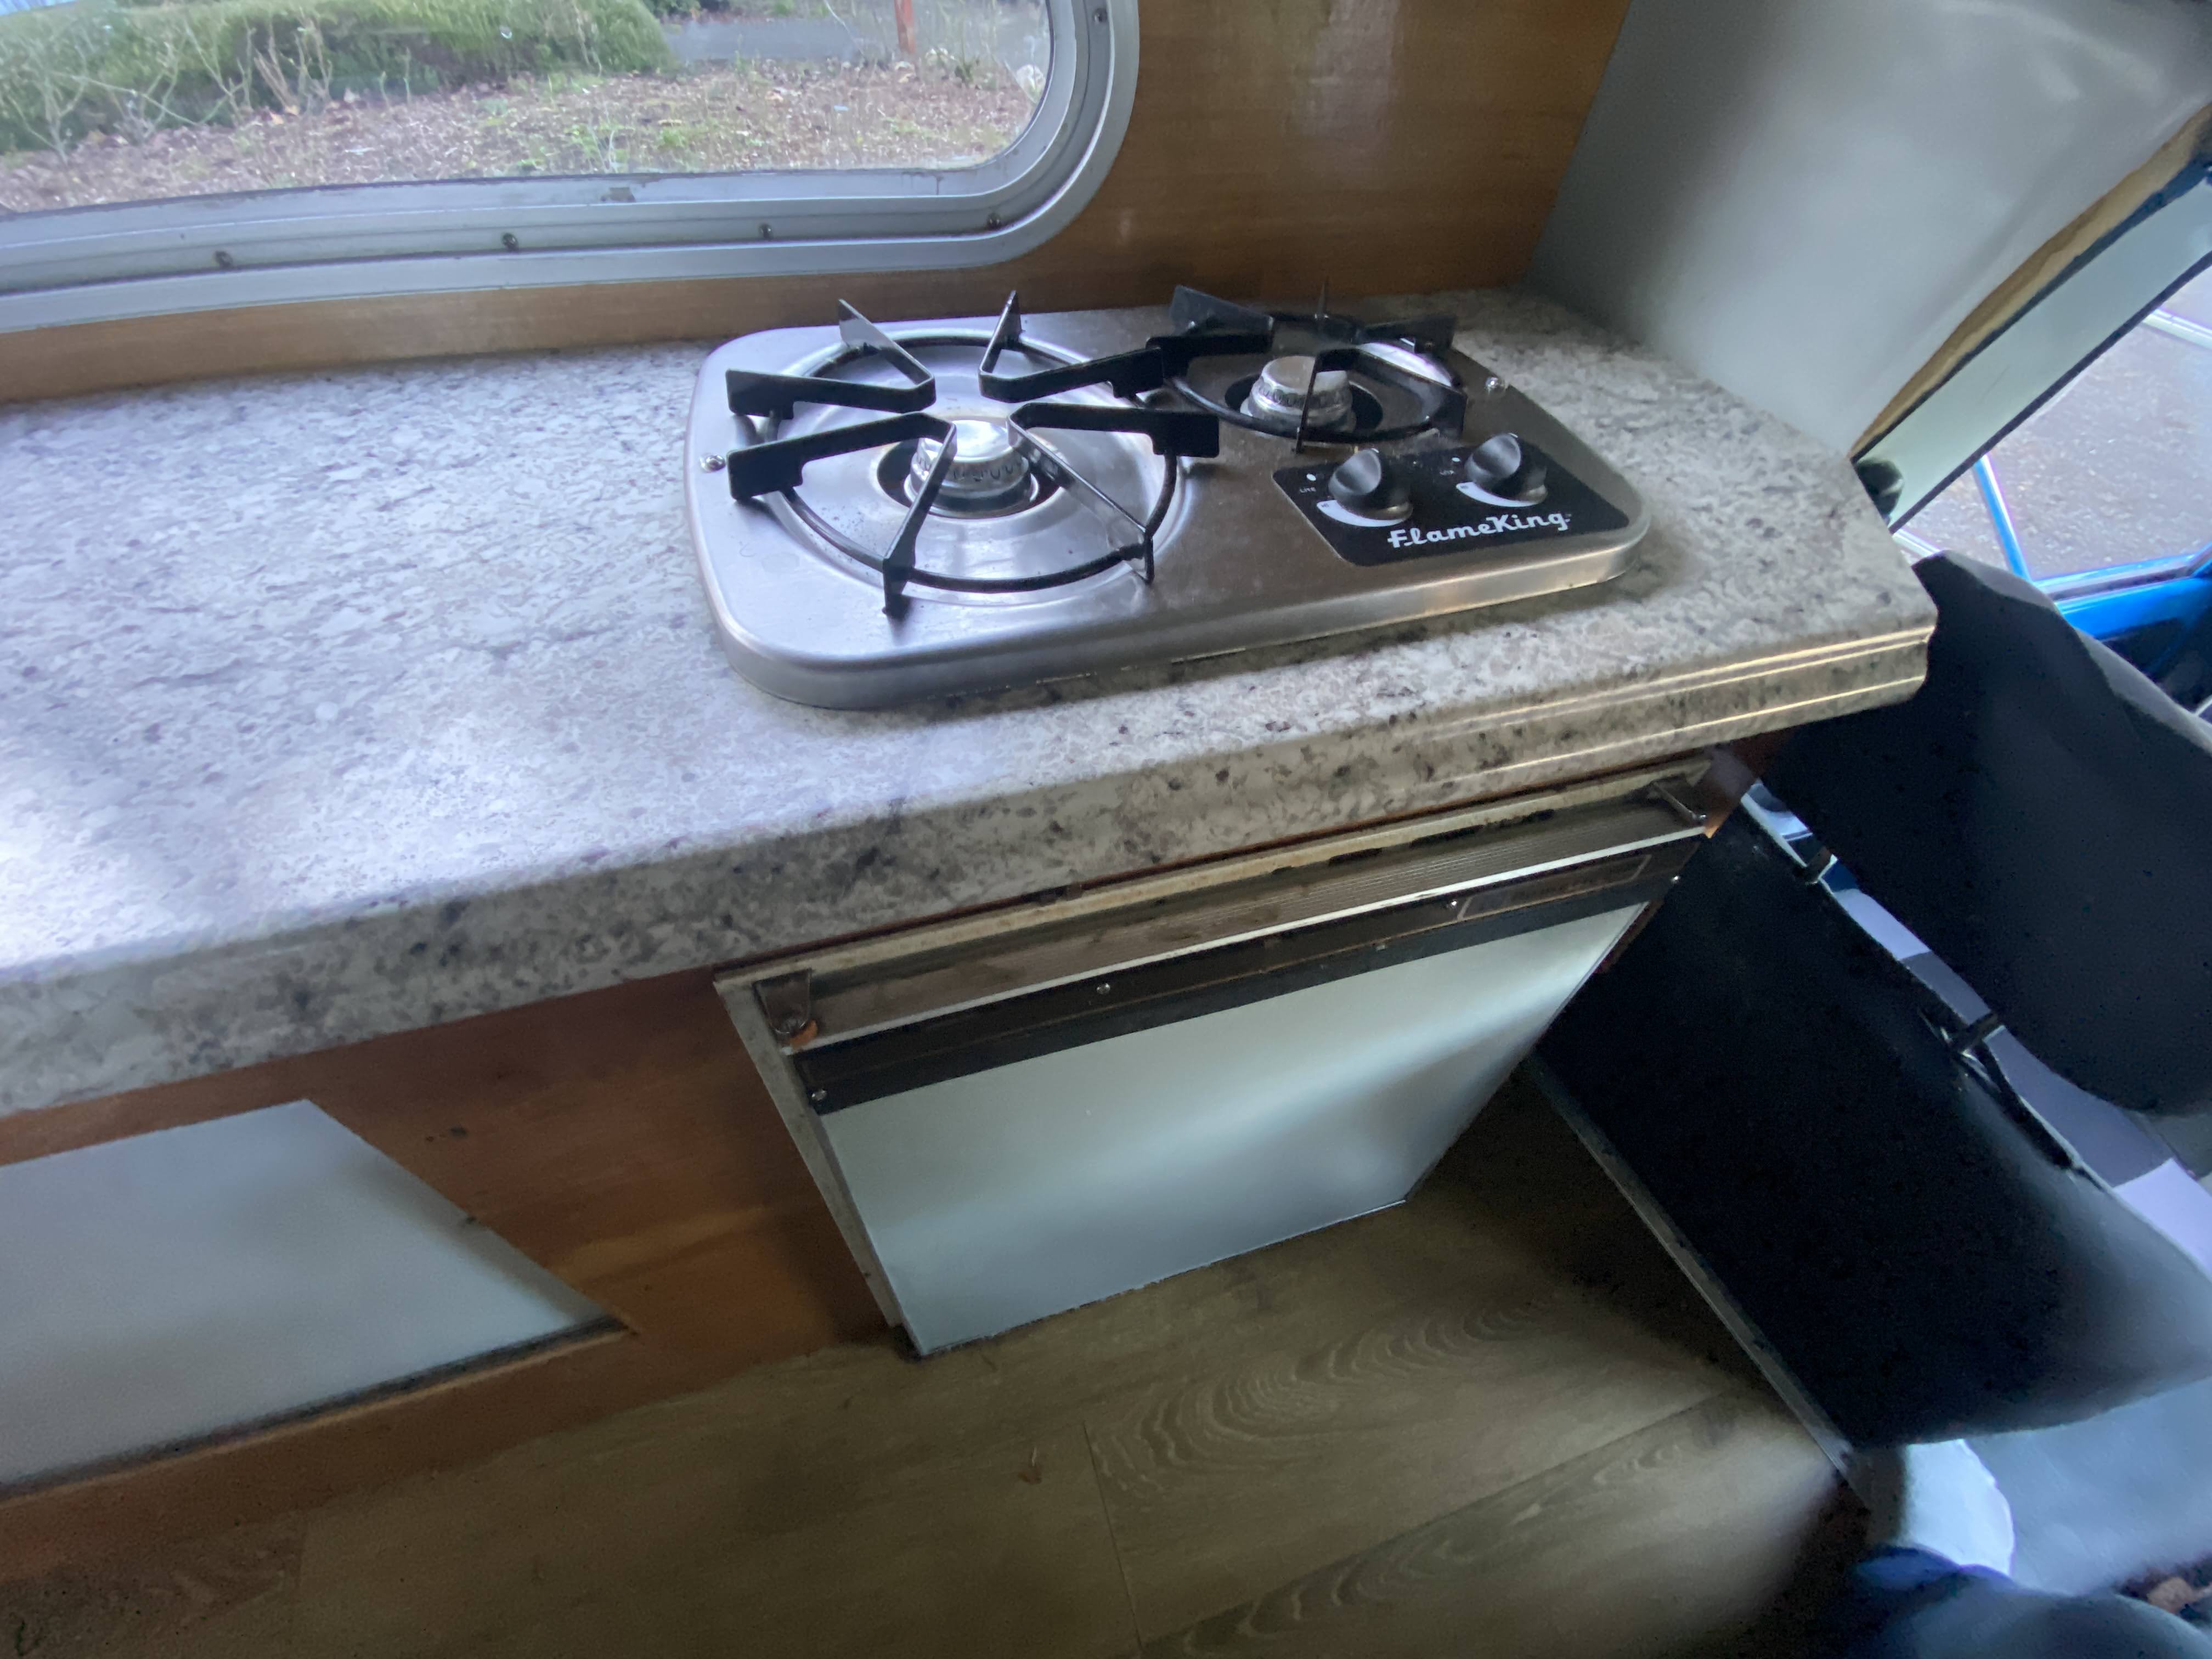
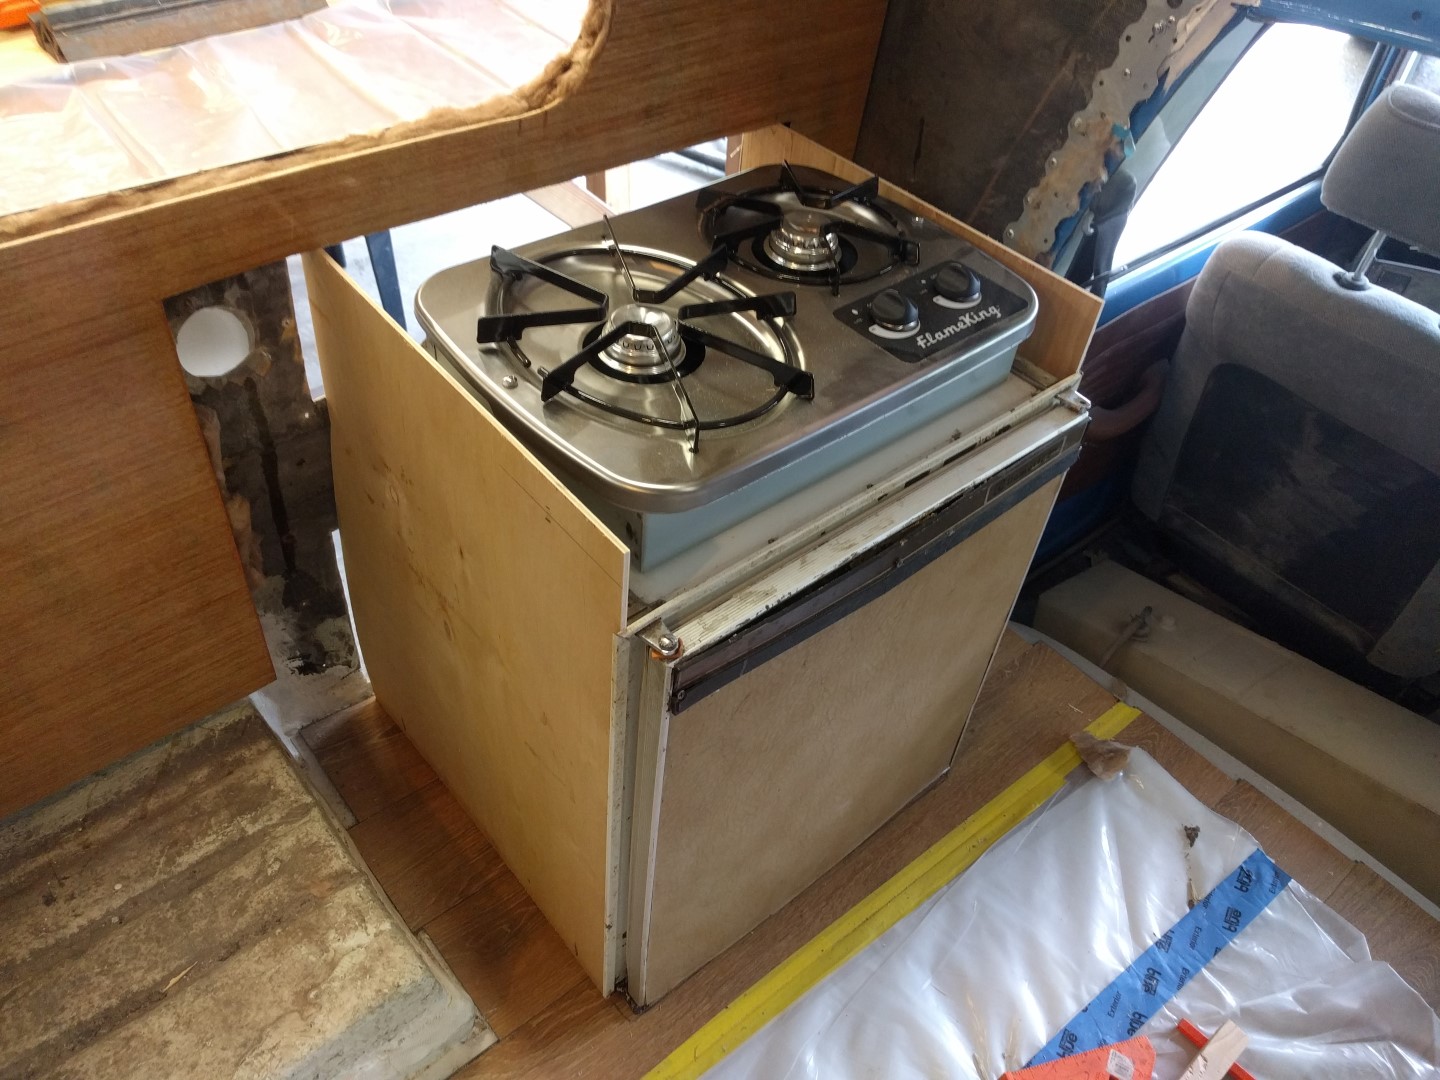
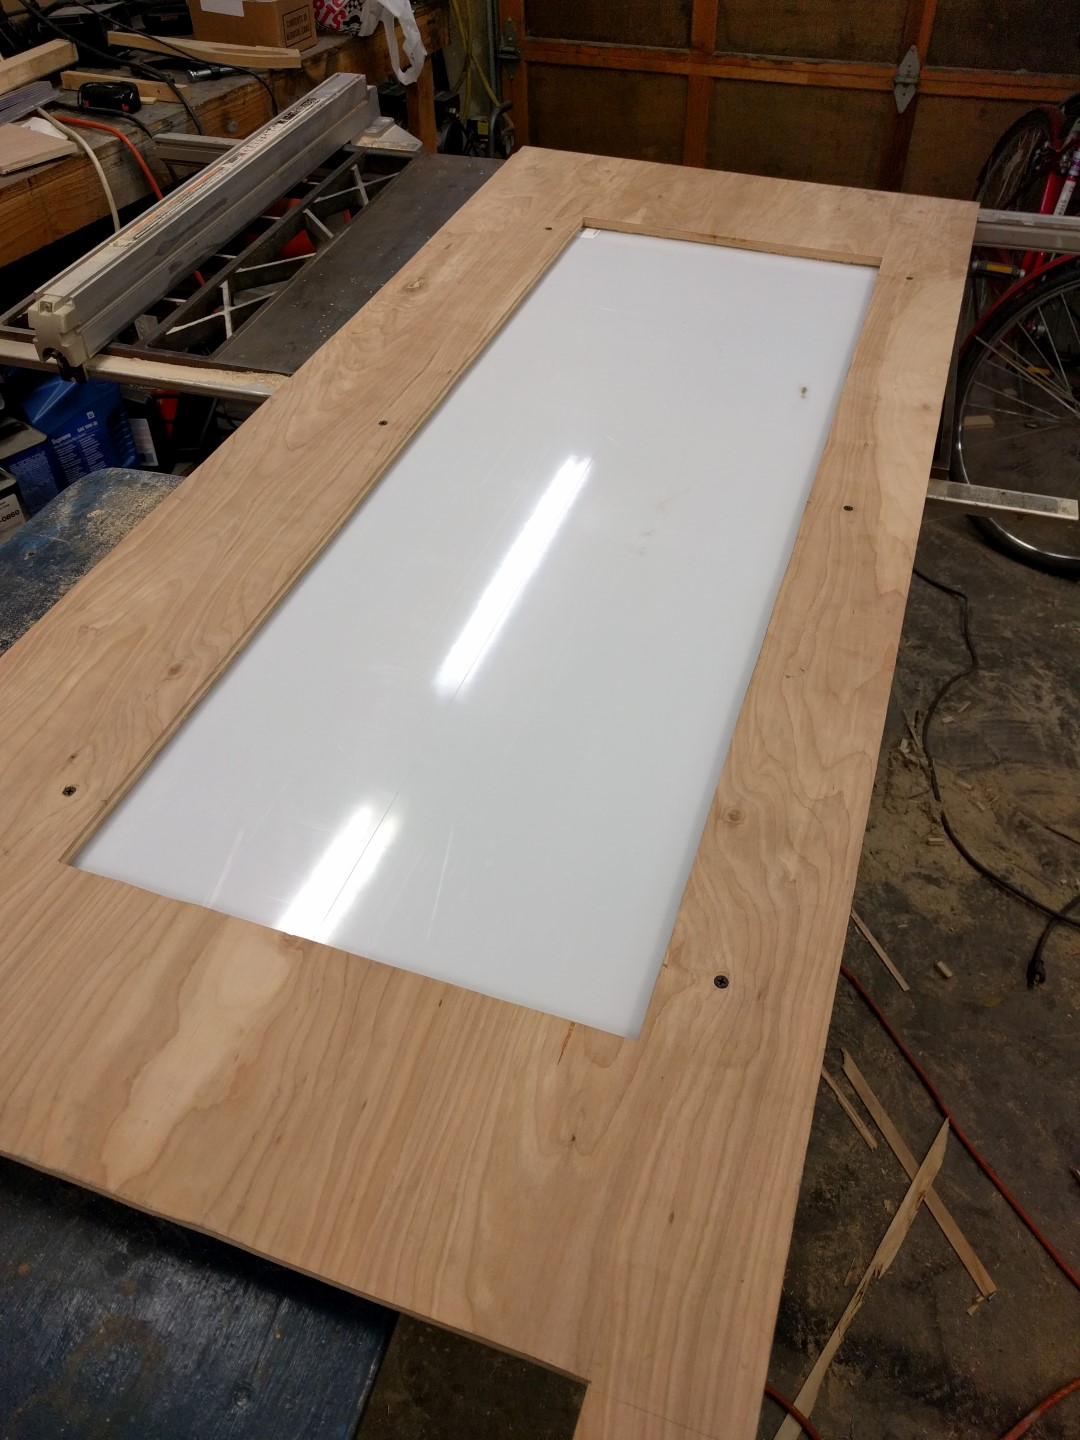
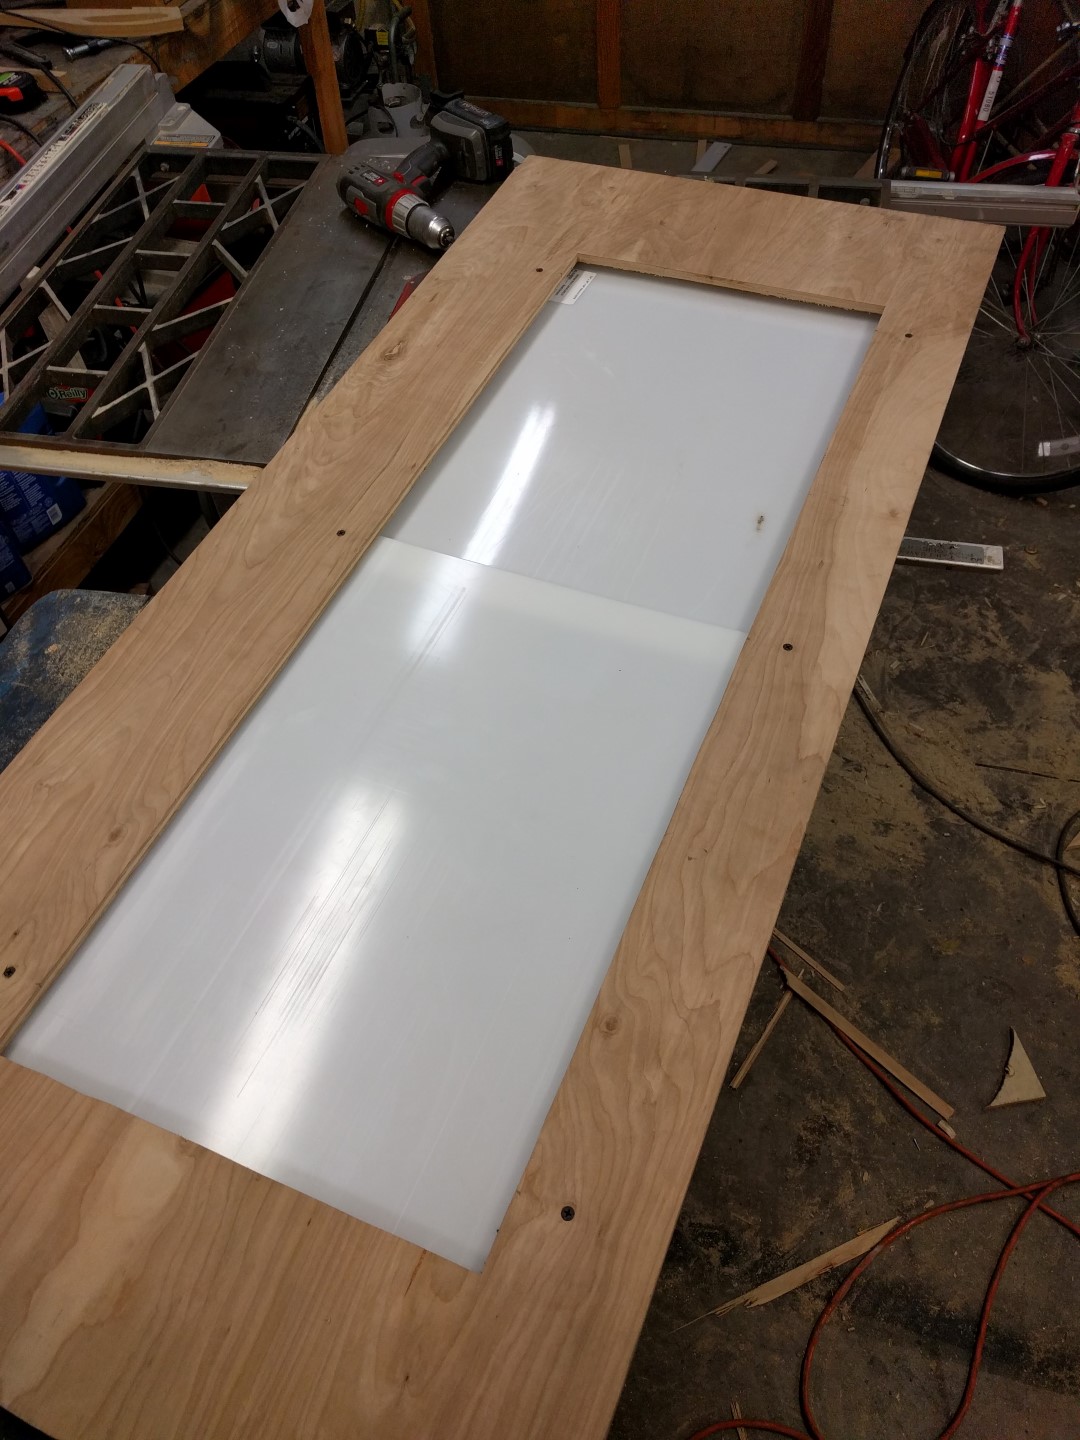
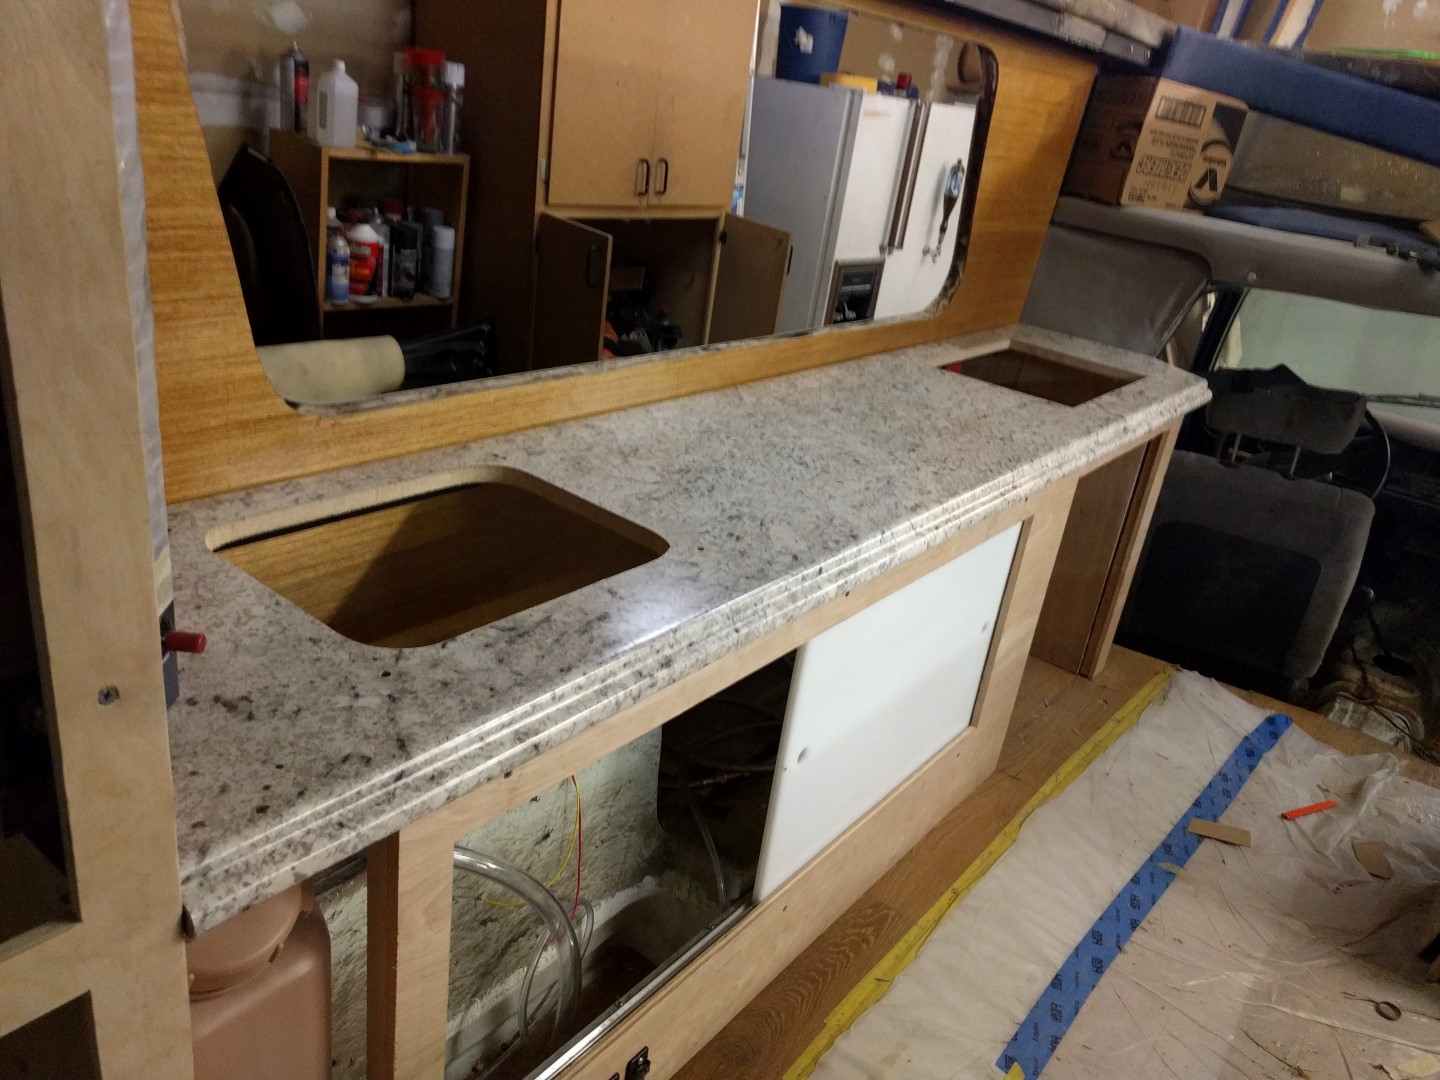
Table Top with Stove and Sink
The sink is the original but the stove is the Flame King YSNHT600 LP Gas Drop-In 2 Burner RV Cooktop Stove with Cover and the countertop is the White Laminate Countertop from Lowe’s (heavily cut to size).
The table shape was mocked using a cheap piece of plywood then cut to final size when everything fit just right.


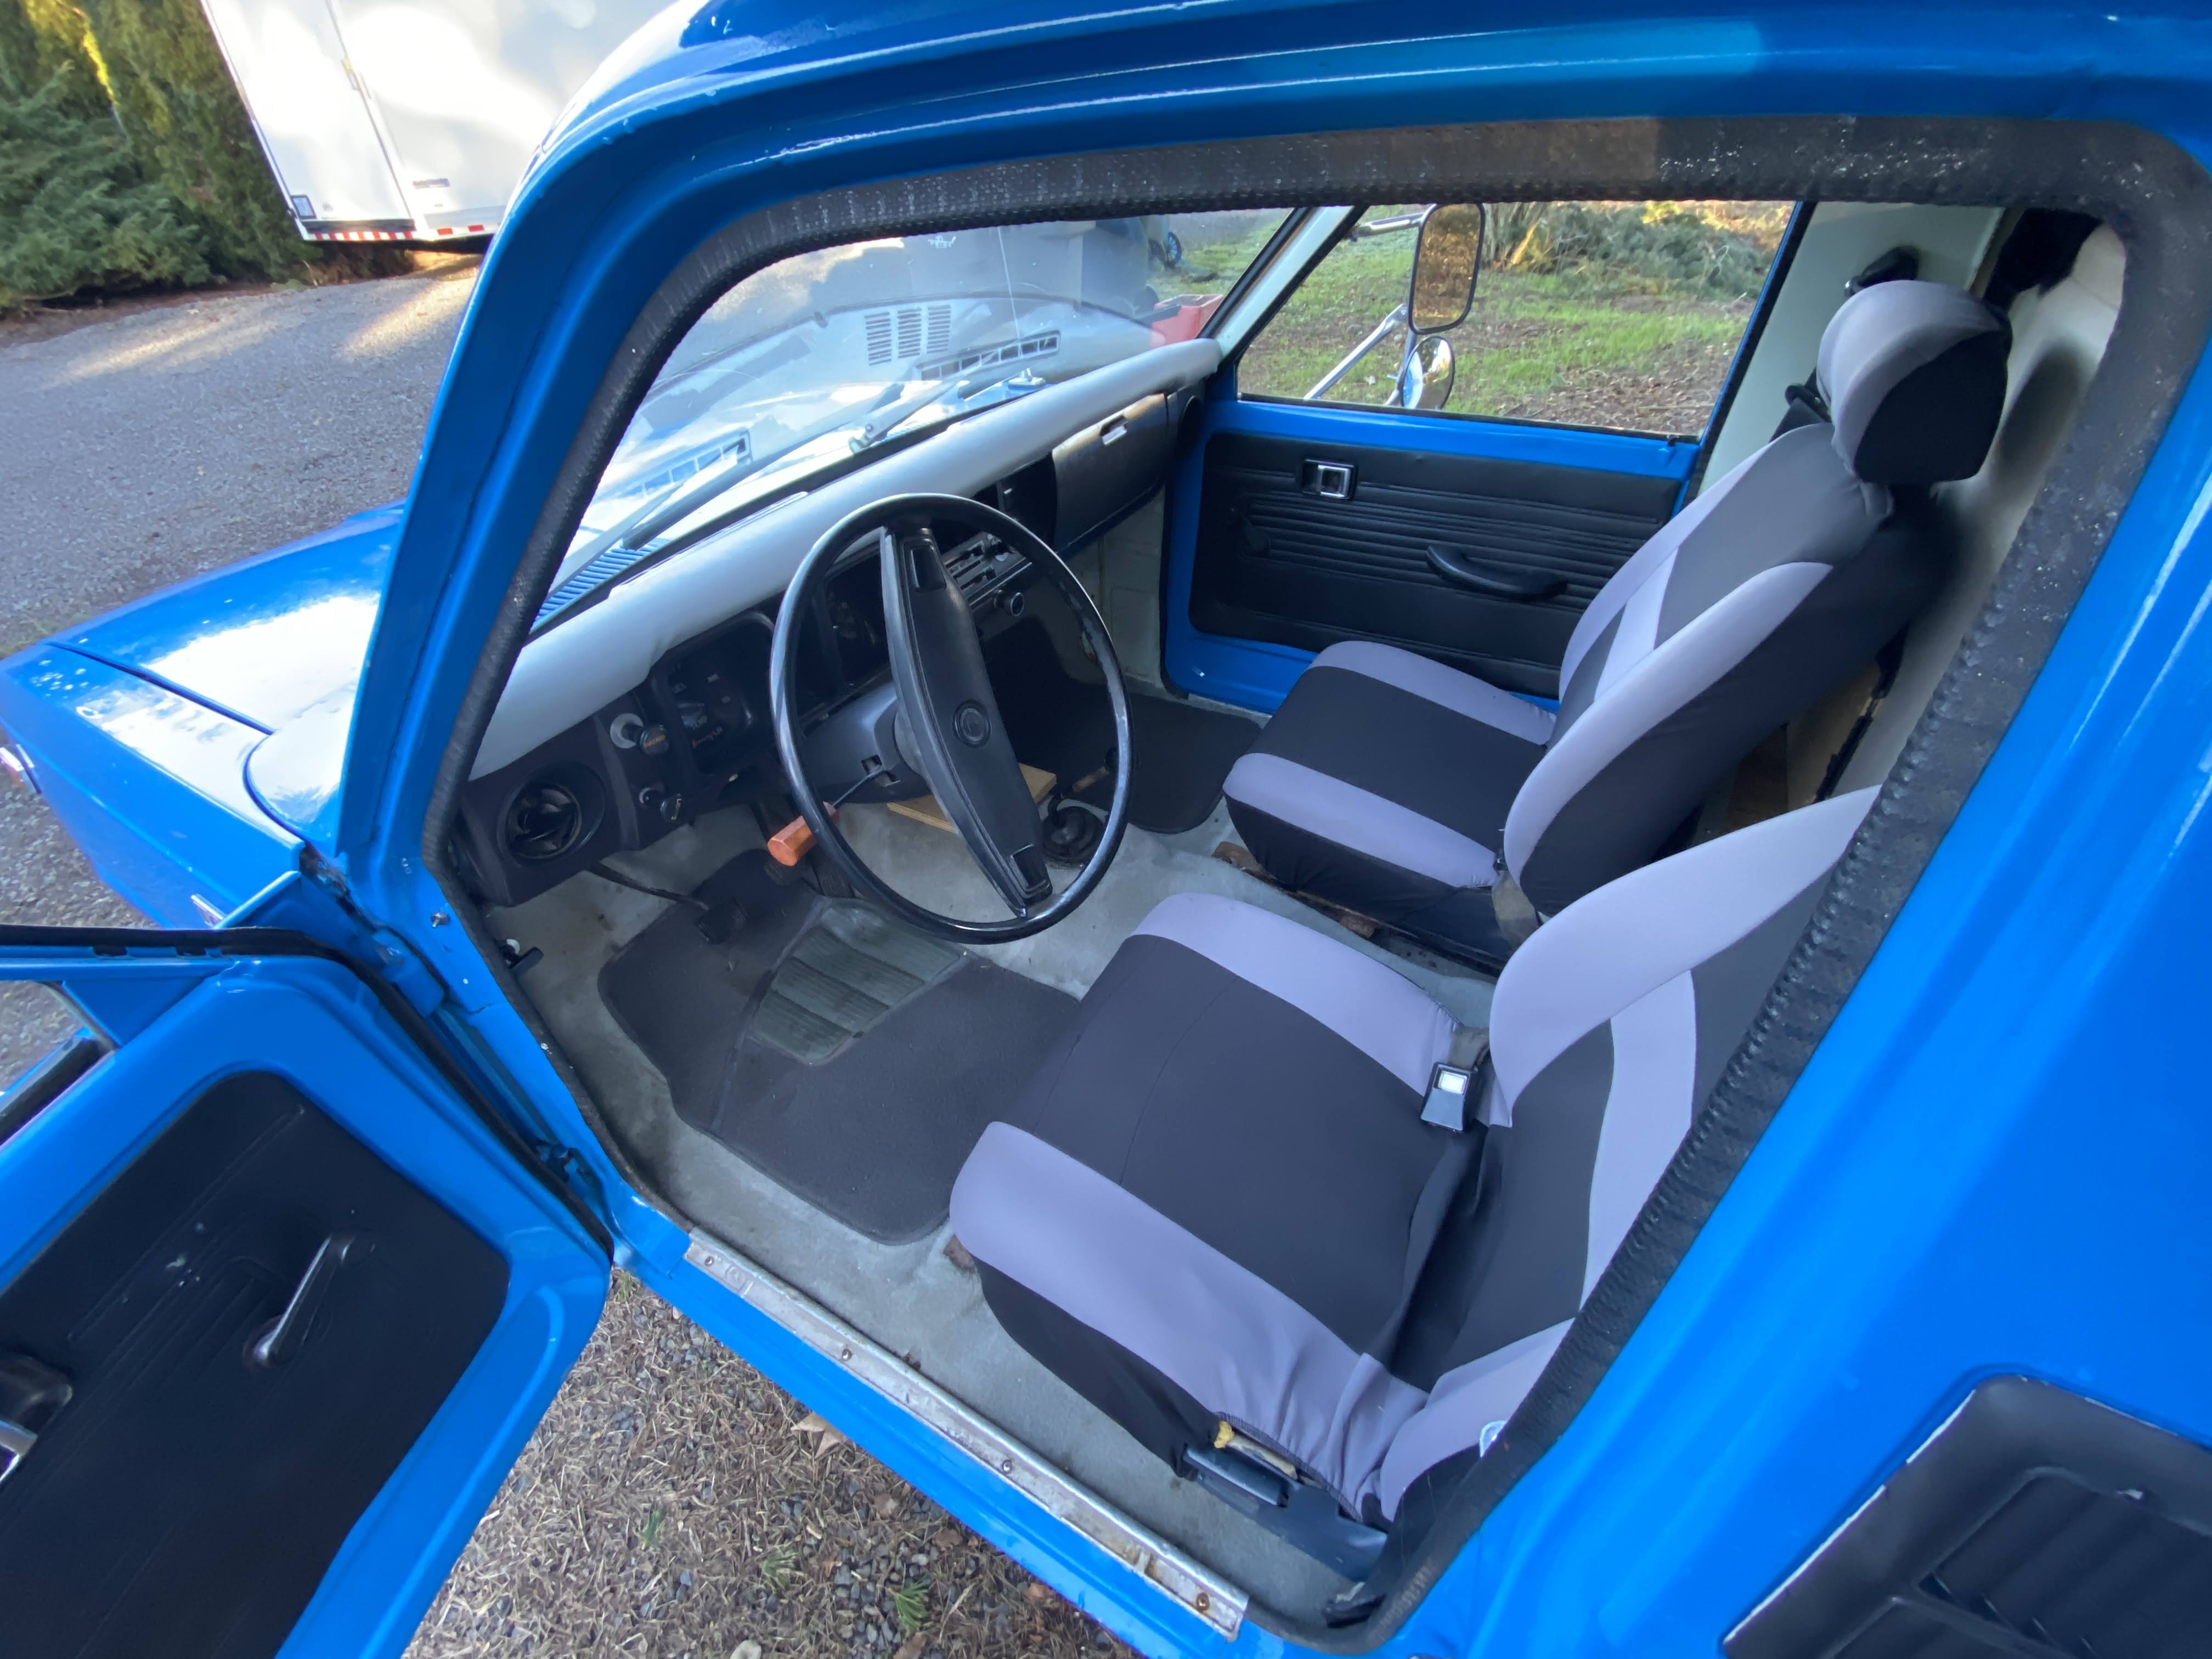
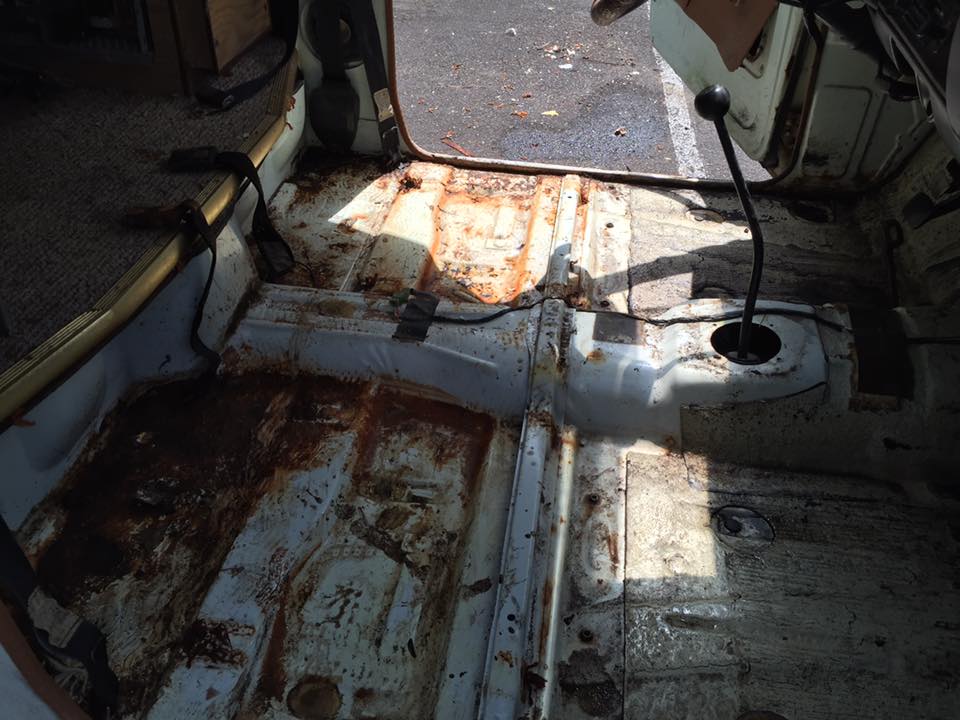
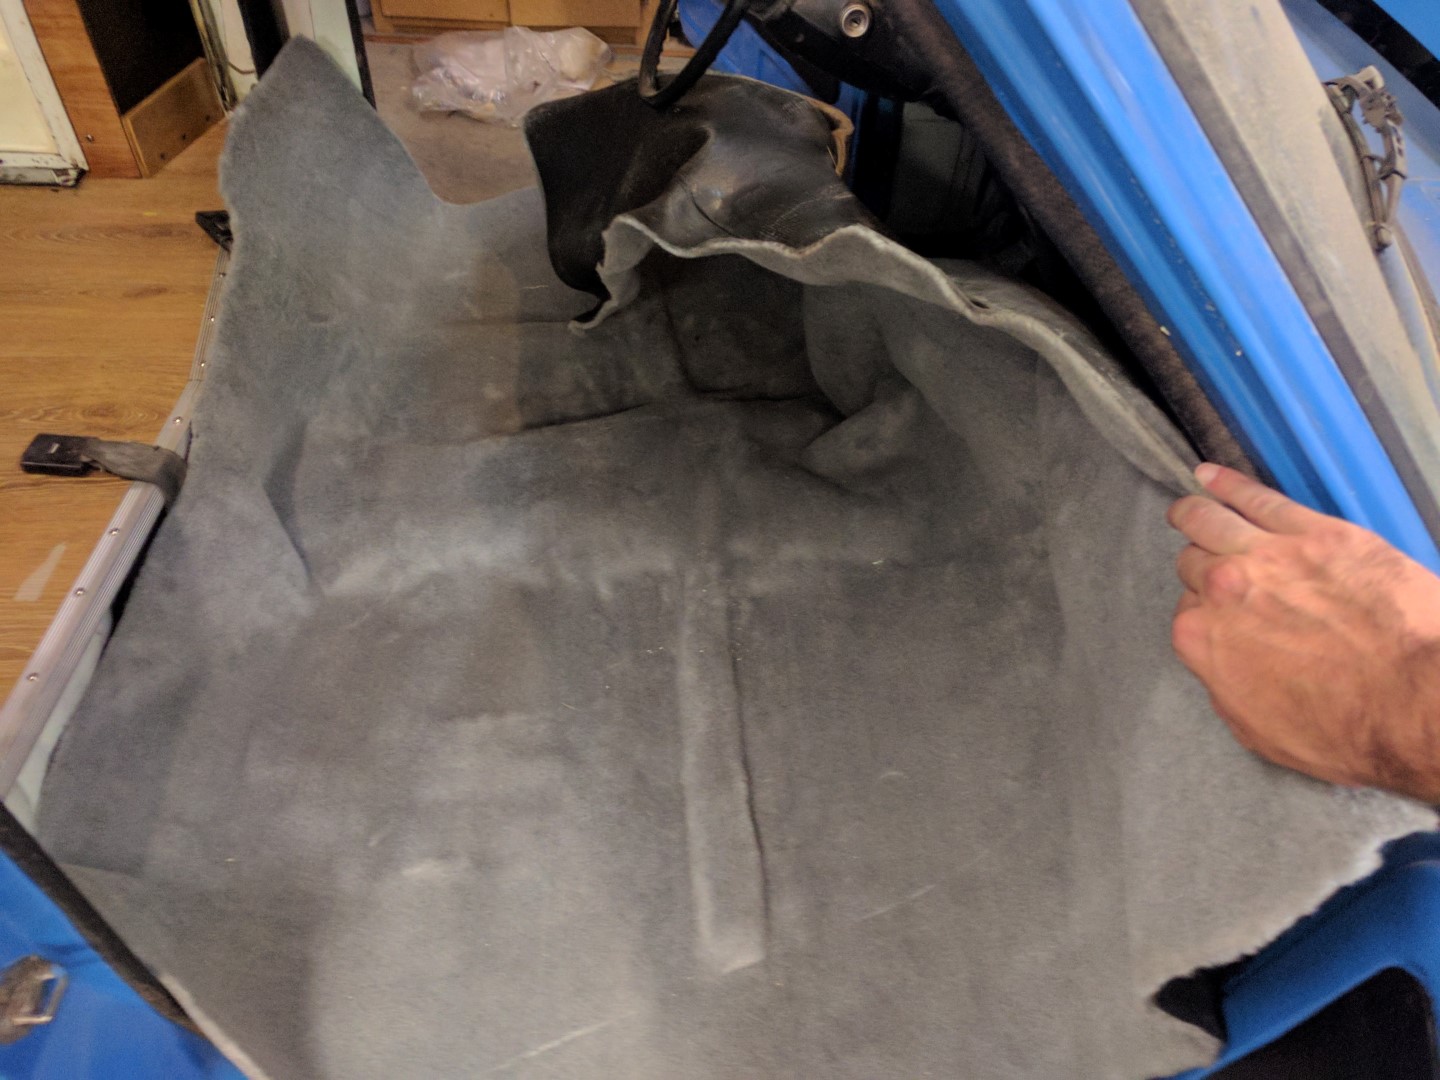
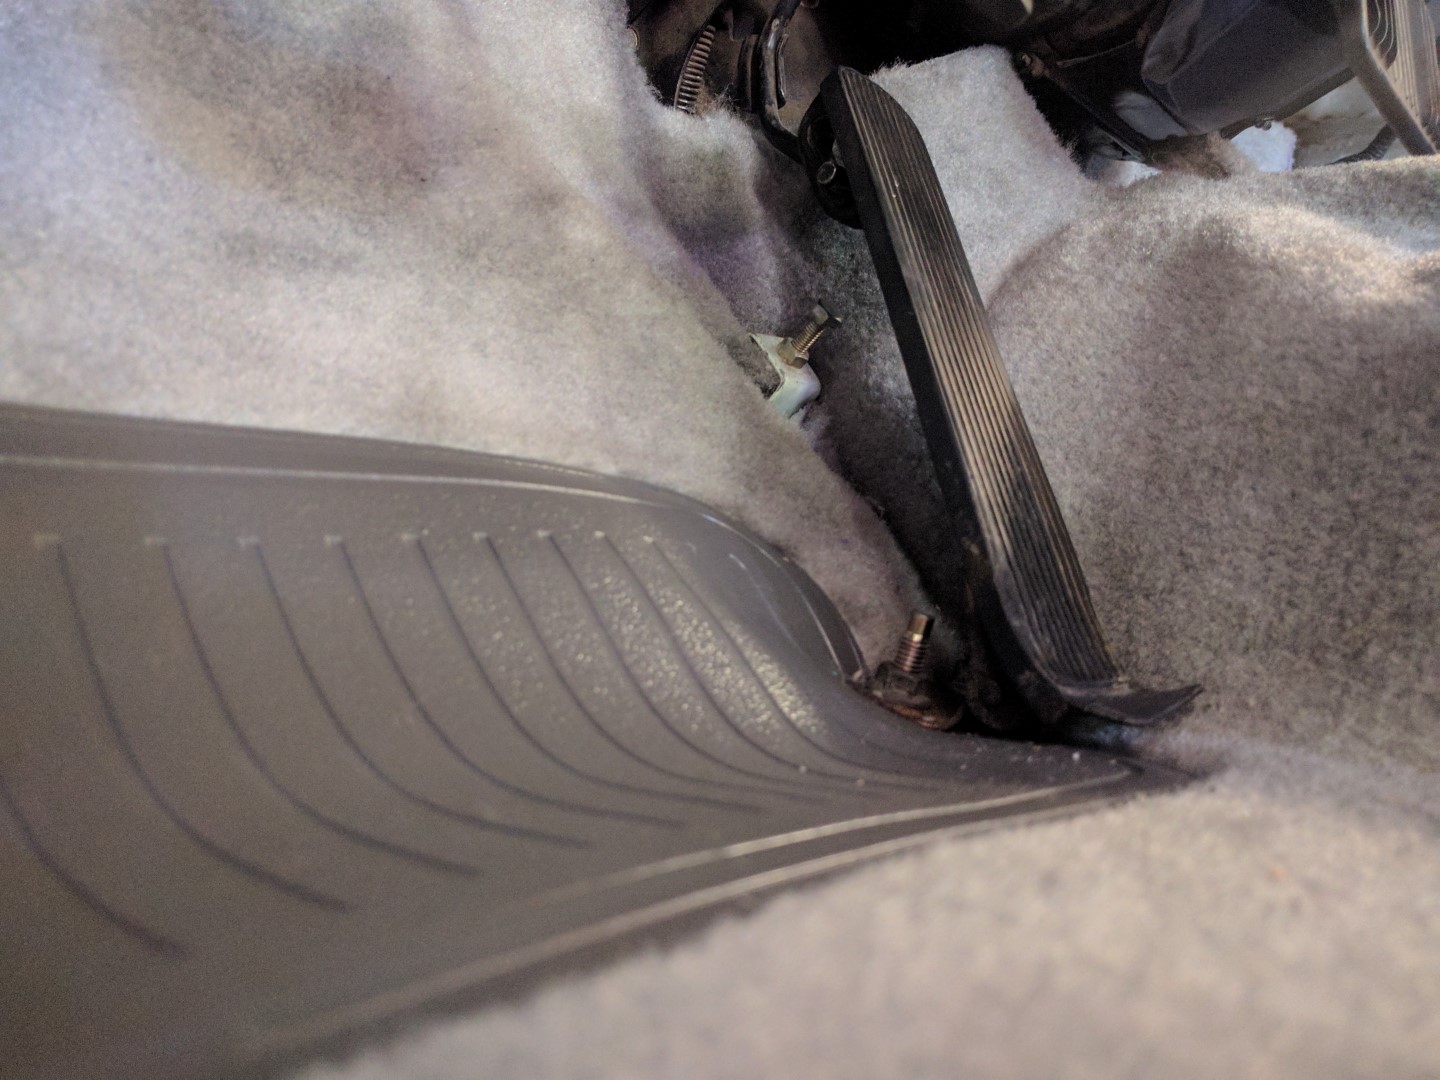
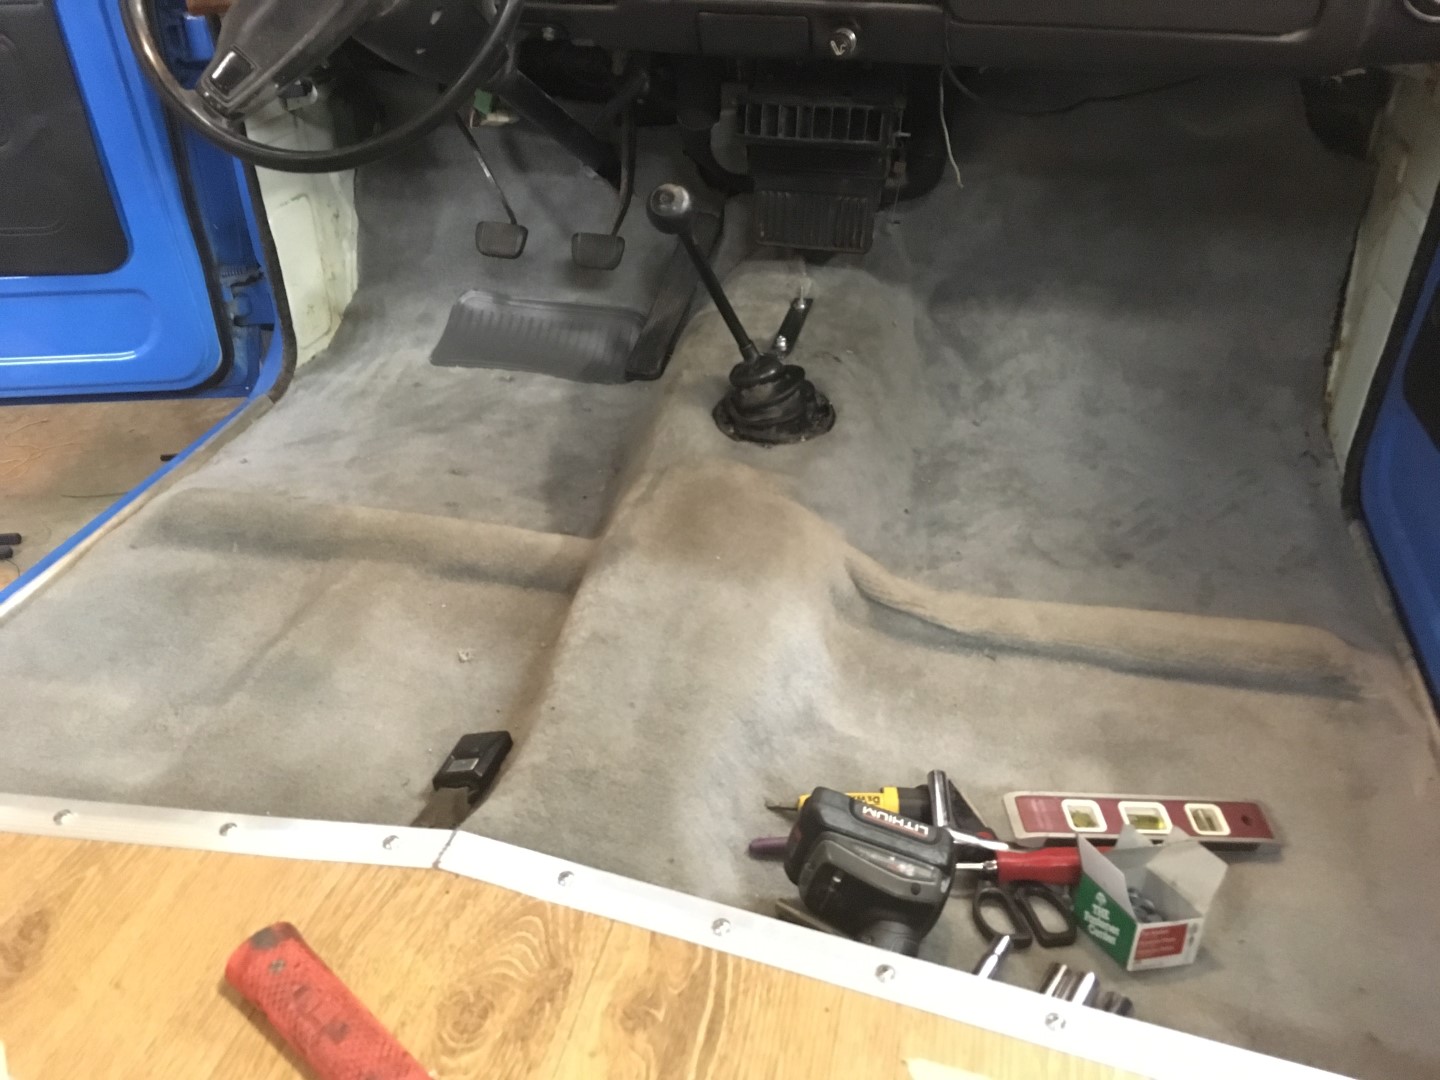
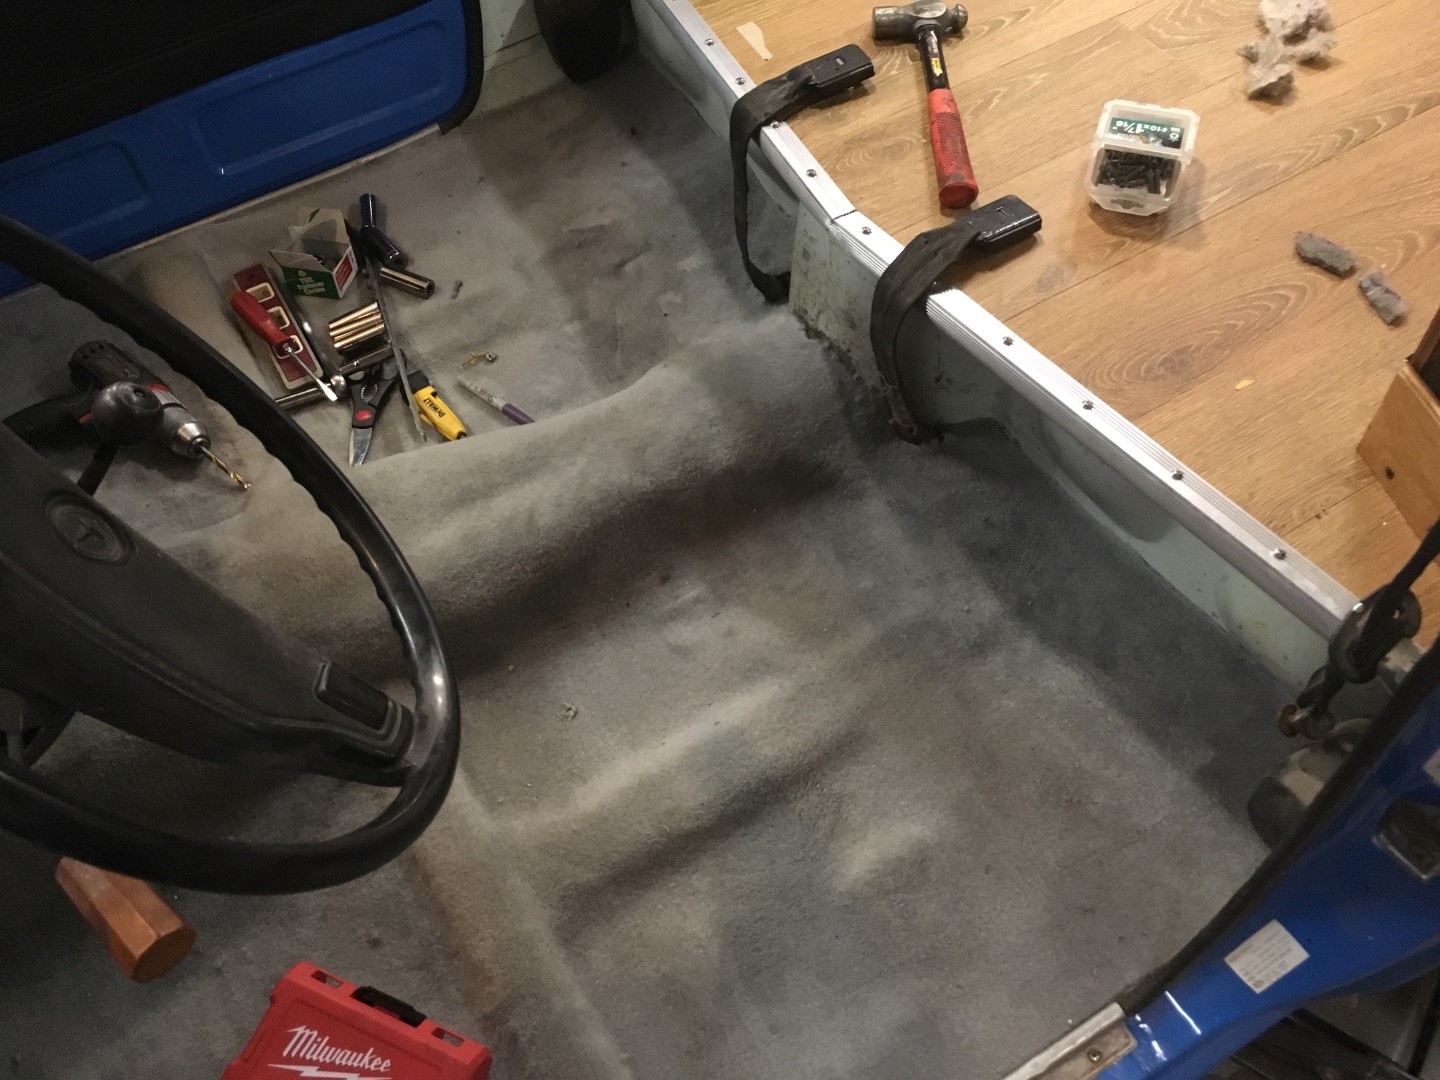
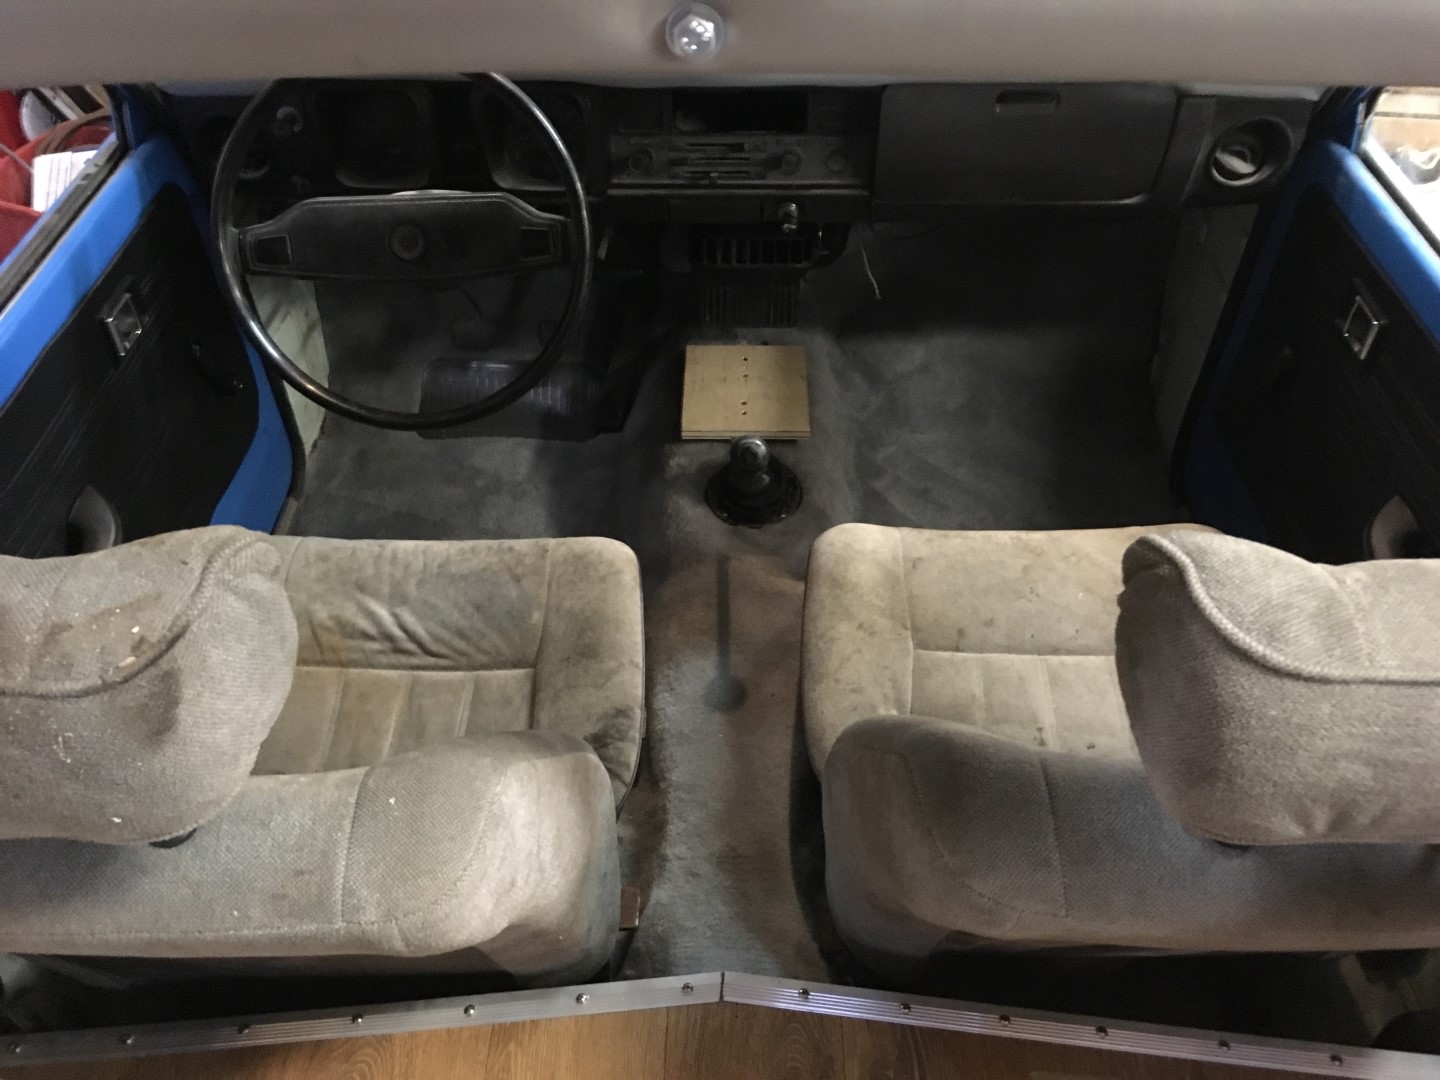
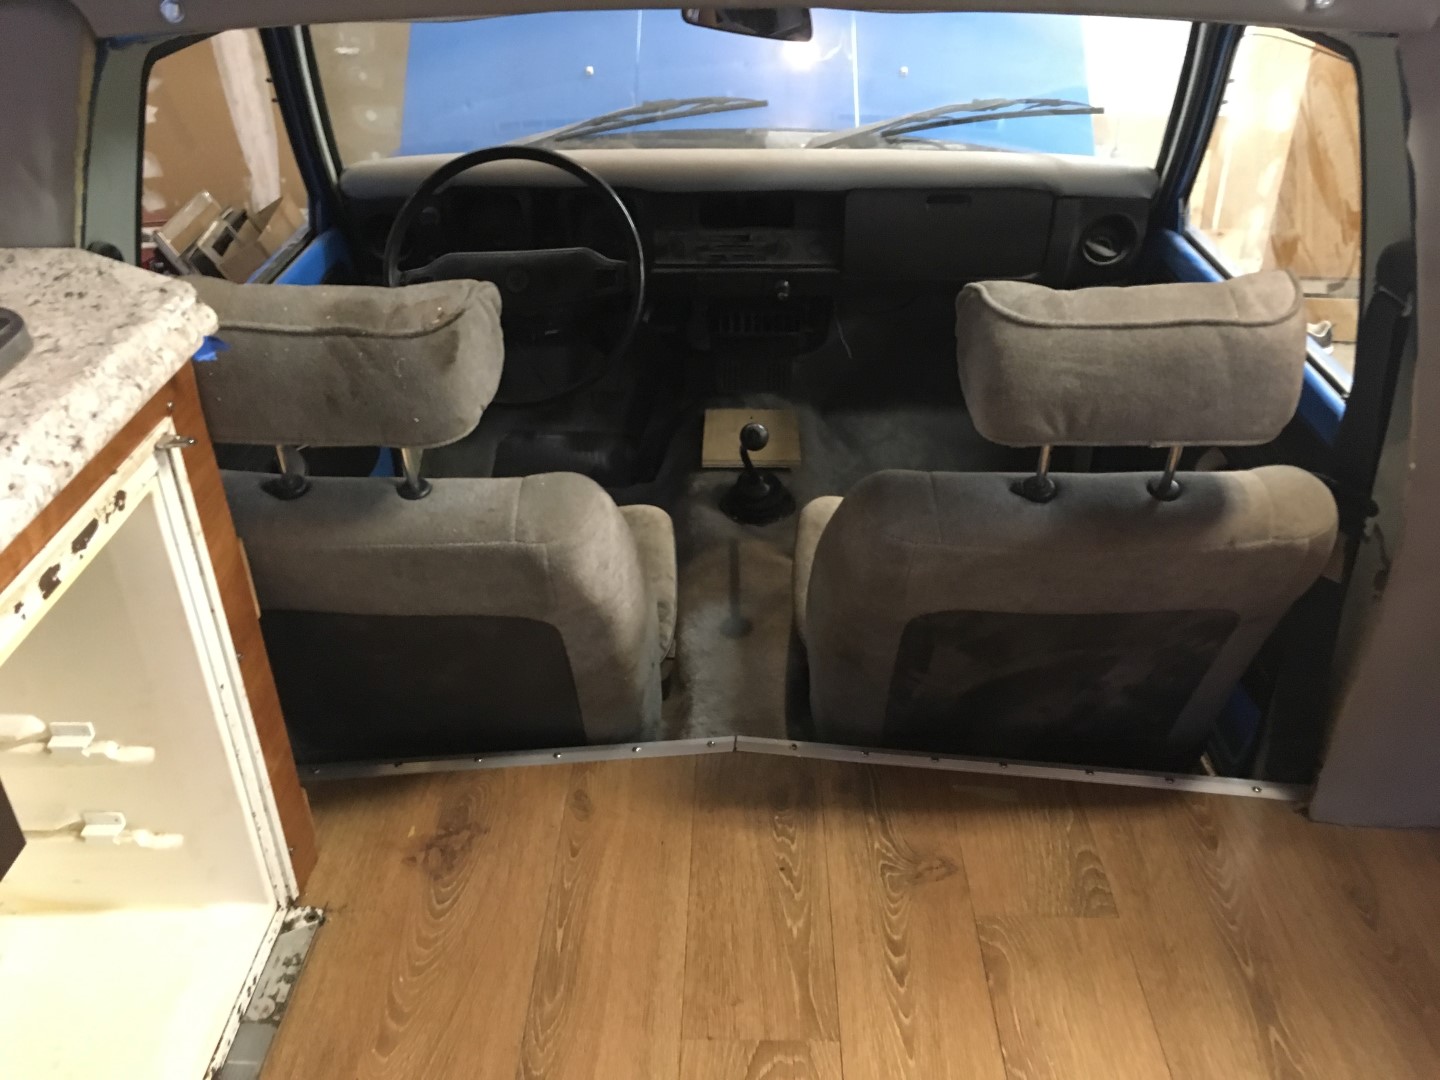
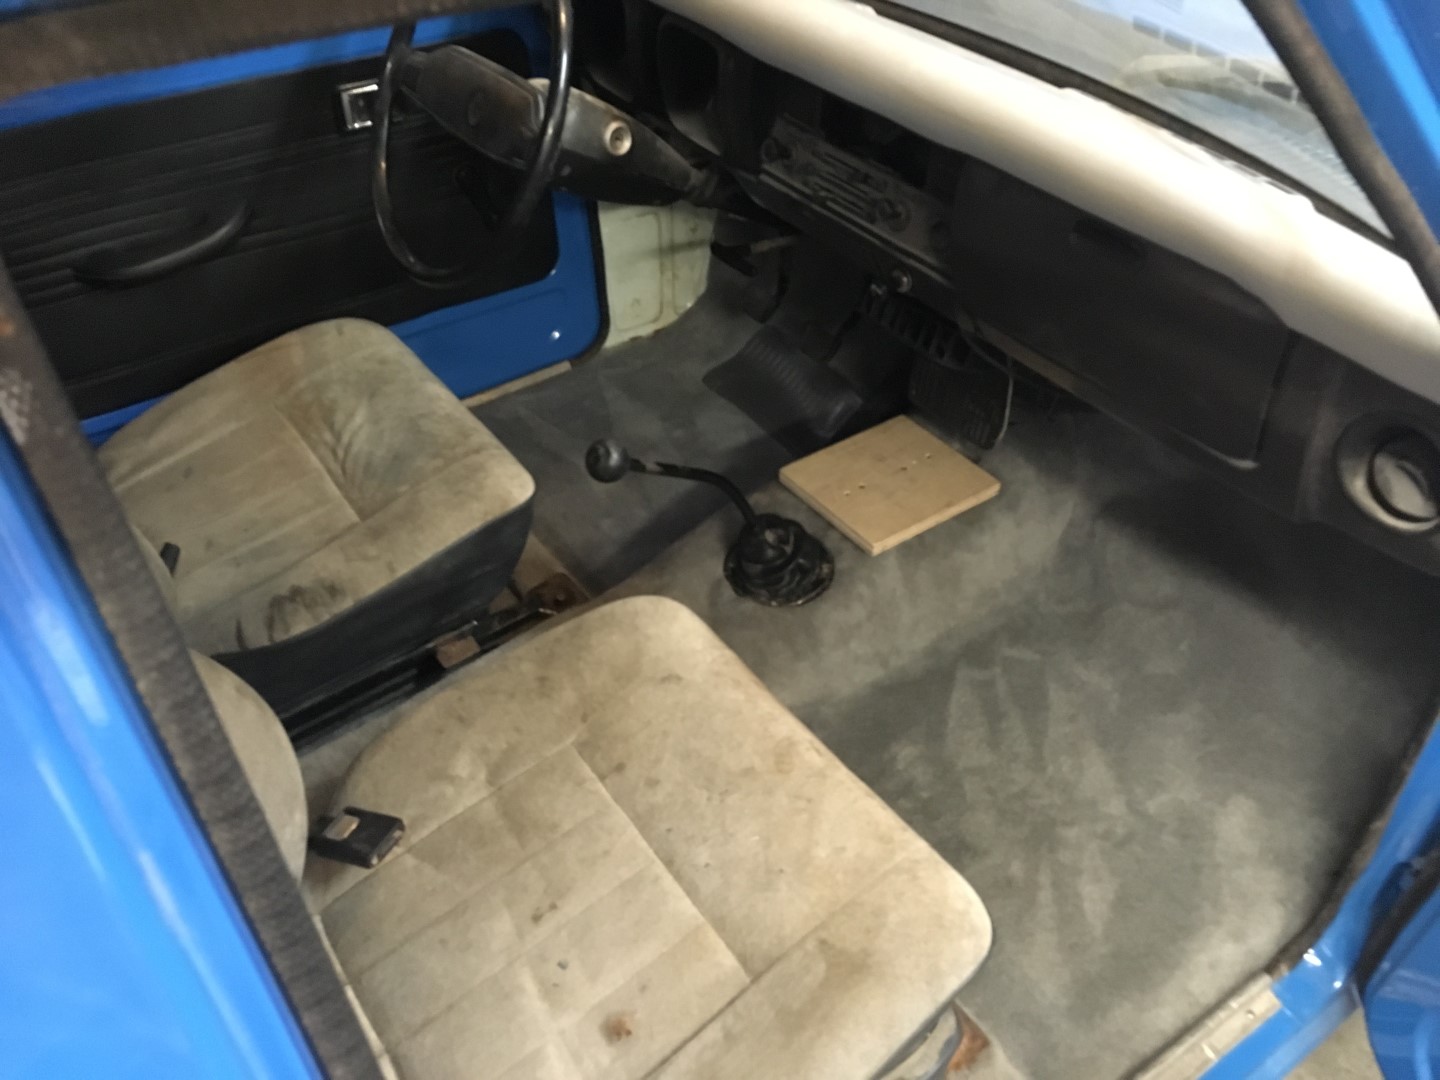
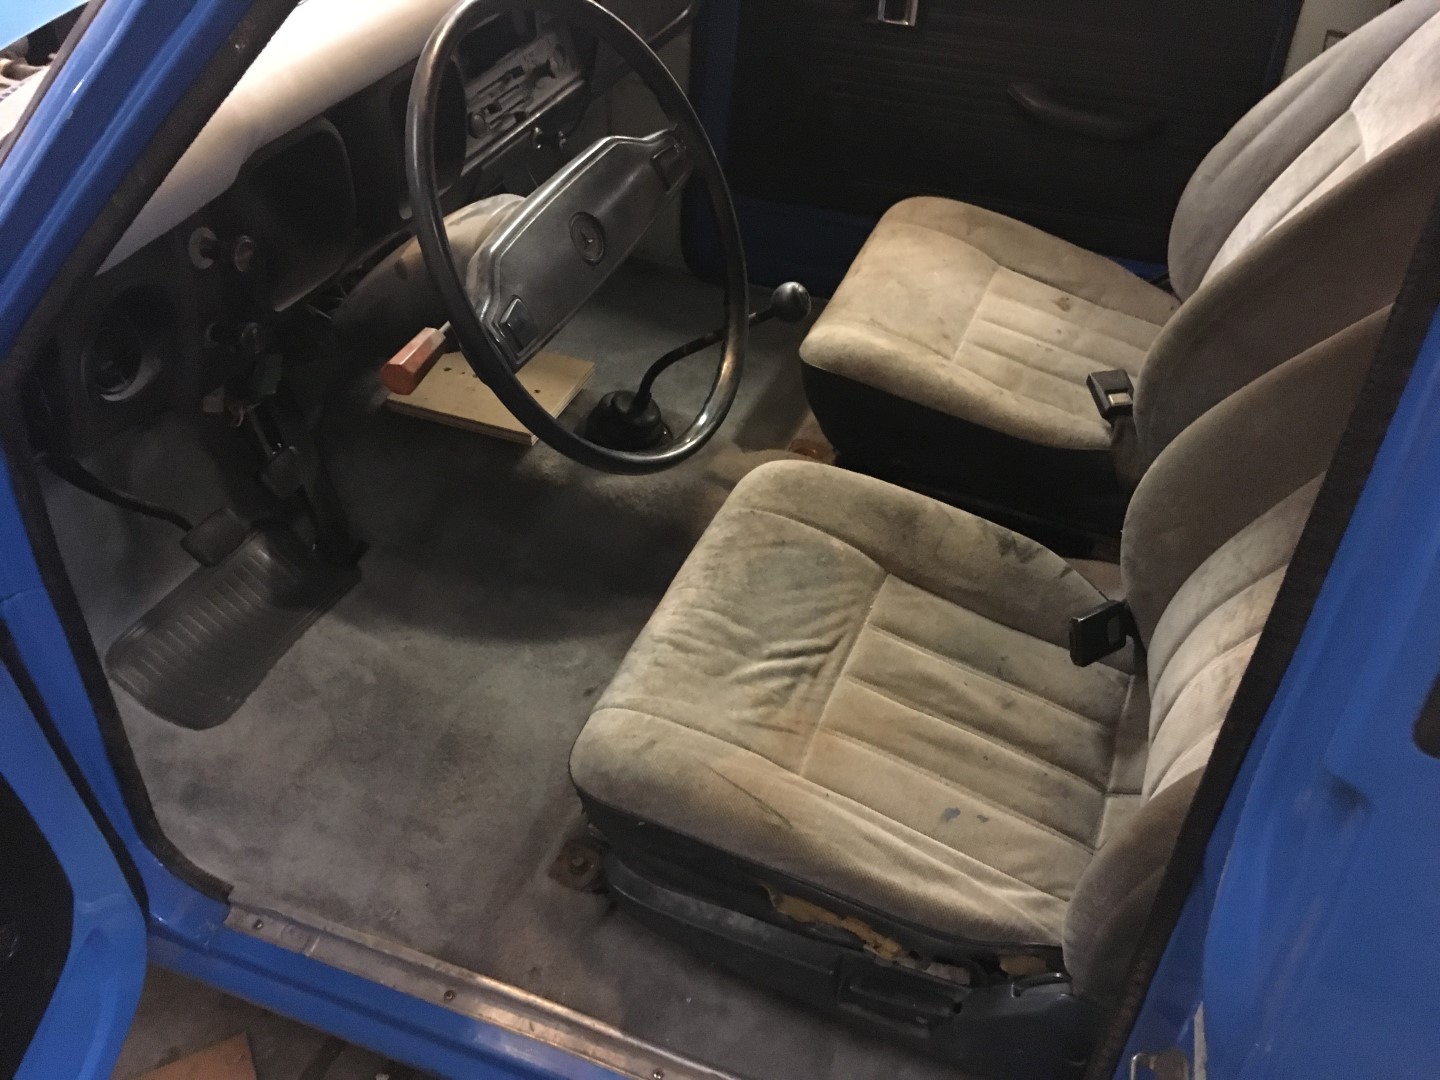
Truck Cab Carpet and Seats
The carpet was replaced with 1977-1983 Toyota Pickup Reg Cab, 8046 Silver Cutpile, Mass Backing carpet from AutoMatStore. The silver color best matched my silver stripes via the free samples they provide. The seats are from an unknown vehicle that came with my restoration chinook. The seat frames are welded to the stock seat frames for compatibility.
Installing the carpet takes a lot of fan-dangling even with the mold shape fitting to this particular truck. Follow the installation instructions that say start at the driveshaft/shifter area and work towards the middle.
After the carpet installation holes were made for the seats, seat belts, and other equipment.


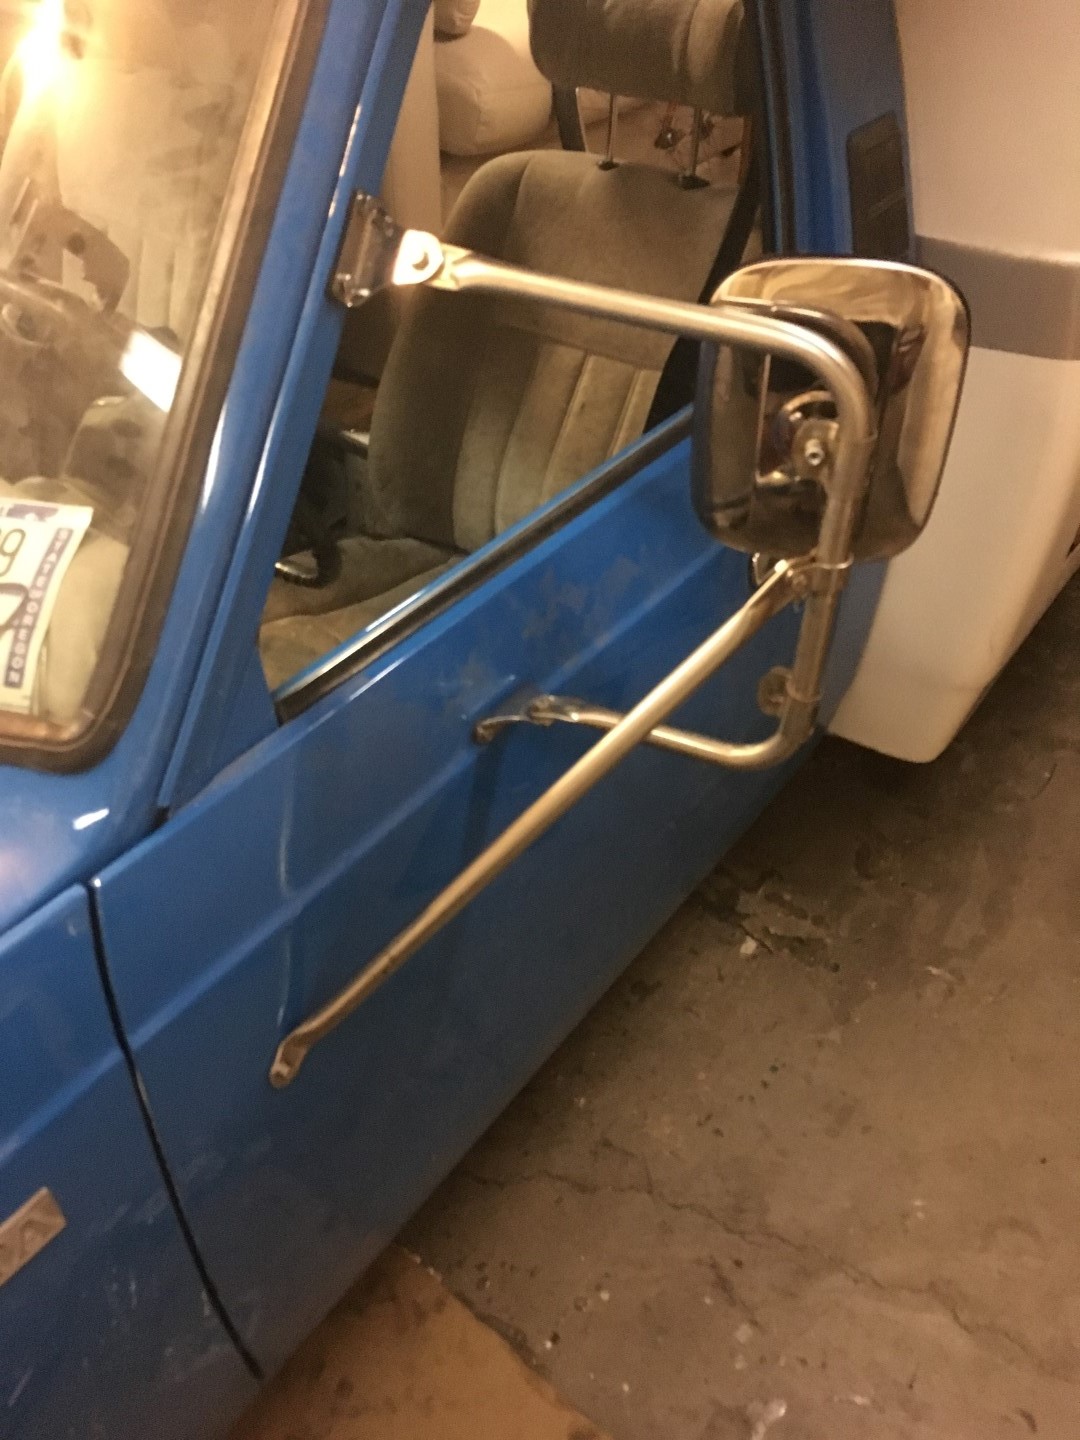
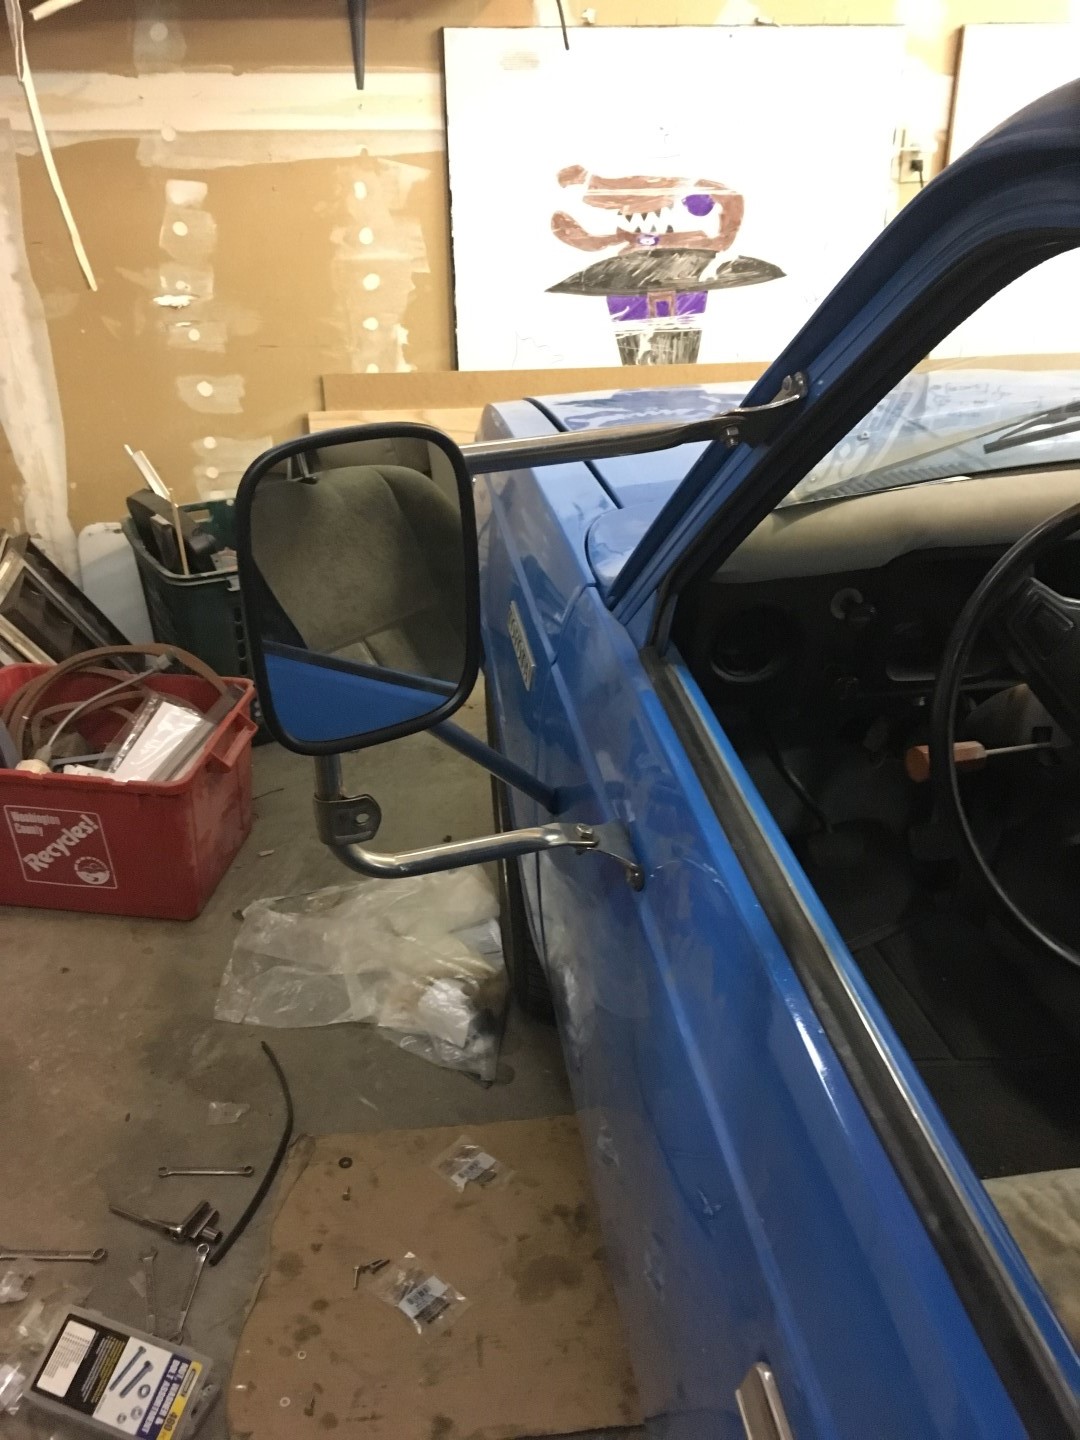
Mirrors
The mirror mounts were cleaned and all the bolts replaced with stainless ones with rubber washers to protect the body from rubbing against the mirror mounts. New basic replacement mirrors were purchased to replace the old ones.
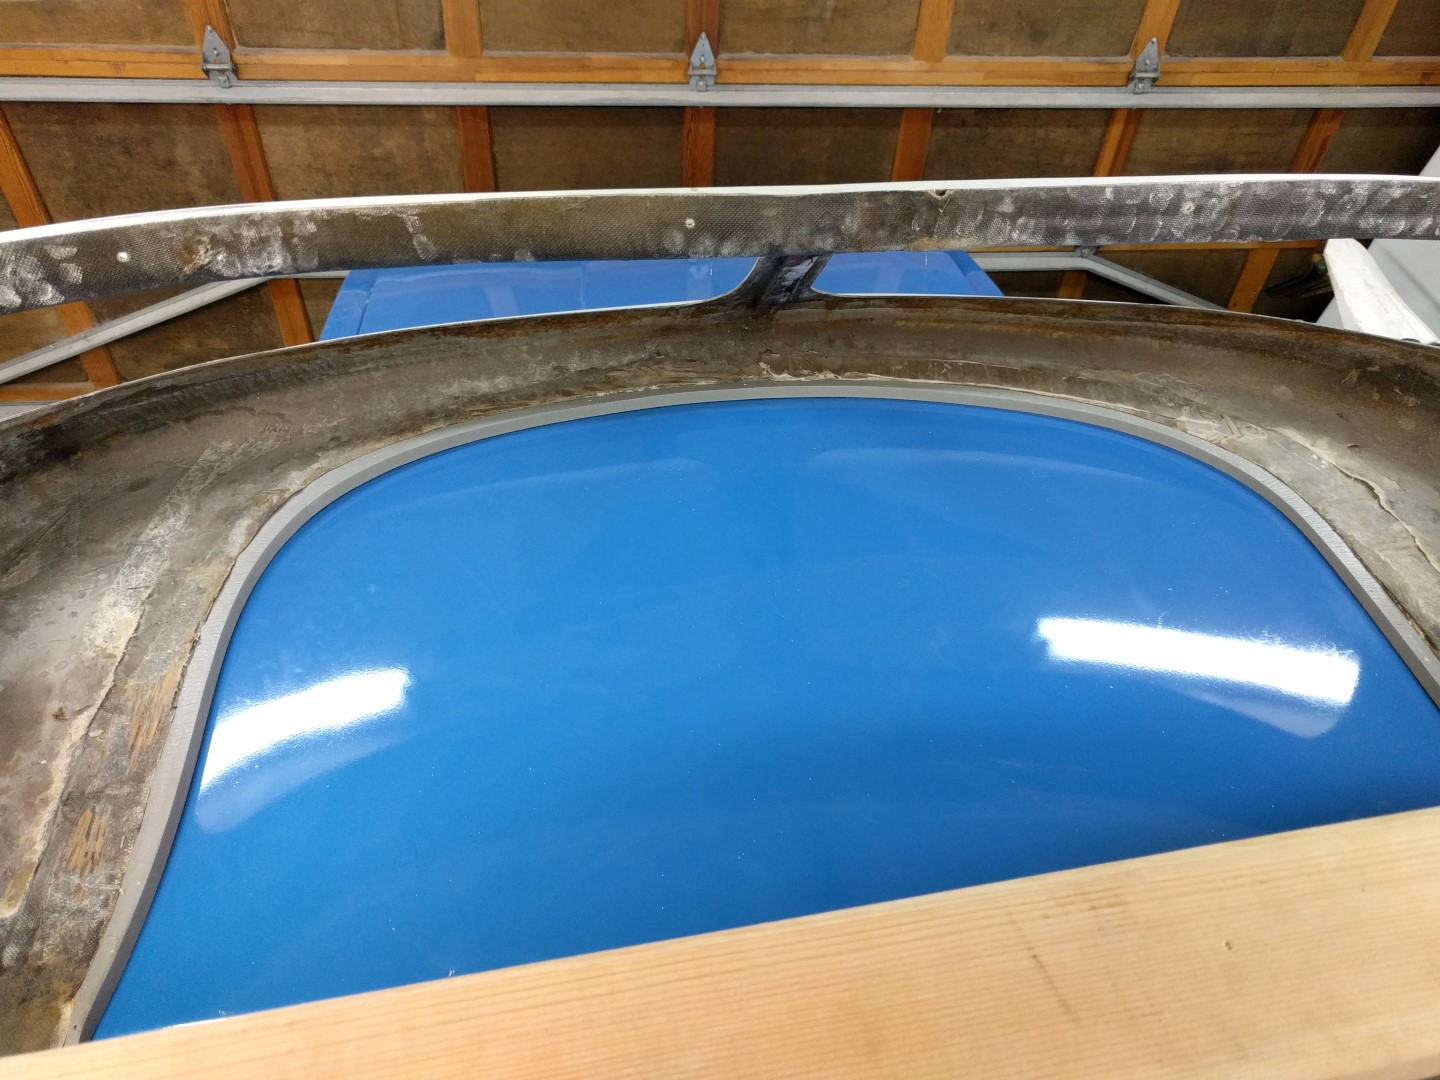
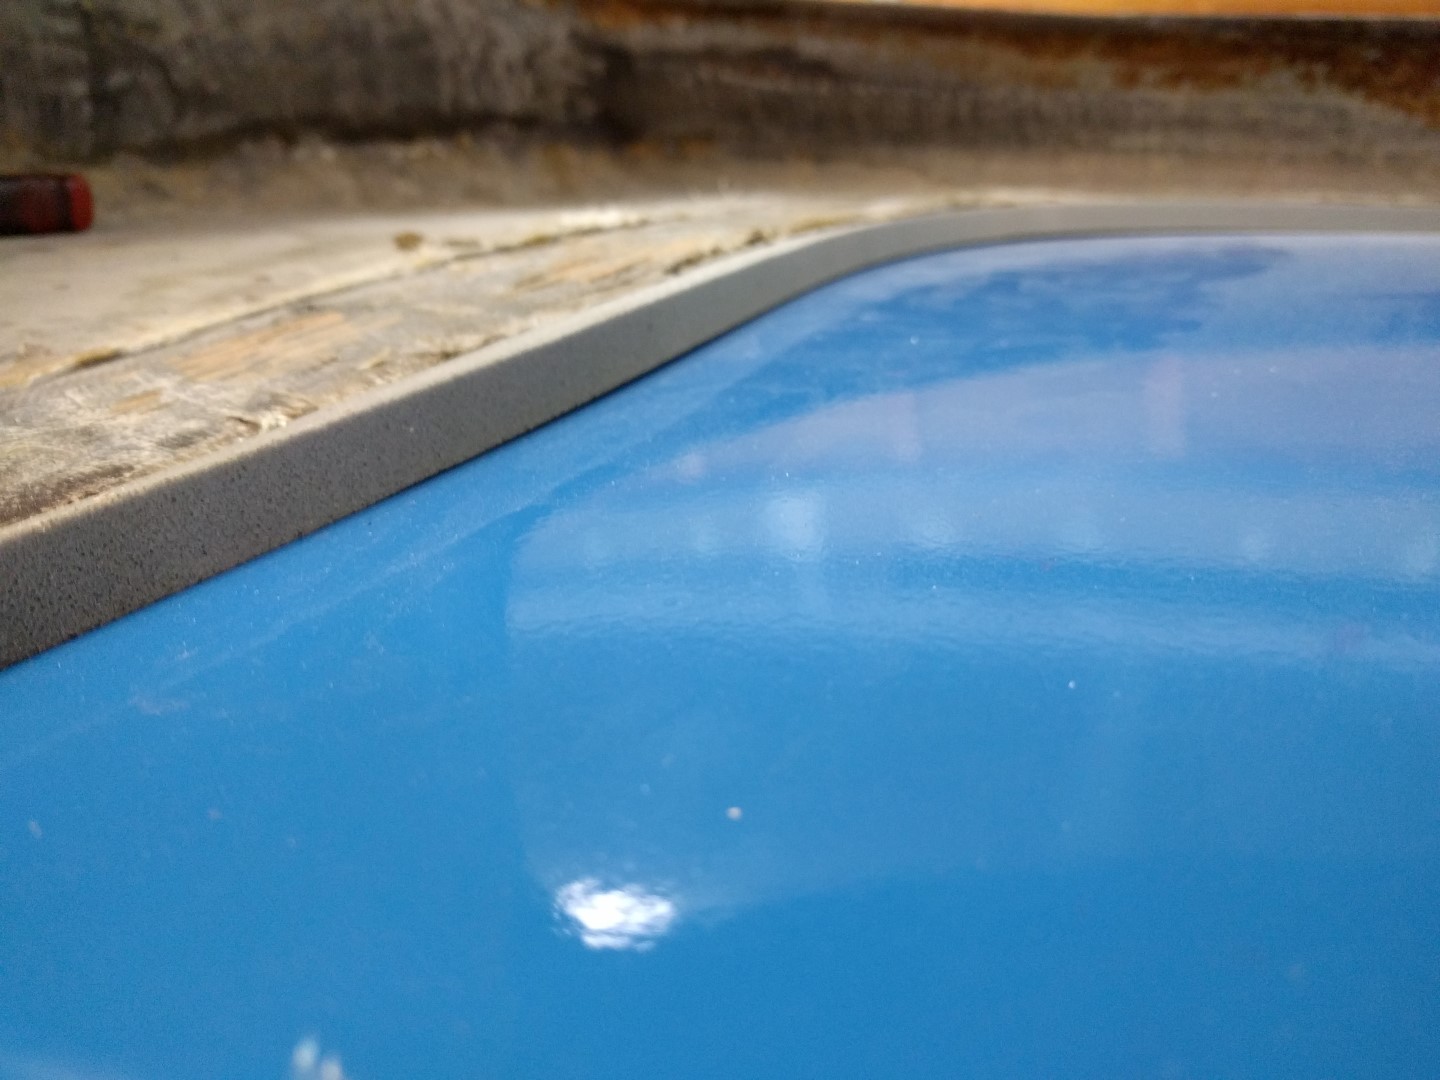
Roof Install
The roof install requires a few people for initial placement. Using four 4x4” blocks to hold the roof about 1.5’ off the shell is optimal for installing the scissor lift mechanism. Once the scissor lift mechanism is secured, use a floor jack in the cabin to lift the roof up to the maximum height to ease the installation of the helper springs.
Where the scissor lift mechanism mounts to the shell, polyurethane sealer is once again used to seal out that nasty water.


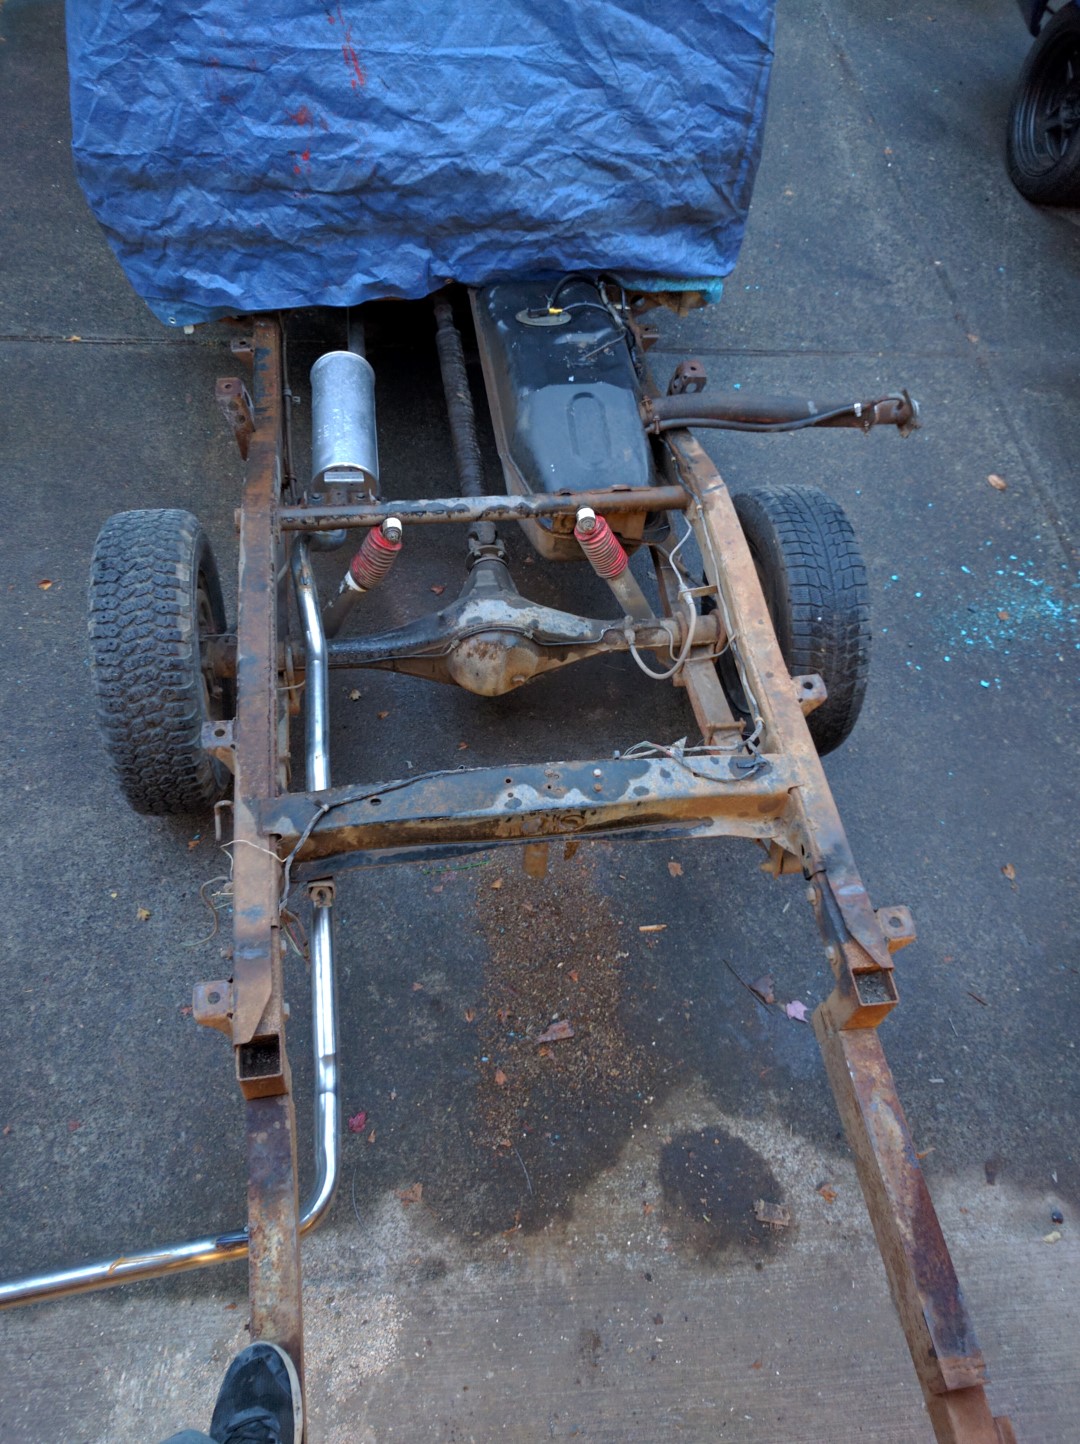
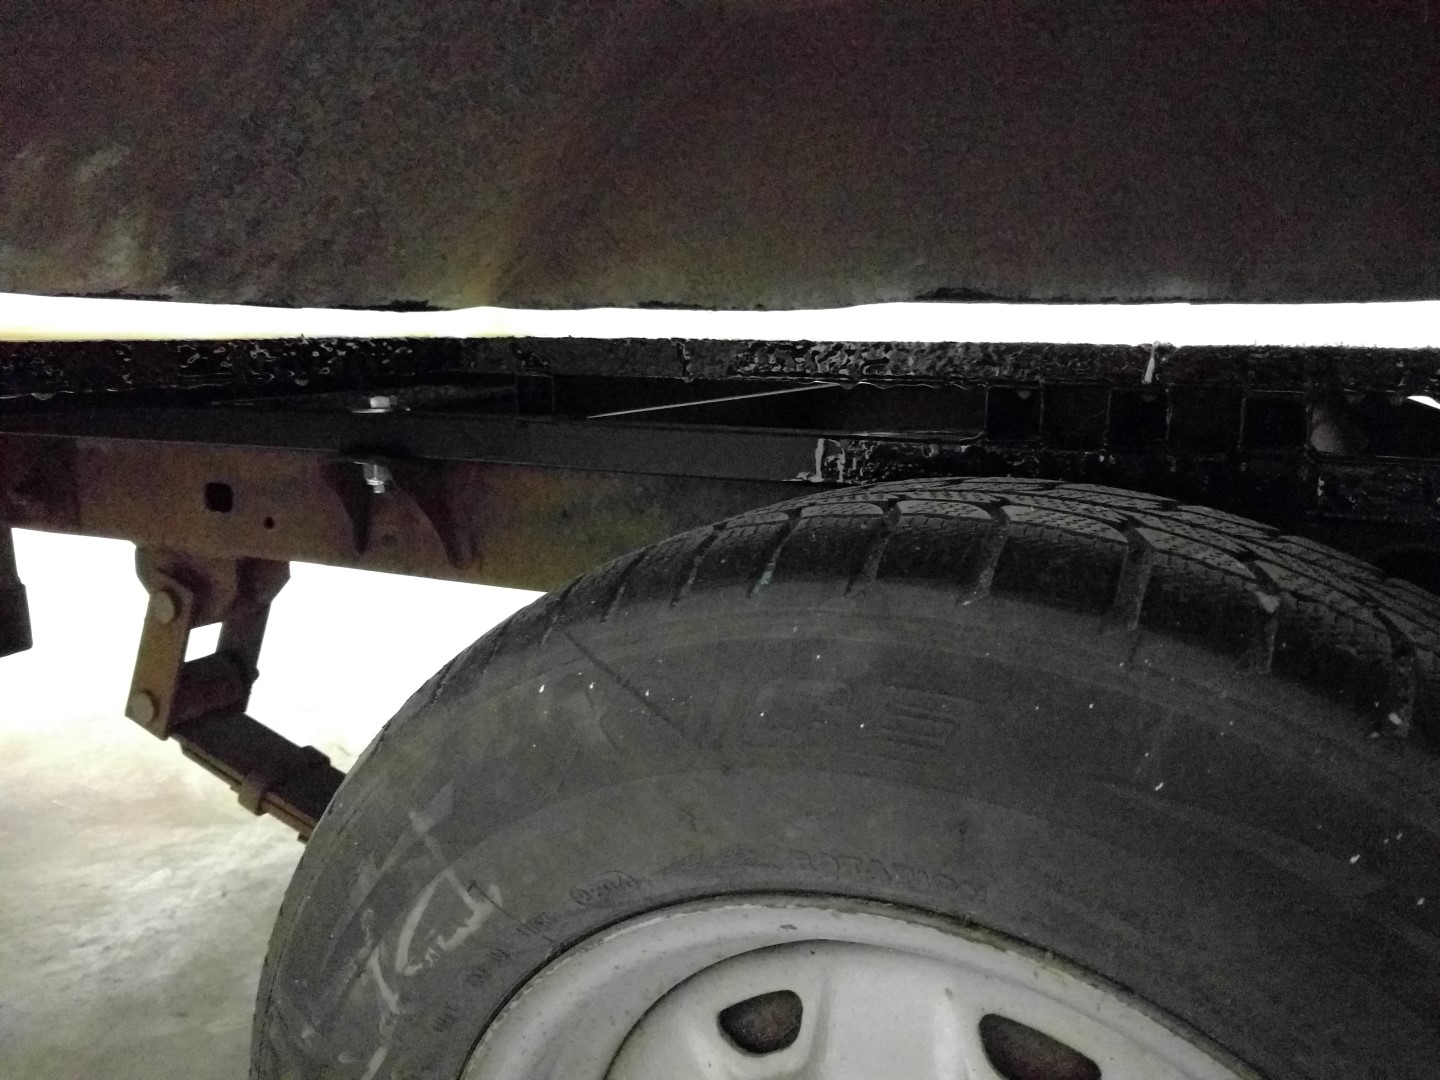
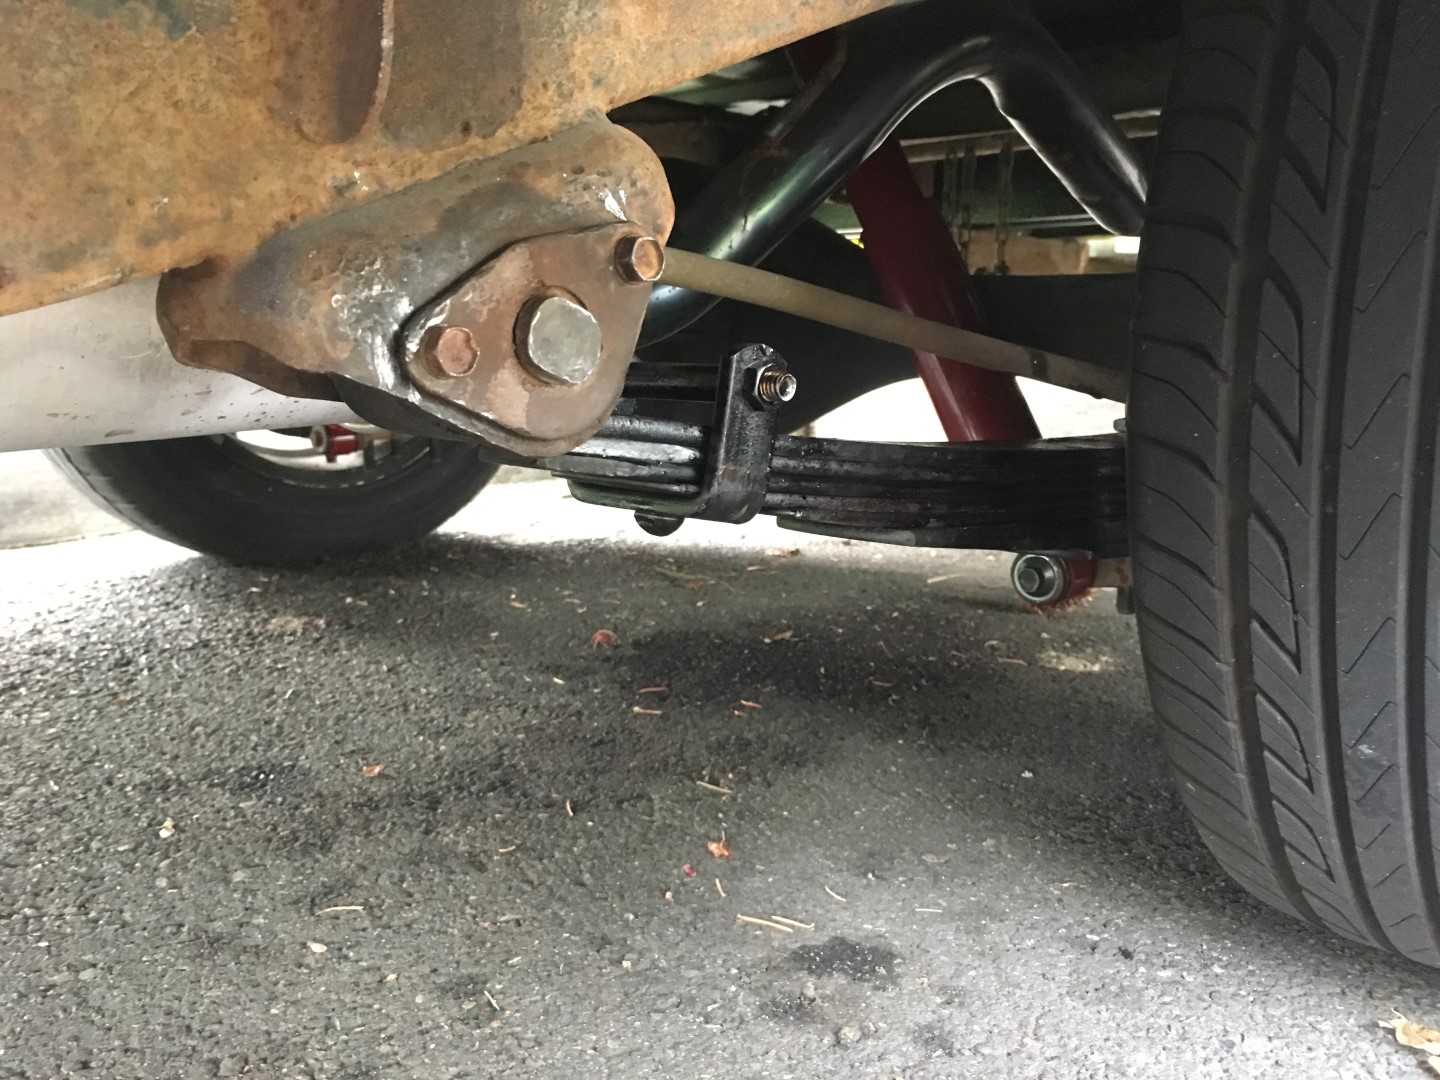
Leaf Spring Rebuild
The leaf springs were quite worn out so they were rebuilt by a local Portland company. They did a great job and leveled out the rig perfectly; an additional leaf was added too. It amazed me that the only thing this company does is leaf springs!

Comments
Please comment on anything above, below!! I would love to hear anyone’s feedback!! Thanks, Aric.