Description
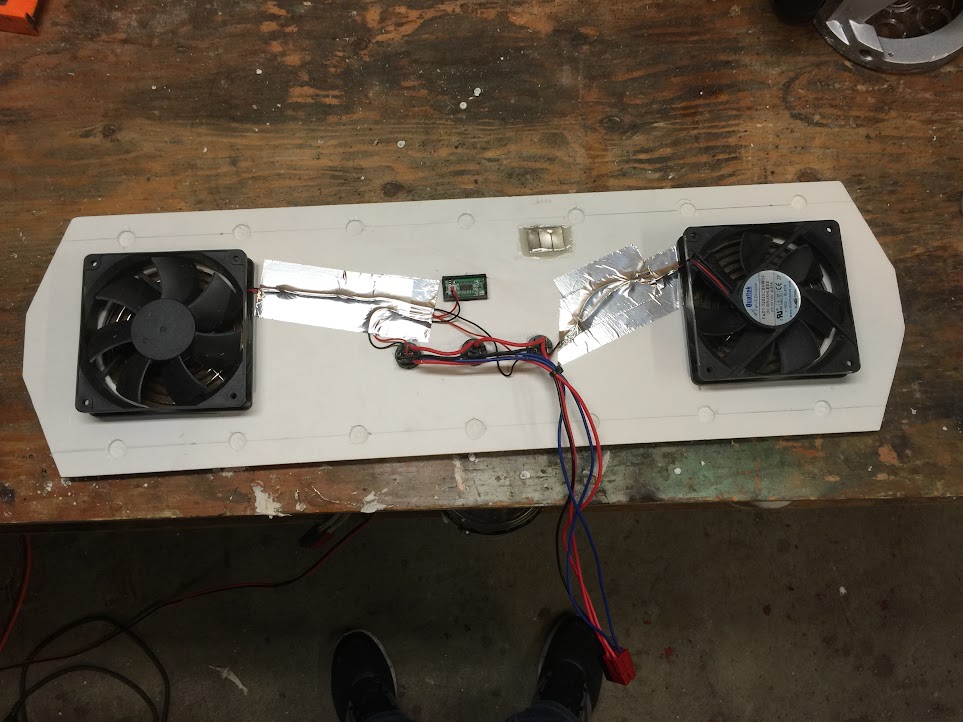
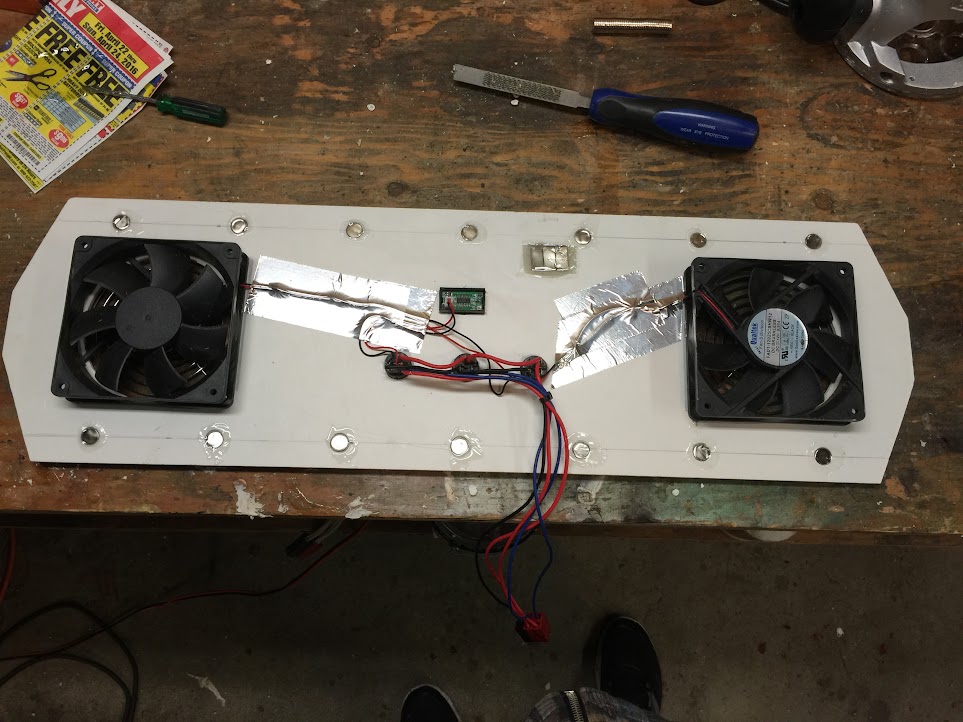
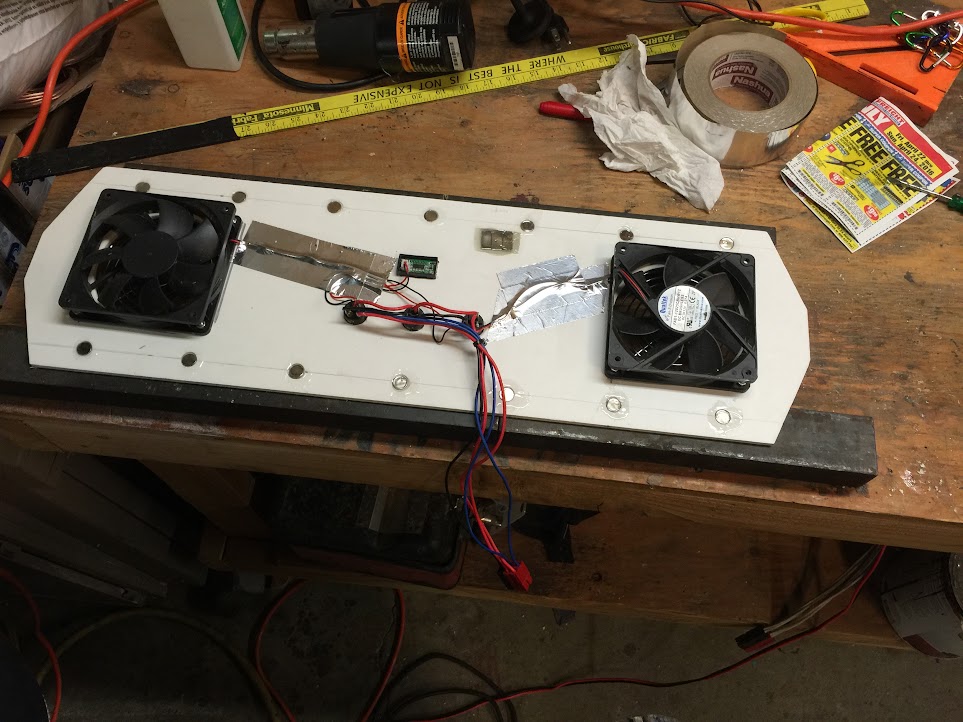
I’ve decided to downgrade v5 (Mr. Meeseeks) from a 14.2 system to a 10.0 system; primary reason being weight. Most of the materials will be recycled. Here are some initial pictures gearing up for the upcoming float season!
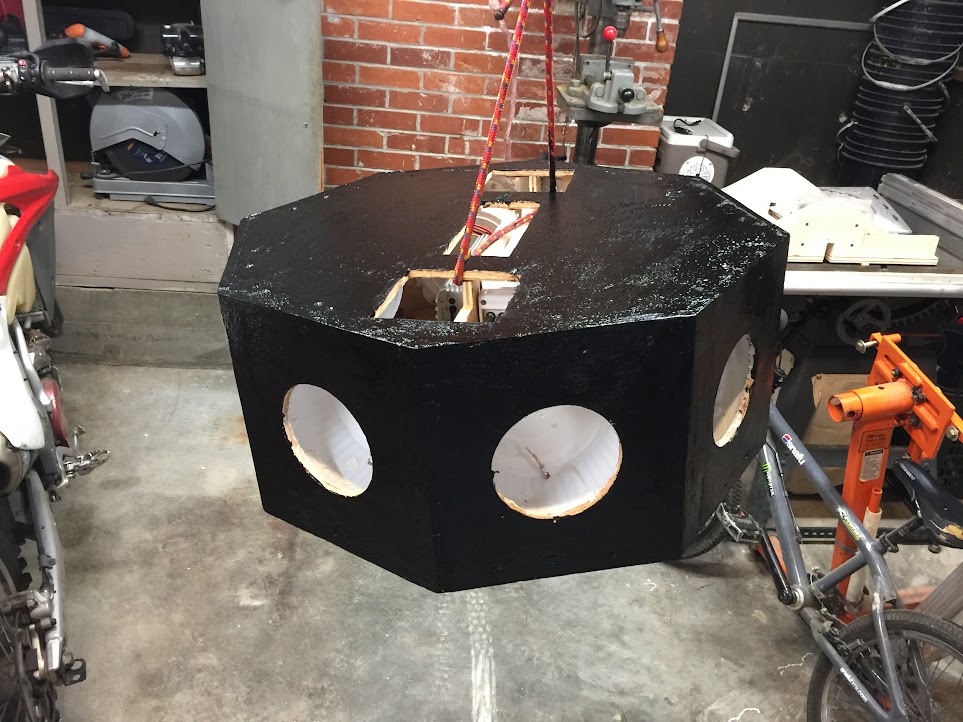
The idea is to have an octagon shape rather than a rectangle/square to more evenly project the sound volume. The eight speakers on the octagon will be 6.5” speakers powered by a 8 channel amplifier. There will also be two 6x9” speakers pointing down towards the raft powered by a two channel subwoofer amplifier in HPF mode.
Photos
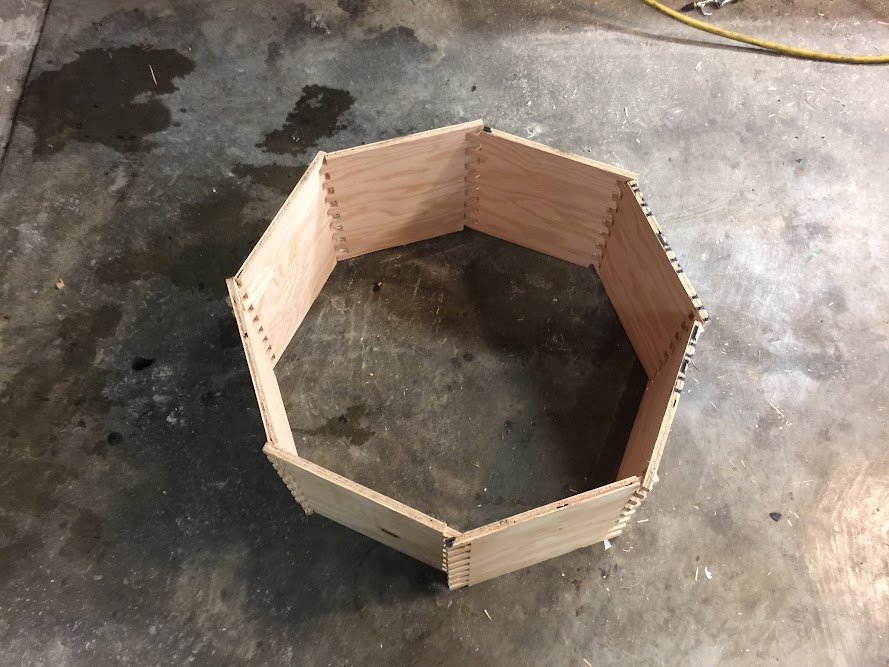
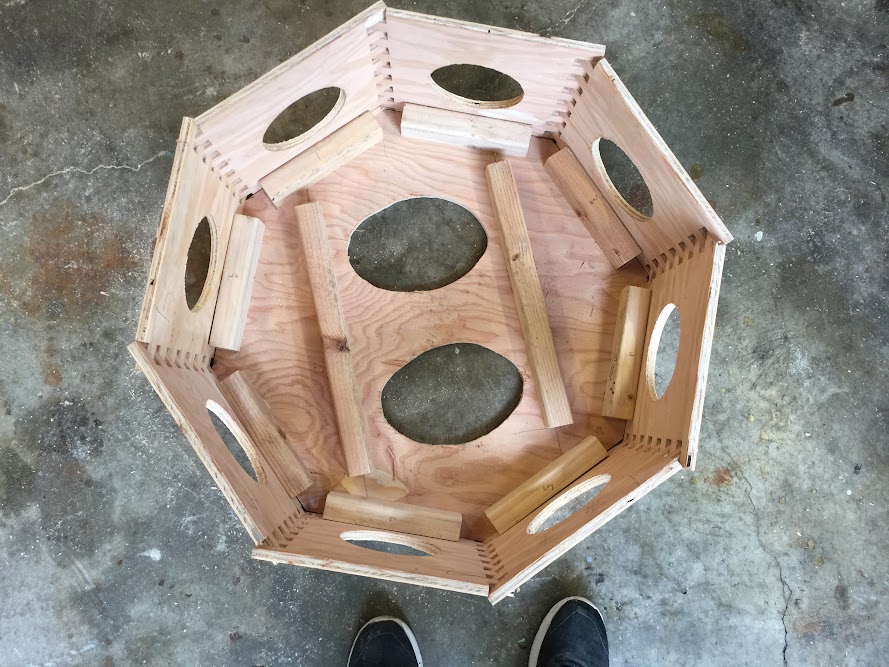
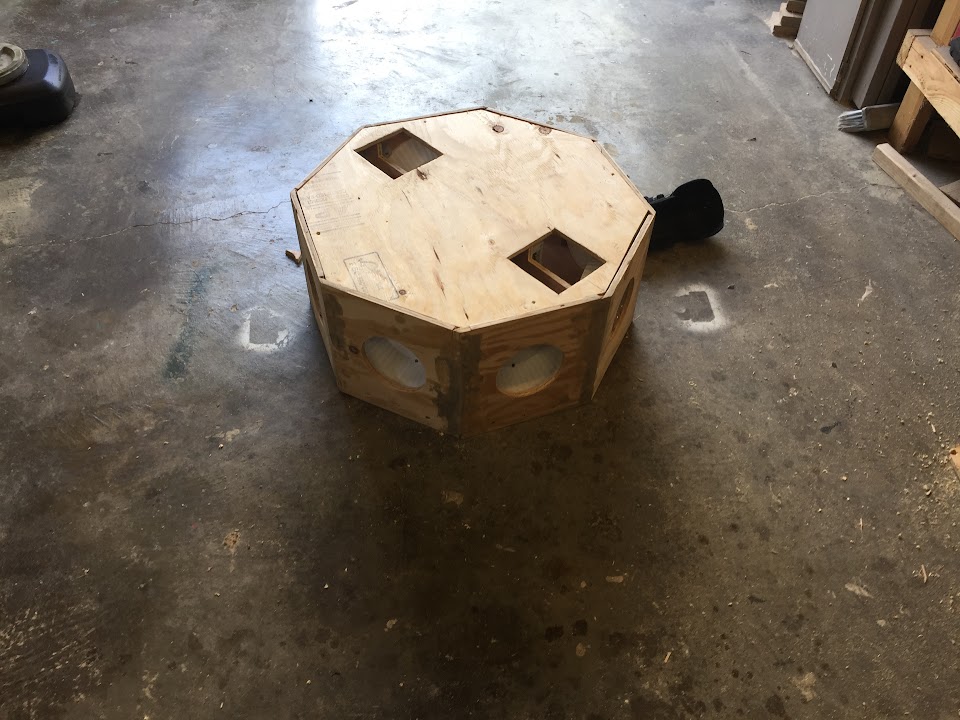
First mock octagon shape, 1ft tall with 3/4” finger/box joints made with table saw dado blade and cross-cut sled
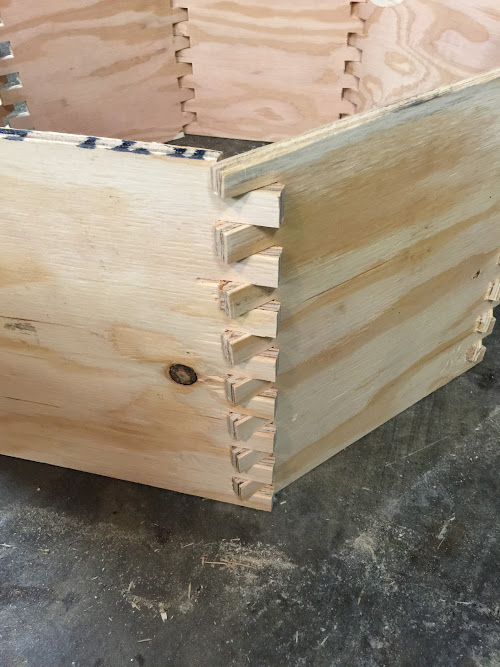
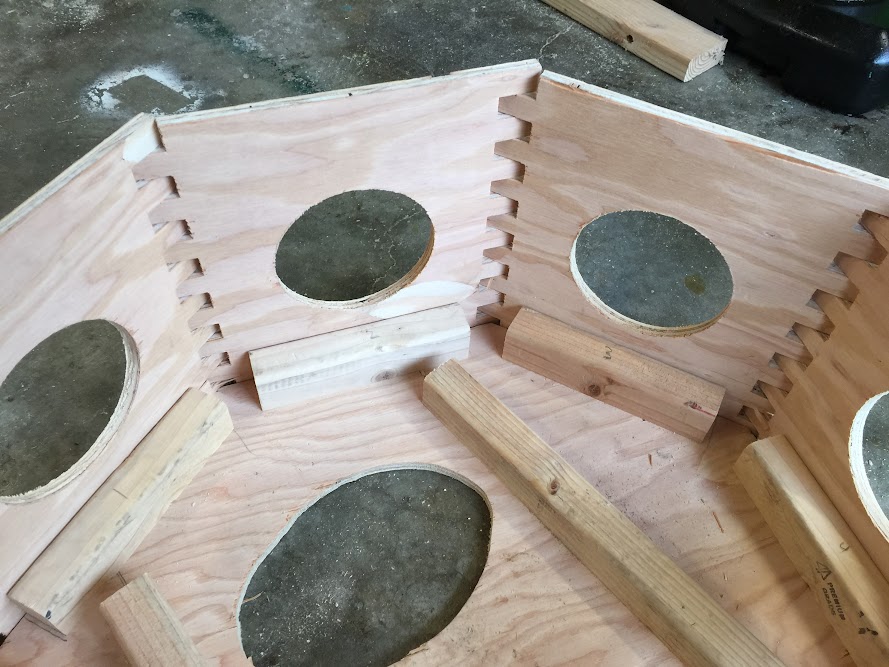
Close up of finger/box joints
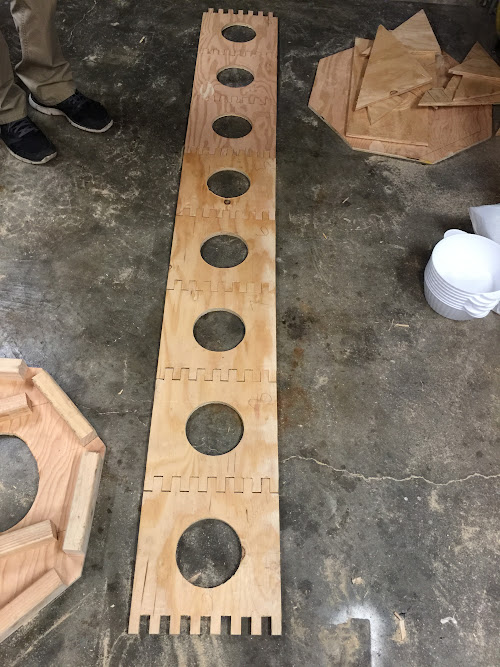
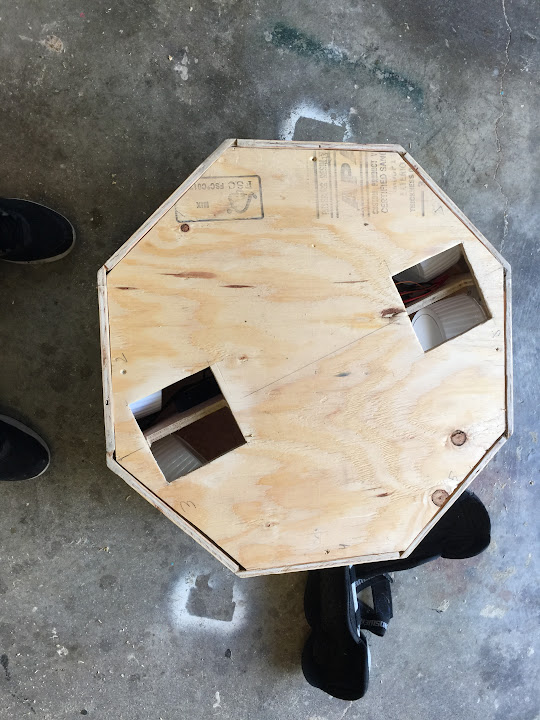
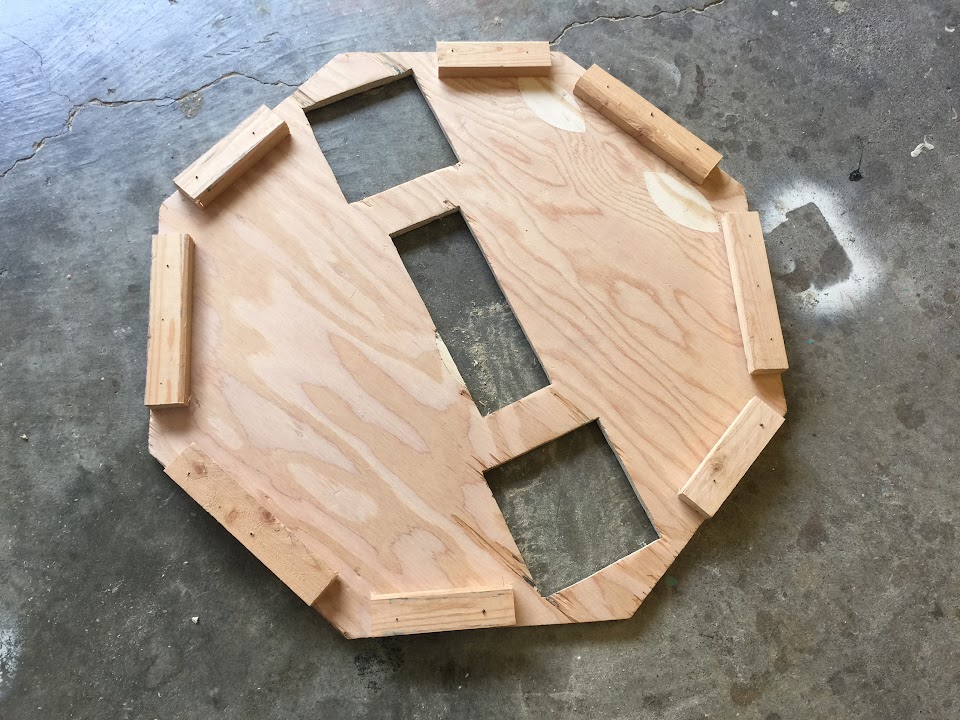
The bottom with 6x9 holes cut, ripped 2x4s to keep plywood straight and to secure the eight sides
The eight sides lined up
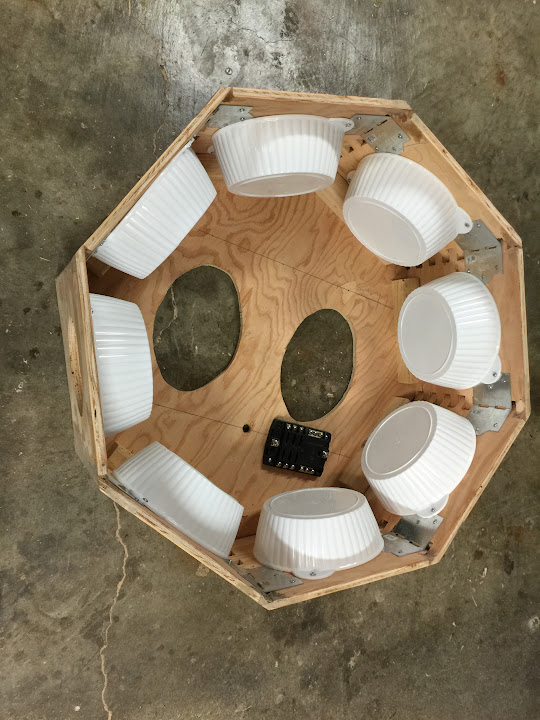
To prevent shared airspace for the 8 6.5” speakers, found some plastic containers at the dollar store that have tabs/handles to be able to screw and silicone them down

The octopus screwed together, awaiting brackets and wood filler
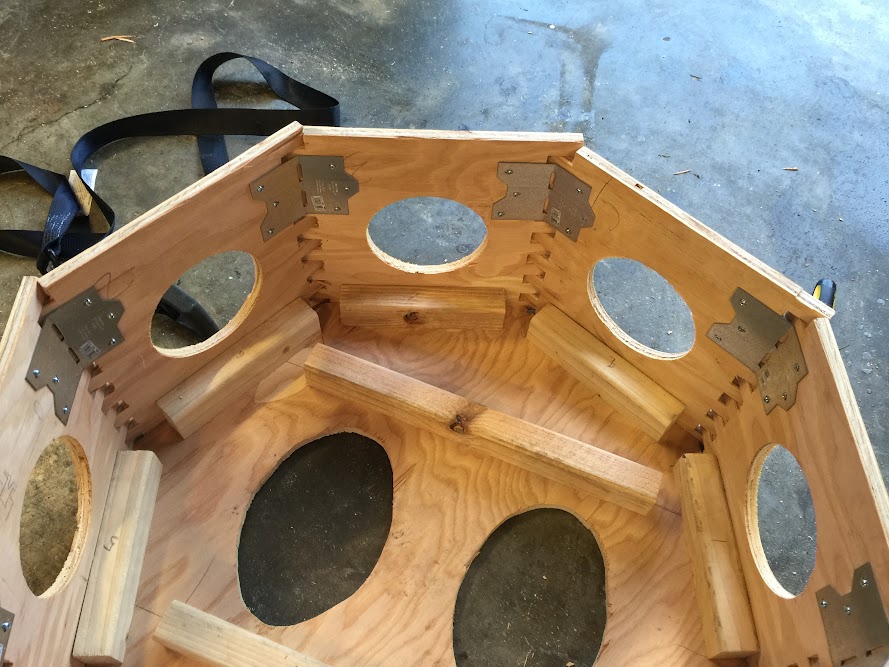
Close up of inside before 135 degree brackets
After the installation of the 135 degree brackets for stability
The lid losely placed on top, the strap in the background was used when securing the brackets to make sure the lid will fit inside the octagon properly. I haven’t decieded if I will entirely enclose the amplifiers or have a removeable opening on top; keep posted!
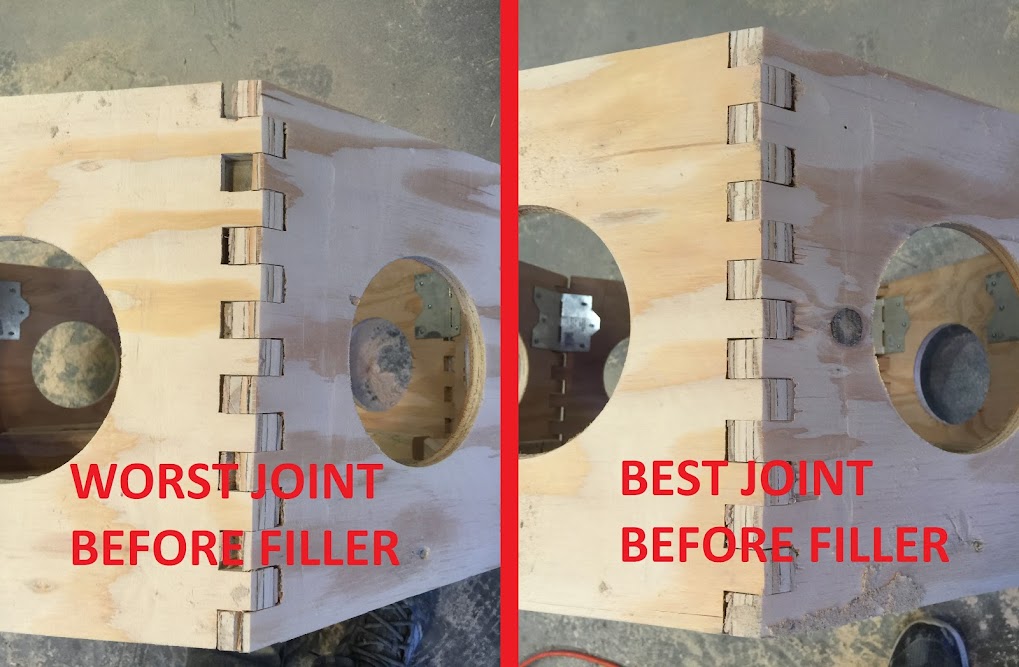
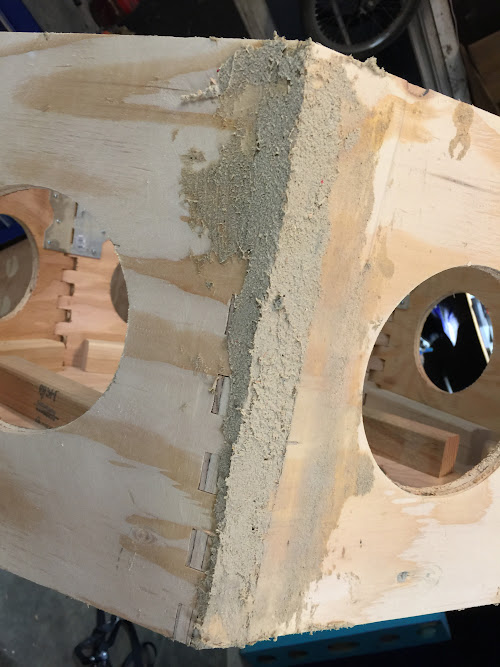
Here are the finger/box joints, worst and best before placing any wood filler in the cracks
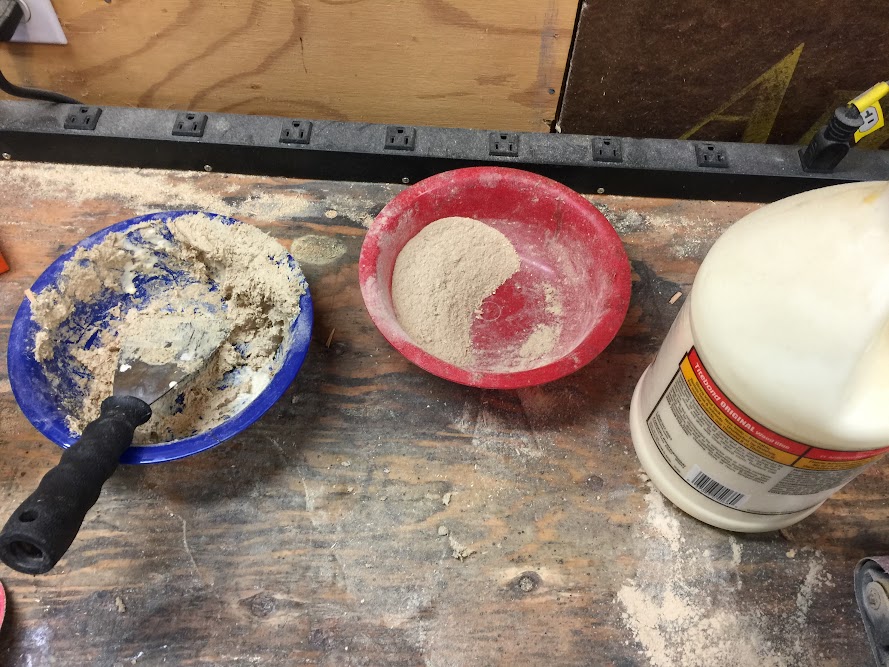
The wood filler was made from the plywood’s sawdust generated from sanding the corners with a belt sander. Super simple reciepe, sawdust + wood glue = ridiculously strong wood filler/paste
Wood filler just applied and still wet
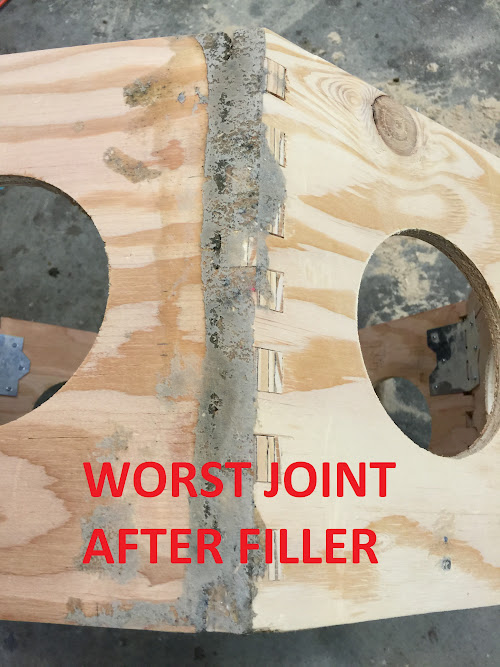
After filler application this is the worst joint from the photo above, turned out pretty good for how bad it was before
Another photo of a joint after filler

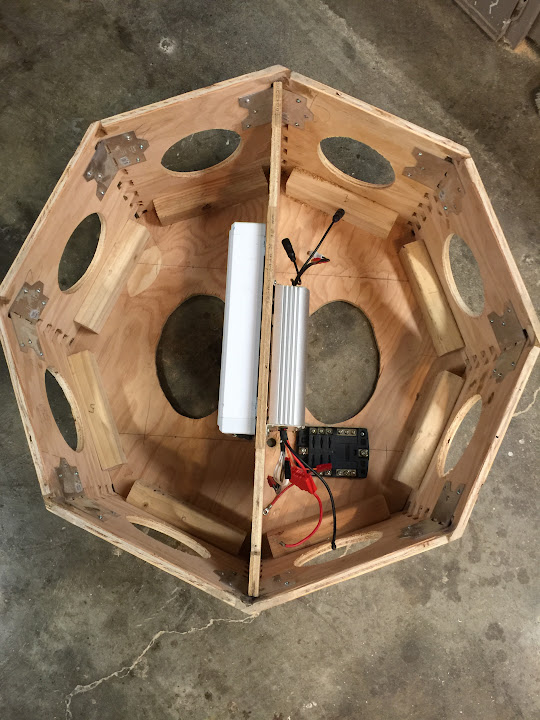
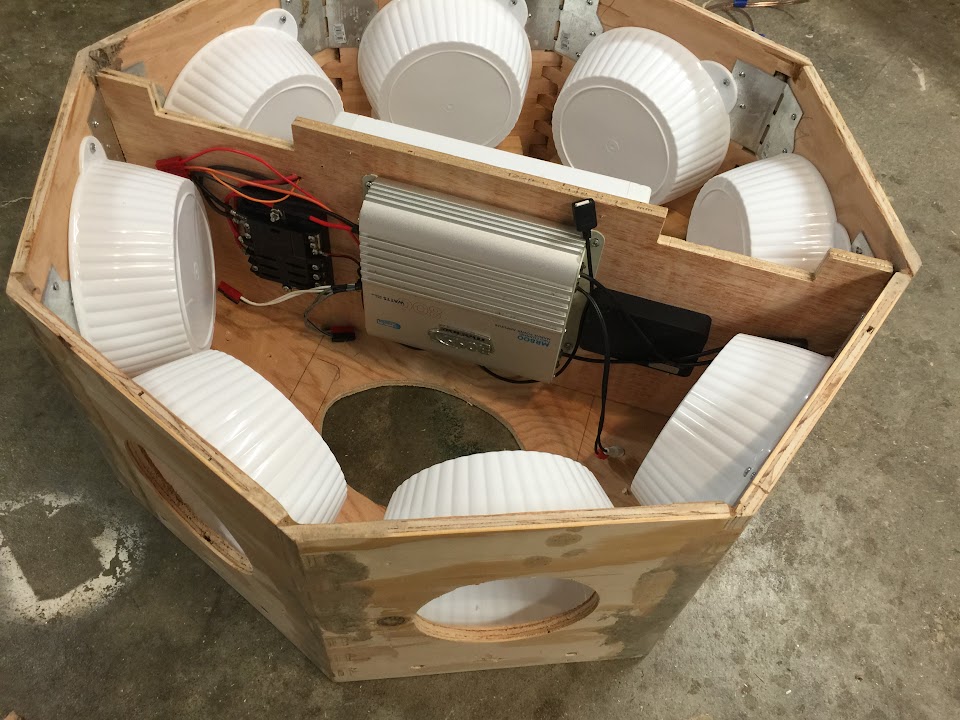
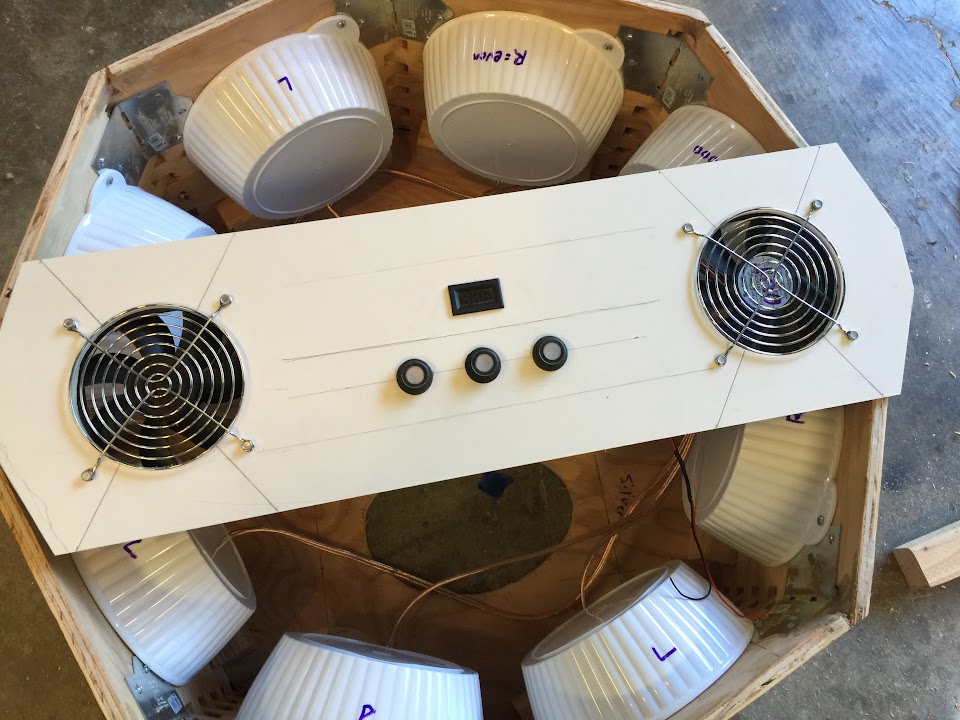
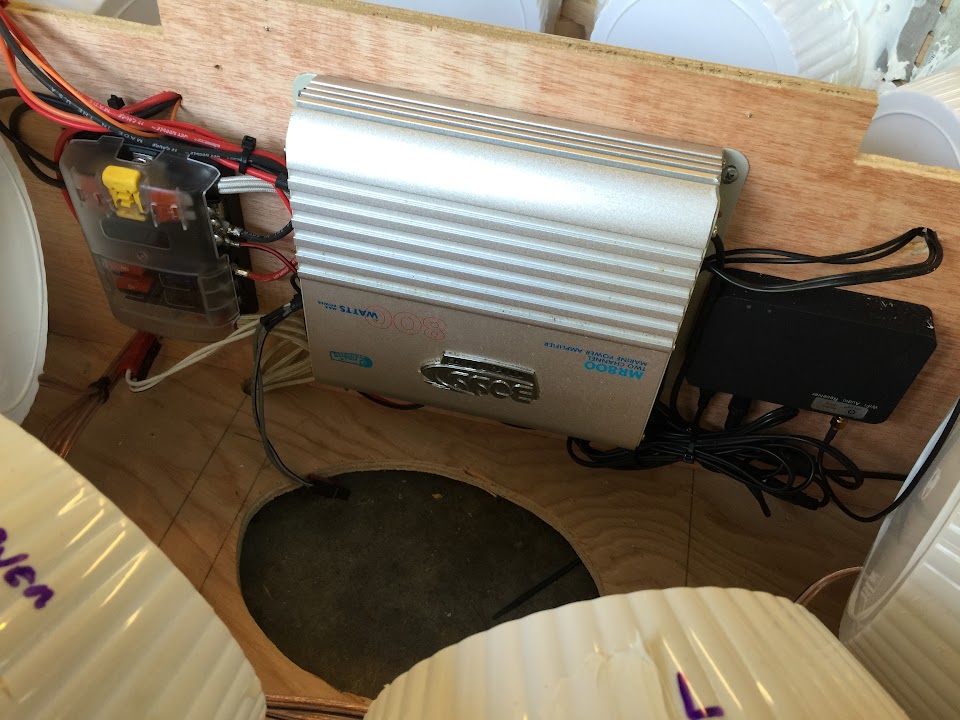
Amplifier shelf in loosely in place, left is an 8-channel amplifier for the 6.5” speakers and the right is a 2-channel for the 6x9” speakers

Amps mounted to have enough room for 6x9” speakers, on middle shelf
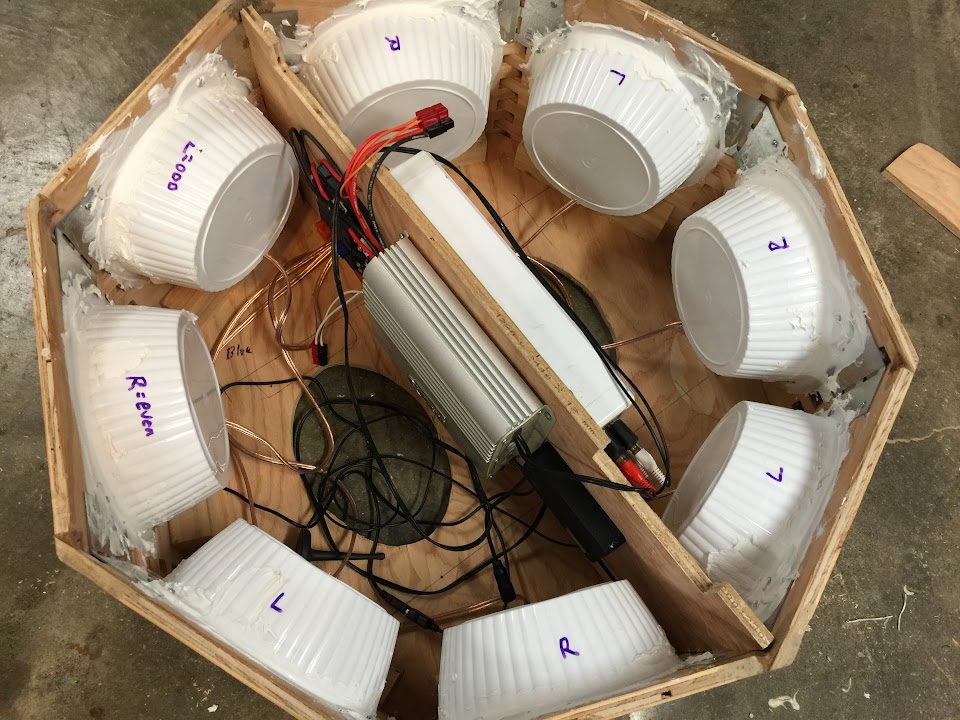
Plastic containers found at the dollar store installed, they have nice tabs for a screw location
Amplifier shelf with speaker air containers in place, fuse block moved to its final location
And from the other side

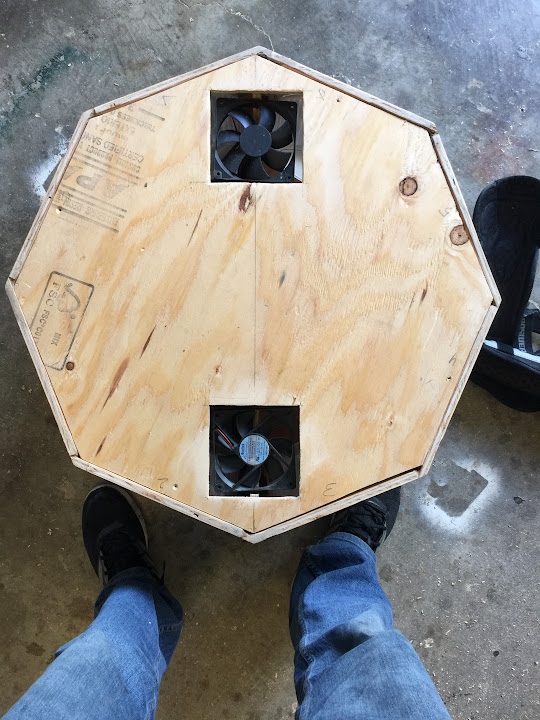
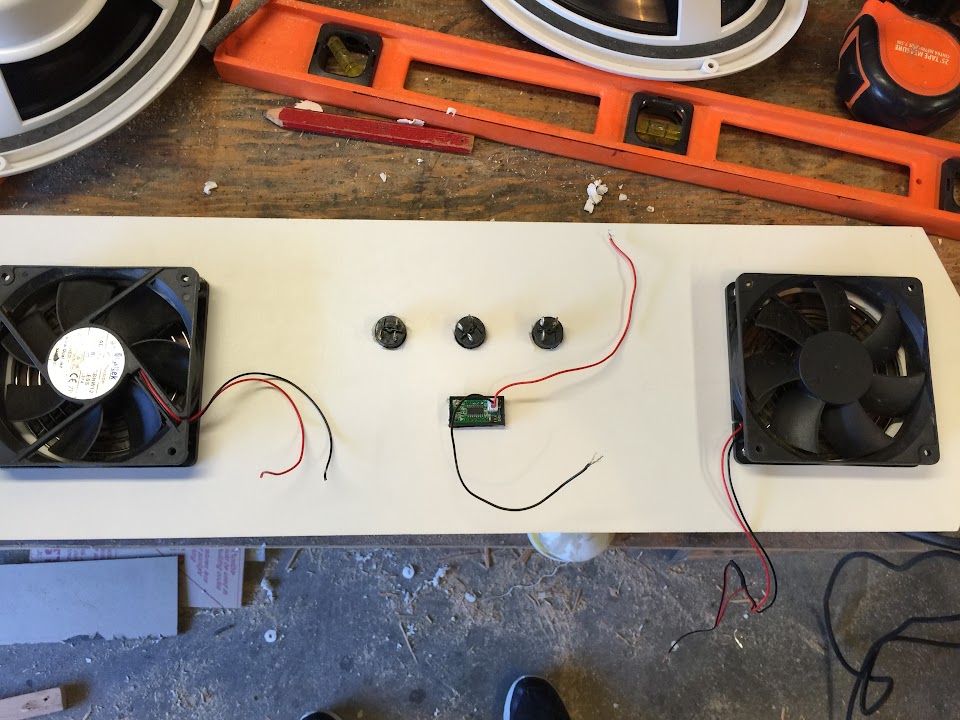
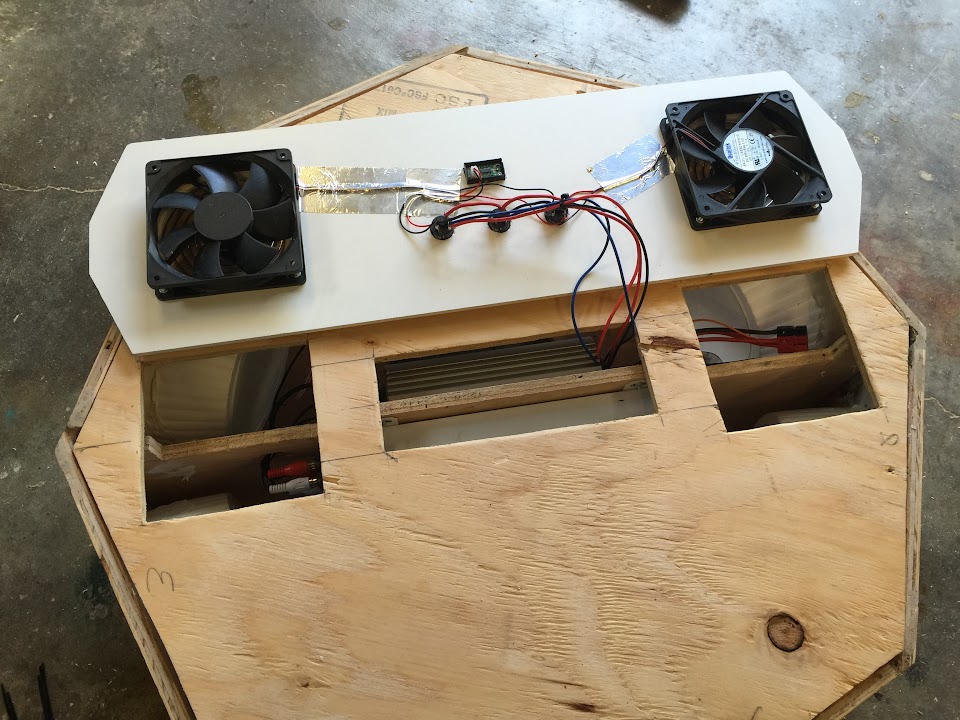
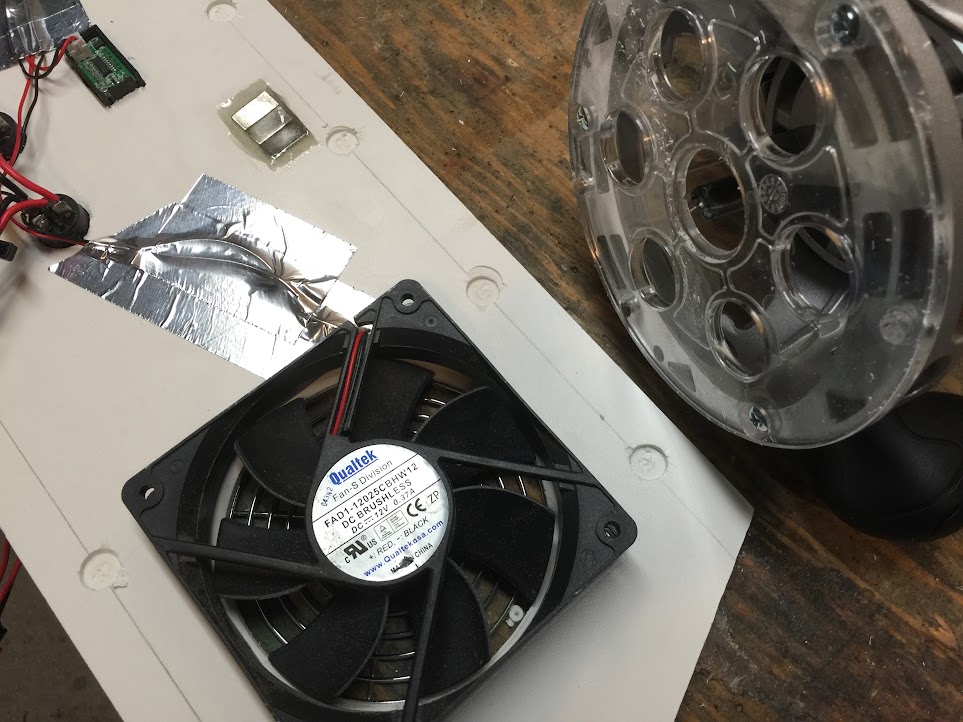
A notch is cut in the amplifier shelf to allow the fans to be recessed

Speakers wired up for initial testing, all different length speaker wire cables

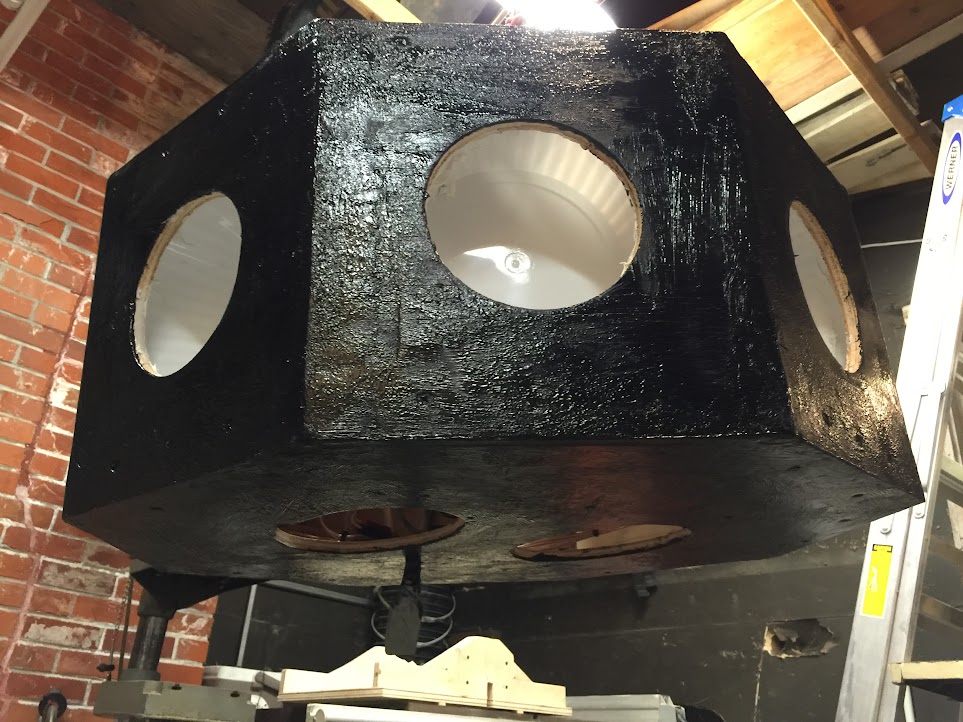
Lid installed with fan holes, only slightly misaligned, will be mitigated with some fancy screw work + wood filler
Fans loosely in place with lid
Lid and speaker hole view
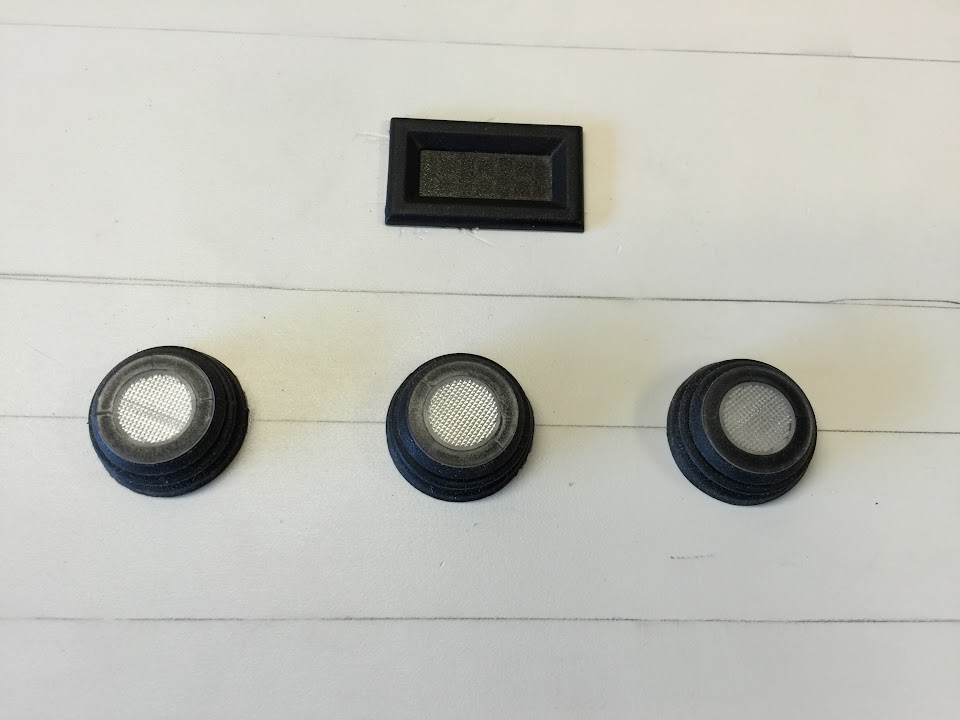
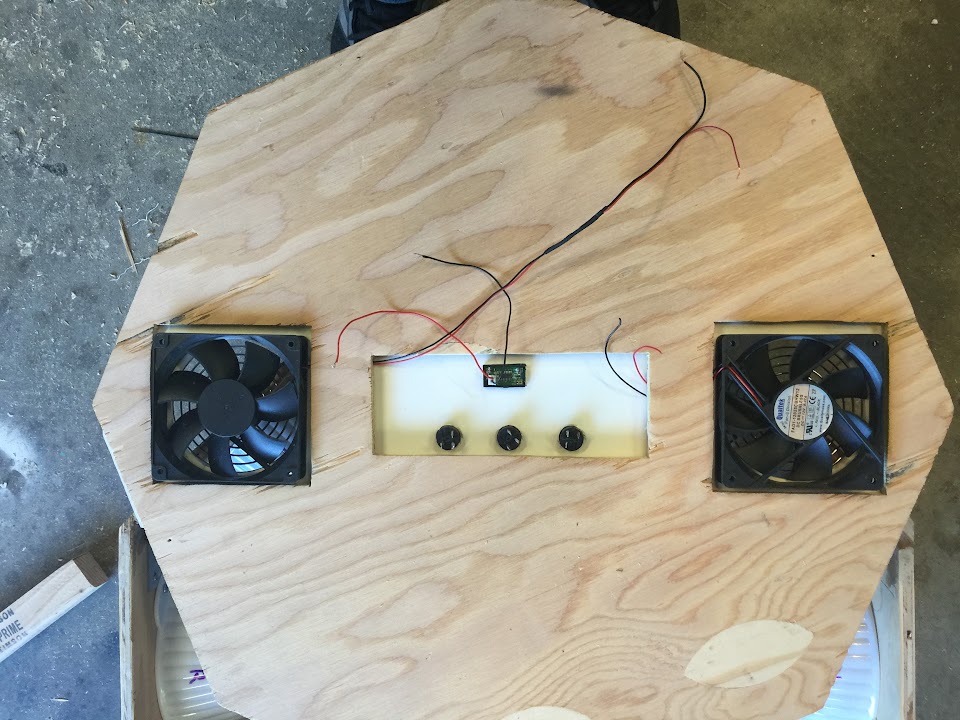
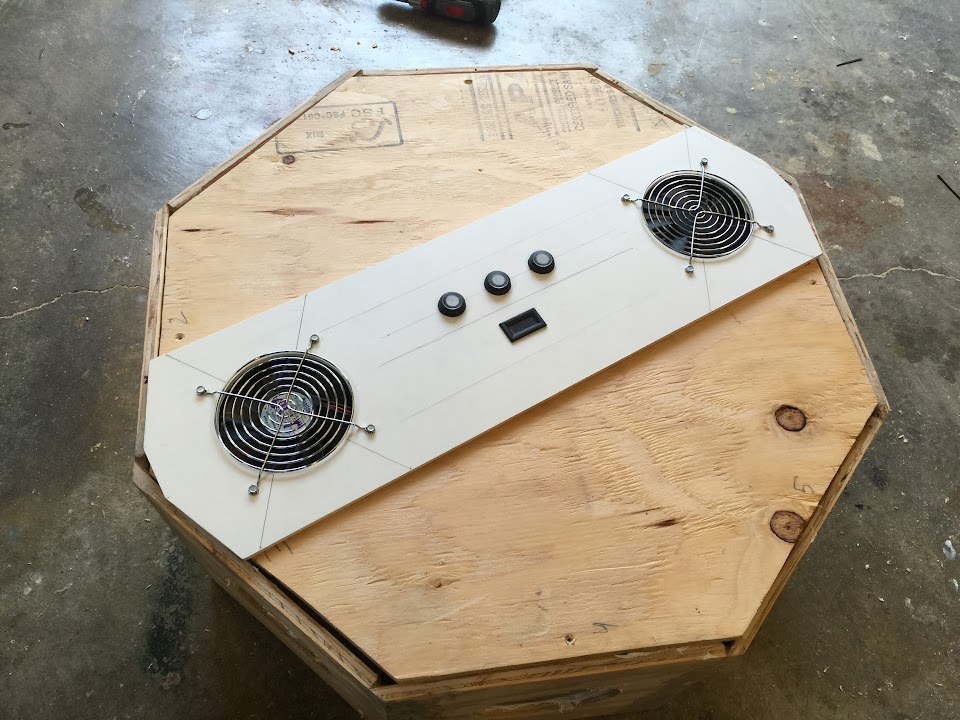
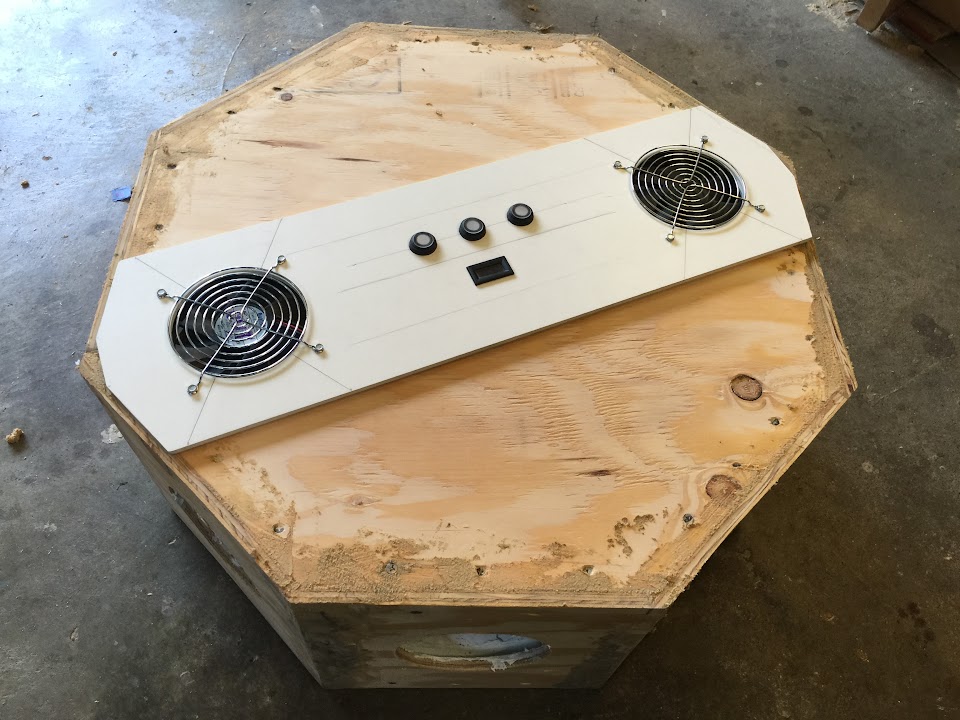
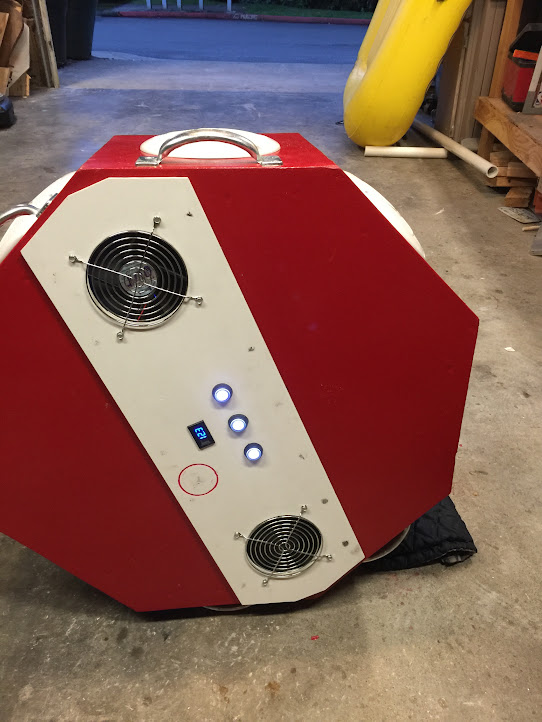
Plastic lid with fan holes, 3 switches, and volt meter for battery charge state
Volt meter on top, one switch for fans, one for 6x9” amplifier, and one for 6.5” amplifier + WIFI audio receiver
Rear of lid with all components installed
Rear of plastic lid with wood lid placed on top
Lid wired up
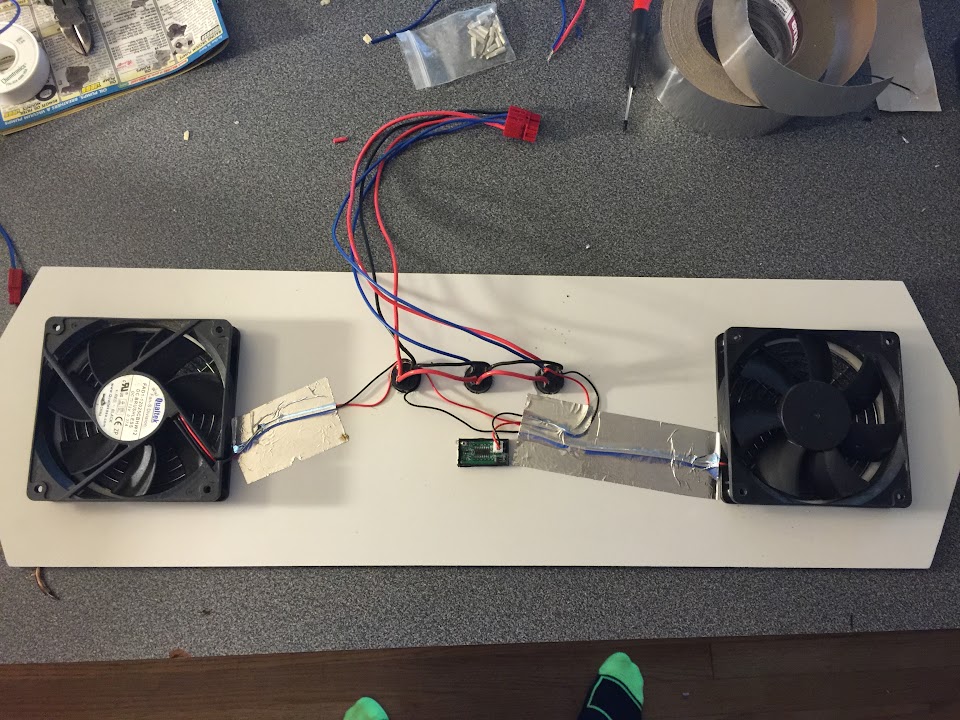
Close up of wiring, all joints are soldered to the switches

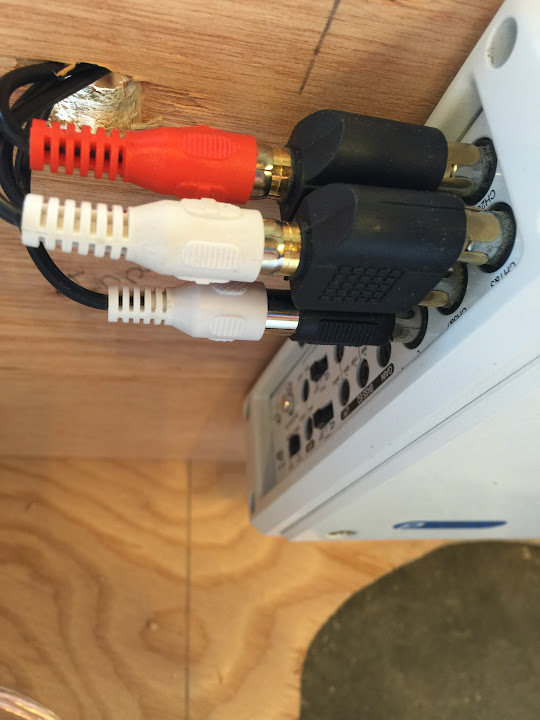
Fuse block close up, input power is provided by the white cable going through the bottom where the batteries will be located

Speakers installed doing some initial testing to ensure functionality/tuning before putting on the wood lid

Speaker air separator containers caulked to prevent any air seeping through the joints
Close up of very poor caulking job :)

All the wiring cleaned up, the WIFI audio receiver is the black box on the left
Wiring cleaned up on other side + connector for removable plastic lid

Input to 8-channel amplifier with output going to 2-channel amplifier
Wood and plastic lids placed loosely on top of octopus
Plastic lid removed to see inside the box to be able to adjust amplifier tuning and mess with other internal things
Lid with wood blocks screwed on for strongly securing the lid
Lid secured with wood filler in the small cracks, prepping for paint

Final plastic lid location
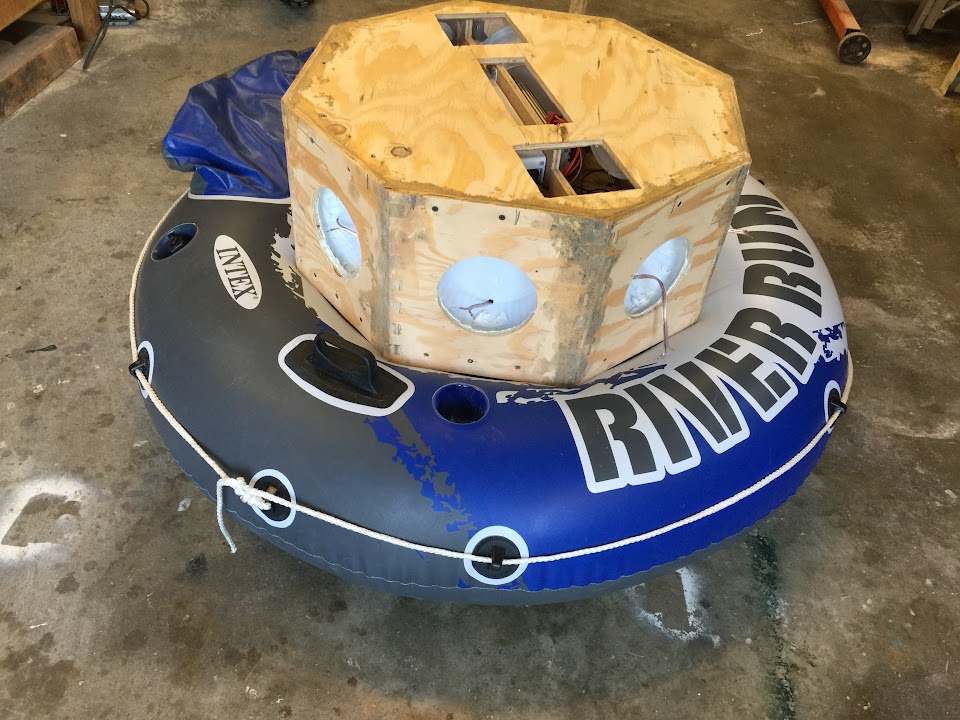
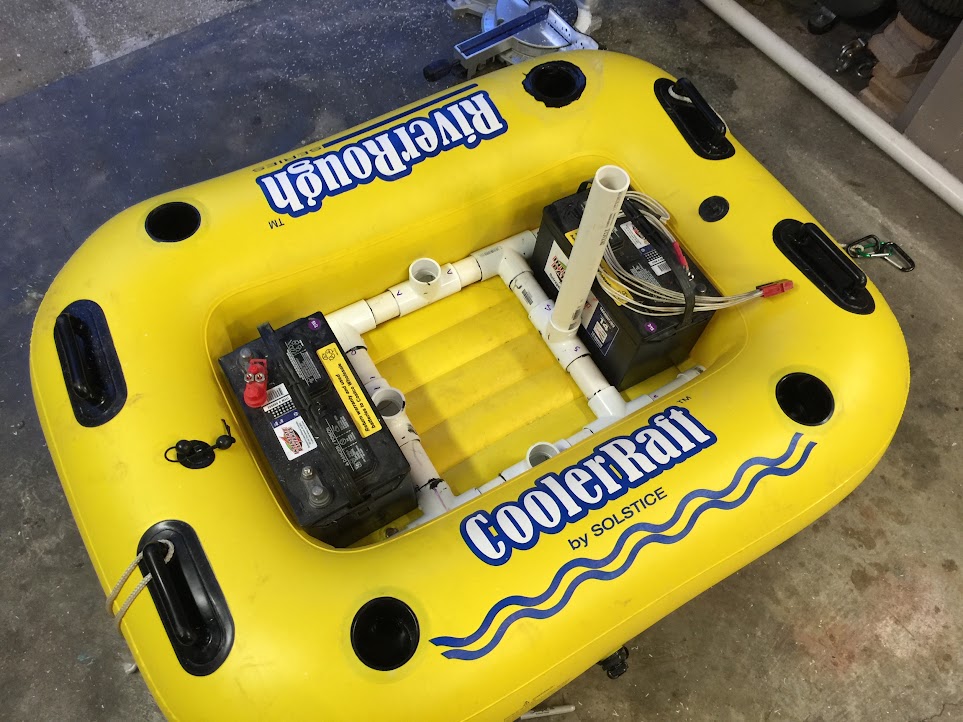
I think I am going to float it in a basic round tube with batteries sitting underneath. Depending on buoyancy I may use larger rectangle one intended for a large cooler
Battery and speaker box holder that will fit inside the tube
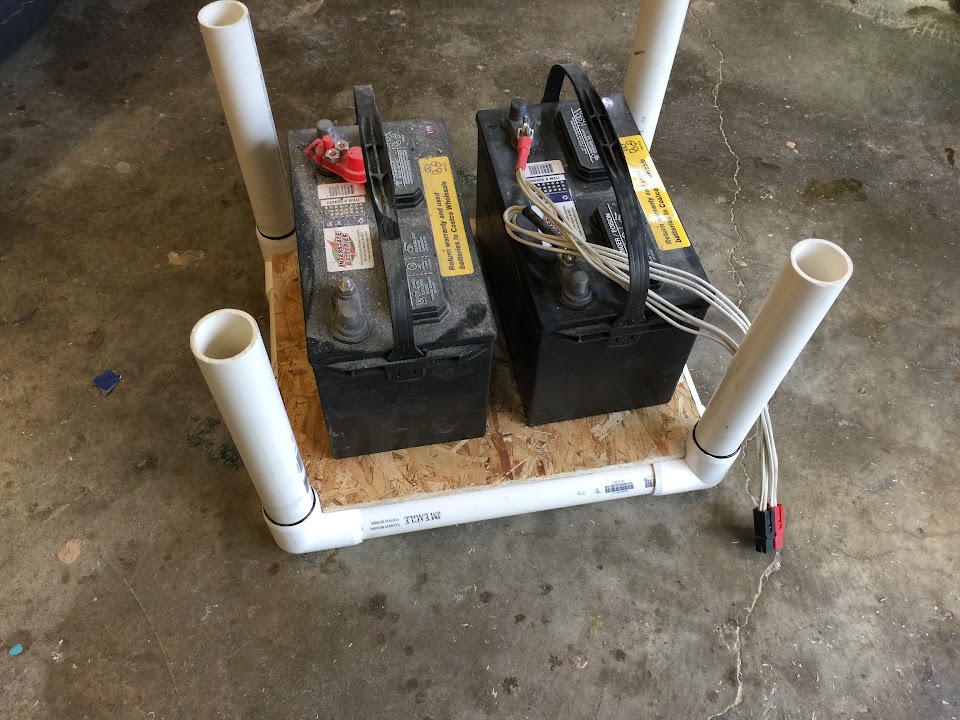
I’ll cut down the height to minimum to keep the center of gravity as low as possible, notice batteries below the box

First few coats of paint will be truck bed liner for protection. Then some basic latex house paint for some color. I was thinking paint it like an octopus but they change colors! Who knew. Watch this crazy video if interested in that subject.
https://www.youtube.com/watch?v=Dcsb8RMmHRg]
Top painted hanging from overhead garage wood beam
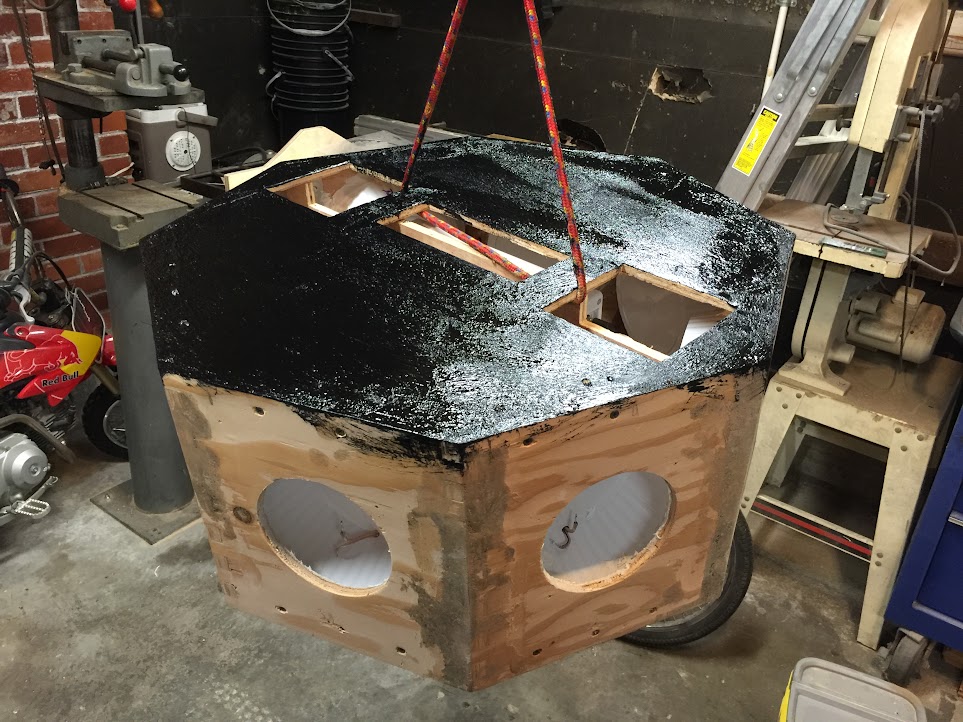
All the sides painted
Bottom painted as well
After the truck bed liner I’ve used a few coats of red latex house paint. Not quite finished yet but 15-20 coats total to get the box very smooth with 220 grit sanding between every 1-3 coats.
I’ve also epoxied neodymium magnets to the bottom of the plastic lid for two purposes: 1) hold the lid onto the box (with some studs on the box for positioning and 2) to hold the WIFI antenna receiver for AirPlay/DNLA to the lid.
First few coats of candy apple red

Neodymium magnets epoxied for the antenna
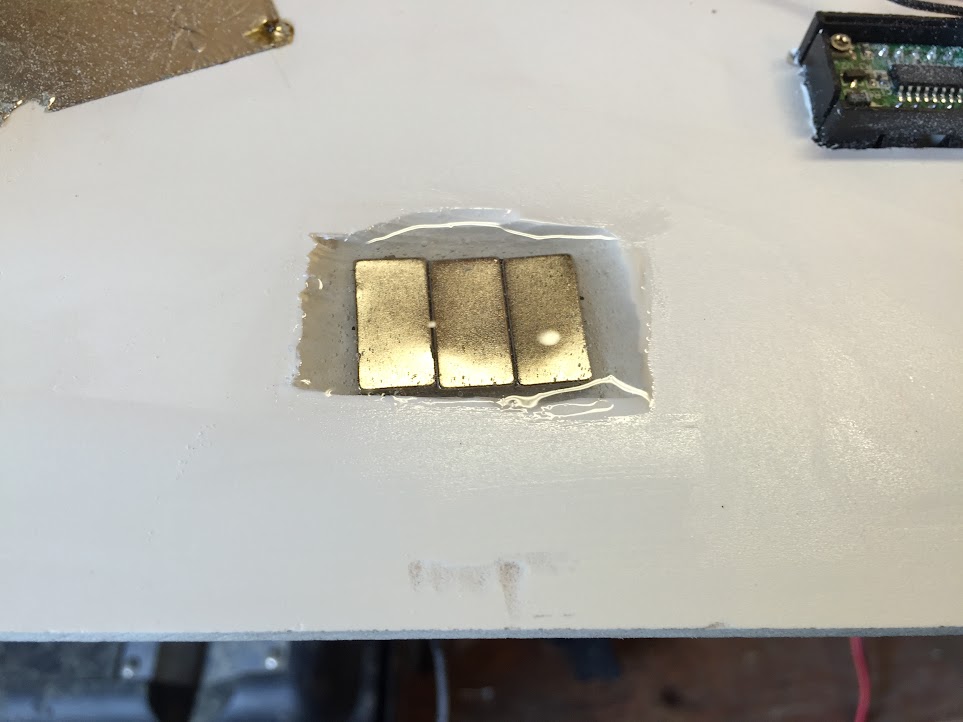
Antenna holding itself to the lid via magnets
Router and router bit used to cut circular holes in bottom of lid for securing 1/2” magnets, will place a metal strip on the box to hold it down
All 14 holes routered for neodymium magnets to be epoxied
All 14 magnets epoxied in the holes
Magnets glued down and metal bars used to recess into hole
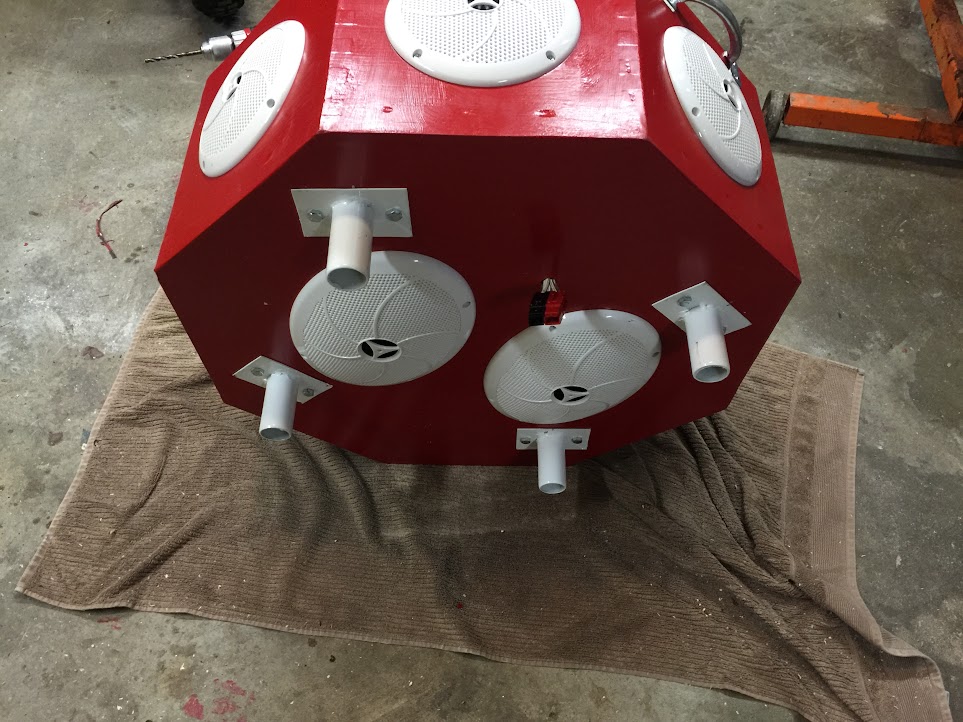
Almost finished! Still waiting on the paint to dry because there was an issue with “blocking” because I painted it without letting the coats fully dry so the paint is still tacky. Need to rebuild the PVC holder you see below because the post locations didn’t work out with 6x9’s spacing on the bottom. Need 4-way PVC joints instead of the 3-way (special order from Amazon)
Ripped apart an old pillow for stuffing the speaker holes for the 6.5 and 6x9 speakers

Speaker filling stuffed into hole with wire ready to solder to the speaker
All the 6.5” speakers installed

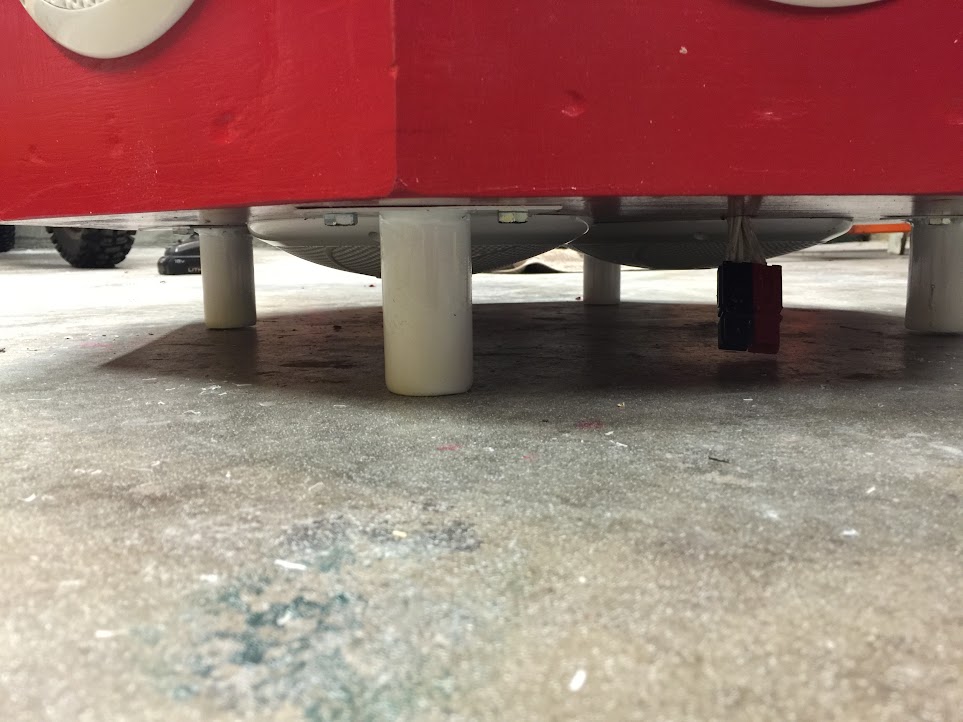
Preliminary battery/speaker box holder, this is going to change to a 4-way pipe system because the mounts didn’t quite work out with the 6x9” speakers on the bottom

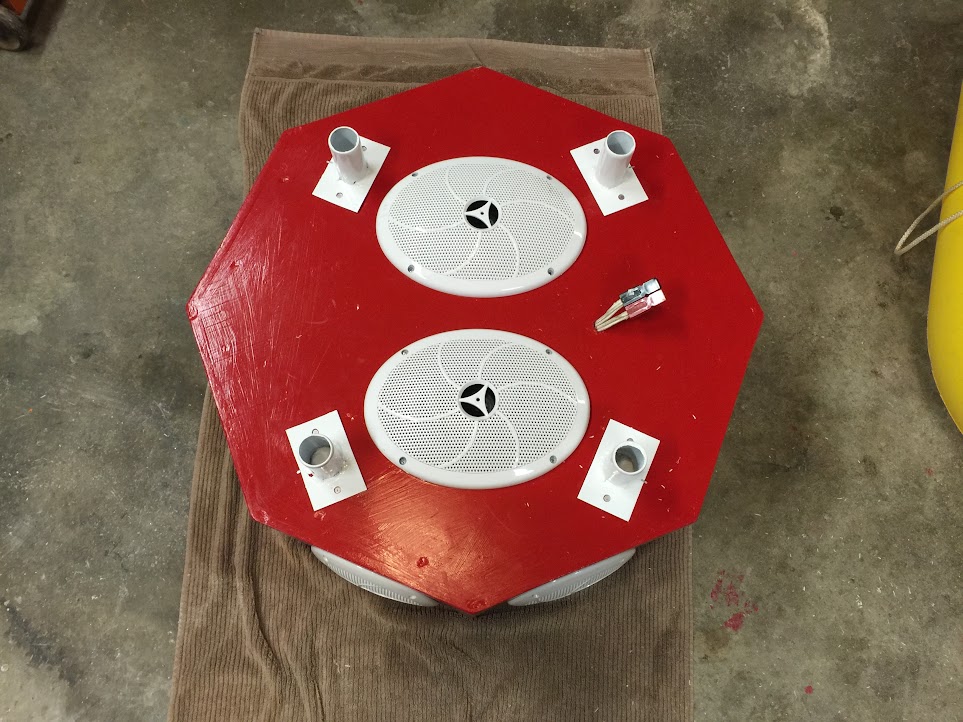
There will be 4 posts to hold the speaker box over the raft/batteries, likely only one battery will be needed for the entire float but the second is for backup and weight distribution
These will be bolted to the bottom of the speaker box as both feet and connection to the PVC holder
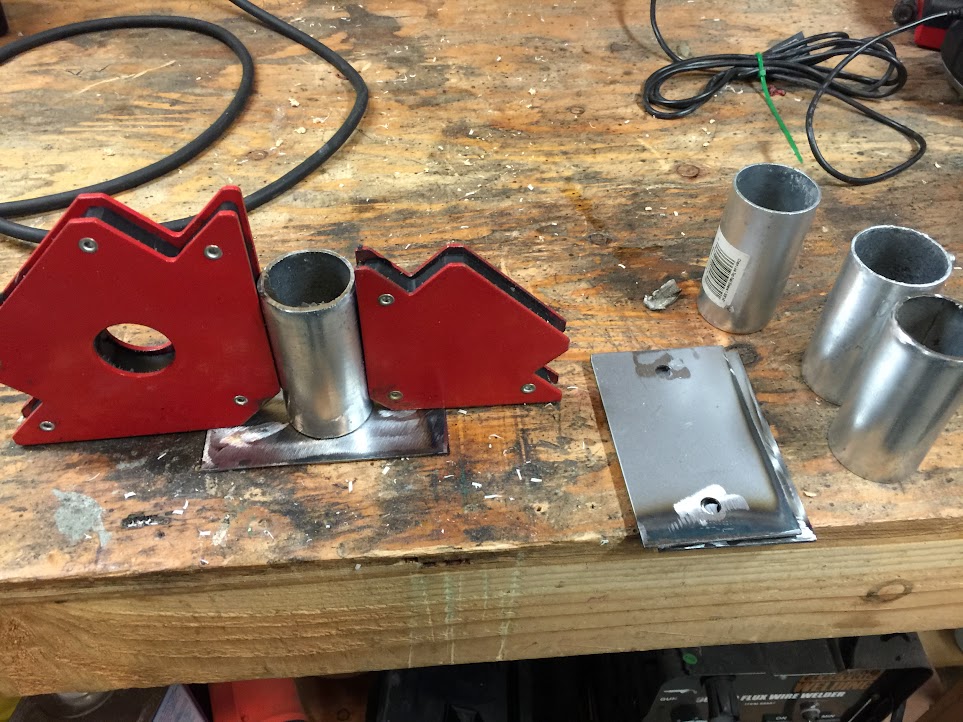
All 4 feet/holders welded up

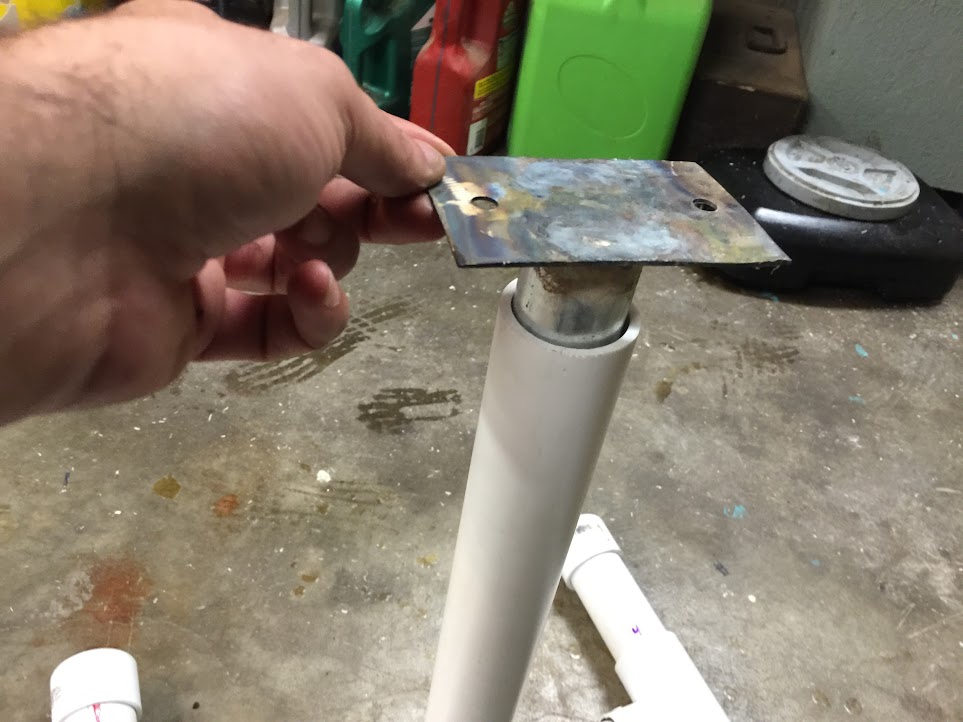
How the feet/holders fit into the PVC holder
Painted white (redneck wind chimes)

Battery connection
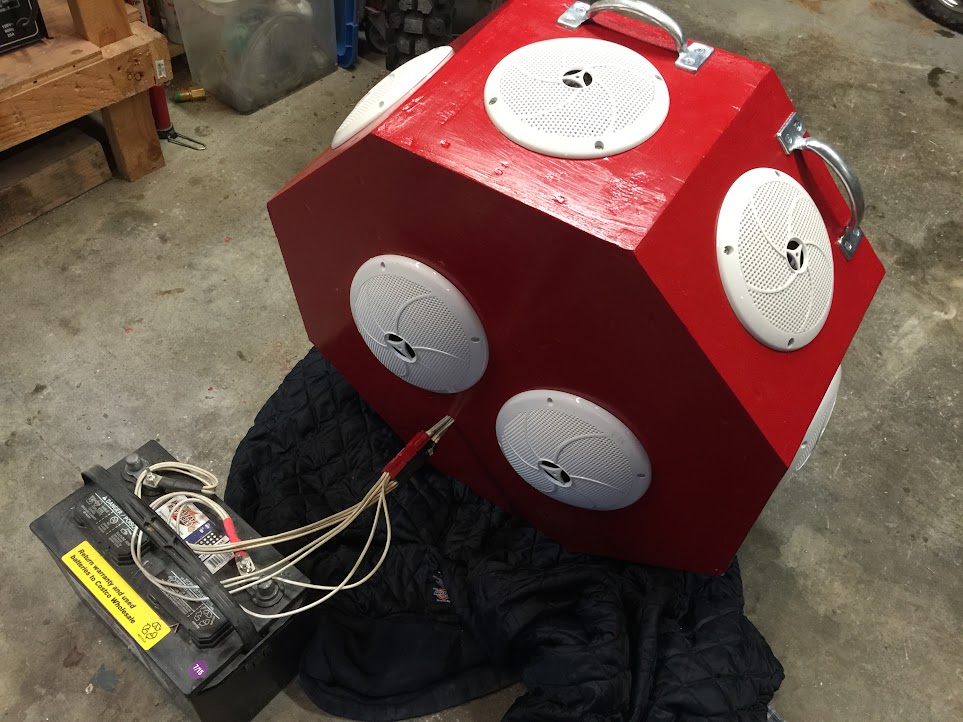
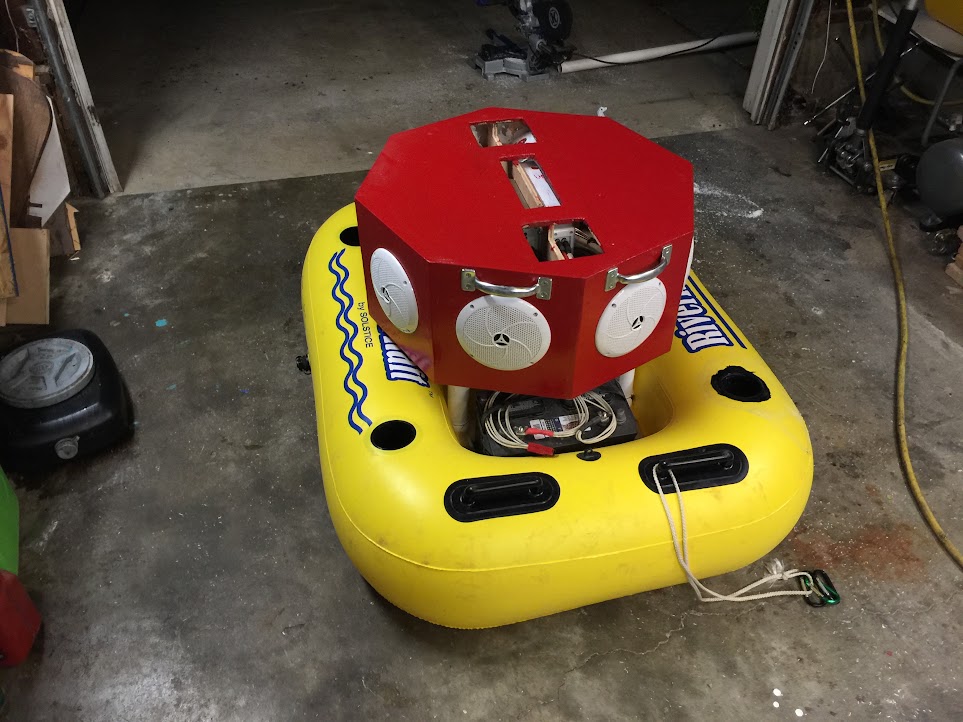
Unit powered on bumping some tunes
Finally done. Here are the last few pictures. It is loud and sounds good.
New PVC holder
Radio with feet on bottom
Feet bolted down
Feet to protect speakers
Feet also fit into PVC holder

Rig fully put together

And again